Updated: Dec. 11, 2018
Next Project›
Family Handyman
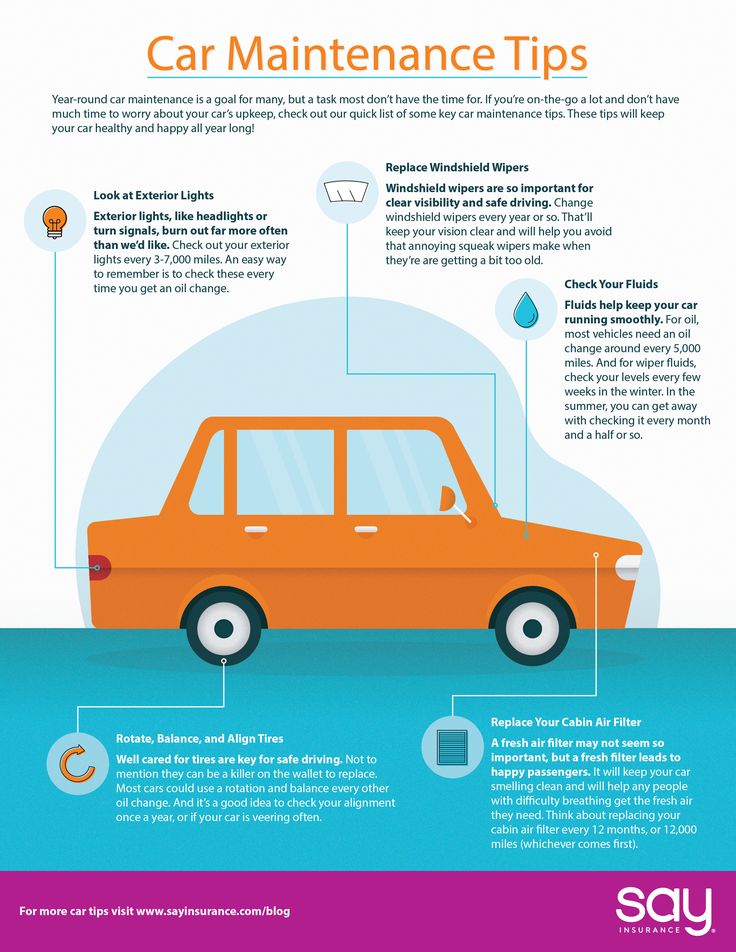
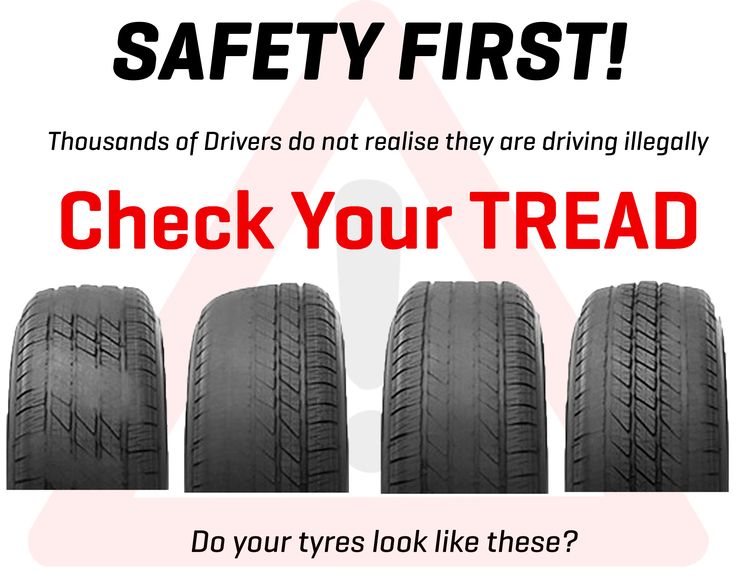
Tightening lug nuts without a torque wrench can be a recipe for disaster. If worse comes to worse and you break the wheel stud, here's how to replace it.
By the DIY experts of The Family Handyman Magazine
Place the remover around the head of the broken wheel stud, behind the hub. Center the driving screw over the stud and tighten it with a ratchet until the stud pops out the back.
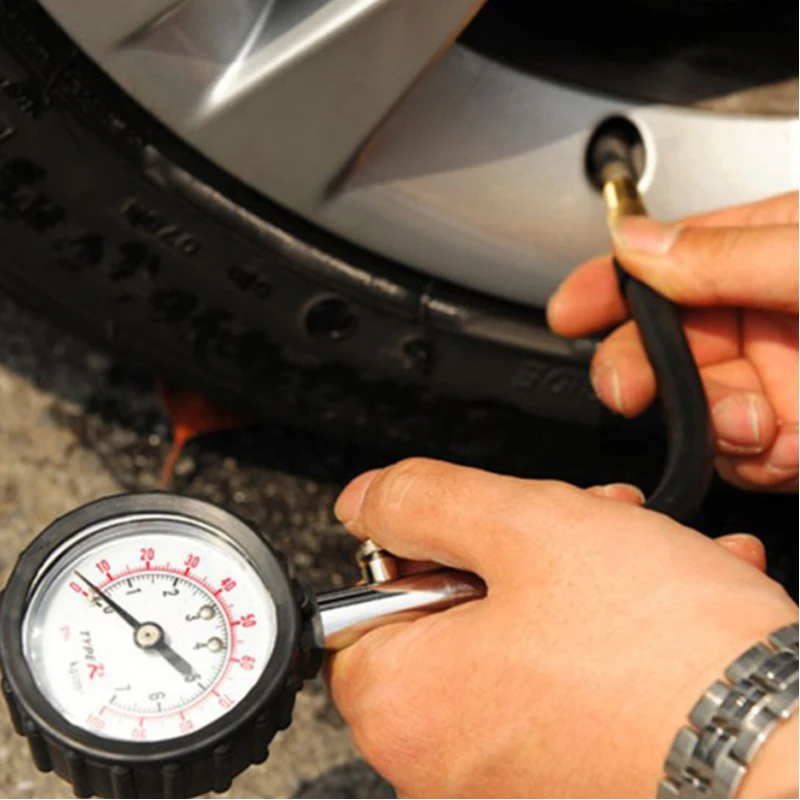
Stop tightening when the head of the wheel stud sits flush with the back of the hub. Install the second lug nut (the one you didn’t toss) on the new stud-it’ll go on easier. Tighten with a torque wrench.
If you’re just like everyone else, you’ve tightened the lug nuts on your car without using a torque wrench. You’re an “all the muscle you can put into it” kind of guy, and now you’re staring at a broken wheel stud. You can fix tire bolts yourself in about an hour and for less than $50. You’ll need to buy a tie rod end remover (OTC No. 7315A, at tooldiscounter.com), or rent one from an auto parts store. Then buy a new stud and two new lug nuts (yes, two of them). Next, stop at the hardware store and get a handful of washers with a hole diameter slightly larger than the threaded portion of the stud.
Above all, don’t hammer out the broken stud. That’s the worst thing you can do! The hammer blows can wreck your wheel bearings and turn this into a much bigger repair bill. Instead, squeeze the broken stud out with the remover tool (Photo 1). It’s staked into the hub, so the tough part is getting it to budge. Once it moves, the rest is easy. Rotate the hub until you find a deep recess so you can angle the stud into the hole.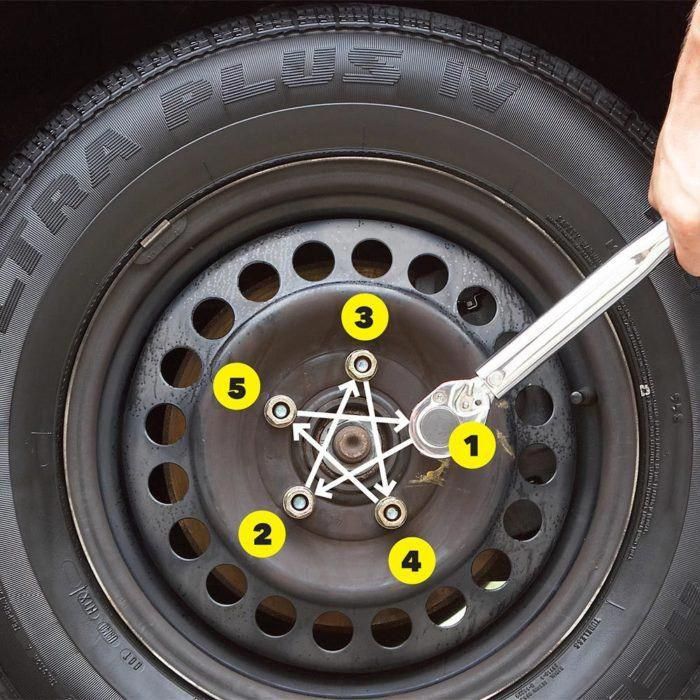 Then pull it through. Next, place a bunch of washers over the stud and spin on the lug nut. Crank down on the lug nut to pull the staked portion of the new stud into the hub (Photo 2).
By this point, you’ve probably stretched the threads or damaged the bevel. So toss the nut (they’re cheap). If you can’t fit the new stud into the hub, you may have to remove the brake dust shield (drill out the rivets and replace them with stainless steel screws, nuts and thread-locking adhesive).
Have the necessary tools for this DIY project lined up before you start—you’ll save time and frustration.
You’ll also need a torque wrench and a tie rod end remover.
Avoid last-minute shopping trips by having all your materials ready ahead of time. Here’s a list.
Originally Published: December 11, 2018
ⓘ
By Matt Weber
A car or truck’s lug nuts and studs are the crucial components that hold the wheels onto the vehicle.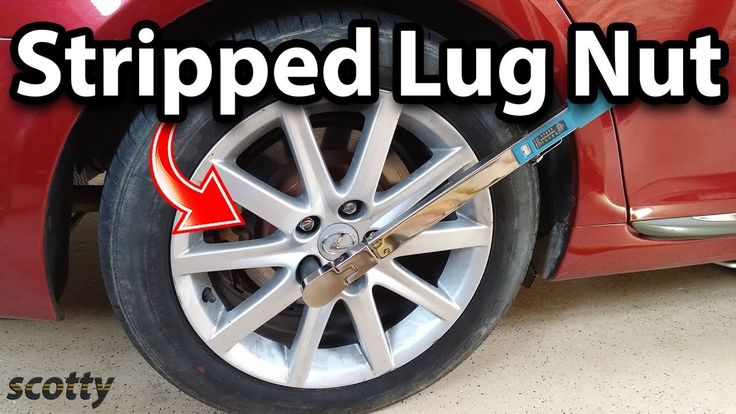 If they fail while driving, then one would expect bad things to happen, ranging from sudden immobilization to a complete loss of control that results in a raging inferno of twisted metal.
Although it’s highly unlikely that all of a wheel’s lugs will fail at once, it’s always a good idea to keep your wheels mounted securely to the vehicle with all appropriate fasteners, and broken lug studs are a common problem. If left unrepaired, the improper connection of the wheel can result in unwanted vibration while driving that could affect steering and lead to premature wear in other vehicle components.
The EHT staff recently broke a lug bolt during a routine tire-rotation job. We suspect the nut and bolt had been cross-threaded by a careless mechanic, because the bolt easily twisted in half when using a lug wrench without exerting any extra torque. Here’s a step-by-step account of how to replace a broken lug nut stud (also called a lug bolt or wheel stud).
Use a wrench to loosen the wheel’s lug bolts while the vehicle remains on the ground.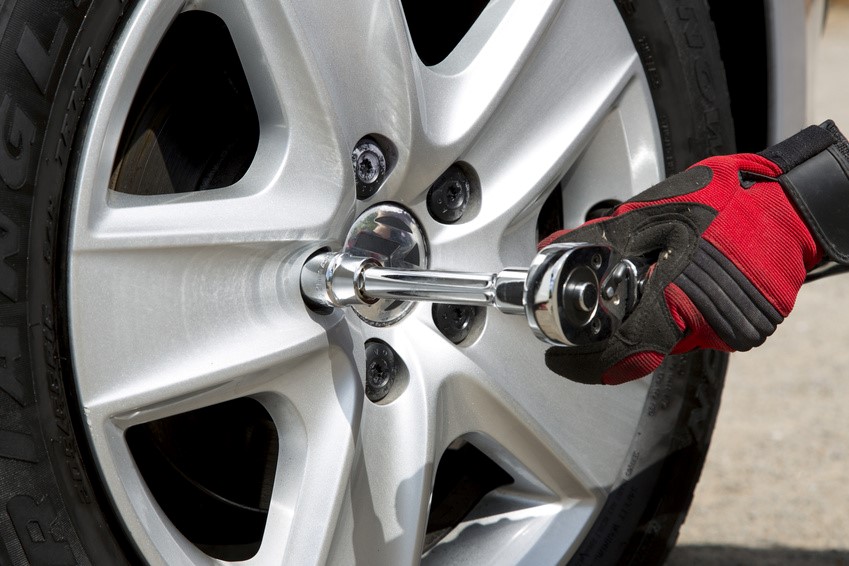 Then jack up the vehicle and support it with jack stands. Remove the lug nuts and pull off the tire.
Next, use a socket wrench to remove the brake caliper. Note, the driver bits required to remove the caliper pins vary among manufacturers—some require hex bits, some require star-drive bits, etc. With the caliper off the car, use a wire to hang the caliper from the vehicle to keep the weight off the brake line. Then, remove the caliper’s mounting bracket. (If working on a drum-style brake system, remove the brake drum.)
Remove the rotor and set aside in a place where it will not be scratched or exposed to dirt or oil. Use a metal hammer to knock the broken lug bolt out the back of the wheel. Aim carefully and be sure not to damage the threads of the adjacent lug bolts. Use your fingers to pull the broken bolt from the rear of the hub flange.
The replacement bolt was a stock part from a local auto parts supplier. To install the new bolt into the bolt hole, the wheel must be turned to align the hole with a slot on the rear of the hub flange, which provides the clearance to thread it through. If the hub flange must be turned for alignment, you may have to jack up the opposite wheel so the axle can freely spin to match the hole with the slot.
One unexpected problem with this job was the full, round head of the replacement bolt. You’ll see the in the photos that the head of the original bolt was flat on one side because it is positioned so close to the axle housing. The full head of the replacement obstructed the bolt’s insertion into the lug hole, so I had to clamp the bolt in a vise and flatten one side of the head with a 4-in. electric grinder.
For easier installation, store the replacement bolt in a freezer for a few hours. The tolerance of the lug bolt and the hole will be very tight, and any small amount of contraction the cold temperature may cause in the metal alloy will make it easier to install the new bolt. This will help greatly with your wheel stud replacement.
Use a metal-bristle brush to knock away any rust from the wheel and lubricate both the bolt and the bolt hole with a spray-on solvent. Insert the bolt straight into the hole as far as it will go (the bolt will stop at its shoulder at this point).
Thread a very large nut over the end of the new bolt (a stack of large washers will also work). The large nut is not intended to thread onto the bolt. There should be no positive connection between the bolt and large nut; it should slide loosely over the bolt like a washer to function as a spacer.
Next, thread the new lug nut over the end of the new bolt, sandwiching the big nut between it and the hub flange. Use a lug wrench to tighten the nut, which will draw the bolt into the hub until the bolt head is flush with the back of the flange and snugly installed. Remove the large nut, tighten the lug nut, and the job is done. Clean the rotor with brake dust remover. Reverse the procedure to replace the brake, wheel and tire, tightening the lug nuts to the manufacturer’s specifications.
The broken stud bolt must be removed and replaced.This wheel stud broke in half during a routine tire rotation.
Unscrew the caliper pins to remove the brake.Unscrew the bracket bolts.Use a wire to hold the brake caliper out of the way while you work, keeping weight off the brake line.
Remove the rotor. Set it aside where it won’t get oily or scratched.Remove the caliper mounting bracket.
To create an identical replacement I had to grind down the head of the new bolt so it would fit against the hub flange.I use a metal punch and hammer to carefully remove the broken bolt.Freeze the replacement bolt so the metal alloy contracts and easily fits into the hole.To create an identical replacement I had to grind down the head of the new bolt so it would fit against the hub flange.Insert the bolt up to its shoulder. This may require turning the wheel so the slot on the hub flange aligns with the bolt hole.Lubricate the new stud and bolt hole.
Tighten the lug nut with a wrench to draw the shoulder of the new stud into the hub flange so the bolt head is flush.
 Thread a very large bolt over the stud to act as a spacer. Follow that with the new lug nut, threading it onto the end of the stud.Reverse the procedure to reassemble the wheel, tightening the lug nuts to spec.
Other Automotive Related Articles
Drivers with experience will surely remember cases from their automotive life when suddenly, for no apparent reason, a wheel came loose. Why is this happening and how can this situation arise?
Of course, the vast majority of drivers immediately blame the tire changers, who, in their opinion, did not tighten the tires. However, this is far from always the case, and there can be quite a few reasons for the spontaneous turning of the wheels. For example, how could a wheel tightened with a torque wrench to a torque regulated by the car manufacturer's factory be unscrewed? Wrong key? No, the wrench has been tested, the tightening torque is the same as the reference torque head.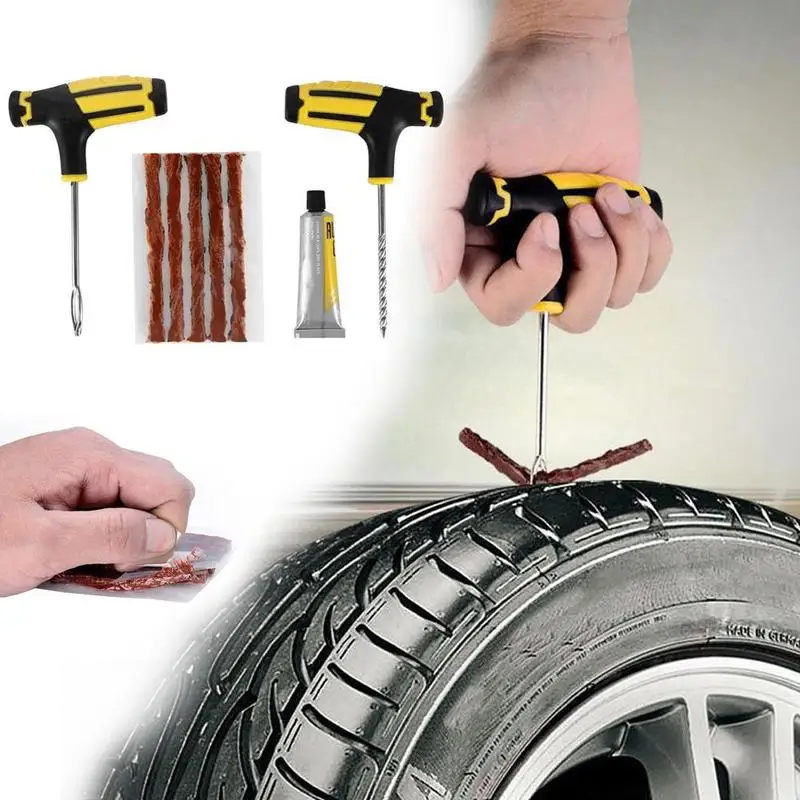 But, why, even in this case, the wheels are sometimes unscrewed? nine0003
Let's consider the possible reasons for this situation:
Of all the examples listed, only the fifth can be conditionally attributed to the fault of the tire center. In this case, indeed, the installer forgot to tighten the fasteners while the vehicle was stationary. Most likely, he baited it with a canopy and did not reach it after lowering the car.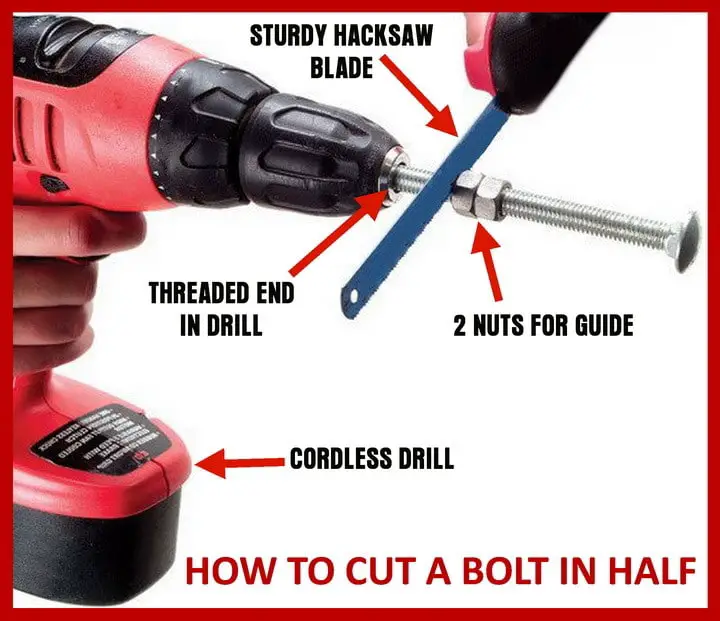
If you are sure that all the wheels were tightened correctly, but one wheel loosened in the direction of travel after several tens of kilometers, then the reason is not in poor service, but in the “tired” thread of the stud / nut / bolt. The reasons for this situation may be as follows:
 We have repeatedly encountered the inability to easily unscrew a nut or bolt after a service using an air impact wrench. The reason is that the tightening was completed at the moment of thread breakage. The customer will know about it only at the moment of loosening the bolts/nuts. In this case, the bolt could be pulled out on the move while turning or avoiding an obstacle. If all the bolts were tightened, then the wheel may simply fall off while driving. nine0010
After listing these reasons, we can conclude that only high-quality wheel fastening parts can exclude the possibility of their self-unscrewing. It is always necessary to monitor their condition and compliance with the type of disks used. In addition, never tighten discs with pneumatic tools. If the nuts loosen after a few days or weeks, then the reasons may be the following:

 Although visually everything can be in perfect order.
 RLD centers follow a number of procedures to avoid such cases:
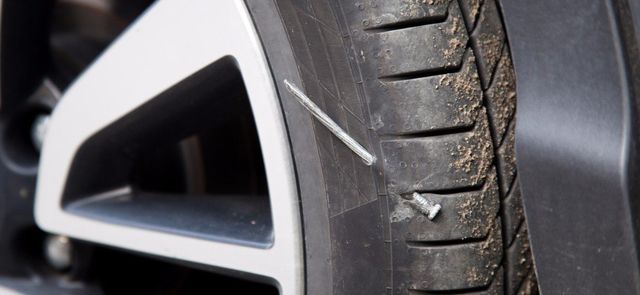
Photo from open sources
Motorists are still arguing about which wheel mount is better: bolts or studs on which nuts are screwed. The AvtoVzglyad portal talks about the pros and cons of such mounts, and also answers the question of which method is more convenient.
Victor Vasiliev
To complete the picture, we recall that the wheels are fixed not only with bolts and nuts. There is also a rather exotic way - with the help of one central washer. This solution can be found on racing or expensive sports cars. Therefore, not every wrench is suitable for them. In most ordinary cars, fasteners consist of bolts or nuts. Let's take a closer look at each of the methods. nine0003
The choice of bolts depends on the type of disc.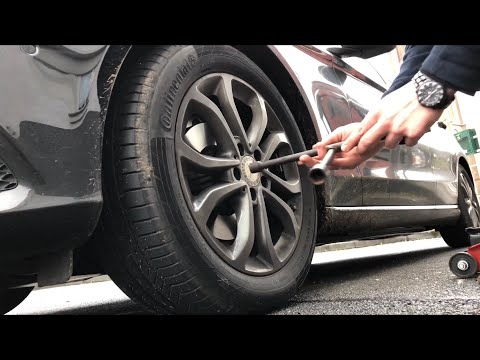 Stamped ones are made of steel, while they have a small thickness at the point of attachment to the central part of the hub. Therefore, for better fastening, the bolt must have a flat surface.
Special lightweight alloys are used for the production of alloy wheels. These wheels have less weight, which reduces unsprung masses. And in order to better center such a disk on the hub, bolts with a conical head are used. nine0003
By the way, bolts differ in material. Usually, manufacturers use steel, aluminum or titanium alloys. Titanium parts are considered the strongest, but they are noticeably more expensive.
Photo from open sources
However, this type of fastening has a number of disadvantages. If you save money and tighten the cast wheel with bolts for a steel disk, the alignment may be disturbed, and the driver will feel vibrations on the steering wheel. In addition, the car will begin to "eat rubber." nine0003
Care must also be taken during installation so as not to strip the threads.