Steep and narrow switchbacks are often found off in the hinterlands in places where ATVs and Motorcycles have been the only vehicles to venture. These trails are often times a test of your personal bravery and skill as an ATV driver. The slightest misjudgment may result in seeing your machine go head over teakettle down the mountainside while customizing the front and rear racks, handlebars and wheel alignment on your ATV with each new bounce. Not to mention the personal injury that you may experience in the whole ordeal.
Great caution is in order while on switchbacks.
For the sake of our ATV community let us establish a few rules, shall we? These are not rules with jail time for disobedience, but rules of good judgment and courtesy.
Riders coming down the hill have gravity and inertia as their companion. Some ATVs with automatic transmissions have no compression breaks to slow them going down a hill. That means that their brakes are the only means of keeping them on the trail. They stand the greatest risk of injury and possible mishap. For the sake of common courtesy let us grant the right of way to those riders coming down a hill, rather than to those climbing the hill.
When approaching a switchback climb, in many instances, it is possible to see, or hear, if there are other riders descending the hill. Whenever possible, those riders ascending (climbing) the hill should wait at the bottom of the hill or at some other point where those descending (coming down) can pass without restriction or problem.
In some cases it is not possible to stop at the wide place at the bottom of the hill. You may not be able to hear or see oncoming traffic in your climb. This is why it is important to cooperate.
If ascending or descending, either direction, start on the outside, cut across the bottom of the curve and come out wide on the other side. This will make the turn as wide and controlled as possible. Keep in mind also that 4 wheel drive machines don’t employ the rear end slide as well as the two wheel drive ATVs. (see the article on ATV Handling)
When climbing a steep switchback one rider, the lead rider, should traverse a section of the trail to the next hairpin turn. On arriving at the hairpin turn the lead rider should visually scan the trail to the next hairpin turn before engaging that section of the trail. If there is no oncoming traffic then the lead rider can proceed to the next hairpin turn. The following rider stays at the previous hairpin turn until they can see that their lead rider has vacated that location for the next point. This is an indication that the trail is clear ahead. The following rider may then proceed up the trail. This would be true of each subsequent rider in a group.
The hairpin turns are usually the only location on the trail where two ATVs could safely pass one another. However if some other trail feature is more appropriate for that purpose, be sure to utilize the safest possible location for that purpose.
Communication between riders can be a very important requirement. It may be a long distance between hairpin turns and it may not be possible to visually see one hairpin turn from the other. The use of FRS radios under such circumstances can offer real advantages to keep riders in coordination with one another and keep the safety at a maximum. REMEMBER that ATVers use the channels in the FRS channel 5 band (0-38) for radio communications.
Do not attempt traversing a section of a switchback that already has a rider on it, coming in either direction. Switchbacks are usually too narrow to permit passage of two machines on the trail. It could cause one rider to back down to the hairpin turn to permit the other rider to pass. This would be very dangerous and difficult. Why should the climbing rider back down? Simply because it is extremely difficult if not impossible to back up a hill under any circumstance. Not all machines have four wheel drive. Many do not.
While traversing down a switchback the same rules apply to when you are ascending a switchback. However, you will have the added obligation to maintain full control and safe speed of your ATV at all times, take extra caution with blind curves and corners.
Many older ATVs with automatic transmission do not have engine braking or compression to assist you in descending a hill. Using engine braking permits you to slow down without the use of your wheel brakes. This is done by switching the gear to a lower gear so that compression will slow your decent. This should be done in every case possible to avoid using your brakes to the point of overheating. It is true, you can apply your brakes so much that they will overheat and this causes a glaze to form on your brake pads, especially if you have drum brakes. Even disk brakes can experience this when overhead. However, disk brakes are more inclined to dissipate the heat more readily and reduce the occurrence of glazing. When this glazing happens the brakes will not slow you with such ease and may not stop you at all.
While descending a trail, if you begin to smell a strange smell that you might associate with burning tires or maybe even a skunk, it may be your brakes overheating and glazing and not a skunk. If this occurs you should quickly find a safe place to stop your ATV where others can pass you, both the ascending and descending and let your brakes cool off for at least 20 to 30 minutes before attempting to go down the hill to the bottom. You will need your brakes do not abuse them. If it is possible to stop your ATV at a place where you will not have to lock your brakes on please select that place. To cool your brakes more quickly you will need to have them disengaged. This will permit the space between the brake pad and the brake drum to dissipate the heat more readily. Block your tires with a rock or log or some other obstacle to permit your machine to sit with the brakes disengaged. Block the tires so that the ATV won’t roll away from you before you disengage the brakes.
While we have agreed here that descending riders have the right of way, if you come to a hairpin turn and find that someone is already coming up the next section of the trail, that rider has the right of way. You should stay at that point in the hairpin turn, making room for the climbing rider to pass unobstructed, until the climbing rider has passed you, then you may proceed down, provided that a subsequent rider has not already started up that section of the switchback. Not everyone will have read this and become educated in the finer points of courteous ATV riding.
In the absence of ample space on the trail for two machines coming from opposite directions to stop and chat, it is a good idea to use the appropriate hand signals as you pass each rider on the trail.

When you purchase through links on our site, we may earn an affiliate commission. Here’s how it works.
(Image credit: Enduro World Series)Switchbacks may seem like a mundane, usually annoying, trail feature. But they are really one of the bedrocks that allow riders to access the terrain that they love to ride.
Trails can't be built going straight up or down a mountain. Over time, this creates ruts and erosion, which isn't as much fun to ride and negatively impacts the surrounding environment. That's why trails have switchbacks to travel up and down steep slopes to get to their planned endpoint.
Since switchbacks are such a fundamental part of most types of mountain bike trails, knowing how to ride them well is a fundamental mountain bike skill.
Let's begin by covering how to ride switchbacks while going downhill as the approach is quite different from when you learn how to ride berms. The first thing you need to do, obviously, is slow down. Switchbacks are tighter than regular corners - sometimes they turn more than 180-degrees - so you will need to scrub off a lot of your speed or risk flying off the trail.
The majority of braking should be done before entering the corner, so start slow and gradually increase your speed as you get more comfortable going around switchbacks.
Next, you need to set up your line through the switchback. Since switchbacks are so tight, it's optimal to set up your line as wide as possible. Sometimes this isn't possible, and you just have to roll with the awkward punches.
If the switchback is turning left, get as far right as possible, this can sometimes mean hoping onto the sidehill of the trail if you need to in order to open up the corner and improve exit speed.
Looking down the trail and leaning with your body will greatly improve cornering control (Image credit: Enduro World Series)Switchbacks can be super slow and awkward, but proper body positioning can make things feel and be a lot more smooth.
Start by looking down the trail at where you want to go. This will naturally pull the front of your body toward that point, so you don't have to consciously think about it as much.
Drop your outside foot and pivot your hips and shoulders to face the direction the trail is going. If you point your body, your bike will naturally follow.
If you need to, lightly feather the brakes to control your speed. It may also feel more comfortable to take your inside foot off the pedal for stability as you are first practicing on switchbacks.
You want to avoid grabbing too much brake, as this will kill all of your momentum, make your bike feel nervous or cause your tires to lose traction. Once you've gotten through the work of the corner, you can let off the brakes and continue riding. It's better to come into the switchback slower and exit faster, rather than the opposite.
On man-made trails, it's unlikely that you will encounter a switchback so tight that you cant ride around it however if you ride natural or walking trails then these features are more common. The approach to these is to perform an endo turn or euro turn (so-called because of the repetitive super tight switchbacks common in European EWS rounds), this involves pulling the front brake and pivoting the rear of the bike around.
It can be a complicated maneuver to perform however the fundamentals of this move are fairly simple and can be learned during carpark skills sessions.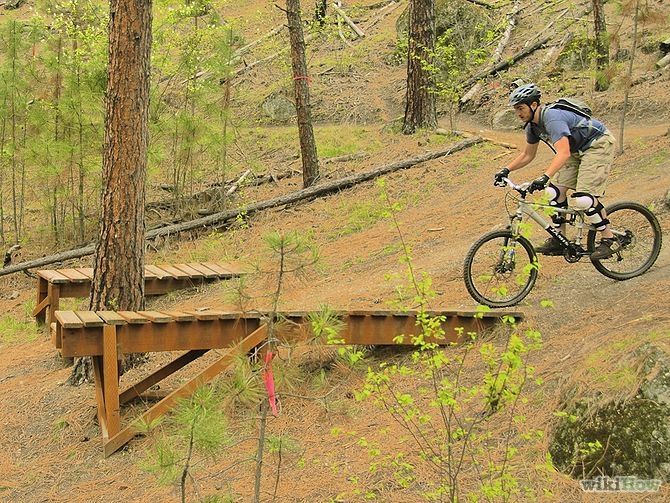 To perform an endo turn, approach your turning point slowly, gently turn in and put the front brake to pick up the rear wheel. As with all cornering skills, look to where you want to go which will help bring the bike around. Releasing the front brake will bring the back wheel safely down. Start small and build up, experimenting with the effects of body weight and the amount of front brake used as these have different effects on the bike's pivoting movement.
Going uphill through switchbacks can be simpler and less scary since you are relying more on your own power rather than technique. However, some of the same advice applies. Looking ahead around the corner will help you get around it, and starting with a wide line will give you more space to work with.
If the switchbacks are mellow, you can remain seated, but if they are steeper, you may need to stand up and pedal out of the saddle. In this case, you need to focus on keeping the rear wheel from sliding out.
Everybody's bike and setup is different, which can impact how much traction the rear tire has. But you will want to keep your body position balanced to keep some weight over the rear of the bike. If you lean too far forward the rear tire will slip out, however if you move too much of your weight back it may cause your front wheel to lift up causing you to lose control.
You may encounter switchbacks that are either too tight or feature technical obstacles that disrupt your line. If this is the case you may be required to use a series of bunny hops to pivot around the corner or over the mid-corner features. While this is a skill all in itself and requires excellent balance, the trick is to tackle it slowly, smoothly with a calculated approach.
Shop MTB products
Scott Centric Plus
£194
View
See all prices
Specialized S-Works Epic AXS HT
£10,800
View
See all prices
Reduced Price
Oakley DRT5
£170
£51
View
See all prices
Low Stock
Reduced Price
RockShox SID Ultimate
£817
£774.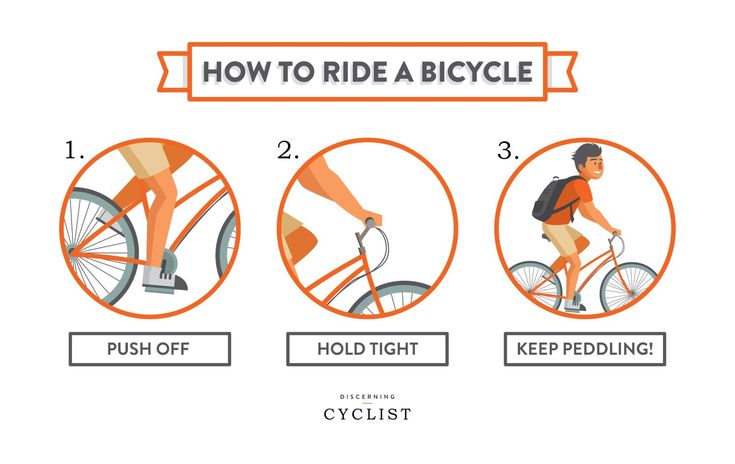 99
99
View
See all prices
Santa Cruz Highball XX1 AXS Carbon CC
£6,599
View
See all prices
Ryan Simonovich has been riding and racing for nearly a decade. He got his start as a cross-country mountain bike racer in California, where he cultivated his love for riding all types of bikes. Ryan eventually gravitated toward enduro and downhill racing but has also been found in the occasional road and cyclo-cross events. Today, he regularly rides the trails of Durango, Colorado, and is aiming to make a career out of chronicling the sport of cycling.
Rides: Santa Cruz Hightower, Specialized Tarmac SL4
ATV riding techniques could be the subject of a full book. In the same article, we want to reveal to you the basics of safe riding. At first glance, there is nothing complicated in driving ATVs - you just need to steer and enjoy riding.
When driving over bumps, for example, those of the "wave" type, the driver must change his position all the time. So, when approaching an obstacle, you must shift your body back, otherwise you can hit the obstacle with your wheels. When driving over a bump, you need to move the body back forward, thus preventing excessive separation of the front wheels, i.e. rearing up the ATV. Then, when the rear wheels come off the ground, you need to move back again, otherwise you can fall out of the saddle, hitting your knees on the steering wheel.
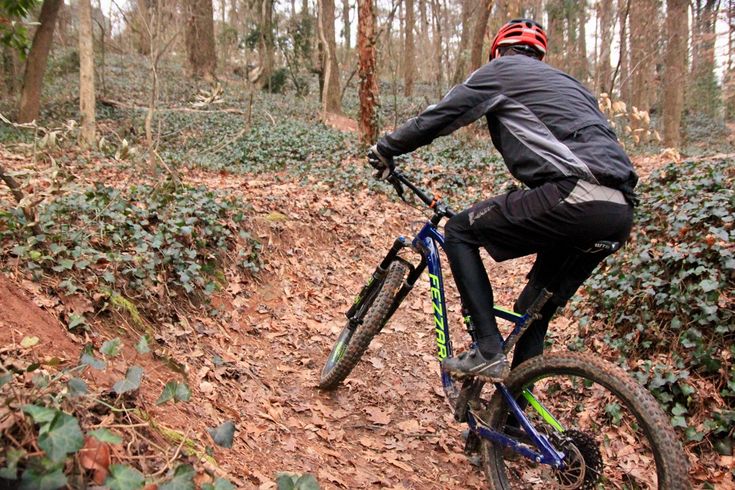
Moving in a straight line at low speeds (up to 40 km/h), you can afford to relax. But at higher speeds or when passing sharp turns and slopes, the driver must move very actively. Indeed, due to the high center of gravity, short wheelbase and small width, ATVs are very prone to rollovers. In addition, if the motorcycle flies separately from the motorcyclist during falls, then the ATV most often covers the driver. Therefore, in order for ATV riding not to end with serious injuries, it is necessary to study the driving rules and strictly follow them.
ATV rider's weight is an important factor that affects machine handling. By shifting their weight, the driver can unload or load the front or rear of the ATV, thus compensating for centrifugal forces.
The first rule you need to learn is that when riding an ATV, you need to relax your arms. When driving, the driver can always let go of his hands, because his legs are holding him in the saddle. As the speed increases, the load on the legs also increases.
Conventionally, three racks are distinguished. The middle stance is used when driving in a straight line without turning. When opening the gas, the body must be moved forward to unload the hands. Thus, the front strut is obtained. When braking and closing the gas, the body, on the contrary, must be moved back, i.e. take a back seat. By the way, the word "stand" comes from the word "stand", and this name is not accidental. When actively riding an ATV, you do not have to sit. Standing on an ATV lowers your center of gravity. After all, there is a huge difference between the weight on a high saddle and the weight on the footrests.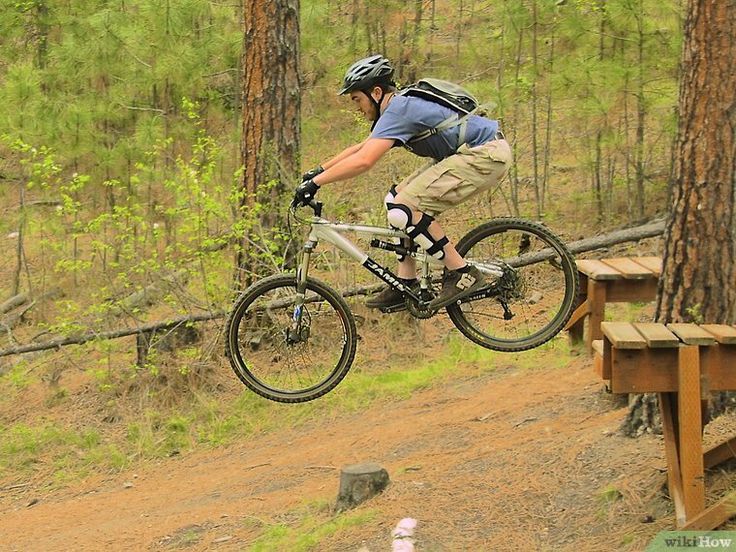 And the effect of moving the body in a standing position is much greater than from fidgeting back and forth on the saddle.
When going through a turn on a motorcycle, it is tilted inward, thus struggling with centrifugal force. But you can't do that with a quad bike. Therefore, it is necessary to use the weight of the driver. The main rule here is to always transfer the weight inside the turn. Moreover, it is necessary not only to tilt your shoulders. It is necessary to hang the entire body, including the fifth point. Only the shin and knee hold on to the saddle. Of course, if you turn at minimum speed, then you can limit yourself to turning the steering wheel.
The correct stance is characterized by slightly bent knees, elbows set apart, and a slightly arched and relaxed back. Why not stand on straight legs or keep your back straight and tense? Because bent knees allow you to absorb shock coming from uneven terrain. By the way, the force of these blows is sometimes quite enough to knock the driver out of the saddle. A straight tense back under such conditions can lead to injury to the intervertebral discs and even a compression fracture of the spine. Yes, and the internal organs with the wrong fit will have a hard time.
Active ATV riding requires good physical shape. So, in quad schools, the duration of the lesson does not exceed an hour, and at the end of the lesson, students can literally be squeezed out. And riding an ATV off-road is also an activity worthy of training in the gym.
When riding non-sport ATVs, it is best to avoid jumping. Firstly, this way you can break the ATV. Secondly, in order to safely perform such tricks, the ATV motor must have high-torque and fast response to the throttle. If, nevertheless, the jump could not be avoided, then it is necessary to land in the middle stance, but be ready to move to the back. When the wheels touch the ground, you need to slightly open the gas. It is better not to use four-wheel drive when jumping.
Every time you ride an ATV, you need to practice looking into the distance. This is necessary to develop the habit of evaluating the trajectory of movement in advance. Beginners often do not have time to track the road, and at some point they are not ready to perform adequate actions. And another, very predictable obstacle, can become a problem for them.
| When moving along a slope, it is necessary to move the body in the direction opposite to the slope. On the steepest sections, full overhang should be used, such as when cornering at speed.
|
Before you start climbing, you need to pick up speed. Then the resulting inertia will allow you to smoothly drive into the steepness. If you suddenly open the gas directly on the rise, the ATV may tip over. Climbing should be in the most forward stance and on medium gas. If the incline is too steep, the ATV may roll backward when the throttle is released. In this case, you should not brake with the front axle, not the rear. If the ATV starts to roll over, you can try to jump to the side, but this acrobatic stunt is unlikely to be successful.
If the driver moves his torso out of the turn, then his centrifugal forces will pull him to the outer radius, and in order to stay in the saddle, he will need to firmly grip the steering wheel. At the same time, the ATV will definitely try to roll over. To avoid such an unpleasant situation, it is always necessary to remember a simple rule - to shift the body only in the direction of rotation. Those. if we turn to the left, then we shift the body to the left side, and vice versa.
Descents must be made in the C-pillar. In this case, the arms must be extended and slightly bent at the elbows. There is no emphasis on the hands, you can even let them go, holding on with your feet. The steeper the descent, the more the driver must move the body back. The lower photos show the consequences of a descent in an incorrect landing. The main mistakes - the driver shifted the weight forward and pressed his hands to the body.
ATVs (all-terrain vehicles) are compact and versatile vehicles. They are used for extreme recreation and sports competitions. They can effortlessly ride off-road and rough terrain. Wide wheels and a powerful engine make it easy to overcome dirt roads, potholes, ravines and slopes. Many summer residents, hunters and fishermen prefer to travel on ATVs. They can carry goods. In winter, they replace snowmobiles. A trip on such motor vehicles brings a lot of pleasant emotions. However, quad biking is an extreme form of transportation. And it is better to do it with professional instructors of the QuadRider club. Unlike motorcycles and other vehicles, they have a short wheelbase, narrow width and high center of gravity. Improper driving often leads to rollovers. Important to know how to drive an ATV correctly to avoid dangerous accidents. Appropriate training and compliance with driving rules is a guarantee of safety not only for drivers, but also for pedestrians.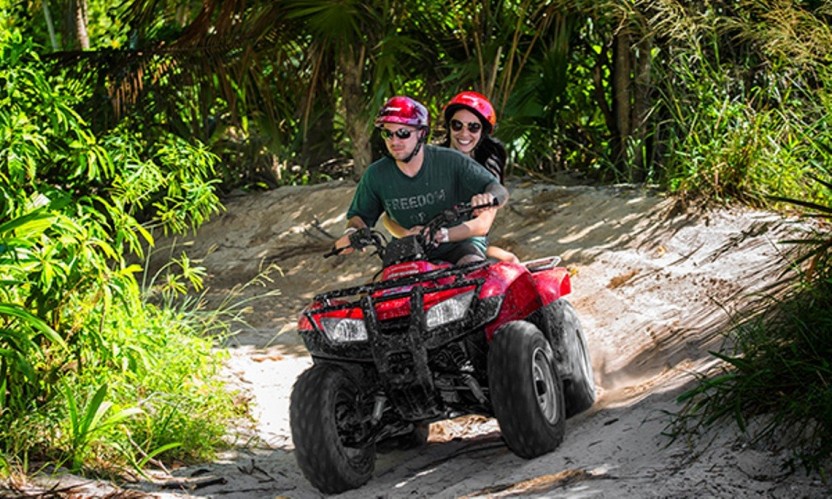
Before driving an ATV, you must do the following:
Operating a vehicle without a license and skills is fraught with serious injuries and large fines.

Strictly prohibited:
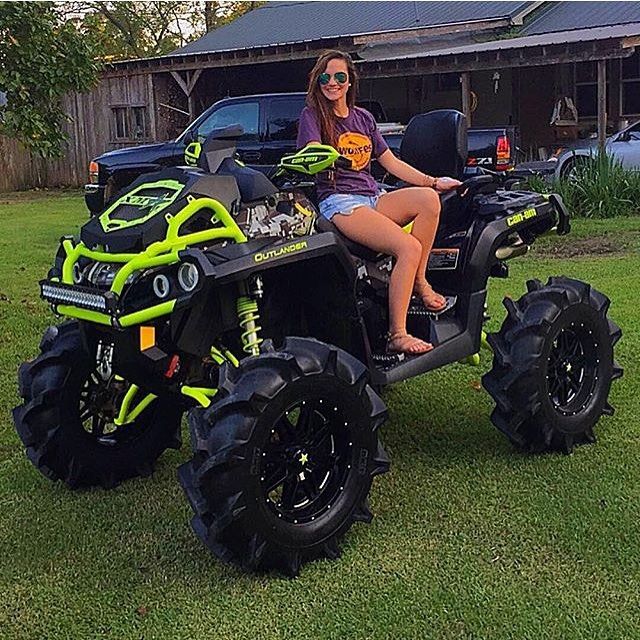
The rider's weight has a big impact on the handling of the ATV. Centrifugal forces are compensated by transferring body weight to the rear or front of the vehicle. Quads are a powerful technique, prone to tipping over and slipping. Wrong driving can cost lives. In this regard, it is necessary not only to know0126 how to ride a quad bike , but also to learn the basic rack.
When riding an ATV standing up, it is easier to avoid tipping over. There are 3 main stances common among ATVs. Each of them is used in certain situations.
 Tilt the body forward as much as possible and bend the knees slightly.
 A dangerous stance option is a tense back and straight legs. In this position, the body cannot absorb shocks and shocks. The spine and joints are subjected to enormous loads. In this situation, control over transport worsens.
The main ATV controls are located on the steering wheel. On the right handle are: throttle trigger, differential lock switch (2WD / 4WD / LOCK) and fuse. On all-wheel drive, cargo transportation, off-road driving and slippery roads are usually carried out. The differential lock ensures the synchronous rotation of the wheels. On the left side of the steering wheel is the ignition switch, engine start button, headlight switch and horn button.
Sit in a correct and comfortable position on the ATV. Place your feet on the footrests and place your hands on the handlebars. Insert the key into the ignition switch and turn it to the "ON" mark. Then depress the brake pedal and the electric starter button. Hold the starter button for 5 seconds until the engine starts.
When the motor starts, let it run for 1 minute. In the cold season, warm it up for about 5 minutes. Before you start driving, make sure that there are no obstacles in the way (other vehicles and pedestrians). To move off, shift the gearbox to overdrive H. Release the brake pedal and gently press the gas trigger with your right thumb until you reach the desired speed.
Slow down on curves and turns. Turn as far as possible. Entering the turn, lean your whole body and lower body into the turn. If you turn right, shift your body weight to the right. If you turn left, lean your whole body to the left side. In this way, you will avoid falling and overturning the ATV.
Correct gear shifting and ATV should be carried out after it has come to a complete stop. Release the throttle lever and press the brake pedal. Move the gearshift lever to the desired position. The selected gear indicator should light up on the instrument panel. The gear lever must be in the "H" (normal high gear) or "L" (extreme low gear) position. The "R" mode is used for reverse.
Pick up speed before entering the hillock. Drive only in a straight line. Move your body forward. Maintain a smooth speed after opening the throttle. Don't lose your vigilance. Try not to drive on hills, the angle of which exceeds 25 °. Climbing a hillock or a steep slope, do not step on the gas abruptly. Drive at medium engine speeds. If the ATV begins to roll backwards while climbing a hill, get up and apply the front brake. In this case, it is not necessary to use the engine power and the rear brake. If the quad has stopped, apply the rear brake and move the gear lever to park. Put the handcuff on the transport, turn around manually and try to repeat the ascent to the hillock again. To descend, take a back stance and bend your elbows slightly. Shift into low gear. To avoid tipping over, apply both front and rear brakes at the same time. Do it smoothly. Do not press the gas trigger when descending. Do not change the set trajectory of movement.
You need to drive down the slope in low gear, moving the body towards the top of the hill. Hang your body completely on the steepest slopes. On the slopes, you can not brake sharply and pick up speed sharply. If the slope is slippery and steep, try to take a different path.
Start braking well in advance before coming to a complete stop. To slow down, release the throttle. ATVs stop quickly. But in an emergency, press the foot pedal or brake lever. Stop on a level, level surface. After stopping, shift into neutral. This will help to avoid unforeseen situations when disembarking from the vehicle.
After learning how to ride the ATV, learn how to drive on flat terrain without obstacles and other moving vehicles. Make sure the brakes are working at low speed when starting, turning and stopping. At first, try to avoid jumps and high speeds. Also, avoid jumping when riding a sports ATV. With a sufficiently high power, quadrics cannot accelerate much.