ATV Riders Forum > Sport ATV Model Information > Honda TRX 400EX & 400X ATV Info > The right way to bring your plastic back to life.
PDA
View Full Version : The right way to bring your plastic back to life.
Budweiserebel07
05-16-2011, 08:56 AM
Alright I was going to wait till tonight to start this thread but I'm bored at work so here we go. This is for the people like me that like the color of your plastic but its in rough shape and you don't have the cash to drop on new plastic.
You will need a bucket of water, 180,220, 400, 600, and 1000 grit sandpaper. ( 2 sheets each) Also you will need a liquid rubbing compound (medium is best), liquid wax, and a 10 inch buffer.
So here is what ya do. No need for any paint or Plastic renew or any of that crap. Wet sand then buff it out.
Keep in mind plastic is the same color all the way thru so sanding isn't going to be a problem. Depending on how horrific your scratches are is what grit to start with. Mine looked like a badger gnawed it. so I started with 180. Then to 220, 400, 600, and finally 1000.
It is imperative to only wet sand using as much water as you can. Plastic burs easy and wet sanding will prevent that.
With the 180 grit just sand the really bad places and get the deep scratches, nothing more. After they have disappeared, Use 220 on the whole bike. Sand until the color is even all over and the scratches are gone.
That was the obvious part. lol
By this time some part of your bike has dried and it looks almost white and foggy. Like the picture below.This is normal.
Now using lots of water again use the 400 grit and sand till you can't feel resistance between the sandpaper and the plastic.Should feel like your hand is gliding across a wet glass table. Do this with the 400, 600 and 1000 all over.
Dry off the bike completely. You will notice its still foggy and faded looking. Time to buff. I recommend using a buffer or even a mothers ball for the rubbing compound and wax. Usually i would say to do it by hand but plastic isn't like paint, it will need some persuading to buff to shine.
Don't be shy with the rubbing compound. It will be self explanatory when to stop. This will bring the plastic back to a shine. After going over the bike heavily with the compound, wipe it all off. Then do the same process with the wax.
Once its buffed, take a dry rag and wipe it down and you will have clean shiny plastic. ENJOY !
pics of how i did the process below in order of how i wrote this.
Budweiserebel07
05-16-2011, 08:57 AM
Started sanding
Budweiserebel07
05-16-2011, 09:07 AM
I will have pics up of what it will look like after the 1000 grit, as well as the buffing and the finished product this evening after work.. :D
MisterGraphic
05-16-2011, 09:31 AM
Nice write-up!
What brand of liquid compound are you using?
Looking forward to the next pictures!
Budweiserebel07
05-16-2011, 09:37 AM
Thanks man !. Well I'm using 3M medium compound and wax. I know its ridiculously expensive. I used it simply because I had some leftover from a guitar I was buffing. Turtle wax, Mothers and Maguires will work well too. Ya I'm pretty anxious to get it done.
Budweiserebel07
05-16-2011, 04:42 PM
Alright all here is the closer. A few changes have been made, which will need a little explanation. First of all I could not find my 10" buffer. SO I used my pnuematic drill and a mothers ball at about 16000 rpm. This isn't all that necessary .
Now the explanation. To buff something as hard as atv plastic you need 2 of 3 things. Either pressure and compound (hence the buffer) OR speed and compound (which is my little pneumatic friend with the mothers ball).
The first pic is as promised what the plastic looks like after using 1000 grit.
The second pic is after i buffed with the compound
The third is me playing with the mothers ball. lol
lol
The fourth is my finished plastic with me on it NOT riding in anyway so please dont delete my photo lol.
ENJOY !
Budweiserebel07
05-16-2011, 04:45 PM
Small buffed area.
Budweiserebel07
05-16-2011, 04:46 PM
16000 RPM wooo
Budweiserebel07
05-16-2011, 04:46 PM
Grand finale !
CJM
05-16-2011, 08:20 PM
I painted mine with krylon fusion awhile back. The plastics utter trash tho and Im buying new. I have front cut fenders I dislike anyways.
But this, this is gonna be filed away into the "really good idea" bank in my head. Very good job man!
jake"08"400
05-16-2011, 08:37 PM
This is really cool man when my plastics get a lil worse deffintley will keep this in mind. But one question after you wash it do you have to re wax your plastics are does it stay on and shiny?
O and the orange quad looks real good man Wish they had orange in the new 400 when I bought mine lol.
sheweezy
05-16-2011, 09:02 PM
Sticky???
kbnorth99
05-16-2011, 09:36 PM
Originally posted by sheweezy
Sticky???
X2!
CJM
05-16-2011, 09:44 PM
Ill message pappy.
honda400ex2003
05-16-2011, 10:12 PM
looks great! glad it came out nice for you.
steve
2001400exrida
05-17-2011, 06:00 AM
are these plastics really orange or does it jst look that way in the photos?
did the red color fade after sanding and shining?
Budweiserebel07
05-17-2011, 06:03 AM
The bike is how it looks in the photos and as Maier plastic named it Zest orange. And ya shes shiny
Budweiserebel07
05-17-2011, 06:11 AM
Originally posted by jake"08"400
This is really cool man when my plastics get a lil worse deffintley will keep this in mind. But one question after you wash it do you have to re wax your plastics are does it stay on and shiny?
O and the orange quad looks real good man Wish they had orange in the new 400 when I bought mine lol.
Actually here is the beauty of it. After about 3 washes ( if you wash by hand) the plastic will get a little shinier. Simply because a rag or sponge is in some form abrasive. Like wet sanding with like 5000 grit. If you are really picky about your plastic I would say wax like once every 3 months by hand. No need to use a buffer because you would just be waxing to break the oxidation from being in sunlight and throwing mud all over it. :cool:
Thanks for all the comments and sticky requests guys !
Budweiserebel07
05-19-2011, 06:12 AM
Here is my final pic of the bike after i took the buffer and wax to it and washed it. I'm actually surprised it came out this shiny. Oh and my angry eyes are on too,lol. Enjoy.
chronicsmoke
05-19-2011, 07:30 AM
wow. .
.
That turned out REALLY good!:eek2:
How long did it take you?
Sick bike BTW, for $900 you walked away a lucky man!
Budweiserebel07
05-19-2011, 07:39 AM
Thanks man !! from the time i started sanding till getting it to look like that id say i had 4 1/2 hours in it. But I had some pretty horrific plastic. The buffing took the longest for sure.
When I first bought the bike I thought it was going to take way too much money to fix up to where I wanted. Turns out I only had like 250 bucks in the restoration. Including the aluminum handguards and pro taper grips, paint for the motor and frame, and bearings. The guy I bought it off of gave me the piston, hotcam, and gasket kit for free. My 400 ex decals should be in today along with my plastic fuel switch.
chronicsmoke
05-19-2011, 07:43 AM
Originally posted by Budweiserebel07
Thanks man !! from the time i started sanding till getting it to look like that id say i had 4 1/2 hours in it. But I had some pretty horrific plastic. The buffing took the longest for sure.
When I first bought the bike I thought it was going to take way too much money to fix up to where I wanted. Turns out I only had like 250 bucks in the restoration. Including the aluminum handguards and pro taper grips, paint for the motor and frame, and bearings. The guy I bought it off of gave me the piston, hotcam, and gasket kit for free. My 400 ex decals should be in today along with my plastic fuel switch.
Keep it up! I noticed the hand guards, they really set it off.. now all you need is a front bumper lol!
Budweiserebel07
05-19-2011, 07:55 AM
haha Oh YA !! hold on ive got one. The goober before me welded the top bracket shut and Ive got to torch it off :mad: but hers a pic of it with the bumper just sitting on the bracket. here it is..
chronicsmoke
05-19-2011, 08:31 AM
Originally posted by Budweiserebel07
haha Oh YA !! hold on ive got one. The goober before me welded the top bracket shut and Ive got to torch it off :mad: but hers a pic of it with the bumper just sitting on the bracket. here it is..
Haha at least it's keeping you busy
I wish deals like that came up around me! :ermm:
Budweiserebel07
05-19-2011, 08:42 AM
LOL Craigslist man. It rocks.
sheweezy
05-19-2011, 08:47 PM
Man, you did an excellent job....been hesitant to try this, but if mine would turn out a fraction of the quality of those i would be satisfied
Budweiserebel07
05-20-2011, 07:33 AM
thanks ! biggest cost for that project is time.
thebig450es
05-20-2011, 11:12 AM
Thanks for the post, my black plastics need help, i'll give your process a try
Budweiserebel07
05-20-2011, 11:19 AM
Sweet. for black, I would really be tedious with the wet sanding. Cause we both know black shows every scratch, lol. However it looks bad ***. The more elbow grease the better the shine ! Good Luck !
grovesbm
05-23-2011, 07:55 PM
i've been thinkin about doing this for awhile . .....i got black plastic that looks like a gerbil has been gnawing at it for awhile..........anyway, looks sweet man! thanks for posting!
sanding begins tonight!
:devil: :bandit:
thebig450es
05-23-2011, 10:23 PM
need some more pics
Budweiserebel07
05-23-2011, 10:26 PM
of "how to" or just my bike now that its done ?
thebig450es
05-24-2011, 09:59 AM
Just how it sits lol, looks great from the pics you put up already
Budweiserebel07
05-24-2011, 10:04 AM
lol no problem i have a few on my phone ill upload now.. bikes pretty dirty now.. I went on a poker run after it rained and i havent had a chance to do more than pressure wash it.. also got my decals i need to take pics of.. they are small black honda 400 ex decals on the tank.. not stock
Budweiserebel07
05-24-2011, 10:07 AM
guess i only had one clean pic.. ill take more this evening for you all
My 416 and my brothers 600rr
orange is kinda our thing i guess lol
Budweiserebel07
05-24-2011, 10:09 AM
and here it is after the poker run. . hahaha
Budweiserebel07
05-24-2011, 11:04 AM
I got bored at work so I cleaned the bike up and dried it for you guys to see after i got the decals and how well its holding up after a hellaciously muddy poker run.
Budweiserebel07
05-24-2011, 11:05 AM
next
Budweiserebel07
05-24-2011, 11:06 AM
back
Budweiserebel07
05-24-2011, 11:07 AM
and a little angle to finish
Honda.rider5871
06-09-2011, 11:09 AM
Im looking to dothis to my older 400 that has had scratched up plastic since i bought it , i was going to buy new plastic buy thats $500 so i was gonna try this . 2 questions - 1. My plastics red will it fade at all ? 2. How excatly do you wet sand plastic?
thanks for any help
Budweiserebel07
06-09-2011, 11:45 AM
No bro Red is fine. Black is only one Id be weary of but its still do able. Now when your wet sanding your plastic it WILL look faded on the parts that dry, dont stress tho, that is how its supposed to look until you buff it out. Now to wet sand, what you need to do is go get some 3M wet sanding sandpaper. EASY to find. Depending on how bad the scratches are, is what grit to start with. I started with 180 I think. Basically to wet sand just get a bucket of water and get your plastic wet and keep dipping the sand paper in the water to keep it wet. That is important. Make sure its soaking wet at all times. Sand in a circular motion as well. Sanding back and forth tends to create lines that are hard to get rid of. after that get rubbing compound a buffer and wax and go to town on it.
Honda.rider5871
06-09-2011, 12:43 PM
Thanks for the help, ill post a couple before and after pics too when i get done if anybodys interested in what it looks like in red
Budweiserebel07
06-09-2011, 12:56 PM
Alright ! Im anxious to see it. Elbow grease never hurt anybody !
GAZ-V-21
07-25-2011, 06:24 PM
Any one have pics of a black one after this process? Im thinking about tring it on my ride.
Honda.rider5871
07-25-2011, 08:18 PM
I have pictures of it done to red, but i ended up getting a good deal on oem plastic . but i can post some pics of what it looked like after i did this if anybodys interested
BoneStockHonda
09-25-2011, 01:51 AM
Originally posted by GAZ-V-21
Any one have pics of a black one after this process? Im thinking about tring it on my ride.
X2 I bought my 450 with black rear plastics and they're pretty beat up. I'm afraid to try the black cause I know how well everything shows on black. Pics anyone?
DirtyBirdRacing
09-26-2011, 07:02 PM
If no one has Pics of doing this with black, Why not try doing a little part on the bottom side of your plastics and see how they turn out? just an idea.
dirtrider420
09-26-2011, 07:59 PM
hey budweiserebel i know this is not related to ur topic but how u like that tusk clutch and what oil u run with it
grovesbm
09-26-2011, 09:22 PM
i tried on my old black rear plastics. ........ill never try it again! im just gonna keep sprayin cable lube on them
:D :D to shine em up!
DirtyBirdRacing
09-26-2011, 10:30 PM
Originally posted by grovesbm
i tried on my old black rear plastics.........ill never try it again! im just gonna keep sprayin cable lube on them
:D :D to shine em up!
Tire shine works great as well i used it right after i cleaned it. lookes pretty good in this pic lasted awhile to
http://i128.photobucket.com/albums/p185/lord-inuruku/Quad%20trip%202010/1b56c563.jpg
Thumpin440ex
09-27-2011, 11:06 PM
I just did this to a ds 650 before getting it ready for sale.. I used 220, then 500, then a buffer on ruffly 1400 rpm, wool pad, water, it brought it back beautiful.. I never had seen this thread until just now.. LOL But great rite up.. :D
John
CJM
09-28-2011, 08:32 AM
^ Curious Thumpin, what did you use for buffing compound?
Thumpin440ex
09-28-2011, 10:19 AM
Originally posted by CJM
^ Curious Thumpin, what did you use for buffing compound?
No BSing, just water. .
.
John
DirtyBirdRacing
09-28-2011, 10:42 AM
Originally posted by Thumpin440ex
No BSing, just water..
Wouldnt that keep you plastics Dull if you dont buff it out?
BoneStockHonda
09-28-2011, 10:49 AM
Originally posted by DirtyBirdRacing
If no one has Pics of doing this with black, Why not try doing a little part on the bottom side of your plastics and see how they turn out? just an idea.
I'm gonna try below the the seat where my boots rub cause it can't get much worse haha
Thumpin440ex
09-28-2011, 11:24 AM
Originally posted by DirtyBirdRacing
Wouldnt that keep you plastics Dull if you dont buff it out?
A wool pad will buff things out depending on the material that is being brought out.. :)
John
hcomras
11-09-2011, 05:20 PM
i dont know wtf happened but i followed your steps verbatim and they look worse now than ever. ...ill give her another shot tomorrow...
the 320 grit made swirls that showed up throught the 600, 1000 and 1500 grit wet sanding...and i used enough polisher to cover a truck...so....crap.
duneslider
11-09-2011, 06:01 PM
My first thought would be you didn't go long enough with the 600 to get all the 320 scratches out.
hcomras
11-09-2011, 09:24 PM
possibly....the black plastics look the worst...the yellow just looks dull...ill start over with 600 and go from there....
duneslider
11-10-2011, 08:03 AM
Black is really hard to get to look great. With a wax buffed in it should look okay from a distance but not up close. I have yellow plastics too and have been wanting to shine them but its getting cold and wet sanding in 20 degree weather isn't sounding fun.
Jake250ex
01-14-2012, 06:04 PM
sorry to bring this back up but I gave it a shot today on my 450 plastics and ruined them.
started with 400, went to 600 then 800 then 1000 then 1500 then 3000.... 4 hours just on the rear plastics.
went to buff it and certain parts came our shiny, like all the creases and edges of the plastic but the rest look foggy and I spent a couple hours buffing it too. I have access to a body shop too so I used a high speed buffer and tried every rubbing compound they have... Its smooth but thats about it. Looks super cloudy.
Also it burns the compound on the edges of the pad and basically ingrains it in the plastic.
What am I doing wrong? Please tell me I didnt trash my plastics. Wish I woulda just left em alone
Thumpin440ex
01-14-2012, 06:10 PM
Use a wool pad turn the rpms down to 1400-1600. Use water only in a spray bottle and keep it damp. Do not press hard on it.
John
PrideRider
01-16-2012, 03:23 PM
Originally posted by Budweiserebel07
Here is my final pic of the bike after i took the buffer and wax to it and washed it. I'm actually surprised it came out this shiny. Oh and my angry eyes are on too,lol. Enjoy.
very nice man im going to have to try this once i feel like cleaning mine....
HondaRacing83
05-27-2012, 10:55 PM
bump because im gonna do this and dont want to forget
Resq
07-11-2012, 04:41 AM
Just picked up an 08 with the plastics in need of a shine.
Worked thru 220,400, 600, 1000, and 2000 wetsand on the tank cover. Will say its smooth, and white for red plastic.
Next is the buffing.
Otis.Leo
07-11-2012, 08:42 AM
Originally posted by Resq
Just picked up an 08 with the plastics in need of a shine.
Worked thru 220,400, 600, 1000, and 2000 wetsand on the tank cover. Will say its smooth, and white for red plastic.
Next is the buffing.
please post a pic when done.. i have reds and they are shiny yet but i have scratches and might do this. .
.
Resq
07-11-2012, 08:26 PM
http://i266.photobucket.com/albums/ii258/Resqu/IMAG0007.jpg
http://i266.photobucket.com/albums/ii258/Resqu/IMAG0008.jpg
Im going to replace the plastics over the winter (jan or feb). Tried the mothers foam ball and buffing compound for a half an hour on one small area, never did shine. My drill is only 1200 rpm. Since ive put time in sanding i may just end up with a clear plastic spray paint and buff it up for now.
Resq
07-13-2012, 07:58 AM
http://i266.photobucket.com/albums/ii258/Resqu/IMAG0009.jpg
http://i266.photobucket.com/albums/ii258/Resqu/IMAG0010.jpg
Painted with clear plastic rattlecan paint.
I'll start another thread on how it hold up.
Powered by vBulletin® Version 4.2.1 Copyright © 2022 vBulletin Solutions, Inc. All rights reserved.
ATV Riders Forum > ATV Riders Mechanical Section > ATV Body > wet sanded plastic, how to get it shiny?
PDA
View Full Version : wet sanded plastic, how to get it shiny?
hondaking52
04-10-2008, 07:21 PM
i just wet sanded my plastics in a few spots, now how do i get them to shine better? any tips welcome
thanks
jkiserracing
04-12-2008, 03:52 PM
Hi,
Ok so Im not sure if you will have any shine left if you wet sand. I think that even the lightest abrasive will kill whatever shine is left (all though I could be wrong) Heres something you can try. Use a product called plastic renew (ive seen it in dirt wheels) its suppose to work well. Also You can pick up a bottle of plastic cleaner at Auto Zone (in the wax and wash isle) It is for cleaning the plastic on Lexan headlights found on newer cars. It works well too. Spend some time working it in..it will take a while. Finaly, when your done with that, the best thing that Ive found to use so far is High Gloss SC1 Clear Coat from Maxima Oils. You can find it at your motorcycle dealer or order it from someone (Motosport.com carries it I think) Its basicly a spray on and buff off. Use it after every wash. Not only does it make your quad shine like a new penny, it prevents dirt from sticking as well. It also makes cleaning it up after your ride much easier. Hope that helped.
cbr929rr
04-13-2008, 08:48 AM
I used heat from a propane torch, but work carefully and slowly plastic does melt. It will leave a nice shine then I coat all plastics with mop and glo or clear linoleum floor shine from the supermarket, this needs to be done time to time depending on how much it is ridden and strong cleaners used when washing.
Dr89
04-27-2008, 08:03 PM
if it's just a few spots use heat (lightly go over with propane torch)
if the areas are large you'll have to lightly sand all the plastic to match, then go over with 000 steel wool, and then use a something like green glo or plastic renew.
fairly simple fix, practice on an underside or a scrap piece if you have one.
Thumper400EX
05-02-2008, 12:02 PM
You can also use car wax and a heat gun...works VERY well...
hondaking52
05-02-2008, 01:14 PM
ya i've just been usin wax with good results, wat does the heat do?
brokenmike
05-03-2008, 09:35 PM
well you already wet sanded the plastics. You can use plastic renew. I have used it and it works great
cbr929rr
05-04-2008, 05:02 AM
the heat will close the cells of the plastic making it less prone to hold dirt particles and increase shine.
450rJam
05-04-2008, 06:50 AM
I have seen the plastic renew............... not a pretty sight
its ALOT of work, and only lasts a month before it started peeling
a heat gun will work a little better than a flame torch
(less likely to burn a hole)
I used armour-all wipes, then a clean towel to get the "grease"
look off....................... leaves it looking new
cbr929rr
05-04-2008, 09:08 AM
mop and glo works and is easier and cheaper than plastic renew
hondaking52
05-04-2008, 09:38 AM
k thanks guys, i'll have to try these, so with the heat do i put the wax on then heat it or clean it very good then heat then wax?
brokenmike
05-04-2008, 02:09 PM
my plastic renew has been on for over 2 years and still looks good. It is alot of work.
cbr929rr
05-04-2008, 04:00 PM
heat first, then wax
eastcoastpro20
05-11-2008, 07:48 PM
buff them out it works wonders
Powered by vBulletin® Version 4.2.1 Copyright © 2022 vBulletin Solutions, Inc. All rights reserved.
Plastic polishing on ATVs
We know from advertising: “if your TV screen has lost its former brightness, just wipe the dust off the screen.” Something similar can be done with the details of the ATV.
If the plastic lining of your ATV has a lot of small scratches (this method is not suitable for deep scratches) and began to look unpresentable, do not rush to run to the store, you can try to polish it. This process is long, tedious and painstaking, if done correctly, the place of cloudy abrasions will be taken by an even gloss. Similar technologies are used to remove scratches from mobile phones and laptops, polishing car headlights. The plastic of the vast majority of ATVs acquires its color already at the stage of its production, and not during painting, thus it is an ideal candidate for "resurrection".
Before starting work, the plastic element must be degreased and removed as much as possible from stickers and fasteners. It is important to maintain cleanliness during all stages of restoration and to prevent dirt from entering the restored area.
Estimate the depth and nature of the scratches by eye, you will need this when choosing the appropriate sanding paper (the deeper the scratches, the “angrier” the sanding paper should be).
The sanding process takes place in several iterations with a gradual change in the grain size of the sandpaper according to the principle from larger to smaller. For the best effect, water the "sandpaper" and plastic with water. The last few approaches are performed with a gentle "zero". The surface of the plastic will become smooth, but still cloudy.
This is where polish comes into play. A specialized polish for motorcycles on the domestic market cannot be found in the afternoon with fire. The loss is not great - automobile and other analogues are no worse and much cheaper. Apply polish to a soft non-abrasive rag, sponge, napkin or piece of felt (all this can be found in an ordinary car shop), rub the substance over the surface of the plastic in a circular motion with light pressure. After 10-15 minutes (the polish should dry and absorb), apply another layer. The procedure must be repeated until an even gloss appears on the entire surface of the part.
Sanding and polishing can be done both manually and with the use of a special tool (polishing machine or nozzle on a drill), this will significantly speed up the execution, but it is important not to overdo it - when overheated, dull areas and bubbles may appear on the surface. At the exit, after 4–5 hours of work, the old and worn ATV linings will acquire an almost pristine factory shine, while your wallet will not be empty for an amount equivalent to the cost of the original part in the salon of an authorized dealer.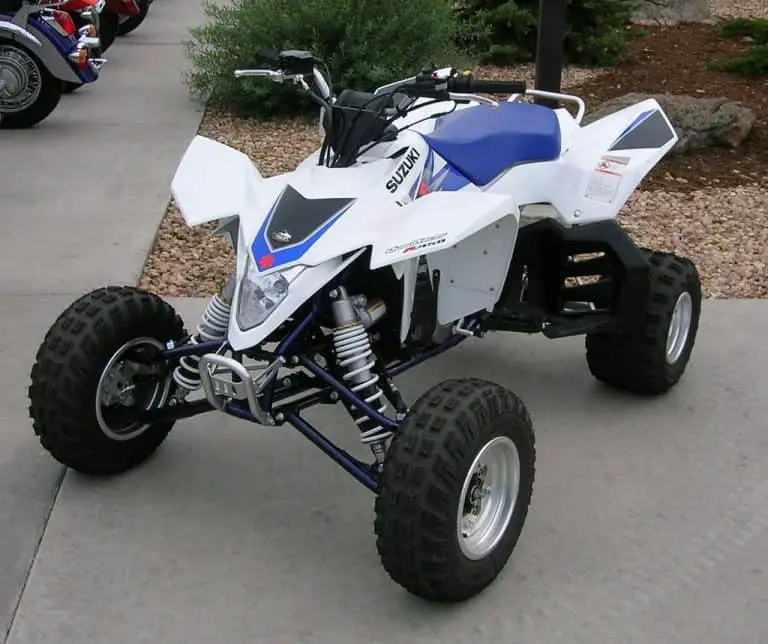
Ice Redoubt > 26 February 2013 10:09 Mikhail Pimus
Share:
December 18, 2020
Even the most careful driver can face the problem of damage to the plastic parts of the car.
Inside the cabin, the “weak” point is the dashboard and doors. Knowing how to remove scratches from plastic in a car, the car owner returns the parts to their original appearance, saves on expensive repairs or replacement of plastic components.
The slightest plastic defects and chips on the dashboard visually "age" the interior of the car and give it a careless look. Few manage to avoid injury. They accidentally dropped the keys - there is a scratch, they pressed a little harder - a chip. You can just open or close the door unsuccessfully. There are several ways to repair plastic.
Remember that corrugated surfaces cannot be repaired, much less polished or heat treated. They are completely replaced.
It is very easy to remove mechanical damage to plastic parts with a repair pencil, special wipes, as well as towels and microfiber cloths.
Before proceeding with heating the plastic, it is necessary to carefully clean the damaged area from contamination using fine-grained sandpaper. Then treat this place with an automotive degreaser. After that, we direct a working hair dryer to the defect (at maximum power). The distortion should disappear. In this way, only minor damage to the plastic can be removed. By melting plastic with deep defects in this way, you can achieve the opposite effect: the scratched place can deform even more.
The lighter is brought as close as possible to the damaged area of \u200b\u200bplastic. The fire must cover its entire surface. Remove soot from the cooled surface with a swab dipped in alcohol. With the right actions, the plastic should recover. This method is also only suitable for removing small scratches.
Remember to take precautions when handling fire.
Restorers are polishes and gels. Means remove damage after repair and give the product its original appearance. The polishing process is especially important when repairing glossy surfaces. The polish is applied with an abrasive paper or a grinder.
Make sure that the tool runs at low speeds. This will allow you to control the process of polishing the plastic. Eliminate minor scratches in this way is not worth it, the measure is excessive.
The method is suitable for removing small scratches on a glossy plastic surface.
The disadvantage of plastic is the rapid appearance of defects. Perform the following steps to repair deep scratches and chips:
If the above methods do not work, take extreme measures.
