Jeff Chen
I wanted to share some tips for mounting tubeless tires that I've learned from doing 4 tire comparison tests and mounting over 60 tires over the last year and a half:
Warnings:
Installation Process:
Clean the rim bed with alcohol to remove any trace of oil or grease. Tape tubeless-ready rims with tubeless tape and install valves onto the rim. Be as careful as you can to tape rims securely as losing air through improperly installed tape seems to be the most common cause of tubeless setups not being able to maintain tire pressure.
Check the tire for markings that indicate direction of rotation before installing.
Install the tire bead on one side of the tire onto the rim.
Install the other tire bead ending at the valve. (The valve tends to allow less room for a tire bead leading to a tighter fit if you end away from the valve.)
[If you only have a floor pump] Try to inflate the tire. If you can get the tire beads to form some level of seal with the rim bed, you'll be able to get the tire to hold air. From that point keep pumping fast(!) up to 35 psi. You'll generally hear a 'snap' as the tire beads seat at about 35 psi. I don't recommend going above 40 psi to reduce the risk of tire and/or bead blowouts. I've found that about 1/4 to 1/2 of tires install easily with just a floor pump.
See tips and tricks below for ways to help the bead seat with just a floor pump
See below for the tire brand/rim brand combinations that I've found install easier
Warning: Be VERY careful not to exceed 40 psi in the tire to reduce the risk of tire and/or bead blowouts.
[If you have access to a compressor or gas station air hose] The process of installing tubeless tires is a LOT easier with access to a compressor. The high pressure that a compressor can deliver quicker than a hand pump helps force tubeless tire beads against a rim bed from which you can then add air up to the tire pressure at which the tire beads will seat (about 35 psi).
Warning: Be VERY careful not to exceed 40 psi in the tire to reduce the risk of tire and/or bead blowouts.
Congratulations if you are up to this point. Getting the beads seated is the most challenging part of this process. To complete the installation you need to add sealant into the tire & distribute the sealant around the sidewalls of the tire.
Let the air out of the tire. Generally the tire beads will remain seated on the rim.
Remove the tire valve core. Generally tubeless valves will be of the presta variety, not the schraeder valves that are typically used with car tires)This is the top part of the presta valve that screws into the larger diameter base of the valve.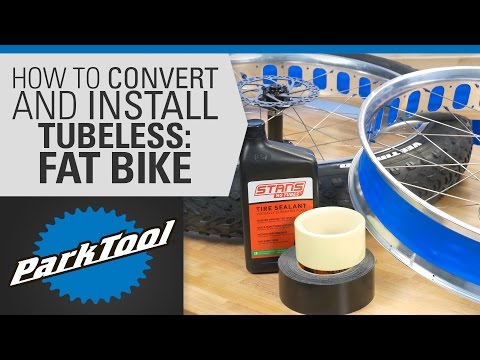 You can do this by using a core removal tool such as the Stans NoTubes Core Remover Tool or an adjustable wrench if you don't have a core removal tool.
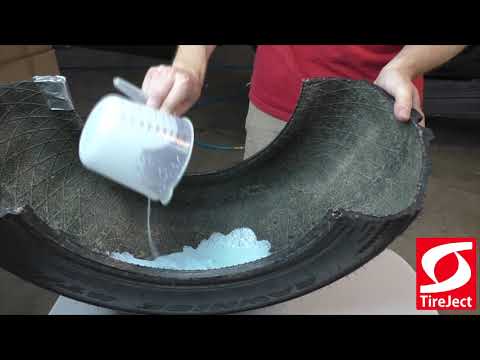
Inject about 4 oz of tubeless sealant into the tire through the tire valve with the valve core removed
Reinstall the valve core
Pump up the tire to about 35 psi
Shake the wheel/tire laterally to distribute sealant onto the tire sidewalls. Rotate the wheel/tire as you continue to do this around the entire tire.
Rotate the wheel/tire held horizontally to allow sealant to work its way into the junction between tire bead & rim. Set the wheel/tire down horizontally for 5-10 minutes. A cardboard box is a good way to keep the wheel/tire level. Flip the wheel over to the other side and repeat this process. Losing air due to tire beads not being adequately sealed against a rim is another common cause of tubeless setups not being able to hold pressure.
Adjust tire pressure based on your weight.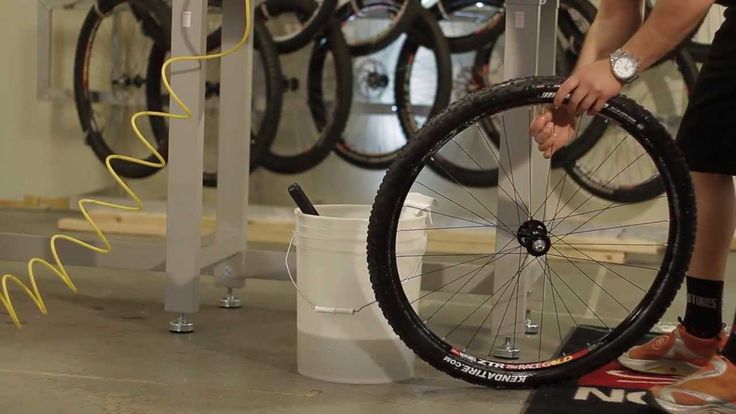 This is a formula from Stans NoTubes that provides a starting point for matching tire pressure to your weight:
Rider weight / 7 = X
Front pressure = X -1 psi
Rear pressure = X -2 psi
Example based on a rider weight (with gear) of 160 lbs
160 lbs / 7 = 22.9
Front pressure = 22.9 - 1 = about 22 psi
Rear pressure = 22.9 + 2 = about 25 psi
Tips & Tricks:
Use rims designed for tubeless use: Tubeless rims have a ridge next to the bead seat that will help to "lock" a tubeless tire's bead onto the rim after it is seated. I personally will not do tubeless "conversions" with non-tubeless rims. Non-tubeless rims that don't have the ridge to help lock in a tubeless tire's bead greatly increase the risk of burping (losing air in hard cornering) or rolling a tire off in corners.
Use tires designed for tubeless use: Tires designed for tubeless mounting have a casing that is more likely to be air tight as well as tighter fitting beads (keep reading for the benefits of tighter fitting beads for ease of tubeless installation).
Seat the tire beads before adding sealant: Trying to seat a tire that already has sealant added just adds potential for messiness. The sealant does not help the initial bead seating process.
Seating the tire beads with just a floor pump: If a tire's bead fit snugly against the rim bed, you have a good chance of being able to just use a floor pump to get enough air pressure to seat the beads. An air tight seal between bead and rim allows you to gradually build up enough air pressure in the tire until the beads seat around 35-40 psi.
Tricks for seating tire beads when a tire doesn't start holding air pressure immediately:
Make sure the tire is covering the valve hole
Try to move the tire so that the beads press against the rim bed
Use an inner tube to strap the tire against the rim
Seating the bead without a compressor: A inexpensive way to get a high volume of air into a tire at high velocity is to use a gas station air compressor. If you have Presta valve, you will need a presta-to-schrader valve adaptor such as the Slime 23042 Presta to Schrader Valve Adapter. The high velocity of air that is delivered by this method or with a compressor pushes the tire beads against the rim allowing pressure to build up to seat the beads.
Add sealant via a tubeless valve that has a removable valve core: Many instructional videos will recommend removing one side of the bead at this time to add sealant. I don't agree with this approach. You've done a lot of work at this point to get both tire beads seated properly. Why would you want to undo part of the work you've done to seat the beads? Adding sealant through the valve core is by far the lowest effort way to add sealant.
For really hard to seat tires, pulling the tire bead on top of the rim could be worth trying: I just learned this new method of getting a better seal between tire and rim to do the initial inflation & seating of the bead if you don’t have access to a compressor or tubeless charger pumps that can deliver a high volume blast of air. The basis of this technique is that you pull the tire bead on top of the rim with a tire lever. When you get to about 40-50% of the tire bead resting on top of the rim. you put your thumb on the tire bead so it doesn’t slip off of the rim and gently pull out the tire lever. Repeat on the other side and pull the bead up on the rim as far as you can go. Proceed to inflate the tire. Once you are able to get some pressure in the tire. There seems to be at least some risk of having the tire bead blow off the rim when you inflate the tire, so be aware of that and try this technique at your own risk. You can see the technique being used at: https://youtu.be/tE3h5nmDdOo.
Easier to install tire brand/rim brand combinations
On Stans rims (Easton & DT rims have a similar diameter. Mavic & WTB have a slightly smaller diameter)
Schwalbe Snakeskin - Easiest
Maxxis Exo - Fairly Easy
Specialized 2Bliss - Fairly Easy
Continental Protection - Difficult to do initial seating of the beads on Stans rims
WTB TCS - CAN work but beads may be tight as the bead diameter is based on the tighter UST bead specification. I have mounted 2 WTB tires on Stans rims, but have heard that others have had challenges with this. Works better on WTB and Mavic rims.
Michelin, Hutchinson - I don't have direct experience but I believe these brands will work better on WTB and Mavic rims.
This is a great video on installing difficult-to-mount tubeless tires:
You can help support Dirt Merchant Bikes’ product testing by purchasing through our retail partners.
Orange Seal Tubeless Sealant
Our experience is that Orange Seal seals punctures quickly and consistently. The amount of rain we get in the PNW makes sealants drying out less of an issue, but Orange Seal also resists water absorption well.
Stan’s Tubeless Rim Tape
Stan’s tape has a little stretch that helps in removing air bubbles when taping rims. It sticks well to most alloy rims and some carbon rims. It also removes cleanly unlike Gorilla Tape.
Stan’s Tubeless Valve Stems
Stan’s valves have a solid rubber base that helps reduce air leaks around the valve base. Tightening the locknut helps seal tape against the rim.
Diamondback Steel Core Tire Levers
It can be helpful to use a tire lever to get the last part of a tire bead onto a rim. Plastic tire levers don’t last long with that type of abuse. I like these better than the more expensive Park Tool TL-6.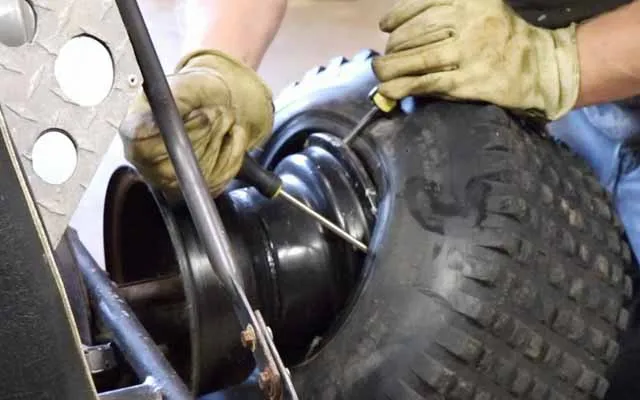 2 Steel Core Tire Levers because the entire tip of the lever is covered in plastic to reduce the chance of scratching a rim.
Orange Seal Sealant - 16 oz Refill bottle
Orange Seal Sealant - 32 oz Refill bottle
Stan’s No Tubes Rim Tape 60 Yards x 30mm
Stan’s No Tubes Rim Tape 60 Yards x 27mm
Stan’s No Tubes Rim Tape 60 Yards x 25mm
InTires TagsTires
Tubeless tires are much, much better than the alternative, but that’s not to say they’re perfect. Sometimes, just getting a tubeless tire to hold air can be a challenge, and diagnosing the problem — let alone fixing it — can be frustrating. If you find yourself staring at a flat tire in the garage and muttering “why” over and over again, here are some tips for getting rolling again.
This article won’t cover mounting tubeless tires; we’ll assume the tire has been mounted successfully, but that it won’t hold air for more than a day or so.
No, we’re not celebrating yet, but this will get us closer to our goal by allowing us to zero in on the part that’s leaking.
Fill a spray bottle with water and some dish soap, or really any soap that forms bubbles. Next, inflate the tire to 30psi or so. Spray or just pour the soapy water all around the tire and rim, one section at a time. Note any places where air bubbles appear.
If there is a puncture in the tire itself that is leaking, this is generally an easy fix. Make sure you have plenty of sealant in the tire and move it around until the sealant pools at the puncture. Larger punctures may benefit from a tire plug.
With a sidewall leak, you’re usually better off replacing the tire.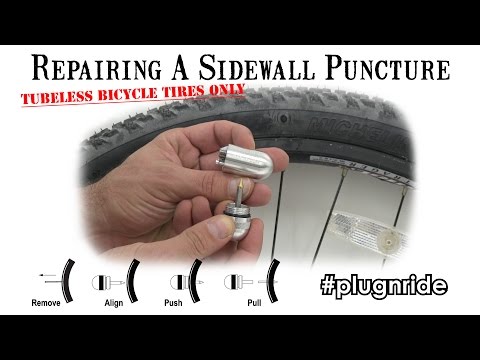 It might be possible to patch it, or if you’re really lucky, plug it, but in my experience sidewall repairs rarely last very long.
While rare, some tires have been known to absorb or even weep sealant. Tiny pores in the tire compound fill with sealant when it’s initially added, so you may need to add a bit more liquid to replace what’s been lost. If a tire still leaks through the tread or sidewall in multiple locations despite having good sealant coverage and no punctures, you may want to check with your local bike shop or tire manufacturer to see if the tire should be replaced.
Check to make sure the rim wall isn’t dented. If it is, your tire won’t be able to seal. If you find your rim is slightly bent or dented, it might be possible to get things straightened out enough to hold air. According to Gerow, “a couple of small planks of wood, a vice, and a hammer will get you started.”
Even if the rim wall isn’t visibly dented or misshapen, there could be a small gap between the tire bead and the rim that’s leaking air.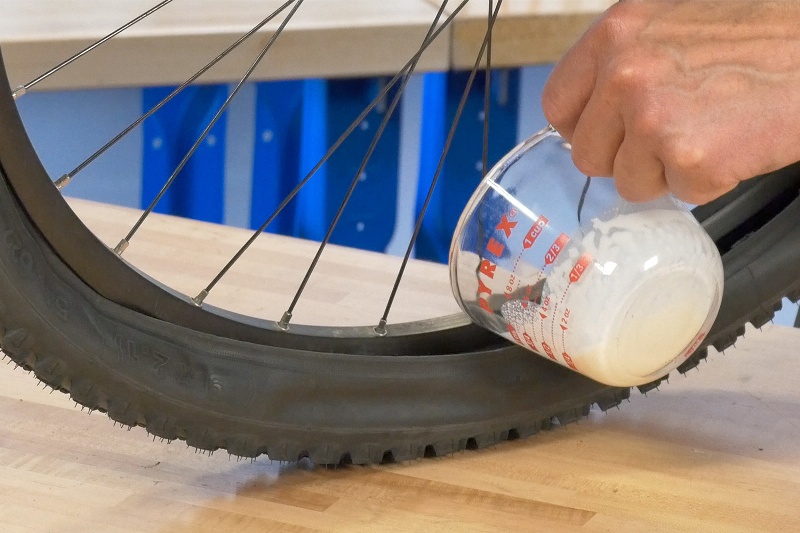 Make sure you have plenty of sealant in the tire, and hold it horizontally and tilted to allow the liquid to pool around the part of the rim where you saw the bubbles forming. Shake the wheel gently for a minute or so to let the sealant do its work.
In some cases, the tire-rim connection may not be tight due to buildup of old sealant. “Older tires can have a buildup of dry and hardened sealant at their bead that will create space between the rim and the rubber, causing air leaks,” says Gerow. “When mounting a tire that has already been mounted previously, be sure to remove as much dried sealant from the bead as possible.”
Sometimes a tire bead may not be fully seated in the rim. Try pumping the tire up to maximum pressure. The loud popping sound you’ll hear is the bead popping into place. If you didn’t hear that noise the first time you mounted the tire, chances are that is the issue.
After running through the checks above, try soaping the tire again and checking the same spot to see if the fix was a success.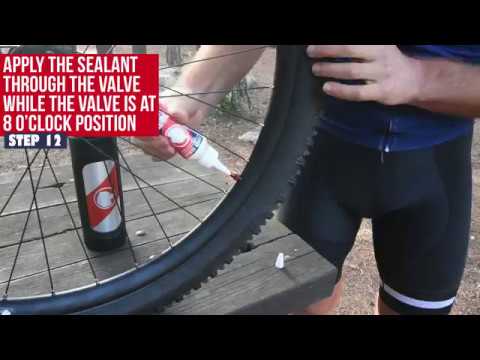
In my experience a leaky valve is often the cause of air pressure losses over time. If the soapy water reveals bubbles at the valve, it’s time to investigate further.
Tubeless valve parts with a valve core remover tool (red, right).First, check the easy stuff: Is the core screwed in tightly? Is the inlet screw loose or bent? A dedicated valve core tool is helpful for proper tightening, and if your fingers aren’t getting the inlet plunger tight enough, needle nose pliers can do the job. Just make sure you don’t over tighten and break the valve, or get it so tight you can’t add air later. If any part of the valve is bent or broken, don’t try to fix it; it’s time to replace it.
If soapy bubbles are forming around the base of the valve, it may not be attached to the rim properly. Most valves have a nut at the base that tightens the valve to the rim. Get this as tight as possible with your fingers, and if necessary give it a slight turn with a wrench. Just be sure to avoid tightening too much because you could damage your rim, especially if it’s carbon fiber, and you may need to be able to remove the nut on the trail in the case of a puncture.
Next, investigate the valve from the other end, which means taking the tire off the rim. Most valves have a soft rubber gasket that forms a seal around the valve hole in the rim, so check to make sure the valve is seated properly in the rim channel. You can also add a bit of teflon tape around the base of the valve to seal things up.
Sometimes sealant can fill in small gaps around the valve. If you notice air leaking while on the trail, try rotating and shaking the tire so the liquid sealant can get to the valve.
If bubbles form around the spoke nipples, the good news is you’ve found your leak! The bad news is, there isn’t a quick fix. This generally means the rim needs to be re-taped, or at the very least the tape needs to be patched over. If the tape appears wrinkled, ripped, or punctured that’s probably what’s causing the leak. Tire levers can often puncture the tape while installing the bead, causing the tape to leak air through the rim.
There are many tutorials online for taping a tubeless rim, but in general, the idea is to get the rim as clean and as dry as possible before taping all the way around in one go. Be mindful of any gaps where air might be able to leak, keeping the tape flat and taut to avoid blisters or pockets.
Sometimes, tires can be sneaky leakers. Pump them up and they’ll stay rock solid in the garage for weeks, but as soon as you roll in the parking lot, or take a turn, they go soft. You soap ’em up, and there’s not a bubble in sight. In fact, this has happened to me a couple times in just the past few months.
This is usually due to a small cut that only opens up when there’s weight on the tire, or if the tire is pumped up to a higher pressure. In your garage, you can try to simulate the effect of riding by adding pressure above what you normally ride, or by deforming the tire with your hands and looking for air bubbles as the tire squirms.
Gerow notes, “Some tires need to be ridden immediately after setup in order to hold air properly. A new tire that won’t hold air in the garage might be good to go after a short romp on the trail.”
Once you find the sneaky leak, getting sealant to the right spot can do the trick, though a plug may work even better.
Ultimately, tubeless mountain bike tire systems are pretty straightforward and there are only so many spots where air can escape. Imagine that you’re the air inside the tire, and you’re looking for a way out. How would you do it? That’s exactly the mindset you need to solve this mystery.
Singletracks may receive compensation for purchases made through any affiliate links in this article.
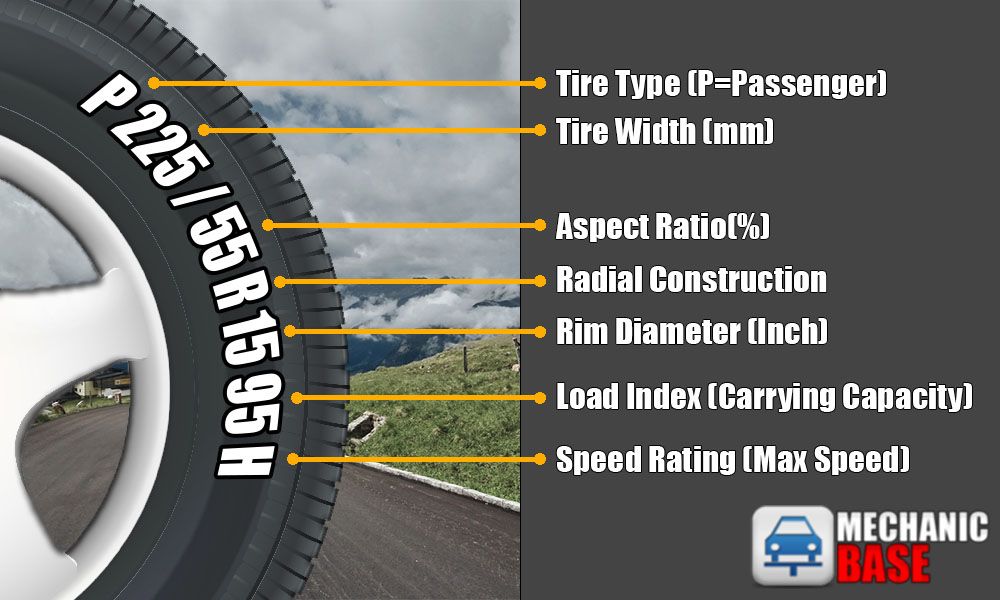
 Most passenger cars are equipped with tubeless tires, which are easy to mount on the rim, reasonable price, lighter weight and easy to repair if a puncture occurs. The driver will be able to seal the tire on his own, without disassembling.
 To learn how to seal a puncture in a tubeless tire, it is worth considering that there are several ways to perform this procedure. Most often, tire repairs are performed using a tourniquet, a fungus patch, and special sprays that tighten the puncture site and stop air leakage. nine0005
If you want to learn how to seal a tubeless tire at home with a repair harness, you should follow the instructions:
The machine must be put on the parking brake, and a chock can be used to fix the position of the transport. Next, the car is jacked up and the wheel removed.
You need to carefully inspect the surface of the wheel to find the puncture site. Damage could occur as a result of piercing the wheel with a nail, self-tapping screw or glass shard. In this case, the head of the nail or the edge of the glass will indicate the cut. The foreign object must be removed with pliers. If the puncture site is not visible, you can pour water on the tire, which will cause the air that comes out of the hole to attract attention with a hiss. The puncture site must be cleaned of dirt and marked with chalk or a marker. nine0005
Next, you need to take an awl with a screw tip and apply special glue to it. After that, the awl is immersed in the puncture hole and several reciprocating movements are made. The tool should not be removed from the hole.
Then, a repair harness (a strip of raw rubber) is installed in an awl with a needle hole. From two parts there should be identical strips, on which a thin layer of glue is applied. To perform a short-term repair of a large damage, you can apply two rubber strips at once. nine0005
The first awl is removed from the puncture, and a tool with a tourniquet is placed in its place. Outside the tire, the edges of the strip remain (1-1.5 cm long). Next, the awl is pulled out of the hole after the tourniquet passes through. A strip of rubber that has folded in half will remain at the puncture site, and its ends should be cut off.
Having learned how to properly seal a tubeless tire with a tourniquet yourself, and after completing this procedure, you need to inflate the tire to the optimum pressure, after which the wheel can be returned to its place. This method is considered relevant if you need to seal a tire tread puncture, and the hole diameter is up to 10 mm. As for side cuts, the elimination of such a problem should be entrusted to professional specialists working in a car repair shop. nine0005
If you are looking for an option on how to seal a tubeless tire with a repair kit yourself, you can perform this procedure using a patch fungus. For this method, you will need to remove the wheel and tire from the disk. You also need to purchase patches in the form of fungi, sandpaper and glue. The repair procedure is as follows:
It is necessary to clean the puncture site, rinse it and remove dirt, as well as foreign objects that damaged the tire. nine0005
Next, the puncture site is cleaned from the inside to give it a roughness. For this task, you can use sandpaper or a drill with a special nozzle.
At the next stage of work, a fungus of the required diameter and size is selected (patches can be purchased at auto parts stores), based on the size of the puncture.
Then the patch must be allowed to dry, after which the wheel can be assembled.
If you are looking for an answer to the question of how to seal Michelin tubeless tires or tires from another brand, you can use the easiest and most effective way. You can use a spare in a can. Sealant allows you to quickly seal the wheel. To apply it, you need to unscrew the nipple (this action is not always required). The contents of the vial must be squeezed into the opening of the nipple and returned to its place. Within 10 minutes after inflating the tire, you can continue on your way. nine0005
To see how to seal a tubeless tire in a video, you can watch a YouTube video with detailed video instructions: https://www.youtube.com/watch?v=PpnKzfpkeoQ.
Based on the method of repair, certain tools and fixtures will be selected. To repair a tire with a tourniquet, you will need a repair tourniquet, two awls (one of them with an eyelet) and glue. When using a patch fungus, you will need a patch, sandpaper (or a drill), and glue. Among other things, repairs can be carried out with tire sealant. Also, when repairing tires, it is worth using a portable compressor (for inflating tires), a repair kit, a jack, pliers, a wheel wrench, a knife and anti-recoil fixing auto devices.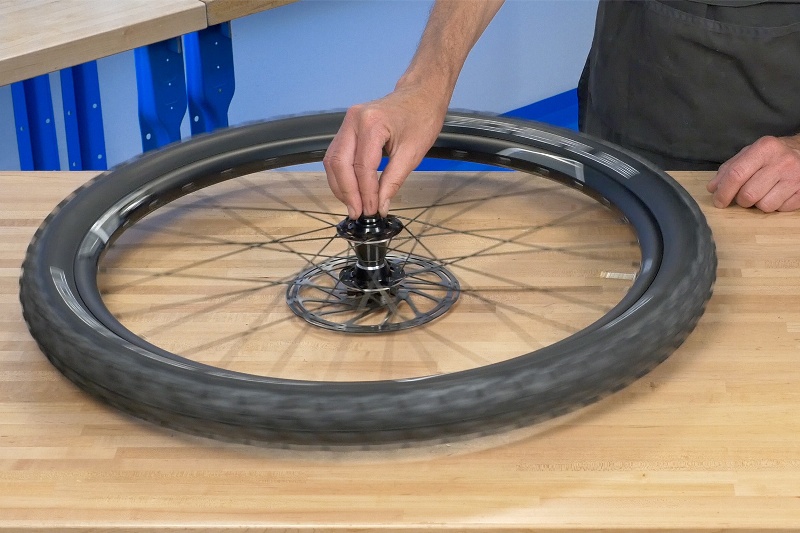 nine0005
When choosing a repair method, take into account the degree of damage to the tire and follow the instructions so that the work is done as efficiently as possible and the wheel returns to its previous operational state.
06 Breast 2018, Thu
In this article, we'll show you how to fix a puncture or cut on a tubeless bike tire. What tools are needed for this. What mistakes should not be made when repairing bk rubber. nine0005
For repair of punctures and cuts up to 2 cm - you can use special repair kits for BC tires. They are a screwdriver with a sharpener and a special hook for a tourniquet made of vulcanized rubber. In our store, such sets are represented by the Lezyne brand:
1. So, we got a puncture or a cut in the tire. First you need to quickly find the puncture site and prepare a repair kit.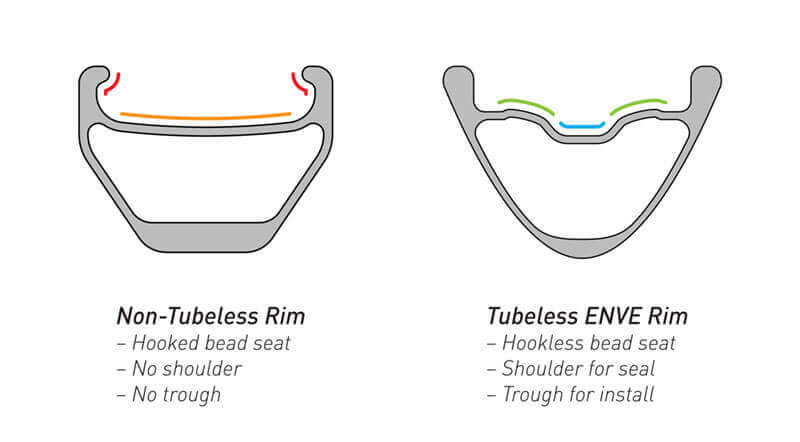 nine0005
Important! It is advisable not to let the tire go down "to zero" as it can "click out of the beads" (this is when the tire peels off the rim bead) and then, in addition to the puncture, you will also have to solve the problem with inflation in the field, and this requires a special Co2 pump or a high-performance pump/stack/compressor. So that the tire does not go down completely, you can not remove the object due to which the wheel has broken through or pinch the puncture site with your finger until you start to eliminate the puncture. nine0005
2. Prepare the site of damage to the tire: We remove the cause of the puncture from the wheel, if it remains, and insert the awl of the repair kit into the site of damage and grind it. We take out the awl and again hold the puncture site with your finger so that the wheel does not go down.
3. Take the tourniquet and insert it into the holder as shown in the photo.
4. Together with the tourniquets, we insert our awl into the puncture site by about 1.5-2cm so that two tendrils of the tourniquet stick out. Glue is not required. If there is sealant left in your tire, it will seal the remaining puncture well. If the sealant is not enough, it is advisable to add it, but after using the repair kit. nine0005
5. Now the most difficult moment, which everyone who has ever dealt with tire repair does in his own way, is how to remove the awl and at the same time leave the tourniquet in the tire. Someone simply breaks the tourniquet in half by twisting the awl in the tire (this is what many motorists or motorcyclists do), but for this you need to have a fairly strong tire with a thick bead. If the tire is light and thin, then this trick will not work.
Tip: In my experience, I stretch the tourniquet a little in the middle, thereby making it thinner at the awl grip. This allows you to easily remove the holder from the flagellum when it is already in the tire. nine0005
Q&A:
How reliable and durable is this repair? How wide can a hole be repaired with a repair kit?
- With proper use of the repair kit, this repair will last the entire life of the tire. An exception occurs only in cases where the cut is more than 1.5-2 cm or the tire at the place of the cut begins to "diverge along the seam".
Do I need to cut the tendrils from the harness sticking out of the tire?
Not required. Over time, they will rub against the asphalt because they have a softer rubber compound than your tire. nine0005
Can the repair kit be used in wet weather?
Yes. No problem.
Can I use an awl or a small screwdriver instead of a special awl-screwdriver for repairing tubeless tires?
- It is possible, but it carries certain nuances. It is better to use a small screwdriver, but you need to be careful as you can damage the tire carcass.