Certain auto detailing products do not always have to be purchased from shops. You can opt for their homemade substitutes. Tire shine is a good example of this. For many vehicle owners the biggest reservation about using commercial tire shine is the cost, so homemade tire shine might seem like a good alternative. But which product will give the best shine and protection for your tires? Let’s evaluate both of them.
The most common household product used as tire shine is oil – castor, lemon, vegetable, olive, baby oil, and even brake fluid. Natural oils like castor and lemon are said to nourish the rubber without drying it. Furthermore, oil will give your tires a wet, glossy look much like solvent-based tire shine. However, the stickiness of oil will result in your tires attracting even more dirt than usual. The result is hard to clean grime and dirt coated tires in less than a week.
Also, after dabbing the tires with oil if you do not wipe off the excess product, it can sling on to other parts. For instance, a product like brake fluid can do a lot of damage to the paint. Another negative of using oil is it does not provide UV protection to your tires, while water-based commercial tire shine have agents that block UV rays.
An important thing to remember is to never apply tire shine on the tire tread, especially oils. They will make the tread slippery.
If organic living is important to you, then homemade tire shine is a good choice. Substances like castor oil will not harm the environment or you in anyway.
Some commercial tire shine products like Meguiar’s and Turtle Wax are priced over $20. A homemade solution is very cheap if you do the math and make the comparison.
Here’s a video on how to make an easy homemade tire shine:
There are two types of commercial tire shine: water-based, which is biodegradable and solvent-based, which is non-biodegradable. Stay clear from the latter because these products contain petroleum distillates that are harmful to rubber. Choose a water-based product instead because this environmental friendly solution will give a nice satin finish to your tires. This shine will last longer as the solution is also non-greasy, so it won’t attract dust and grime like a greasy solvent-based product would do. Additionally, as mentioned above, water-based tire shine have UV ray blocking properties so it will provide additional protection for the tires.
Solvent-based tire shine can even threaten your health. The harsh chemicals can cause dangerous skin ailments and the vapors emanating from them can cause a variety of respiratory problems.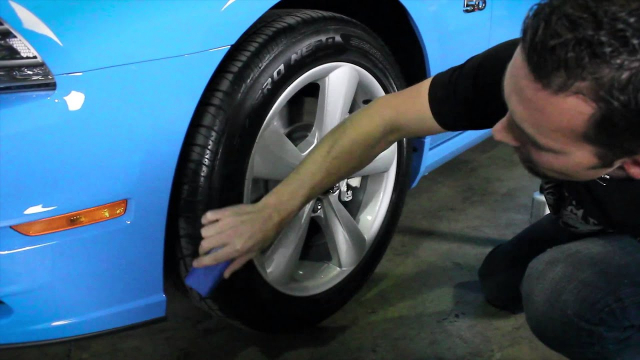 A benefit of using homemade tire shine is that you don’t have to worry about chemicals.
Many commercial tire dressings are also highly flammable so using them means you have to take extra precautions. You should dispose the empty cans and bottles according to the method that is mentioned on the product label.
A good tire shine will give you long lasting results without causing damage to the tires or other elements of the car. Homemade tire shine is a decent alternative but a commercial water-based tire shine will give better results and protection. Because the results will last longer than that of a homemade tire shine, the money spent on the product is actually a worthy investment.
Enjoyed this post? Sign up for our newsletter to receive more valuable tips, ideas, coupons, and extras!
NASCAR may have been founded around moonshine, but those early days of running “white lightning” are long gone. Nowadays, auto enthusiasts prefer to run a different kind of shine, and unlike those hot-rodding bootleggers, this stuff won’t force you to run from the fuzz.
Homemade DIY alternatives are as numerous as crashes at Talladega, and nowhere is this more apparent than in the world of car detailing, with liquid car detailing solutions leading the pack. So is it possible to concoct homemade tire shine with a bunch of random ingredients you’ve got lying around the house? It’s not like you have to worry about a peeling clear coat or hard water spots when caring for tires. So why not get play “mad scientist,” and mix-up a potent shine of some sort?
Now before we get too “antsy in the pantsy” over talking tire shine, let’s get one thing straight: There’s a reason why the tire dressing business is so fucking profitable. For decades, the world’s wealthiest chemical companies have spent an asinine amount of cheddar on researching and testing tire shine products, just to guarantee that they work.
That being said, please don’t get all hot under the collar when your homemade tire shine solution isn’t lasting nearly as long, or bringing the thunder like a $1 billion dollar investment from 3M. You are here because your cheap ass is trying to make due with what you’ve got, and you’re curious to see if all those post-apocalyptic survival supplies you’ve been hording in your auntie’s garage will cut the kimchi.
Well fear not good citizen! The following three, relatively decent, super simple homemade tire shine recipes are here to make your quest for frugality a reality. While we’re at it, I guess we might as well address some of the common issues associated with homemade solutions of this caliber, and maybe even throw in a brief FAQ section, just for shits-and-giggles. Onwards!
3 of the Best Homemade DIY Tire Shine Solutions
While a lot of people have their own homemade tire shine recipe (tortoise saliva and turpentine anyone?), the following three oddball entries are generally accepted as the best, and safest solutions. However, just to err on the side of caution, we strongly suggest using protective gear such as nitrile gloves and eye protection when concocting an automotive “tincture” on one’s own. The last thing we want is for you to end up in the hospital because you just discovered that you are allergic to any combination of the following ingredients.
It may sound like a frilly Hipster highball, but when you combine castor oil and alcohol with a little auto shampoo and water, the natural shine of the rubber and synthetic materials contained within modern tire compounds really pops. Here is what you’ll need to make this oddball “cocktail.”
To whip-up this magical mixture, you’ll first blend the automotive shampoo and water to wash the tire. Use a tire brush to get into all of those little grooves and textured surfaces on the outer sidewall.
After scrubbing the rubber, use some rubbing alcohol to further clean the tire. The alcohol essentially acts as an extra step to further remove contaminants from the tire’s sidewall, and should be used sparingly, as it can dry out rubber rather quickly. A modest splash of rubbing alcohol on a microfiber towel or applicator pad will be all that is needed to wipe the entire tire clean.
Once the tire has dried, splash some castor oil on a different microfiber towel or applicator pad, and hit every square centimeter of the tire’s sidewall in a circular motion until a sheen can be seen from every angle.
Out of all of the products on today’s list of homemade tire shine formulas, baby oil has to be the cheapest and slipperiest. Not only does this slick mineral and aloe-based oil add insane amounts of shine to anything it touches, but the infusion of Vitamin E has caused it to become prized for its ability to nourish cracked and drying surfaces, and that includes automotive rubber.
Here is what you’ll need:
First, pour the 1/2 cup of water into a bucket, add the baby oil, and mix with three drops of automotive shampoo. Pour the solution into a spray bottle and shake it up. Spray the homemade tire shine directly onto the tire , as well as onto a clean microfiber towel. Once the tire is completely covered and slick-looking, allow the solution to sit for a minute or two before wiping it away with a separate microfiber cloth.
While the smell of burning rubber may excite fans of drag racing, most people abhor this pungent automotive aroma. Try laying a citrusy smackdown on UV damage and cruddy contaminants with the dry-rot-reducing power of a lemon oil tire dressing solution. When blended properly, this concoction acts as both cleaner and conditioner.
First, pour the automotive shampoo into a bucket and then add the water along with the Borax. Stir the concoction until fully mixed, adding the lemon oil last. Once fully blended, dip the brush in the solution and clean the tire, reapplying fresh amounts of solution as necessary. Rubber thoroughly scrubbed, break out a clean microfiber towel and conduct a final, dry wipe down.
A Few Other “Unique” Homemade Tire Shine OptionsNaturally, there are a ton of other homemade tire shine options out there, most of which rely upon common household products. The issue, is that from a shiny tire’s viewpoint, most of these ingredients really aren’t all that great when it comes to durability and visual appeal. So take the attached video with a glob of grease, because the aforementioned DIY tire shine solutions are about as good as it gets.
In order to help you remember the core components of routine tire care, we suggest following the classic T.I.R.E. acronym, for it still rings true today. This will not only help keep those sidewalls looking spiffy, but potentially prolong the life of the tire compounds themselves, and therefore make your windshield time all the more safe.
“T” is for TIDYThe easiest way for someone to keep their tires in good shape, is to clean them regularly. Washing away tire contaminants like grime, brake dust, pollution, and road salt helps remove the risk of this crud embedding into the rubber.
By keeping your tires tidy, and routinely applying a protectant, contaminants and UV rays alike become far less of an issue, as both are the core cause behind premature cracking and blowouts.
“I” is for INSPECT The old “penny test” may be a proven method for testing tread depth, but on many tire compounds this means you have reached a dangerously low level of grip. The top of Lincoln’s head on the US penny measures about 2/32nd’s of an inch, which traditionally means it’s time to replace a tire. Don’t wait until your tires reach this level, because your traction at this point will likely border on being dangerous.Automotive tires should undergo monthly maintenance checks, especially when routinely driven. This includes checking tire pressure levels, which should be done every other week, especially since these numbers fluctuate when there are dramatic changes in ambient air temperature.
Inspecting tires for cracks, bubbles, or odd wear patterns should also be a routine, with a monthly, or bi-monthly basis being the norm. This will not only help you keep an eye on the condition of the tire compounds themselves, but by detecting uneven or unusual treadwear patterns, you will shine a spotlight on any suspension alignment issues. There is also the issue of improper tire inflation, which can lead to premature wear and potential blowouts.
“R” is for REPLACEMany car owners assume that if there is more than 2/32nd tread depth left on a tire, they’ll be totally fine. This is one of those outdated, shade-tree mechanic recommendations. By the time a tire’s tread pattern has worn this low, traction will have been reduced to a dangerously low point. Play it safe, and replace your tires when the rubber reaches Lincoln’s forehead on the US penny.
“E” is for EASY For those of you who are unfamiliar with tire lingo, this guide will help explain what all the numbers and letters on the sidewall of a tire means.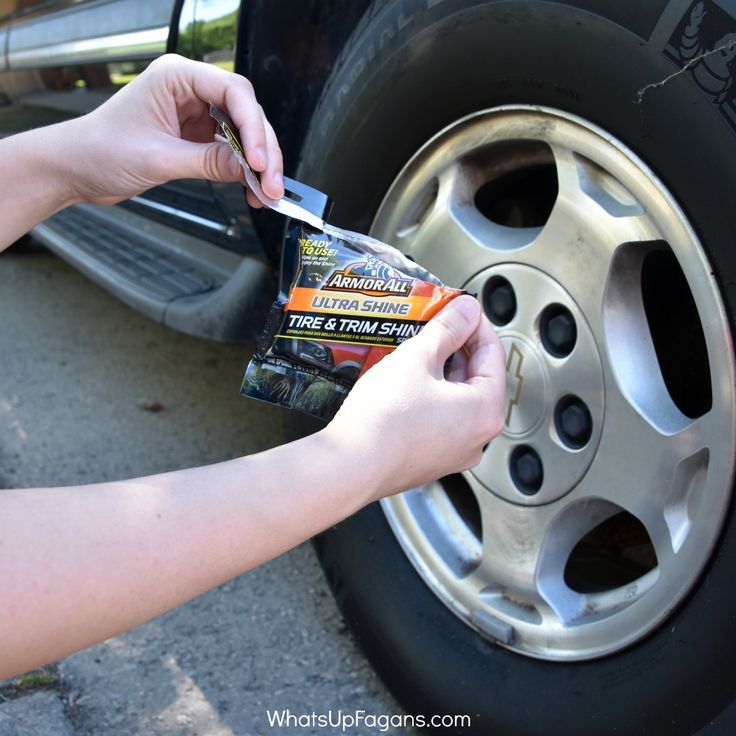
Having the right tires on your vehicle is just as crucial as routinely inspecting and maintaining them with a tire dressing cleaner. Keeping an adequate load weight, and not exceeding the tire’s maximum capacity is a core way to maintain tire integrity, as is ordering the appropriate tire size.
Overloading a vehicle, or specific areas of a vehicle (like the trunk or truck bed), puts a ton of strain on tires, as every tire compound on the planet comes pre-engineered to withstand a certain amount of pressure. So shop wisely, and know that any tires with the letters “XL” on their sidewall won’t be “extra large,” but strong enough to hold extra air, thus allowing them to carry “extra loads.”
Quick Tip: Don’t forget to check your spare tire every month. Nothing is worse than having a flat tire, and realizing that the doughnut is also low on air or damaged in some way.
Parting ShotsDry rotting tires or tire sidewall cracks are a commonplace, and often avoidable tire malady.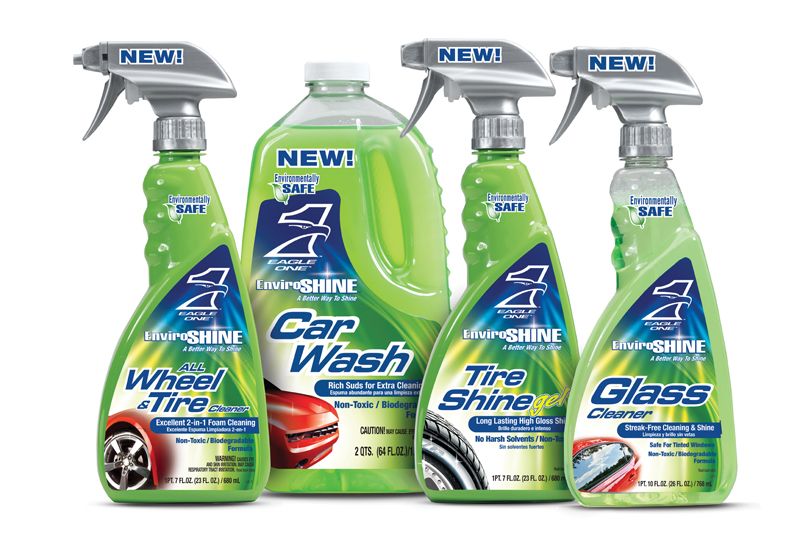 If your tires look like this it is time to replace them ASAP.
While these homemade tire shine solutions are rather good at improving appearances and protecting sidewalls, extending longevity really boils down to protection, not enhancement. That is why the lemon oil shine option remains the preferred homemade method for accomplishing this vital step.
Just remember, automotive tire care is more than just applying a product or some homemade solution to a piece of rubber. In order to safely enjoy the joys of the open road, one must first inspect and then protect their tires. This rubberized consumable product is the only part of the vehicle that comes into contact with the ground. So take good care of these rolling pieces of rubber, and they will take care of you…
0003Related materials
5 cool and inexpensive Chinese car ideas for autumn
You don't have to go to a car wash or a spare parts store to get your tires back to a deep black color. You can get by with improvised means, and some of them are sure to be found in almost every home.
There are several ways to blacken tires that are safe and do not affect traction. In the absence of special means for restoring color, for example, shoe polish, glycerin, silicone oil, and even laundry soap and household chemicals are used. Each substance has its pros and cons, but it should be remembered that none of them fully possesses the qualities inherent in special solutions: neither long-term effect, nor protective properties, nor ease of use.
Related materials
11 factors that the driver needs to remember in the fall
Blackening tires with shoe polish or other shoe care product is the first thing that comes to mind. At the same time, the processing process itself is no different, only instead of a brush it is better to use a sponge so that splashes of shoe polish do not stain the body. We simply rub the sidewall of the washed and dried tire with shoe polish and let it dry.
To be honest, the result does not look very good, even when using the product with wax: there is neither shine nor color depth. The application process itself is also inconvenient - imagine what it would be like to process four wheels. The downside is that you have to wait for the shoe polish to dry completely before driving. Otherwise, road dust will quickly stick to the treated surface, reducing all the efforts made to nothing. Of course, there are also quick-drying paint creams, but their cost is such that it will still be cheaper to buy a special product for blackening tires.
Due to its consistency, glycerin creates a stunning jet-black shiny tire effect, and the degree of "greatness" can be adjusted by diluting the product with plain water. For one procedure, only one hundred grams of glycerin and the same amount of water are enough. We mix them, taking into account the fact that the less water in the composition, the more "fat" the effect will be. But it’s better not to spare water, otherwise dust will stick to the tires, as in the case of wet shoe polish. The composition is applied with a simple sponge without rubbing. By the way, unpainted black plastic body parts can also be processed with this composition.
The advantage of this method is its low cost and the availability of glycerin in any pharmacy. The disadvantages overlap all the advantages: glycerin quickly ages rubber, causing it to crack. In addition, the composition is very well washed off with water - the very first rain or driving through a puddle will not leave a trace of glycerin. In dry weather, tires will only stay black for a couple of days.
Related materials
How to sit behind the wheel - check your fit
Blackening tires with silicone oil is not the cheapest way because it is not sold in small containers and you will have to buy an annual supply of funds right away. This method is the simplest, most efficient and less labor-intensive than the others. It is better to use medium viscosity oil, which will also come in handy for treating tires before winter or summer storage - this is the only substance described that somehow protects rubber from cracking, drying out, ultraviolet radiation and moisture.
The effect after treatment with silicone oil is long-lasting and the tires look blacker than new. Silicone oil is also treated with door seals and trunk lids so that they do not freeze.
Laundry soap is perhaps the cheapest product suitable for blackening tires. It can be applied with a pre-soaped brush, or by dissolving a crumb of soap in water, apply the composition with a sponge. There is no need to rinse off the soap: when it dries, the rubber will acquire a beautiful and deep black tint. Like most artisanal methods, blackening tires with laundry soap has its drawbacks. Rubber because of it, as in the case of glycerin, ages faster and may begin to crack, so we do not recommend this method of blackening.
Related materials
Preparing the car for winter: what needs to be done first
Household chemicals are often used in car washes. This is a cheap, effective and harmless method for rubber and its adhesion to an expensive method, which can be offered as a bonus or "gift". It is mainly used for washing glasses, as well as dishes. The first is sprayed onto the sidewall of the tire and rubbed quickly, while the second is applied with a damp sponge. It is not necessary to wash off the compositions.
Also on the forums it is advised to blacken tires with drinks. More often than others, Coca-Cola is mentioned. But because of the sugar in the composition of the cola, it creates a sticky layer, on which dust quickly settles, and is easily washed off in the first puddle.
***
All of the listed products, of course, are inferior to the special compounds sold in auto chemical departments.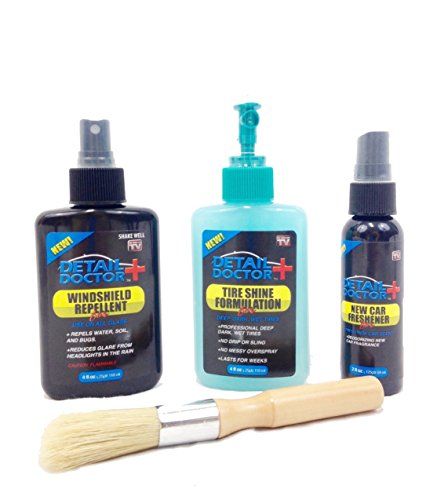 Their blackening effect is short-lived and does not look so beautiful. In addition, most of them can harm rubber by affecting its chemical composition and reducing its service life. Nevertheless, the described methods are in demand due to their availability and spontaneity, because most motorists do not need to blacken tires every day.
However, the safest alternatives to professional tire blackeners are silicone and household chemicals. The latter is usually also cheaper.
Photo: depositphotos.com
Our new video
Haval Dargo and Mitsubishi Outlander test (video)
The story stopped on it: test of the last Volga
5seats, boosted motor... Is it Lada? Yes!Did you like the note? Subscribe and you will always be in the know!
Driving in Zen
News smi2.ru
Why does rubber become sticky? This is due to the composition of the rubber and the process of its vulcanization. Find out how to fix sticky rubber around your home and prevent it. Get tips and tricks for removing sticky residue from rubber.
Rubber can become sticky for two reasons. Either you spilled something on it, or the rubber itself breaks. Sticky substances spilled on rubber are relatively easy to clean up. However, with deteriorating tires - a completely different matter. When rubber deteriorates, it is commonly referred to as sticky rubber syndrome.
The rubber on the new product is vulcanized to make it elastic and improve grip, but it returns to its unvulcanized sticky state when it starts to deteriorate. Once the rubber band on your favorite controller or camera starts to stick, there is nothing you can do to save it. Instead, you can use chemicals to remove the old, torn rubber so that a fresh layer of vulcanized rubber forms underneath. Eventually, all of the rubber will need to be removed as it continues to break down.
Because household items are prone to sticky rubber, you can use some basic household items to remove rubber from plastic.
Windex
Magic eraser
Cotton ball
ask a girl to be your girlfriend
Fabric
Medical alcohol
Spoom
Toothbrush
One of the most simple ways or medical alcohol. The ammonia in Windex breaks down the rubberized coating, removing it. Just be careful when using any liquids with electronics, such as laptops.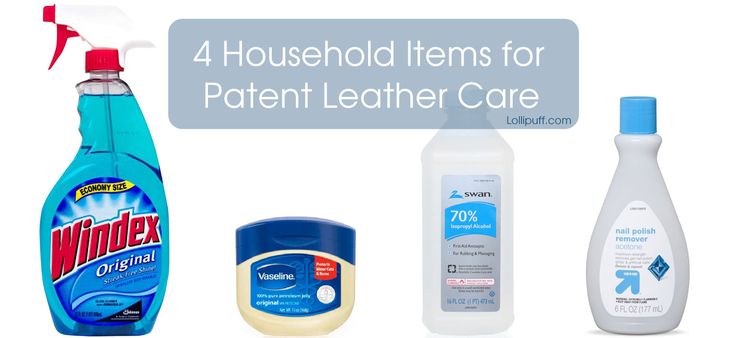
Apply Windex or rubbing alcohol to a cloth or cotton pad.
Wipe off the sticky mass from the surface of the object.
Use your toothbrush to get into hard-to-reach crevices.
Repeat until the sticky rubber is completely gone.
For laptops or other electronics, you can try using a magic eraser to remove stickiness from your items.
Erase the sticky magic eraser.
Keep moving it over the sticky rubber until it is completely gone.
If all else fails to remove the sticky rubber from the item, you can scrape it off with a spoon. Since the rubber deteriorates, it is surprisingly easy to remove.
Dip a cotton pad in rubbing alcohol and wipe the rubber with it.
Use a spoon to scrape off any remaining rubber to keep the plastic clean.
Since rubber degrades due to aging and environmental factors, there are a few things you can try to keep your rubber from succumbing to the dreaded sticky rubber syndrome.
Store rubberized equipment in a controlled environment with a humidifier.
Add polyurethane coating to new rubberized tools or items without electronics to add an extra layer of rubber protection.
Protect rubberized equipment from direct exposure to UV rays.
Sticky rubber syndrome is just one of the reasons rubber can become sticky. Rubber spatulas, wallets, and rugs become sticky due to food or dirt. In these cases, you want to use mild detergents to clean the rubber to avoid discoloration and deterioration. To remove sticky residue from rubber, you will need:
When it comes to cleaning rubber, you want to start small and work your way up.