|
 com Your JavaScript is disabled. This site requires JavaScript.
Delivery options and delivery speeds may vary for different locations
Sign In
or enter a zip code
Email * Password *
REPAIR & HOW TO
MAINTENANCE
TROUBLESHOOTING
GUIDES
TIPS & TRICKS
ALL ARTICLES WATCH VIDEOS ABOUT US SHOP PARTS CONTACT US
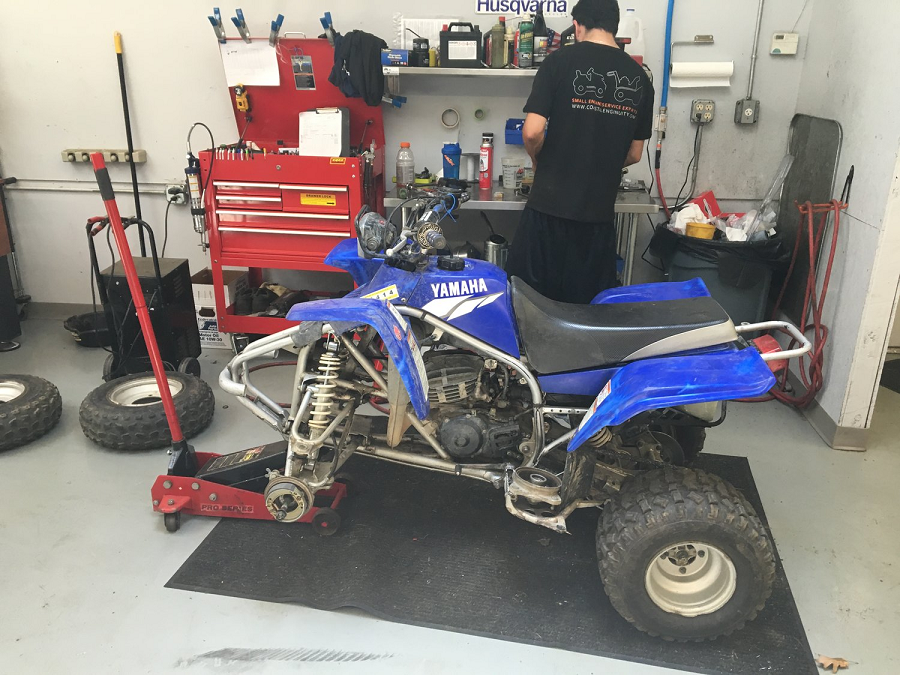
We know how frustrating it is when you’re ready to rock n’ roll out on the track and then all of a sudden your ATV won’t start. Diagnosing Yamaha ATV starting problems is relatively easy to do, and there are multiple tests you can run to find the problem.
You want to start by testing the battery. However, if the battery is new or still in good shape and your Yamaha ATV still won’t go, it’s time to poke around other areas of your machine to find where the starting problem lies.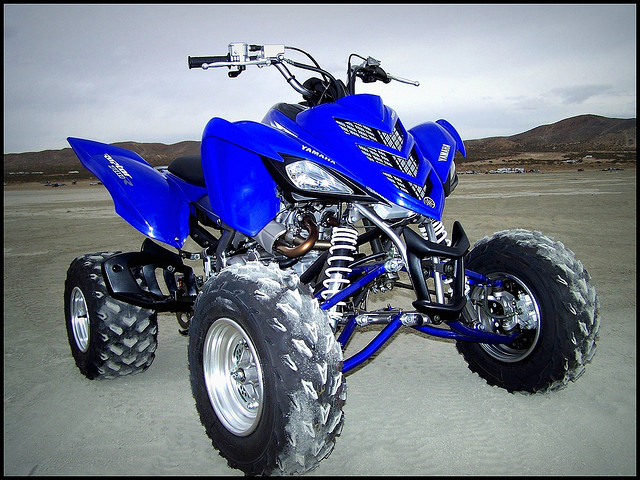 Watch the video above or read on below to troubleshoot starting system problems with a Yamaha YFM700 Grizzly.
NOTE: The parts listed above are parts you may or may not need after running some of these troubleshooting tests for Yamaha YFM700 Grizzly starting problems.
Troubleshooting Yamaha ATV Starting ProblemsA “no start” problem on a Yamaha ATV can be attributed to one or more electrical problems. Fortunately, there are many simple tests you can do yourself with relative ease. While your starter problem might be something simple, you might need a new battery or a starter relay. Check out our Yamaha Grizzly 700 electrical parts diagram and starting motor parts diagram for reference.
Make sure the kill switch on the left handlebar side is in the “Run” position. It might seem like a “no brainer,” but it’s actually a common oversight.
If nothing happens after flipping on the kill switch, remove the front plastic cover to expose the battery, starter solenoid, starter relay and other electrical components.
Yamaha Grizzly 700 Starting Problems Troubleshooting Test #1A battery test is the best place to start. Set your volt/ohm meter to DC volts, and connect it across the two battery terminals. Your Yamaha ATV’s battery should have a reading of 12.5 volts or higher to be considered healthy. If the battery registers anything less, it’s time to buy a new battery. We also recommend you buy a battery tender, which monitors and charges batteries when needed.
Yamaha Grizzly 700 Starting Problems Troubleshooting Test #2After you’ve tested the battery and replaced it if necessary, the next step is to test the starter motor.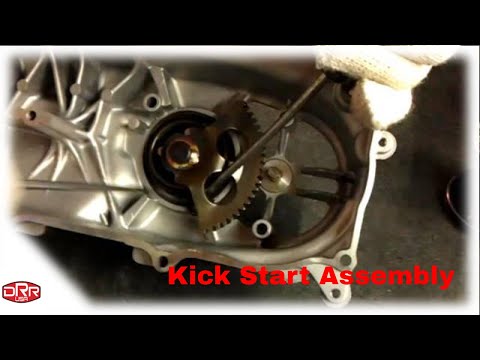 Use a short jumper from a test lead kit to go across the two terminals on the starter solenoid. Make sure there’s nothing flammable nearby, as jumper contact with the terminals will create a spark. If the starter solenoid fires up the starter after making contact with the two terminals, the starter is good to go. However, if it doesn’t respond at all, you need to buy a new starter motor.
After checking the starter motor through the solenoid test, the next part you want to test is the starter circuit interrupt relay. Remove the starter circuit interrupt relay from the machine to test the continuity of the output by connecting it to a volt/ohm meter and the battery.
Set the volt/ohm meter to measure resistance for ohms, and have it make contact with the positive terminal on the battery. Listen for a click upon contact, and look for a low resistance reading close to 0 ohms, which indicates that the starter circuit interrupt relay is working correctly. A high resistance reading means it’s time to buy a new starter circuit interrupt relay.
The next test after reconnecting the starter circuit interrupt relay is to disconnect the starter relay (or starter solenoid) from the machine, and repeat the same method used to test the starter circuit interrupt relay, checking for a low resistance reading near 0 ohms to ensure it’s working. If the resistance reading is high, it’s time to replace the starter relay.
Yamaha Grizzly 700 Starting Problems Troubleshooting Test #5After reconnecting the starter relay, the next step is to check the brake light relay. Turn the ignition on your machine, push the brake, and then hit the start button. If the machine doesn’t start up right away, your starting problem could be a bad brake light relay. Repeat what you did in the last two tests again for your brake light relay, checking for a low resistance measure close to 0 ohms to indicate that it’s working properly. If the brake light relay has a high resistance reading, you’ll need to replace it.
After testing the brake light relay, the next electrical part to test is the diode, which is taped next to the battery and is distinguishable by a light blue wire and a black wire with a yellow stripe. Cut the tape off the diode to unplug it for testing.
Set the volt/ohm meter for diode testing, and bias each diode to see if a current flows through it. Check for a low diode reading close to 0 by touching each vertical prong, which — like some of the parts you tested before it — is also an indicator that the diodes are in good shape. A short circuit or an open circuit during this test would indicate that you need to buy a new diode assembly.
Yamaha Grizzly 700 Starting Problems Troubleshooting Test #7After plugging the diode back in, the next step is to test the connector for the Run switch on your machine.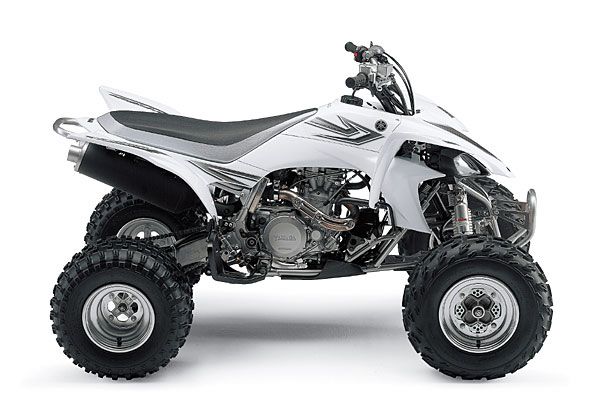 This connector is a gray two-conductor. Set the volt/ohm meter to ohms and continuity. Listen for a beep when a connection is made with the inner points of the two-conductor and the meter after turning on the Run switch. A beep tells you the connector is in good shape.
The next component to test is the engine start switch, which has a black wire and a blue wire with a black stripe. Once connected to the volt/ohm meter at the point where these two wires connect to the engine start switch, flip the engine start switch on to listen for a beep, which means it’s working.
Remove the main side panel to access the wiring for the gear position switch and the reverse switch, which are the last two tests to run to check for starting problems.
Set the volt/ohm meter to continuity, connect one end of the meter to the negative terminal of the battery, and the other end to the four-conductor for the gear selector switch (mounted on the back of the engine) to test for each position of the gear selector. Test the connection to the park gear first by putting the machine on Park, touching the pink wire on the four-conductor of the gear selector switch, and listening for a beep. Repeat this process for Neutral gear (blue wire), High gear (gray wire), and Low gear (white wire). All the gear connections will beep if they’re working properly after making contact.
The last step is to check the Reverse switch, which is one terminal located around the middle of the engine, and has a green wire with a white stripe. Pull the wire off, put the machine in Reverse gear, and connect the volt/ohm meter to the terminal with the alligator clamp. For the Reverse gear, look for a reading for an open circuit (OL reading), or no resistance reading, to indicate that it’s working correctly.
The steps to troubleshoot starting problems on a Grizzly YFM700 are the same or similar for all Yamaha ATV models. However, if you want to see a similar troubleshooting procedure on a different model, watch the video below to see how to troubleshoot starting problems on a Yamaha YFZ450R.
body
Content
New models of ATVs are equipped with an electric starter. Therefore, problems with starting almost never arise. But in older models, 9 can be installed0029 manual kick starter . With him, beginners sometimes have difficulties.
To start the ATV, do the following:
 In both cases, you need squeeze gas . The throttle valve will open, adding fuel to the engine.
 Start the CFMOTO 500 with a manual starter?
Watch this video on YouTube
Paradoxically, but sometimes the owners of ATVs simply forget to pour gasoline into the tank. Therefore, before proceeding with the diagnosis, it is worth checking the fuel level. nine0003
It is not uncommon for the cause of the problem to be insufficient battery charge . It can be charged at home. If the ATV is small, you can purchase an additional battery. The cost of batteries for budget models is relatively low.
How to start an ATV?! If the battery is dead!? Life hacks! Subscriber reply | Irbis Atv 250s | SJ8Pro
Watch this video on YouTube
If the battery is good, but the starter does not work, it may be worth looking for the cause in the starting system. It is necessary to try to close the contacts, which are located on the starter relay. To do this, you need to use a screwdriver. The relay is usually located under the seat. Two thick wires are connected to it.
If you need to find a way to start the ATV without a key, you can also follow these steps. This technique will be effective only if the system is not controlled by the central computer . Otherwise, blocking will work.
If, after the manipulations, the engine starts up, then the problem is in the launch system . Otherwise, you will need to look for the cause of the malfunction further or visit a service center.
Each ATV has a stop button on the steering wheel. Usually it is red. This button is responsible for turning off the ignition, it turns off the engine . If you do not bring it to its previous position, the engine, of course, will not start. Therefore, it is worth checking in what position the "Stop" button is located.
Another security system provided in ATVs is a special check. This is a cable that is attached to the ATV at one end and to the driver at the other. If the latter falls off the ATV while driving, check flies out and the ignition turns off. You won't be able to start the vehicle without this receipt either. If this part is lost, you will need to look for the appropriate contacts and close them directly. nine0003
Another possible reason why the ATV won't start is a blown fuse. If the ATV is small, there is usually only one fuse. He is located next to the battery . The suitability of this part for operation can be assessed visually. The cost of the fuse is cheap, so it is better to have several of these parts in stock.
If there is no spare fuse, and the failure happened away from home, you can insert wire instead. This is a temporary solution that will allow you to get home. It is impossible to constantly replace the fuse with wire. You can burn much more expensive elements of the system.
This part is located under the saddle or next to the motor (depending on the model). It's a small box with wires coming out of it. They are connected to the ignition coil. It is difficult to assess the health of this part, so it is better to contact a service center with a similar problem. nine0003
If the spark plug wire is broken or the ignition coil is broken, it will not be difficult to check the performance of these systems. The candle is unscrewed and inserted into the candle cap. Next, you need to attach it with the metal side to the engine and press the starter button. If there is no spark between the electrodes, this is a sign of a breakdown. Try cleaning the spark plug electrodes and adjusting the gap between them.
If there is a spark, then the problem lies either in the candle cap or in the candle. You need to buy a new part and change it. nine0003
It will be possible to eliminate many malfunctions and start the ATV even in the forest. For models with a manual transmission, you can try to start the engine from the pusher. It should be said right away that this cannot be done with an automatic transmission. In other cases, it is recommended to look for the cause of the breakdown according to the points listed above.
How to start an ATV with a PUSHER
Watch this video on YouTube
Abundance of containers
The main goal was to increase the capacity of the GRIZZLY 700 LEAR We immediately installed a Yamaha cargo box. The box replaces the front post, it is covered with moisture and dust resistant rubberized padding, and its dimensions (94 × 40. 5 × 25) were enough to accommodate our tent, an air mattress and a small lantern. nine0003
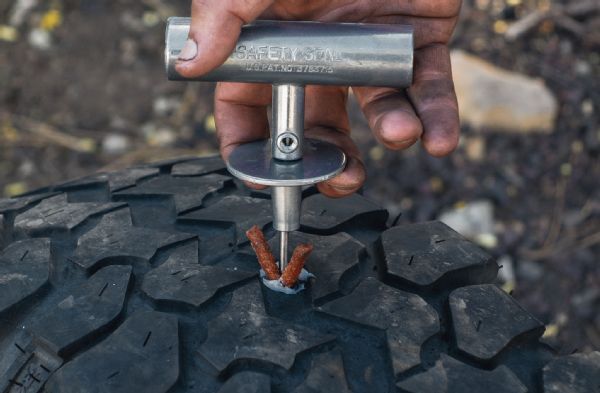
At the rear, we started with a Yamaha C-pillar extension that added 15cm up the rear and side. After that, we put a large Coleman Pro Series cargo container and a fender bag at the C-pillar. Coleman is new to the ATV cargo market, but for just 70 bucks, the container adds a lot of storage space while having great mounts. In the main compartment, we fit a stove, a folding table and a change of clothes, and we still have room for a couple of flashlights and bug spray. The second compartment in the middle was enough for a cute little fanny pack (God forbid they would see me with it ...), a drawer and a folding knife. The little bag on the fender was just enough for a tire repair kit, a couple of candy bars, and some shotgun shells. nine0003
And we gave away the last container from Kolpin for fuel. Our Fuel Pack Jr. allowed us to take extra gasoline with us. Grizzly gives up to 95 km. on 3 liters, but when going to wild places, it never hurts to take a little in reserve. With Fuel Pack Jr. we also powered our gas stove and lantern. For longer trips, Kolpin's "Fuel Pack" can be purchased.
Other important tools
A winch is just as important on long journeys as fuel. And although most likely you will not have to use it, the need may come just when it is not there. Yamaha has a 'Warn' winch kit available for up to 1133kg. It can be installed at a dealership, or you can do it yourself in a little over an hour. The motor of the winch is completely closed, and all the cables are rubberized, so the kit will do its job perfectly even in the mud. The winch is attached directly to the front differential using the mount that comes with the kit. We also placed the thumb shifter on the left brake using the supplied bracket. nine0003
Garmin's latest Montana 650t GPS navigator is pure joy on this journey! To attach it to the ATV, I had to use the mount on the handlebar.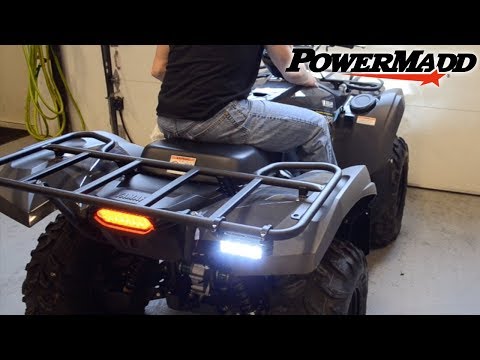 But instead of mounting the navigator on the steering wheel, we placed it on the plastic insert that is located directly under the digital instrument panel Grizzly 700 . Thus, it was possible to immediately monitor the readings of the navigator and the dashboard. The Montana 650t is equipped with a 4-inch color touchscreen that shows everything even if it's covered in dust. The navigator itself can be mounted both vertically and horizontally: the screen supports landscape and portrait modes. The device uses "TOPO US 100K" maps, supports many topographic features such as "BirdsEye Satellite Imagery", and is equipped with a 5-megapixel camera. Other interesting features include a tilt-compensated 3-axis compass, barometric altimeter, and turn-by-turn navigation support. You can set checkpoints along the way, so it will be impossible to get lost! The navigator can be attached to the steering wheel or carried in the hand if you decide to move away from the quadric.
 nine0003
Power Up
By equipping our Grizzly with a winch, bags for fishing tackle, camping and hunting equipment, and spare fuel, we prepared our ATV for any challenge. However, all that extra cargo requires more power from the standard 686cc SOHC. HMF produces the "Swamp" series exhaust pipes and the required EFI optimizer, which we paired with a K&N air filter. All this increased power by 8%, and the noise level rose by only 2 decibels. The stainless steel "Swamp" exhaust pipe is equipped with a spark arrester, necessary in such an area. The manufacturer gives a two-year warranty. nine0003
Knowing that we would be riding our Grizzly 700 at over 3,000 meters, we contacted Yamaha Accessories for another important addition. A Yamaha high-altitude clutch kit is the best way to spend if you're going to be riding at high altitudes. It includes a new clutch spring and clutch, and the kit itself does not affect the number of revolutions per minute compared to the standard clutch. This means that at normal altitude, the grip will be the same, and at an altitude of more than 1500 meters, acceleration will be much better. When changing the clutch, we also changed the oil and the stock oil filter to a K&N variant. nine0003
Control problems?
We specifically chose the Yamaha Grizzly 700 for this experiment because of its smooth speed range, exceptional handling and overall reliability. This is one of the easiest utility quads to handle and is great for camping, hunting and fishing. Although the standard equipment provides an already very comfortable ride, we purchased a seat cover from Quad Tech. It made the seat more tenacious and durable. Once we even accidentally hit it with a fishing hook, which would probably have torn a standard case, but the Quad Tech product remained unscathed. nine0003
Preparing for long rides also included Boyesen's "Flex Grip" handlebar grips to help mitigate bumps and bumps on rocky routes.
Good lighting is a must for night trips in the mountains. Grizzly's standard HID headlights weren't enough, so we installed a 6" LED panel from Kolpin. Kolpin use converted (and branded) LED systems from Rigid Industries. The headlight is waterproof and shock resistant and delivers a very bright 2,160 lumen beam. Claimed battery life is just over 50,000 hours. We installed it next to the Yamaha shipping container, drilled a hole and ran a wire to the battery. Another hole had to be made for the switch, right below the key hole on the right fender of the ATV. This headlight (7.375 in. X 3.625 in. X 3.375 in.) is amazing! Driving at night has become much safer; with its help we even lighted our camp while we set up the tent and kindled the lantern. nine0003
Mud Improvements
We started our ride on sand and mud, after which we drove through a lot of deep mud holes and potholes, and ended up on rocks. The Blackwater Evolution tires from ITP turned out to be exactly what we needed! The dimensions of the front tires were 26×9-12, rear ¬ 26×11-12, which is an inch higher than standard.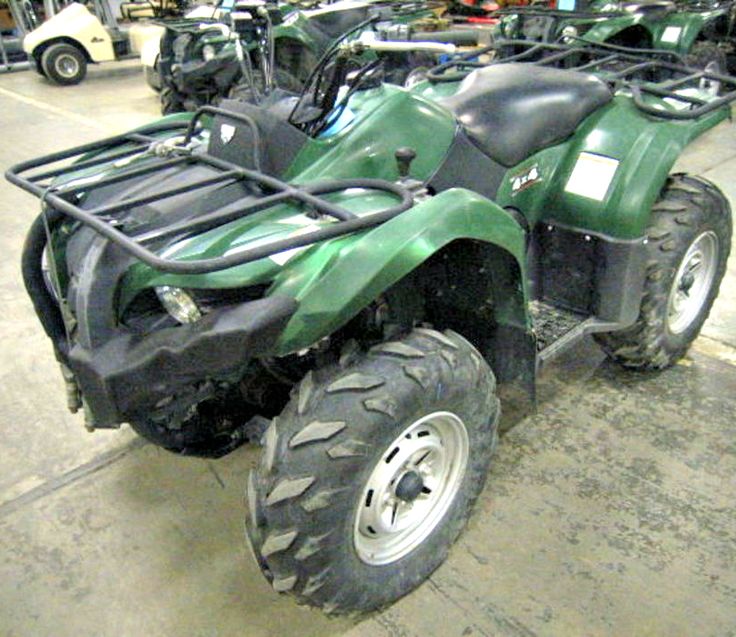 What's more, the Blackwaters are available in the same size as the stock tires Grizzly 700 so you can save your money and use stock wheels. nine0003
Despite the fact that the Yamaha Grizzly 700 is well protected from the mud, with tires from ITP, a lot of it flew onto our luggage, so we decided on another upgrade. Kolpin's oversized fenders are almost 3 inches larger than the standard fenders, and they did a great job with flying mud and other debris. Unfortunately you have to drill the base fenders to install them, but they look great and do the job!
Grizzly 700 standard footpeg too short . When dirt starts to accumulate on your feet, you start to slip off them. We tore the stock ones down and replaced them with taller, sharper footpegs from Yamaha's range of accessories.
Conclusion
With all of these improvements, the Yamaha Grizzly 700 is a great companion for off-road adventures. The capacity has been significantly increased, the Quad Tech seat is even more comfortable, and the Kolpin headlights shine brightly in the night! At 3,600 meters, a Yamaha high-altitude clutch kit proved to be an indispensable upgrade, and an HMF exhaust pipe and optimizer, along with a K&N air filter, provided the necessary power boost due to the increased weight of the load. nine0003
Yamaha's Grizzly 700 ATV, introduced back in 2006 as a model for the 2007 lineup, was the first ATV to feature electric power steering. It has had a significant impact on the ATV market and has since won numerous duels of large-caliber machines and set new standards for ATVs in its class.
Last year, the Yamaha Grizzly 550 ATV was tested by an international team of testers, and the experts were blown away by the ability of this machine, especially when it came time to test its capabilities in off-road racing. When creating the Grizzly 550, the technical solutions used earlier for the Grizzly 700 are used, so the 550 model is practically the same as its older brother, the Yamaha Grizzly 700.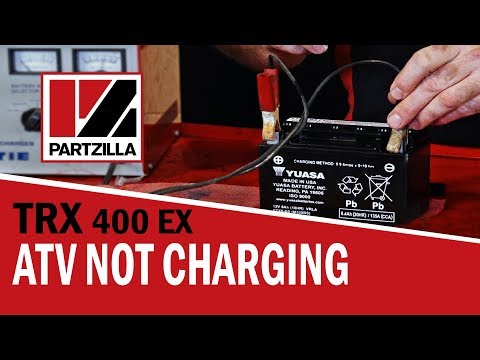 The only significant difference between the two machines is that the Grizzly 700 has slightly more power and slightly larger engine. The testers liked the light and sporty nature of the Yamaha Grizzly 550 and concluded that a little more power could only double the enjoyment of riding the Grizzly550. Therefore, it was decided to ride the 2011 Grizzly 700 to look at it with fresh eyes and once again understand the secret of its success, which it uses with a large army of riders. nine0003
The engine of the Grizzly 700 is very similar in design and technology to Yamaha's phenomenal Raptor 700 sport ATV. The four-cylinder 686 cc Grizzly 700 engine is now configured with an overhead camshaft, overhead valves, ceramic composite coated cylinders, forged pistons and chromium molybdenum alloy steel connecting rods. The weight of the engine has been reduced, as has the chance of overheating, and the life span has been maximized. The Mikuni fuel injection system controls the air/fuel mixture, which is fed into the engine through a 44mm throttle body.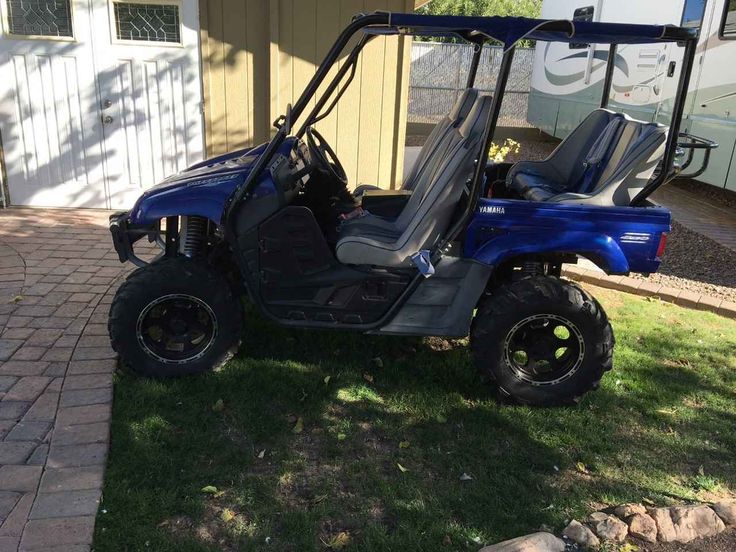 The engine is started by lightly pressing the electric starter button. nine0003
The Grizzly's automatic transmission is designed for both high and low revs, with neutral, reverse and park modes all selectable with a compact lever. The CVT's automatic centrifugal clutch maintains a constant belt tension to reduce belt wear. The drive axle housing is sealed to prevent water and debris from entering.
Yamaha's 4WD ECU allows you to choose between 2WD, 4WD and 4WD with front differential lock. This Grizzly features the most efficient shifter on the market that looks and functions like a part of a jet fighter. nine0003
Steel tubular frame mated to double A-arms located at both ends of the machine. Yamaha's WideArc A-arm front suspension gives the ATV maximum ground clearance at its widest point, a whopping 11.8 inches! In terms of width (which is 46.5 inches), the Yamaha Grizzly ATV can be called a typical representative of its class, but the distance between the axles is one or two inches shorter than the 49.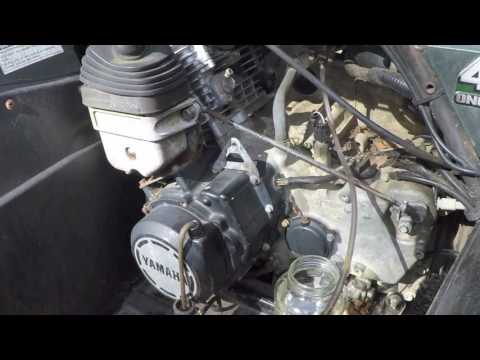 2 inches between the axles of most similar machines. nine0003
Five-level shock absorber preload adjustment in all four corners of the machine to be adjustable. The ATV's suspension travel is impressive, with 7.1 inches on the front and a whopping 9.5 inches on the rear.
Yamaha was the first manufacturer of ATVs to delight ATV enthusiasts with light steering with reduced feedback. The company achieved this by equipping the ATV with electric power steering. The Yamaha system measures speed and force at the steering wheel and front wheels, helping to optimize the efficiency of the electric power steering. As it accelerates, it reduces the electric assist assist to prevent the twitchy feeling experienced by some systems. nine0003
To keep the Grizzly 700's already light weight to a minimum, Yamaha paid particular attention to the machine's center of gravity and moved as much weight as possible to the center of the machine. The cylinder has been tilted forward by 35 degrees to increase ground clearance and provide a low seating position that is now 35. 6 inches (90.4 cm). To lower the center of gravity, the 20-litre fuel tank has been relocated under the seat, but the tank is filled under a movable panel in front of the seat, where you might expect to find the tank itself. nine0003
The independent hydraulic disc brakes that slow down the Grizzly 700 are activated by pressing one of the levers located on the handlebars or the foot pedal located on the right side. Brake control is assisted by the engine braking system, which allows you to brake with all four wheels of the ATV when using all-wheel drive.
ATV steel luggage racks with a "wrinkled" painted surface allow you to carry 45 kg of cargo in front and 85 kg in the rear of the machine. In addition, the Yamaha Grizzly 700 is capable of towing an additional 590 kg on a trailer hook attached to its towbar. On the right front fender of the ATV is a storage compartment that can hold and protect several pairs of gloves, goggles or a raincoat from water.
Dunlop 25x8-12 front tires and 25x10-12 rear tires mounted on lightweight aluminum rims adorned with caps bearing the Yamaha emblem. Yamaha ATV digital gauge displays are the pride of the manufacturer, as they are very easy to read information. Yamaha made the smart move to mount them on the front panel rather than on the handlebars as so many models do, so you can get a handlebar from the aftermarket without the fear of having to reinstall or remove gauges. nine0003
Over the past few months, a team of testers has spent the last few months making the Grizzly 700 several hundred kilometers through the Wilderness Roads nature reserve in southeastern Kentucky, USA, using it as a filming base for several day trips. trips when other models were tested.
The Yamaha Grizzly ATV starts flawlessly, regardless of the air temperature, thanks to its injection engine and electric starter. The engine warms up quickly, so the car starts off quickly even in severe frost. nine0003
This ATV's strengths cannot be described solely in terms of power output, although it generates enough power to get the job done or go fast in off-road racing. In this regard, it is in many ways similar to the Grizzly 550 with its power delivered evenly across the entire range. The only difference between these machines is that the Grizzly 700 generates slightly more torque, and this is especially noticeable in the low and low-mid engine rpm ranges. The quad showed exceptional power on steep climbs, and its wheels spun rhythmically in deep mud and tight corners. However, he clearly lacks the pulling force and excess power of twin cylinders of increased diameter. nine0003
The continuously variable transmission worked evenly with a slight delay. In most situations, the high range was ideal, and the low ranges made it seem like the Grizzly was unstoppable either during off-road racing or in tight rocky areas. The drive system of the Yamaha Grizzly ATV is close to perfection. Two-wheel drive allows you to rush forward, easily slowing down the rear wheels. When roaming slippery, unpredictable trails and off-road in all-wheel drive, safety is provided by additional traction with the ground, and this practically does not affect the force that must be applied to turn the steering wheel.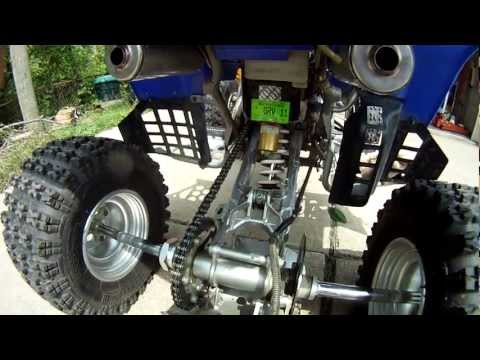 Of course, a differential lock is available in most situations where one is needed. To get full power using the diff lock, you need to press the "automatic override" button located on the left handlebar. But experience shows that it is best to completely abandon the speed limiter and the "automatic override" button. nine0003
Combine the engine and gearbox of the Yamaha Grizzly 700 ATV with its light and agile chassis and you have one of the finest large-caliber 4WD machines on the market. In fact, the increased centralization of mass turns this giant into a light and sensitive machine both on the ground and even in the air! A few compact, small-bore 4x4s were tried on the test drive, but they felt much heavier than the Grizzly 700. With good driving technique or when driving around small bumps, you can easily rear up the Grizzly when you pull it out of a tight turn or over small log. On climbs, the front feels pretty predictable, unless you hit a sapling that's better to jump over. nine0003
The Grizzly's agility is particularly felt in corners, where it handles quickly and precisely. When cornering too tight, the front of the quad will lean a little, but this is easily overcome thanks to the smooth rear end sliding and throttle opening. Despite its high ground clearance and long travel CVT, the Grizzly 700 is a powerful and easy-to-handle sprinter. If you're patiently waiting for Yamaha to release a big 4x4 sports machine, your expectations are in vain: even if the company does release one, we're willing to bet it will work a lot like the Grizzly 700.
In our opinion, Yamaha has the best power steering system on the market. It's so good and organic that you don't even realize it's there. To turn the steering wheel, you need to apply very little effort, but this effort is never too small. EPS electric power steering reduces force at high speeds, preventing the feeling of shaking when driving at high speeds. Its ability to protect against off-road impacts is amazing, yet it still gives you enough feedback to still feel like you're riding off-road. Power steering also reduces the car's propensity to drive in wheel or water ruts, so you're free to choose your own path. If you wanted more from Yamaha's EPS system, you could ask the manufacturer to provide you with more support when you're standing or moving extremely slowly doing some work, or if you're hovering motionless over a giant log. nine0003
Suspension work provides Grizzly (Grizzly) maneuverability and sporty character. The shock absorbers guarantee a stable and non-jumpy ride over rocks and roots rising from the ground. Rectangular edge impacts on ditches and young trees are absorbed, and shocks from successful jumps are easily smoothed out. Riding on the "comb" may seem a little bumpy, but the lightness of the machine will allow you to deal with it without difficulty.
We won't go out of our way to prove our point about which ATV has the best brakes out of all big-bore machines. The Yamaha Grizzly has very powerful brakes that feel just as good as quad sport brakes.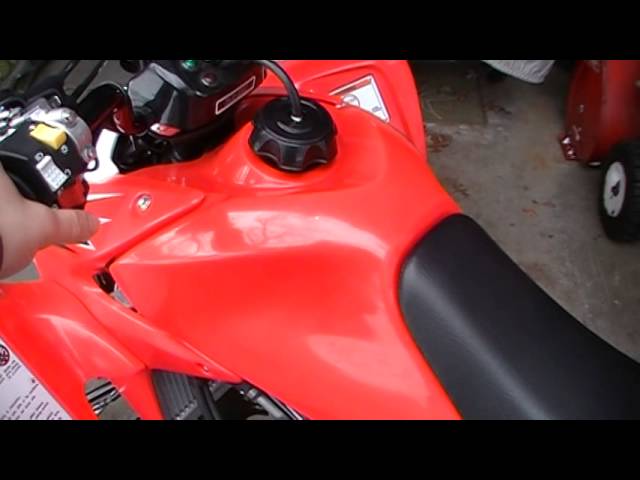 They are equally powerful and silent both in conditions of high humidity and on dry ground. Yamaha Grizzly rear brakes may need to be repaired more often than the sealed disc rear brakes used by some other manufacturers, but their ease of use and the great feel they give more than make up for the need to change them from time to time. Always ready for action, these brakes, independent of other systems, enhance machine control and become more useful as off-road conditions require more skill. nine0003
Yamaha's engine braking system is amazingly effective downhill and allows you to slowly "crawl" downhill at low RPMs. The ability to brake with all four wheels becomes especially useful on moderately steep or slippery slopes, however, we do not recommend using four-wheel drive on very steep slopes, as you may not want engine braking to be carried out by the front wheels. When closing the throttle at speed, engine braking feels almost the same as if you let off the throttle on a manual shift car to get a uniform and predictable reduction in revs. nine0003
It's still hard to get excited about Grizzly wheels and tires, but there's no denying they're extremely durable. Dunlop tires seem to perform well in every situation. On the trip, it becomes clear that they are to some extent the reason for such a pleasant and smooth ride of the car. Although, perhaps they deserve some criticism for a little roll in the front. The wheels are quite simple, but they are light and help the car in its work.
The ergonomics of the Yamaha Grizzly 700 are good enough. The relationship between the handlebars, seat and footplates with elevated steel side steps creates a comfort that is felt in everyday and aggressive riding. The space between the driver's legs feels justifiably narrow, and the side panels have a smooth surface and comfortable curves that you can squeeze with your knees. The gauges, levers, and handlebar grips are impeccable, and swapping out the handlebar grips for those with the most comfortable flex and swing for you is a breeze. The seat of the ATV is simply luxurious, but the transition between the seat and the body in front of it is a little rough. nine0003
If we talk about the utility of this ATV, then the tubular steel grilles on the body deserve the highest praise. They are easy to install, regardless of size and shape. The front grill is mounted on a curved handle. The Grizzly chassis performs well and is able to support the weight of the plow thanks to adjustable front shock absorbers.
The Yamaha Grizzly 700 is a great choice for many riders. Of course, there are machines that perform some functions much better than him, however, when considered in its entirety, the Grizzly, this machine is not easy to beat. That is why for many years he has consistently won many duels. nine0003
Powerful engine and unrivaled handling versatility combined to make the Yamaha Grizzly 700 one of the best 4x4 ATVs on the market to take on off-road adventures without hesitation, especially if the terrain is rife with difficult or twisty sections, and also spaces that require special craftsmanship. Owners of sporty 4x4 Grizzlys looking to modify their machine will be pleased with the wide range of important parts available on the market. Buying a Yamaha Grizzly ATV means getting a hardworking assistant who won't make you sweat when you need to get the hard work done
There are other good big-bore 4x4s on the market, but few of them deserve the title of the greatest ATV of all time. But the Grizzly 700 is exactly the car that deserves it.
In our store you can buy Yamaha Grizzly 700 ATV. ATV "Grizzly" (Yamaha, Grizzly): models, specifications and reviews The Yamaha Grizzly 700, introduced in 2006, had a predecessor, the Grizzly 660, which was quite popular in those years. However, the novelty outshone all, without exception, competitors, because it was the first in the industry to use electric power steering - EPS. At first, macho quad movements spoke contemptuously about this innovation, saying that weaklings and ladies needed it, but after trying it, they stopped. Injection single-cylinder five-valve engine is very successful in all respects. It is both economical and high-torque, and everything is fine with pickup. One thing is frustrating: unlike the 660 model, it does not have a backup manual starter, and if the winch “sucks out” the battery (purchased as additional equipment), then an external source of electricity will be needed. All known motor problems have two causes. The first is drowning. Despite the fact that the air intake system is made according to the siphon principle and the air for the engine is taken from the top point under the plastic of the front trunk, it is not at all difficult to “drown” the quadric. And here, if there is no water hammer, the water will be clean, and resuscitation work to clean the oil system will be carried out in the next few hours, then most likely everything will go without consequences. Delay in resuscitation threatens the appearance of rust on the parts inside the motor, and this is already a verdict. By the way, experience has proven that, shod with high-profile 27-inch wheels (with standard 25s), the Grizzly 700 has positive buoyancy. That is, if you do not sit on it, but swim nearby, then the water does not reach the air intake. However, the quad will try to float up with its wheels, and the slightest current will help it with this. The second reason is overheating. The water-cooled radiator, located behind the front grille, is quickly covered with mud and grass. The thermal mode of operation of the motor is violated, and even a constantly running fan does not save the situation. Of course, there is an overheating light on the dashboard, but not everyone sees it, and during quad competitions they simply turn a blind eye to it. The result appears gradually. To begin with, the engine starts to eat up oil, then it smokes, and then it comes to the “capital”, and this is not a very budgetary event. Therefore, lovers of serious off-road trips take out the radiator on the front trunk. As for fuel consumption, it depends solely on the driving mode. A twenty-liter tank in a hard off-road in swamps and windbreaks, where the quadric does not drive, but crawls, constantly getting stuck, will end in 60-70 km. Well, with a leisurely journey, it will be enough for 140 km. nine0003 Variable speed transmission with engine braking system during non-extreme operation is almost eternal. CVT ventilation snorkel is located in the same place as the engine air intake. Drowning in dirty water is fraught with serious problems, but again, it is not easy to “kill” the variator, at first it will hurt with noticeable symptoms. You can tear the CV joint covers on the branches, and if you don’t change it right away, you will soon have to change the drive. However, as a result of the modernization of 2009th year, covers began to be made of especially durable material. Disc brakes are installed on each wheel. Their efficiency and clarity are at their best, only in particularly muddy conditions, expensive pads run out without even having traveled thousands of kilometers. The all-wheel drive system here is the most common, we can say that the classic. There is a rear wheel drive mode. Independent front and rear suspension perfectly tuned for all kinds of intelligent driving. The levers are strong, the ball joints are well protected. Unless the hub bearings, when installing large wheels, become a detail that you have to remember from time to time. By the way, about the wheels. Without intervention in the suspension, you can even put 28-inch wheels, thereby significantly increasing the already not small ground clearance. The entire electrical part is made taking into account moisture and dirt protection, vibrations and is laid in such a way that it is very difficult to damage it even when wading through a windbreak. It's nice that there is a sealed outlet. In electrics, there is a system for reading error codes from electronic components with output to the dashboard information display and programming from it. nine0003 Plastic frost-resistant and very flexible. Even wings bent against trees straighten out and restore their shape. A more expensive version of plastic - camouflaged - is different in that scratches are not visible on it and the ATV retains a fresh look for a long time. But there is also a minus. Moving away from the quadric in the forest, it can be lost. Since there is no front bumper as such, when driving on roads overgrown with undergrowth, the front part of the plastic takes over the contact, and the headlight mounting caps break from this. In this case, it becomes impossible to adjust them. The front and rear luggage racks can hold more than 100 kg of cargo in total. On the right in the wing there is a sealed compartment for a couple of liters, but under the saddle there is a niche for tools. The Yamaha Grizzly 700 is one of the most popular ATVs for those who like to go further. Reliable, lightweight, maintainable, and off-road properties are on top. And he would be a hit of all times and peoples, if not one but. Due to complex considerations of potential safety, the Japanese gentlemen do not make long-wheelbase two-seat models at all. But the long base is not only the ability to carry a passenger. This is also stability, especially when driving in the mountains, where without steep ascents and descents there is simply nowhere. It has been verified by numerous trips and expeditions that where long quads drive without problems, a short "grizlik" is on the verge of leaving "in flight". After all, EPS (with variable effort depending on speed) not only reduces the effort on the steering wheel, it also works as a damper - it protects your hands from shocks transmitted from the wheels. However, not everything went smoothly with this device. The most innocuous failure occurred during winter operation, when water frozen inside simply turned off the system. But a much worse malfunction manifested itself as follows. At some point, when taxiing, the ATV jerked slightly away from the trajectory intended by the pilot. However, ways to solve all these troubles have long been known, and fresh models do not sin like this. nine0003
 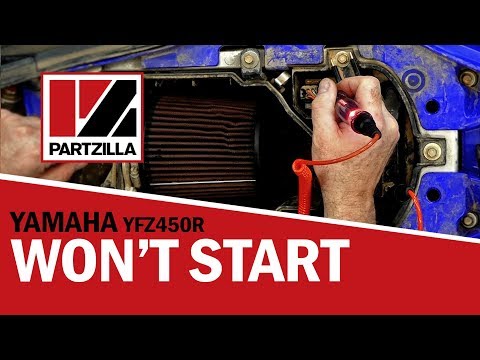 After all, it is impossible to start a symbiosis of an injection motor and a CVT gearbox from a tugboat.
  nine0003
  And even such a consumable item as a variator belt for this model is not among the essentials on a long journey. High belt life is ensured by a special design with two clutches, one of which is a shoe type.
  Since there is no cross-axle differential at the rear, the two wheels always "row" with full force. The next mode is all-wheel drive, and the third one is the same all-wheel drive, but also with a locked front cross-axle differential. Since there is no center diff here either, it turns out that the torque is distributed equally to all wheels. You should not abuse the last mode, because it increases the patency in very rare conditions, and the load on the transmission increases significantly. Gearboxes, subject to intact seals and regular inspection of the oil for emulsion, are not included in the area of increased attention. nine0003
 And more about headlights. They shine well, as long as they are clean, of course, and they are also quite well protected from moisture and it is not easy to get water in them, unlike most classmates. nine0003


 Then place the plug gap end in contact with the head of the engine(this will ground the plug) so that you can observe the spark jumping the gap. Be careful not to hold the metal threaded portion of the plug while performing the following test. Next, have a friend press the starting button to see if you have spark jumping across the gap. If a spark occurs, the ignition system is good. If no spark occurs you will need to check if all wires are connected at the coil including the main spark plug wire. If all wires are connected and there is still no spark when the engine cranks over, contact Superior Powersports service technician for further troubleshooting advice.