Coolster ATV is a Chinese quad, which is sold in the United States by various firms. Together with other Chinese ATV brands, the Coolster rose to fame in 2006 and became so popular! There are more than 14 types of Coolster ATVs. They differ from each other due to different body composition, purpose, and even different starting mechanism. And in this article, we’ll be covering how to start a Coolster 125cc ATV. We’ll also give you some tips to solve if you have problems relating to your coolster 125cc ATV won’t start. So don’t skip any part. Read the article to the last.
Table of Contents
What is a Coolster ATV?Coolster is a Chinese company who has been manufacturing ATV for decades. At first, when people knew so little about ATVs and the market was narrow, Coolster entered into the market and changed the whole scenario. These Chinese quads featured rear racks, flexible tire tread patterns, and detailed operating guidance on setting up and using the safety features.
Eventually, the Coolster became famous for young ATVs.
If you switch from motorbikes to a coolster 125cc ATV, the first problem you’ll face is how to start a coolster 125cc ATV. ATVs and regular motorbikes have a different operating system and differ from each other. Not only between motorbikes but some ATVs also have different starting mechanisms than the other ones. So follow the below steps to start a coolster 125cc ATV-
1. Fill The Gas and Check BatteryIf you want to know how to start a Coolster 125cc ATV, firstly, you need to fill the gas tank. The minimum rate is ½ L of gas in the gas tank. After this, check if your ATV is charged or not. The ATV needs to be charged if you need to start it. If it’s not charged, connect the charger to the battery and charge it. Make sure to maintain 12V.
2. Ignite and SparkTo spark the engine, locate the “run” or “kill” switch on the ATV and keep it in the “on” position, or else you can’t start your Coolster 125cc ATV.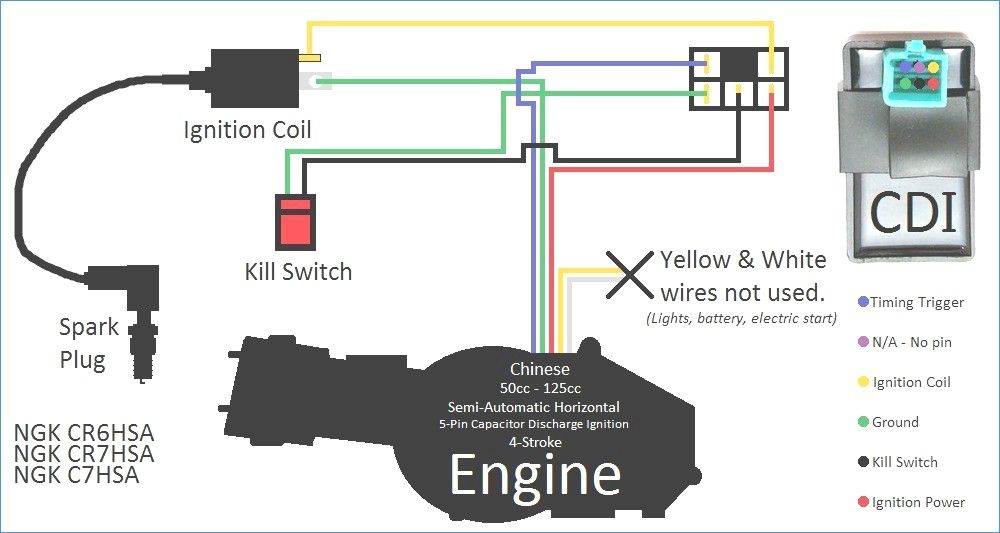 After this, put the right key in the key slot. For starting a cold engine, the choke needs to be open. A choke valve prevents the flow of air in the carburetor of an engine. In most ATVs, the choke is found in the carburetor. But in some ATVs, you have to actuate choke by the left side handle by pressing or pushing a button-up.
Press any of the left or right lever. Now to start the engine, press the “starter button.” Generally, the starter button remains on the right side of the handle. Open the throttle a few times to get the gas moving inside the carburetor jets. This method is so useful if you’re starting an ATV for the first time. And when the engine starts for the first time and makes the sound, let it sit till it warms up after applying throttle. No need to initiate a choke after the engine warms up. After the engine warms up, then you’re set to go. Check all the things; brakes, tires, and acceleration.
We hope you now know how to start a Coolster 125cc ATV. So by following the above steps, you can quickly start your Coolster 125cc ATV.
Coolster 125cc Won’t Start: TroubleshootingIf your Coolster 125cc ATV won’t start even after following all the steps correctly, it’s not a big deal. In this part, we’ll be troubleshooting the starting problem of ATV.
Here’s what to do if your coolster 125cc ATV won’t start-
1. Check FuelTo start the Coolster 125cc ATV, the fuels need to flow into the carburetor to produce the power. Check if your fuel is reaching the carburetor by checking the left flank. Also, check for any leakage in the pipes.
2. Check SparkThe spark and combustion provide power to the bike. There can be a faulty spark plug. Your coolster 125cc ATV won’t start? Check the spark plug in the engine. Try removing and installing it again and see if it works or not!
Remove the spark plug wire by catching the boot at the plug nearest to the engine head. Next, insert a plug into the wire boot to make sure it is completely inserted for good electrical communication. Then put the plug gap in contact with the engine head (this will ground the plug) so that you can see the spark jumping through the gap. While performing this, don’t touch the metallic parts.
Now try to start the bike by pushing the starter button. If you see the spark, then it’s alright. If not, then seek the help of a mechanic.
3. Check the WiringFor any loose or detached wires, your Coolster 125cc won’t start. To avoid this, proper maintenance is necessary. Check the wiring of your bike. Identify if there are any loose cables or not. Try giving tension or gently try to pull the wires. If any wire comes out, you have a loose wire connection. Repair the wiring, and you are set to go.
4. Check FuseCheck the whole electrical system. Even if it doesn’t help, then locate the fuse and check it. Check near the battery connection cables to find and locate the fuse and check if it’s alright or not.
If you follow the above steps, you can easily solve your problem related to your Coolster ATV not starting. Still, Coolster 125cc won’t start? Then take your bike to a mechanic to solve and identify the problem. And let us know about the issue and your experience in the comment box.
ConclusionStarting an ATV can be confusing for a newbie. Still, we believe that in this article on how to start a COolster 125cc ATV, we’re able to help you with all the necessary information that you needed to know while starting an ATV. And we’ve also given solutions to “Coolster 125cc won’t start.” So that’s it for today. Don’t forget to share your experience in the comment box. Good luck!
Your ATV won’t start. It is a frustrating situation that many ATV owners and riders will face. Since this is a troubleshooting guide, we will begin with the very basics.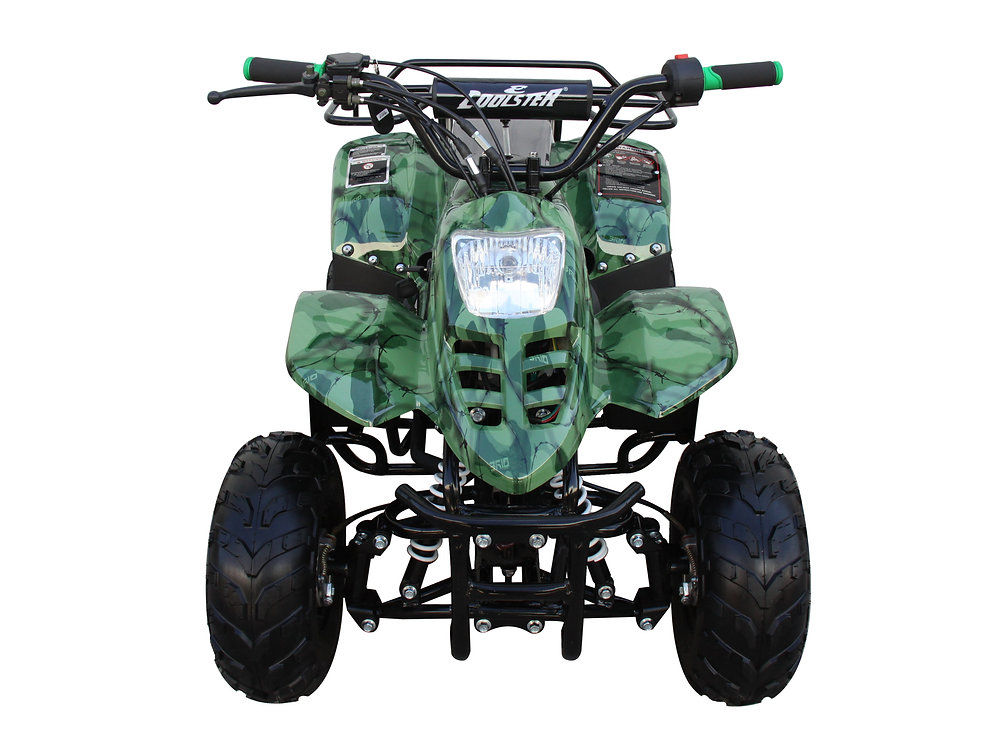 The first place to look is the fuel gauge to ensure sufficient gas, followed by testing for a spark.
To check for the spark, turn the ignition to the ON position, remove the spark plug, and ground the hex part of the plug to bare metal on the engine. Clean up any spilled gas, spin the engine, and watch for a spark jumping across the gap. To test gas flow, remove the carburetor’s fuel line, hold it over a container, and watch the flow. It should be the full stream of the line size.
If the ATV has spark, fuel, and gas flow but will not start, what comes next? If you find yourself in this challenging scenario, don’t panic. There are a few more things to try before you should call for help. Run through this checklist after determining that your ATV does have spark and fuel but will not start.
Check the Petcock ValveBefore running through an extensive list of complex problems and their solutions, start with the simple tests. If your ATV has spark and fuel but will not start, it could be something as simple as the petcock valve in the off position..jpg) Double-check the petcock valve as soon as you suspect engine issues.
Double-check the petcock valve as soon as you suspect engine issues.
If your ATV’s petcock valve is not in the ON or RUN position, put it there. Try starting the engine again. If that was the problem, of course, your ATV should start right up.
Check Your GearIs the ATV in park or in neutral? Checking your gear could be a simple solution to a simple problem, but people often overlook it. After checking for gas and ensuring a spark, always make sure that your ATV is in gear. Many ATVs are designed not to start unless it is in the right gear.
Put your ATV into the correct gear if need be, then try to restart it. With luck, this was the issue and you’re able to get going again with minimal troubleshooting.
Check the BatteryIf you are not experiencing a simple run switch or gear issue, the battery could be the problem. This is the next step in your DIY troubleshooting checklist. Ideally, you have a battery tester in your traveling tool kit. Use it to check your battery’s status.
If it has a low charge or is dead, you can try boosting it. You may need to stop for the day to get the battery onto a charger. In the worst-case scenario, your battery won’t hold a charge and will need replacing.
If it does turn out to be a battery issue, consider investing in a battery charger for the future. If your ATV sits unused, you can plug it into a trickle charger to prevent unwanted drainage.
Consider Fuel QualityYes, you have gas, but how old is it? If you are trying to run your ATV using gas that has been sitting in the tank too long, that could be your problem. Degraded gas is not ideal for your ATV, and the machine may refuse to run. You may be able to change the fuel filter and replace the gas yourself. If you don’t want to or don’t feel comfortable, this is an easy job for a mechanic.
Check the AirflowIf you’ve gone through all of these steps and your ATV still won’t run, even though it has gas and spark, it could be an airflow issue. Exhaust needs to leave the system properly. And, the ATV requires air for combustion. If the engine isn’t getting enough air, the ATV will not start. The issue may lie within your air filters, which may need repairing or replacing.
Again, this is the kind of issue that might be within one’s DIY skills. However, if you are not comfortable handling these parts of an engine, leave it to the pros. You do not want to cause more damage with an at-home fix accidentally.
Other Engine IssuesOther engine and system issues could prevent an ATV from starting even with spark and fuel. An intake valve that is too tight is one example as this impacts compression. It could be a dirty carburetor or even a carb O-ring requiring replacement. If you are still stumped because the ATV won’t start when you have spark and fuel, it may be time to head to a mechanic for expert help.
Disclaimer: While we endeavor to keep the information on our blog up to date and correct, Maxtrade (Coolster) makes no representations or warranties of any kind, express or implied about the completeness, accuracy, reliability, suitability, or availability with respect to the website or the information, products, services, or related graphics contained on the website for any purpose. Any reliance you place on such material is therefore strictly at your own risk.
Articles
02 Dec
Any wheeled vehicle - from a bicycle to a multi-ton truck - has a transmission in its device: a system that transmits rotation from the engine to the wheels. The operation of the transmission - and therefore the speed of driving - can be controlled by shifting gears.
Gear shifting is organized differently in each mode of transport. In the article below, we will tell you exactly how to shift gears on ATVs, and what gearboxes are found on such equipment.
Gearboxes for ATVs can be of two types:
 They have a foot clutch or clutch with a lever on the steering wheel (in most cases it is), and a foot shifter. Manual transmission usually has 4 “forward” gears, neutral and reverse.
 Rare and mostly found in older models, but other variations can be found. For example - "automatic" with the ability to manually shift gears.
Manual ATVs are a little more difficult to drive (at least at first, until you get used to it), but you can more accurately select the appropriate mode. And vice versa: CVT "boxes" are much easier to operate, they are easy to master for a beginner who gets behind the wheel of an ATV for the first time. But on the other hand, with active driving along a route with variable difficulty, riding a CVT will be a little less convenient.
For example: you are driving on a flat packed dirt road on H and you see a large stretch of muddy road ahead with deep mud (or a steep hill, or bumps, or stones). You will have to come to a complete stop and shift to L, drive through mud, and when you get back on a dry road, come to a complete stop again and shift back to H. , like motorcycles, and a manual clutch lever on the handlebar on the left.
The foot lever device can be of two types:
The shift itself is carried out in the same way as on motorcycles:

When exactly to switch speeds up and down is determined by the tachometer, speed, road complexity, weight of the load taken and the characteristics of the ATV itself (power, weight).
CVT gearboxes are much more common on ATVs. The clutch in them does not need to be squeezed out, and the “mode” of driving forward is selected from two (most often) options: in high (suitable for driving on an easy route) or in low (for difficult sections, steep climbs and towing) gears.
An important difference from driving in a manual transmission: switching between L and H is carried out only when the ATV is completely stopped, with the brake applied. To select a mode, move the knob to the desired position. Switching between L and H on the go is impossible.
The rest of the gears - park, neutral and reverse - of course, are also included when the ATV is standing still.
To ensure that ATV riding does not end up in a long stay in the hospital room, always wear special protective clothing.
Equipment for each ATV must include:
Do not drive too fast. A four-wheel drive ATV is not a car or a motorcycle. It doesn't respond as well to the driver as a car, it can't lean quickly into a corner like a motorcycle. Remember that when riding an ATV it is very easy to roll over on level ground or even crash into a tree at full speed.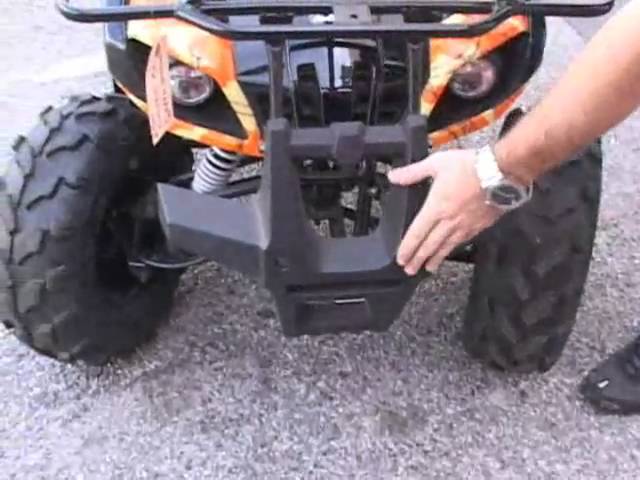 For example, if a stump comes across in a field under tall grass, the ATV can run into it, and then the rider will fly over the steering wheel, or at least hit it.
Never ride an ATV alone. It is best to ride with someone in a pair on two ATVs. There are a lot of situations when a partner is needed. For example, it is very difficult to put an overturned ATV on wheels, and if it covered you from above, then you won’t even be able to get out from under it alone. The second ATV can pull the first one out of the swamp or tow it to the camp in case of a breakdown.
When passing a difficult obstacle, it is better to get out of the saddle and, carefully working with the brake and accelerator, walk alongside. You should also not go too deep into the water - you can fill the motor.
Turn the steering wheel in the desired direction. Tilt your upper body inward and rest your weight on the outside footboard. This will change the balance of traction between the wheels, and the turn will be made smoothly. Turns back are performed in the same way.
ATTENTION!!! ATVs are not designed to make sharp turns or turns at high speed!
If you have to drive on slippery surfaces, drive as carefully as possible and strictly observe the following rules:
ATTENTION!!! Crossing hills on an ATV is very dangerous! If possible, try to avoid hills when riding an ATV. Any incorrect action while crossing a hill can cause serious injury, or even death!!!
If you still need to cross a hill with your ATV, follow these rules:
When descending a slope, you must:
If the machine stalls while climbing, do not let it roll down. Do the following: