Braking is an important part of ATV riding. For ATV racers, it can be the difference between a win or loss, but for normal ATV riders, it can be the difference between life or death. While braking is a relatively simply concept, there is actually a lot that goes into maximizing the efficiency of your braking to ensure you can stop as quickly and safely as possible, or to provide you the most advantage when you are racing or just having fun riding aggressively on a good trail. In this article, I am going to share 33 of my favorite tips to help your technique, maximize your ATV’s ability and ensure your safety while braking.
How effective your braking is and how quickly you can slow down is going to depend a lot on the surface you are braking. If you have the option to choose where you are going to brake, you want to choose the smoothest and hardest piece of ground.
This will help you keep the most control of the ATV and keep your tires keeping the most traction to the ground so the brakes can be at their most effective. While this is not always realistic or even possible, you should train your mind to search out the best piece of ground for when you have to brake, even if it just means you steer a little towards the left or right as you enter your brake to hit the better braking surface.
2. Brake in a straight line.
The easiest way to keep traction on your back tires and increase your drag it to brake when your ATV is traveling in a straight line, meaning all tires are facing straight ahead. If your wheels are turned when you apply the rear brake, there is a good chance the ATV will start to slide. This decreases the drag and slows down your braking. So, if possible, try to keep the wheels perfectly straight when you need to stop in a hurry.
3. Keep your weight towards the rear.
This one is pretty self-explanatory, but it is so important. Anyone that has flown over the handlebars (or been stuck riding in your underwear because your pants caught on the handlebars and ripped off you (in the snow no less)), knows how essential it is to keep your weight as far to the rear as possible. By keeping your weight on the rear of the vehicle, you help keep the back end of your ATV on the ground. Not only does this help you from flipping over the front end, it helps keep all four tires on the ground, allowing that traction to continue to slow the ATV as you apply the brakes. Remember, the brakes don’t do you any good if your tires are not on the ground.
4. Grip your ATV firmly with your knees.You want to squeeze the middle of your ATV between your knees while braking hard. This prevents your feet from bouncing off the ATV over rough terrain and helps keep your body weight down on the bike so you don’t lose control.
Keeping your feet on the footrests is important during braking. Not only does this help you keep control of the ATV, it keeps your body weight pushing down on the ATV to help keep the maximum amount of traction on the tires to let the brakes work more efficiently.
6. Use both brakes together.You want to use the front and rear brakes smoothly together. Your front brake will be doing most of the work because of your forward momentum, but if you only use your front brakes you have a much greater chance of locking up your wheels and losing control of your ATV.
7. Understand what determines your stopping distance.Stopping distance is the time it takes for you to stop the ATV once you realize you need to stop. Stopping distance is calculated by adding your reaction time distance (how long you will travel between the time you realize you need to stop and you start braking) and your braking distance (the distance traveled while you are braking to a stop). The braking distance is dependant upon your speed and drag. Drag is the amount of friction between the tires and the surface of the land. For example, mud has more drag than dirt, and dirt will have more drag than wet cement.
As discussed above, your stopping distance is going to depend on a lot of different factors, so you will need to pay attention while riding as you are learning your own stopping distances. Even though you will need experience to learn your personal stopping distances at different speeds and in different conditions, but there are some general examples that can help you get a baseline for what to expect.
9. Do not lock up your wheels.
When you are braking, you have to try hard to not lock up the wheels. This is especially important with your front wheels. If you lock up the front wheels, it can cause the front wheel to wash out and kick you off. Locking up the back wheel is not as dangerous, but it can still cause you to skid out and lose control. Not only can locking up your wheels be extremely dangerous, it can slow down your stop. Because the tires need to have traction to slow the ATV down, if they are skidding over the ground, they lose valuable contact with the ground and don’t slow the ATV down as quickly.
10. Ease off the brakes when they lock up.
 If you do lock up any of the wheels, quickly ease off the affected brake to get the wheels turning again. This is the best way to keep from ending up face-first in the dirt, but it also allows your tires to gain traction so you can regain control of the ATV and the stopping process will continue more quickly.
11. While braking during turn in 4WD, lean out from the turn.This one seems counter-intuitive as you usually like to lean in while you are braking and turning, but in four-wheel drive, the front wheels will dive in, so you want to put more of your body weight to the opposite site to prevent falling off the front side of your ATV.
12. While braking during a turn in 2WD lean in toward the turn.While the opposite is true in four-wheel drive, you want to lean toward the inside of the turn if you are in two-wheel drive. In four-wheel drive, you need to worry about the ATV biting to the inside, but in two-wheel drive, you need to worry about the back of the ATV sliding out. Because you are more likely to lose traction in two-wheel drive, you want to compensate by leaning in toward the turn to keep the ATV from sliding as much. Remember sliding slows down your braking.
While you usually want to use all brakes to stop most effectively, you only want to use the front brakes while going up a steeper hill. This, in conjunction with keeping your weight forward, will help keep the ATV from rolling backwards, which could happen if you use the back brakes on a very steep hill.
14. Use the rear brakes while going downhill.This is the same idea as using your front brakes while going uphill. When you are going down a steeper hill, you need to keep you weight back and only use the back brakes. If you use the front brakes, the momentum from the back side of the ATV will want to continue and flip over the front end, which can be very dangerous.
15. Keep your weight uphill.
Whether you are going uphill or downhill, you just need to remember, while braking, to always keep your weight uphill. If you are going uphill, this means your lean toward the front of the ATV to keep the ATV from flipping backwards. If you are going downhilll, this means keeping your weight toward the rear of the ATV to keep from flipping over the front of the ATV.
16. Downshift.This is going to depend on your specific ATV. If you have an automatic, you obviously do not need to worry about it, but with a manual, downshifting is usually helpful when slowing down, especially going down hill. However, even with a manual, it may not always be a good fit for your ATV. Make sure to read the owner’s manual for your ATV and test out how the ATV performs while downshifting in 4WD and 2WD, if available on your ATV, and while downshifting with the front brakes, rear brakes and all brakes applied.
To downshift, start by pulling the clutch in to disengage the drive while applying the brakes to slow down.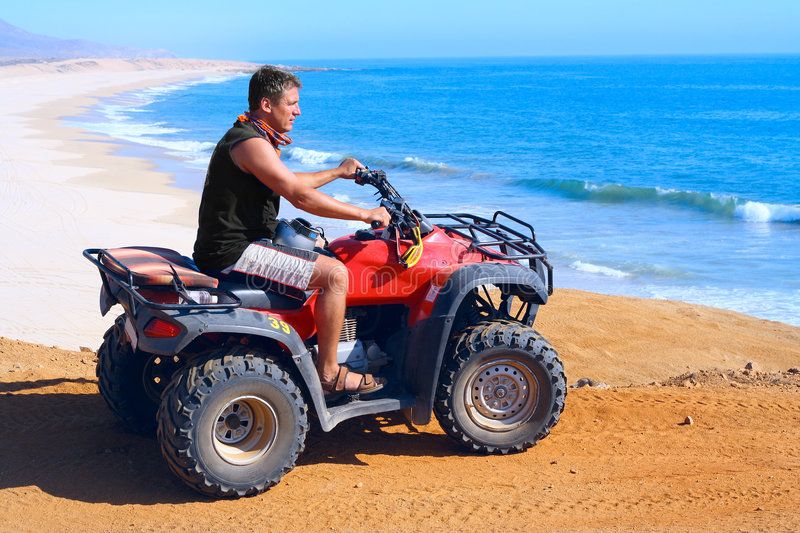 With your left foot, push down one click on the shift lever to move down one gear. Apply throttle and release the clutch slowly to reengage the drive. When actually downshifting, you need to make sure you are not shifting into a lower gear than is appropriate for the speed you are travelling. For example, you do not want to shift into second gear while you are going 40 m.p.h. You also want to, if possible, match your rpms to where you are shifting. So if your engine would normally be revving in second gear at 10 m.p.h., you can rev your engine a bit while downshifting to match that. With your brakes fully applied, this won’t slow down your stopping.
Downshifting is not going to be necessary on all situations, like when you are quickly braking on level ground in a straight line. That being said, you can guess when downshifting is going to be most helpful. One is going downhill where you need to quickly slow down, but are not going to be coming to a complete stop. Second is where you are braking around a corner and need to accelerate quickly. Be sure to check out our awesome guide to cornering in an ATV for more on that.
Once again, this only applies if you are driving a manual ATV. When you are braking on a manual ATV, and are not going to be downshifting, you must first pull the clutch with your left hand to disengage the drive. Once you have pulled the clutch, you can use your right hand and right foot to apply the front and rear brakes to slow down. You hand brake will control the front wheel brake, which will do most of the braking when slowing quickly, and the foot brake handles the rear wheels. It is important that you hold the clutch in until your ATV comes to a stop or until you have shifted into a new gear. This will help you avoid stalling or damaging your ATV. Once you have come to a stop or have reached the speed you want to be at, then you need to shift down with your left foot until you are in neutral, if stopped, or into the gear appropriate for the speed you are continuing at.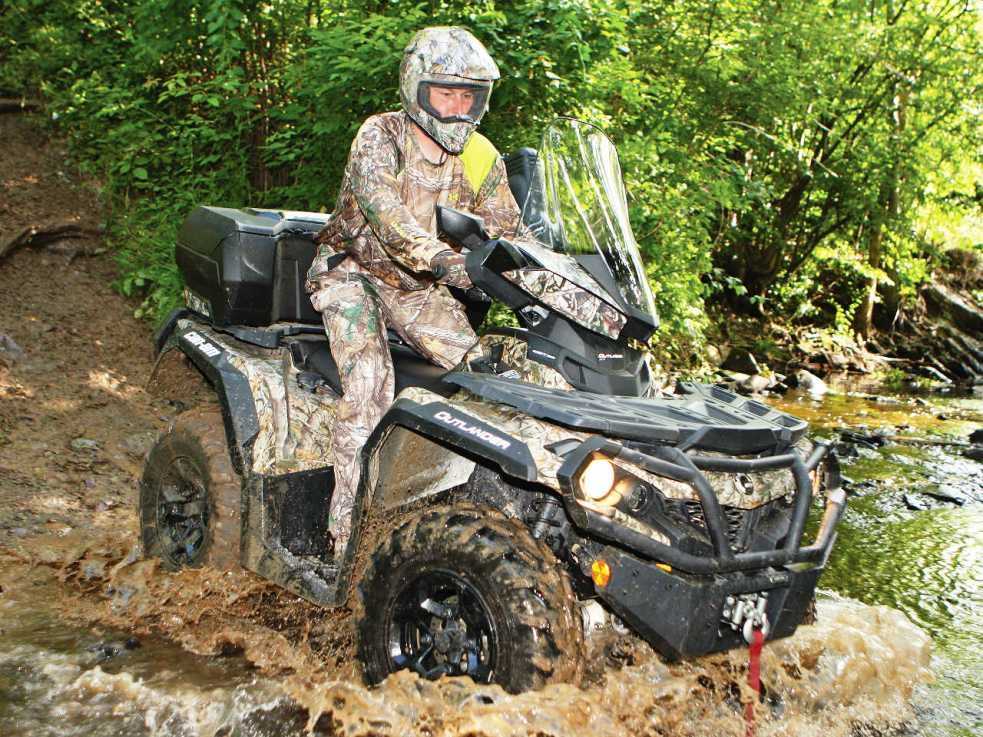 Then you can release the clutch without stalling the engine.
This tip is more applicable to ATV racing. There is a common saying in ATV racing that whoever can out-brake the competition will win a race. This is referring to the added speed and control you gain by braking later into a corner. If you have the experience and skill, you want to go fast into a turn, brake late, and accelerate fast out of the turn. This causes you to lose less speed around the turn. If this is something you want to learn more about, read our guide to more effective cornering.
19. Swerve properly if necessary.Sometimes the need to stop quickly comes from something in our path that we need to avoid. Because of this, we need to learn how to swerve properly. The two biggest things to swerving are remaining in control and letting of the brakes. While you would think you want to keep braking to continue slowing down during a swerve, braking will often cause the tires to lock up, which means you will lose traction with the ground and end up skidding.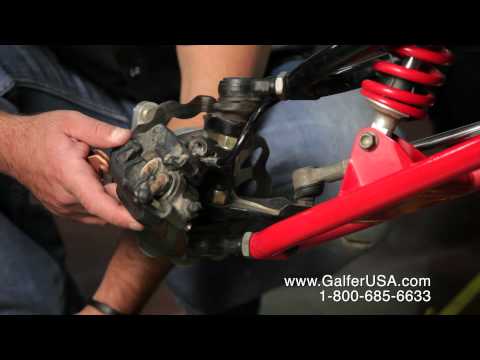
This one may sound strange, but ATV brakes lose their feel and performance over a long period of time. So, unless you only ride your ATV very rarely, you may not notice the slow decline on your brakes over time. It can help to have someone new ride your ATV every once in a while to give you feedback on how it feels to them. It is also valuable to perform routine inspections of your brake components to visually see what kind of condition they are in, which takes us to our next tip.
21. Practice good brake maintenance.It goes without saying that brakes in good condition are going to be much more effective at slowing your ATV than brakes that are not functioning to their full capacity. Most ATVs are usually equipped with hydraulic disk brakes because they have some advantages over drum brakes when it comes to ATVs. Luckily, hydraulic brakes usually require easier maintenance, they are easier to mount and they provided more braking torque, which means slowing down faster.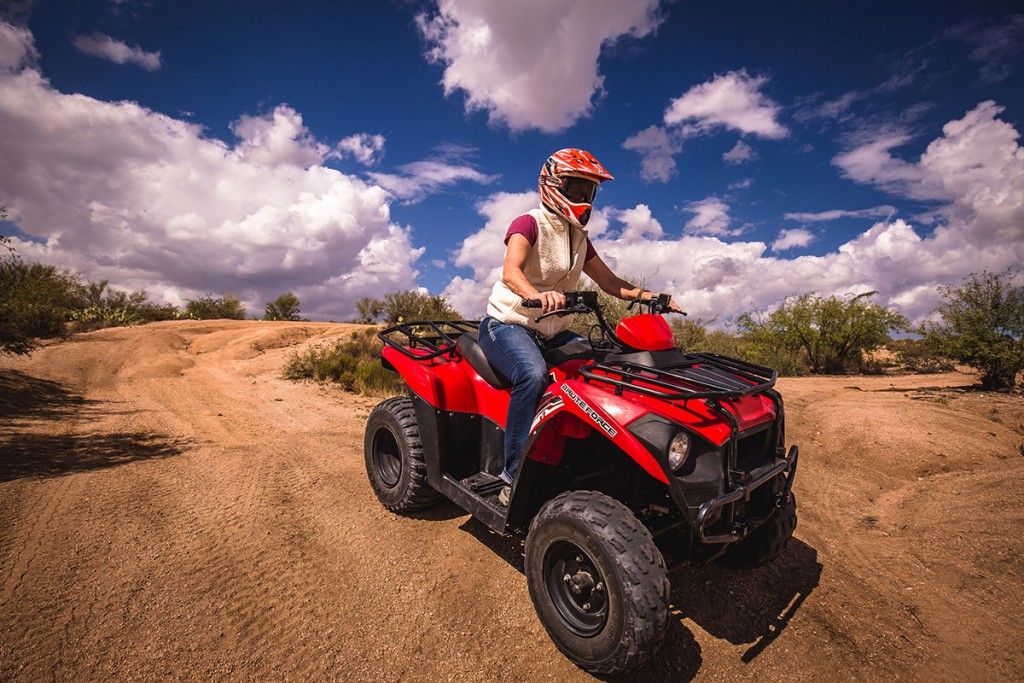 The next — tips will help with brake maintenance.
Brake pads are an important component of the brakes that need changing the most, but simply throwing new brake pads on will not always restore your brakes to top performance. If there are other brake components that require maintenance, simply changing the pads won’t help and the conditions could just cause the new pads to quickly wear out.
23. Get new brake pads.Wait, the tip above said don’t just get new brake pads. While new brake pads will not help if you have other brake maintenance needed, worn out brake pads do need to be replaced. Getting better brake pads, especially those designed for motocross use, can really improve your braking efficiency as well.
There are two main types of after-market brakes pads you can purchase:
 These organic materials won’t pollute the environment as they wear and are easy to dispose of. Organic pads not only provide a much softer stop, but they are quieter, and don’t release as much dust. The organic pads are usually used on smaller ATVS or utility ATVS that do not usually need to stop all of a sudden.
 While the sintered brake pads will improve your braking performance, they are more likely to wear on your rotors, so it is even more important to inspect your rotors as discussed in another tip.
As rotors become thinner, they lose their ability to dissipate heat and create the friction necessary for effective braking. Also, rotors do not always wear perfectly evenly, even though it may be difficult to see with the naked eye. In most cases, your brake pads will create a concave wear pattern. Putting new brake pads on a rotor that is not flat will result in ineffective braking. It will also create a bad wear pattern on your brand new pads and decrease their lifespan as discussed above.
25. Clean out between the brake caliper and the pistons.In most ATVs, a floating caliper is used to compensate for brake wear and movement in the brake rotor. The caliper rides on guide pins that must be clean and lubricated to facilitate proper movement and perform their jobs.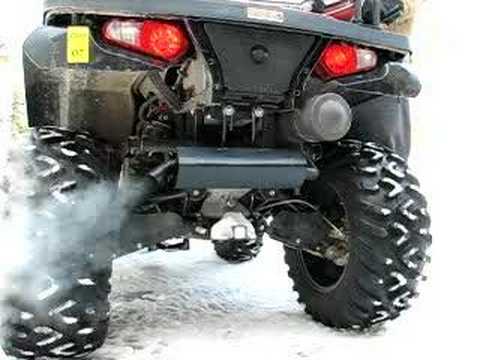 Over time, crud and corrosion can build up between the brake caliper and the pistons. This keeps them from moving freely and smoothly. While there are rubber boots that attempt to keep it as clean as possible, but there is only so much you can expect when you are riding through dirt, sand and mud. The caliper pistons must be able to float freely to transfer hydraulic pressure to the brake pad when the brakes are applied.
If the piston is stuck, you need to dislodge it to ensure the most effective braking.
If the piston is only slightly stuck, you can probably get it freed by pushing the piston out by applying the brakes lightly with the caliper/pads removed, and then pushing the pistons back in with a pliers or C-clamp.
When you remove the caliper pins, you will want to clean them thoroughly. You are also best served by applying a little bit of silicone lubricant to help to free things up. You will also want to make sure the rubber boots are in good condition so they will help keep future grime and dirt out of the pins.
Brake fluid is an important part of the braking system that should not be overlooked. Brake fluid has many purposes in a braking system. It has to transmit force from the master cylinder piston to the caliper pistons, lubricate the internal components, and help to transfer heat away from your brake caliper pistons.
Over time and use, your brake fluid will become contaminated with wear particles from the braking system, water, and dirt. When this happens, the brake fluid cannot effectively fulfill its purpose and your braking performance suffers. To fix this problem, you must flush and replace your brake fluid.
Flushing your old brake fluid out of the system and replacing it with fresh fluid will make a surprisingly big difference in the feel and performance of your brakes, helping you to stop more quickly
27. Enhance the longevity and performance of your brake fluid between flushes. Brake fluid is hygroscopic, which means it will draw moisture from the atmosphere and become fouled with water. This is a big deal if it happens because the water will drastically decrease brake fluid longevity and performance. To prevent moisture from getting in you brake fluid, make sure to keep your master cylinder reservoir and your brake fluid containers closed at all times except for when you are filling your reservoir
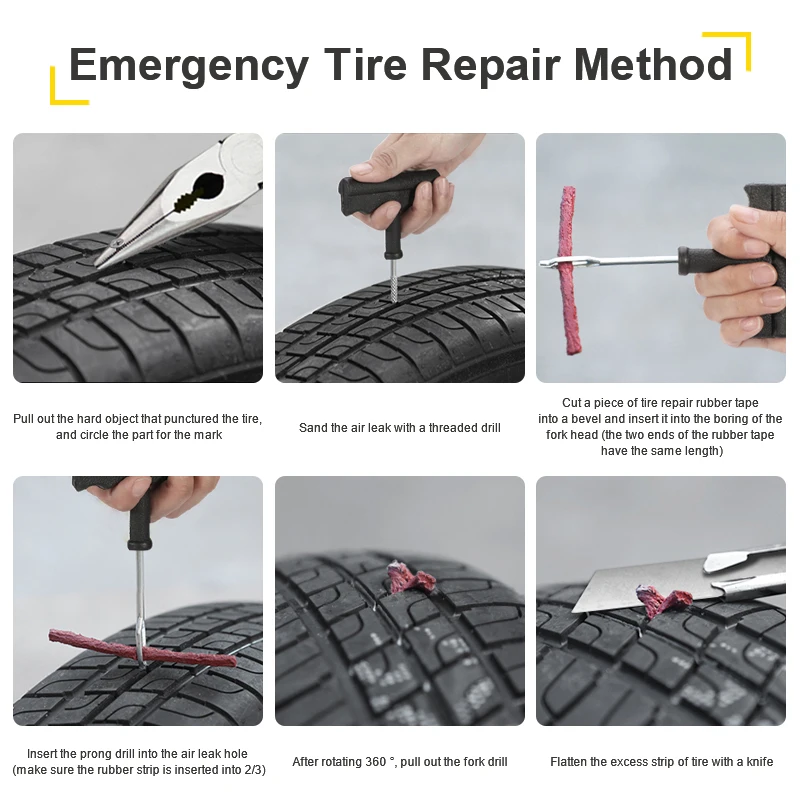
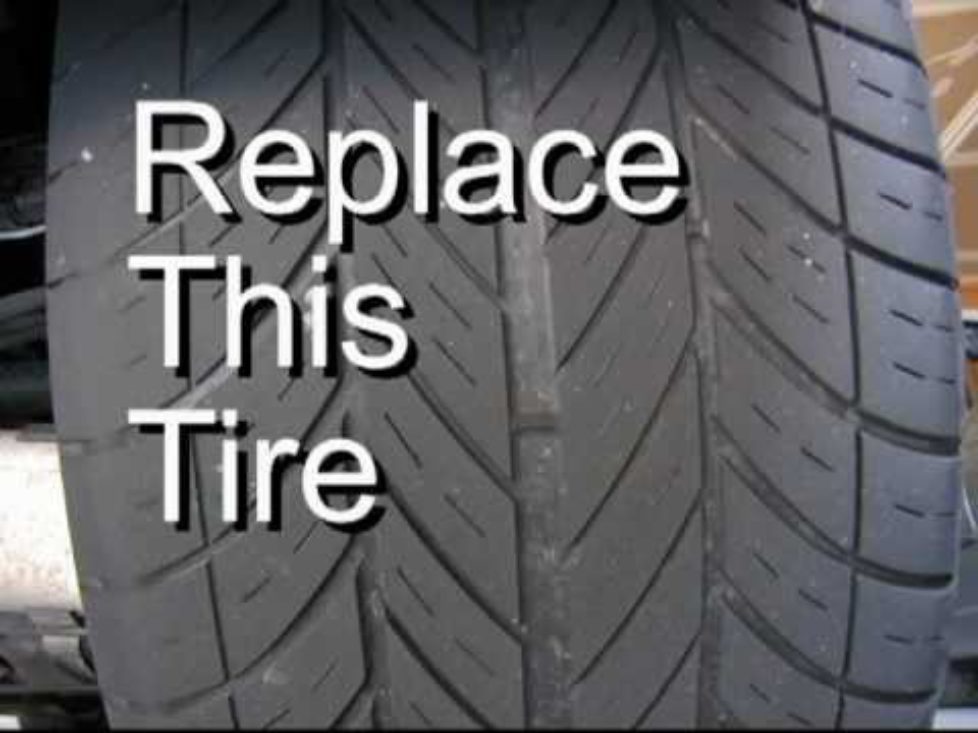
Riding an ATV on old tires with little tread left is a surefire way to slow down your braking. Remember, the tires need friction with the surface to create drag, which impacts how quickly you can stop. Thus, if your tires are lacking tread, there is nothing to grip the ground, which means less drag.
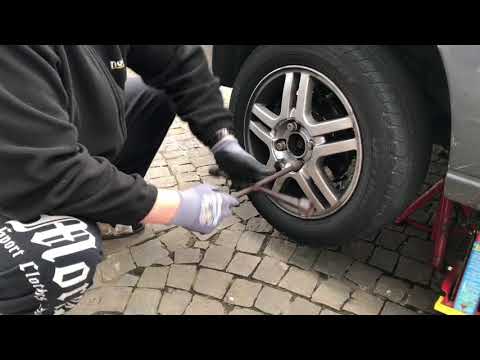
Checking your tires should be part of the routine maintenance check you perform before every ride. If you see, during your tire inspection, rounded down knobs or tire rubber that is dry, discolored and/or cracked, you will need to replace your tires to ensure maximum braking efficiency (in addition to other important considerations such as not wanting to blow a tire or deal with skidding out,etc. ). You should be able to tell when your tires look weathered, old and in need of replacement, but if you can’t decide, try putting them next to a newer tire to see how they compare to the rich, dark black color you find on a new tire. This can be pretty revealing, much like when I think an old shirt is still nice and white until I look at it next to a new white shirt and it looks yellow or gray. As a general rule, the shelf life of most ATV tires is going to be about four or five years.
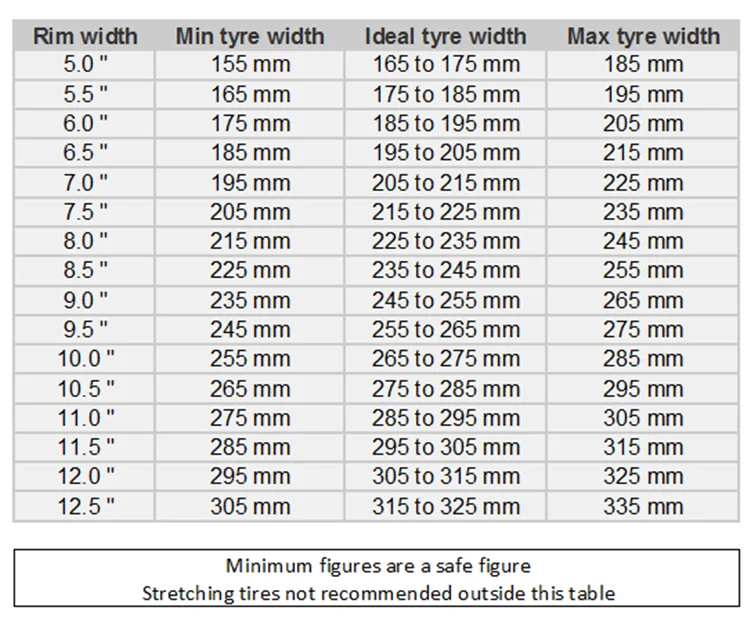
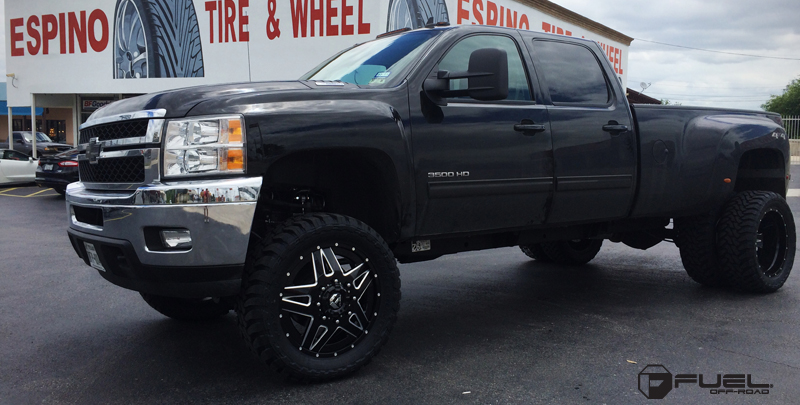
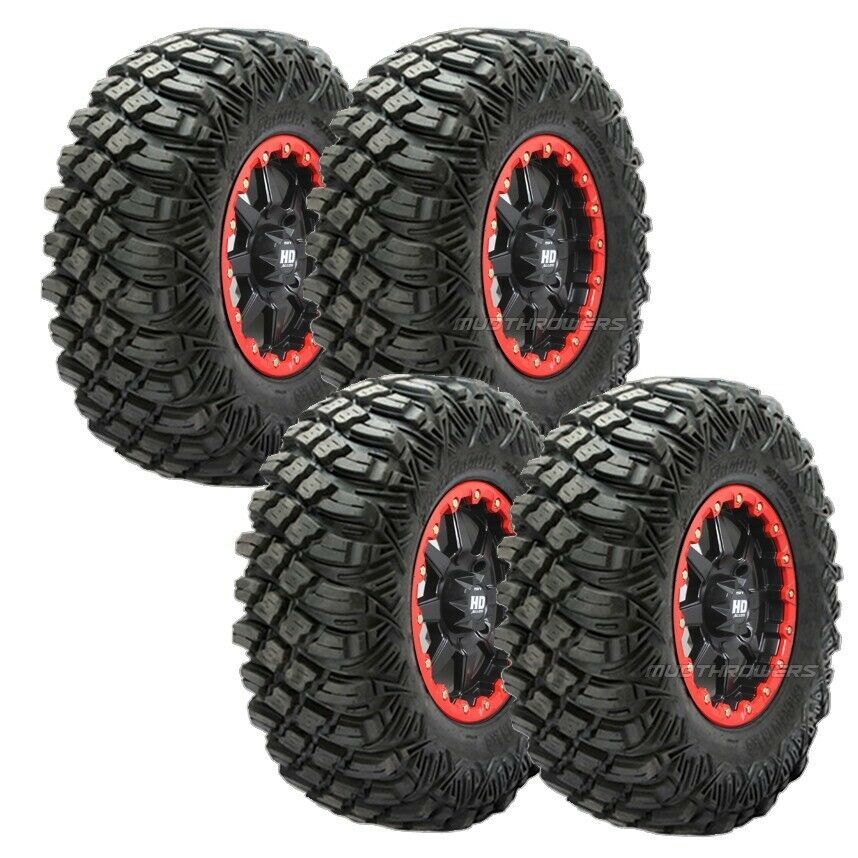
29. Have the right kind of tires on your ATV. The first step to choosing the right ATV tire is knowing the type of terrain you are going to be riding on. While most casual riders are going to be spending their time on trails, some riders might be spending the majority of their time on sand dunes, muddy swamps or racing tracks.There are five types of tires you can put on your ATV:
A good all-purpose tire is going to be sufficient for most casual rider, but if you are a serious rider and what maximum control of your ATV and the ability to stop as quickly as possible, getting the right kind of tire for your riding style can make a big difference. The best tire to match your style of riding will allow as much surface area of the tire as possible to make contact with the ground while still allowing the tires to clean their treads out. This, in turn, will give you the most grip and responsiveness while braking.
Unlike your car, the tread on your ATV tires should not all be the same if you want maximum performance. Serious ATV racers and other riders have different tread between the front and rear tires. While the front tires typically contain a tread that runs down the center of the tire to act more like a blade for precise steering, you still want to ensure there is some tread toward the sidewall of the tire to make sure you have some decent braking ability with the front tires.
On the other hand, the rear tires need to be designed for stopping quickly. The rear tire tread should have a staggered pattern to them. This ensures maximum contact with the ground while simultaneously giving you control and comfort. This staggering of the tread will also keep the tires free of mud and debris and help to prevent hydroplaning while on a wet trail or track.
This is another tip that is just trying to get the maximum advantage out of your tires is you are an ATV racer or very serious enthusiast.
Camber refers to the amount of degrees that your tires and wheels are either tilted inwards or outwards at the top of the tire in relation to the bottom of the tire. When a tire is tilted in at the top and protrudes outward at the bottom, it is said to have a negative camber. The opposite holds true for a positive camber, the top is tilted outward while the bottom of the tire is drawn inward toward the center of the vehicle.
The camber of your tires can affect your braking performance because it changes the traction your tires have with the ground, and braking performance is at its best when the tires have the most traction on the ground. This happens when as much of the tread is in contact with the ground at any given point in time. As your ATV enters a corner, centrifugal forces naturally cause positive camber. To ensure that the tires have as much traction as possible, you want to ensure that maximum tread is always on the ground. To do this, you set your camber with a slight negative position. How much negative camber you choose to set on your ATV depends on the particular terrain you plan to ride on and the amount of travel your suspension has.
While this is probably a good idea for many reasons (check out our article on ATV security), direct sunlight will fade and dry out the tires. This will speed up the cracking of a tire and drastically reduce its lifespan. Cracking and worn-out tires reduce your ability to brake at maximum efficiency, as discussed above. It also wastes money having to replace your tires more often.
33. Check your tire pressure.
You should check tire pressure before every ride as the tire pressure can change on any given day between rides, especially if you have stored the ATV for any significant period of time. The tire pressure can greatly affect the way your ATV handles, including how well you can brake, and how quickly your tires wear out. We have a seriously awesome pump to help you keep your tire pressure perfect over on our Recommended Gear page.
A kill switch, although small in size, can make the difference in saving your ATV or UTV, and potentially some lives. Kill Switches are especially useful when you have children riding, but it can be a useful tool for anyone with an ATV or UTV.
An ATV kill switch causes the engine to shut off whenever it is triggered. It usually attaches to the rider and can be pulled in an emergency or triggers automatically if the rider falls.
In this article, we will look at the kill switch, its importance, and, more importantly, how to use it.
Generally, the kill switch is used to kill the engine of a vehicle. The Kill Switch can have many uses. One is to reduce your risk of vehicle theft. In fact, one of its most crucial and important components is that you, as the owner of the ATV, UTV, or car, will be the only person who knows where the switch is and how to operate it. It won’t stop someone from hauling your ATV away on a trailer, but it will stop them from riding it out.
The kill switch deters crime since without finding it, a thief cannot start the vehicle. Many thieves will leave a vehicle alone and move on when there is a kill switch. With an ATV, this is very important. Although you may not have a lot of belongings within the vehicle itself, its open model is very enticing. Without a kill switch, someone can easily hijack the vehicle and take it for themselves. Although it sounds a bit far-fetched, a lot of ATVs are stolen; in fact, there has been a huge rise in stolen ATVs over the past few years.
The more common purpose of a kill switch on an ATV or UTV is to shut off the vehicle in an emergency situation. It is extremely beneficial for you when you want to shut it off immediately. Depending on the kill switch, you can arrange for it it shut the engine off immediately if you fall from the ATV or UTV.
Another perk is that some insurance companies offer a discount for those owners whose vehicle does have a kill switch. This is often an overlooked aspect of having one. Insurance companies are well aware that these features prevent theft and also provide a safety measure that protects the driver and vehicle.
Other than understanding its benefits, you must learn how a kill switch works on an ATV or UTV. It is in the vehicle for a reason and understanding that can help you a lot as an owner.
The kill switch is usually wired to the ignition coil. The ignition coil is part of the ATV or UTV that sends a spark that ignites the engine.
The kill switch breaks the ground circuit so that the coil no longer has a positive and ground. Because of that, the ignition coil is no longer firing. Without that, the ATV or UTV cannot run.
A kill switch can come in different forms, such as the push or pull style, which have different ways of functioning, but their key differences are essential.
In an ATV/UTV, there are two ways or systems that a kill switch is used, either an NC or NO, or “Normally Closed” or “Normally Open.” An NO switch is the open type, hence the name Normally Open, and functions by grounding the primary ignition lead when the tether is pulled away from the bars.
When the tether is removed from the NO, it will end up closing itself. This, in turn, creates a short to the circuit to which it is wired. It is important to note that this function should not be used to ground the high voltage. An NO system is not used as often as the NC system, but you still see them frequently enough.
An NC switch, on the other hand, works in the opposite way. It is Normally closed and is connected to the 12V input to the ignition. When the tether is removed, it will disconnect or open the circuit from the negative to a positive voltage, turning on the ignition.
Usually, NC kill switches are used in battery type ignition systems that have a clear Run/Stop switch with a key identifier. While it is typically known that newer models are NC, but you will want to double-check the manual at all times to confirm.
In general, the ATV kill switch is usually easy to install and uses wire plugins that ease into the OEM stock designs. Most of the kill switches for ATVs are designed to mount on the handlebars, but there are other option.
Most of the time, the kill switch will activate the same as a kill switch in any other vehicle. Essentially, you either push or pull the switch and the engine should shut off. You will want to remember to shut the ignition off if you are not going to start the ATV back up.
Typically, you only want to use the kill switch when needed, but some riders like to use the kill switch whenever they shut down their ATV.
This isn’t the end of the world, but it isn’t a best practice. You can cause serious damage to your alternator if you regularly try to start your ATV without reengaging the kill switch. Your manual should have clear instruction about whether you can use the kill switch routinely, but most recommend only in emergency situations.
Most of the time, an ATV kill switch is mounted to your handlebars, or to a handlebar clamp designed for the switch. You also want to install the kill switch where it can be easily reached, but won’t get in the way during normal operation.
Once you have determined where to mount the kill switch, simply tighten the screws using a 3mm Allen wrench in most cases. You will want to be careful not to overtighten the screws, while still ensuring the switch is mounted securely and wont slide or come loose during aggressive riding.
In terms of wiring, most kill switches are universal and will work with almost any ATV. However, the wiring inside ATVs is not universal.
Regardless of the type of ATV you have, the kill switch can never be directly on the on/off panel if the ATV already has one. In most ATVs, one lead from the switch will be wired to the ground, and the second wire will splice between the stator and ignition coil.
When the stator wire is grounded, it will cause the engine to shut off. Make sure to consult the instructions of your particular model to ensure you wire it correctly.
Once you have installed the kill switch on your ATV, test the switch by pulling the clip while the ATV is running.
The kill switch, regardless of where or which vehicle it is used in, is one of the most imperative and essential assets you can have for safety purposes. From its anti-theft design to its last-second emergency usefulness, a kill switch can do you wonders.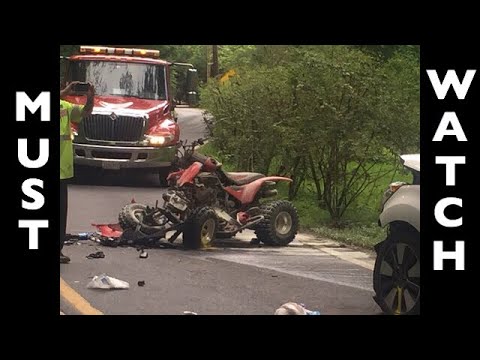
Regardless if you have an ATV or UTV, this kill switch can save your life. Whether that be on the off-road when you are going too fast or when the engine seems to malfunction, the kill switch is known to be the last resort and for good reason. It is both efficient and easy to use, either through a push or pull motion, and can be easily found by the owner of the vehicle.
Furthermore, it can protect your vehicle from being stolen. A ton of ATVs and UTVS have been stolen through the years and having a kill switch has been one of the most effective protection against thieves. This is important in cars, but even more so in an open-model vehicle like an ATV. With a kill switch, you can turn off the engine from being used unless you yourself are utilizing the vehicle.
In terms of its installation, know where and how to activate the kill switch. It will be useless unless you know exactly where it is at all times and how to use it. Usually, this place would be accessible and easy to activate. In an emergency situation, you do not want to be looking for a kill switch. Instead, you want it to be an instant instinct that comes from experience. So, when installing, try to even practice or simulate what it would be like to use the switch. Furthermore, when attaching to the handlebar, make sure that the lead from the switch will be wired to the ground, and the second wire will splice between the stator and ignition coil. If not, you can cause serious damage to yourself and the ATV or UTV that you are operating on.
Finally, there are a lot of automotive insurance policy benefits for having a kill switch. Make sure you check to see if you insurance carrier offers a discount when you are considering whether to install a kill switch.
• Tractor driver's license with an open category A1 (A according to the old one)
• Certificate of vehicle registration
• License plate
• CMTPL policy
By presenting the listed set of documents, you most likely will not arouse further interest from the traffic police inspector, and provided that you are sober, continue driving.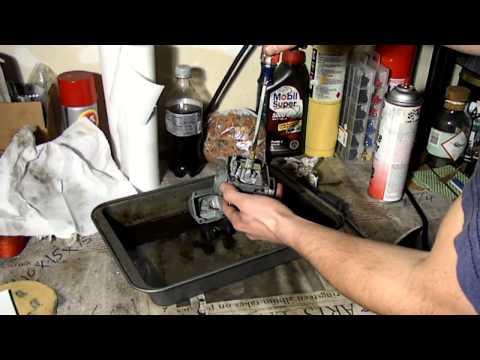
Let's take a closer look at each document and the situation itself.
• Tractor driver's license - this is the name of the crust that gives you the right to drive an ATV or snowmobile. The certificate is issued by Gostekhnadzor at the place of registration. Do not confuse the B1 automobile category, which gives the right to drive a quad bike, a quad bike and a quad bike are different vehicles.
• Car Registration Certificate – A green card similar to a car license, also issued by Gostekhnadzor along with a license plate.
• OSAGO policy – equipment cannot be registered without it now. "OSAGO policy is not required for agricultural machinery, self-propelled vehicles, the maximum permitted speed of which is less than 20 km / h."
Dispelling rumors and misconceptions! Let's discuss the most common ones:
• While driving on a country road, the traffic police inspector cannot stop me, because I am not moving on a public road (DOP) is a delusion, all roads are public roads. "Road" - a strip of land or a surface of an artificial structure, equipped or adapted and used for the movement of vehicles. The road includes one or more carriageways, as well as tram tracks, sidewalks, shoulders and dividing lanes, if any. That is, even a narrow lane laid by a bulldozer or grader in the middle of a snowy field is considered a road.
• I can ignore the request of the traffic police inspector to stop and I will get nothing for it is a delusion. Without stopping, you first of all do not obey the police officer, and he can use all the necessary powers and means, up to shots at the wheels.
• Only Gostekhnadzor inspector can stop me – this is a delusion, see above.
• You can drive a quad bike on the DOP only if you have turn signals - this is a delusion, you can show turns with your hands, even with one hand, but without OSAGO and other documents you really can’t get behind the wheel of an quad bike.
• The traffic police inspector cannot issue me a fine, even if I have violated something. - this is a delusion. The main difference between the meeting with the inspector of Gostekhnadzor and the traffic police is precisely in the amount of fines, for the latter they are much higher. This is due to the different articles that guide these departments. Gostekhnadzor fines are much lower.
• I drank and went to ride a quad bike and nothing will happen to me - this is a delusion. In the event of an accident, and this happens more often than you think, you will be deprived not only of a tractor driver’s license, but also of an automobile VU, moreover, under the same article, for drinking. This is a common court practice today. Remember this.
Thus, quad bikers and snowmobilers, although they receive other certificates and certificates, must obey the requirements of a police officer, otherwise they are fully liable under the law. Of course, you can jump off the road into a forest or a field, and it is unlikely that an inspector will chase you in a car, but you are breaking the law and getting into trouble.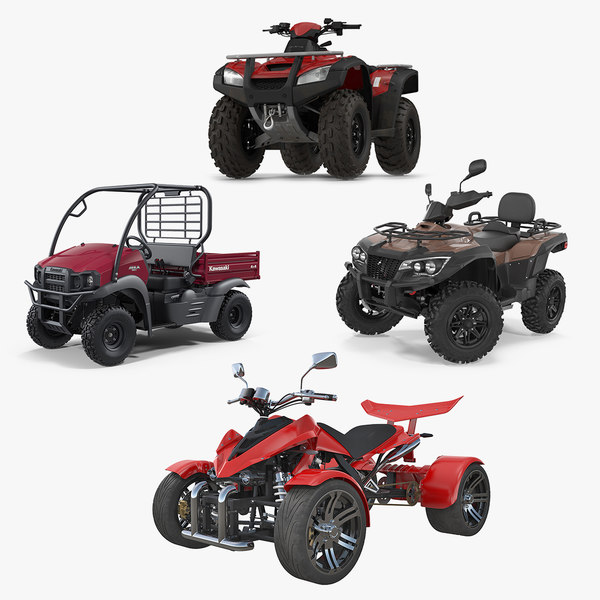 Agree, there are enough problems at work, on an ATV you just want to get away from problems, take a break from stress. It is clear that there are areas where an inspector of the traffic police or Gostekhnadzor is as rare as a polar bear in the Moscow region, however, we recommend that you do not break the law.
Helpful advice from experience. When obtaining a tractor driver's driver's license, it is necessary to prepare a medical certificate, it does not differ from a certificate for a driver's license or carrying a weapon. But, when filling out the certificate, it is necessary to indicate that it is issued for driving an all-terrain vehicle. This is important, if the doctor, out of habit, indicates the VU, then such a certificate will have to be obtained again.
Three golden rules from Category A!
1. Do not drink alcohol while riding an ATV or snowmobile!
2. Always wear a helmet!
3. Never ride alone!
We are for safety and good mood!
Subscribe to our Telegram channel https://t. me/Slednews and be the first to know all the news!
Take part in the discussion of the article on the forum https://t.me/categoria_a
Creative video about INTERPARTS actuators
Watch with sound, cover your children's ears, after watching buy actuators here
03/16/2015
BRP Can-Am Maverick Interparts Drive Installation Instructions
Step-by-step instructions for installing or replacing an Interparts drive, with commentary. Recommended for viewing on your own...
02/26/2015
You can save a person!
22.01.2020
Yamaha 2019 - the latest news
For Yamaha, 2019 turned out to be fruitful: several new products appeared on the Russian market for lovers of two...
08/26/2019
Sherpa pulls snowmobiles out of the water!
Is everything all right here? Why are snowmobiles in the water?
08/21/2019
Taiga Motors - new electric snowmobile
Taiga Motors, developer of electric snowmobiles, announced the line of third -generation electric shifters under named . ..
..
06/13/2019
We represent the new all -terrain vehicle Sherp
Sherp Max - new model - new model - new model - new model grew in size and became more comfortable.
05/26/2019
Nikola NZT electric buggy
Nikola Motors introduced the NZT off-road buggy.
04/18/2019
2020 Yamaha Snowmobiles
With the release of the 2019 lineup, many have wondered what Yamaha has in store for the future. Last year's adjustment looks like...0006
03/27/2019
This issue is regulated by the following regulatory act:
Order of the Ministry of Internal Affairs of Russia dated 03/02/2009 N 185 (as amended on 12/22/2014) "On approval of the Administrative Regulations of the Ministry of Internal Affairs of the Russian Federation on the execution of the state function of control and supervision over the observance by road users . ..
..
Rights and obligations of officials in the exercise of public function
(as amended by the Order of the Ministry of Internal Affairs of Russia of August 13, 2012 N 780)
Russia) - on the territory of the Russian Federation;
(as amended by the Order of the Ministry of Internal Affairs of Russia dated August 13, 2012 N 780)
--------------------------------
Further - "State traffic inspectorate".
by the governing bodies of the State Traffic Inspectorate of the territorial bodies of the Ministry of Internal Affairs of Russia at the regional level - within the limits of the corresponding constituent entities of the Russian Federation;
(as amended by the Order of the Ministry of Internal Affairs of Russia dated August 13, 2012 N 780)
--------------------------------
Hereinafter referred to as "government bodies of the State traffic inspectorate".
paragraph deleted. - Order of the Ministry of Internal Affairs of Russia dated 13.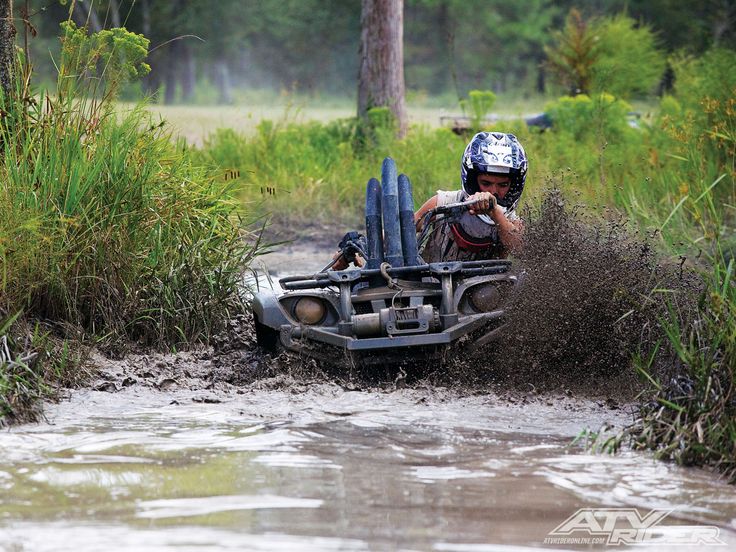 08.2012 N 780;
subdivisions of the State traffic inspectorate of the territorial bodies of the Ministry of Internal Affairs of Russia at the district level, combat units of the State traffic inspectorate - within the areas of responsibility of the relevant units.
Further - "subdivisions".
(footnote as amended by the Order of the Ministry of Internal Affairs of Russia dated August 13, 2012 N 780)
The footnote has been excluded. - Order of the Ministry of Internal Affairs of Russia dated August 13, 2012 N 780.
[b]4. The execution of the state function is carried out by employees of the State traffic inspectorate authorized to draw up protocols on administrative offenses in the field of traffic, as well as district police officers. [/ b]
Order of the Ministry of Internal Affairs of Russia dated May 5, 2012 N 403.
(footnote as amended by Order of the Ministry of Internal Affairs of Russia dated 08/13/2012 N 780)
Further also - "employees".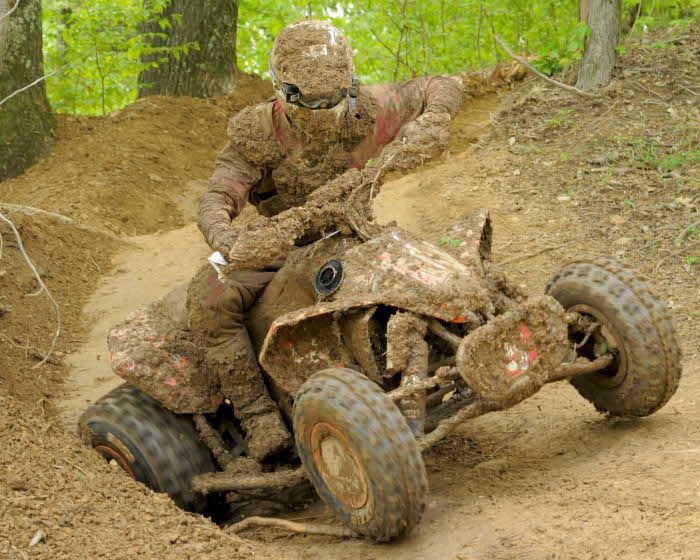
[b] Employees of other police units can carry out, within their competence, in accordance with their position, administrative actions to perform a state function when, on the basis of administrative acts of the heads of internal affairs bodies, together with employees of the State traffic inspectorate, special events to ensure public order and public safety. [/b]
Part 2 of Article 13 of the Federal Law "On Police".
(footnote as amended by the Order of the Ministry of Internal Affairs of Russia dated August 13, 2012 N 780)
Drawing up a protocol on an administrative offense in the field of traffic is carried out by employees of other police units in accordance with their authority.
(as amended by the Order of the Ministry of Internal Affairs of Russia dated August 13, 2012 N 780)
In order to prevent and (or) suppress a crime, an administrative offense, the detention of persons suspected of committing them, when citizens apply for a crime, an administrative offense , about an incident or in the event of a crime, administrative offense, incident, stopping a vehicle, a pedestrian (paragraphs 63 - 81 of this Administrative Regulation) can be carried out by a police officer on the territory of the Russian Federation, regardless of the position, location and time of day. At the same time, subsequent actions are carried out in accordance with the legislation of the Russian Federation.
(as amended by the Order of the Ministry of Internal Affairs of Russia dated August 13, 2012 N 780)
(see the text in the previous edition)
---------------------- ----------
Part 2 of Article 27 of the Federal Law "On Police".
(footnote as amended by the Order of the Ministry of Internal Affairs of Russia dated August 13, 2012 N 780)
Police officers, in order to fulfill their duties, have the right to use vehicles belonging to state and municipal bodies, public associations, organizations and citizens, in cases and in the manner established by the Federal Law "On Police".
(as amended by the Order of the Ministry of Internal Affairs of Russia dated August 13, 2012 N 780)
(see the text in the previous edition)
---------------------- ----------
Footnote deleted. - Order of the Ministry of Internal Affairs of Russia of August 13, 2012 N 780.