Don’t let losing or forgetting your ATV key stop you from enjoying your quad. In this article, I’ll show you a few ways to start your ATV or UTV without the key. You can do any of these methods with basic hand tools found in most garages.
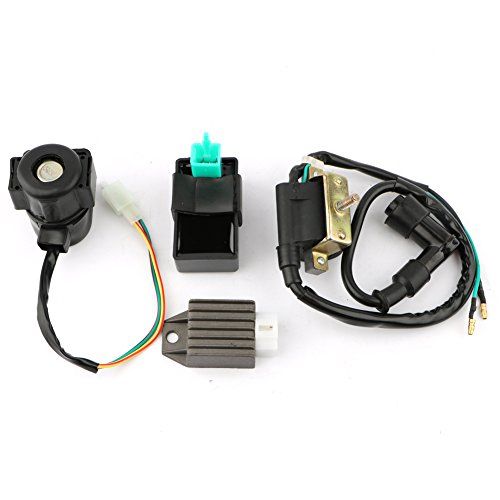
Your ignition switch is simply a break in a circuit telling your electrical box when it’s ok to start or not. When there’s no key in the ignition, no power can be sent to the rest of the needed components to start the engine. There are some pretty simple ways to get around this though.
Of course the easiest way is if your machine has a pull start or kick starter on it. A lot of the newer quads being made don’t have this functionality anymore unfortunately. If you do have this option, simply unhook the ignition switch from the cdi or electrical box. That way the engine will start without needing a key inserted, then start the engine.
This method may work without a pull start or kick start if you can push your machine to a good pace and pop it into gear. Your other options are:
This is my preferred method to starting an ATV without the key. Most ignition switches will only have two wires going into it. On wire is sending power in, and the other wire sends power to the electrical box if the key is inserted. Telling the machine that it’s ok to start.
Simply remove the ignition switch from the equation. You can disassemble the switch or just cut the two wires leading to it. Be sure to leave enough slack in the wire just in case you want replace the ignition switch later on.
Now connect the two wires and your electric start should work like always. Remember to connect the wires on the side leading to the engine not the side leading to the ignition.
You have to remember to disconnect the two wires when you’re done riding or you’ll drain the battery dead.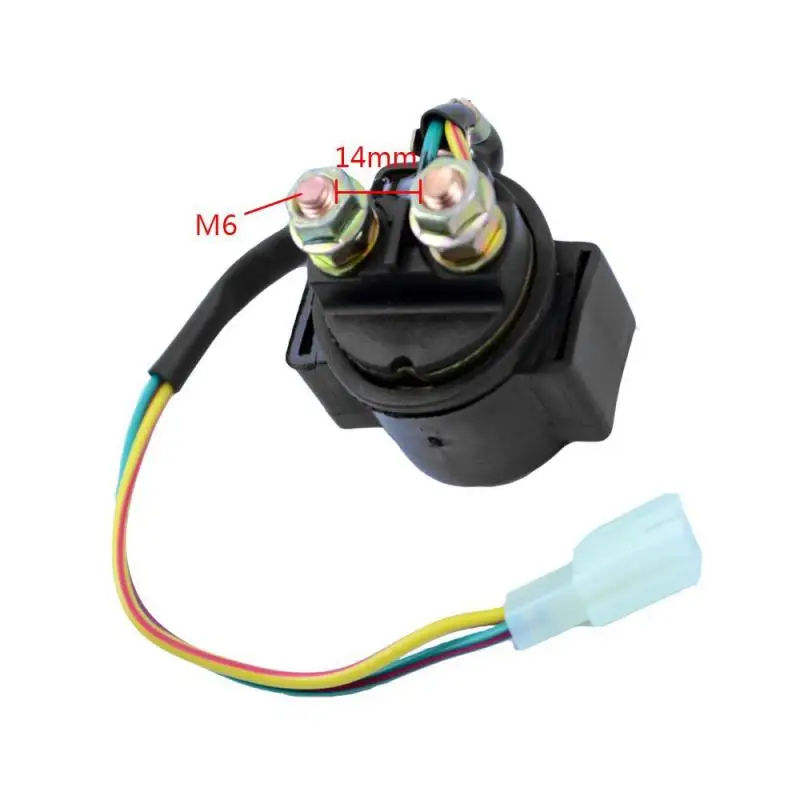 I would recommend you put a simple switch here in place of the ignition, a simple on/off switch will work perfect.
Some of the newer quads have more than two wires coming out of the ignition switch, not to worry. A lot of times there will also be a ground wire or something like that. The two wires you should focus on are red and black. Cut those two wires and tape them together. Make sure you tape together the ends of the wire leading to the engine not to the ignition.
You may also see a black with white stripe and green wire. These two wires are shorted together when the key is in the off position. You will need to open that short by cutting the black with white stripe wire and tapping off the end.
Once the black with white stripe is cut and taped, and the red and black wires and spliced together and taped. You should have power to your quad as if the key was turned on. You can use your normal electric start and everything the way it is.
Remember to disconnect the black and red wires when you’re done to avoid killing the battery.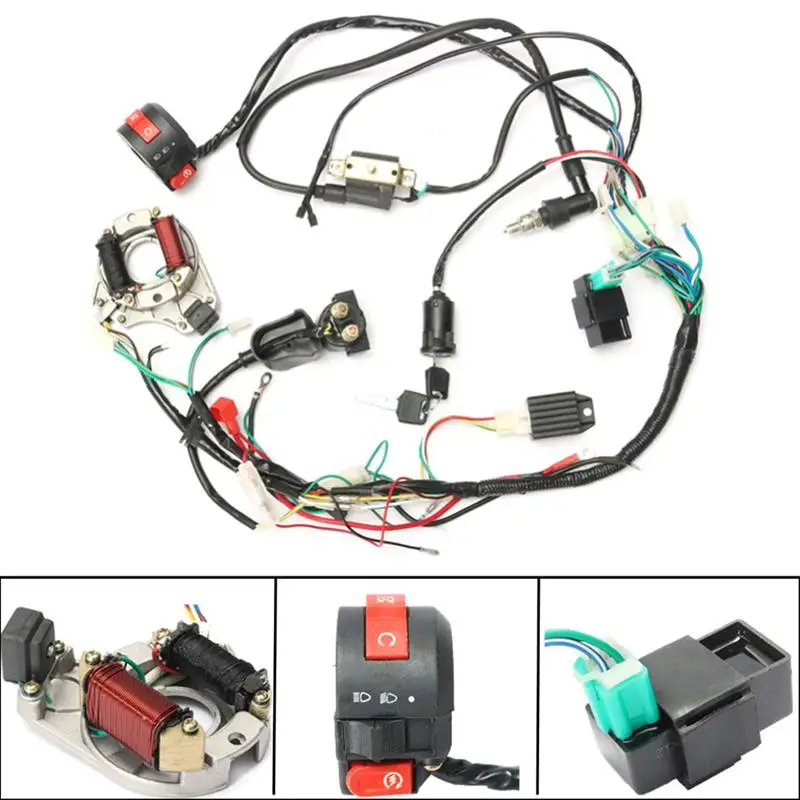 You could also tape the black with white stripe wire back together to prevent anyone from easily starting the quad.
This doesn’t work on all ATVs, only machines with an electric start option only. Your solenoid should be near your battery and wiring harness. On some quads you have to remove a side panel to access it.
Your solenoid will have two main wires coming out of it and possibly some other smaller ones, we only care about the two big wires. You need to lay a wrench or something metal across the two connectors of the main wires. Then, you should be able to start the quad.
I don’t use this method myself because you have to be real careful the wrench or piece of metal is not touching anything else that could short it out. If you accidentally touch the frame or something when doing this, you could cause damage to your electrical parts of the engine.
Desperate times call for desperate measures, and that’s what this method is.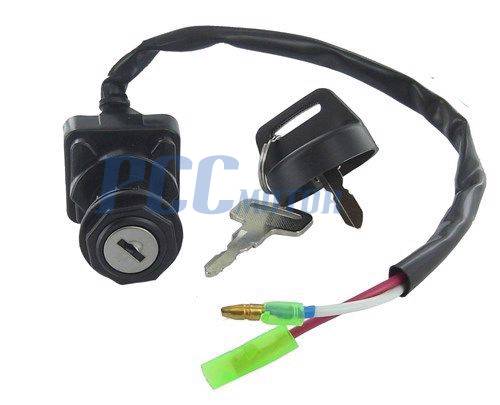 This trick is mostly used by thieves, so if you’re driving around the trails with a screw driver sticking out of the ignition and get stopped by trail enforcement, be ready to get asked some questions.
Basically you just hammer a screwdriver into the ignition and turn it on as if it were the key. The screwdriver will brake the pins in the lock allowing you to turn the ignition on.
I don’t recommend this method because you could damage the ignition and not get the quad to start anyway. And even if you are successful, you’re now riding around with a screwdriver sticking out.
This is obviously the best method in the list. Of course if you forgot your key and you’re already way out on the trail, then there’s no way you can order a part and do the replacement. This is more for someone who lost their key, or broke their ignition trying the screwdriver method.
Here’s a decent Replacement Ignition Switch found on Amazon to help get your search started.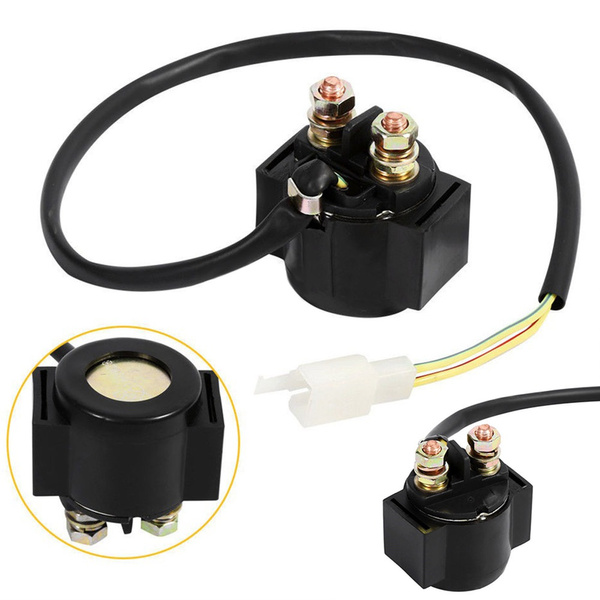 If you can find a replacement from the manufacturer for your specific machine, that would be the best route, but probably a lot more expensive.
One thing I want to mention is that it’s always best practice to tape up any wires you cut and exposed. You may have gotten the hotwire job done correctly, but if any of those wires hit the frame and short out you could have bigger problems.
Leave enough slack in the wires to work on them again later on. Try to avoid cutting the wires to the ignition real close to the ignition itself, or somewhere that makes it hard to get to the wires. You may want to work on it later on, like putting in a new ignition switch or on/off switch.
Don’t tell everyone how easy you hot wired your quad and how you did it. Maybe you’ll be safe to do this, but I lean a little more to the cautious side when it comes to my machines.
Sharing is caring!
So you have driven five hours to ride a great ATV trail through some beautiful mountains, you get the campsite set up and you go to unload the ATV and realize you left the key at home. The ten-hour round trip drive is off the table, so you have two choices: You can spend the weekend camping with the ATV on the trailer, or you can find a way to start the ATV without the key.
Here is what you need to know. As a disclaimer, don’t go stealing someone’s ATV using this advice. Only use it on an ATV you legally own for which you do not have a key.
How do you start an ATV without a key? Here are 7 ways you can try.
Your ATV key is not some magic trigger that makes everything in the engine work. Turning the key in the ignition opens and closes a circuit that allows a spark to ignite the engine.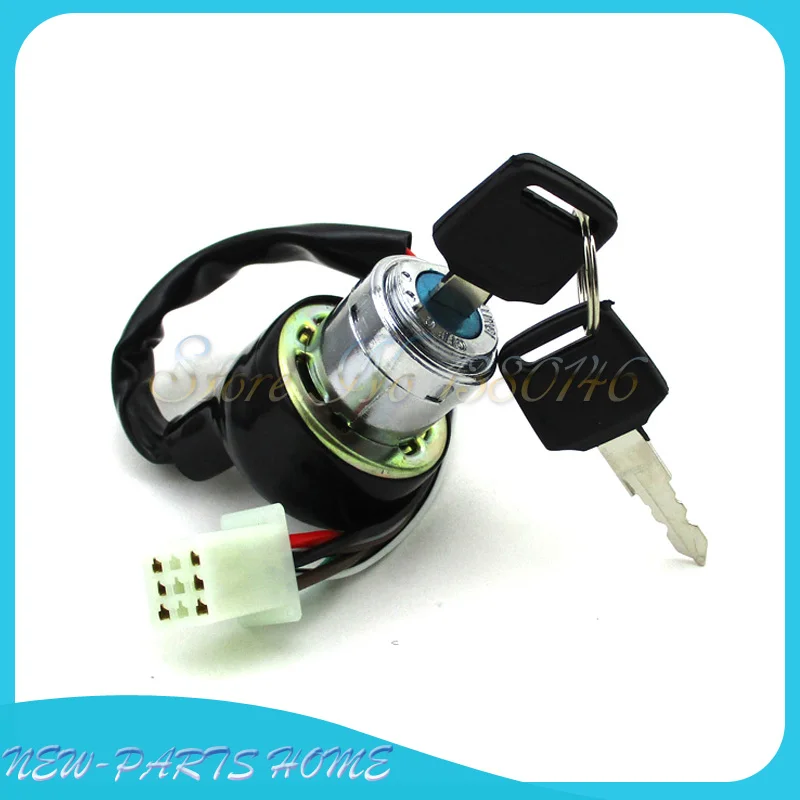 Once that spark ignites the engine, assuming your engine is good, then you are good to go, with or without a key.
The real dilemma in the situation where you don’t have a key to your ATV us whether you want a permanent solution or something just for the weekend. The other issue is how much you are willing to risk damage to the ATV and how much you are willing to spend.
I am going to start with the less ideal methods that should probably only be used when you really need it or just don’t care because it is an old machine or because you are going to get an new ignition anyway.
This one will not work on all ATVs, but if your ATV has an alternative start method that permits you to do a pull or kick start, this is going to be your best option by far.
Hopefully you have your owner’s manual or can locate an owner’s manual online so you can look at the exact directions for your ATV model, but here are the basic steps.
Okay, hot wiring an ATV is going to depend on the type of ATV you own. Basically, the goal behind it is to change the wires so they bypass the ignition switch, leaving the circuit open so that a spark can start the ATV’s engine.
I am going to list the different hot wiring guides I have found so you can hopefully determine which one will work best for your ATV.

This option is probably the best and easiest of the hot wiring methods if is available to you. Just remember to leave some extra wire from the ignition so you can rewire it if you find or replace your key.
This method is not going to work on most ATVs, but you may get lucky. It will only work on certain ATVs that have an electric starter without an alternative start method.
You might as well give it a try and see if you are able to do it before moving on to the more advanced hot wiring discussed above.
First, you need to locate the ATV’s starter relay or solenoid. It is usually located on the outside of the plastic right next to or under the battery and near the wiring harness.
A starter solenoid is a switch that controls a high amp load with a low amp. Starter solenoids come in all different shapes and sizes, but normally they have a round or square body with two larger and two smaller wires. The larger wires are for the high amp load and the smaller wires are for the low amp switch.
Your ATV’s solenoid may only have one smaller wire if the ground is coming from the frame where it is mounted. It may be sitting in a plastic or rubber cover, but it’s not uncommon for it to be on the outside.
Once you have located the starter solenoid, you should see two big main wires. Hopefully, it will be set up so you can jump those two main wires using a wrench. If you can jump the wires, you should be able to start the ATV.
This method requires you to take apart the ignition so I would only use it if you are planning to get a new ignition to install or if you are comfortable enough with getting the ignition back together if you plan on it.
The point of this method is to basically line up the ignition the same way turning your key would. Follow these 5 steps to give it a try.

This is the first method I saw used to start a vehicle when I was 13 or 14. My friend wanted to take our his parent’s spare vehicle, but didn’t have a key so he took a screwdriver, jammed it into the ignition, turned it and the van started right up. While this method works, it is not ideal.
Once you have jammed a screwdriver into your ignition, there is no point in a key because anything you jam in there will turn the ignition. There is also a good chance of damaging your ATV’s ignition to the point where you need to buy a new one anyway.
I have also seen people use one blade of a pair of scissors the same way. I am not sure if one is any better for your ignition, but I would have to assume there is not much difference.
This is definitely your best option if it is available.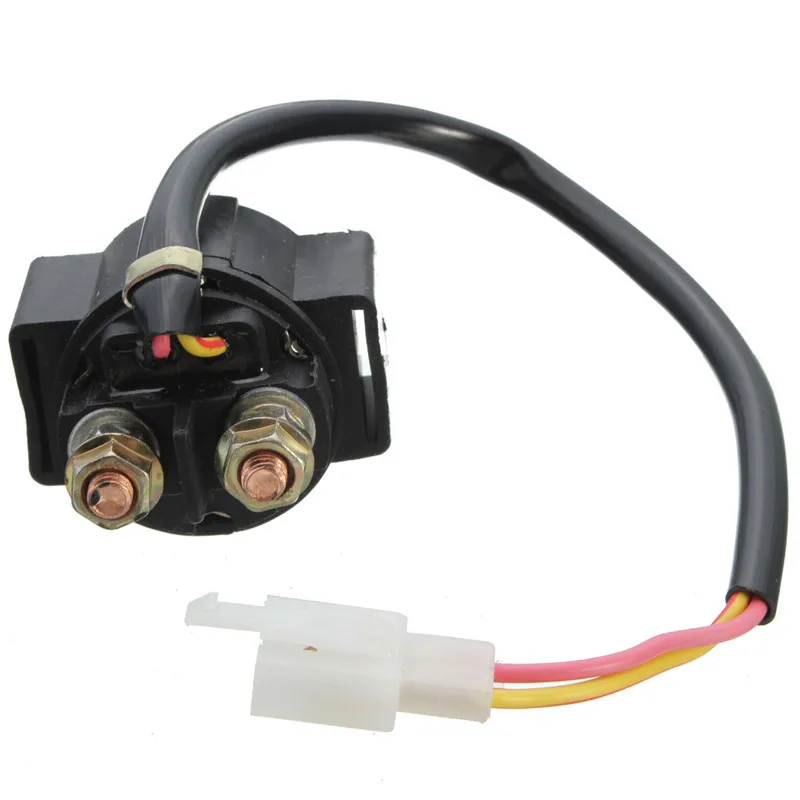 If you are in the situation we described above where you are far from home and simply left your key behind, you may be able to buy a new key from a local dealer.
Assuming you can locate a dealer near you that can replace keys by the code, get in contact with someone back home that can access your ATV key.
There should be a code stamped onto the key. If you tell the local dealer that code, they should be able to make you a new one. Another alternative that may work is telling the dealer your ATV VIN and model. If they trust you didn’t steal the ATV, they may make you a new key.
If you don’t have the code stamped on your key, your best option is finding a lock smith that can hopefully cut you a new key. Note some locksmiths also have key codes so that may be an alternative if you can’t fine a local dealer that can make you a key from the code.
If you can’t get a locksmith to your ATV, you can hopefully remove the ignition from your ATV and get a key made.
If you aren’t in the situation where you are camping and need immediate access to the ATV, getting a new ignition switch is a good alternative, especially if you can’t get a new key made.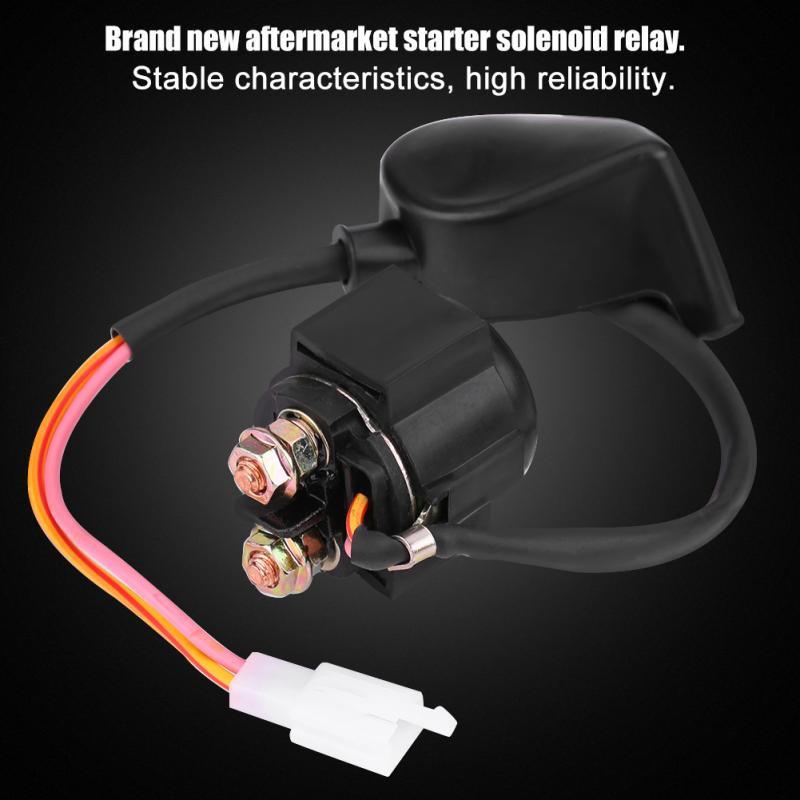
A new ignition switch is surprisingly inexpensive and should be easy to install. If you are not comfortable doing this yourself, you can always take it to a dealer to have it done for you.
 If you lose your key, that won’t help you much, but you could write that code down now and store it somewhere safe so you have it in the event you lose a key in the future. I recommend sending it to yourself in an email and storing it on your phone so you can access it wherever you may be with your ATV and no key.
 In this article, we'll cover the maintenance features of 125cc 4-stroke gasoline engine ATVs for kids and teens. see the MOTAX family, using the MOTAX T-REX SUPER LUX ATV as an example.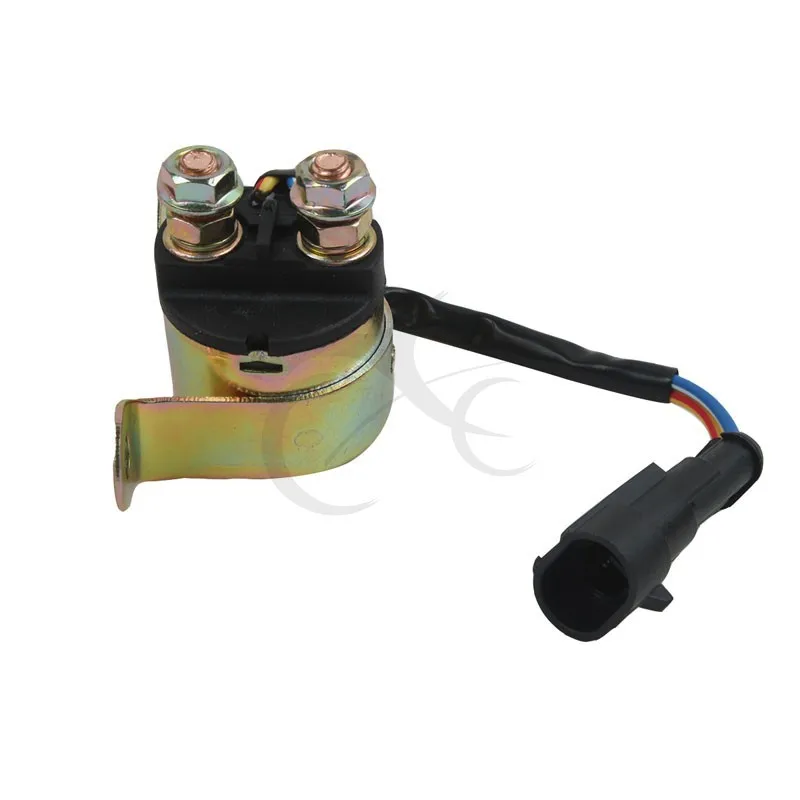
To change the engine oil you will need:
1. A container for draining used oil (can be made from an old plastic canister by cutting off the side).
2. Four-stroke ATV engine oil (we recommend using oil of the MOTUL line).
Please note that it is not permissible to use oil intended for automobile engines, since the gearshift mechanism and clutch are in the same oil bath with the engine and for their proper operation a certain set of additives is required, which are not found in automobile oil.
3. 17mm socket wrench or wrench.
The 125cc MOTAX T-REX SUPER LUX power pack has a 0.7L oil fill tank.
The ATV engine must be warmed up to operating temperature before changing the oil. Since the oil sump of the gearbox and engine is combined, it is recommended to ride the ATV forward and in reverse gear. This must be done so that the oil becomes more liquid and fluid, and the wear products that may have been deposited on the inner walls of the crankcase and the mechanism become suspended and mixed with the oil.
Don't be alarmed if the oil you drained from the ATV's power unit is dark in color. During operation, the oil darkens, which indicates that it works and protects the engine from wear.
In order to drain the oil, it is necessary to unscrew the drain plug located at the very bottom of the engine crankcase. Do not confuse this plug with the chain tensioner bolt, which is installed next to it, in the left side cover of the motor.
It must not be unscrewed during this operation.
Unscrew the drain plug (in our case, the drain plug is green, see the photo above), having previously moved a container under the ATV to drain the used oil.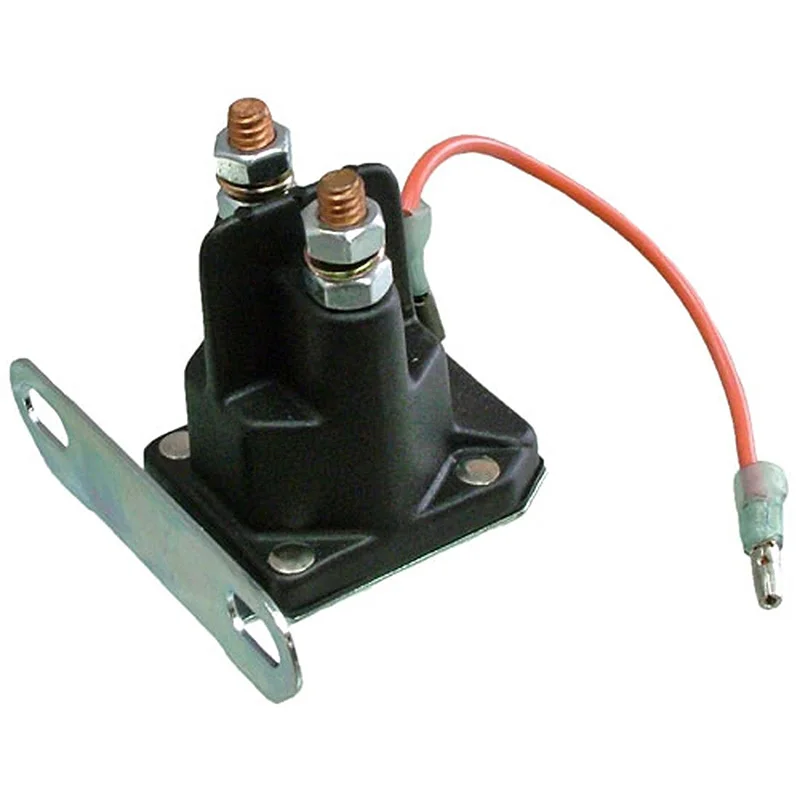 Let the oil drain completely.
While the oil is draining, unscrew the oil dipstick, which simultaneously functions as an oil filler plug and leave it in place without removing it
below
In this case, the used oil will drain off without residue.
After the old oil is completely drained, screw back the oil drain plug
Be careful not to use too much force when tightening the plug, as this could damage the threads in the aluminum crankcase of the ATV engine.
New oil can now be added. The ATV's engine is equipped with both a dipstick and a viewing window on the bottom of the engine.
It is better to focus on the viewing window. The oil level should be approximately at the top of the oil.
The engine is splash lubricated, too much oil is better than too little. The ATV engine is equipped with a breather at the top, the excess will come out through it without damaging the gaskets and seals. Of course, you should not get involved in overflowing oil into the engine either.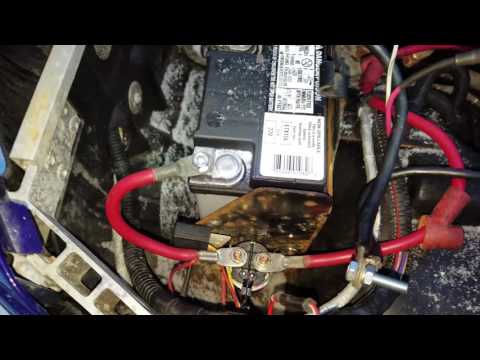 Oil should be poured through the hole in which the oil dipstick is installed
After the oil has been filled, screw the dipstick back into place. Start the engine and let it idle for about 30 seconds. Stop the engine, let the ATV stand still on level ground for about 30 seconds. If the oil level has dropped, the oil must be topped up.
If the level is correct, you can proceed to the next stage of maintenance work.
Almost all 2017-2019 ATVs a serviceable foam rubber filter is installed for cleaning the air entering the carburetor. If the filter element is intact, not torn, then it is allowed to simply rinse it without changing it to a new one.
The first thing to do is disconnect the filter from the ATV carburetor.
Filter, worm-drive clamp, Phillips screwdriver required for removal
Loosen the clamp and tighten the air filter
The MOTAX uses two types of filters.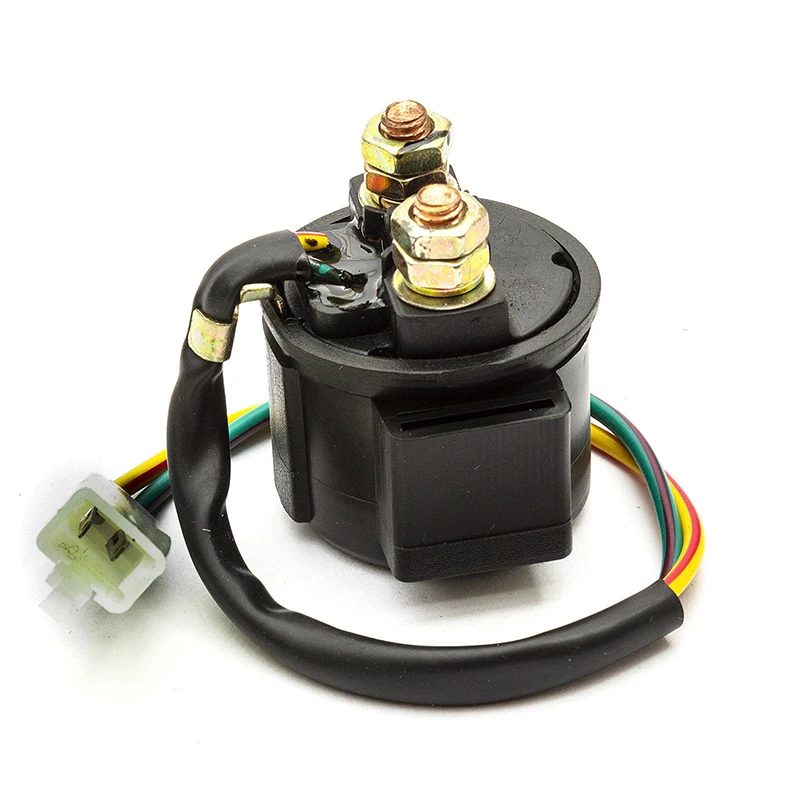 Foam rubber, as in the photo above and a filter with a metal mesh. The principle of their maintenance is similar, the used ATV filter must be washed and then impregnated with a special oil, such as MOTUL.
To wash the filter element, you can use both special liquids (for cleaning carburetors) and ordinary liquids - gasoline, kerosene, diesel fuel, water from Fairy for washing dishes.
The filter must be washed carefully to avoid damaging the filter element.
After the filter has been washed, it must be dried and soaked in oil. Oil penetrates through the pores of the filter element, lingering in them, thereby helping to trap the smallest particles of dust and dirt. It is necessary to impregnate the filter evenly, without gaps. Any, even the smallest gap, is a weak point through which dirt and dust will surely get into the engine, subjecting it to premature wear
After oil is applied to the filter, you need to take a regular plastic bag, put it on the filter and rub the applied oil on the surface of the filter element.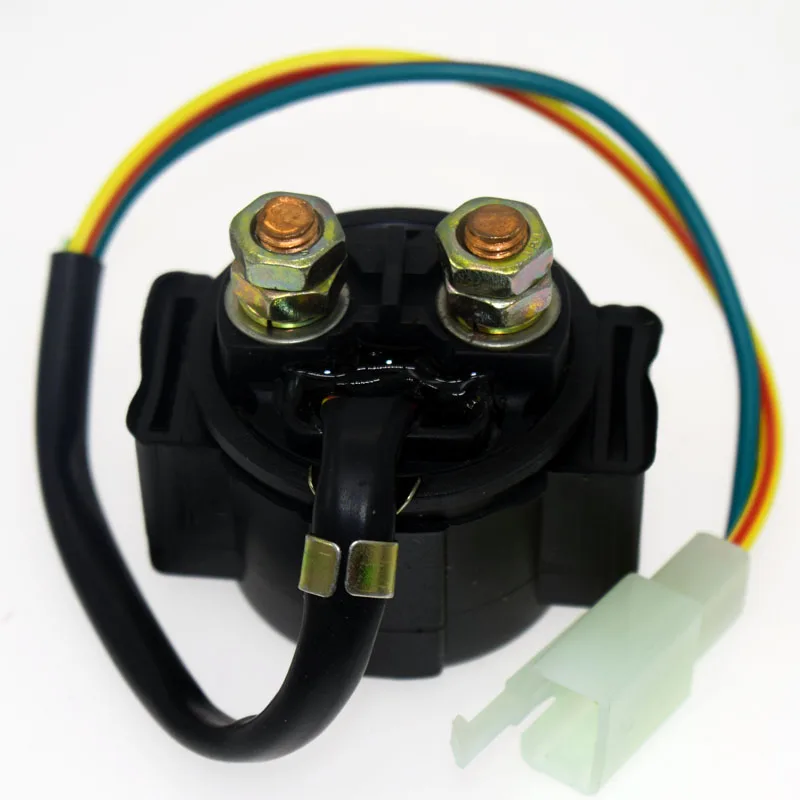
The oil is now evenly distributed over the surface of the filter element. No gaps or voids.
Reinstall the filter, leaving the filter bag in place for now to avoid getting your hands dirty. Before installation, it is recommended to lubricate the rubber seat with engine oil
Tighten the clamp with a screwdriver
Remove the bag from the filter. Done - the air filter has been serviced, you can proceed to the next stage of the ATV maintenance work.
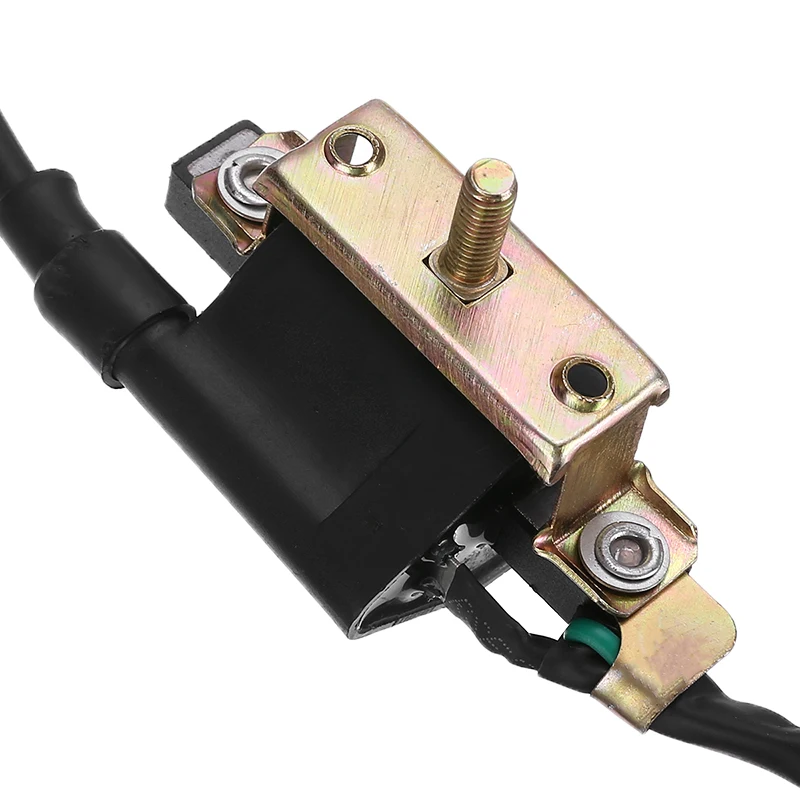
NGK C7HSA Spark Plug
Requires 16 Spark Plug to ignite mixture on MOTAX ATVs with 125cc engine
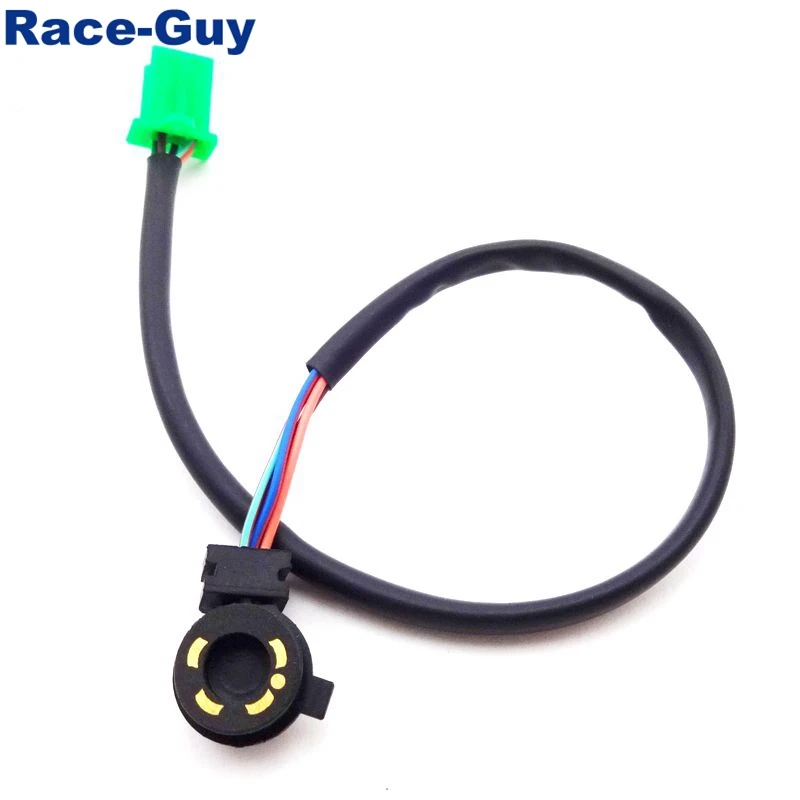
MOTAX T - REX SUPER LUX0003 Remove the spark plug cap from the spark plug, put the cap on the spark plug and turn it counterclockwise. Install the new spark plug in reverse order. We tighten the candle with sufficient force, but at the same time carefully so as not to break the threads in the head of the engine block. After the spark plug has been replaced, it's time to service the ATV's suspension. The MOTAX ATV's suspension joints are equipped with grease fittings that are designed to force grease into the ball joint using a special grease gun. The same grease fittings are provided to lubricate the steering shaft and rear swingarm ATV's suspension requires a special grease gun and grease for the pivot joints. Any type of grease gun can be used, but we find the most convenient gun with a flexible nose, designed to work with hard-to-reach suspension grease points MOTUL Tech Grease 300 is an excellent lubricant.0003 Once the syringe is ready for use, put its head on the grease fitting of the suspension assembly to be lubricated injected with a syringe can damage them. In order to control the supply of oil to the lubricated unit, we recommend that you keep your fingers free from the syringe on the rubber boot. Wipe off excess grease with a rag or rag and put a protective cap on the grease fitting All suspension units equipped with grease fittings are sprayed in this way. To lubricate the steering shaft, put the syringe head on the grease fitting it is equipped with. passed through the entire node and is no longer required. To service the ATV's drive chain, jack up the rear axle of the ATV so that the wheels turn freely in the air, but the ATV maintains a stable position. mud. For this work, you can use the special tool MOTUL or regular gasoline and a brush. It is better to install a pan under the ATV so that the remnants of the old grease and cleaning agent flow into it. To do this, you can use the same canister that was used to drain the used oil from the engine. The chain should be thoroughly rinsed from the inside and the outside by turning the ATV wheel and thereby shifting it Apply new lubricant only on a dry, clean surface, so after washing the chain should be wiped with a rag or rag Please note that the ATV during the performance of these works, for safety reasons, it must be de-energized. Be careful not to get your hands between the drive chain and the star. ATV chain can be lubricated with any lubricant specifically designed for this purpose. Chain lubricant is sold in aerosol cans. We recommend using MOTUL C3 off Road Lubrication should be applied on the inside and outside of the chain, on both rows of links. A chain tensioner is installed on MOTAX ATVs. This assembly is flushed and lubricated during maintenance along with the chain Pull the roller down and loosen the chain with one hand, check for slack with the other by pressing the chain from the bottom up If the chain slack is more than 1. To adjust the tension of the chain, loosen the rear bottom bracket at the top and bottom using the 17 and 14 wrenches. Next, tighten the chain with tensioners. Chain tensioners are installed on both sides of the carriage and it is necessary to adjust the chain tension both simultaneously and evenly. Otherwise, the axle of the ATV will be skewed That is, if the nut was tightened three turns on one tensioner, then the same must be done on the second tensioner. Retract the roller and check the chain tension. After the chain tension is adjusted, tighten the nuts securing the rear carriage of the ATV. Pay special attention to the position of the speed sensor, which is mounted on one of the bottom bracket bolts. Please note that the sensor must be installed flush with the holes in the driven star into which the magnets are inserted. These magnets during movement transmit signals to the sensor, which converts them and transmits them to the dashboard of the ATV From time to time the quad is acting up and not behaving as you would like. Nothing beautiful lasts forever, right? One of the most common faults you may encounter is the ATV suddenly pulling to the left or right. If you are lucky, your problem may have a simple solution) The most common problem that causes the ATV to pull to one side is the difference in rolling resistance due to different tire pressures. Also, the problem may be associated with natural wear or damage to various components of the chassis of the ATV and, as a result, a violation of the angle of the wheels. So how do you determine what is causing problems when riding an ATV? As you probably already understood, there can be several reasons. To understand why an ATV wants to pull off the road and dive into a ditch when you really don't want to, you need to do a number of checks. In my experience, the most common cause, and by far the easiest problem to check and fix, is uneven ATV tire pressures. A flat tire has a larger area of contact with the road surface than a normally inflated wheel, as a result of which the friction force, and hence the rolling resistance force, applied to such a wheel will be higher. The wheel will roll more slowly. The opposite wheel will run ahead and try to turn the ATV around the slow wheel. That is, if the ATV pulls, for example, to the left side, most likely, the fact is that the left wheel is lowered. To solve this problem, you need to equalize the air pressure in the ATV tires. At the same time, you should be aware that due to the design features and weight distribution of the ATV, the tire pressure on the front and rear axles may differ. Check with a good tire pressure sensor. Most manufacturers are equipped with ATVs with a set of tools and a sensor for checking air pressure in wheels, for example, ATVs Yacota SELA 200 , Yacota SELA 150 , Yacota Cabo 200024, Yacota Cabo 20023 , , MOTAX 200 , MOTAX GRIZLIK and MOTAX RAPTOR . ATVs MOTAX and YACOTA have these sensors in the standard tool kit. The air pressure should be checked in both the front and rear tires. True, uneven pressure in the rear tires, most likely, will not be the reason for the withdrawal of the ATV from a straight path. Different pressure in the rear tires can provoke another malfunction - premature wear of the rear differential, due to the increased load on it. But this is a story for a separate review. I always keep this inexpensive instrument in my tool kit, its accuracy is good enough to use. Also make sure that the maximum tire pressure is not exceeded. To check if the front wheel diameters are the same, you can do a simple check: place the ATV on a level surface and use chalk to make a mark on the sidewall of each front tire at the lowest point. Wheels must be pointing straight ahead, gear lever in neutral position. Roll the ATV forward until one of the wheels has made two or three revolutions and the mark you just made is back to the very bottom, to its original position. Look at the mark on the opposite tire. Ideally, it should also be at the very bottom. If this is not the case, the wheel circumferences do not match. If the reason for the ATV pulling to the side lies in the difference in wheel circumference, then when driving to the right, the right tire should have a smaller circumference, and when driving to the left, the left one. The circumference of the wheels can differ not only due to uneven wear, but also due to the difference in air pressure in the tires. The wheel is like a balloon, the higher the pressure, the larger its diameter and vice versa. For this operation, you need to lift the ATV, put it steadily on the supports so that all the wheels are in a suspended state. It is very convenient to use a motorcycle stand to lift the ATV. If you do not have them yet, and you plan to service the ATV yourself, I recommend purchasing them. They are relatively inexpensive. Tackles will greatly simplify the ATV maintenance process. Check that there is no excessive play in the ATV suspension and steering joints. Start with the tie rods and steering rack. This operation is more convenient to carry out with an assistant. Have an assistant move the ATV handlebars to the right and left, often and with a small range of motion. And you, in turn, keep your hand on the swivel, which are subject to verification. Check the steering tips and tie rods one by one. You will feel the excess play in the hinge with your hand. If the ATV steering wheel has excessive play, but the tie rod and steering tip are in order, then the steering rack itself or the steering shaft bushing may have play, which can also be checked by hand. The steering column bushing usually wears out over time. Tighten any loose bolts and replace worn parts. Worn parts can break soon, so replacing them won't be a waste of money, even if their wear isn't the reason your ATV pulls to one side. In addition, the wheel bearings must be checked for excessive play. To do this, have a helper grab the top and bottom of the wheel and shake it while you check for play in the ball joints and wheel bearings. Check how easy the wheels turn. The wheels should rotate freely, without noise and crackling. The presence of noise indicates wear on the hub bearing. And the tight running of the wheel is about bearing wear or souring of the brake pads. As we said, if one of the ATV's wheels is spinning at a slower speed than the other wheel, the ATV will pull towards the slow wheel. If necessary, replace the bearings and service the front brake calipers. Sometimes the caliper is easy enough to clean, and sometimes you can’t do without replacing the brake cylinders or the caliper bracket itself. Control check three: checking the running gear for geometry violations. If you use the ATV for active riding or sports, then it is possible that you have bent some part of the suspension on the next jump. ATV front suspension A-arms are especially prone to damage if you hit a stump or rock while riding. "Fast-growing" trees suddenly appearing in front of the ATV as you drive, a common story!) A-arms are designed to absorb heavy suspension shocks and, through their integrity, retain more expensive and hard-to-find ATV parts that are more difficult, more expensive or even impossible to repair, for example, an ATV frame. The applied force on the key should be smooth and moderate.
  Thus, it will be possible to feel when the lubricant passes through the swivel and its excess begins to come out. At this point, the injection of lubricant into the joint must be stopped
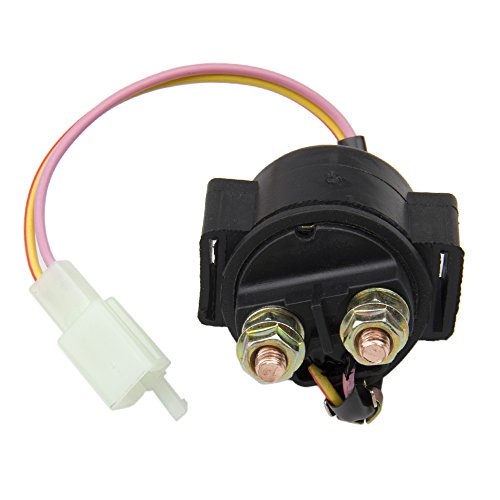
 5 cm, the chain tension must be adjusted.
 ATV » ATV pulls to the side? What malfunctions can provoke such behavior of the ATV and how to fix them.

Why is the ATV pulling to the side?
Let's take a look at some of the most common causes of ATV pulling to the side, and of course, here we'll talk about how to get rid of these problems. 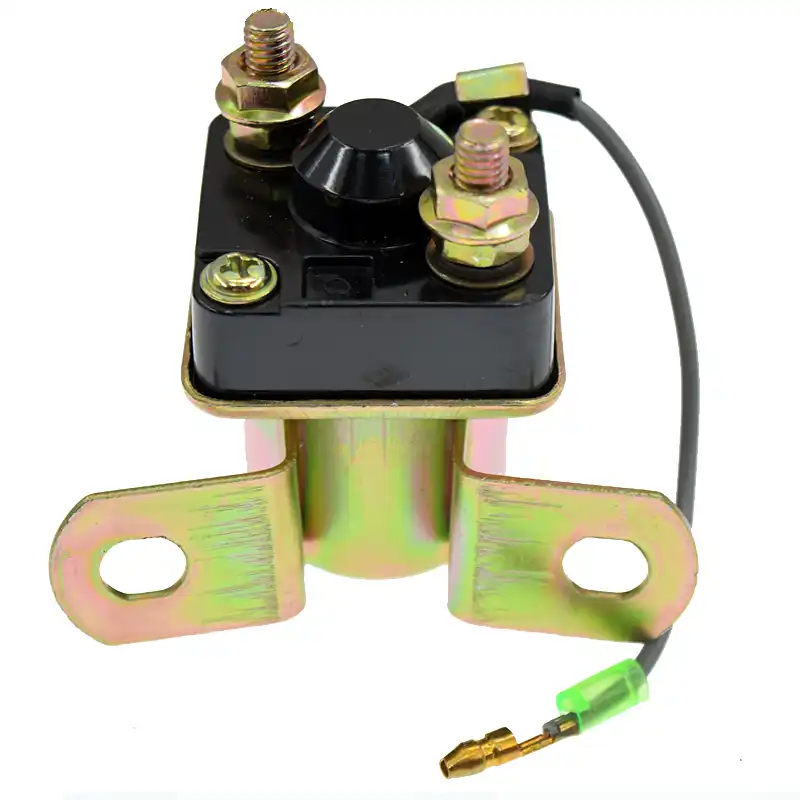
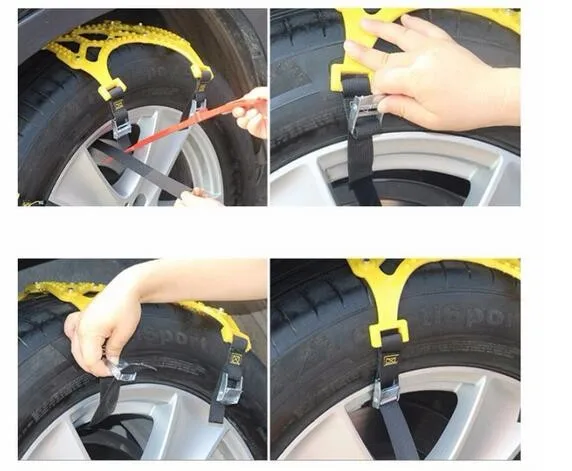
Although I don't have exact statistics to tell you which malfunction occurs most often, I still recommend that you start with what is easiest to check and fix before spending time and money on more unusual and potentially more complex searches. Control test one: ATV tire pressure check.
Let's look at what happens when ATV tires have different pressures. 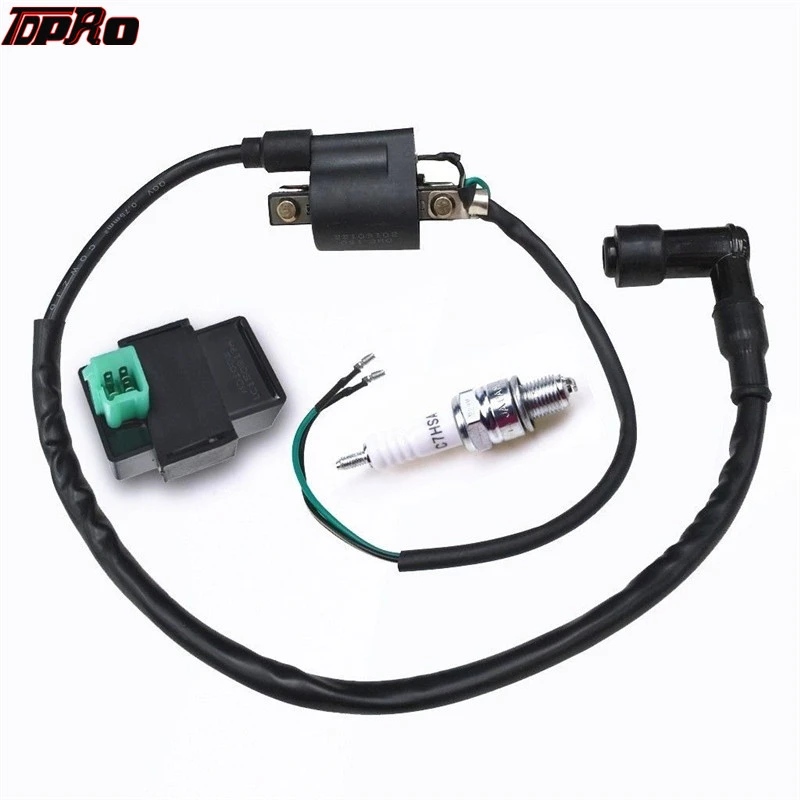 It is best to refer to the operating instructions, which must indicate the required air pressure in the wheels recommended by the manufacturer. The pressure in the wheels installed on the same axle of the ATV must be the same.
  If there is no such device in your kit, I recommend that you definitely purchase it. A very slight difference in air pressure in the tires may well be the reason that the ATV pulls to the side when driving in a straight line.
ATV wheels can wear differently over time, resulting in the diameter of one wheel being different from the diameter of another wheel. This can also cause the ATV to pull to the side. 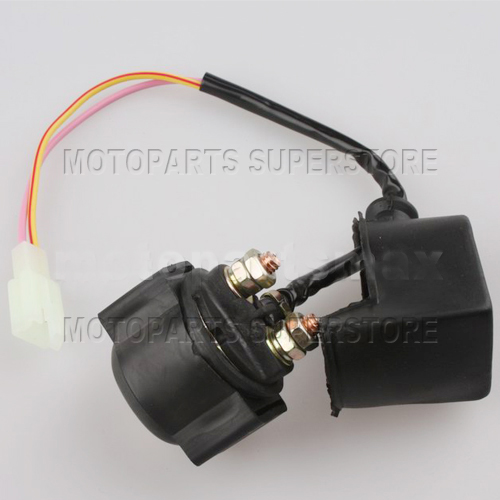
Control check two: checking the wear of the tie rods, ball joints, bushings and bearings

 The same goes for the ball joints on the tie rods.
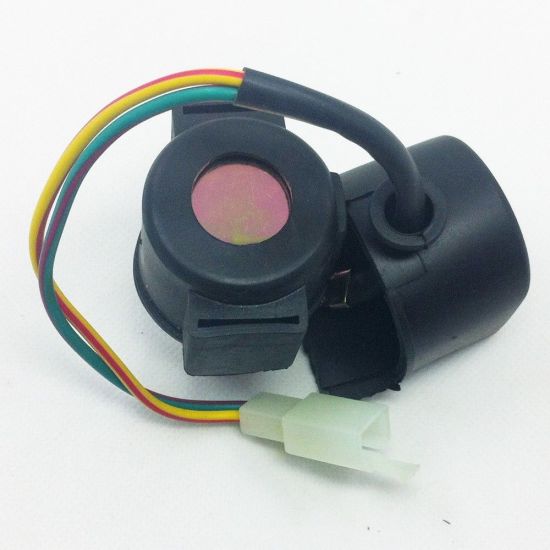
Complete the work with suspension lubrication. The running gear of ATV brands YACOTA , MOTAX , AVANTIS is equipped with special grease fittings through which you can easily lubricate the desired suspension unit. We have already told, in one of the reviews, using the example of a gasoline 125 cc ATV MOTAX T-REX , about the features of maintenance of the ATV suspension. Regular maintenance of your ATV will definitely prolong its life.