Tires are just as crucial as the engine when it comes to maintaining your car’s safety and performance. At some point, however, tires wear out and this compromises the car’s efficiency, especially in traction and braking ability which can potentially lead to fatal road accidents.
If any of your tires exhibit a pattern of excessive wear, it’s about time you change them. Changing tires involves taking off the rubber tread that is tucked inside the wheel’s rim, a grunt work that many would rather pass and hand to a mechanic.
But what if we tell you, popping the bead out of the rim is not too much of a mundane job if you are armed with the in-depth information on how to do so. Doing your own tires will save you a lot of money from costly repairs that should be otherwise spent wisely spent on other car-related maintenance.
With few hand tools and tricks, you can remove the bead off the rim yourself. But the easiest and quickest way to do it is by using a tire-changing machine. This article will cover both of these methods.
Prying the tire loose from the rim might sound intimidating especially if you are a novice or new to tire maintenance. But you don’t really have to be an auto mechanic or expert to do the task. All you need is the right tools, basic mechanic skills, and know-how. The following is an easy guide to carry out the goal.
What you will need:
● Lubricant (Alternative: liquid dish soap or oil)
● Crowbar, Prybar, Tire Levers, Tire iron (any of these)
● Presta or Schnader or any Valve Core Removal Tool (Alternative: Pliers)
● Screwdriver
● To break the bead manually, you need either one of these things: a Jack, a Knife or any other sharp cutting tool, a vehicle
● Optional: Tire Bead Breaker, Tape
The Procedure:
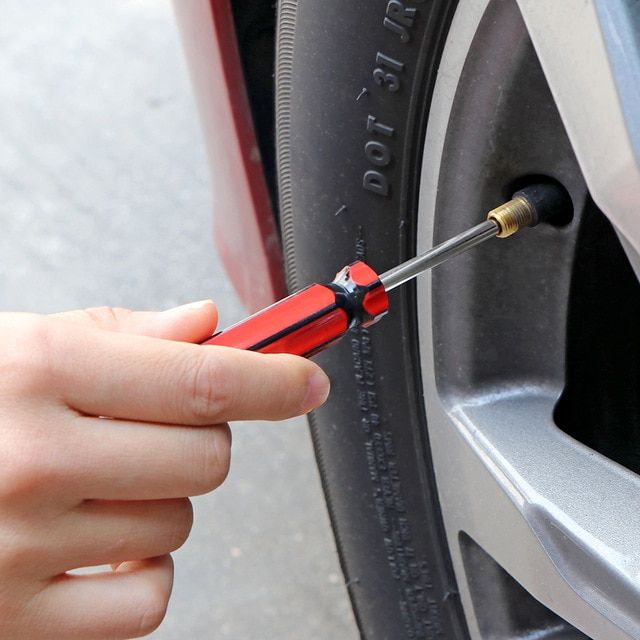
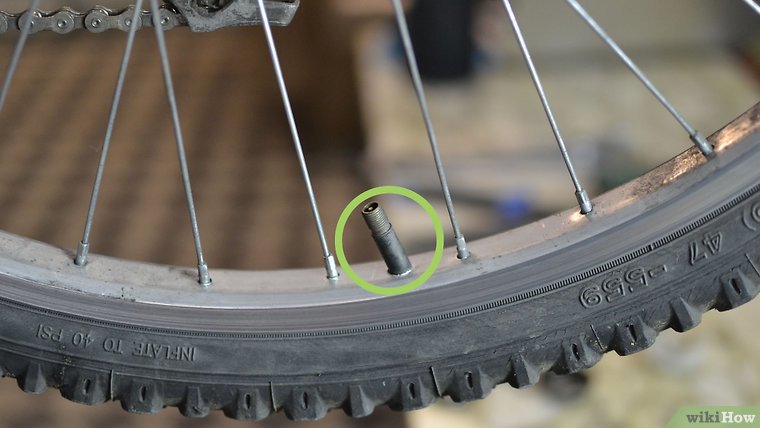 The air cap or valve core is a small pressure sealing device made of either rubber or metal cylinder located on the core which is where the tire is inflated from. You will need a Schrader or Presta valve tool to extract the air cap from the rim.
Thread the tool inside the valve stem and twist it in a counterclockwise direction. This should loosen and remove the cap off the tire. Then release and allow the air to exhaust.
A valve core removal tool is a small metal that resembles a small screwdriver. It is a handy tool that is relatively inexpensive and often available in a set for different valve sizes like that of the Awpeye 4 Pack Valve Core Remover Tool.
 There are three methods and tricks you can use to break the bead bundle between the bead and the rim.
● Drive and run over the tire you are working on. The aim is to force the rubber down so its easier for the bead to pop out. Hence when driving your vehicle over the tire, make sure that it is the rubber part you are driving onto and not the metal rim. You may need to run the car over it a few times to break the rubber part.
● Put the whole weight of the vehicle on the tire via suspension. The method involves raising the vehicle using a jack and partially lowering it. Once the vehicle is lifted, place the tire underneath the jack. Adjust the jack and lower the vehicle onto the bead part of the tire. Warning: Do not attempt this method if you are new to the process of car suspension unless there is an expert or professional supervision. The procedure requires lifting a car and working underneath it which is can be really dangerous to you and to your vehicle especially if you don’t know what you are doing.
● Cut the bead off the rim. You can cut through with it using a saw blade or a drywall knife. To cut it, follow the seam running alongside the bead, carefully not touching the metal rim. Be cautious as you cut because you don’t want to damage the metal rim To avoid the blade veering towards the tread, insert a wooden towel in the sections that are already cut.
If you are really having a hard time with the bead, you can easily get away with a bead breaker tool. A tire bead breaker is a handy tool designed to dismount the innermost diameter of the tire interfacing the wheel. The operation is so fast and easy it’s basically like opening a canned good! It’s also the safest way to de-bead without damaging the rim. To make the most of your purchase, invest in a well-designed bead breaker like that of BeadBuster XB-450. To date, this is the most affordable and efficient bead breaker.
 Once you have managed to break the bead, grease the edge around the rim as well as the bead by applying the lubricant. This will prep the area when prying the tire later on. You will find it easier to pop the bead off the lip of the rim easily once everything is lubricated. Use as much as a lubricant as necessary. To avoid accidentally scratching the metal easily while prying, you can also tape the edge of the rim prior to lubrication.
  At this point, it is only the bottom half that is loosened, you still have to work on the other half of the tire. So to do this, flip the wheel over on the other side and pry in the wheel off in the same fashion as you were prying in step 4. Use as many pry and screwdriver alongside lubricant as necessary.
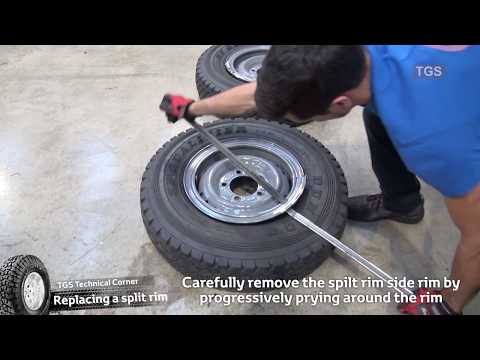
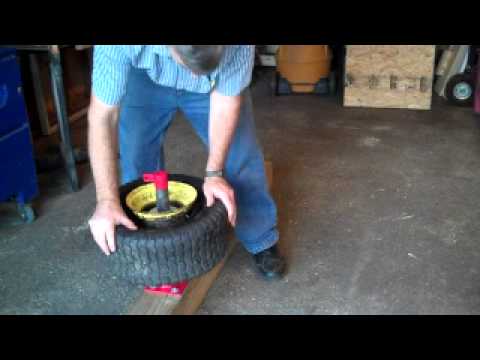
If you find taking a tire off a rim by hands too much of a task, time to pull out the big weapon. A tire changing machine skips most of the lengthy process of manually separating the tire from the rim.
Note that the tire changing machine we are referring to differs from that of the actual heavy-duty tire changing equipment technicians used in the shop.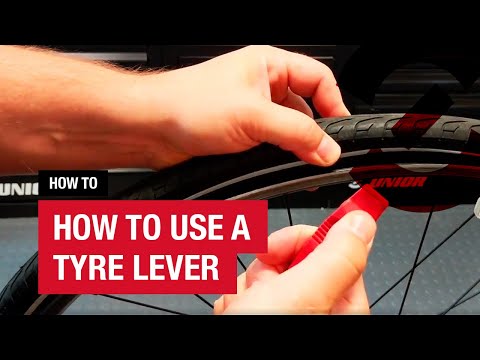 The manual tire changing machine is a rather portable and handy tool that requires no power hookups to operate. While the machine will mostly do the job, you will still need the help of a few hand tools.
What you will need:
● Plywood Board (Alternative: any strong wood surface that is at least ¾ inches thick)
● Manual Tire Changing Machine
● Tire Changing Rod (Alternative: any metal rod or tube with a pointed tip)
● Screwdriver
● Bolts (preferably 5 inches long and ½ inch wide)
● Presta or Schnader or any Valve Core Removal Tool (Alternative: Pliers)
● Marker or Pencil
● Lubricant (Alternative: liquid dish soap or oil)
● Optional: rug or paper
The Procedure:
 Using a marker, trace the machine’s base on the platform. Do put a mark on the holes or the location of the bolt as well.
Some prefer a block of concrete as a base because they are sturdier and stable. Others drill the machine directly on the floor. But note that you will need a mason drill to engage the bolts into hard cement. Nonetheless, the bolting process is the same as with the wood material.
 You will use it to expose the rim of the tire. Start the process by sticking the rod’s pointed end into the rim-tire joint. Using your hand or your foot, apply pressure on the wedge by pushing it down. This will gradually exposed the rim.
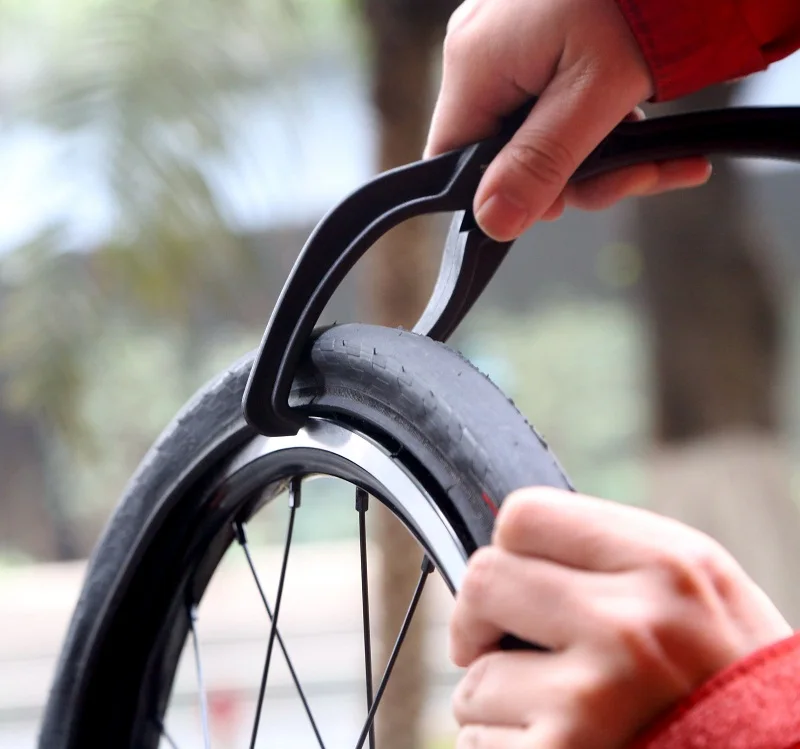 To avoid scratches on the rim while inserting the rim, you can wrap a rug or any cloth (a paper may do) around the spoke.
 Apply generous amount lubrication as necessary.
You may not be able to pry a certain section in one shot and that is fine. If this happens, simply go back by lifting the foot pedal using your foot to turn the rod counterclockwise.
Related video:
This article has thoroughly discussed the process of disengaging the tire from the rim and now it’s your turn to take the wheel. Sure, the entire process of changing your own tire– from removing the wheel of the vehicle to fitting new tires might seem lengthy and complicated but hey at least we have taken down one of its processes, namely removing the tire off the wheel. Doing your own tires will save you money and soon enough, you will be reaping the satisfying feeling of your hard work.
Over time and with frequent use, even the best tires will wear out. When your tires wear out, it’s best to change them as soon as possible, as worn-out tires reduce the vehicle’s efficiency in braking, increasing the chances of an accident.
Of course, to change a tire, you must remove it from its rim (or wheel). Removing a tire from the wheel is relatively easy and does not require highly specialized skills or equipment. It can be done manually, by hand or with a manual tire changing machine.
Removing a tire from the rim is a relatively straight forward process:
Here’s what you’ll need to remove a tire from a rim:
Place the tire on the ground or any level surface, and locate the air valve—a small rubber or metallic device. The valve has a cap, which you will need to take off (by twisting anti-clockwise) to reveal the valve core inside. The core is a metal cylinder in the valve, by which the tube in tire gets inflated, and removing it releases the air in the tire.
You will need to use a core removal tool to remove the core from the valve. The tool is similar to a small screwdriver; you put the end into the valve and again twist anti-clockwise to let out the air. The tools are inexpensive and are available in auto stores and online.
The bead is the edge of the tire attached to the rim. When the tire’s air pressure is sufficient, it keeps the bead firmly attached to the rim. Therefore, deflating the tire and with the application of force, you can separate the bead from the wheel and remove the tire.
There are several ways to remove the bead after deflating the tire. Some of these methods include:

This method is perhaps one of the simplest ways to disengage the bead from the rim without using any additional tools. Set the tire on the ground and drive over the tire. Doing so forces the edge down and out of the groove.
Sometimes you may need to repeat the process a few times before the bead breaks. However, take care to drive only on the rubber and not the metal, which may damage the rim.
Lowering a vehicle over the tire is another relatively simple way to break the bead. It involves raising the car with a jack and then pushing part of the tire under the vehicle. The car gets lowered, resting on the rubber right next to the metal wheel, consequently pushing the edge of the tire out of its groove.
However, do not attempt this method if you do not fully understand how to jack a car, as there are some technicalities involved.
You can also cut through particularly tough beads using a sharp knife.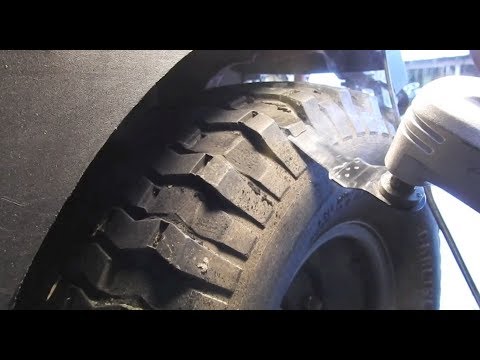 However, cutting through will cause largely irreparable damage to the tire. To cut, lay the tire flat on the ground, and saw along a section nearest to the edge, taking care not to veer toward the metal wheel to avoid damaging it.
As the name suggests, a tire bead breaker is a tool designed to detach the tire from the wheel. This tool is the easiest way to detach the bead without damaging the rim.
You may use any available lubricant such as oil or dish soap, applying generous amounts around the edges of the rim and tire. Ensure that the lubricant gets under the rim too. The purpose of lubricating is to make it easier to pull out the tire over the rim’s edge.
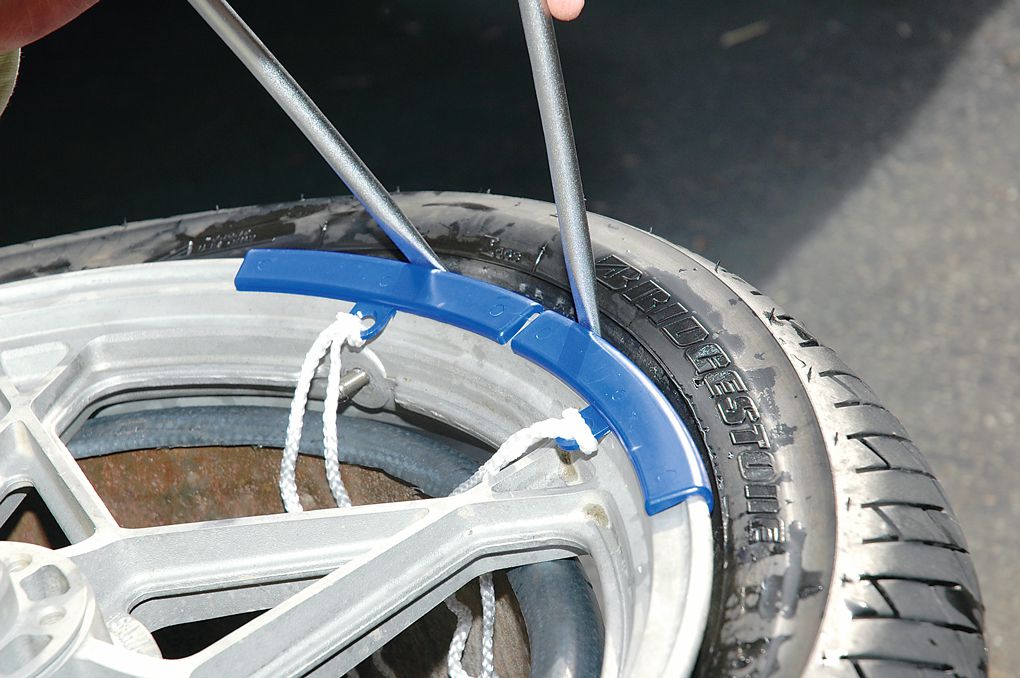
Having lubricated the wheel and tire edge, use your feet to press down on the rubber, creating an opening. Carefully push the pry bar into the newly created opening, and lift the tire up and over the edge of the rim.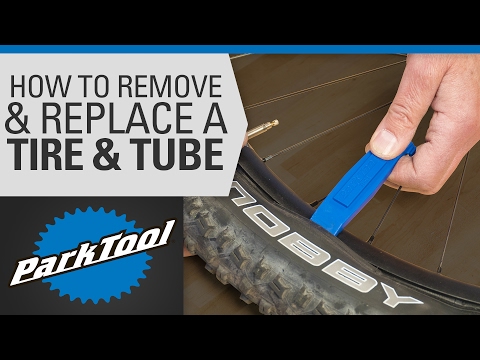
Hold the pry bar in place, and insert the flat-head screwdriver next to it, using the screwdriver to pull out the edge over the entire circumference of the wheel. Flatter pry bars and screwdrivers work best for this task.
After successfully extracting the bead, you will need to do the same thing on the other side. Start by applying generous amounts of lubricant to the edge of the rim and bead, again ensuring that the lubricant gets under the rim.
Like before, press down the tire and insert a pry bar into the opening, lifting the tire over the rim’s edge. Again use the screwdriver to pry the tire out on all sections. At this point, the tire should be entirely free of the wheel, and you can easily lift it from the tire.
While removing the tire from a rim by hand is not an overly complex procedure, it is a rather hands-on process, and not everyone prefers this method.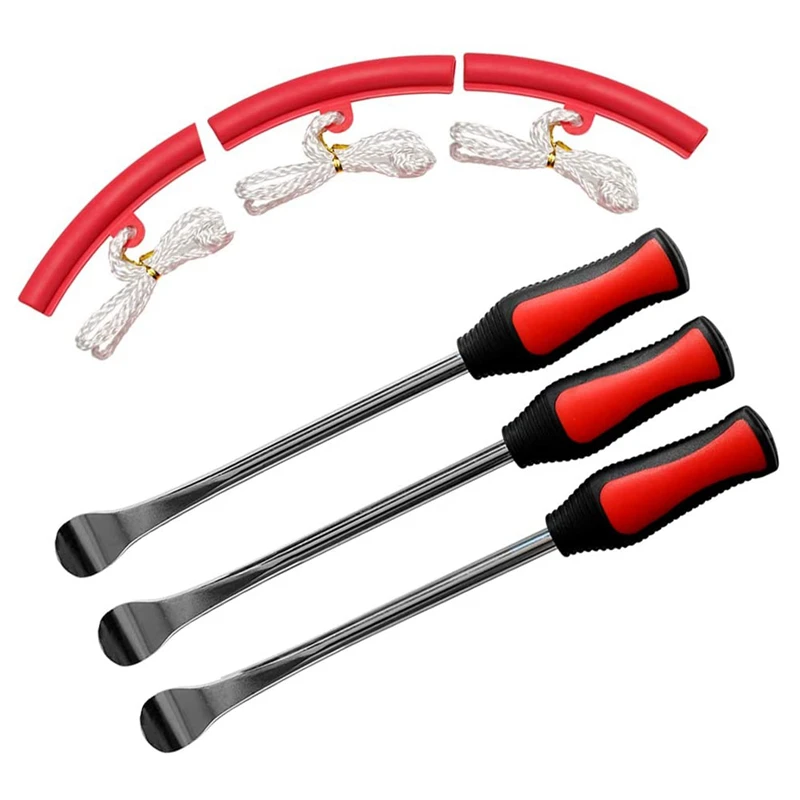
One other way to remove the tire from the rim without going to the mechanic is to use a manual tire changing machine.
This compact machine allows you to skip the greater part of the tedious process of separating the wheel from tire, and is manually operated, unlike those found in a mechanic’s shop. Manual tire changers are cheap and available in stores and online. The machine also comes in handy if you don’t know how to put a tire on a rim by hand.
In addition to the machine, you will need:
Place the machine over the plywood board and use a pencil or pen to trace the outline onto the board, indicating the bolt positions. You may use boards other than plywood, just ensure that it is of sufficient thickness (at least ¾ inches).
Screw the bolts into the wood, at points marked for holes. Using 5 inch long bolts with ½-inch diameter works best for this.
Flip the wood over and position the machine over the bolts, securing each bolt with a nut and washer.
An alternative to wood is to bolt the machine to a concrete floor. This option affords greater stability, but it is more tedious to achieve, as it requires the use of a masonry drill.
Locate the air valve on the side of the tire, removing the cap to expose the core within. Insert the core extraction tool into the valve and twist counterclockwise to deflate the tire.
Set the now deflated tire and rim on tire changing machine. Ensure that you hook the rim to the small triangular-shaped nub at the base, and that the front of the wheel faces upward.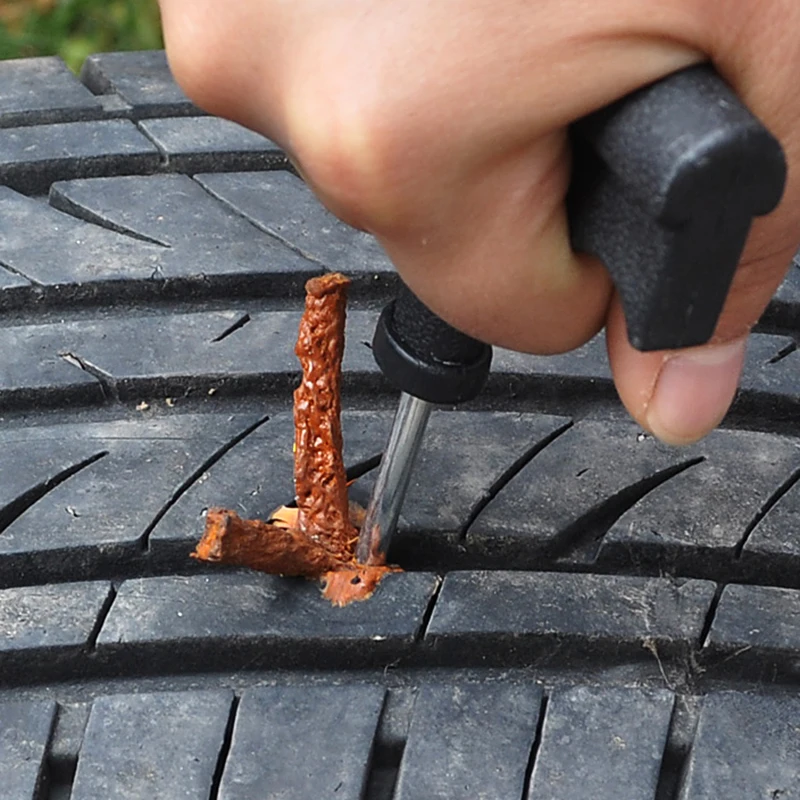 Next, drop the machine’s arm onto the rubber at the edge of the rim. The arm resting on the rubber is wedge-like, to fit between the metal wheel and the rubber.
Typical tire changing machines come with a changing rod to help in removing the tire. However, any metallic rod with a pointed end will suffice. Insert the changing rod into the open end of the arm, and slowly apply pressure; this will cause the arm to press down on the rubber and reveal the wheel.
Rotate the tire, pressing down the tire changer arm on all points along the edge of the rim. Afterward, flip the tire and repeat the process to break the bead on the other side.
Set the tire over the machine’s top by sliding it over the central tube connected to the machine arm. Next to the central tube is a smaller spoke that should pass through one of the rim’s lug nut holes.
Place the bracket piece, which is a large ring with four spokes attached. The spokes prevent the tire from tilting or turning when you start to pull the bead over the rim. Finally, place the cap over the bracket piece and twist clockwise to secure the tire firmly.
Before you attempt to remove a tire, apply generous amounts of lubricant to the edge of the wheel and adjoining rubber, ensuring that the lubricant gets under the rim as well.
Gently push the pointed end of the changing rod between the rubber and the rim, then lift the bead over the rim’s edge. Slide the rod along the circumference of the rim, using the central tube as leverage.
When all the tire sections are free from the wheel, push the rod down to the bottom of the tire and repeat the process to free the tire on the other face of the wheel.
You can remove a tire from a rim either by hand or using a manual tire changing machine. Hand removal can be tedious and requires screwdrivers, pry bars, lubricants and a core removal tool. You will need the same set of tools when using the changing machine for removing the tire.
The manual changing machine also comes in handy if you do not know how to put tire on rim by hand.
Whichever way you choose, the processes of removing a tire from a rim are fairly simple and easy to follow.
Contents
You can remove the tire from your bike yourself.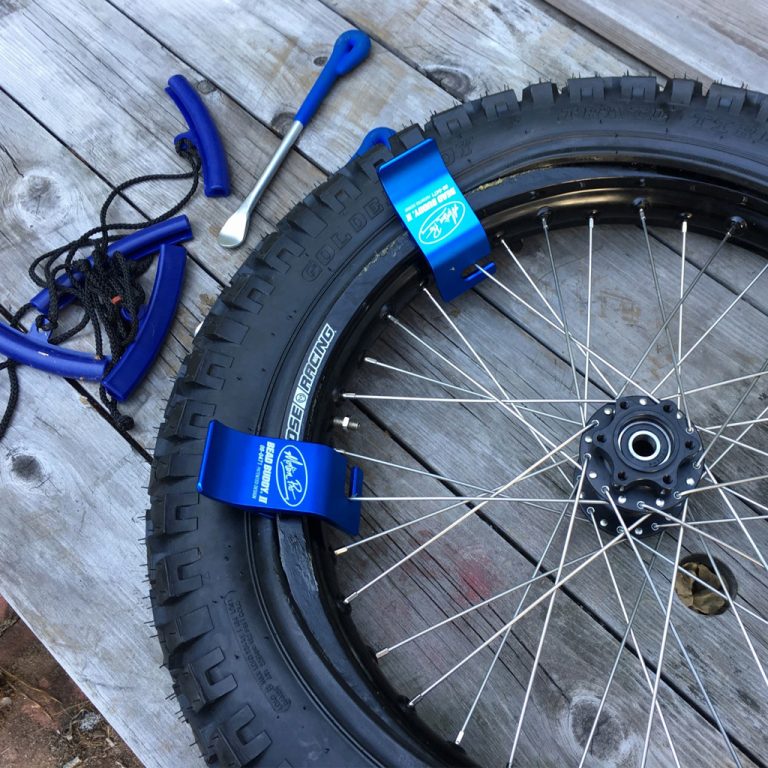 But in order to cope with this matter without problems, you need to know the sequence of actions for dismantling parts. It will also be useful to familiarize yourself with the list of necessary tools and understand in which cases the tire must be removed.
Under certain circumstances it is necessary to remove the tire from the bicycle rim. Sometimes this part needs to be replaced.
There are several reasons:
Removing a tire from a disc has its own algorithm of actions.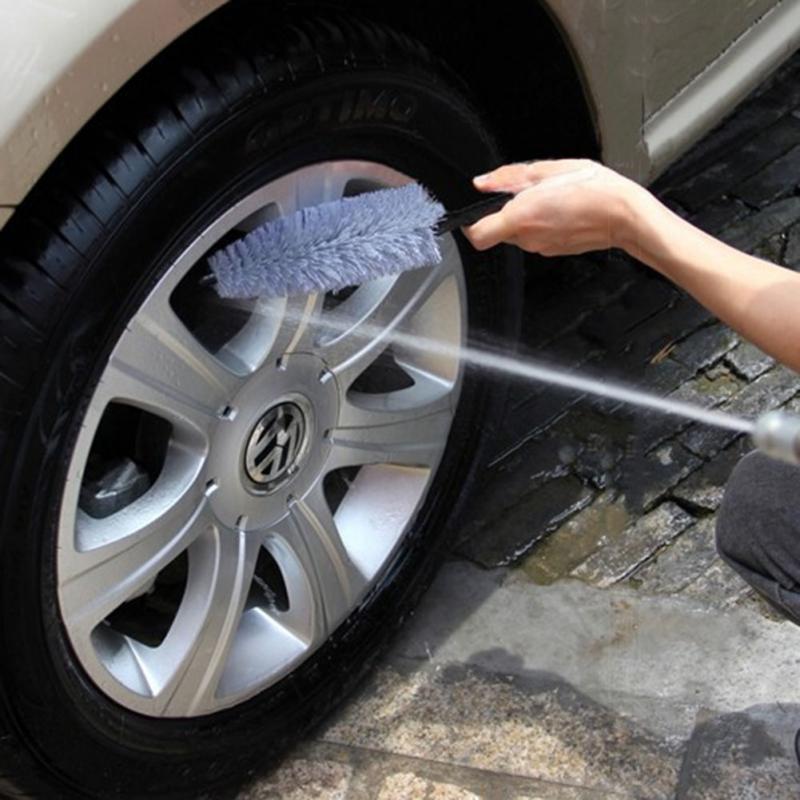 It will require a few special tools. It is important to remember: it is undesirable to press too hard on the sidewall of the tire when removing. Also, the tool should be free of burrs and sharp edges.
The dismantling steps must be followed strictly, accurately and carefully.
To do this, you will need the following tools:
Once you have the necessary tools ready, you can start removing the tire from the rim.
Work steps:
 Such an action is performed so that it does not interfere in the following steps. The cable must be carefully pulled out of the connector.
 Anyone can pierce the camera while driving. And such an unpleasant situation, requiring the removal of a tire, usually takes you by surprise. Often a cyclist does not have the necessary tools with him.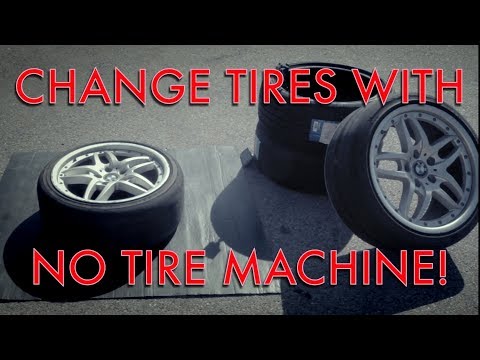 To replace a tire, you need to have at least a spare set.
Procedure:
Comfortable riding requires optimal tire inflation. In case of lack of air in the tires while riding, the cyclist has to exert more effort.
Tire life is reduced. If the amount of air exceeds the optimal threshold, grip becomes worse. And, as a result, a tough ride and an increase in the possibility of a camera puncture.
In order to avoid punctures, scuffs and other problems, experts advise you to follow the rules for using bicycle tires.
General recommendations:
Removing a tire without the help of specialists is easy. Many cyclists succeed right away. Accuracy, attention and the availability of suitable tools are all necessary conditions for a positive result. And so that the process of dismantling or replacing tires occurs less frequently, it is advisable to follow the rules for their operation.
Practical advice on how to remove a tire from a wheel rim with minimum effort.
I often see how people suffer when beading a wheel, and although in this procedure is nothing supernatural many manage to break plastic mounting blades and end up buying metal. In my short cycling practice, I have explained many times and showed how to do it quickly and easily, and sometimes even do without montazhek. Therefore, I decided to drop a couple of lines here, maybe it will fit someone.
So, we take the wheel, let the air out of it. The less air in the chamber, the easier it is to remove the tire.
Separate the tire from the edge of the rim and move it to the middle. Almost everyone rims in the middle there is a groove, the diameter of which is less than the diameter of the sides tires.
Starting on the side opposite the nipple cameras.
We move the tire beads into the groove of the rim
wave" in side of the nipple.
As a result, the tire bead rises above the edge rims.
Now it is enough to slightly pull the tire, pick up the bead with a pry bar and without any effort to throw the bead of the tire over the edge of the rim.
That, in general, is the whole procedure. The second side of the tire is removed in the same way. first.
When putting on tires, do everything in the same way, but before putting on the second side you need to slightly pump up the camera and make sure that it is nowhere twisted and didn't budge.
Car enthusiasts often change tires - either from summer to winter, then from winter to summer, then when buying new tires, then in case of damage and punctures. Tire replacement is usually entrusted to service stations. But, in order to save money or for other reasons, motorists can master this procedure on their own. To replace rubber with your own hands, you need a wheel wrench, a pair of mounting blades, a jack and a car pump. However, without knowing some “secrets”, it is difficult to replace a tire on your own. We'll talk about the tricks of replacing a tire now.
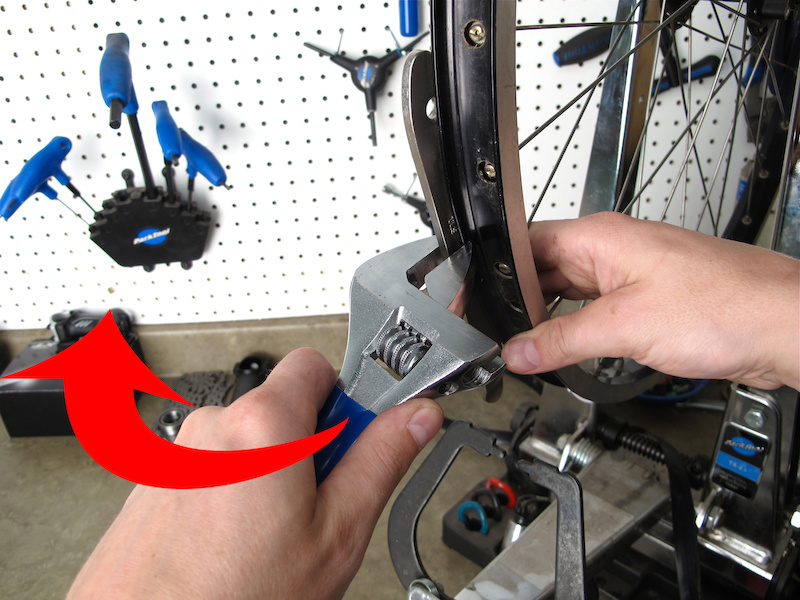
First, you need to remove the old tire from the rim. To do this, raise the car with a jack, unscrew the fixing bolts with a wheelbrace and remove the wheel from the car. Lay the wheel on the ground with the valve up, remove the nipple from the valve and let the air out of the tube or tire (if the tire is tubeless). After that, “drown” the valve inside the tire and stand with your feet on the wheel so that the sidewalls of the tire are wrung out from the rim.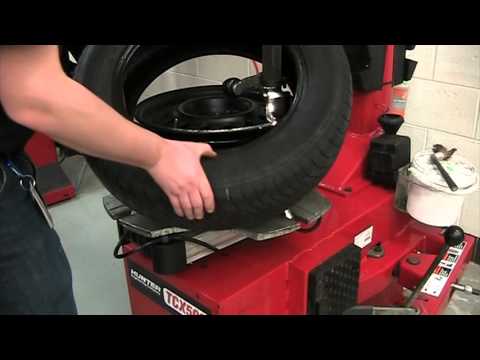 Sometimes the tire "sticks" to the rim and you have to make an effort. After you managed to wring out the sidewalls, insert the mounting spatula into the gap between the rim and the sidewall of the tire. Working with two mounting blades, bring the sidewall of the tire out of the wheel rim, and pull out the chamber into the resulting gap. In the same way, bring the other sidewall of the tire through the same rim, and remove it from the disk. Be careful not to damage the disc. Especially carefully must be handled fragile.
Before installing a new tire on a rim, check its condition - carefully inspect it for defects and damage, make sure that . Also check the condition of the disk, for mechanical damage, the absence of dirt and rust, wear of the rim flanges. Remove the old balance weights and the old valve if the tire is tubeless.
When installing new tires, remember to take into account . Namely, the recommended direction of rotation, which is usually indicated by an arrow on the sidewall of the tire.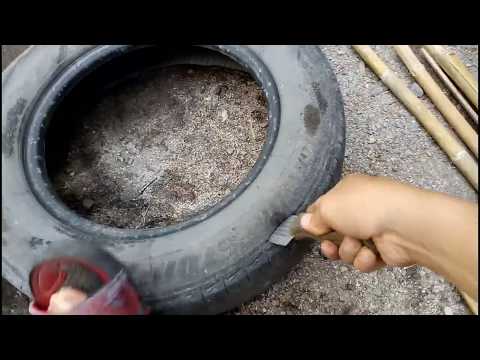 For an easier and more gentle installation of the tire, you need to apply a special lubricant or soap solution to its bead and bead heel. Don't over-lubricate or the tire will slip on the rim!
Mounting the tire on the rim is carried out in the reverse order with respect to dismantling, that is, first one sidewall is put on the rim of the rim and, if it is a tire with a tube, then the tube is inserted, while its valve must enter the hole in the rim. After that, the second sidewall of the tire is put on.
If the tire is tubeless, then the task is more complicated. Unfortunately, it will not be possible to inflate it with a conventional hand or foot pump or even a car compressor until the tire beads “sit” tightly on the rim, since the air will simply go out into the gap between the tire and the rim of the disc. But there is a way out!
To solve the problem, inflate any car wheel to 3.5 - 4 atm., remove the hose from the pump, put one end of this hose (the one without a fitting) directly on the valve of a freshly mounted tubeless tire, after removing the nipple from the valve , and put the other end of the hose, equipped with a fitting, on the “pumped” tire. At the moment of putting on the fitting, a large portion of air will enter the empty tubeless tire and "put it in place" on the disk. The beads of the tire will sit firmly on the rim, and the tire can now be inflated in the usual way. At service stations, special compressors with volumetric receivers are used to inflate tubeless tires, but, as you can see, you can solve this problem yourself, at home.
Do not forget that after installing a new tire, the wheel must be re-balanced.
Not everyone pierces their own wheels, and not everyone repairs their bikes on their own. However, understanding how to remove a tire from a bike and put it on, what it takes and how to do it easily and without unnecessary problems, is useful for most riders.
When do we remove a bicycle tire?
Depending on the design of the bike, you will need different tools.
The minimum set is hands (preferably with gloves), nothing else is needed. What is used to facilitate the process?

First step using stripping
So what do you need to do to remove a tire from a bike?
 Usually this stage is already easier.
 Only repair of the camera is limited to points 1-7.
The reverse process is the same:
Do not forget that all actions should be carried out correctly. Rubber does not like a heavy load, especially thin and soft, which is used in cameras. All operations, when the camera is inside the tire, should be carried out delicately.
Do-it-yourself tire removal is no big deal and most riders can do this repair exercise the first time. Accuracy of execution, the availability of convenient tools - and changing the camera will not be difficult.
Unfortunately, the violation of the integrity of tires and bicycle tubes is not a rare phenomenon, so the topic of our article today is how to remove a tire from a bicycle wheel and put it back on. To successfully cope with this task, you need to at least superficially know the design of a bicycle tire and know the special terminology. So let's get started.
Bicycle tire includes 4 elements:
Its purpose is to securely fasten the tire to the wheel rim of the bike. The materials for its manufacture are Kevlar (most often), synthetics or steel wire. Steel beading cable - the most budgetary. The cost of Kevlar cables is much higher, they have less weight, they are easy to store when rolled up. Kevlar cable can be taken with you on a trip as a backup. It won't take up much space.
This is its frame or foundation. This element largely determines the strength of the tire. This is a diagonal weave of nylon threads. Weave density is determined by the number of threads per 1 inch. This figure is in the range of 24-130. Naturally, the higher this figure, the better the strength qualities of the tire.
This is a rubber cover. There are two varieties.
This is the part of the tire in direct contact with the road. The performance of tires depends on the tread depth and type of pattern.
Bicycle tires are made from ordinary rubber or polymeric materials.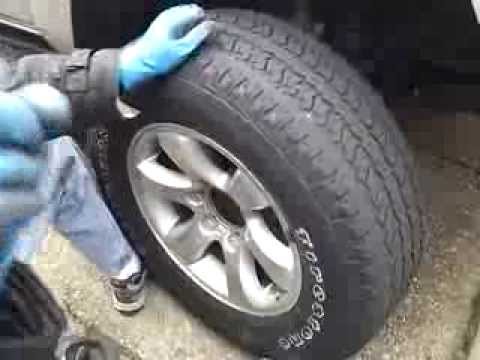 Rubber has a better grip on the surface, but in terms of wear resistance it is inferior to the compound. The cost of the compound is lower, but when driving off-road, it has proven itself better than rubber. By type, 4 main types of tread can be distinguished: slick, semi-slick, mountain, winter. Each of them behaves better in the environment for which it was created. Slick on the road, semi-slick off-road, dirt road, the winter tread has a spike for ice.
You may need to remove a bicycle tire in the following cases:
If desired, the tire can be removed and replaced without the use of tools (this will be discussed in detail). But, if you follow all the rules, then they can come in handy:
To remove a tire from a bicycle wheel, proceed in the following order:
 As a rule, it is now much easier to work.
 To mount, follow these steps:
It remains to mount the wheel and apply the brakes. When working with a tire, do not forget that the camera is made of soft and thin material. All actions must be carried out so as not to damage the camera.
The possibility of a tube puncture always exists. The situation when you need to remove a tire can be taken by surprise, so that you do not have any tools with you. It's almost impossible to do this without tools. To replace it, you must have a spare kit if you took it and what kind of tool you still have. By default, we will assume that you still took the wheel repair kit for a bike ride. So, if you don't have montages, how can you deal with this problem?
 Continue in the same way to move to the nipple, keeping the tire near it;
 For a comfortable ride on a bicycle, an important point is the optimal tire inflation. With insufficient inflation, the cyclist has to exert more force while riding, the bicycle tires wear out faster. Over-pumping reduces traction, makes the ride harder, and increases the risk of tube puncture.
To minimize the risk of punctures, look for tires with good side coverage when purchasing. Another indicator is cord weaving. The denser it is, the better the product. A useful device is a special anti-puncture tape located between the tire and the chamber.
Be sure to take a tire repair kit with you when you travel. This will allow you to quickly deal with the trouble.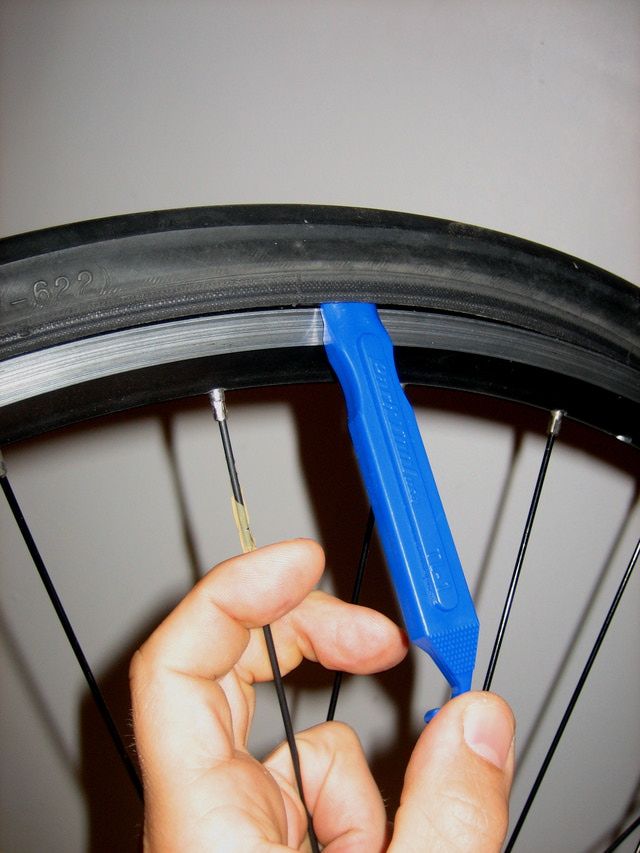
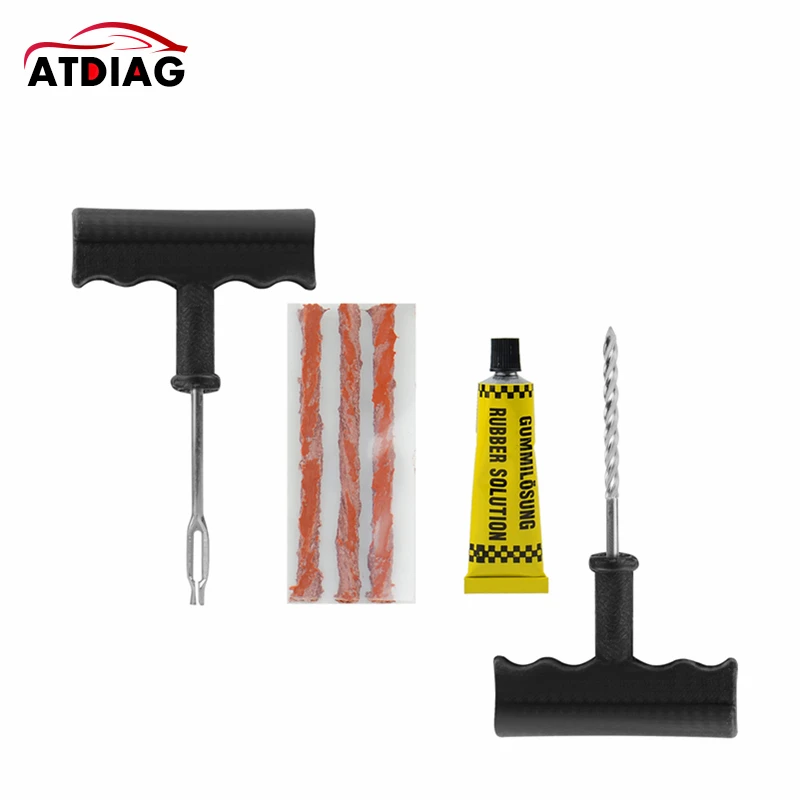
To repair tubeless tyres, bikers typically use:
The most common repair tool is a cord harness. This is a nylon strip impregnated with an adhesive compound. The harness is mounted using two awls: a spiral and an adjusting one. This method is cheap, but quite effective. The results of the repair are enough for about 6 months.
Rubber band - more expensive, but quite reliable option. Before installation, it is lubricated with glue, which is recommended by the manufacturer.
"Anchor" - the same tourniquet, but ending with a patch.
In any case, the use of harnesses is not the final repair. Only masters from tire fitting can qualitatively repair a bicycle wheel.
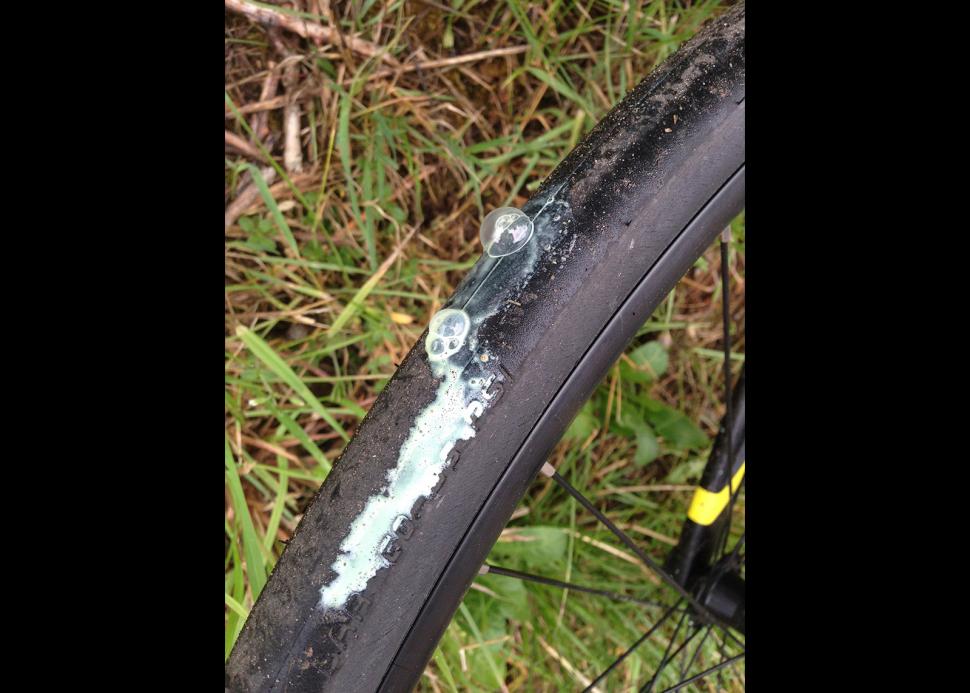
The use of sealant is a quick but short-term tire repair that will allow you to get to the tire shop without any problems. The ease of use is just phenomenal. It is only necessary to pump the composition through the tire valve.