Let us help you test and troubleshoot your motorcycle or ATV charging system – quickly and easily. You can do it – you just need the correct information, presented in an easy to follow format with lots of full color photographs. Start saving money now!
Are you experiencing trouble with your motorcycle battery or charging system? Do you want to gain a solid understanding of how charging systems work? This charging system manual applies to everything from ATV’s, motorcycles, snowmobiles and personal watercraft yet is not just another watered down booklet full of theory. This manual will show you how to troubleshoot your charging system properly.
And you’ll pay absolutely no shipping fees or have to wait for the mail to arrive because the charging system book is available for download right here. Written by an expert motorcycle instructor with fourteen years of experience teaching motorcycle electrical troubleshooting and repair at AMI (now WyoTech) and MMI (Motorcycle Mechanics Institute). This charging system help system will give you insight into the operation and testing of motorcycle and ATV charging systems and the components involved.
Our charging system manual unravels the mystery behind your charging system in plain English. You’ll never need to visit a repair shop again and you’ll never have to blindly throw parts at your charging system. This online charging system manual will show you how to pinpoint problems and solve them efficiently.
The information in this manual will allow you to:
Test & Troubleshoot ATV Charging Systems, Test & Troubleshoot Motorcycle Charging Systems, Test & Troubleshoot Personal Watercraft Charging Systems. You’ll be able to Save money & Save Time by Doing it yourself!
Subscribe to our online Charging System Testing and Troubleshooting manual now and you’ll get immediate access to the information you need to test and troubleshoot ATV charging systems, motorcycle charging systems, personal watercraft charging systems and snowmobile charging systems.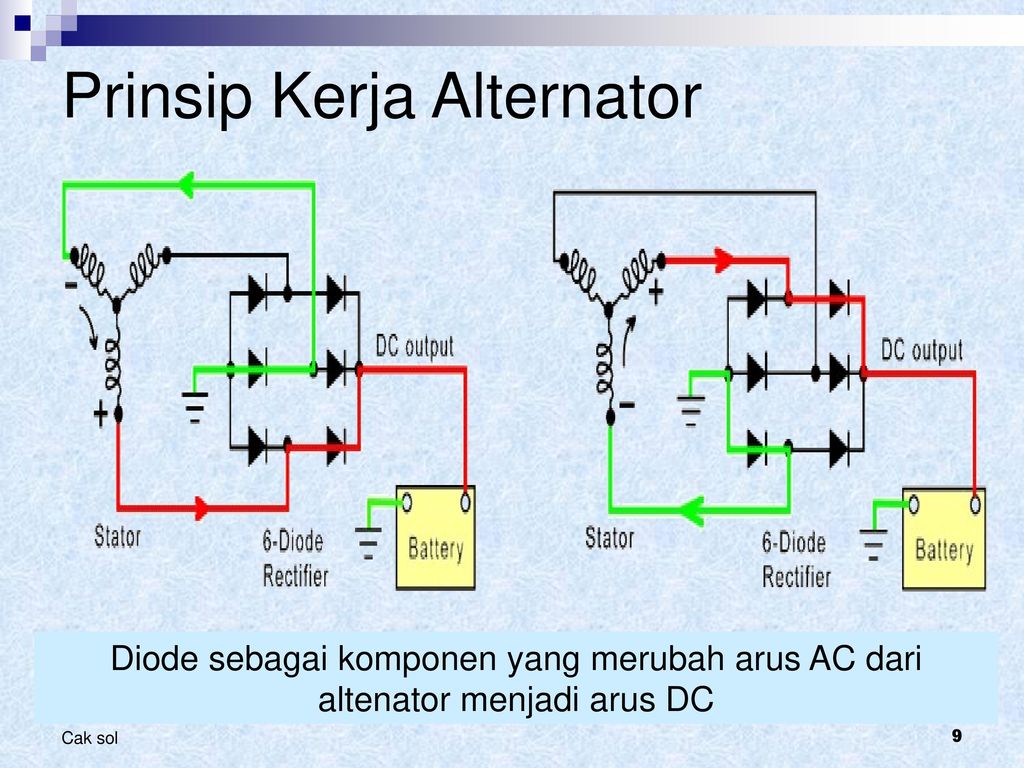
Save money on repair bills – gain confidence through understanding your charging system and be sure you are not being charged for unnecessary components or repairs. Plus you’ll have the satisfaction that comes with doing a job yourself and doing it right.
Included in this manual are descriptions of the different types of common charging systems, the components and their functions and, of course, what to do if your battery goes dead. A list of terminology and color codes by brand make it easy to understand and perform the test procedures. Detailed step-by-step instructions accompanied by full color photos allow even the inexperienced do-it-yourselfer to test and troubleshoot their charging system using only a few inexpensive tools that you may already own. Don’t pay someone else to do what you can do yourself in well under an hour.
 com Your JavaScript is disabled. This site requires JavaScript.
Delivery options and delivery speeds may vary for different locations
Sign In
or enter a zip code
Email * Password *
REPAIR & HOW TO
MAINTENANCE
TROUBLESHOOTING
GUIDES
TIPS & TRICKS
ALL ARTICLES WATCH VIDEOS ABOUT US SHOP PARTS CONTACT US
When your Honda ATV is having charging system problems, troubleshooting the issue only requires a few simple tests.
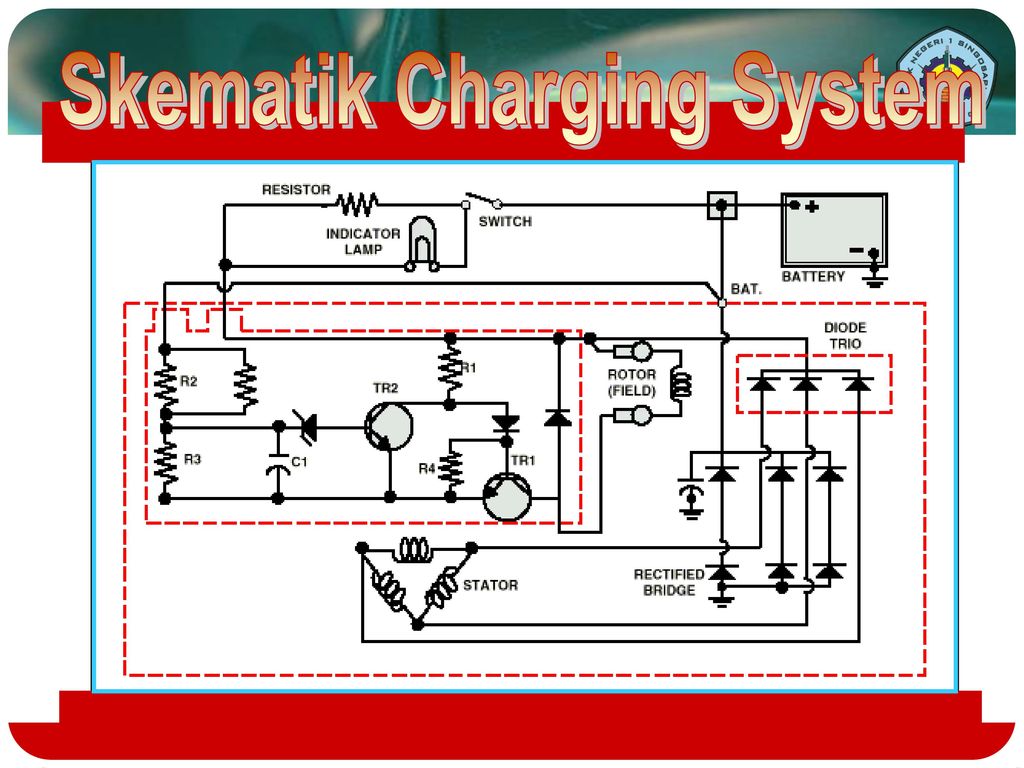
An ATV’s charging system is made up of three basic components that work together to get your machine running: a battery, a stator and a
regulator-rectifier.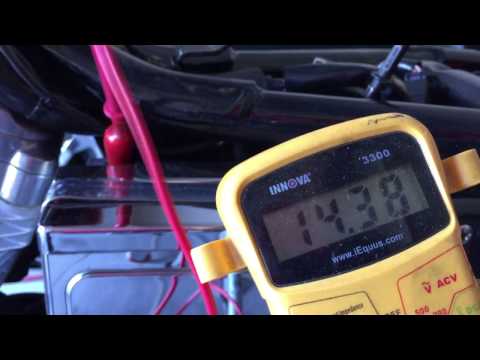 Watch the video above and read on below to learn how to troubleshoot charging system problems on a Honda Rancher TRX420.
To get to the charging system on your Honda Rancher, simply pop off the seat by lifting the tab behind it and pulling it out, then sliding off the panel below it. No tools needed.
Watch the clip below to see how to access the charging system on a Rancher 420.
Start with the simplest thing first: testing the battery. The most common electrical and charging system problems usually stem from a weak or dead battery.
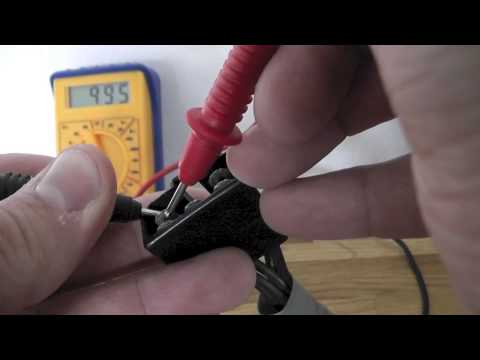
Troubleshooting Honda Rancher 420 Charging System: Battery TestingSet a multimeter to DC volts and with the ignition off, connect the probes on the multimeter to the respective positive and negative battery terminals.
A healthy reading should be above 12.3 volts. If the reading is below that, set the multimeter to AC volts, start the engine and let it idle. The AC voltage reading should also be at least 12.3 volts.
If the reading is below that, the battery might still run but it’s not getting enough charge, which will end up killing the battery. The next step is to test the stator.
Watch the clip below to see the battery testing segment of our Honda Rancher 420 charging system video.
To test the stator, push the button or lever on top of each plug connected to the regulator-rectifier, and use a screwdriver to gently pry off the two plugs that connect the battery (the one with two wires) and the stator (the one with three wires) to the regulator-rectifier.
Troubleshooting Honda Rancher 420 Charging Problems: Stator TestingSet the multimeter to AC volts, then start the engine and let it idle to get an AC voltage reading. A healthy AC voltage reading will be between 18 and 22 volts.
Connect the probes of the multimeter to each phase of the stator plug in the following sequence to get a voltage reading:
Each phase or winding should produce a voltage reading of 18 or above. Any reading below that from any of the three phases means the stator needs to be replaced. Otherwise, the stator is working as it should.
If the stator is healthy, the culprit for your ATV’s charging system problems is going to be the regulator-rectifier, which should be tested next.
Watch the clip below to see the stator testing segment of our Honda TRX 400EX charging system video.
Troubleshooting Honda Rancher 420 Charging Problems: Regulator/Rectifier TestingRemove the regulator-rectifier from the unit by taking off the 10mm bolts that hold it in place, then set the multimeter to diode.
NOTE: This test is only meant for this particular ATV’s regulator-rectifier. Testing procedures for regulator-rectifiers vary between manufacturers.
For the forward bias diode test, ground the negative probe of the multimeter into the battery connection port of the regulator-rectifier and using the positive probe of the multimeter, touch each one of the three diodes inside the stator connection port. Each diode reading should produce about 0.5 volts.
For the reverse bias test, ground the positive probe into the battery connection port and check each diode in the stator connection port again with the negative probe.
If any of the diodes reads anything other than 0.5 on either test, such as an OL (open loop/open circuit), the regulator/rectifier unit is faulty and needs to be replaced.
Installing and Testing New Regulator/RectifierInstall a new regulator-rectifier, then crank up the engine, set the digital multimeter to DC volts and connect it to the battery just to make sure the new regulator-rectifier unit is charging.
The new regulator-rectifier should produce a reading of 14 volts or above. Anything less than 14 of course means the unit is faulty, but otherwise the new regulator-rectifier is working properly.
Watch the clip below to see the regulator/rectifier testing and installation segment of our Honda Rancher 420 charging system video.
body
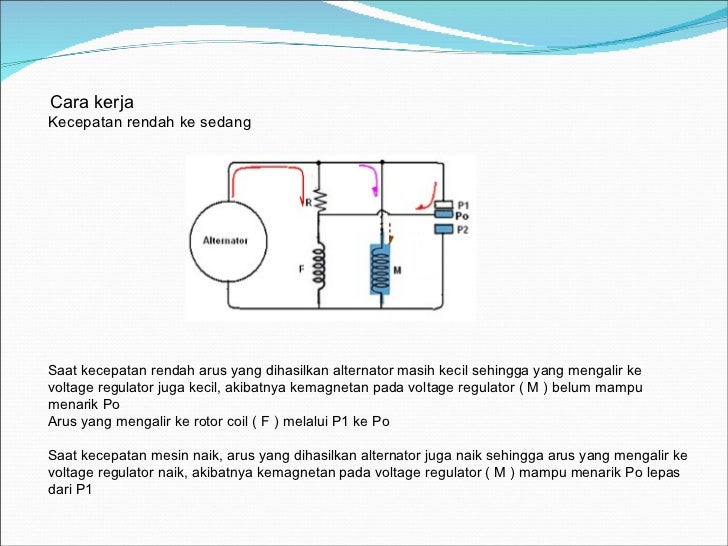
The generator is one of the main mechanisms of any ATV. During the operation of the ATV, it creates an electric current from the rotation of the crankshaft. During the operation of equipment, it is constantly in operation, so after long-term use there is a possibility of its breakdown.
All ATVs presented on the page https://sh.sh3011.ru/kvadrocikly/cforce-600-eps.html are powered by internal combustion engines. With the help of a powerful motor, the necessary cross-country ability and speed are provided. While the engine is running, the generator continuously generates electricity, which is used to power various electrical appliances and the ATV.
ATV alternator breakdowns are not uncommon, due to the constant operation of this unit. If there are problems with its functioning, there is usually a serious disruption in power generation. If this happens, then you can independently check the main elements of the entire system. To carry out verification work, you can use a conventional multimeter. Everything must be done in the following sequence:

ATV alternator repair procedure involves replacing it because this unit is rarely repaired.
Repairing an ATV alternator is a complex process, so ATV owners most often just replace it with a new unit. The disassembly process includes the following steps:
This completes the dismantling work. Installation of a new unit is carried out using the same tools, only in reverse order. When installing the right engine cover, a new gasket must be installed. If it is not there, then it is best to coat the surfaces to be joined with sealant to prevent moisture from penetrating into the mechanism. On the site https://sh.sh3011.ru/ you can learn more about the features of repairing ATVs and checking the operation of the main components and assemblies.
Many riders don't know how to properly charge their ATV battery.
In fact, if you don't properly charge your ATV's battery, you can cause extremely significant damage.
If you're puzzled too, then this is your lucky day, because I'll most likely show you in detail how to properly charge an ATV battery.
Contents
The ATV has a built-in engine-powered charging system. But the current it provides is not very high.
You can charge the battery during long trips, but this is not always practical. Instead, you can use an external charger.
I will give you 3 easy ways to charge your ATV. By following the 3 steps below, charging your ATV is a breeze.
Before starting all the work, it is necessary to prepare some tools in advance so that you can better charge your ATV. With the right tools, the process is so simple that just about anyone can complete it.
When all the tools are ready, let's get started.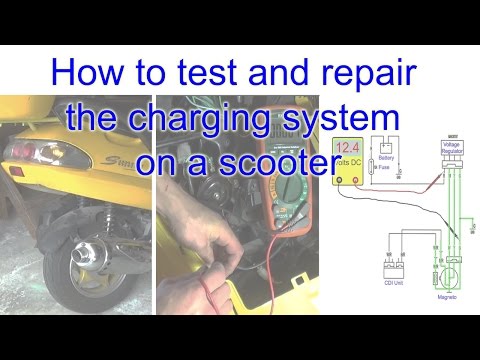
The battery and charger must remain dry throughout the charging process .
In addition, the battery should be somewhere well ventilated to ventilate any gases generated during the charging process.
Recharging or even simply recharging a battery causes a chemical process that releases explosive hydrogen gas. With proper ventilation, you reduce the risk of the gas being agitated by a spark, which could lead to an explosion.
A garage or shed where you can leave the garage door open would be a great place.
If you don't have a completely dry and well ventilated area to hold your entire ATV, consider removing the battery from your bike to charge it.
Game Machine ATV and all accessories must be switched off while charging. to stop sparks.
Once you have placed your ATV near a power socket, you will definitely need to open the seat of your ATV to make sure you have access to the battery.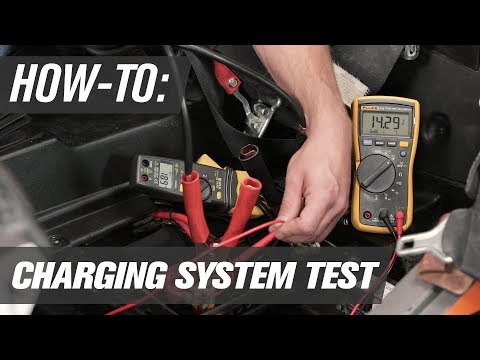
To remove the ATV seat, you will need to use a screwdriver to remove the screws securing the seat, and then you will need to start loosening all the screws that protect the ATV battery.
It is very important to make sure that the screwdriver you are using is suitable for the screws that hold the seat in place to ensure that it does not damage the screws which can be very difficult to remove once they are damaged.
Once you have removed the ATV seat and gained access to the battery, you will need to get rid of the battery covers .
After removing the battery cover, you must determine which battery is in your ATV. This should be clearly classified on the side.
If you can't check the tag or it's missing, here's how to find out which battery you have.
If there is liquid inside and there are removable caps on the front, it is a flooded lead-acid battery. In addition, it will have a partially transparent body, which will allow you to monitor the level of liquid inside.
If there is liquid inside, but there is a flat top without any covers, it is a sealed lead-acid battery. This can also be a VRLA battery.
However, if the battery looks like lead acid, has a high level, and you can't hear liquid inside, it's a gel cell or AGM battery.
If the battery is small and very light, it is a lithium-ion battery.
All ATV batteries, regardless of type, require a 12V charger that provides a low current of 1 to 3 amps. .
Sealed lead-acid, sealed lead-acid, VRLA and AGM batteries can be recharged with a manual charger. However, you need to monitor the charge of the battery with a voltmeter in order not to overcharge it.
This is especially important for sealed lead acid and VRLA batteries, as they cannot be recharged after recharging and may be permanently damaged.
For gel batteries you will need a charger, especially for this type of battery.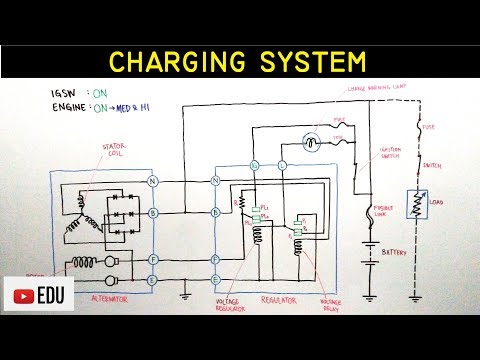 It's the same with lithium-ion; try to find a lithium-ion compatible charger.
If you want to avoid all these problems, we recommend purchasing an automatic charger . Unlike a manual charger that needs to be unplugged or the current setting changed, once the battery reaches a certain level, you can plug in an automatic charger and walk away as well.
It instantly detects the battery voltage and provides the correct voltage and current. It will automatically stop charging or enter trickle mode when the battery is fully charged. So you never have to worry about damaging your ATV battery.
The ATV battery can be charged while it is in the vehicle or removed. Just make sure you charge it in a well ventilated area , the charging process creates flammable gases .
If you are using a manual charger, check battery voltage with a voltmeter . This will tell you how low the battery is, as well as how long it will take to charge it.
Next, connect the red wire of the charger to the positive terminal of the battery and negative wire to the negative terminal of or a piece of steel around the engine.
Set the hand charger to the ideal charging current. To be on the safe side, choose an existing one that is no larger than a tenth of an Ah battery . For a 30 Ah battery, set the current on the charger to 3 A or less.
Connect the charger and start the charging process. Check battery level continuously. When it reaches 80%, halve the current. This allows the battery to fully charge.
When fully charged, turn off the charger quickly. If you leave the battery for a very long time, you can enable maintenance mode if the charger has it, or purchase a battery tender to keep it charged.
The automatic battery charger is much easier to use. You don't need to check the battery voltage or monitor the battery.
All you have to do is select the battery type and voltage. Many automatic/smart chargers have special charging modes for AGM, Li-Ion, GEL and other types of batteries.
Connect the charger to the battery and leave it to charge as well. It will safely charge the battery and also keep it charged without overcharging.
The charging system on an ATV is not as efficient as on a car, so it will take longer to charge the battery properly.
Unless you make hour-long rides each time you start your bike, it will probably use even more power to start the bike than it can charge while you start it.
In addition, ATV batteries are small enough in both sizes to support the overall weight of the bike.
Add to that a few energy-hungry accessories like an ATV winch and you'll quickly find that your battery is too low to start your bike. Leaving the battery at a low charge level in time will further damage the battery.
That is why it is recommended to charge it from time to time to save yourself from problems in the future.
ATV batteries should be charged whenever battery voltage drop is below 12.4-- 12.6 volts . Charge the battery every fall and every spring, and use the battery to keep it in good condition when the ATV is left idle for long periods of time without use.
Car battery chargers typically deliver 10 amps of existing ones, which is too much for an ATV battery. It can overheat and also permanently damage the battery.
If the charger is not set to limit current to less than 3 amps, do not use the car or truck charger.
If you can reduce the current to 3 amps, use the same as the manual charger.
Yes, you can charge your ATV battery with your car, but only to give it a boost. This is useful if your ATV won't start because the battery is dead.
Use the jumper cable to connect the car battery to the ATV battery. Do not start cars and trucks . This can give too much power and also damage the ATV's small battery.
Vehicle battery has sufficient charge to revive a dead ATV battery. After a few minutes, disconnect the connecting cable and try to start the ATV again.
To emphasize, this technique is just for starters . Do not use it to fully charge an ATV battery, given that you have no control over how much current and voltage it receives.
Yes, you can recharge your ATV battery. This happens if you are using a charger that provides too much current or voltage. Leaving the hand charger plugged in even after the battery is fully charged can also cause it to overcharge.
Overcharging can damage the battery, usually completely. This is especially true for sealed batteries where you can't open the caps and regenerate the electrolyte.
How long to charge a motorcycle battery (The Unique Guide 2022)
What does the stator do on an ATV? Most Comprehensive Review 2022
Rodney L. Herron
Rodney L. is a technical writer and product consultant with over a decade of experience in the automotive industry. Rodney is a fan of high performance machines that run fast and loud and is an expert in all things custom. His numerous articles and reviews are available in our knowledge base. Whether something is wrong with your bike or you are building a custom bike, you can trust Rodney's experience.