If your ATVs front end alignment is off, you may notice the ATV pulling to the side while riding, or a shaking and wobbling feeling in the handle bars while on the trail.
That’s not the only effect you’ll notice either, your tires will wear unevenly and need to be replaced sooner if you’re out of alignment. Not to worry, a front end alignment is a pretty easy task you can do yourself at home with some basic hand tools.
When you buy a brand new quad, the manufacturer recommends you do a front end alignment after the first 30 days. Then, every 3 months after that. To me, that seems a bit extreme. I do mine once a year with my yearly maintenance before I take it out for the season.
You will also want to do an alignment any time you swap out your tie rods, or do any work on the machine involving those parts. Here are the steps you take to do an alignment, I go into more detail on each of these steps below.
First you want to make sure your quad is on a level surface. You don’t need to spend a ton of time on this getting it perfect. But try to get the machine as level as possible, it makes the whole job easier.
If you have a flat spot in a garage or drive way, that would work best. But you could always jack up one side of the machine if you’re on a really uneven area. The quad won’t need to move for you to do the alignment.
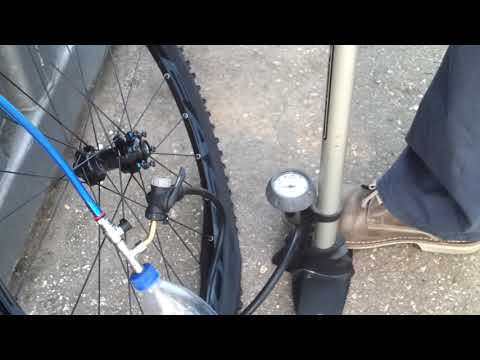
As part of this step, make sure your tire pressure is set to spec or to what you normally ride with it set to. The most important factor is that the tire pressure is the same from side to side. Front and back doesn’t need to match, and usually shouldn’t. But make sure the left front tire matches the right front tire at least.
This step isn’t absolutely necessary, but it sure makes everything a lot easier knowing the handle bars aren’t able to move and mess with any of your measurements. If you have someone that won’t mind sitting there holding the handle bars straight that would work.
In fact, having someone sitting on the machine is better because the measurements will more closely match the conditions you have when someone is riding the machine.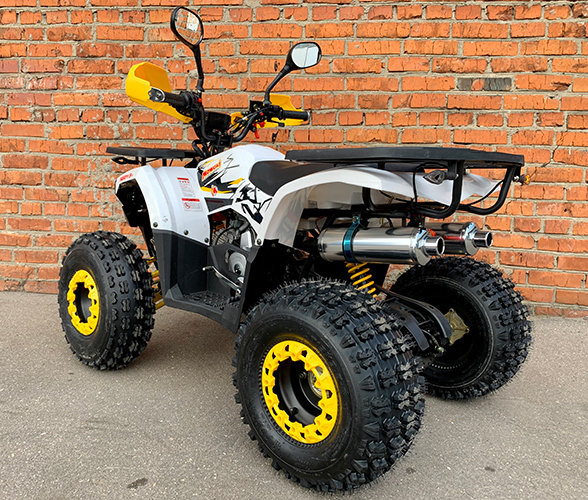 But if it’s just you doing this job, you’ll have to find another way to secure the handle bars.
I usually just get a ratchet strap and wrap the two hooks on each side of the handle bars and through the grab bar on the back to keep the handle bars from moving at all. It’s really a simple step that will save you some headache later on. Don’t strap it down to tight or you could cause other damage, just enough to hold her steady.
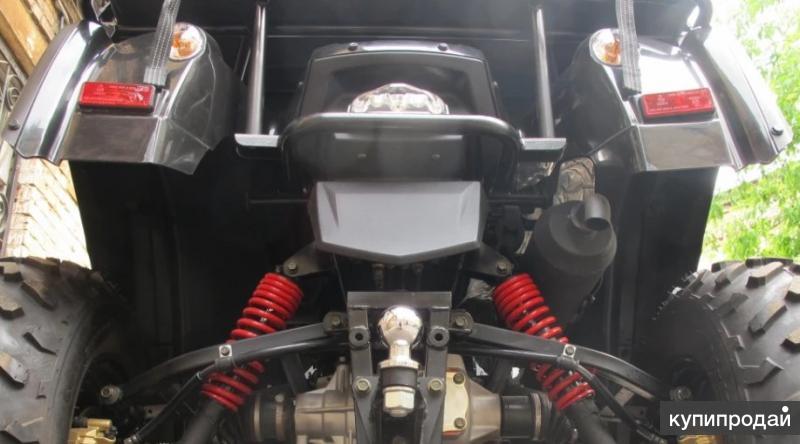
The camber of your front tires is often overlooked. But since we’re doing an alignment, this is the best time check the camber is on point. You’ll want to take a level and place it against the side of the tire vertically. Try to be as close to center near the axle as you can.
Rest the level against the bottom of the tire on the outside of the tire and get the bubble into the center of the level. Now measure the gap between the top of the level and the top part of the tire. You should get somewhere between 0.2 and 0.8 inches distance.
Not all ATVs and UTVs are rated to have the same camber. Check your service manual for the exact measurements, but about 1/8 inch to 3/4 inch is a pretty common standard to go by. If you’re not within those measurements, you should adjust your camber.
To adjust your camber, take the cotter pin out of the castle nut of your ball joint where it connects to the upper A-Arm and loosen the castle nut. Now with the correct size wrench, adjust the ball joint by screwing it in or out to get your camber within the recommended range.
Some A-Arm assemblies require that remove the ball joint from the spindle it sits in order to adjust. Once you’re done with the adjustment tighten back up the castle nut and put back the cotter pin.
If you want to think of the camber as the vertical alignment, then think of the toe as your horizontal alignment. First determine weather your machine calls for a toe-in or toe-out alignment by checking your service manual. Most quads require a 1/4 inch toe-in alignment.
There are two popular methods for actually getting the toe-in toe-out measurements. I prefer method two because it’s easier to see if only one tire is out of alignment or if both are.
Method 1 is quicker and a pretty straight forward way to get your measurements. You’ll simply measure the distance between the middle point on both your front tires, front and back at axle height.
The distance measurement between the center of the front of the tires will be measurement A and the distance between the center of the back of the tires will be measurement B. You will take your measurements and subtract measurement A from measurement B to find your toe-in. If the measurement is negative, you have a toe-out situation.
I found it easiest to measure the front of the tires, then put a piece of tape or something to mark where you measured. Then rotate the tires 180 degrees by rolling the quad to get the back side measurements.
To find out which wheel is out of alignment, maybe both are, maybe just one is. Take a long 2×4 or something long and straight that won’t bend. And hold it flush with rear tires and along-side the front tires.
Measure the distance the from the 2×4 to the front tires. The distance should be the same from right tire to left tire. If it’s off then you will want to get the adjustments done to the tie rods to get these to match.
For a toe-in alignment you will want the front of the tires measurement away from the 2×4 to be higher than the back of the front tire by about 1/8 inch. Remember that the standard toe-in measurement is about 1/4 inch? Well, that’s both front tires combined.
If you find that you need to make adjustments to your toe, that is all done with the tie rods. Start by loosening the lock nut on the tie rod ends. You will want to use two wrenches to do this part.
One wrench to hold the tie rod in place and the other to loosen the tie rod end lock nut. If you don’t use two wrenches you could cause damage to your machine.
Once the tie rod ends lock nut is loosened up, you will be able to adjust the tie rods. Make the adjustments to the tie rod by spinning clockwise or counter clockwise to get your correct toe measurement.
You will most likely need to adjust the tie rod, and take another measurement, repeating until the toe is where you need it to be.
After you’ve got your toe-in or toe-out where you want it, you can tighten the tie rod end nuts back up and you’re good to go. It’s a good idea to take another measurement after you’ve tightened them up just in case it shifted a little bit when tightening.
There you have it, an ATV front end alignment. If you’re alignment is still off after doing this, you may have a bent tie rod or A-Arm. If you notice, the handle bars still wobble or shake, you may just need to Balance The Tires or maybe even Replace The Wheel Hub Bearings.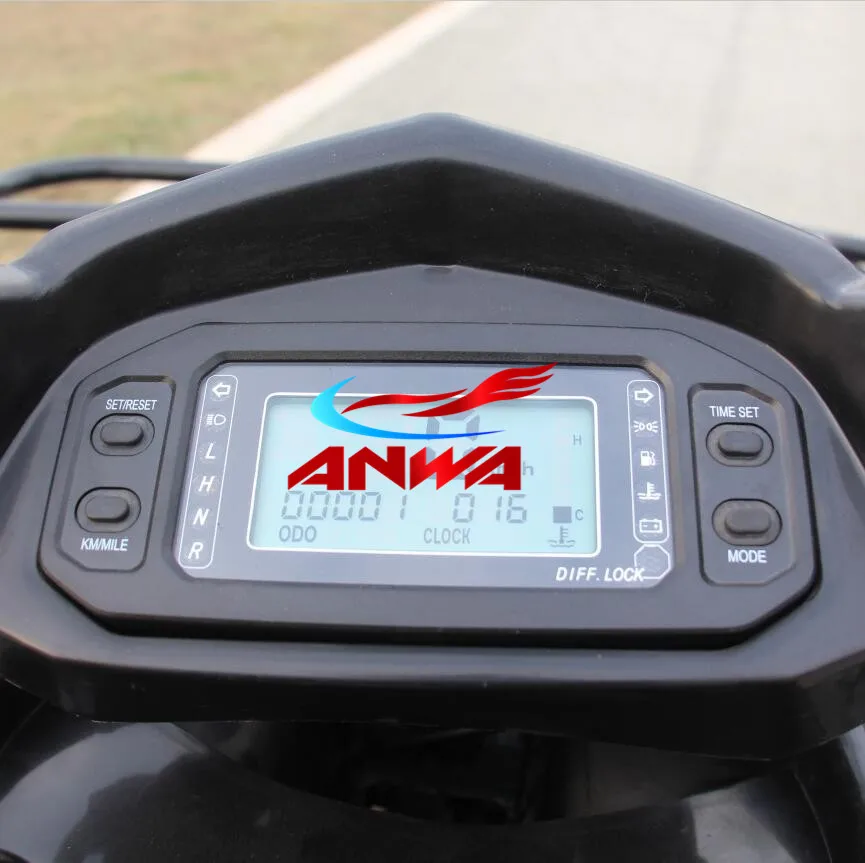
Sharing is caring!
Whether you’re using your ATV for work or play, we’d be willing to bet that you’re not treating it with kid gloves when you ride. That’s not what these units are meant for and, honestly, where would be the fun in that? However, one of the unfortunate side effects of taking your off-road vehicle for a rougher ride is that you could throw your wheels out of alignment. Luckily, misaligned wheels are normally pretty easy to identify. Common signs of misalignment include:
It’s important to look out for signs of misaligned wheels and fix them immediately. Operating an ATV that is unexpectedly darty, wobbly, or sluggish can make for dangerous riding. Plus, misaligned wheels lead to uneven wear on tire treads, which is also a riding risk. Even if your unit seems fine, it’s a good idea to realign your wheels at least twice a year. Aligning your ATV wheels is relatively straightforward and something you can likely do on your own by following these seven steps:
Start by parking your off-road vehicle on a smooth and completely level surface; your garage or driveway should work. You want to make sure that any unevenness you see is coming from an issue with your alignment, not because of where you’re parked.
Step 2: Properly Inflate the TiresSimilarly, you want to make sure that all your tires have the same air pressure to ensure you’re starting your realignment with everything else as even as possible. Having even tire pressure across all four of your tires is also just good practice when making sure your unit drives straight once you’ve realigned your wheels.
Next, grab your ratchet straps. You’re going to use them to center up your handlebars and lock them in place. Loop one ratchet strap around each handlebar and then hook them to the back of your unit. Be careful not to make the straps too tight, though, because you could cause some unintentional damage. You just want enough tension to keep your handlebars even and in place while you work.
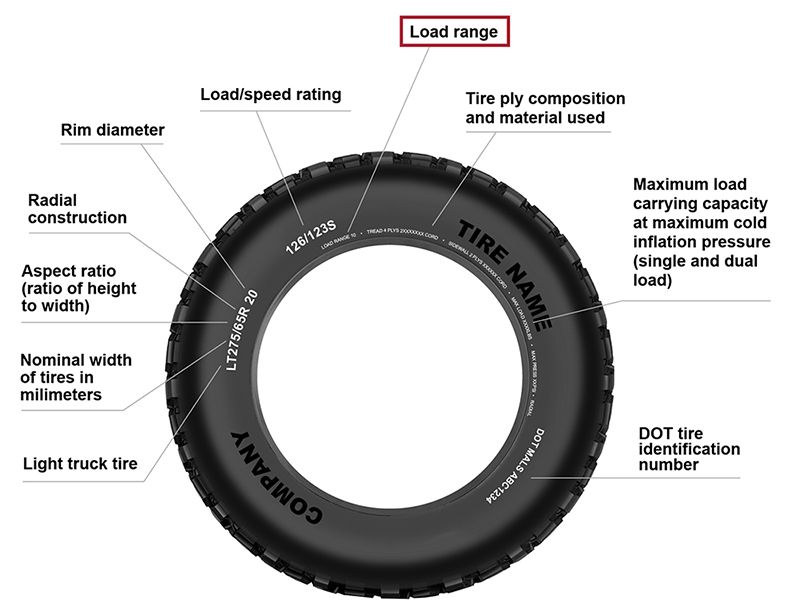
Step 4: Make Your MeasurementsTo fix an alignment issue, you have to figure out if you have a toe-in or toe-out situation. Toe-in means that your tread blocks are pointing towards the frame of your unit. Toe-out means that your tread blocks are pointing outwards from the frame. It’s actually recommended that ATV wheels be toe-in by ¼ inch. To figure out what you’re dealing with, grab a tape measure and follow these simple steps:

There are a couple of tricks to remember when loosening tie-rod end nuts. First, you’re going to need two wrenches: one for the nut and one for the rod. If you try to do this with only one wrench, you could end up doing serious damage. Find the dimple on your tie-rod where you can put one of your wrenches while you work on the nut with the other. This will let you get a solid grip on the rod, making it easier to loosen the nuts. Keep in mind that one of your tie-rods has left-facing threads, so when you’re working on that side, make sure to adjust your direction or you’ll strip the nut.
Step 6: Adjust the Tie-RodsOnce you’ve loosened the end nut, adjusting your tie-rod is as simple as turning it either clockwise or counterclockwise until you get the right toe measurement.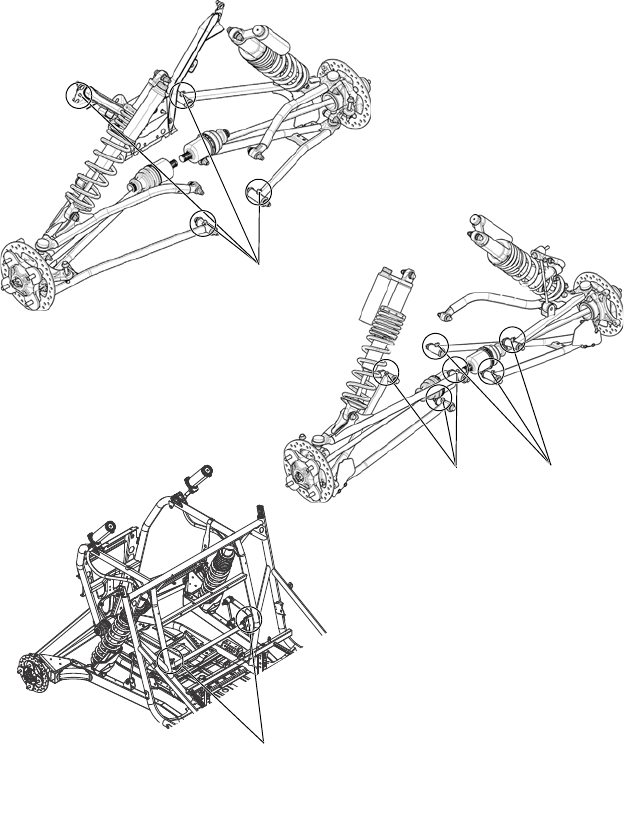 However, this can be a tedious process, because you’ll probably want to re-measure as you work to make sure you don’t overshoot your adjustment. Remember that ATV wheels should be slightly toe-in. Aim to get your front tire measurement ¼ inch less than your back tire measurement.
Once everything is aligned, retighten everything to lock in your work. Don’t forget to use two wrenches as you do this, just like you did when loosening things up. You’ve worked this hard, you don’t want to hurt your machine now. We’d also recommend taking one final alignment measurement before you finish tightening, just to make sure nothing shifted while you were working.
Checking and adjusting your alignment should be common maintenance for any ATV owner, so we recommend getting comfortable with it. Familiarizing yourself with these seven steps will help you be ready and able to realign your unit whenever it’s needed. And if you’re looking for your next ATV, UTV, or other off-road vehicle, be sure to check out the nationwide selection at ATVTrader.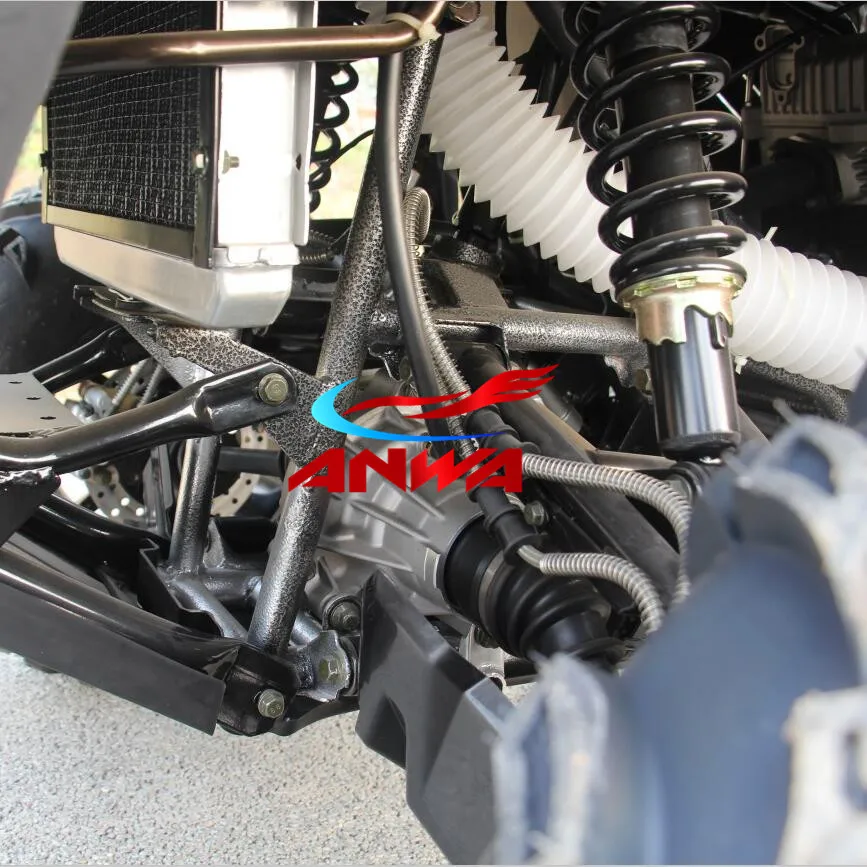 com.
com.
To turn it over or fall from it, it , on a steep slope or when making a sharp turn. Due to the high center of gravity, small width and short wheelbase, the equipment easily stands on 2 wheels. At the same time, a fall, even at low speed, threatens with fractures. Therefore, after buying an ATV, you need to familiarize yourself with the basics of control.
To start an electric start engine, turn the ignition key to the ON position, press the brake and press the green electric start button for no longer than 5 seconds.
ATVs usually shift automatically—the shift lever is used to shift up, down, neutral, reverse, and select park mode.
To start or increase speed, you need to press the thumb of your right hand on the throttle. The gearbox must be in the “H” or “L” position. The middle finger of the right hand rests on the front brake lever while driving, and the middle and index fingers of the left hand rest on the rear brake lever.
Also on the steering wheel there are buttons for turning on the four-wheel drive and locking the differential. Four-wheel drive will be needed when driving off-road, slippery roads, transporting goods and towing. A differential lock is needed so that the wheels of the ATV spin synchronously - for example, it will help to drive out if one of the wheels is stuck in the mud, and the second remains on a stable surface. When the lock is off, in such a situation, only the wheel that is stuck will spin.
Whether it is possible to turn on the four-wheel drive and blocking on the go and at what speed - should be indicated in the instruction manual. At the same time, regardless of the model of the ATV, the lock cannot be turned on after a jam, since the differential gears must engage without load.
1 - ignition key. 2 - starter button. 3 - light switch. 4 - signal.
1 - throttle lever. 2 - switch 2WD / 4WD. 4 - fuse.
1 - throttle lever. 3 - 4WD / LOCK differential lock switch. 4 - fuse.
Standing up makes it easier to avoid the ATV tipping over by shifting your body weight. There are 3 main racks:
The worst stance is when the back is tense, the person leans on his hands, and his legs are straight. In this case, the body does not absorb shocks and shocks, and the bones, intervertebral discs and joints experience a strong load. In addition, control over technique worsens and fatigue increases.
middle rack
A-pillar
rear pillar
Climbing involves shifting into low gear, landing in the front strut and moving at medium engine speeds. It is impossible to sharply press the gas when driving up a slope or mountain - there is a risk of rolling over.
When stopping in the middle of a hill, start carefully, as a sudden start will be followed by tipping over. If the ATV rolls backwards, you need to press the front brake lever, and after stopping, turn off the engine, put the equipment on the handbrake, turn around manually, slide down and try again.
To descend, you need to take the rear rack and shift into a lower gear. In order not to roll over, brake should be simultaneously front and rear brakes. To avoid skidding, you can not change the trajectory of movement and speed abruptly, as well as brake too hard. It is better not to touch the gas lever when descending.
To drive downhill, shift into low gear and shift your body weight towards the top. Don't hit the gas hard and don't brake hard. You can also fall when making a sharp turn. If the slope is steep and the ground on it is slippery, it is better not to risk it.
To enter a tight turn, lean on the outside footrest and tilt your upper body inward. On slippery surfaces, shifting forward will improve handling, and shifting back will improve the grip of the drive wheels with the road.
Before driving into deep mud, you need to make sure that there are no logs, large stones and other obstacles in it, and the soil is not marshy. You should drive smoothly, without sharp pressure on the gas lever. At a slow speed, high engine speeds should not be allowed - the wheels will begin to slip and dig deeper. If the ATV has sunk deep into the mud, after releasing it, you need to dry the brakes with a few clicks on the levers.
To estimate the trajectory of the ATV in advance, you need to look into the distance and not fix your eyes on any one object.
It is not necessary to drive into steep mountains and hills unless absolutely necessary, because if you lack experience, you can, for example, press the gas too hard or allow the engine to stop - both errors lead to a rollover.
ATV requires special equipment. It will protect against getting wet, hypothermia, wind and dirt, and will also reduce the risk of injury after a fall or collision.
How to adjust the carburetor on an ATV? What to pay attention to? What are the signs of misuse of the device? About this today in our article. Using the proposed instructions, you will be able to set up the carburetor step by step without the help of specialists.
For stable operation of the ATV, it is necessary that the engine receives the optimal amount of combustible mixture corresponding to its rev range. Otherwise, the following problems may occur:
What should be applied in this case:
Important! Carry out tuning only when the carburetor is cleaned outside and inside, as well as when the engine is warmed up to operating temperature.
Note. The location of the bolts on each carburetor model may vary, so read the instructions that came with your machine.
1. Start the ATV and test ride. Wait until the engine has completely cooled down.
2. Check the condition of the spark plug. To do this, unscrew the cap and inspect the candle.
What to look for:

3. Unscrew the needle cover at the top of the carburetor. Pull the needle. This is the main element that regulates the supply of fuel to the combustion chamber, since the needle is connected to the gas trigger. When the trigger is pressed, the needle rises, slightly opening the hole for supplying the fuel mixture. This directly affects the growth of power and speed of the ATV.
4. Remove the cable, then press the needle to pull it out. The needle has 5 grooves and a retaining ring. By default, it is set to medium. The lower the retaining ring is located, the higher the needle is raised, which means that a lot of gasoline and little air is supplied. Accordingly, the higher the ring - the less gasoline and more air.
5. Reposition the circlip in the desired direction to optimize carburetor performance. Insert the needle into place.
6. Start the engine and press the throttle trigger. With proper adjustment, the engine should not stall from a sharp pressure.
And remember, you should resort to adjusting the needle only as a last resort, when adjusting the quality and quantity screw does not bring results.
The performance of a four-wheeler depends on the correct level of gasoline in the carburetor. An excessive amount will flood the candles, spill onto the ground and lead to unnecessary expenses. If there is too little fuel, the engine simply will not start.
How to optimize the fuel supply