Photo: istockphoto.com
Sometimes the simplest things can bring the greatest summertime pleasures. Outdoor fun doesn’t have to include expensive, custom-built play sets; you can create instant outdoor entertainment by upcycling an old tire into a one-of-a-kind swing. Read on to learn how to make a tire swing the easy-peasy, old-fashioned way!
Tools & MaterialsRELATED: The Best Tree Swings for Backyard Fun
This project is perfect for beginners, as you only need a few tools and basic knot knowledge—oh, and you need a tree (a big tree).
Chances are, if you’re looking into how to make a DIY tire swing, you already have a tree in mind for mounting it. Just make sure that it’s large, healthy, and the branch that will hold the tire swing is at least 8 inches thick. If a tree shows signs of decay or has cracks or dead branches, it’s not suitable for a tire swing.
Other considerations include making sure there’s enough clearance between where the tire hangs and the trunk of the tree as well as the ground. And removing large rocks or other tripping hazards from the area beneath the swing.
Photo: istockphoto.com
Any standard-size passenger car rubber tire will work for a swing, though you could use a smaller or larger tire as long as you factor the weight into your specific project. If you find a used tire, be sure it has some tread left to prevent any wires from popping through the surface and scratching or poking swing users.
Give the tire a thorough cleaning with a pressure washer. If you don’t have the right tool, take the tire to the car wash to clean it with one of the high-pressure hoses on the premises.
When you’re ready—that is, when you’re satisfied with the cleanliness of the tire—drill holes in the bottom of the tire to prevent water from pooling when it rains. You don’t want mosquitoes to get wind of any standing water! On that note, you’ll also want to check for bees, wasps, and other insect pests each time you or your kids use the tire swing.
RELATED: Weekend Projects—5 Fun DIY Swing Sets
Photo: istockphoto.com
Determine the maximum weight your tire swing will hold. That includes the weight of kids (or adults) that will use it as well as the weight of the tire you choose. Then select a heavy-duty braided exterior rope that is rated for three times that weight.
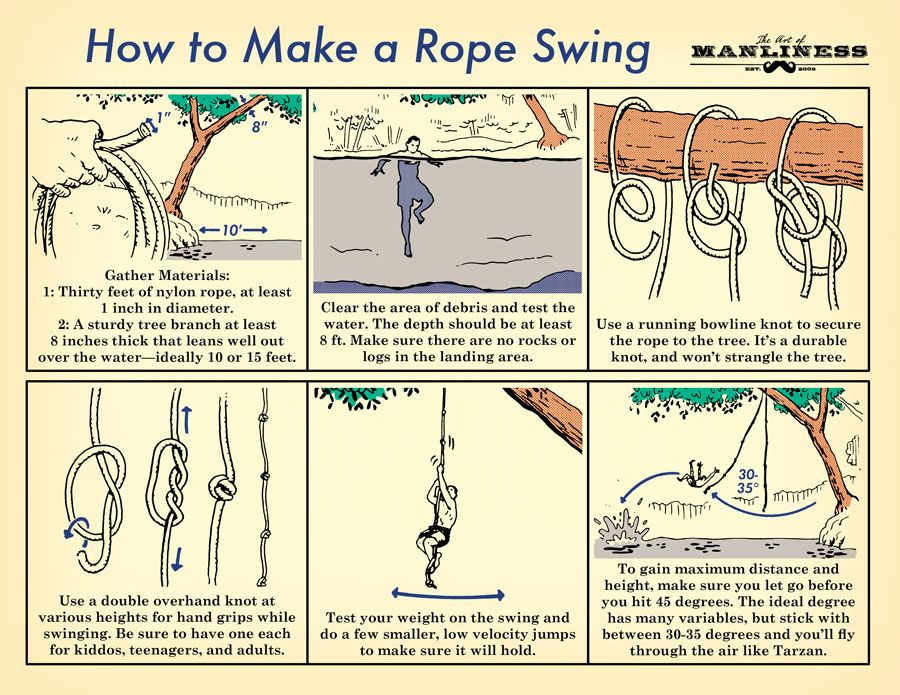
Cut a section of rope to the desired length plus a little bit extra for tying a couple of knots. If needed, melt the ends to keep the rope from fraying. Tie a double bowline knot on one end of the rope, making sure to leave a little slack in the loop portion of the knot.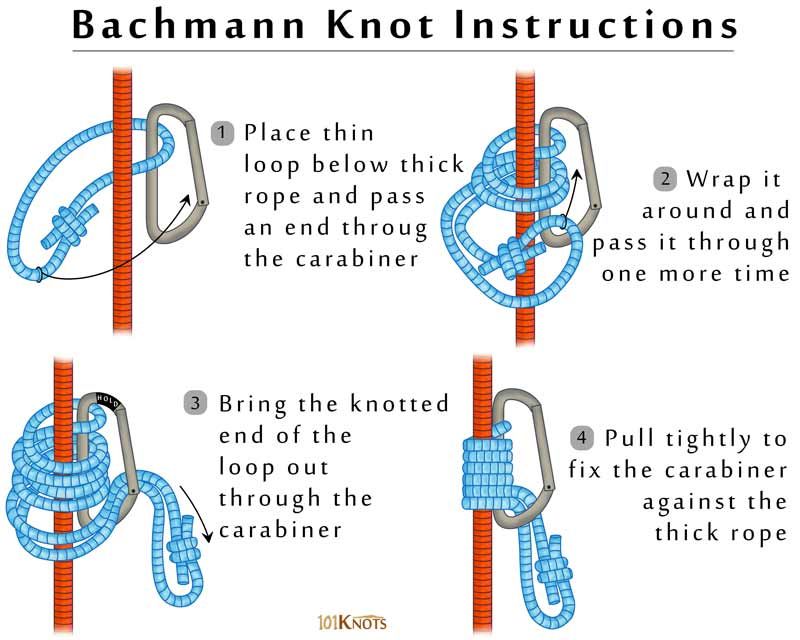
Toss the knot end of the rope over the tree branch. If you need a little help, place a softball in a sock and tie the sock to the knot end of the rope; then toss the ball over the branch. Thread the opposite end of the rope through the loop of the bowline knot and pull it tight. The knot will travel upwards until it finally reaches the branch.
Tie another double bowline knot around the top of the tire, tightening it so the tire hangs at the desired height off of the ground.
Photo: istockphoto.com
Have the heaviest member of your family test the tire swing to ensure its strength. You may not want to tell this person why he or she was chosen…
Let your impatient kid swing already. You can cut off the excess rope later. Pat yourself on the back and admire your handiwork from the street, just like the neighbors will.
RELATED: How to Make a Tire Swing with Chains and Bolts
Got questions about how to make a tire swing? You’re not alone!
One of our favorite DIY tire swing ideas is to find a tire, clean it thoroughly, and hang it by a rope from a sturdy tree branch.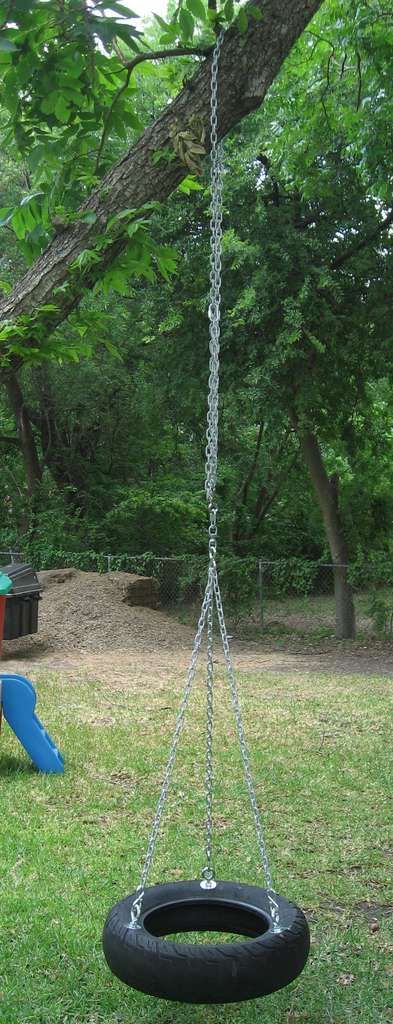
First and foremost, you need a tire. You’ll also need some tire cleaning supplies (or clean it at a self-serve car wash), braided exterior rope rated for three times the weight of the tire and swing users combined, and some basic knot knowledge. You’ll also need a sturdy branch on a large, healthy tree.
The best rope to use for a tire swing is one that is braided, designed to hold a lot of weight, and rated to withstand outdoor elements such as UV rays, rain, etc.
Kick off your summer staycation by adding a tire swing to your outdoor space. This simple project can add hours of fun and relaxation with minimal effort and expense. Just be sure to keep safety top of mind by thoroughly inspecting the tree and branch that you intend to mount it on, and by selecting rope that is rated for the amount of weight that your specific tire swing will hold.
By
Kamron Sanders
Kamron Sanders
Kamron Sanders is a home improvement expert and writer with over 15 years of hands-on construction, remodeling, woodworking, home repair, and landscaping experience.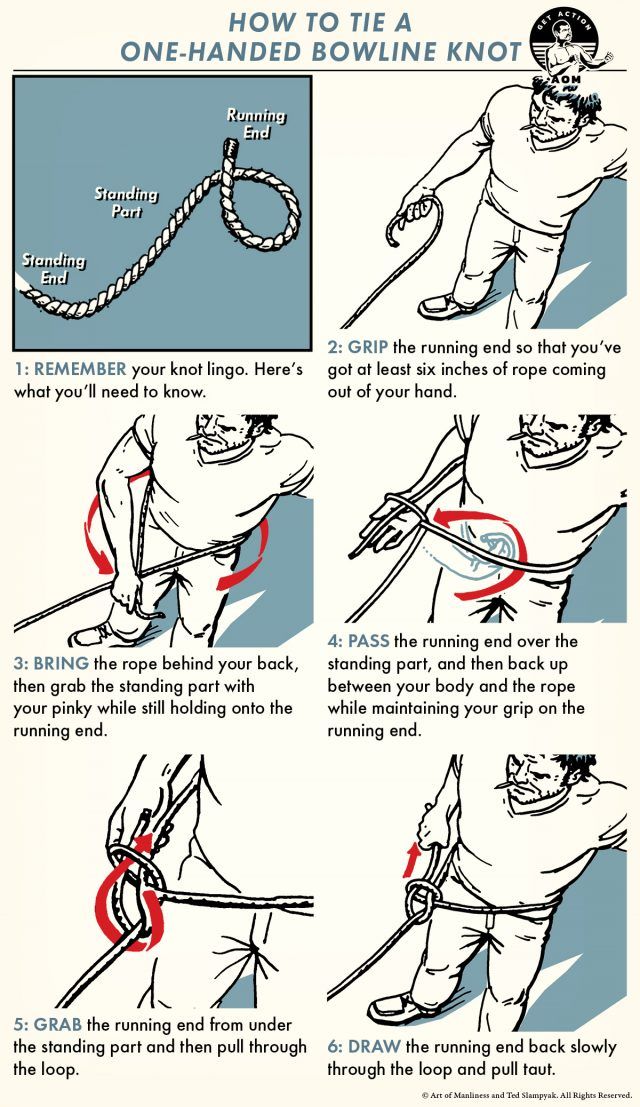 He has also written for HGTV. Kamron's expertise ranges from troubleshooting saws and lawnmowers to painting kitchen cabinets.
Learn more about The Spruce's Editorial Process
Updated on 07/08/22
Reviewed by
Deane Biermeier
Reviewed by Deane Biermeier
Deane Biermeier is an expert contractor with nearly 30 years of experience in all types of home repair, maintenance, and remodeling. He is a certified lead carpenter and also holds a certification from the EPA. Deane is a member of The Spruce's Home Improvement Review Board.
Learn more about The Spruce's Review Board
Stephen Simpson / Getty ImagesProject Overview
Introducing a tire swing to your backyard is sure to be a decision that you (and, more importantly, your kids) will be happy you made. If you've seen tire swings and assumed they're too hard to install or difficult to make safe, you may be surprised to know that this project is actually very simple.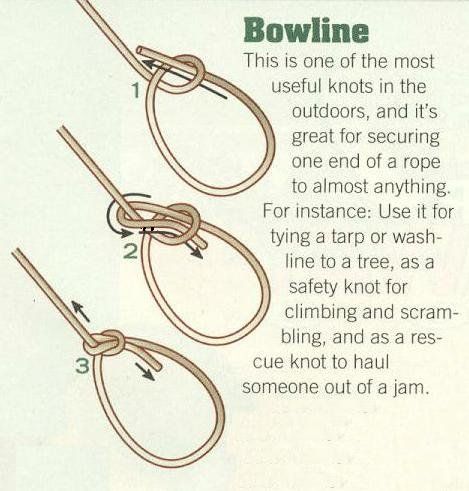 And, when done right, tire swings can be a safe form of entertainment for both children and adults.
11 Delightful Swing Ideas for Yards of All Shapes and Sizes
There are two popular styles of tire swings. One type features a horizontal tire with ropes attached at three equidistant points. The second type features a vertical tire with a rope simply tied around the top of the tire. For this project, we'll focus on the latter option as it's quick, easy on the wallet, and a more versatile option for users of all sizes.
A tire swing requires a solid branch at least 8 to 10 inches in diameter that is in good health. Fruit trees, evergreens, and other softwood varieties should be avoided, as these are prone to breaking under pressure. Instead, look for strong, mature trees such as oak trees, maple trees, hickory trees, and other hardwood varieties.
How to Build a Swing
If you don't have one already, recycled tires in good condition are readily available. Check tires stores, online listings, and family and friends. Look for a relatively large tire with a wide sidewall and no dry rot.
Polypropylene rope is perfect for a tire swing, as it won't be compromised as a result of outdoor exposure. When used properly, 3/4-inch polypropylene rope is more than strong enough to hold the weight of a tire and any potential user. The amount needed will be determined by how far your branch is from the ground, but you should aim for a branch no further than 15 to 20 feet high. In this case, a 50-foot rope should do the trick.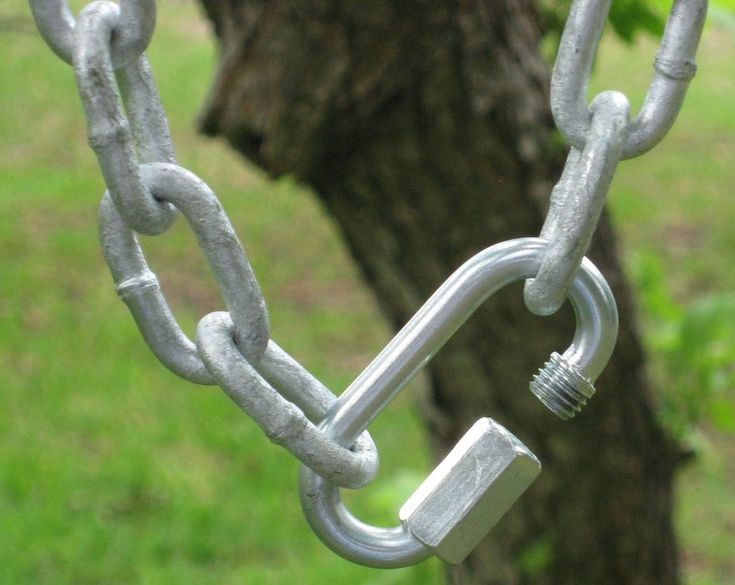
Polypropylene rope is a strong, synthetic rope that is resistant to rot and deterioration due to water. While many styles are colorful, varieties that imitate the look of natural rope can also be found.
If you don't have a ladder long enough to lean on the tree branch, there's an easy way to get your rope over the branch. Simply tie string (something like mason line string will do the trick) around a small object like a bean bag and toss it up over your branch. Once over, tie the other end of the string to your rope and pull it over the branch. Repeat this process once more to double the rope over the branch and prevent it from slipping down the branch.
To secure the tire to the rope, no hardware is needed. Simply slide the two ends of the rope through the center of the tire and around the top of the tire twice. Adjust the tire until it sits 3 feet off of the ground to account for rope stretch. Approximately one foot above the top of the tire, tie a bowline knot with plenty of excess rope left at the end. This will be trimmed later.
Improperly tied knots can pose major safety risk. If you aren't confident in your knot tying abilities, consult with someone who can help ensure the job is done correctly.
Step back and inspect the tire, the rope, and the positioning of the tire from the ground and tree. Once you've verified that the rope is properly knotted and the tire is adequately spaced from the tree and ground, have an adult carefully test the swing. This will allow the adult's weight to set the knots and stretch the rope.
Once the knot has been fully set, trim the excess rope from the knot, leaving approximately 4 to 5 inches. Use a lighter to burn the ends to prevent fraying.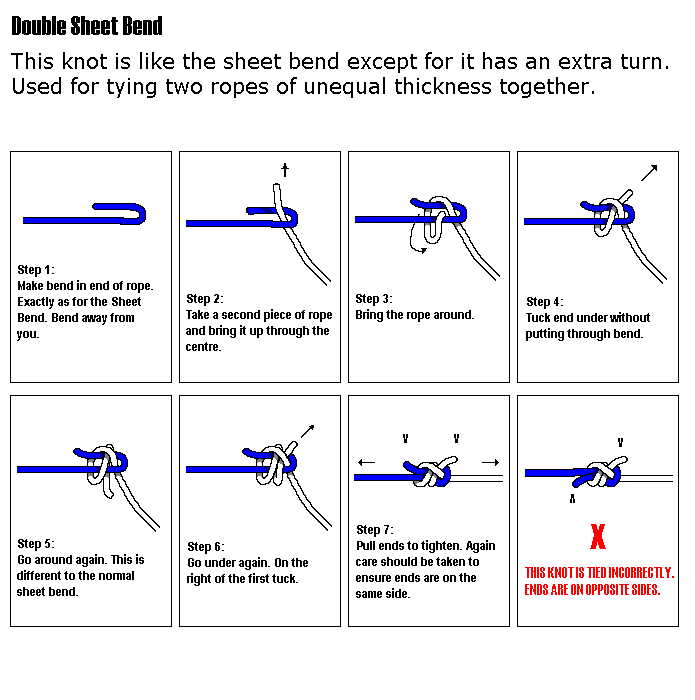
Without drainage, the tire will be prone to collect water, leading to messes and mosquitoes. To add a drain hole to the tire, use a 7/8-inch paddle bit and drill through the lowest point of the tire.
To further prevent pests, consider treating the tire with a bug repellant that is safe for human contact.
Depending on the size of the user, this tire swing can be used by sitting inside or sitting on top. Always hold the rope tightly and avoid swinging toward the tree.
While the polypropylene rope and the tire will likely last forever, trees are living and ever-changing. Make a habit of consistently inspecting the tree branch and the position of the rope on the tree. Should you suspect anything has been compromised, always act on the suspicion and ensure the safety of the swing.
Additionally, tire swings can serve as ideal homes for wasps, bees, spiders, and other biting and stinging creatures.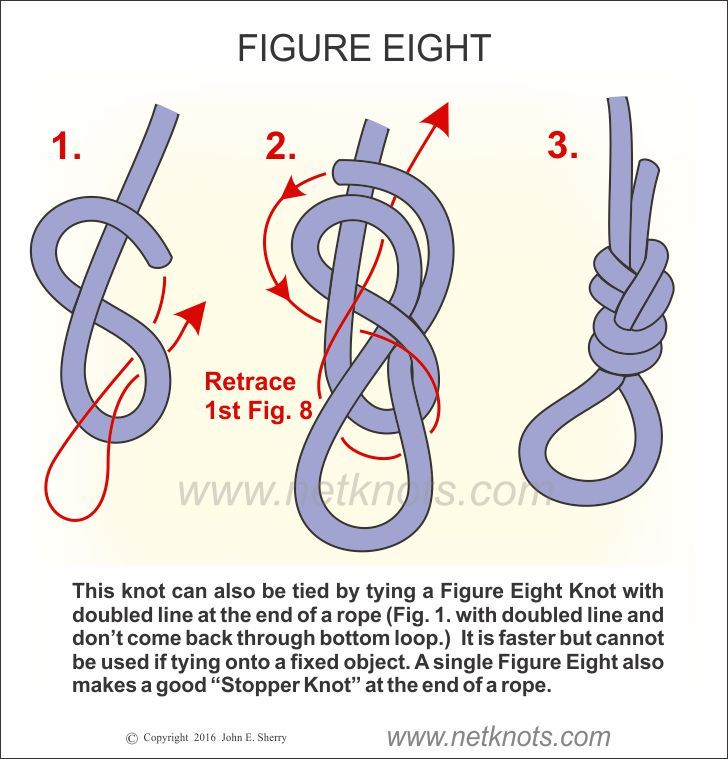 Always inspect the inside of the swing before playtime and instruct your kids to do the same.
The 9 Best Swing Sets of 2023
May 29, 2022 Likbez Do it yourself
Everything can be used, from an old tire to a construction pallet.
1. Cut a piece of board about 50 cm long with a hacksaw or other saw that is at hand.
Jeremy Rabe YouTube Channel2. Paint the finished seat to protect it from rain and make it look more aesthetic.
YouTube Channel Jeremy Rabe 3. With a drill a couple of millimeters larger than the thickness of the rope used, make two holes - at both ends of the board. Set back 2-3 cm from the edge so that the seat does not break, and drill exactly in the center of the vertical for even suspension.
4. Divide the rope into two equal parts, make loops at the ends and fasten to a suitable branch. Place the ropes at a distance approximately equal to the width of the seat.
Jeremy Rabe YouTube Channel5. Thread the ends of the ropes through the holes in the board and tie a couple of knots at the desired height.
YouTube channel Jeremy Rabe6. Try rocking.
Jeremy Rabe YouTube Channel
1. Build a platform out of planks. To do this, spread the side ends with glue, connect them together and tighten with clamps. An easier option: nail two blocks across the boards, stepping back from the edge by 10 cm.
Mitch Deitrich YouTube channel2. Sand the top of the platform manually with sandpaper or using a machine.
Mitch Deitrich YouTube Channel3. Using a tape measure, find and mark the center of the area with a pencil. Also put a line at a distance of 10 mm from the edge of one of the sides.
YouTube channel Mitch Deitrich4. Drive a nail into the center, tie a pencil to it with a thread and draw a circle with a radius along the mark at the edge of the site. Pull out the nail; you won't need it anymore.
Mitch Deitrich YouTube channel5. Saw out the circle with a jigsaw and trim the sharp edges with a file or sandpaper.
YouTube channel Mitch Deitrich 6. Using a drill, make a hole in the center with a diameter of 2-3 mm larger than the thickness of the rope of the future swing.
7. Use a file to grind off the resulting sharp edges in the center so that the rope does not fray when swinging.
Mitch Deitrich YouTube channel8. Paint or varnish the resulting seat and wait until it dries.
Mitch Deitrich YouTube channel9. Thread the rope through the hole and tie a couple of knots to keep it from falling through.
Mitch Deitrich YouTube Channel10. Attach the free end of the rope to the tree.
Mitch Deitrich YouTube channel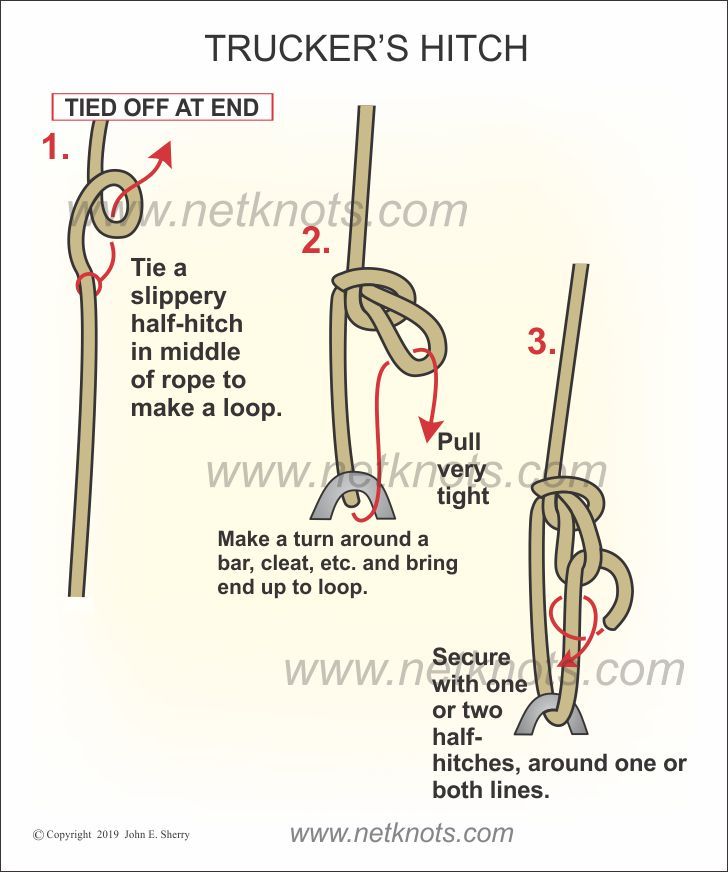
1. Estimate the approximate length of the rope to be enough from the branch to the ground, and add 1 m in reserve.
Rewind in place with duct tape to keep the edges from fraying, and cut off the piece with a sharp knife.
Chris Notap YouTube Channel2. Cut the bike tube and put it on one end of the rope.
Chris Notap YouTube Channel3. Tie off this piece to form a loop wrapped around the camera. This will protect the rope from chafing and prevent it from cutting into the branch.
Chris Notap YouTube Channel4. Throw the rope over the branch and tighten the loop. For convenience, you can use a thin cord with a weight attached to it.
Chris Notap YouTube Channel5. Form a knot at a height of about 1.5-1.7 m from the ground.
Chris Notap YouTube channel6. Cut two more pieces of rope about 2 m long each. Thread them into a knot on the hanger, and then tie one knot at each end to secure.
Chris Notap YouTube Channel 7. Tie a knot on the main rope from the branch. You should have three ends to hold the tire on.
8. Divide the tire into three approximately equal parts and drill holes d along the thickness of the rope, stepping back from the edge of the tire. On its back, make a few more holes for rainwater to drain.
Chris Notap YouTube Channel9. Insert the ropes into the holes, put on the washers, and fix the ends with clamps.
Chris Notap YouTube channel10. Release the tire and try to rock.
Chris Notap YouTube channel
1. Step back from the edge of the furniture board by 250–300 mm, attach a square and draw a line with a pencil.
YouTube channel “Mikhail Le Dantu”2. Saw off the future swing seat along the line with a hacksaw.
YouTube channel “Mikhail Le Dantu”3. Mark with a pencil the places for attaching the rope in each corner, stepping back from the edges by 20 mm.
Michael Le Dantu YouTube channel4. Make holes with a drill. Choose a diameter so that the rope passes with difficulty and does not dangle.
YouTube channel “Mikhail Le Dantu”5. Cut the sharp corners of the plank with a hacksaw, and then grind it down with a file. If you want it to be neat, first outline the shape with a template, coin, or other round object.
YouTube channel “Mikhail Le Dantu”6. Round the top edge of the board with sandpaper or a planer so that the child does not get hurt.
Michael Le Dantu YouTube channel 7. Cut two identical pieces of rope and cauterize their ends.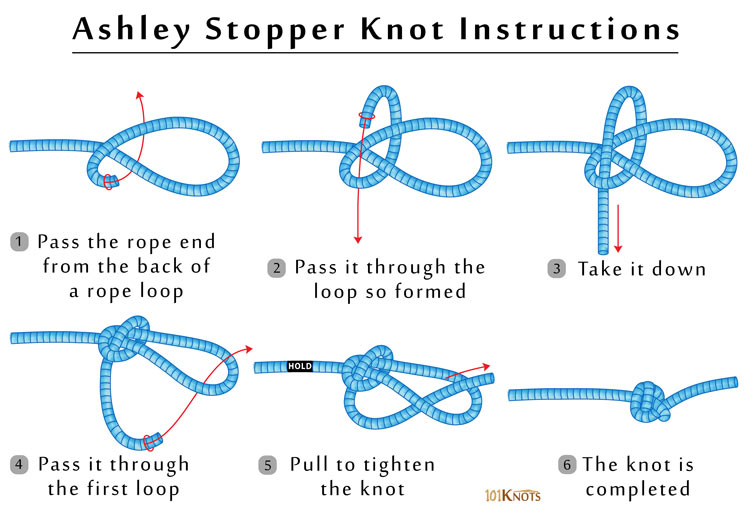
8. Thread the ropes through the holes in the board on each side, with the loose ends on top.
YouTube channel “Mikhail Le Dantu”9. Attach the ends of the ropes to any strong support, such as a wall bar.
YouTube channel "Mikhail Le Dantu" 1. Cut a 30 x 30 cm or 30 x 40 cm seat out of plywood. Drill holes in the corners to attach a rope. Paint the plywood if desired.
Cut the polypropylene pipe into pieces: 15 cm four pieces, 25 cm two pieces, 35 cm two pieces. Drill through holes in each piece along both edges.
Divide the rope into two equal pieces. Then fold each in half, thread and secure in carabiners. These will be the left and right suspensions.
YouTube channel “Marcel Yarmakov”2. Take the longest piece of pipe and thread one rope of the right and left hangers through the holes on each side.
YouTube channel “Marcel Yarmakov”3. Next, string the middle piece of pipe one at a time, also inserting the rope through the holes at the ends of the parts.
YouTube channel "Marcel Yarmakov"4. Next - one short piece at a time. Here, the rope is already inserted into the pipe itself, along the entire length.
Marcel Yarmakov YouTube channel 5. Now thread the free ends of the left and right hangers through the holes of the second long piece.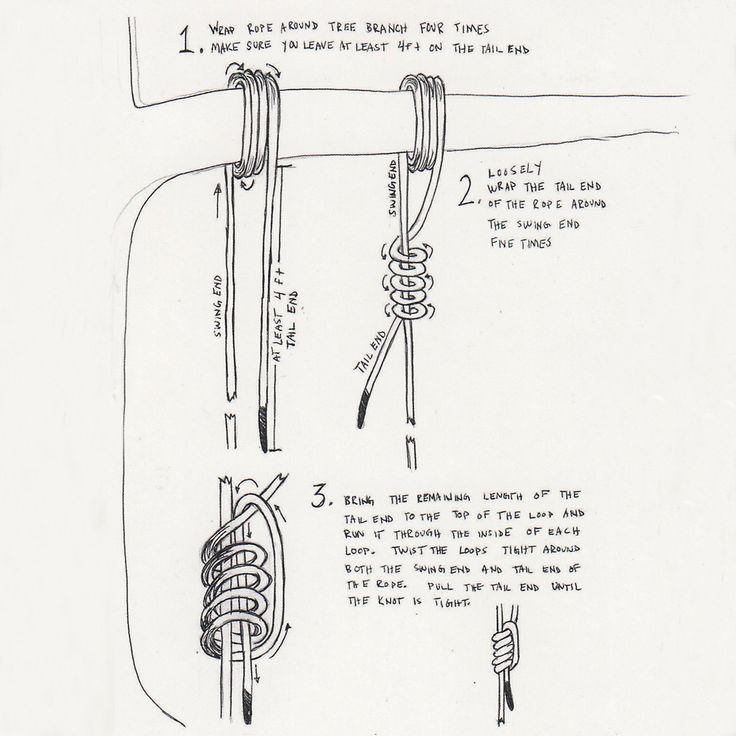
6. Insert the rope into the remaining free holes in the tubes of medium length. And then add one short piece at a time, again passing the rope through the pipe along its entire length.
Pass the free ends of the hangers through the holes in the seat and tie a knot in each.
Marcel Yarmakov YouTube channel7. Attach the carabiners to any solid support. The swing is ready!
YouTube channel "Marcel Yarmakov"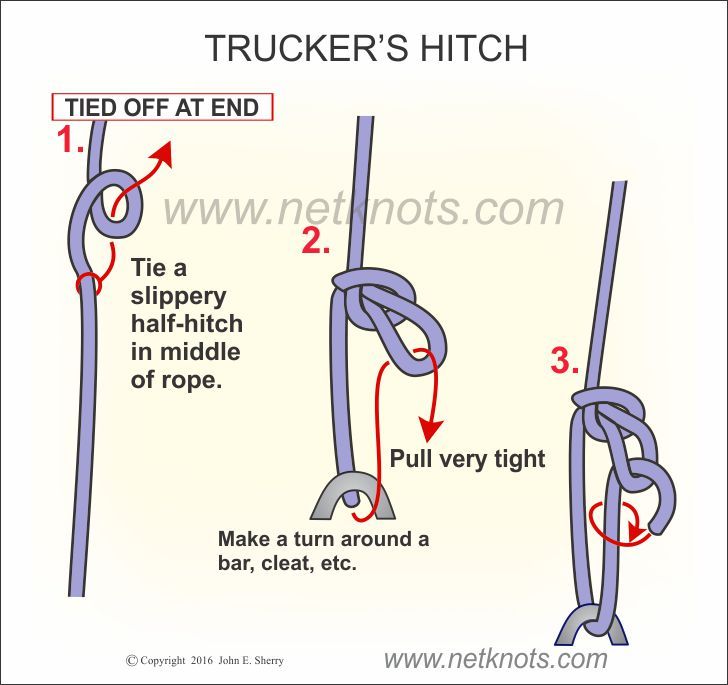
1. Remove the wheels and everything else from the board.
DIY Network YouTube channel2. Step back 5 cm from the edges and mark four holes for the ropes: two on each side.
DIY Network YouTube channel3. Drill through these areas. Choose the diameter so that the rope holds as tightly as possible.
DIY Network YouTube Channel4. Cut two 30-40 cm long pieces from the handle and drill one hole in each side. Step back from the edge by 3-5 cm so that the wood does not crack. These will be the hand rests.
DIY Network YouTube Channel5. Paint the bars the same color as the skateboard.
DIY Network YouTube channel6. Divide the rope into two equal pieces and fold in half. Tie a knot at each end, but don't tie it tight just yet.
DIY Network YouTube channel 7. Pass the rope through the bars, make another knot, and then pass the rope through the holes in the skateboard. Tie knots at the free ends from the bottom of the board.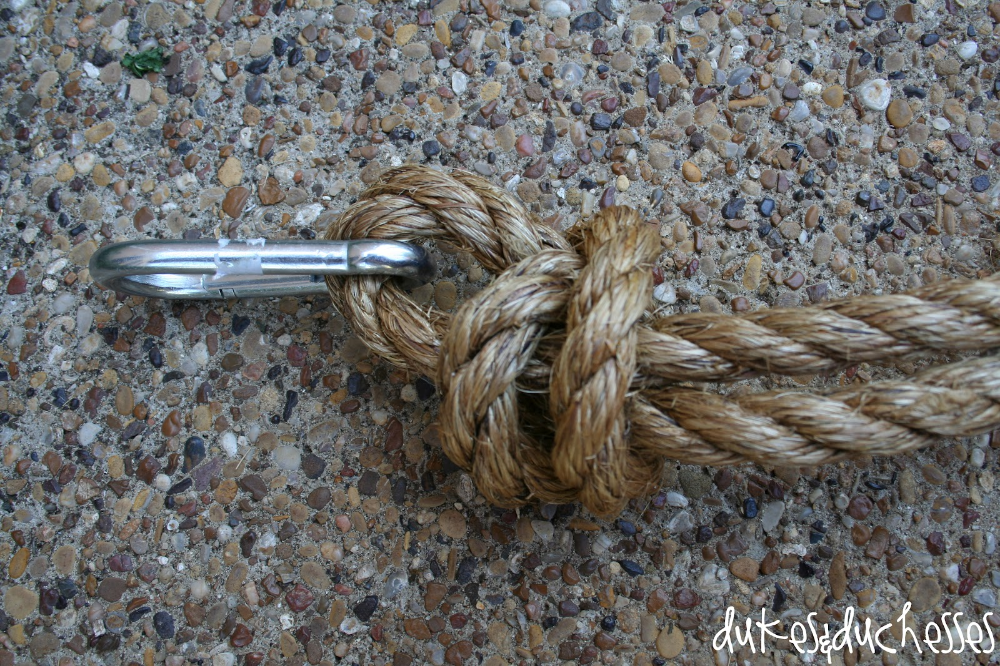
8. Hang the structure from a suitable tree branch and use knots to adjust the handles to a comfortable position.
DIY Network YouTube Channel 1. Cut the parts needed to assemble the two supports: four pieces of 2.5 m from a board 50 × 200 mm, four pieces of 1. 35 m from a board of 25 × 100 mm and four pieces of 35 cm from a bar 50 × 100 mm.
Assemble the "A" structure. Fold long boards at an angle and nail lintels from the middle segments to them. Reinforce the top of the support with short pieces of timber.
Build the second swing leg in the same way.
Dacha TV YouTube channel2. Trim the protruding edges with a hacksaw or jigsaw to avoid injury.
YouTube channel “Dacha TV”3. Place a piece of board 50 × 200, 2 m long, on the crossbars at the top of the letter “A” and nail it. Raise the entire structure.
YouTube channel "Dacha TV"4. Drill holes for fasteners in the middle of the beam at a distance of 50–70 cm from each other. Wrap anchor bolts with rings in them.
YouTube channel “Dacha TV”5. Hang the seat on the ropes and fasten it to the rings with carabiners.
Dacha TV YouTube channel6. Check the strength of the structure.
YouTube channel "Dacha TV"
1. Saw off the chair legs with a hacksaw near the seat.
deco dino YouTube channel2. Drill one hole in each corner of the seat.
YouTube channel deco dino3. Sand the surface of the chair with sandpaper.
deco dino YouTube channel4. Paint the resulting swing seat with fresh paint and let it dry.
YouTube channel deco dino5. Divide the rope into four equal parts. Pass each piece through the hole and tie a couple of knots.
deco dino YouTube channel 6. Use the loose ends to hang the structure from a thick tree branch.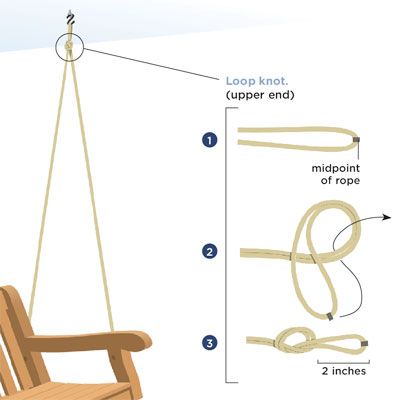
1. Sand the surface of the pallet with a sandpaper or machine to remove all burrs.
SuzelleDIY YouTube channel2. Drill six holes in the outer boards of the pallet with a diameter equal to the thickness of the rope.
SuzelleDIY YouTube Channel 3. Flip the palette over and do the same on the other side. Try to keep the holes in the top and bottom boards on top of each other.
4. Go over all the holes with sandpaper or a machine to remove burrs and not damage the rope.
SuzelleDIY YouTube channel5. Prepare two pieces of rope. Wrap the rope with tape and cut in this place. Then cauterize so that the edges do not fray.
SuzelleDIY YouTube Channel6. Snake the rope through the holes on one end of the pallet and tie knots at the ends.
SuzelleDIY YouTube Channel7. Do the same on the other side of the palette.
Straighten the ropes to look like the cables of a suspension bridge, and connect with carabiners - one on each side.
YouTube channel SuzelleDIY8. Take two more pieces of rope and tie them in a loop at both ends.
YouTube channel SuzelleDIY9. Throw these ropes over a thick tree branch.
SuzelleDIY YouTube channel10. Attach the pallet to the hangers with the carabiners.
YouTube channel SuzelleDIY11. Lay down a blanket and bring pillows.
SuzelleDIY YouTube channel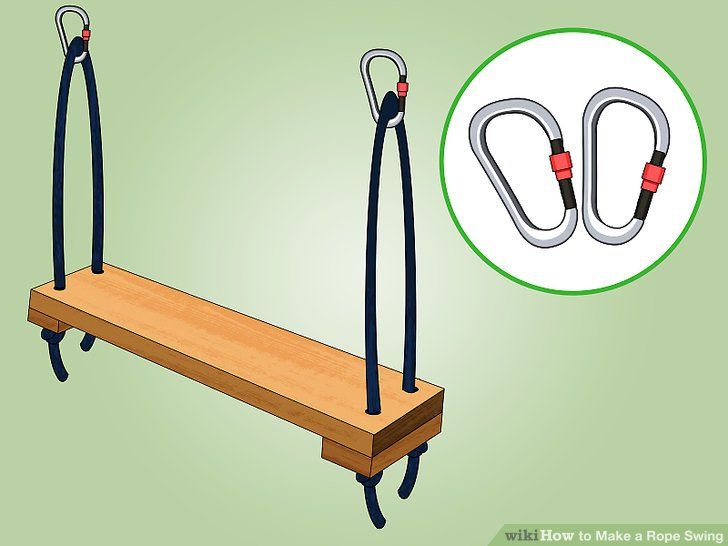 Support cables can also be replaced with chains, but it will look too brutal.
 5 see
YouTube channel “Mikhail .MD. Dervedmid"2. Assemble two supports in the form of the letter "A" with the upper and lower braces from a bar 50 × 50 mm. Drill through the parts and connect with bolts.
YouTube channel “Mikhail .MD. Treevedmid” 3. Cut off a 1.8 m long crossbar from a 100 × 100 mm beam and fasten it to the upper stops of the uprights by tightening it with bolts.
4. Saw six boards 120 cm long: three for the back and three more for the seat.
YouTube channel “Mikhail .MD. Derivedmid"5. On the top board of the backrest, if desired, cut out a pattern with a jigsaw. Sand well with sandpaper.
YouTube channel “Mikhail .MD. Derivedmid”6. Attach three boards with screws to the pieces of timber 50 × 50 mm - this will be the seat.
Do the same for the back and join the two pieces together at the desired angle.
YouTube channel “Mikhail .MD. Derivedmid»7. Saw out the armrests from two boards and attach them with screws through the beam to the seat and back.
YouTube channel “Mikhail .MD. Derivedmid"8. Drill holes for the bolts in the beam and install them through the chain link. Fix it on top with a nut, and so that it does not fall into a tree, place a metal plate or a large-diameter washer.
YouTube channel “Mikhail .MD. Derivedmid» 9. Make holes in the beams of the seat, insert bolts into them and fix the ends of the chains.
10. Adjust the length of the hangers to the desired position.
YouTube channel “Mikhail .MD. Derivedmid"Read also ⚒👍🤗
This workshop describes the process of making a tire swing. If you have a cottage, then perhaps you should pay attention to it. We have prepared a clear step-by-step tutorial and useful tips for you, as well as collected some great examples for inspiration.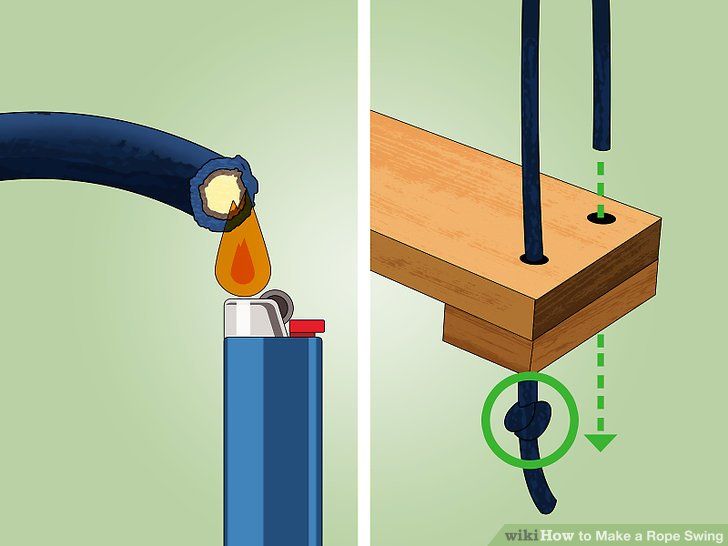 You will learn how to make a garden swing out of tires with your own hands and be able to transform your summer cottage at no extra cost.
Children love this swing. Of course, many adults will also like them. Working with tires is quite easy, and most importantly, they are very easy to paint and make them bright, beautiful and original. From several pairs of tires you can make a whole children's town in just half a day!
It is worth mentioning separately the choice of tires for the swing. Foreign tires are best suited, since Russian ones are more rigid, and therefore drilling and cutting them turns out to be quite problematic. This is especially true in cases where you want to make some unusual garden swings from tires. It is also important to add that it is most convenient to work with winter tires - they are also easier to cut.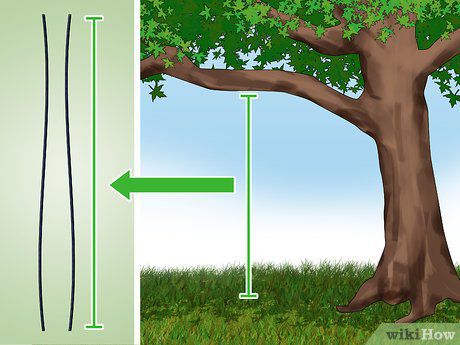
It is important to pay attention to the fasteners as well. In this case, we are talking about a chain, but it can be replaced with a strong rope rope.
Also remember to clean the tire with a tire cleaner. If you don’t have it, then feel free to replace it with dishwashing detergent.
First of all, we need to drill six holes for three brackets. Staples must be placed at an equal distance from each other.
At this stage we paint our tire. It is preferable to use spray paint - it is convenient to work with it, it does not stain clothes after drying and fits well on the material.
We put the bolts in the holes and fasten them with washers from the inside of the tire.
Next, we need to connect the structure to the chain. To do this, we take the fasteners and fix them on the brackets inserted into the tire.
We pull the three chains up and on the other side we connect them with another fastener.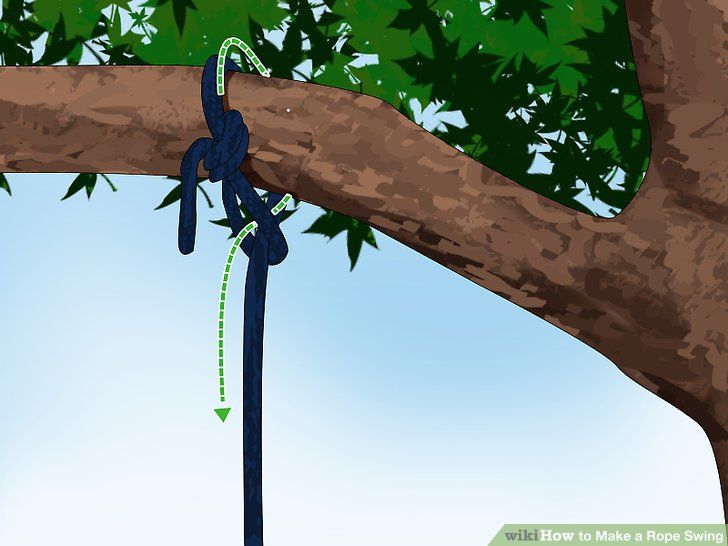 In the same place, if necessary, we fix a hanging carabiner or a ring - it depends on where you lead the homemade swing from the tire.
Done! It remains only to securely fix the structure on a solid beam.
This is the easiest DIY tire swing. Of course, you can do something more original. Take a look at these examples for inspiration and try to repeat the master class or make something of your own.
The tire must be cut in half and the side part must also be cut off. Holes are made in the same way as in the master class above. You can insert staples with a chain into them or just a rope.
It is better to paint tires for such a swing from all sides - it will be more beautiful.
The manufacturing principle will be exactly the same. Just in this case, the tire is mounted vertically.
In this case, it is preferable to use a chain rather than a rope, since there will be only one fastening, and not three, as in the horizontal version.
If you are making a swing for a small child, it makes sense to make something like a hammock. To do this, the tire must be cut and unscrewed. The excess is cut off.
Hanging this swing is easy - just wind the tire with a rope. You can also use staples and a chain. If desired, an interesting pattern can be made on the tire.
Two tires are needed to make the chair. The first part is cut and turned inside out. The second part is attached to the first with screws and is a piece of the flattened part of the tire.
It is best to fasten such a swing on a chain. If desired, you can put soft pillows or a blanket on it.
Make your swings colorful to make them even more fun for kids. If you are making a DIY tire swing for the first time and are not too confident in your artistic abilities, draw a ladybug - this is the easiest. This option looks very funny and beautiful.