posted on: May 15, 2020 07:15 am
You need to have a practiced touch to accurately mount and dismount your tires if you hope to avoid damage. It takes more than sheer force to replace tires safely, and Bauer Built Tire & Service has you covered.
Dismounting Your TiresNever dismount tires while they’re inflated and avoid tools that will damage the sidewalls or tire beads. Lubricate the rim flange and tire beads to assist the removal process.
Lubricate Tire And Wheel ComponentsThere are plenty of moving parts during mounting and dismounting, and all that motion can take a toll on your tire and wheel components. Lubricating facilitates mounting, dismounting, and adjustments, so you won’t have to worry about punctures or tears.
Before fitting a new or existing tire back onto the wheel, lubricate:
Avoid any lubricant that will damage the tire like silicon or hydrocarbon-based products.
Inspect the wheel and rim for damage, cracks or corrosion. Clean with a wire brush to remove flaked or excess paint, rust, and debris. Any irregularities will prevent the tire from laying flush once the clamping force is applied.
Pay attention to the studs. If you replace a single damaged stud, you’ll need to replace the two studs adjacent to it as well. Two or more damaged studs require replacing all ten.
Position the wheel on the ground with the drop center facing upward. With the valve hole at the bottom of the wheel, line up the first bead is at the rim’s edge. Place the tire on the wheel with the proper tools, do not force it on with your knee or foot, and use a rocking motion to fit it properly.
Inflating Mounted TiresInflate the tire to 5 psi and check that the beads are positioned correctly. Your service technician should verify the correct inflation pressure with the tire manufacturer’s load. Tires must be placed in a cage during inflation as a safety measure. The tire will have to be deflated, removed, lubricated, and replaced if the beads do not sit correctly.
Inflate commercial truck tires to 20 psi to inspect that sidewall cords are good. Upon completing this inspection, over-inflate by 20 psi the manufacturer’s standard psi to confirm that there are no cracks in the sidewall cords. Then achieve the final manufacturer’s psi by deflating the air pressure until the correct psi is reached while not exceeding the air pressure recommendations of the wheel.
Bauer Built also offers a wheel reconditioning program to correct surface corrosion and rust found during our inspections and mounting and dismounting of tires for our commercial accounts. Contact us to learn more.
Categories: News, Tire Care Tips
Posted on
Tire mounting and demounting requires specific knowledge and tools.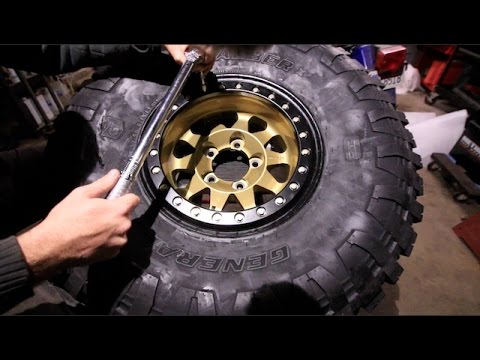 Only trained professionals should mount and demount tires. The Rubber Manufacturers Association has established guidelines for safe demounting and mounting which are available in manuals and wall charts often displayed in professional garages where these services are provided.
Tire technicians are trained to safely demount, mount and inflate tires according to the Rubber Manufacturers Association’s procedures.
Faulty mounting or demounting can cause a mechanical failure that can result in a traffic accident, potentially causing serious injury or death. Following the proper procedures and practicing safety is essential to minimizing risks.
Professionals should adhere to the following steps to demount and mount tires.
 Then break the top bead and remove the top bead over the rim.
 Use an extension hose for air insertion. Never stand over a tire when inflating but stand back and away as far as you safely can.
Find a Personal Injury Lawyer,
Near Me (855) 529-0269
The following cautions may help keep tire technicians and vehicle owners safe from tire mounting-related complications.
Proper tire mounting and demounting and inflation of your tires is essential to your safety while driving your vehicle.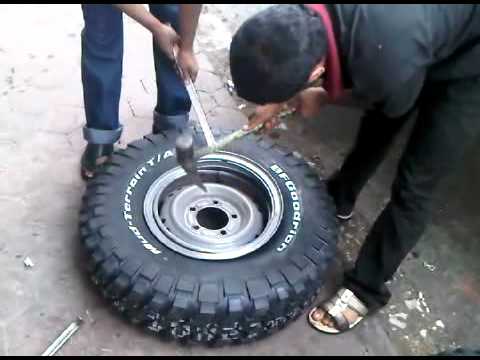 Do not attempt to mount or demount your tires yourself.
Seek a professional’s services instead. Be sure to ask any questions if you are unsure of a professional’s qualifications. If injured by someone else’s poor tire mounting or demounting practices, you may be entitled to compensation for damages.
Chalik and Chalik can help if you are injured from a tire failure or other tire-related problems. We’ll help explore liability for your accident; the tire manufacturer or a tire service professional may be liable in the event that you experience tire failure and a related accident. Call us today at 855-529-0269 to set up a free consultation to discuss your case with an attorney.
Call or text Chalik & Chalik (855) 529-0269
0003Related materials
Tire inflation with nitrogen and 7 more wirings at the tire fitting
In the middle-end of autumn, car owners storm tire shops. However, you can disassemble the wheels yourself.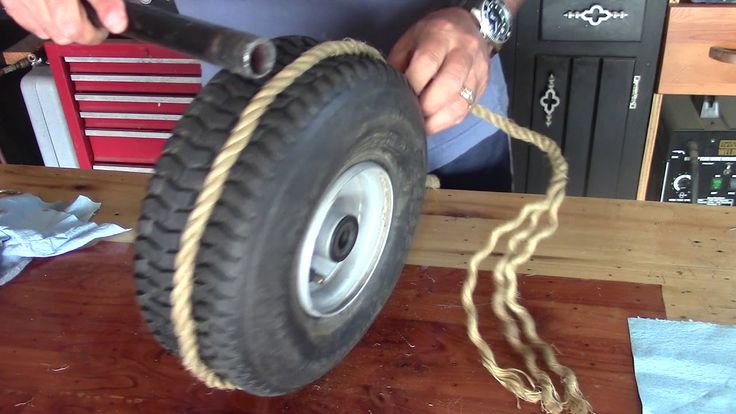 We'll show you how to do it. We will need a special tool, as well as a screwdriver to unscrew the wheel valve, and a couple of pliers to help remove the tire from the rim.
To rid the rim of the tire, we bought a simple but very useful device - a mechanical wheel beader. There are several options on the market, but we chose the one produced by the Sorokin company. It is inexpensive. Thanks to the ability to adjust the retractable linkage, tires can be removed from discs of different diameters. You only need to select the desired position of the rod and tighten the two bolts holding it, after which you can start working. nine0003
Related materials
Is it possible to pump up a wheel without a compressor - the experiment "Behind the wheel"
We took a 16-inch wheel. It is more convenient to remove the tire if you put it on the floor. In order not to scratch the aluminum disc during work, we will place a sheet of foamed polyurethane under it, which is used in construction for sound and heat insulation. We unscrew the cap on the valve, holding it with a finger, unscrew the spool so that it does not pop out under air pressure. The tire starts to deflate. nine0003
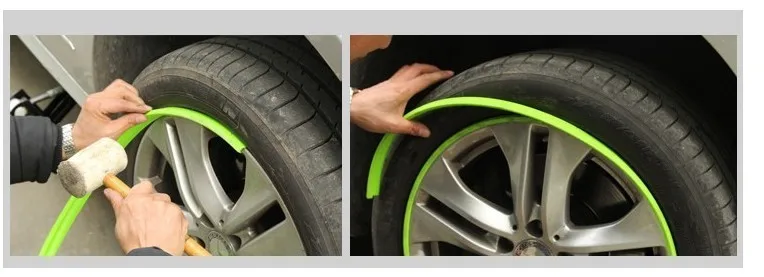
Before carrying out work with the help of a special tool, it is necessary to moisten the working edge of the disc with a penetrating liquid. Otherwise, we risk damaging the disk. Also, the liquid, having seeped under the edge, will facilitate the removal of the wheel from the humps.
We apply our device to the disk. Its hook in this case should protrude from the mandrel by 7–8 cm. For reference, this is one hole on the retractable rod. With a hand, we press on the device from one side so that it goes under the protrusion of the disk, and we wind the hook under the disk from the opposite side. We spread the levers of the device in different directions. The main thing is not to try to throw off the tire immediately, but to move it off the hump gradually. Otherwise, the tire may be damaged. Please note that the device should not be inserted near the wheel valve. nine0003
Related materials
Changing shoes correctly: everything you need to know about disks
Pulling out and moving the tool, slowly move the tire off the hump around the entire circumference. You can hold the side of the flight attendant, where there is no hook, with your foot. Having removed the tire on one side, turn the wheel over and do the same work on the other. Don't forget about lubrication. By the way, it is not necessary to use a liquid, a silicone composition is also suitable.
We removed the tire from each side of the humps. It remains to take mounting blades and completely remove the tire from the disk. We process the belt with penetrating lubricant. It is advisable to get on the inside of the rim, this will make things easier. We start the first blade under the tire. It is convenient to do this in the area of the wheel valve. We take the assembly aside in advance so as not to damage it during work. Hold the mount with your foot. We insert a second spatula next to it and lift the edge of the tire with it. We do this along the entire inner circle, also gradually. We removed the tire from one side of the disc, it remains to do the same on the other. We turn the wheel. We wind the blade behind the disk and begin to remove it from the tire. As soon as we succeeded, we can consider that the work is over. nine0003
Taking apart the wheels yourself is easier than you think. The main thing is to stock up on the right tool and free time, as well as take into account the characteristics of rubber.
Please send all questions and suggestions regarding the Technical Environment series to: [email protected].
Our new video
Mazda CX-4 from China: first test
Test of Chinese crossovers Omoda C5 and FAW T77
Chinese DFSK EC35 will replace Largus?
Did you like the note? Subscribe and you will always be in the know!
Driving in Zen
News smi2. ru
ru
A tire puncture or tire rupture, as well as other defects, may lead to the need to disassemble the wheel right on the road. Also, disassembly is required if do-it-yourself tire fitting is performed, tires are repaired and / or replaced in a conventional garage, etc. nine0003
At the same time, not every car owner knows how to disassemble the wheel on their own without a special machine or tool. In general, wheel beading involves working with two types of tires:
The first type is used much less frequently today, but can also be found on some vehicles. In any case, it is necessary to take into account individual subtleties and nuances, as well as to have a minimum set of tools. Read more in our article. nine0003
Content of Article
 Such a minimum set can only lead to hidden or obvious damage to the rubber, and the nuances will appear later (after installing the previously removed tire on the rim). nine0003
Let's start with wheels that have a tire and a tube. nine0003
A tubeless tire, unlike tires with a tube, does not have a separation into a tube and a tire. This means that the inner cavity of the wheel is filled with air. To maintain tightness, the tire fits tightly on the disc. At the same time, this design assumes that there are additionally special convex areas along the edges (hampas).
When the wheel is inflated with air, the tire joint seals as the pressure increases. Taking into account such features, disassembly of tubeless tires is more labor-intensive. To disassemble a tubeless wheel, you need to literally tear the tire off the seat. nine0003
Please note, if this type of tire punctured on the road, it is better to use a tubeless tire repair kit or try to insert a tube inside and get to the tire shop on your own.
It is also important to consider that even if the tubeless tire can be removed, the air must be supplied quickly and at high pressure during subsequent inflation. This is necessary in order for the board to be able to jump over the hump. In artisanal conditions without a powerful compressor (compact automobiles will not work), this is almost impossible. nine0003
The only way out is to put the tire on the rim with a small explosion (popularly, this method is called pumping the wheels with gasoline). To solve the problem, you need to take about 20 grams of gasoline or ether.
We also recommend reading the article about which tires are better, studded or non-studded. In this article, you will learn about the advantages and disadvantages of different types of winter tires for a car, as well as what you need to consider before buying.
The following is done:
In fact, this is the only way to board a "tubeless" in artisanal conditions without a powerful compressor.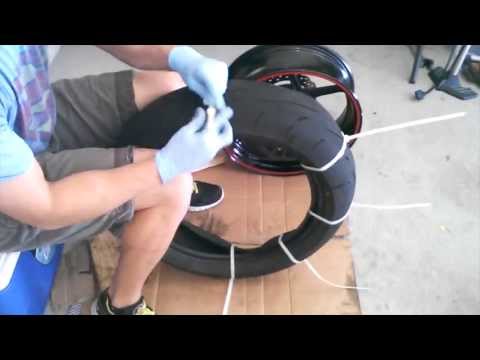 It is quite obvious that wheel beading in this way is associated with certain risks and cannot be recommended, especially for novice drivers.
When replacing one tire, it is necessary to install exactly the same tire as on the other wheels (summer or winter tires with the same pattern from one set). If a different tire is installed, be aware that driving and braking stability, as well as vehicle handling, will change. nine0003