by Mike Anderson
themikeanderson
10th July 2015Benjamin Franklin reckoned that life had two inevitabilities: death and taxes. If you’re a cyclist, there’s one more thing to add to that list. Punctures.
No matter how smooth your local roads, how tough your tyres, how little you ride in the rain, eventually you will puncture. It’s just one of those things.
A couple of tyre levers, a small piece of sandpaper, some tube patches and rubber solution are all you need. You may want to carry a tyre boot as well just in case the tyre is badly damaged. Needless to say, you’ll need a pump or CO2 inflator, tooAnd when you do puncture, you’ll need to know how to fix the punctured inner tube.
Admittedly, you can just change the damaged tube for a new one but unless you have an endless supply of new tubes in your back pockets, you’ll eventually have to face up to repairing the tube itself, even if it’s when you get back home so you can re-use the tube at a later date.
Of course, for starters all this means having a puncture repair kit, and keeping it in your saddlebag should you need it on the road.
The first part is getting the punctured tube out of the tyre. The easiest way to do this is with tyre levers although you can occasionally get some tyres off just by using your hands if the fit is particularly good, or you happen to have the grip of a powerlifter, of course.
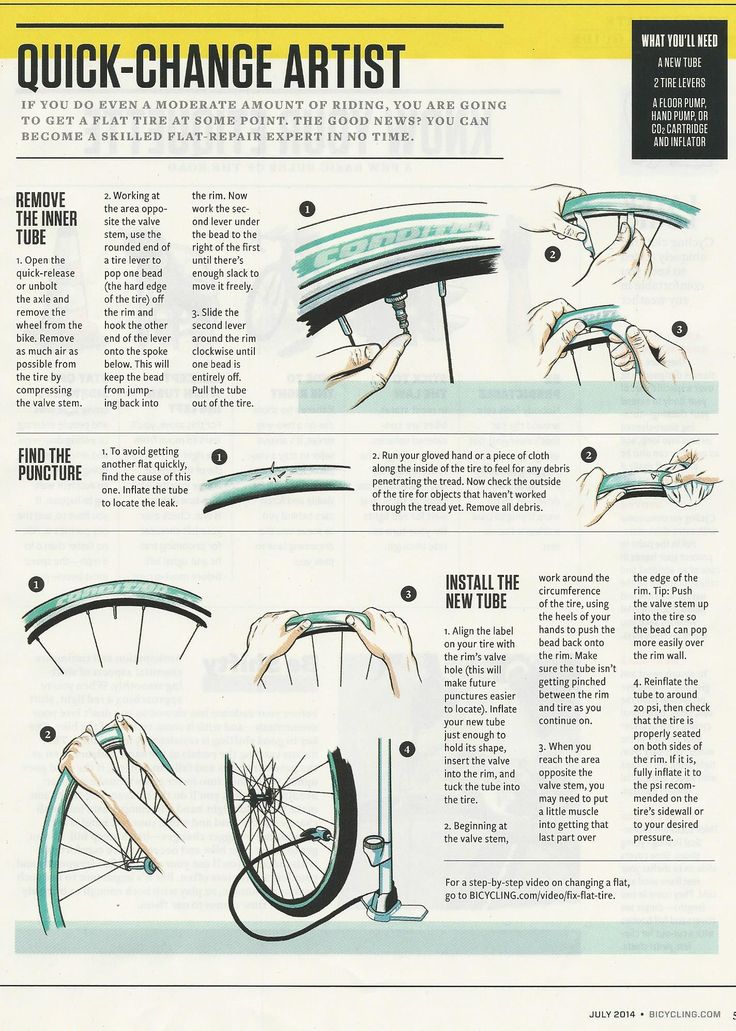
Levering the first bit of the tyre off the rim is the hardest part. Let all of the air out of the inner tube (if there’s any left, that is) and push the lever end of the tyre lever under the bead of the tyre. Then push down hard on the end of the lever and lift the tyre up.
Some tyre levers will have hooks on the end so you can attach them to the spokes to hold them in place at this point, but remember that the more you stretch the tyre, the harder it’ll be to get the second level under the bead.
With many tyres, this likely wont be a problem, but if it’s a particularly tight tyre, it might make it damn near impossible to get the tyre off.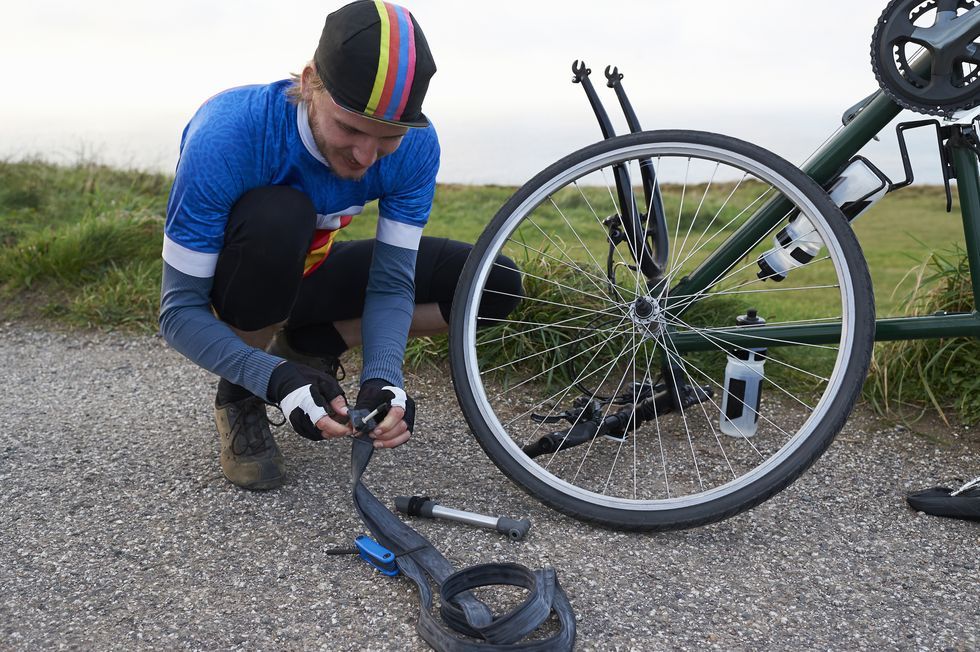
Anyway, the next step is performing the same action with the second lever while making sure the first one stays in place. Once you’ve lifted that second part of the bead, it should sit outside the rim, leaving you free to lift the rest off the tyre off the rim, or do the same thing for a third time, if it needs a bit more persuasion.
At this point it’s actually possible to slide the tyre lever around inside the bead of the tyre, pulling it all out of the rim. As we’ve alluded to, it’s often possible to do this earlier in the procedure, but again it all depends on how tight and stiff the tyre is.
Some tyres can be removed without the use of levers if they’re particularly supple, or you have a very strong grip, but tyre levers just make the process easier
Once you have half of the tyre completely out of the rim, you can remove the tube.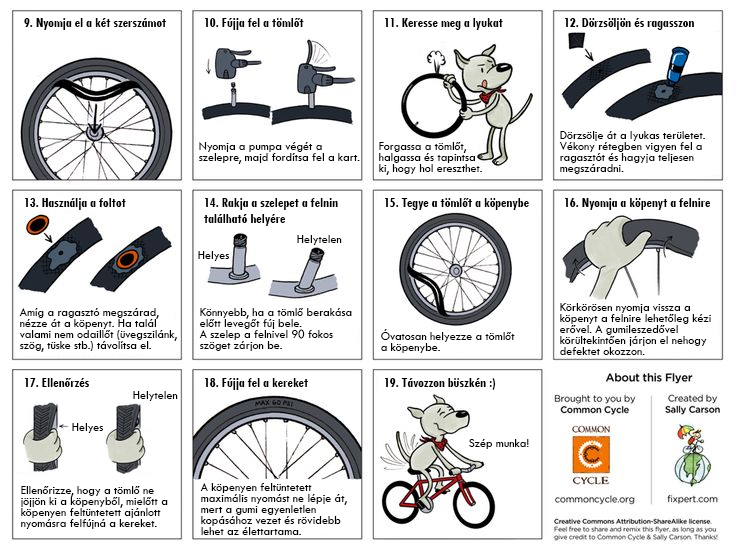 After the tube’s out, check it over to see where the hole is.
There are various methods to do this. One if the hole is obvious enough, is to just look. Another, easier, way to do it is to pump air through the tube and listen/look/feel for air escaping.
Yet another way (and this one only generally works for fixing punctures when back at home, for obvious reasons) is to submerge sections of the tube in a tub of water while pumping air through the tube. That way you can see the air bubbling out of the hole when you reach the damaged section.
One you have one half of the tyre completely off, you can slide the tube out without removing the other side, too. This just makes the process a bit quicker as you don’t have to mess about any more with the tyreSomething that’s easy to forget in the haste of fixing a tube is to check the tyre.
If your puncture’s been caused by something piercing the tyre, the last thing you want is to fix the tube, stick it back in the tyre only to puncture again five minutes down the road because the piece of glass or offending item is still stuck in the tyre.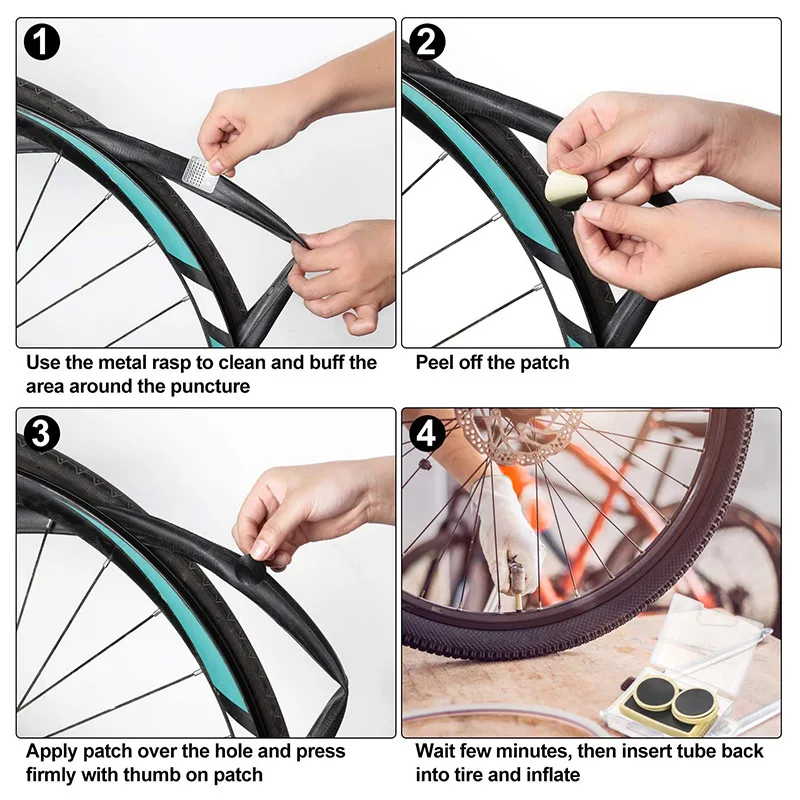
So check the tyre thoroughly – use where the hole is in the tube to clue you in to where the tyre may be punctured – and make sure any debris is cleared.
In the case of bad punctures, where there’s a hole in the tyre, you may need a tyre boot to cover that hole until you get home.
Sometimes finding the hole in the tube is easier than others, but if you have a mini pump, using it to push air through the tube can really help as you can hear/feel it escapingIn your puncture repair kit, there should be a small piece of sandpaper. Use it to lightly rub around the damaged tube in the area of the hole to provide a better surface for the rubber solution to grip.
Next, apply the rubber solution to the tube. The reason we call it rubber solution rather than glue is because if you treat it like conventional glue, you’ll have no joy at all trying to fix the puncture. Basically, you need to apply enough to cover an area the size of the patch and you don’t need a massive amount of solution.
Once applied – and this part is vital – leave it for around 30-60 seconds. You want the solution to go tacky, runny is no good at all, and you don’t want to apply the patch until the solution is just the right consistency.
You can just apply the solution and spread it out with a finger, no special tools necessary! But don’t use too much and remember to wait until it’s tacky before you apply the patch because otherwise you’ll have no joy trying to get it to stickWhile you’re waiting, get the patch ready by pulling the silver foil or similar off the back, but don’t touch the side you’ll be applying to the tube as you don’t want to get dirt on it.
Next, carefully apply the patch to the tube. Sure, it’s not exactly surgery, but you don’t want to mess it up and leave part not stuck down properly because that means it won’t seal the tube and you’ll have to start all over again.
I usually hold the patch against the tube for a good 30-60 seconds to make sure the whole thing is securely stuck down.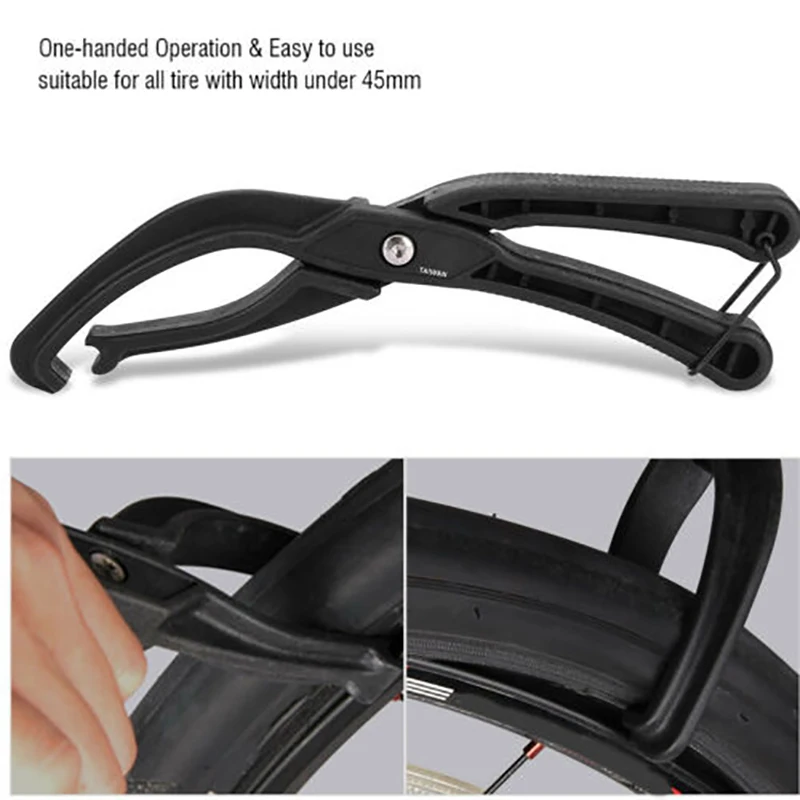
After that, either pump some air into the tube to check that the patch has been installed correctly or, once you’re confident enough in your ability to do it first time, stick the tube back in the tyre, inflate and you’re good to go.
If you need guidance on how to pump the tube back up, we’ve also got a beginner’s guide for that.
Fixing a puncture is really a very simple task. But, like everything, you’ll probably have to muddle through the first few times before you get the technique dialled and it becomes second nature.
I’ve had tubes with multiple patches on that have lasted for hundreds more kilometres after the original puncture, so learning how to do this properly will genuinely save you money, especially as repair kits are usually a few pounds and can fix multiple tubes, whereas new tubes are anything between £3-10 each, or even more if you want something very fancy.
Check out the gallery below for a pictorial step-by-step guide to fixing punctures. And remember, practice makes perfect. If you’re new to cycling and need more advice, check out our other beginner’s guides.
Beginner’s guide: how to pump up a road bike tyre
Beginner’s guide: how to use clipless road cycling pedals
Please enter your email so we can keep you updated with news, features and the latest offers. If you are not interested you can unsubscribe at any time. We will never sell your data and you'll only get messages from us and our partners whose products and services we think you'll enjoy.
Read our full Privacy Policy as well as Terms & Conditions.
Cookies help us deliver our services. By using this website, you agree to our use of cookies. Learn More
Accept
production
Anyone who has been riding bikes for a while can tell you that sooner or later, you’re going to get a flat.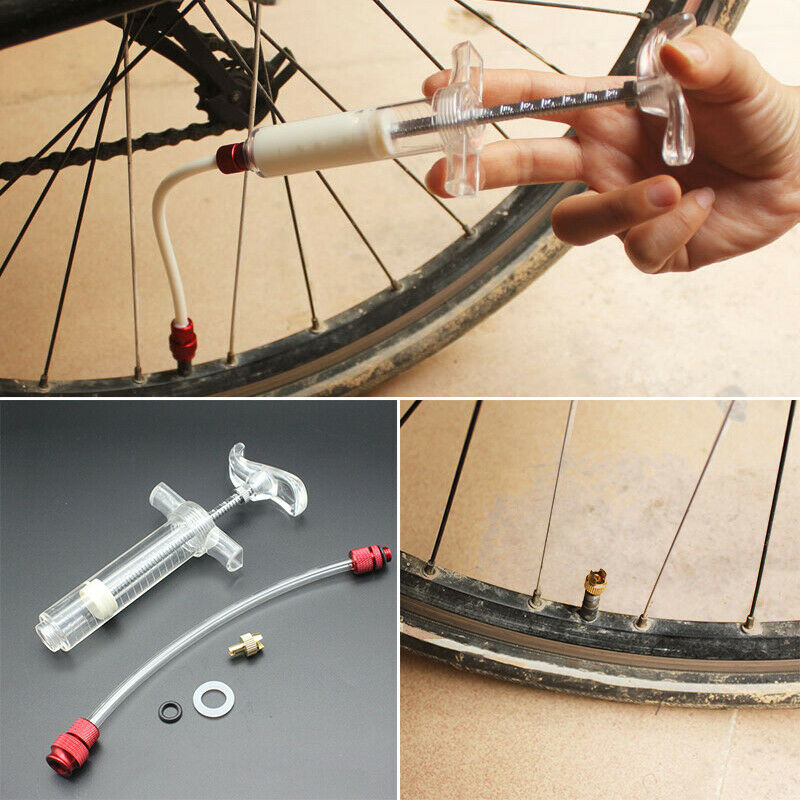 Even with tube sealant that prevents flat tires for up to two years, it’s just an unavoidable occurrence. When flats occur, the best thing you can do is be educated and prepared to patch the tube so that you can quickly get back on the road. Let's get started:
Consider these different flat tire scenarios: The at-home repair scenario where you're walking your bike into the garage and notice that the back wheel is sagging a little bit—you have a flat. Or, the on-the-trail repair scenario where 20 miles into a 50 mile ride, you go down hard on a rock and get a nasty pinch flat.
We’re going to walk you through some of the materials you’ll need for either situation, and then how to use them for both. Here’s a list of some things you will need to repair your tube.
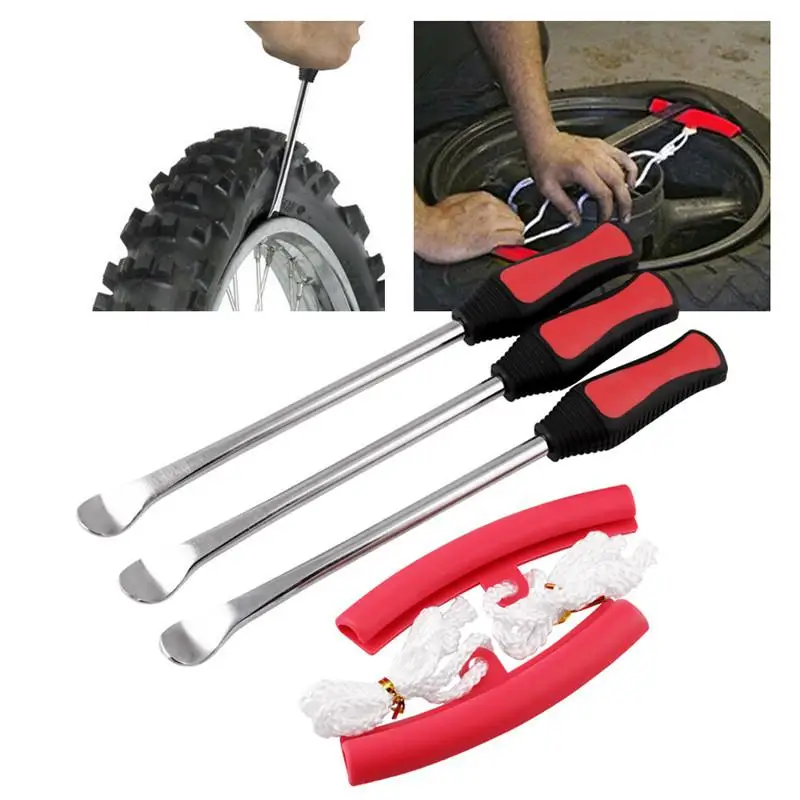
Follow these 4 easy steps to patch your bicycle tube and repair your flat.
Step 1. Remove Your Tire
Take your tire lever and hook it around the outer edge of the tire (the bead) to get it off of the rim. Once you have the tire lever under the tire rubber, hook the other end of your tire lever around one of your spokes to keep the tire elevated. With a second tire lever, work your way around the rim, taking the tire out of the bead until one side has been completely removed from the rim.
Step 2. Find the Leak
If the puncture or gash in your tube is not easily apparent, you’re going to need to fill the tube back up to locate where the air is escaping from. There are a couple of different ways to find the leak. The layman’s way would just be to run your hand along the tube and try to feel it out.
The bucket of water method that we mentioned earlier, however, is a more accurate way. If you’re at home, fill your sink or a large bucket full of water and submerge each end of the tube.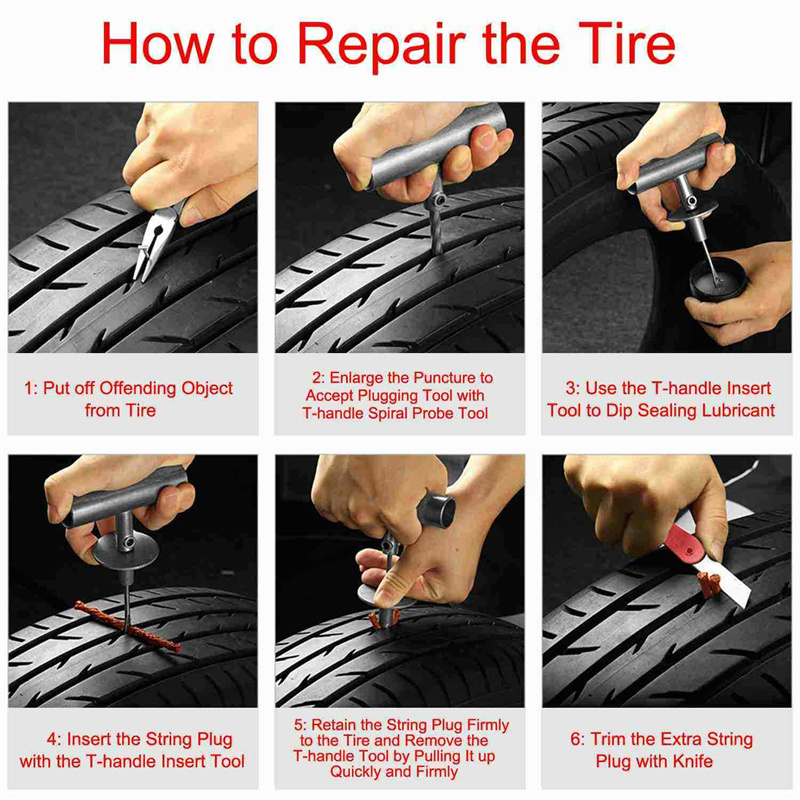 Watch for air bubbles escaping from your tire to locate your problem area.
Make sure you submerge each side, as there may be more than one puncture. Be sure to check the inside of the tire to make sure that the puncture-causing object has been removed. Once located, mark that spot with your tire marking chalk.
Step 3. Patch the Hole
When patching the hole in your bicycle tube, make sure that the area around the puncture is clean so that the patch will stick. Using the scuffer from your patch kit (sand paper or emery paper will also do the trick), rough up the area around the puncture so that your adhesives have something to grip.
If your patches don’t require glue, simply press them firmly over the hole. For patches that do need glue, add a layer of glue and spread it evenly around the area. Wait for the glue to get a little tacky, and then press on your patch. If you have the materials available to you at home, some cyclists will sprinkle talcum powder on top of the patch so that that patch/adhesive doesn’t stick to the inside of the tire.
Step 4. Put It All Back Together
Put a little air into your tube and then put it back in the tire, making sure, again, that there are no foreign objects remaining in the tire. Be sure to insert the tube and tire back into the rim using only your hands, as the tire levers may pinch the tube and cause another flat (we certainly don’t want that after all your hard work).
Once you’ve pushed the tire back in and the valve stem is securely inside the tire, inflate your tube back to maximum pressure, being sure to check the tire one more time to make sure that the bead is installed snugly. Ready to ride!
Contents
A punctured bicycle wheel is perhaps the most common problem that a biker can face. This is due to two main Russian troubles: roads like "so that the enemy tank does not pass" and fools, thanks to which broken glass, bent nails and other sharp objects are on the ground.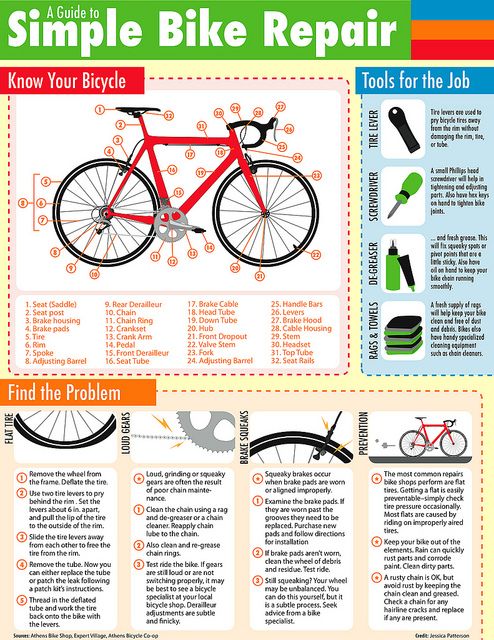
Driving with a flat tire is not recommended, especially if the cyclist is heavier than a 40 kg phyton. And it's not just that the bike will become less manageable, and the ride is unsafe. The tire that has lost air cushioning will “fly” first after the chamber, and then the rim together with the spokes can deform from the load that is no longer compensated for. So, so that a small problem does not turn into a big one and it does not come to replacing the entire wheel, it remains either to lead the injured iron horse in a bridle, or to look for an opportunity for urgent repairs.
If your bike tire is flat in the middle of the city, you can take your bike to the nearest tire shop, where they will most likely help you for a small amount or even free of charge, especially if you are the same 40-kilogram fitonya. But trouble can easily overtake a cyclist somewhere far from civilization, so the best option is to carry everything with you and use it if necessary. Fortunately, a bicycle repair kit fits in a small box and weighs no more than a pack of cigarettes.
You can assemble a "first aid kit" for bicycle tires yourself, but it is much easier to buy a ready-made kit, especially since it is not a shortage at all. On the contrary, there are many varieties on sale for every taste, color and wallet.
Standard bike repair kit includes everything you need to quickly and securely seal a hole in the tube and keep going. The minimum funds required for this:
More advanced repair kits usually include a whole range of patches of various shapes and sizes, designed for different scales of damage - from small punctures to holes visible to the naked eye. In addition, plastic mounts are often additionally placed in such boxes, which make it easier to remove and put the tire back on the rim.
It goes without saying that in addition to any repair kit you will need a bicycle pump to pump up the sealed tube after repair.
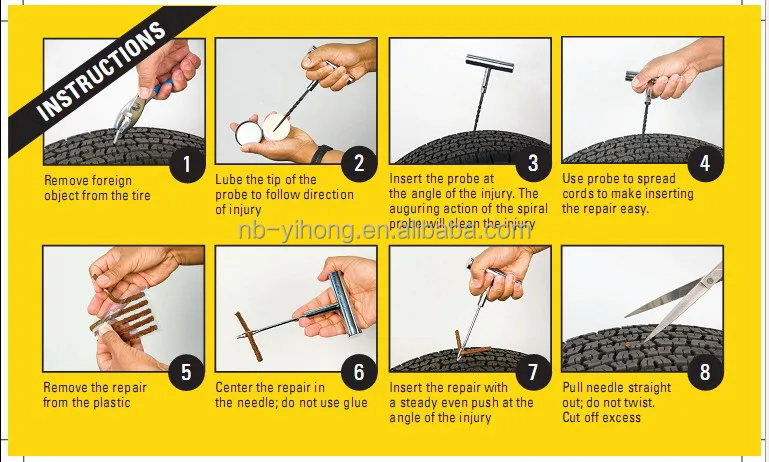
Tube puncture is one of the simplest problems, that is, it does not require a completed engineering education, special tools, or even special skills to solve it. The procedure for repairing a punctured chamber is as follows:
1. Remove the damaged wheel from the frame, completely bleed the air before disassembling it, if this has not already happened spontaneously.
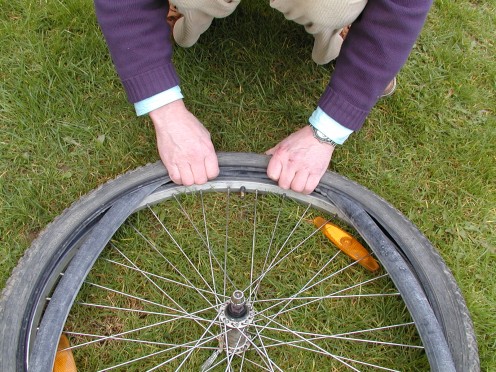
2. Carefully remove the tire from the wheel rim using pryers or tools.
3. Loosen the chamber, starting with the nipple, and look for the damaged area on it.
If the puncture is not visible to the naked eye, find a way to lower the inflated tube into the water at least in parts and determine where the air comes from by looking at the bubbles. For the same purpose, you can wipe the rubber with soapy water. An option for very field conditions is to hold a wet hand at a close distance from the surface of the chamber: in the place of the hole you will feel cool.
4. Select a patch from the repair kit according to the size and shape of the damage.
5. Thoroughly clean and dry the puncture site and its surroundings. Ideally, it is also desirable to degrease them if you have gasoline, acetone, etc. at your disposal.
6. Gently rub the chamber and patch with emery cloth to roughen the bonding surfaces for better bonding and better adhesion.
7. Apply adhesive to both surfaces, wait the time specified in the instructions for this particular compound and seal the hole.
8. Wait for the glue to dry, put the inner tube into the tire, put the tire on the rim and inflate the wheel with a pump to the required hardness.
There is no single answer to the question of what is better - a repair kit or a spare camera - there can only be a couple of tips.
It makes sense to put a spare tire in a backpack if the rides are short and the weight of the luggage is not particularly critical, but time is precious.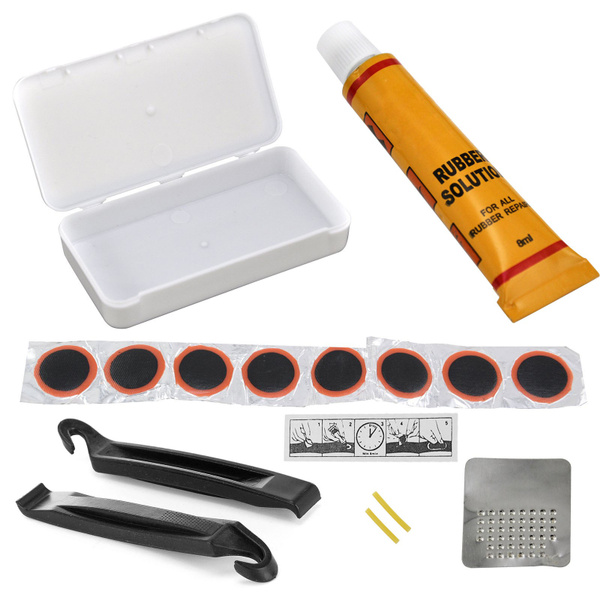
Yes, it's heavier and bulkier than the repair kit, but the above guide will be five points shorter in one fell swoop. No need to look for an annoying hole that seems to be hiding on purpose, no need to wait for the glue to dry - remove the old camera, put in a new one, and you can continue to pedal and devour kilometers.
But on long trips, especially off-road, a good repair kit is still preferable: firstly, the weight of a biker’s luggage tends to increase in sensations in direct proportion to the distance traveled, and secondly, on a long and difficult road it may not happen one puncture.
Contents
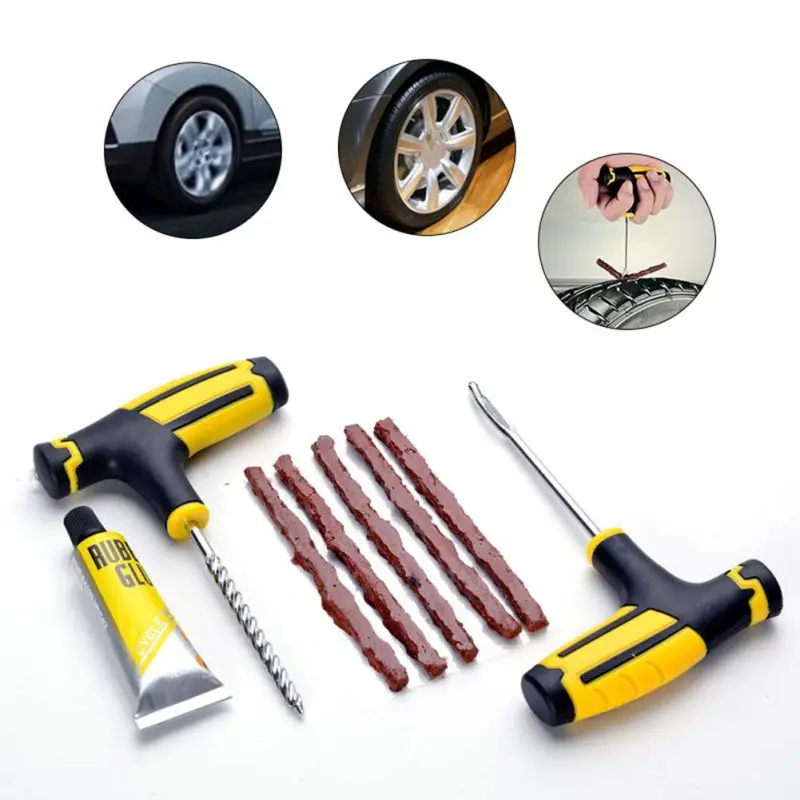
When a wheel is damaged on a bicycle, special repair kits are one of the first helpers.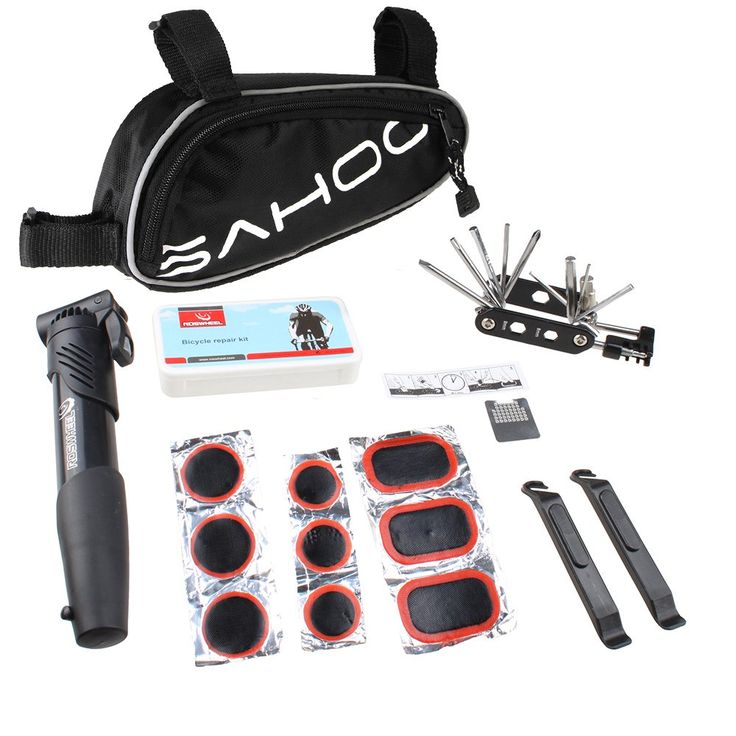 A repair kit for bicycle cameras should be available for all fans to ride a bike. The kit will help to cope with small problems without changing the camera.
Bike inner tube repair kit has the following components:
Some expensive repair kits also include a small hand pump.
In order for the repair kit to help the cyclist fix the problem with the tube puncture, the following sequence of actions must be performed:
Remove the flat tire:
Remove the chamber:
Find the location of damage:
How to use repair kit :
After the damage has been repaired, the chamber should be inspected for possible additional punctures. Very often, punctures form in different places and at first glance may be invisible to the cyclist. Then inflate the camera and install it in place.
When choosing the most appropriate method to fix a problem, it is difficult to give a definite answer.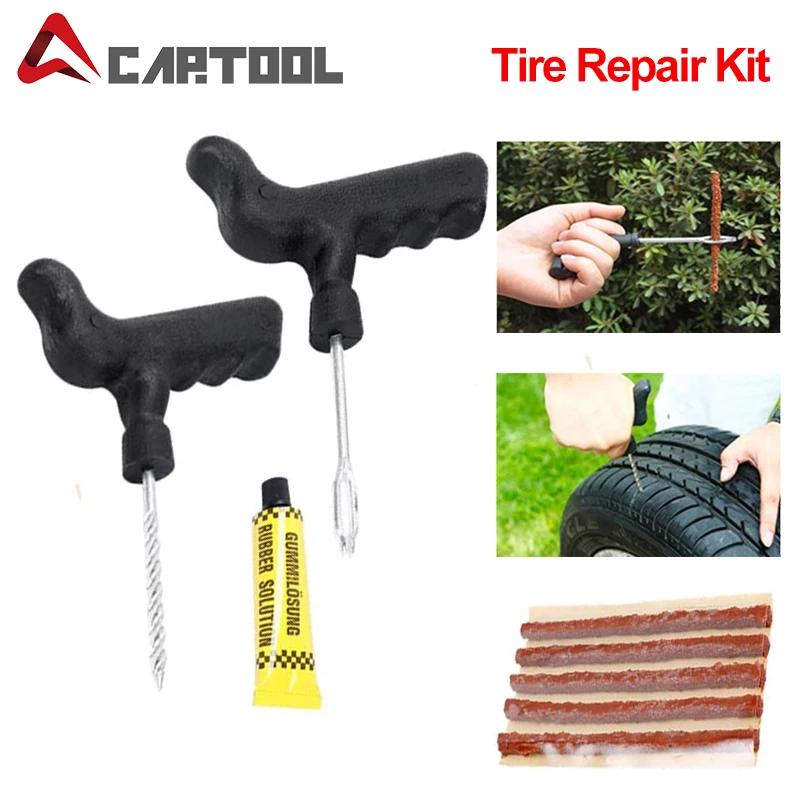 The use of a spare tire allows you to reduce the repair time of the bike.
However, this type is only recommended if the cyclist is going to travel long distances. The spare tire is heavier than the repair kit and can cause some discomfort.
Using a repair kit will help to get rid of small punctures and allow you to reach your destination. However, there are some disadvantages of such a kit, with large accumulations there will be no result from the patch, therefore it is recommended to use a spare tire in such cases.
The appearance of a puncture in the wheel is a problem that can appear in absolutely any cyclist, regardless of the ability to ride a bike.
In order to reduce the chance of punctures, the following recommendations should be observed:
Also among the popular recommendations from professionals is the use of tubeless wheels. With such devices, the wheel does not quickly descend and can serve the cyclist to the destination.
I always have a repair kit with me when I ride. To remove the tire, it is not necessary to use special plastic hooks, any flat objects will do. The advantage of special hooks is that they do not damage the rim, but tend to break quickly.
Rating:
Nikolai
I regularly ride a bicycle on a dirt road. Punctures appear very often. For repairs, the husband always uses repair kits. Spare parts are used only in case of major damage. The use of special kits has an affordable cost, unlike a spare wheel.
Rating:
Marina
Using a bicycle tire repair kit can fix a puncture. But from my own experience I am repeatedly convinced that the quality of the glue that comes with the kit leaves much to be desired.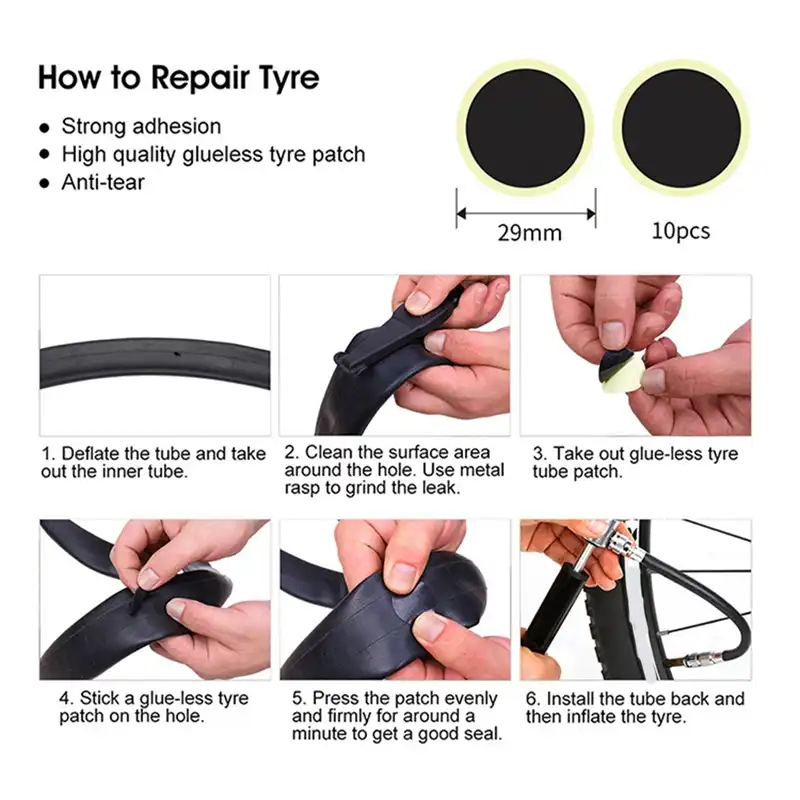 Therefore, when buying a set, you must purchase glue for rubber.
Rating:
Anton
Among the large selection of repair kits, I do not advise giving preference to cheap kits. Such patches are enough for a maximum of several days of active driving. In more expensive kits, the quality of the patch itself is higher and the glue holds for a long time. This reduces not only the finances of the cyclist, but also the time spent on repairs.
Rating:
Maxim
I use repair kits only in rare cases. I prefer tubeless wheels. The use of special repair kits allows you to reach your destination, as well as temporarily repair the damage if it is not possible to replace the tire. However, these types of tires become more vulnerable and are very often damaged directly in the places where the patch is placed.
Rating:
Victor
When cycling for a long time, every cyclist should have special repair kits.