So perhaps you were like me – afraid of the little cylinder. Perhaps you thought it would just simply explode on you, or that when you went to use it you’d end up putting more CO2 into the the sky than into your tube. Or perhaps you’ve just been perfectly content with pumping up your tube while sitting on the side of the road cursing whatever it was that just flatted you.
Whatever the reason is, it’s time to get over that fear of CO2 and start making your life much easier.
The parts:
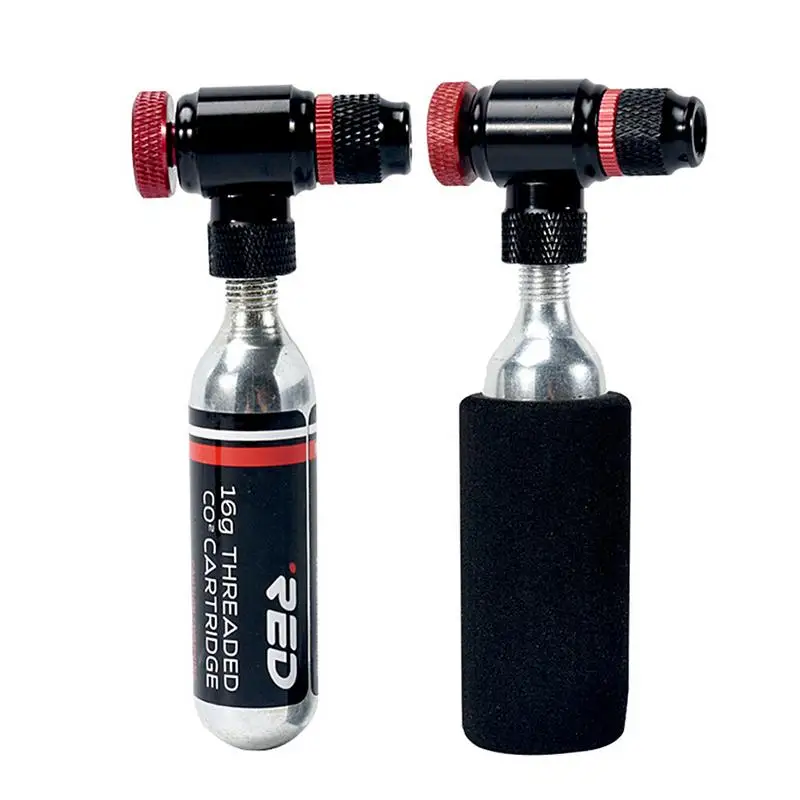
First up, let’s talk about the pieces. A ‘proper’ CO2 setup has two pieces – the inflator (aka nozzle) and the cartridge. Here’s the inflators:
(With flow control lever on left, without on right)
Inflators come in two basic flavors. Those without flow control (ability to stop the pressure) and those with flow control. Obviously the pro to flow control is that you can stop/start it once you pop the seal on the cartridge. The con is they cost a bit more (although, as of this writing the flow control ones are on sale for less than those without). If you don’t have flow control – it’s sorta a one-shot deal. You either do it right all at once the first time, or you’re down and out a cartridge. Hint: Buy the one with the flow control. (Though technically you can control the non-flow control type by carefully tightening and un-tightening the cartridge from the inflator, seems a bit tricky and a bit risky)
Cartridges come in different sizes – 12g, 16g or 25g. The smaller ones are designed for filling tires up to about 90 PSI. The larger ones are designed for filling tires up to 120+ PSI. This corresponds to lower pressure tubes such as clinchers (typically 90-120PSI) and tubular’s (140-170 PSI) such as race wheels.
There are also two different types of cartridges – threaded and non threaded.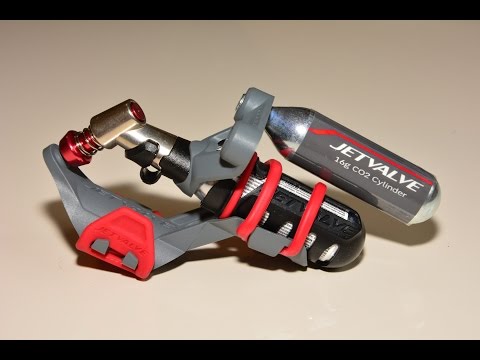
(Non-threaded on top, threaded on bottom)
What’s the difference? Well, simplicity (and a patent). The threaded ones you have a lower likelihood of screwing up, so I just use those. They only cost a few cents more. Make sure that if you buy a inflator and cartridges not in a little kit that you buy matching ones (threaded with threaded, and/or non-threaded with non-threaded).
Last but not least – think about how you want to carry the cartridges. If you have a seat bag, make sure you have room in there. If you have a tail system on your tri-bike you may be able to fashion something creative or purchase something. I actually use the bag that came with the little kit and found it fits PERFECTLY into my Hydrotail. From there, I just created a little zip-tie loop that connects to my Velcro straps for my extra tube. Works awesome!
(Note: If you get this kit like I have, toss the tire levers, they are garbage and will actually bend on their first use)
(Above: Side view of little bag inside Hydrotail, contains two tire levers, two cartridges, one valve/nozzle, and a bike wrench set.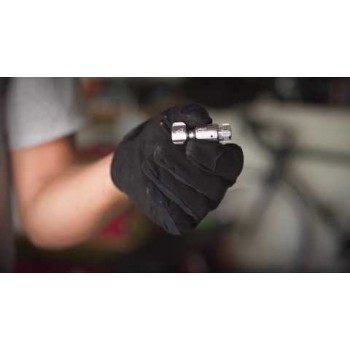 Below: Same thing view from above seat)
Ok, easy so far? Good. Now let’s get onto the action.
Putting the pressure on
Ok, so after you’ve deflated your tire (after wandering through the roadside gravel while distracted in a race by that ‘nice…something’ that just passed you from the M/F 20-29 age group) – it’s time to get air back into the tube.
The first part is no different than your normal tube changing procedure:
Release any remaining air out of bad tube (or tubular)
Check the tube and/or tire to figure out if something is embedded. Nothing worse than flatting a mile down the road again because a piece of glass is stuck in the tire.
Get the new tube with a touch of air in it* situated below the tire and onto the rim.
*Ok, now comes the change from usual. At this junction we need to get a bit of air into the tire to form it onto the rim.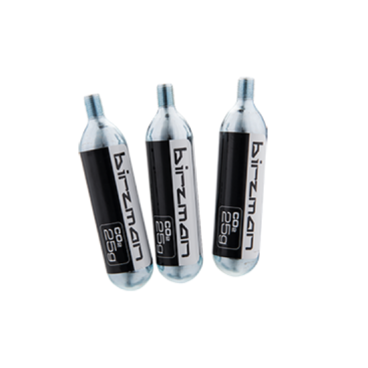 There are two ways to accomplish this. The right way…and the wrong way. Let’s start with the wrong way.
[The right way] – If you have an inflator that has flow control, then put just a tiny bit of air into it – a split second at most. Just enough to create a circular form.
However, if you didn’t buy a flow control unit – then using that nifty thing otherwise known as your mouth and tongue – press the top of the valve stem and blow a bit of air into it. It’s really not that hard. Seriously – try it. Go now into your pile of dead or new tubes and try it. You’ll note it inflates near instantly enough to form a tube like object.
[The wrong way] – Taking one of your two cartridges and holding it onto the tube valve for a few seconds and then yanking it off the valve while the cartridge releases the remainder of the gas into the air. This is the wrong way because now you’ve just wasted a cartridge and didn’t get any air into the tube with the first cartridge now requiring you to use your second cartridge.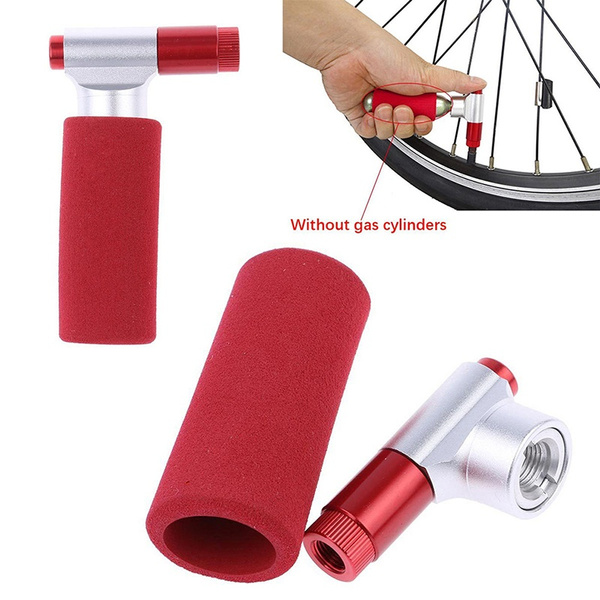 Murphy’s law dictates that should you do this, you’ll likely flat again exactly 500 yards down the road …and be 55 miles from your car…without any further way to inflate.
(Yes, I blew this one up using just my mouth with tongue depressing the valve, it just takes a few seconds)
So – we’ve got things to the point where the tube is inside the tire, and the tire and tube are roughly on the rim. Now, let’s get it all ‘cleaned up’ and ensure there aren’t any edges sticking out or other funkiness. Clean lines all the way around, no bumps or unevenness.
Blast off
Now that everything is ready for launch, let’s first do a Hail Mary. With that out of the way – it’s time to hope for the best.
First step: If you don’t have a control valve – then take the inflator and attach it to your tube’s valve first. DO NOT attach it to the cartridge first (unless you have a control valve). You can certainly do this, but this increases the likelihood of premature ejection of your little friends valuable contents (just sayin’….).
Second Step: With the nozzle on the tube valve and ready to add air, it’s time to screw in the cartridge. It should screw in easily at first, and then come to a slight halt. It’s at this juncture that you will break the seal on the cartridge and release the CO2 into the wheel.
Once you do this – it will inflate your tire in about 1.5 seconds. It’s quick. Very quick.
Depending on if you have a higher pressure tire (such as a race wheel), you may need to do one more cartridge to get to full pressure. Remember that riding a low pressure wheel will likely only get you a flat again – so be sure to really get as much pressure as you can without exceeding the limits of the tube/tire.
With everything complete – inspect the tire.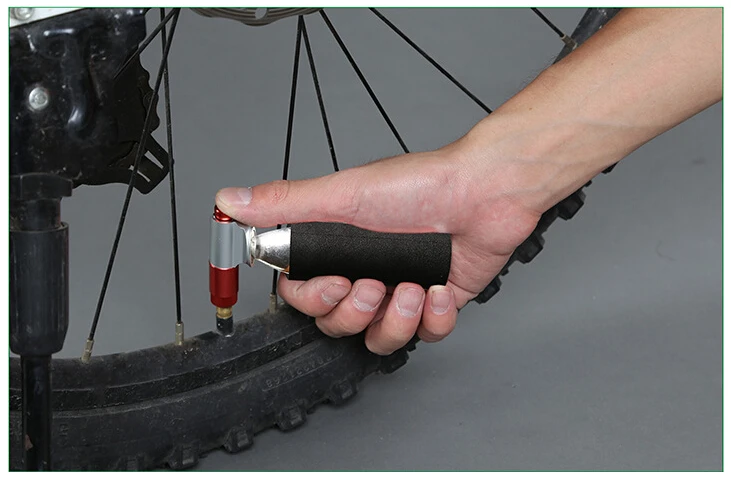 Make sure everything is still ‘clean’ – good even lines all the way around. You don’t want to flat a few yards down the road because of an uneven tire.
Pack up your little roadside work zone – cartridges, tubes, Dunkin Doughnuts leftovers, etc… and take it with you. Don’t be the cyclist who leaves their junk lying around. Plus, if you do leave stuff behind it will get you a well deserved penalty on the race course.
Wrap up
So there ya go – that’s all there is to it. I know I made it sound really long, but in reality it’s very quick. When you do it for real it will only take about 2-5 minutes tops end to end – even less if you really practice it. Here’s the 10 step version for you:
Undo old tire
Check old tire for intrusion
Blow small amount of air into tube to form tire
Get new tire situated on rim and under wheel
Validate clean lines
Attach inflator nozzle to tube valve
Attach cartridge to nozzle and tighten to pop seal
Tire inflates…use another cartridge if on high psi wheels
Check tire for ‘clean lines’ and no bumps
Clean up mess …finish ride.
But WAIT!!!!!
Now – one last REALLY IMPORTANT STEP! When you get home, you MUST deflate your tire out and refill it with regular air (just using a simple stand pump). CO2 as a gas quickly dissipates through the rubber and you’ll lose about half of your PSI by the next day. Here’s a post that explains it all really well in scientific terms. Just trust me on this – I learned this first hand as well. 😉
That’s it – there ya go! Now go buy yourself a little CO2 kit and save yourself the hassle of a pump on the frame.
By Jim Langley
Not long ago, when we were discussing frame pumps and CO2 cartridges, RBR Editor John Marsh shared this ride story with me. Perhaps something similar has happened to you:
“I was with a buddy recently who seemed to have never used his CO2 system before (or I guess it had been so long he had totally forgotten how).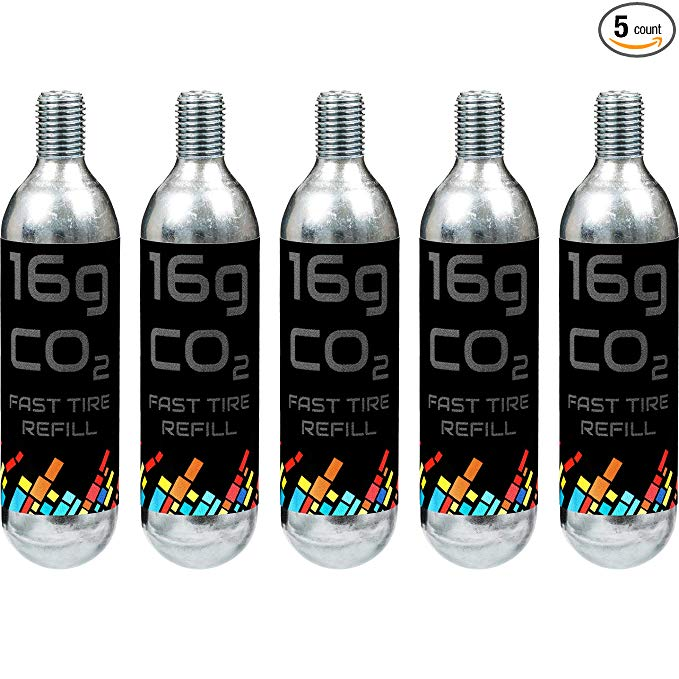
“When it came time to inflate his fixed flat, he actually still had an old, used CO2 canister attached to the chuck – and didn’t really know how to use the chuck, either. He actually cut his hand in the process and froze the chuck onto the canister (which might have explained why the old one was there in the first place!). This is a very experienced rider, BTW.
“The result was that I had a full 10 minutes of standing there holding my buddy’s bike up as he fiddled with the wheel and tire, trying to air it! Let’s offer some tips to help roadies choose and use a good CO2 inflator – and emphasize the importance of knowing how it works before they need it!”
Great idea, John. First, I’ll explain what CO2 inflators are and why they’re so popular, and then offer some tips, including yours.
Tiny portable air compressorsWell, a CO2 inflator isn’t really an air compressor, because it doesn’t have a pumping mechanism to compress and store air. But it does inflate tires in a jiffy with a powerful burst of compressed carbon dioxide gas. So no pumping is involved. You just connect the CO2 inflator to the valve, release the CO2 and, almost immediately, the tire is fully inflated.
CO2 inflators depend on small metal canisters (also called cartridges) filled with compressed CO2. You want to be sure to get the right size cartridge for your tire size. Smaller ones will fill a single road tire. The larger ones can fill two tires. When emptied, the cartridges are not refillable. Instead, you recycle them and buy more.
Advantages of CO2 vs. PumpsUnlike most manual pumps that are carried in holders next to your frame, CO2 inflators with the cartridges are so small you can easily carry them in a seat bag, pocket or pack. So they’re ideal if you’ve got a road bike you can’t fit a pump on – or don’t want to put a pump on for whatever reason.
When you have a good CO2 inflator and know how to use it, you can fix a flat a lot faster than someone with a standard hand pump. So, CO2 is great for events and races where every second counts.
For shortcomings, the CO2 cartridges are not free, and every time you run out, you need to buy more. Checking a few sources, it looks like the size to inflate a single road tire runs about $3 each.
Also, as John described, CO2 inflators can be a little trickier to use than simple hand pumps. The freezing issue he mentioned is because as the CO2 gas rushes into the tire, the gas becomes ice cold. This can freeze everything the gas touches, causing the cartridge freezing to the pump head and to metal tube valves, too.
Another issue is that the CO2’s speedy inflation can blow a tire off the rim if the tire or tube wasn’t installed correctly. For example, if you rush to fix a flat you might not quite seat the tire on the rim. A common mistake is to have a section of tube trapped beneath the tire bead.
In that scenario, if you used a CO2 to inflate the tire, the tube would likely lift the bead of the tire, expand past the tire and rim and explode spectacularly.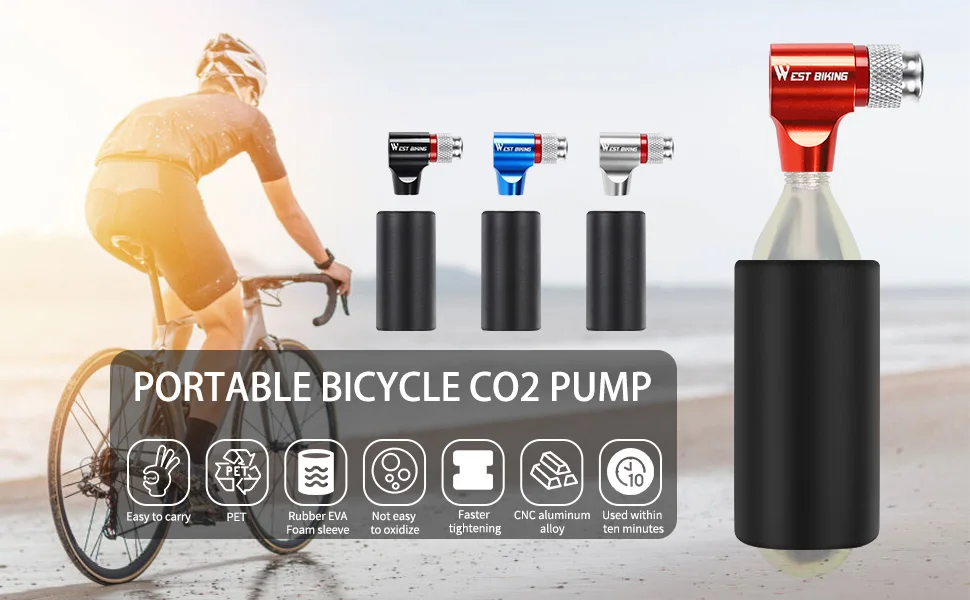 And because the CO2 inflates so fast, it would happen so quickly you wouldn’t be able to stop it. I’ve heard the sound likened to a rifle shot.
Now that you know what can go wrong, here are a few tips for avoiding trouble and getting the best performance from a CO2 inflator.
In our conversation, John mentioned that he’s a long-time CO2 user, and he noted that the variety of inflators can cause problems. I’ll turn it over to him to offer a couple of tips:
“All of the inflators work differently,” he said. “I’ve had some that are not nearly as intuitive or easy to use as others. That’s why I finally settled on the easiest possible (and smallest!) chuck.
“It simply screws onto the threads of the CO2 canister. Screw it all the way in to puncture the canister top, then unscrew to let the CO2 flow out and inflate the tire. Screw back in to stop the flow. There’s no valve or anything to understand or operate.
“The key – no matter what you use – is to know exactly how to use it on the road. This takes practice using it while safely at home – even if it costs you a couple CO2 cartridges.”
Here’s an example of the type of CO2 inflator John uses, Genuine Innovations’ Microflate Nano.
I recommend buying spare cartridges so you always have some on hand and never discover you don’t have any on the morning of a big ride. Most riders who use CO2 always carry two cartridges (at least) on most rides.
To ensure that you never blow a tire off the rim with a CO2 inflator, check carefully after you’ve fixed a flat that the tube is fully tucked up inside the tire and that the beads of the tire are seated down inside the rim (the beads are the two rounded edges on both sides of the tire casing).
Freezing CO2 is more problematic when it’s cold outside. If it’s not very cold, it shouldn’t take too long for the metal parts to thaw, then you can separate them. Or wait a bit for the parts to thaw and then douse them with water from your bottle, which should be warm enough to thaw them faster.
Last tip! Since I still see spent CO2 cartridges tossed roadside – please remember after fixing a flat to tuck the empty canister away, bring it home and recycle it.
If you’re a CO2 user please share your best pros, cons and tips in the comments below.
02/08/2023
In the life of every car owner, a situation may arise when the car has a flat tire or several at once. In this case, the wheel inflation pump may not be nearby, which will complicate the whole process. Or perhaps another car owner will need help. In such a situation, you can use a few simple tips and tricks to remedy the situation.
Inflating your tires is essential to keeping your vehicle running smoothly and safely on the road. Unfortunately, access to the pump is not always possible. But don't worry about this. It is possible to inflate a tire without a pump, and there are several methods that can be used. Let's take a closer look at how to pump up a wheel without a pump on a car.
If you have access to a compressed air source, such as an air compressor at a gas station or an air pump at a service center, you can use it to inflate a tire. Simply connect the hose to the valve stem on the tire and turn on the air compressor. Air will enter the tire, increasing the pressure until it reaches the recommended level.
If you have a bicycle pump at home, you can use it to inflate a car tire. Although it will take longer than using a full size air pump, a bicycle pump can be used to gradually increase tire pressure. Simply connect the pump to the tire valve stem and start pumping. It is important to carefully monitor the pressure gauge on the pump so as not to pump the tire. This is one of the most preferred methods, explaining in detail how to inflate a tire without a pump on a car.
The foot pump is a small portable pump that can be used to inflate tires when a large air pump is not available.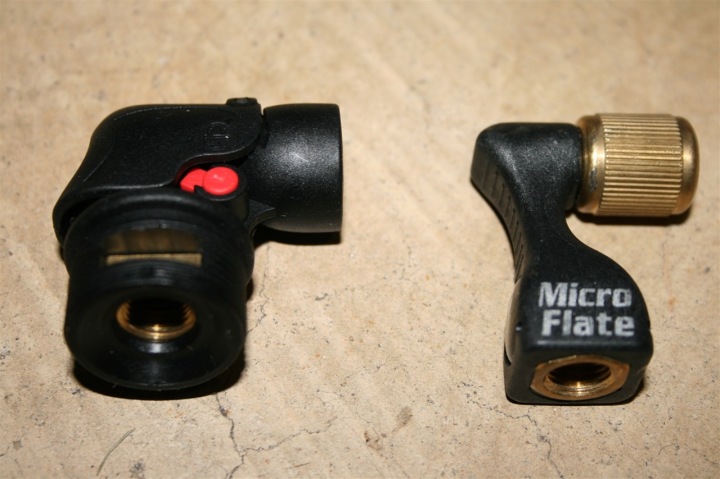 Foot pumps work by using a foot-actuated lever to compress air and force it into the tire. They are relatively inexpensive and can be found at most auto parts stores. To use the foot pump, simply attach the pump to the valve stem on the tire and use your foot to pump air into the tire.
CO2 cartridges are small disposable containers that contain compressed carbon dioxide. With their help, you can quickly inflate the tire without having access to a large air pump. CO2 cartridges are available from most bike and sporting goods stores and can be used with a dedicated CO2 inflator. To use a CO2 cartridge, simply attach the inflator to the valve stem on the tire and use the inflator to release CO2 into the tire. However, this method should be used with the utmost responsibility, because Cartridges are not intended to be a permanent and reliable solution for restoring tire pressure.
There are several myths about inflating car tires without a pump that can lead to confusion and potentially dangerous situations.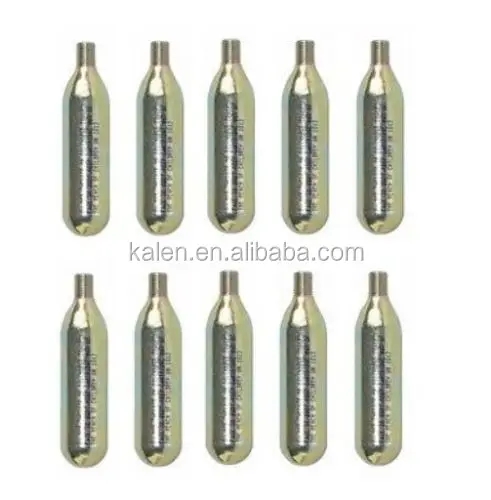 Here are the most common:
It is important to understand the potential hazards and limitations when inflating tires without a pump and rely on accurate information and recommended methods. Inflating tires can result in poor handling, reduced fuel economy and increased risk of tire failure. Always follow the recommended tire pressure for your vehicle and use caution when inflating tires without a pump.
In conclusion, it is possible to inflate a car tire without a pump, and there are several methods you can use, including using a compressed air source, a bicycle pump, your own lungs, a foot pump, or a CO2 canister. It's important to keep your tires properly inflated to keep you safe on the road, so it's always a good idea to have a back-up plan in case you don't have access to a pump. Regardless of which method you choose, be sure to keep an eye on the pressure gauge so you don't over-inflate the tire. Now you know how to pump up a wheel without a pump on a car, and what to do if a similar situation arises.
Do you have a flat tire but don't have the time or energy to fill your tires with a standard pump? Using a CO2 cartridge is a quick and easy way to inflate tires without much work compared to inflating tires filled with air.
Navigation
Removing the rear wheel of a road bike is usually fairly easy, but it can be messy if there is excess grease in the bike chain.
Find out which tire is flat. In this case, the rear wheel is flat.
Disengage the brakes.
This will allow the wheel to slide more smoothly.
To easily remove the rear wheel, turn the motorcycle upside down so it sits on the rails and seat.
Release the quick release lever to loosen the wheel.
Rotate the quick release lever several times while holding the cap on the opposite side of the wheel.
Do not unscrew the lever or cover too much, otherwise the spring will pop out.
If the spring comes out, put the spring back on the bar and tighten the cap or lever.
Pull out the wheel.
Pull the rear shift lever in a straight line so that the wheel can slide out smoothly.
Pull the wheel out with one hand while holding the rear shift lever.
Be careful with the rear shift lever.
Now that the rear wheel is off the bike, use the tire lever to get under the wheel.
Once the tire lever is under the tire, loop it around the wheel rim by slowly sliding the wheel off the wheel.
Ideally, three levers are used to remove the tire. However, one tire lever was enough.
Pull out the inner tube.
The valve must be the last thing removed from the wheel.
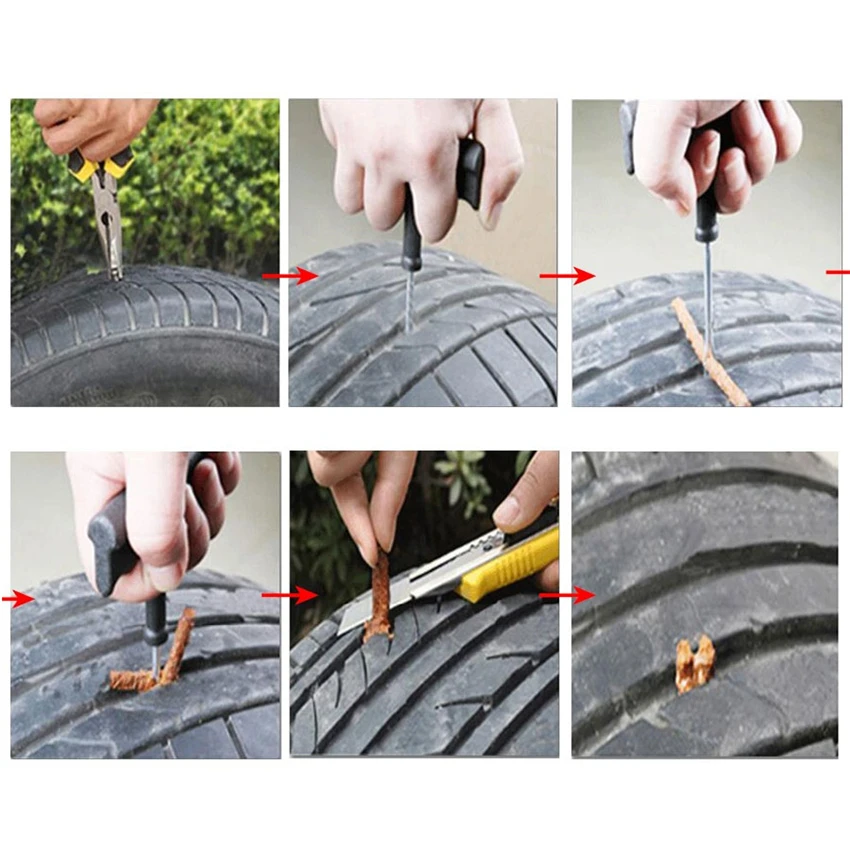
Replace the inner tube or patch the hole if necessary.
Place the inner tube back into the tire.
Insert the valve into the hole first, then loop the inner tube around the wheel rim.
Using the tire lever, lift the tire back onto the wheel.
Now that the tire is back on the wheel, screw the adapter onto the CO2 cartridge and install it on the valve.
Press the CO2 cartridge against the wheel rim.
The inner tube inflates quickly, so keep the CO2 cartridge in for a short period of time.
This may cause the valve to freeze, but this is normal.
Put the wheel back on the bike.
Pull the rear shift lever into a straight line and place the gears under the chain until they lock into place.
Tighten the quick release lever and close it.