KYMCO MONGOOSE 70 & 90 ATV owners who need to perform basic maintenance, electrical testing, or a complete engine overhaul will find the CYCLEPEDIA manual offers everything you need. Find what you need with the easy to use click-able table of contents or search feature. Don’t waste time flipping through a paper manual follow our built in hyperlinks to quickly bring up relevant information for your service work. Print the topics out if needed, or work right from your computer or mobile web browsing device.
The KYMCO Mongoose 70 cc and 90 cc ATVs are powered by a GY6 style 4-stroke engine. Thee engines have electric start and a limited CVT. The limiters can be removed from the CVT to allow the transmission to use its full operating range and reach higher speeds. The 90 cc Mongoose models are available with reverse. The KYMCO Mongoose is one of the bet available GY6 powered youth ATVs.
2004 Mongoose 90
2005 Mongoose 90
2006 Mongoose 90
2007 Mongoose 90
2008 Mongoose 90
2009 Mongoose 90
2010 Mongoose 90
2011 Mongoose 90
2012 Mongoose 90
2013 Mongoose 90
2014 Mongoose 90
2015 Mongoose 90
2016 Mongoose 90
2017 Mongoose 90
2007 Mongoose 70
2008 Mongoose 70
2009 Mongoose 70
2010 Mongoose 70
2011 Mongoose 70
2012 Mongoose 70
2013 Mongoose 70
2014 Mongoose 70
2015 Mongoose 70
2016 Mongoose 70
2017 Mongoose 70
Periodic Maintenance Chart, Air Screw Adjustment, Oil Pump Inspection, Oil Tank Level, Throttle Free Play, Engine Idle Speed, Lubrication, Fuel and Oil Lines, Suspension, Fuel, Filter, Final Gear Oil, Brake Inspection, Carburetor Draining, Drive Chain Inspection, Spark Plug, Compression Check, Air Filter Servicing, Tires, Toe-In Adjustment
VIN and Engine Number Location, General Torque Specifications, Torque Specifications, Specifications
Carburetor Removal, Carburetor Installation, Carburetor Assembly, Carburetor Disassembly, Fuel Valve, Exhaust System, Fuel Tank, Reed Valve, Exhaust System
Front Fender, Rear Fender, Seat, Footrests, Steering Cover, Handlebar, Front Bumper, Engine Guard
Fan Cover, Cylinder Head Cover, Cylinder Head, Cylinder and Piston, Clutch, CVT Removal, CVT Installation, Right Engine Components, Output Drive, Engine Removal, Engine Installation, Oil Pump, Crankshaft, Crankcase Splitting, Crankcase Assembly
Axle Removal, Axle Installation, Drive Chain, Engine Sprocket
Front Drum Brakes
Rear Brake Master Cylinder, Brake Caliper
Wheels and Hubs, Bearing Replacement
Steering Shaft, Steering Knuckles
Front Suspension Removal, Front Suspension Installation
Swingarm, Shock Absorber
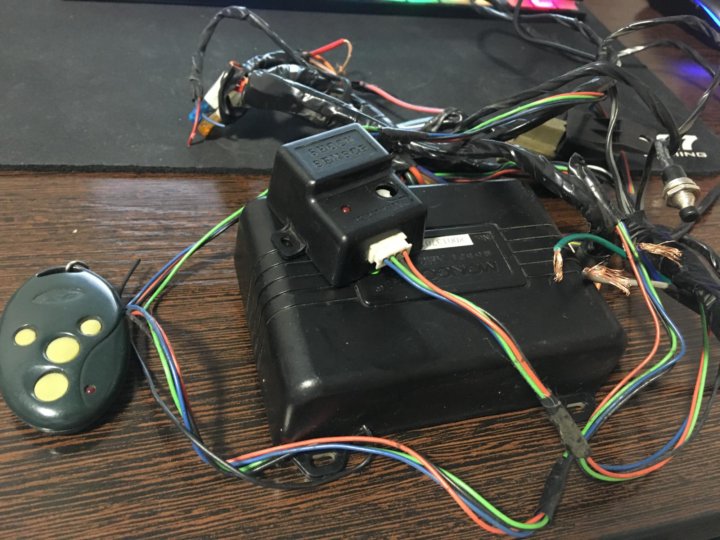
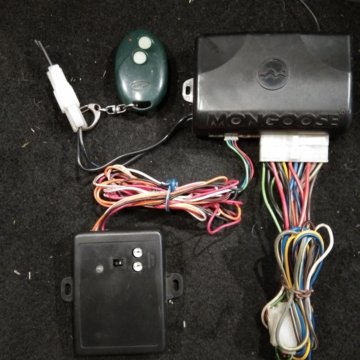
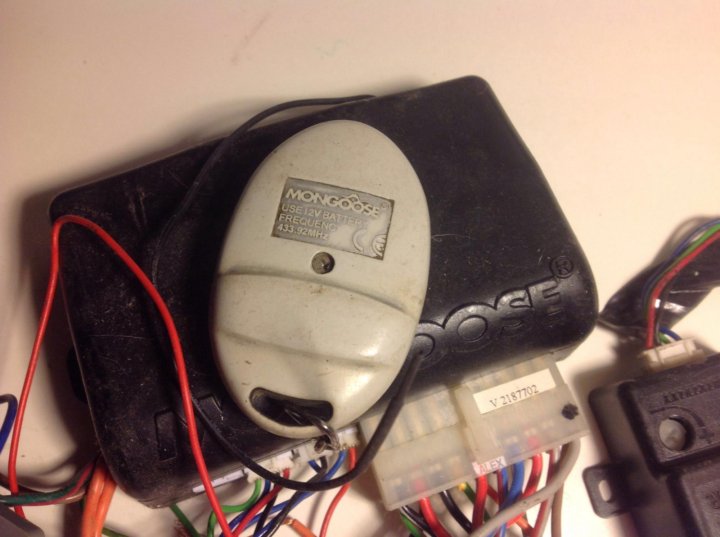
Ignition System, Charging System, Starter Relay, Starter, Battery, Fuses, Switches, Wiring Diagrams
It’s not uncommon for ATV owners to find themselves with a machine that won’t stay running or won’t run properly. Sometimes the ATV won’t run at idle, or it may bog down when applying throttle. Some find that their ATV starts and runs fine, but only for a short time before it shuts off.
In this post, we will have a look at the most common issues to look into when your ATV keeps turning off.
To make troubleshooting a bit easier, we’ve categorized the various issues most likely to occur depending on how the bike behaves. Note that the listed issues overlap the various symptoms. You may just as well find the root of your problem under a headline that does not necessarily fit your machine’s specific behavior.
Page Contents
In this first scenario, we will look at what may be causing your problems when the ATV:
Carbureted ATVs have a set screw that adjusts at what RPM the bike should idle. Whenever it is set to low, the carburetor will not provide enough gas to keep the engine running.
This is how you adjust the idle on a carbureted ATV:
Inspecting your spark plugs can help diagnose the nature of the problem preventing your ATV from idling correctly. Remove the spark plugs and have a good look at them.
If your spark plugs are old or do not fit the description of a healthy spark plug, it needs replacing. Your user manual will tell you the correct type of spark plugs to use.
The rubber intake boot on the carburetor may have cracks or may not be seated properly. When this happens, the air/fuel mixture will be off, preventing the ATV from running correctly at idle.
The carburetor must have an unrestricted gas flow for the ATV to idle correctly. Any restriction in the gas supply can cause idling issues.
Ensure the fuel lines are not clogged or bent so that they do not allow proper fuel flow. Replace any clogged or damaged lines and ensure they are correctly installed with no kinks.
If your bike has a separate fuel filter, it may be clogged up from years of riding or contaminated fuel. Replace the filter with a new one. You should find it if you trace the fuel line from the gas tank to the carb.
To test the fuel flow going to your carb, you can place a container underneath it and loosen the carb bowl drain screw for a few seconds. If there are no restrictions, you should see an unrestricted flow of fuel running into the container.
Now that you have determined the proper fuel flow to the carb, you can shift your focus to the fuel delivery inside the carb.
A carburetor can get dirty and clogged from using fuel contaminated with dirt, missing or improperly fitted air filter, or from old fuel.
When the carburetor is dirty, the ATV may not get enough fuel to run correctly, either when riding or at idle.
ATVs that sit a lot are particularly prone to gumming up. Gasoline starts breaking down after just three to four weeks, forming polymers (unstable hydrocarbon fuel molecules), also known as varnish. The varnish can be seen as a sticky, caramel color substance covering the inside of the tank, the fuel lines, and the carburetor.
Using ethanol-based gasoline adds to the problem by acting as a solvent that dissolves old gum and varnish deposits from the fuel lines and the gas tank.
Inside the carburetor, there are a couple of brass jets that must be cleaned to allow proper gas flow through the carb. When the deposits enter the carburetor, they can clog the tiny opening in the jets.
A gummed-up carburetor can often be cleaned to working order by running through a couple of tanks with a carb cleaner such as SeaFoam added to the fuel. Follow the instructions provided with the product.
If that doesn’t improve gas flow, you will need to disassemble the carburetor for a more thorough cleanse.
 Remember, they are made out of brass, so be careful not to damage the fragile threads.
NOTE: Disassembling and cleaning a carb is not for everyone. If you’re not able to fix the problem or do not wish to attempt to disassemble it yourself, you can have the carb professionally cleaned and rebuilt by a dealer.
Fuel-injected ATVs do not have carburetors with jets. Instead, they use fuel injectors that are nozzles with tiny openings. Fuel injectors can clog up from carbon as a by-product of the combustion process.
Clogged-up fuel injectors can be cleaned by a mechanic using a powerful solvent and high-pressure air combination. Before taking your bike to a mechanic, you can try cleaning the injectors using a fuel additive such as Techron or similar.
The fuel tank on your ATV has a vent that allows air to enter the tank as the fuel level decreases. It can be in the form of a separate venting system, or the vent can be located in the gas cap itself.
If this vent, for some reason, gets blocked or stops working, you will get a vacuum inside the tank, and the carb or fuel pump will no longer be able to pump fuel out from the tank.
Try loosening the fuel cap to see if this resolves the issue. If it does, you need to investigate further to locate your flocked tank vent.
If the bike has a separate venting system, make sure it is not blocked with mud or has a breather tube that is kinked or otherwise damaged.
Sometimes it may be hard to identify a faulty vent. In such cases, your best option will be to replace the tank cap.
If the ATV has been sitting outside through a heavy rainstorm, if the gas cap does not seal properly, or if the bike is submerged underwater, the gas in the tank may become contaminated with water.
Related: This is how you repair an ATV that was submerged in water.
On a carbureted ATV, try draining the carb to see if there is any water inside. Water is heavier than gas and will sink to the bottom of the carb.
Open the bleed screw at the bottom of the carb housing, and let the contents flow into a small bucket. If there is any sign of water, you likely have water inside your gas tank as well.
Thoroughly drain the gas tank and add fresh gas to see if that fixes your issue.
Inside the carburetor, some of the small components can get damaged or stuck, affecting how well the ATV runs.
One of the more common culprits is the needle valve under the float.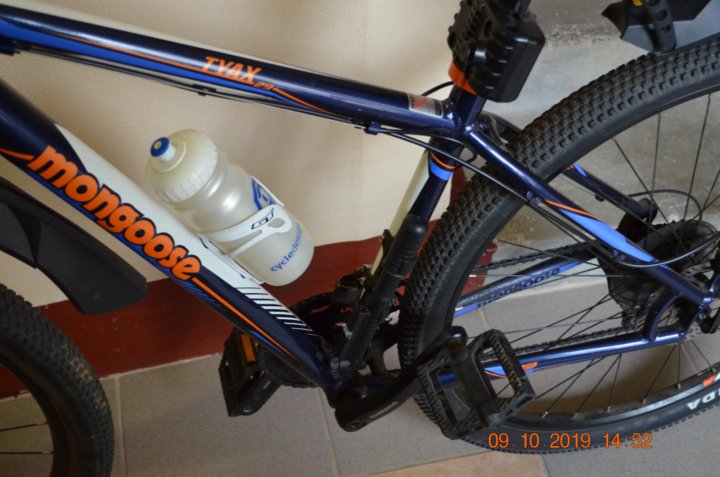 If the carb is dirty, or if the needle is bent, it can get stuck, preventing the float from letting any more fuel inside the carburetor.
To test this, gently tap the carburetor housing with the engine running at idle. Then try putting the bike in gear and riding it. If gently tapping solves the issue, you may get away with cleaning the carburetor with SeaFoam.
In more extreme cases, you may need to disassemble the carb for proper cleaning and install a carb repair kit.
Some Polaris ATVs have a so-called ETC switch that works as a safety feature for when the cable breaks, binds, freezes stuck, or for some other reason, doesn’t retract completely.
The design originally comes from the snowmobile industry, where it was added to shut off the engine if the throttle cable freezes shut in a wide-open throttle position. It is also designed to shut off the engine if the throttle cable breaks at full throttle or if it gets stuck and will no longer slide freely.
Inside the switch, there are two metal connectors that normally should not touch each other. If there is insufficient slack in the throttle cable, the connectors may connect too soon, tricking the ATV into shutting off when it is supposed to idle.
Adjusting the free play of your throttle cable is relatively easy. Please refer to the user manual of your specific bike for the correct adjustment procedure. Correct throttle cable free-play is typically 1/16 to 1/8th of an inch.
If the ATV doesn’t idle well or often stalls after a cold start but runs fine as soon as it warms up, it may be worthwhile having the valves inspected and adjusted.
The rough idle may be caused by a valve that is opening too late, choking off fuel.
When the engine idles fine but won’t rev up, it is a sign of it getting too little fuel, but it can also be because it is getting too much fuel.
The ATV may run fine at low speeds, but as soon as you apply a little or a lot of throttle, the engine will bog down and turn off. If you let the bike sit for a few minutes, it will typically start again just to repeat the same behavior.
Note that all of the fuel and air-related issues listed above may also apply to an ATV that bogs down when applying throttle. The bike may be getting enough fuel to idle but not enough to keep up with hard acceleration.
Here are some potential culprits to look into:
Fuel-injected ATVs can get low fuel pressure for many reasons, most commonly due to a bad fuel pump.
Turn the ignition on (but do not start the bike) and notice whether you can hear the pump charging and if it sounds healthy. The pump should activate for a few seconds to prime the system with fuel.
To further test the fuel pressure, you need a fuel pressure gauge. If you don’t have one, it is best to leave this job for a mechanic.
The fuel pump is located inside the fuel tank. If it is bad, you usually need to replace the whole fuel pump assembly at about $700 to $900. If you are somewhat mechanically skilled and want to save a few dollars, it is possible to replace the pump itself. You can get a decent pump for around $70 to $100.
We recommend that you take the ATV to your dealer to help troubleshoot issues like these.
Vacuum-style petcocks are particularly prone to failing, not letting gas out of the fuel tank.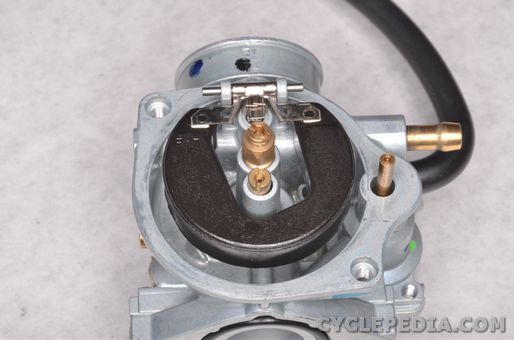
Inspect the vacuum line from the intake manifold to the petcock for damages, kinks, or coming loose.
Inside the petcock, there is a rubber diaphragm that may go bad. Also, make sure the carburetor vent line is not plugged.
In this scenario, the ATV will start just fine but shut after a short time, whether at idle or when applying throttle.
Electric ATV components such as the stator, pick-up coil, CDI, and regulator are less reliable than we would want. If these components go bad, they may be heating up, causing the bike not to run correctly as soon as they reach a specific temperature.
Typical behavior when having electrical issues like this is that the bike starts and runs fine for 5 to 15 minutes before it starts acting up. Then if you let it cool down, it will run fine for another 5 to 15 minutes.
Just as when your bike is having difficulty idling, incorrect valve clearance or timing may cause the ATV to shut off when it gets warm.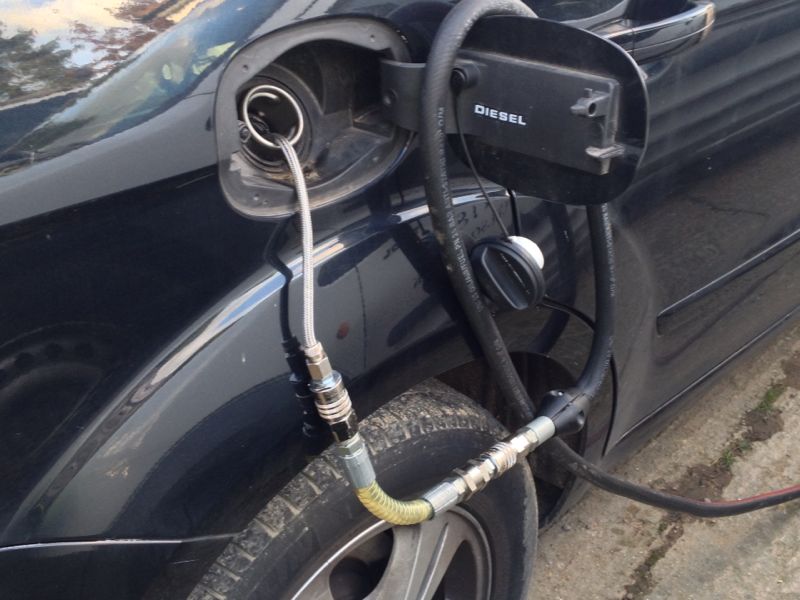
If the bike is acting sluggish and sputtery, it signifies the air/fuel mixture is too rich. Make sure the jetting is set up correctly, and consider a re-jet.
A partly blocked air filter is another possible cause to look into when the bike sputters and shut down as soon as you apply throttle.
Remove the air filter to see if this makes the bike run properly again. If so, you need to replace the filter even if it does not look dirty.
Make sure there is no moisture or snow in the airbox, as this may clog the filter. Dry out any water completely and let the filter dry before installing the filter again.
If your ATV uses an oiled foam-style filter, you must clean it and apply new oil. Ensure not to use too much oil, as this may restrict airflow.
Partzilla has an excellent video on cleaning and oiling a foam-style ATV air filter.
Cheap Chinese ATV youth ATVs of lesser-known brands are notorious for not running properly after a while.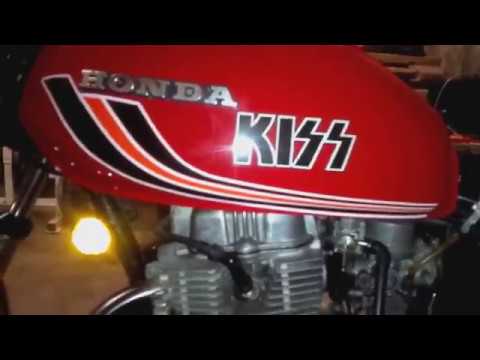 More often than not, you will find that the issue is carburetor related.
Most of these cheap ATVs use cheap knock-offs of a VM 19mm style carburetor to keep costs down. While the carb may look fine at first glance, you will often find that they are made from inferior materials with poorly crafted jets.
When a carb this size gums up, it can be tricky to disassemble and clean. If you know your way around carbs, you may give it a go, but if you’re not, you are most likely better off getting a new, original replacement carb.
The same size original carb should bolt straight on and will likely save you from much agony down the line.
Even if you cannot track down an original carb, a new cheap knockoff is still a better option than fighting with the gummed-up one you have. They only cost about $30.
Sometimes motorists are forced to drain gasoline from a gas tank. For example, for a gasoline lawn mower or refuel another car. And if a gas tank leaks, then you have to drain all the fuel in order to carry out repairs, remove water or bad gasoline from the tank.
If on old cars (carbureted foreign cars and some VAZ models) the merging process is relatively easy, then on new models you will need to work hard. This is due to the fact that they have a long winding channel where it is difficult to push the hose, and a mesh installed at the filler neck, which also prevents draining.
The article describes how to quickly and safely drain the fuel from the tank with your own hands, depending on the type of gas tank and the methods of supplying fuel.
Methods for draining on tanks without a screen are shown. These are mainly the following cars: VAZ, Gazelle, Niva, Volga, i.e. predominantly Russian models. Also given is a way to do this job on modern machines with an injector.
Known to many drivers. You will need a canister and a hose for draining gasoline, which is inserted into the tank, then with the help of your mouth you need to draw air from the other end of the tube.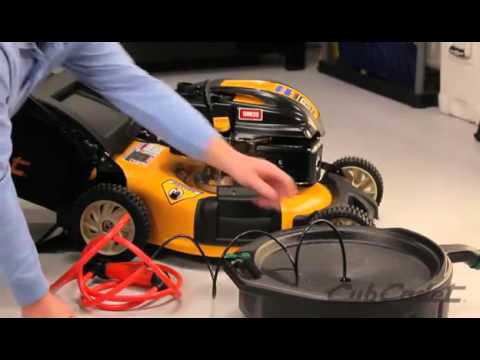 You need to quickly draw air from the hose and wait 2-3 seconds. Because gasoline will not flow immediately. Keep the end of the hose as close to the ground as possible and do not pull up. When fuel flows, the hose is inserted into the canister.
This method is used as a last resort, because there is a danger of swallowing gasoline (dangerous to health), or spilling it on the ground if you do not have time to insert the tube into the canister in time. It's also not hygienic.
As an addition, a video on how to drain gasoline from a tank and not get drunk:

It is done like this:
Another way for injection machines is to use a return line. It is necessary to turn off the car engine and take the fuel hose, which is located behind the fuel pump. Disconnect better under the hood of the car. It runs from the tank to the engine's fuel rail. There it is more convenient to disconnect it.
The end is lowered into the canister, after which the ignition is turned on to the second position. At the same time, the engine is turned off (we do not start), but the fuel pump will begin to pump liquid in the usual mode. After pumping the required amount of fuel, the ignition is turned off, and the tube is installed in place.
Many foreign cars like Renault Logan or Chevrolet Niva and VAZs from the 10th family have a special fitting in the fuel rail, especially for draining gasoline. We unscrew it and calmly drain the gasoline from the tank.
If you drain all the fuel through the fuel pump, it may burn out. To protect yourself from breakage, it is advisable to turn on the ignition in several passes so that the pump pumps liquid in small portions. Airing of the system is also possible, which is treated by pumping the system at increased engine speeds.
In some old foreign cars and carbureted cars, the fuel pump is not located in the tank itself, but near the engine. So you can try to drain the fuel through the fuel line. You need to act according to this scheme:
If the car has a drain plug (see the owner's manual), you will have to use a flyover or drive the car to the inspection hole.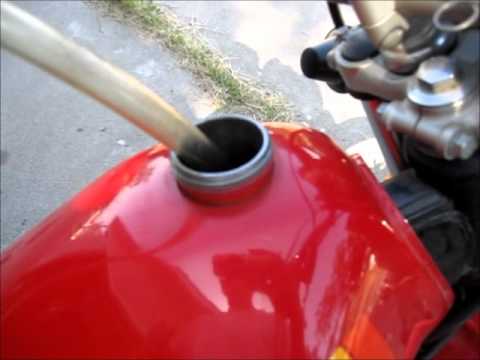 The sequence of actions on how to drain gasoline from the tank:
If there is no such plug, then you need to use the fuel pump. This method is more difficult, because you have to disassemble the interior, sometimes cut a hole in the back of the floor, remove the fuel pump completely. This can be done when you need to completely drain all the gasoline from the tank and clean the system from dirt.
As an addition - a short video instruction on how to drain gasoline from a tank of a foreign car or VAZ with an injector.
Most often, motorists pour gasoline into the tank, but there are situations when it is necessary to perform the reverse process, i.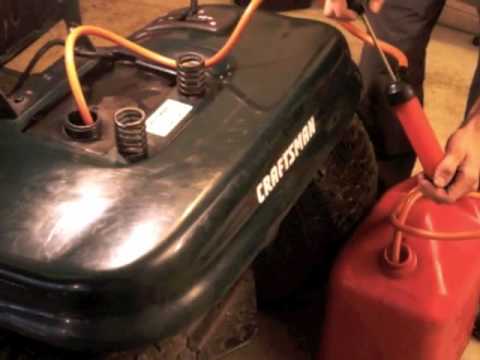 e. drain gasoline from the tank. Most often this is done when cleaning or repairing the fuel tank is required, replacing the fuel pump, which cannot be reached or rescued by another motorist. Are there universal methods that are suitable for all car brands from Lada to Nissan? There is!
Consider 4 ways how to drain gasoline from the tank, they are suitable for any brand of car, be it a Lada or a foreign car, for example, Toyota, Ford, Chevrolet or Nissan. Using these methods, you can drain gasoline without any problems in just a couple of minutes. Let's analyze each of them in detail.
When draining, be aware of safety precautions. You need to do the actions away from open flames, do not smoke nearby, since one spark is enough for something irreparable to happen. This is due to the flammable feature of the product.
If you used the old-fashioned method - pumping out with a hose and swallowed fuel, rinse your mouth quickly with plain water and consult a doctor. The hose must not be pulled sharply; for its easy removal, slightly press the valve with a wooden block. After the procedure, the tank must be tightly screwed with a lid.
How to choose a tank. Experts advise to give preference to a metal container. The fact is that plastic tanks can provoke sparks due to the static stress of this material. It was this reason that created the rule for the supply of fuel from gas stations only in a metal tank.
Important! Drain fuel only in open areas. This is necessary in order not to inhale gasoline vapors, which are toxic, which in turn is very harmful to human health.
Attachments to make work easier:
The last option shows the highest efficiency (device performance 10 ml per second).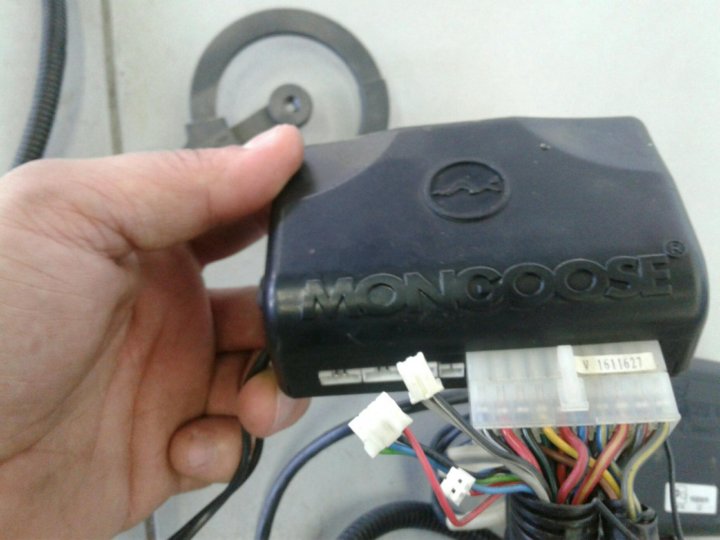
Most often, the mesh in the tank is missing in cars of the Russian assembly, for example: Lada, Gazelle, Volga, etc. To drain the fuel, you should use a special tube, this is the most primitive, most common, old-fashioned way, suitable for urgent fuel draining.
What we need:
Draining process: The first step is to open the gas tank by unscrewing the filler cap. Next, one end of the hose is inserted into the tank, and the other end is lowered into a container into which gasoline will later need to be drained. In order for gasoline to flow, you need to create pressure, and this is quite simple with the help of air. You just need to inhale some air into yourself through the tube. After that, you should lower the free end into the dishes and wait for the moment when gasoline flows.
The first method is only suitable for those cars that do not have a mesh on the gas tank. If there is a drain plug, and it is available on almost all modern Japanese cars, then you need to do it a little differently. This method is faster and safer than the first one, since the first option is more likely to inhale gasoline vapors, which can lead to vapor poisoning.
Important! Many modern vehicles have a fuel drain.
What we need:
Draining process: For the second option, you just need to open the cap located at the bottom of the gas tank. To do this is not so simple as it seems at first glance, because for this you will have to get into a rather inaccessible place - to the bottom of the fuel tank, and only after that you need to unscrew the cap.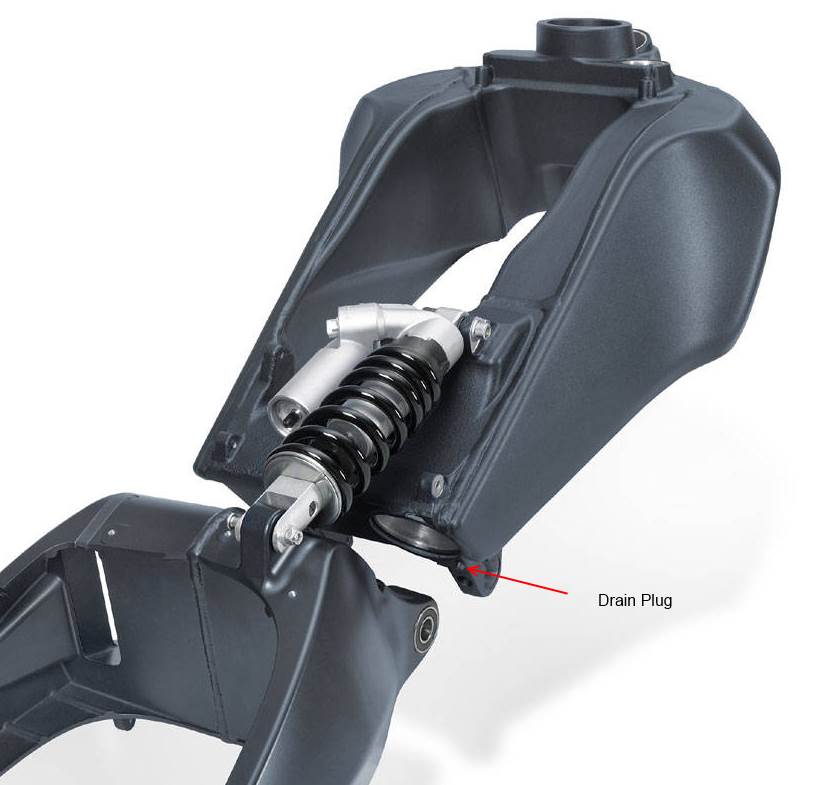 After these manipulations, you can start draining gasoline.
This method is suitable for fuel injected vehicles. The return line is usually located in the engine compartment behind the fuel line.
In order to drain the gasoline from the tank, you need to follow a few simple steps:
Draining process : There are a few simple steps to drain the petrol tank. 1) open the hood of the car; 2) with the engine off, disconnect the fuel hose (coming from the fuel pump) at the point of its connection with the fuel rail; 3) place the released end of the hose in a suitable container to drain gasoline from the tank; 4) turn on the ignition of the car, but do not start the engine!
Important information! Please note that some vehicles may have a fitting on the fuel rail. It is designed specifically for convenient fuel draining. That is, it is enough to unscrew it and begin the drain procedure. If you turn on the pump and try to completely drain the gasoline, it may burn out.
The last method is similar to the first, remember that it is important to follow all precautions.
What we need:
Draining process : Many vehicles have access to the tank through the passenger compartment, located under the rear passenger seats. Throw off the seats, unscrew the cover, access to the fuel pump and tank opens.
turn off the fuel pump
drain the fuel VAZ
are there instructions
alternative to hose
drain fuel from largus
drain fuel from ford transit
method for domestic car
remove fuel line
show all
9007 tank , for example, in order to help one of the motorists left on the highway without fuel.