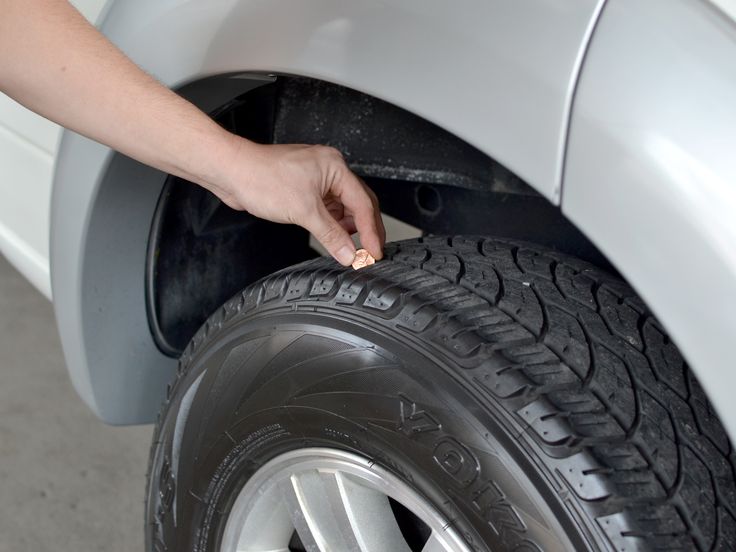
I always carry 18- and 21-inch spare tubes, along with the tools necessary to change them on the trail. Luckily, I have never needed a third tube to get myself or a riding buddy out of a trail flat situation. When I started riding the Ultimate Motorcycling Yamaha Ténéré 700 Project Bike, I found myself going deeper into the woods and with more than one or two other riders. The odds of multiple flats have gone up significantly.Stop & Go International has produced high-quality tire repair kits for over 40 years. Stop & Go has kits for tube and tubeless tires. I chose the Deluxe Tube-Type Motorcycle Tire Repair Kit, the company’s top-of-the-line offering.
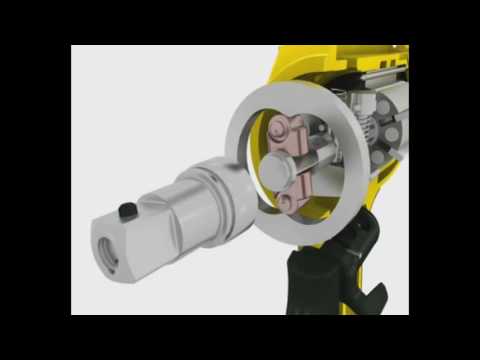
The Stop & Go Deluxe tube repair kit contains three 9.5-inch steel tire irons, eight patches, a thumb buffer, a tube of glue, four threaded-end 16-gram CO2 cartridges with a cartridge discharge adapter, a plastic valve cap with core remover, and laminated instructions. This all fits in a durable zippered vinyl bag that weighs 2.5 pounds and measures 9.5-by-4-by-1.5 inches. Nothing can fix the hole created by a ripped-out valve stem, so rim locks are needed to keep your tire from rotating when the tube goes flat.When I rode the Ultimate Motorcycling Yamaha Ténéré 700 Project Bike home, I went through my storage boxes aptly marked “old stuff” and found my last set of spare tubes. They had been in that box for eight years, so the stems showed rust. They became my test tubes to attempt a practice repair in the comfort of my garage. I inflated the 21-inch tube with a hand pump and then punctured it with the tip of my pocketknife. I made sure to make the hole 1/8-inch, just like the hole I remember seeing in my tube from a buried nail in a Mojave ghost town.Following the instructions, I deflated the tube, roughed up the patch area, cleaned the area, applied the glue, waited for it to become tacky, and applied the patch. I rubbed the patch flat to make sure any air bubbles were out.
 I waited 10 minutes for the patch to fully attach and then got the CO2 cartridge ready.The instructions warn that you should not be holding anything with your bare hands when the cartridge empties, as it drops to minus 65 degrees and will frostbite your skin. To prevent that, the kit provides a hand wrap for the cartridge, and I used a channel lock to hold the end of the adapter tube. This was my first CO2 cartridge experience—trust me, everything freezes. Even if you have to take your shirt and a sock off to hold the cartridge and adapter, do it! The tube filled up. However, I couldn’t accurately check the pressure because it wasn’t inside a tire. Stop & Go claims each cartridge is good for about nine psi, depending on the size of the tube.Of course, a non-emergency garage repair is easy to accomplish. I didn’t test the tire irons, though they’re a proven basic design—look into Motion Pro offerings if you want to upgrade. However, this tube repair kit provides everything needed to patch a tube wherever it happens.
 Conditions are rarely ideal when we have a mechanical issue, so I always strive to have the right tools for trail repairs.At $40, the kit pays for itself in one use, even if it’s a product you hope you never use. The Stop & Go Deluxe Tube-Type Motorcycle Tire Repair Kit is now a permanent fixture in the panniers of Ultimate Motorcycling Yamaha Ténéré 700 Project Bike.
None of us ever enjoy getting a flat, but you can often tell how experienced an Adventure Rider is by the way they react to a puncture on tube-type tires. New Adventure Riders tend to throw their fists up in the air and curse the motorcycle gods. Veterans just get down to business because they know that a motorcycle puncture repair is just 15 minutes out of the day if you’re in practice, 25 if you’re a little rusty.
Here are five tips that will help take the pain out of the inevitable flat. We’ll assume that you know how to remove the wheels from your bike and are carrying the proper tools for the job.
Position the tire bead in the drop center and you’ll have more room on the opposite side to spoon the tire on.
Motorcycle tires, like car tires, have steel wires embedded in the sidewalls to keep the tire stiff and on the wheel. Think of the wires as hoops, and remember that they will not stretch no matter how hard you try. If you pull one side out, the opposite side will go in.
ADVERTISEMENT
Note also that the circumference of the tire’s bead is smaller than the outer lip of the wheel it has to go over. So how is it even possible to get the tire on the wheel?
The secret is in the center of the wheel. This section of the wheel goes by several names, but we’ll call it the drop center, because it “drops” away toward the hub. The wheel’s circumference is smaller in the drop center. Get the tire bead in the drop center and you can more easily pull the opposite side of the bead over the outer lip of the rim. Moral of the story: If you’re breaking a sweat, you’re doing it wrong.
Your kickstand can double as a built-in bead breaker if your bike has a center stand.
Some adventure bikes, and quite a few dual sports, have rims with safety beads, which is a raised area near the inner lip of the rim designed to keep the tire in place in the event of a flat. They improve safety, but can make getting the tire bead away from the rim a real chore.
The first technique to try is simply pushing down on the bead with your hands. Often that’s all it takes. If that fails, try stepping on the bead with you boot. Put your full weight on it (make sure the brake disc is up or you could damage it). Jump up and down. Use both feet.
Another method is to use your bike as a bead breaker, provided it has a center stand. First make sure to secure your center stand in place by strapping it to the front wheel so that it doesn’t accidentally roll forward. Next, extend the kickstand, place the tire under it so that the kickstand foots is resting on the edge of the bead, then lean the bike over until the bead pops. Flip the tire over and do the other side.
You can also use your tire irons as bead breakers for stubborn beads. Work them between the tire and the rim, facing up at first, in a small area. As you create a gap, turn the spoons around so they face down and can squeeze between the rim and the tire. Continue working them around and the gap will grow. It’s a lot of work but eventually, the bead will pop off. Motion Pro also makes a set of tire irons with a built-in bead breaker that simplifies the task.
If all else fails, there’s the “nuclear” option: ride the bike, very slowly, for a bit. A flat tire generates a lot of friction and heat. The tire will start to squirm around which will work the bead loose. Note: This is only recommended for rear flats. It’s extremely difficult to control a bike with a flat front tire.
If you lube the bead of the tire with soapy water, it may make it easier to slide the tire over the rim, but lube also makes it easier for it to slip right back off.
The conventional wisdom is that lubing the tire bead makes it easier to get on and off the wheel. And that is correct; the bead will slide along the outer lip of the wheel much easier with tire lube, soap and water, Windex, etc.
But that also means the bead can just as easily slip back off when you are trying to put the tire back on the rim. You’ll get one section of the bead on, and the side about 90 degrees away will slip right back off. Unless you have a Bead Buddy, or something similar, you’ll feel like you need three hands to get the job done. What if you don’t have a Bead Buddy, or you run out of lube on the trail?
The answer is to practice your technique until you can quickly change a tube with just two tire irons, nothing more. Stand on the edge of the (flat) tire 180 degrees opposite of where you are working the tire irons to make sure the bead is in the drop center of the rim. Get it right and moderate pressure with the irons will move the bead right over the rim, without lube. In fact, the bead is more likely to stay put if it isn’t slippery.
There’s no need to take the tire completely off the rim to repair or replace a tube.
If you’re changing or patching a tube, there’s no need to take the tire completely off the wheel. Break the bead on both sides of the tire, then lever just the disc side off the wheel. Keeping the disc side up while you lever off the tire helps ensure it doesn’t get scratched or bent in the dirt. Once you get the tire off on one side, put your foot on the disc and lift up the tire bead with one hand, then pull out the inner tube with the other.
And don’t forget to run your hand around the inside of the tire and rim once the tube is out. Check for nails, stones or any sharp points that may have caused the flat. Debris can also get into your wheel bearings while you are working on your tire puncture repair, so it’s a good idea to put a rag under the wheel and store your axle and spacers in a clean area.
You want to make sure you keep all of your wheel parts clean, organized and out of the dirt. On some bikes, the exhaust pipe can be used as a handy axle holder.
Bonus Tip: It’s possible to patch a tube without taking the wheel off the bike. Some riders break the bead and lever one side of the tire off, then just pull the tube out with the wheel still in place. Of course, this method assumes you are patching the tube, not replacing it.
Make sure you push that inner tube down away from the edge of the rim. A little extra precaution can help you avoid re-puncturing a newly repaired inner tube with your tire irons while reinstalling the tire.
The tube is patched or replaced, the tire is back on the wheel, everything looks good. Then you air it up and … it leaks. It’s the dreaded pinch flat and it happens to the best of us.
Somewhere in the process of levering the tire back on, you managed to grab the tube with your tire iron and put a hole in it. Or the tube got twisted inside the tire and damaged when you aired it back up. Either way, it’s coming off and you have to start over again.
One trick for reducing the likelihood of pinch flats with tire irons is to put a couple of pounds of air in the tube before putting it back in the tire. You only want enough to keep the tube free of twists and allow it to roll out of the way of tire levers.
Put a couple of pounds of air in, then hang the tube on your extended index finger. If it creases about halfway up the tube, you’ve got it right.
Another trick is to remember not to over-rotate your irons. Don’t push the levers past 90 degrees, or perpendicular to the rim. At that point the bead should slide on the rim and you’ll have less of a chance of catching, and damaging, the tube.
Bonus Tip: After reinstalling the tube, use the levers on the bead to guide the valve stem into the hole. With a little air in it, the tube will hold its shape and you can manipulate it by moving the bead, which is much easier than trying to get the valve stem seated with your fingers. A valve stem fishing tool is also handy for getting the valve stem pushed through the hole.
Got some useful tips for fixing flats of your own? Tell us your best tips in the comments!
Photos by Spencer Hill and Bob Whitby
Bob has been riding motorcycles since age 19 and working as a journalist since he was 24, which was a long time ago, let’s put it that way. He quit for the better part of a decade to raise a family, then rediscovered adventure, dual sport and enduro riding in the early 2000s. He lives in Arkansas, America’s best-kept secret when it comes to riding destinations, and travels far and wide in search of dirt roads and trails.
Since a lot of different adventures take place in the life of a real motorcyclist, it is not surprising that some of them are connected with the repair of a warhorse. At some, I can’t say that it’s a wonderful moment, you notice that the exhaust pipe has changed its color, somewhere it emits exhaust gases, and sometimes even condensate leaks. And oh horror, your favorite sound of velvety rumble turns into a hoarse cough of an asthmatic.
As folk wisdom says: where it is thin, it breaks there. By the same logic, the exhaust pipe burns out. Basically, the collector suffers, it is also the knee. When hot gases hastily leave the cylinders, they inevitably affect the pipes. They try to make the collector as rounded as possible so as not to create obstacles to the flow of hot gases, which are most harmful precisely on the bends.
A clogged exhaust pipe will also speed up the burnout process, as the gases will seek their way out at a higher pressure than usual.
And this means that microcracks and traces of corrosion from condensate will grow faster.
Condensation is the second cause of exhaust system failure. It accumulates inside after the engine is stopped in the process of cooling the system.
The tools are quite simple, the question is the price of the issue, the level of training and ease of use. The most common materials are:
 It does not require great knowledge and skills of an engineering genius, just enough logic and all the same skillful hands.
As with exhaust system cleaning ("Motorcycle Exhaust System Cleaning Yourself"), local repairs will require a work space. As soon as you have found a working room, you need to start dismantling. Carefully remove the damaged part of the exhaust system. By the way, ideally, completely disassemble it, in order to clean it. It will not be superfluous, if you still work with it, why not clean it up?
And you will have to clean it anyway. Because it makes no sense to do repair work on a corroded or burnt-out area without cleaning the workplace. By the way, if you are a fan of chemical experiments, then the treatment with anti-corrosion compounds will be just in time. The second stage will be the preparation of the local area, namely the removal of all damaged parts. To do this, you will need a cork brush and sandpaper. Do we remember the rule of interrupting risks? Your task is not to scratch the area into blood, ashes and dust, but to remove plaque and prepare the plane for good adhesion of surfaces.
After a major repair, welding or thermal tape application, the materials need time to solidify, take shape and all kinds of diffusion processes. Ideally, leave the element to dry for a day. So that later, without consequences, you can put it back.
Let me remind you that all these methods are temporary solutions. They will give you time to select and buy a new part of the exhaust system, but will not solve the problem forever.
Earlier, we spent a lot of time reviewing the exhaust system ("Repairing a burnt motorcycle exhaust pipe yourself", "The structure of the exhaust system, what is useful for a pilot to know?"). Separately, I would like to consider the issue of cosmetic repairs. It happens that you put a scratch on the pipe and it haunts you: you don’t sleep, you don’t eat, your eye is already twitching, you keep thinking how to remove this scratch?
There are already three ways out of the situation:
The choice of repair method depends on the original coating of the exhaust system. If you have chrome parts, then it is logical that you will take polishing wheels, paste and will clean up to a mirror shine for a long time and hard. Another thing is when you just want to paint the surface.
I must immediately warn you that it is possible to repaint chrome, but chrome parts on your own without special equipment will not work. I had experience in chrome plating of motorcycle parts, restored the engine cover and mirror, the attraction is not for the faint of heart. Firstly, because of the huge consistency of the technology, which is very sensitive to violations. Secondly, because of the high cost of consumables and harmful fumes, which cannot be compared with paint fumes from a spray can.
Polishing revives soot-clouded manifolds and hides small scratches. Deep damage cannot be repaired by polishing.
Tools:
In fact, everything is easy, sleight of hand, a lot of patience, chamomile tea and respect for gradation will return the former shine to the chrome parts and manifold. The main task is not to cause new scratches by polishing. This happens when they take large sizes of pasta and do not interrupt the risk with small ones.
If you have an exhaust system that was still chromed under the king of peas, but no one can say for sure by looking at it whether this is true, then you can make a cunning castling. Sandblasting works wonders. I remember that we were brought good co-currents, but outwardly they were caught in such a way that there was simply nothing to restore. I had to take them under sandblasting and repaint with black heat-resistant paint. Essentially, that's how it works. After sandblasting, the exhaust system is prepared for painting with materials that can withstand high temperatures.
Let's make a reservation right away that painting a scratch on a chrome muffler with silver is an unforgivable bad manners. That's serious. This collective farm is not needed. You either fly with a scratch, because as a rule, if you do not point to them, it does not catch your eye, or repaint completely.
There are a lot of subtleties with silver. It will not work at all to mask local damage on chrome, you will only make it worse, and it will peel off your chrome in the first week. Yes, there is silver in the line of heat-resistant paints. I don't mind at all if you decide to paint the exhaust silver, but only if you do it in its entirety. Scratched engine covers are often sprayed with the same paint, which is also usually too noticeable when you are too lazy to paint the element completely.
Working with silver paint has an important nuance: the surface must be perfectly prepared. Serebryanka will give away all your imperfections, all the places where you went through in a hurry.
And one more thing, if you decide to paint in silver, then spray the paint carefully and at a greater distance than black. If a silverfish forms a smudge of paint, then this will be a mission failure. Because all the accumulations of silver will give away your repair work. It is very sensitive to the number of layers and methods of application. Smudges and repeated overcoating in the sun will look like mottled patches.
Black occupies a special place in the line of heat-resistant paints. A win-win. You prepare the surface, apply black and admire the result. Black absorbs most of the coating errors and will not give out flaws in preparation so much, however, this applies to the exhaust system, but not to gas tanks, on the rounded shapes of which any flaws are visible.
Important: heat-resistant paints acquire their properties only after calcination. In other words, as long as you don't put the exhaust system back on and let the pipes warm up (or forcibly burn them out), the paint can be damaged like normal.
Case from life. She painted the two-stroke engine, cylinder and covers with black heat-resistant paint, before that she only knew about the need for baking. I shifted the microfiber soaked in a degreaser, touched the lid with wet hands and suddenly the paint began to peel off! So I learned that heat-resistant paint is very afraid of a degreaser before calcining. A tip for those who dyed but didn't like the result. To remove the paint, before grabbing onto the solvent, try to wipe it off with a degreaser.
But if you don't feel like messing around with polish and paint, too lazy to prepare surfaces, you have the last option - thermal tape. Usually they resort to it to eliminate burnouts as a local repair.