If you ride long enough, you’re eventually going to get a flat tire. It's inevitable.
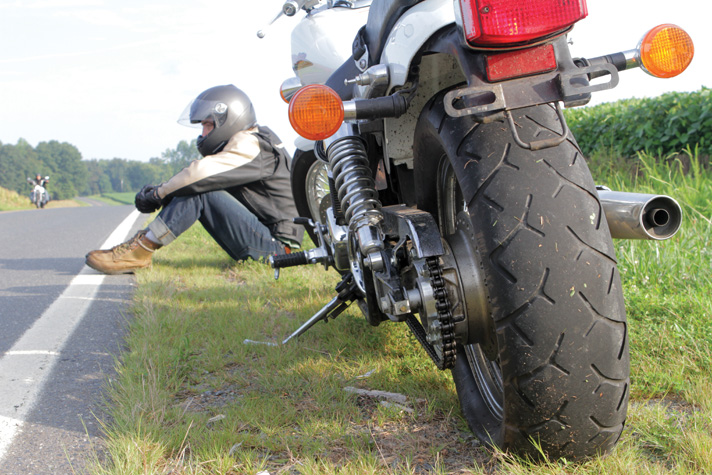
Recommendations aside, most riders do what they need to do to get home. This is certainly not an approved repair, but it allowed the rider to get out of the woods. Photo by Lemmy.
And since most modern motorcycles roll on radial tubeless tires, it’s possible to plug the puncture. But are plugs reliable? Are they even safe? Let’s dive into the nitty gritty of tire repair so you know when it’s OK to plug a tire and when it ought to be replaced.
The fact is, motorcyclists fix flats in tubeless tires all the time, but they could be plugging away indiscriminately, with limited knowledge of the proper repair process or the risks associated with riding on a repaired tire.
After all, there’s a big difference between an emergency fix, where you stuff three rope plugs into a gaping wound and ride slowly with your hazards on just to get home, and what we would call a long-term or permanent fix that you can ride on like normal.
I’ve ridden from Los Angeles to Boston on a plugged tire, and even done track days on repaired rubber, so I'm confident that plugs can be safe and reliable. Photo by Ari Henning.
Just to be clear, not all tire manufacturers condone repairs, even in emergency situations. That’s because just like riding a motorcycle, there’s danger in riding on a repaired tire, so some manufacturers will simply tell you to call a tow truck and order a new tire. The integrity of your rubber is really important, so a fresh tire is definitely the safest option, but it’s not what you want to hear if you just picked up a nail in a nearly new $200 Pirelli.
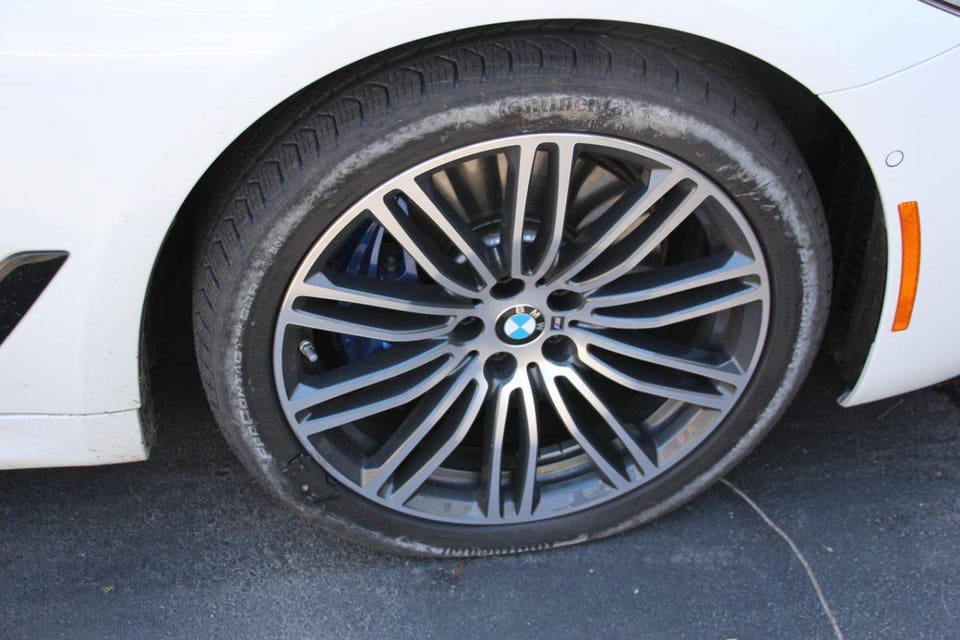
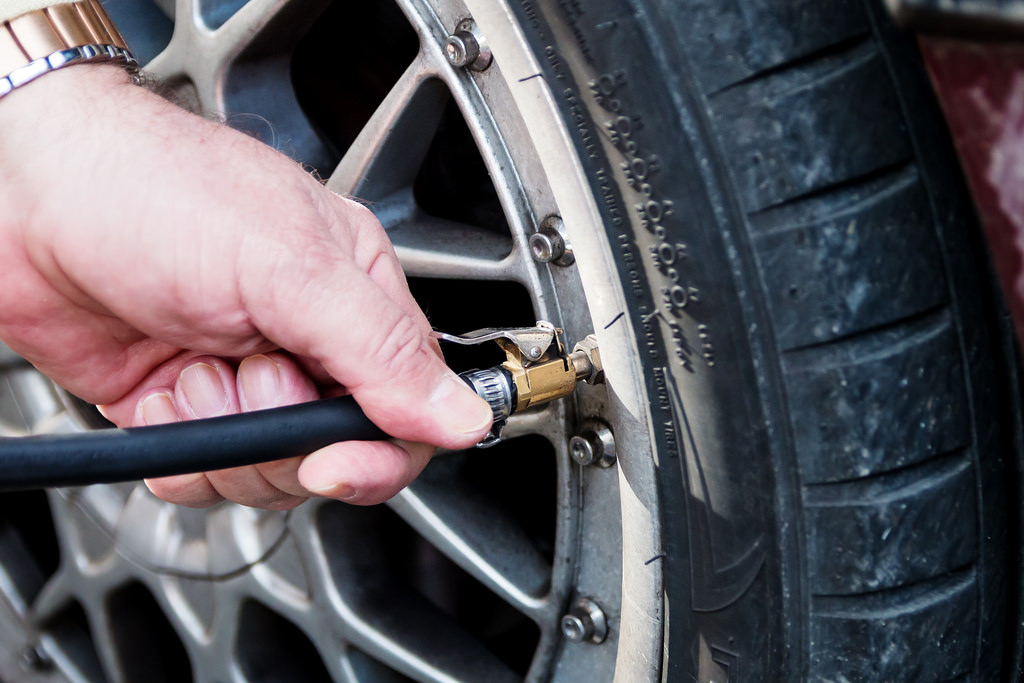
Officially, plugs should only be installed in the center portion of the tire. Luckily, most common punctures occur at the contact patch, within the center 75 percent of the tread. Photo by Spenser Robert.
Now, those tire makers that do allow for repairs of any kind, even temporary fixes just to get home, state that the puncture has to meet certain criteria in terms of the location, shape, and size.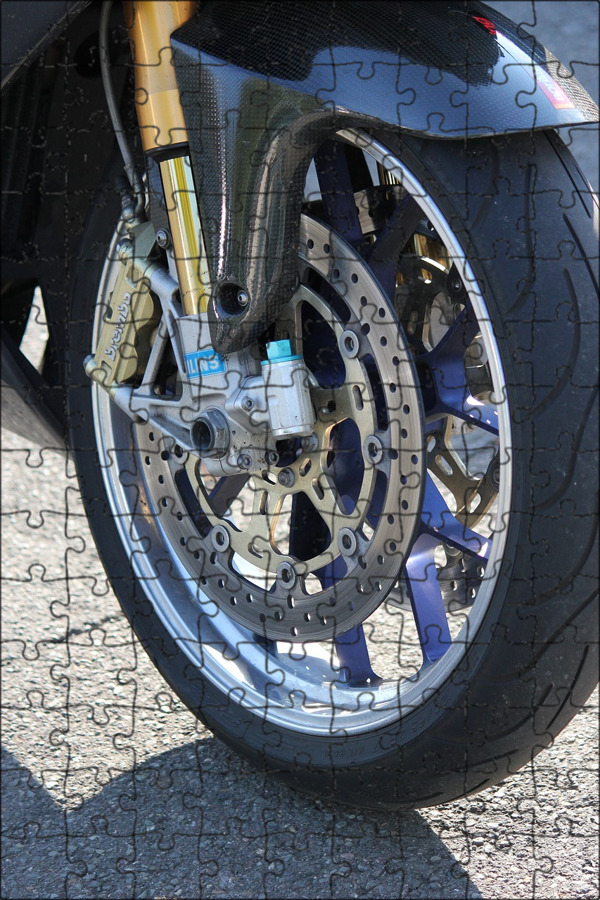
Tire makers and plug kits say you need a minimum of 1.5 millimeters of tread to retain a plug. Photo by Spenser Robert. For starters, the eligible repair area is limited to the crown of the tire, specifically the center 75 percent of the tread. That’s because the shoulders flex too much and might spit the plug out like a sour grape. The sidewalls are off limits to plugs for the same reason.
Editor's note: See the video version of this article in The Shop Manual on the RevZilla YouTube channel.
The tire also needs to have a reasonable amount of tread left to retain the plug. Technically, the minimum is 1/16 inch or about 1.5 millimeters. An easy way to check tread depth is to stick a penny in the groove. If the top of Abe’s head is visible, you’re working with less than 1.5 millimeters of tread, which means you don’t have enough meat to safely hold a plug.
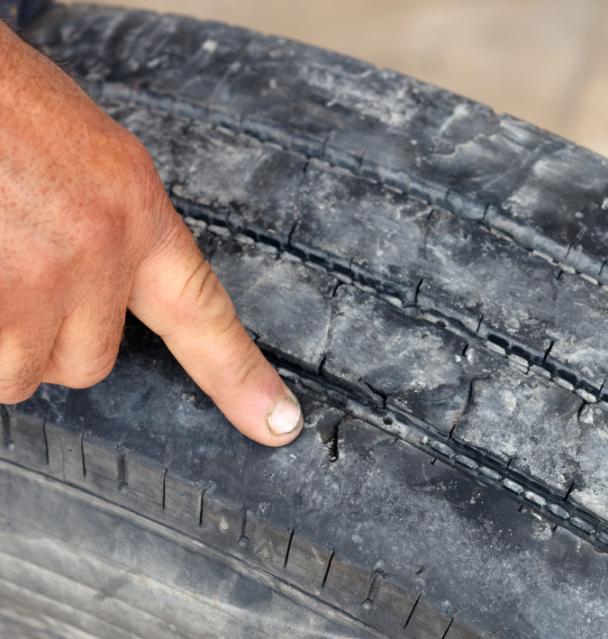
The size of the hole you can fill is determined by how many rope plugs you have on hand, am I right?! For permanent repairs, even the most lenient tire manufacturers draw the line at seven millimeters. Photo by Spenser Robert.
Assuming the puncture is within the allowable area, and there’s enough depth left to the tread, you then you have to consider the size and shape of the damage. According to tire manufacturers, tears, slices, and oblong punctures can’t be repaired. Luckily, those types of injuries are pretty rare. For the more common round holes, like you’d get from a nail or screw, the maximum acceptable size runs from three millimeters to seven millimeters, depending who you ask. For reference, seven mm is just a little smaller than the diameter of a standard BIC pen or your classic #2 pencil.
Now, again, that’s all for emergency fixes to get you home. However, for a repair to be considered permanent, at least according to tire manufacturers, all that criteria needs to be met and you’ll need to take the tire off the rim and install a combined plug/patch, which both fills the wound with a plug and covers the hole with a patch from the inside, providing two means of sealing.
To be considered a permanent repair, a combined plug/patch must be installed from the inside of the tire, and the interior of the tire must be inspected for damage. Photo by Spenser Robert.
It’s also important to carefully inspect the interior of the tire once it’s off the rim. Tubeless tires don’t usually lose their pressure all at once when punctured — they’re designed not to — so it’s possible for the rider to cruise along on a deflating tire. This isn’t uncommon and can lead to internal tire damage, either from the carcass overheating or from the nail or whatever made the puncture gouging the tire’s inner surface. Damage to the liner could result in a slow leak, could allow air to creep between the plies and cause tread separation, or could let moisture get in around the steel belts and corrode them, none of which is good.
I carry two types of plug kits with me when I ride: Gas-station variety rope plugs for big ugly punctures (left), and a DynaPlug kit for smaller holes (right). Photo by Spenser Robert.
Another caveat for repaired tires is that you’re supposed to reduce their speed rating. Some manufacturers simply cap the maximum speed of a repaired tire at 75 mph.
And, while it’s obviously important to know when it’s OK to plug a tire, you also need to be familiar with how to install a plug. So the next time you’re about to replace a tire, run some nails or screws into it, read your repair kit’s instructions, and practice the process so you’re familiar with it before you’re stuck on the side of the road after dark.
Search
Home Features How to Plug and Repair a Tubeless Motorcycle Tire
Sacre bleu! The discovery we all dread, usually right before a ride. Don’t attempt to repair a severe gash or cut, or a puncture in the sidewall of the tire. Once you get the hole plugged, it’s off to your dealer for a new tire.
 Considering how bulletproof the rest of our motorcycles have become, it’s ironic that it only takes a little 1 ½-inch box nail in a tire to bring the whole show to a halt. We’re fortunate today that tubeless tire technology prevents intrusions by nails, screws and other foreign objects from becoming catastrophic blowouts. The object usually stays in the hole, the only place from which the tire can lose air, so it deflates more slowly than a puncture in a tire with a tube on an unsealed spoked wheel (which can lose air through all of the spoke nipples and even the tire bead). But even if that pointy thing does stay put and flush with the tread surface, as it flexes back and forth in the carcass the tire will eventually deflate enough to become a problem. Hopefully you will have noticed its presence or even received a low tire-pressure warning before that happens.
Of course, if it doesn’t stay put or is large enough to stick out of the tire (like a 6-inch gutter nail — don’t ask), the tire will probably deflate rapidly enough to strand you by the roadside. Unless you’re lucky enough to be next to a motorcycle shop at the time, you’re going to need either a good roadside assistance plan or a tubeless tire repair kit. (We’ll cover tube-type tire roadside repairs in another installment).
 Use the knife in the plug kit or any sharp blade to cut the plug flush with the tread surface. Give it a few minutes to set up, inflate the tire and then spray some water or a soapy solution on the plug to make sure it’s holding air.
Here at Rider we’ve fixed enough tubeless punctures to appreciate that the most dependable tire repair kit you can carry uses rubber strings or “worms” for the plug that gets inserted into the tire, preferably the large red ones like those in the T-Handle Tubeless Tire Repair Kit from Stop & Go. There are more convenient plug types, but the strings rarely let us down. If you’ve had good luck with liquid sealers, installed either pre- or post-puncture, more power to you — we often carry Slime for tube-type tires on bikes that have tubes in the hope of avoiding a roadside tire dismount. But we change bikes too often to make using the pre-installed sealers practical, and prefer to avoid irritating the mechanic who has to change a tubeless tire on a wheel full of messy sealer.
Advertisement
Repair kits that use string plugs often come with rubber cement, which — depending on the string type — may not be necessary to complete the repair, but at a minimum it acts as a lubricant to ease inserting the plug, and seems to help vulcanize the plug to the tire. It’s important to keep your glue supply fresh (preferably unopened), or you may find that it has dried out when you need it.
Stop & Go’s T-Handle Kit has everything you need to affect a solid repair. Just add pliers and something with which to inflate the tire (CO2 cartridges or a compressor).Stop & Go also offers a plugging kit that uses special mushroom-shaped plugs that don’t require glue, and the pocket version doesn’t take up any more space than the T-Handle Kit, so we often carry both. A portable mini compressor beats the heck out of CO2 cartridges if you have the space. Stop & Go’s is small, inexpensive and has a built-in gauge.No matter what sort you use, any plug inserted from the outside should be considered a very temporary repair used to get you and your bike to the nearest replacement tire. Limit your speed per the plug kit instructions, and replace the tire as soon as possible. Special patch plugs inserted from the inside of a tubeless tire are certainly safer, but even if you can find someone who will install one for you, every tire manufacturer (and even those who sell patch plugs) recommend replacing the tire instead since it has to come off anyway.
The photos in this article cover the basic plugging process with rubber strings. Depending on the size of the hole, you may need more than one — I once used three in an ATV tire and it got me back to camp.
It happens that a motorcycle rider thinks about changing the wheelbase, not just changing tires or changing tread. As for installing a different radius on a motorcycle on your own or replacing rubber with a different tread pattern on only one wheel, many people used to immediately poke at the traffic rules - 2.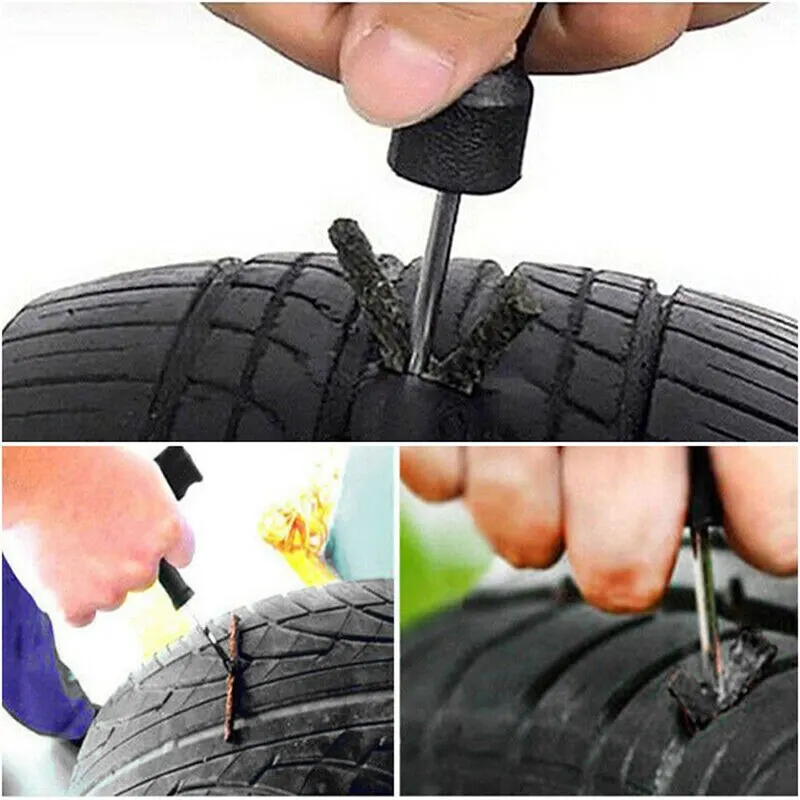 3.4.4.
It is not allowed to install tires of different sizes, designs (radial, diagonal, chamber, tubeless), models, with different tread patterns, frost-resistant and non-frost-resistant, new and retreaded, new and with deep tread pattern, on the same vehicle axle.
However, this part of the SDA applies to cars, ATVs, and sometimes tricycles. Initially, there are motorcycle models that imply a different radius or wheel tread pattern for the front and rear suspension. But not always a different radius or tread pattern makes practical sense. Let's look at the dangers of installing different wheels and treads.
Since we are considering this issue in general terms, it is not surprising that you can find models where the rear wheel is one unit larger than the front, for example, sports landings in order to reduce air resistance can have such a design. But cases with a high front wheel are not a fairy tale either, remember the tough tough bikers, where the front wheel is high and narrow, and the rear wheel is wide and squat.
If your motorcycle does not involve changing the wheel radius, then you are at great risk of permanently upsetting the balance of the entire motorcycle. We're not one bit sorry that you put a different radius, but this trick will work if you change both wheels, not just one. The point is not how high the engine will be, but that you are changing not just a wheel, but the angle of the WHOLE motorcycle. Is the suspension designed to change the radius? Will the pendulum reach? Another radius - another chain. Do you need it?
The traffic rules say about different tread, this is not a whim, but prudence. Because with a different tread on your motorcycle, a different level of grip and a different size of the contact patch are formed. What's more, with a different pattern, the wheels will react completely differently to the same weather conditions. Yes, they are already each busy with their own business, but manufacturers are always puzzled by the calculation of average indicators for creating a motorcycle tire that would minimize the functional gap, and then you decided to put completely different treads and some engineer’s sleepless nights went down the drain to Vaska’s cat .![]()
The only tiny option where the difference in tread can do a good job is off-road. So off-road that you literally delivered the motorcycle to the scene in a van, and did not ride it on the asphalt, doing the wonders of balancing act. Knowing that you need to go through a fierce route along the off-road track, you can put a very evil protector on the rear wheel, since it is he who will tear the track and push you out of the pits, and it’s really easier to put the front wheel. But such changes must be made with a clear idea of what result you expect. On civilian motorcycles, a different tread is an expensive repair as a result of a stupid fall due to the difference in the contact patch.
It is also possible to install various protectors, for example, slick on the front and standard city on the back for participation in stuntriding.
The case when motorcyclists are not particularly strongly clung to if the difference in manufacturer is not obvious in the tread pattern.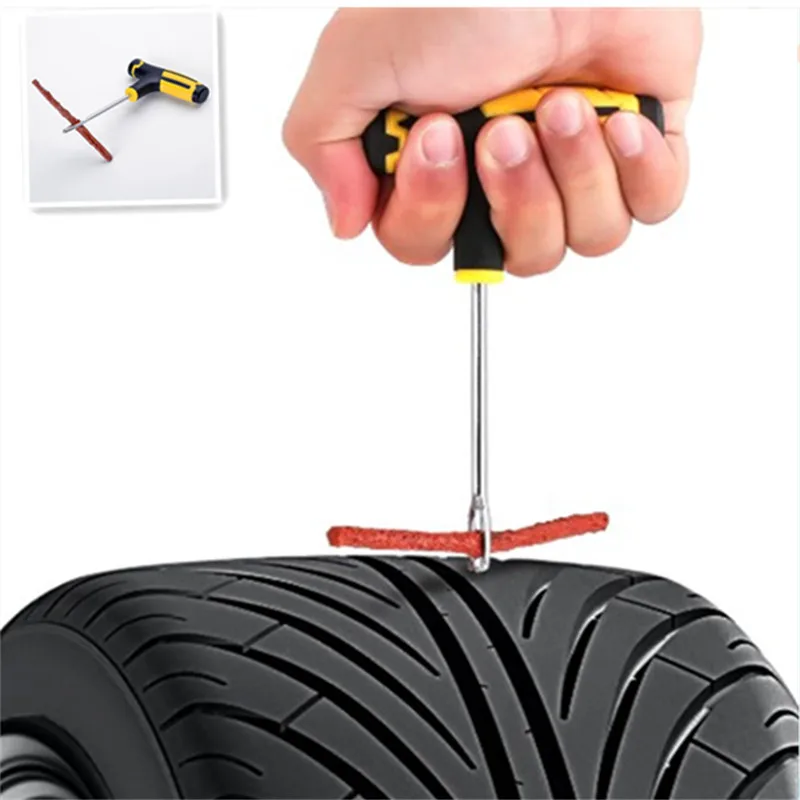 You can put tires of different brands only if their characteristics do not contradict each other, but match on all counts.
A motorcycle gives you a feeling of freedom, allowing you to discover new routes. However, in reality, this freedom can turn into a trap in an instant if you are unlucky enough to puncture a tire somewhere in the middle of the road. The feeling of annoyance will be ten times stronger if there is no way to fix a punctured wheel. At this point, it remains only to hope for cellular communication and help from other drivers on the road. Therefore, consider the basic recommendations for repairing a motorcycle tire on the road.
Always keep a rubber band or tire repair insert in the trunk. This simple tool will add peace of mind on the road. It will be much better if you learn how to use it in advance. You don't want to be the guy who has the right tool but lacks the skills to fix a problem, even something as simple as fixing a tire, do you?
The repair technology for tube and tubeless tires is different, but both types are subject to restoration (at least to such a state as to get home). Repairing a tubeless tire is easier. Repairing a tubed tire requires removing the wheel, removing the tire, and removing the tube to install the patch.
So you run over a nail, screw, glass, or that damned sharp stone and punctured a motorcycle tire. If the object that caused the damage is still in the rubber, the first step is to remove it. Pliers are great for this. Therefore, you should always keep this tool in the trunk: with it, you need to grab an object sticking out of the tire. Try to pull it out along the same path that it entered the tire so that the puncture does not increase and become torn.
After removing the object, clean the edges of the pierced hole. To do this, the repair kit must have a special tool - a tool for cleaning holes. All debris and rough edges must be removed to create a surface for patching.
Then you need to install a patch. Different kits offer different types of patches, so you should read the kit's manual to complete this step correctly.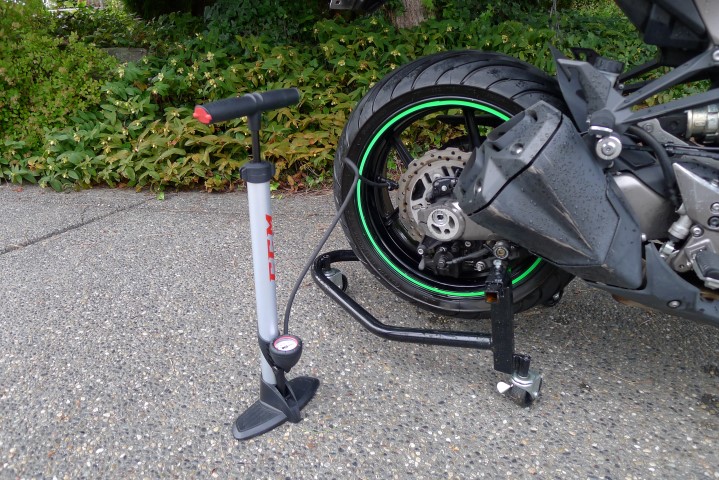 However, there are two main types of patches: long cord patches and fungus patches. Some kits may include adhesive to bond the patch to the tire rubber.
Patches or cord inserts are supplied with an awl for installation. It is necessary to bend the cord in half, and thread one half into the tool. This is necessary for a tight fit of the material. Next, bring the cord into the hole until it protrudes above the tire by about 1 centimeter. Then you can pull it out of the awl and put the tool aside. Take a knife and cut off the excess patch material by about 0.5 centimeter.
Fungus patches (plug and play type) require the use of a special tool for installation. Again, you must follow the instructions for the specific repair kit. Then stretch the patch material with pliers. When the puncture is closed, you can cut the patch over the tire.
After installing the patch, the tire needs to be inflated. For repairs on the road, you will need either a 12V electric compressor that can be connected to the motorcycle's electrical system, or a CO bottle 2 . Carrying a compressor with you is not always convenient. A more compact and more portable option is to use the small CO 2 bottles in combination with the tire inflator. This is the fastest way to inflate tires on the road.
If possible, apply some soapy water to the patch to make sure it is airtight. If there is a leak, you will see tiny air bubbles around the repaired area.
On-road retreading of tube tires is a more labor-intensive process. If your motorcycle is equipped with such tires, then you will need a few more tools to repair them. In most models, you will have to remove and disassemble the wheel in order to get to the camera. The vehicle owner's manual should describe how to do this and what tools to pack in your luggage. In addition, you will need a tire removal tool. It makes the job easier.
Once the inner tube has been removed from the wheel, the remaining air must be completely bled out. The next step is to prepare the camera for patching. The repair kit should include a special scraper to roughen the surface around the punctured hole. This treatment is necessary to ensure adhesion of the patch to the chamber material.
After completing the preparation, you can start installing the patch. Follow the instructions in the repair kit manual. Some patches come pre-applied with adhesive, while others require the use of the included adhesive. It is necessary to place the patch on the damaged area of the tire and lap it firmly, moving from the center to the edge, to ensure a snug fit without air bubbles.
Now that the tube has been repaired, the tire needs to be checked to make sure the object that caused the puncture has been removed from the tire. Then you can install the camera and tire in place, after which it remains only to pump it up. If possible, the tire should be checked for leaks.
So, after retreading a tire yourself, the best solution is to immediately go to the nearest tire repair shop.