| How-To - Wheels and Tires
We usually carry spares. Tires that is. We hope they always remain spares and that we never have to use them. However, there's always the chance you have no spare or already damaged one tire, and now have a tire that's jumped off its wheel bead. It's rapidly lost all air and you have to find a way to get it reseated on the wheel and re-inflated.
If you stick to running street pressures in the dirt, it's highly unlikely you'll push a tire off the wheel bead. But airing down is an off-road necessity in many cases and without beadlocks there is some risk of popping a tire bead. When bead retention fails it almost always occurs on the outside wheel bead and very often on the downhill side of the vehicle where the weight of the vehicle is pressing the hardest on the tire sidewall. Other times, when bouncing laterally in deep ruts, a tire can be slammed sideways hard enough to blow the tire off the wheel bead.
A tire that's been knocked off the outer wheel bead can often be reseated, re-inflated, and then you can be on your way again. If the tire has come unseated from both the inner and outer wheel beads, you've got a bit more work on your hands to get both sides sealed again. In this situation, a large ratchet strap tightened around the middle circumference of the tire may help get the tire beads pushed outward a bit for a better chance of seating. Wider wheels also make reseating more challenging.
Getting the tire completely back on the wheel and re-inflated requires cleaning the bead surfaces on the tire and wheel, getting them pulled together, and getting sufficient air inside to inflate and seal the tire back on the wheel. It can be done in the boonies with a little technique and a good shot of air.
The first thing you must do is get the tire fully off the ground and high enough so it has room to be inflated without touching the ground. Short of this, there's no way to get the tire pulled back out towards the wheel bead for reseating. In most cases, it's easier to work with the wheel on the vehicle, using the rig as a solid anchor to hold it while you pull on the tire.
When the tire popped off the wheel, there's a good chance dirt or mud got inside it. We're not overly concerned with what got all the way inside, but we do care about debris on the tire and wheel bead areas. Always clean these surfaces before attempting to reseat the tire as debris here can keep the tire from fully sealing and holding air well. Feel free to wash down the bead areas with water which will clean and help the tire slide back on the wheel easier.
The final step of getting the tire back to a serviceable condition is to inflate it. If the backside bead is still in place on the wheel, that's a huge plus. In many cases, a couple pairs of hands pulling the tire towards the outside can get the outer tire bead out where it can start to seal again. Shoot the valve stem with air to attempt to inflate. You'll hear air hissing in locations that are not sealing. Shift your pull to try to get those spots to seal. Once the seal begins, further inflation will cause the tire to pop rapidly back onto the bead seat.
A voluminous shot of air helps greatly when trying to reseat a tire. A CO2 tank, or large air pump with reservoir, works best to get air rapidly back into the tire while trying to get the bead to reseat. A small pump often has trouble getting sufficient airflow into the tire to seat it. We've seen the starter fluid trick help reseat tire beads effectively. It involves shooting a few squirts of starter fluid inside the carcass, then tossing in a match to ignite the flammable material. Once the tire expands onto the wheel from the heated gases, one has to get to the valve stem quickly to get air into the tire for inflation. Often removing the valve core helps get the air inside quicker, but be cautious of hot gases coming back out of the stem.
Camper and Trailer, Four Wheel Drive, Skills and Training, Video
Scott Brady / January 11th, 2012
Without question, tire issues are the most common vehicle problem encountered in overland travel.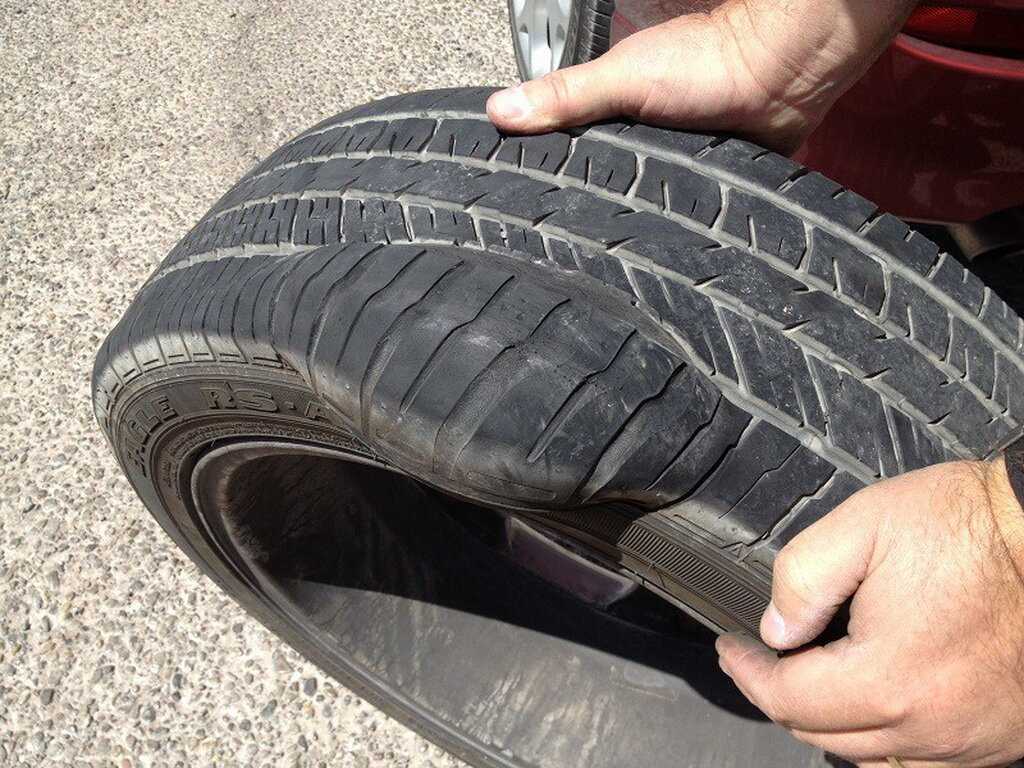 Punctures, slow leaks, damaged valve cores and tire beads losing their seat on the wheel. Developing your skills on tire repair is an essential component of preparation and should include:
There are of course other skills related to wheels and tires, but those are the big ones. For this article, we are focusing on the process of reseating a carcass bead to the wheel. Most wheels used on 4wds include a welded, formed or cast safety bead that helps the tire remain on the wheel, especially at low pressures. However, low pressures required in some conditions, like driving in deep sand necessitates low tire pressures and potentially high travel speeds. This generally exceeds the ability of the tire construction and wheel safety bead (which is relying on internal pressure) to keep everything together. In the video shown here, we were having some fun on the dunes in Australia at higher speeds with a heavy Toyota Land Cruiser. The cameras were rolling and we were hoping for some big fans of that bright red sand for an article in Overland Journal. One particularly fast turn resulted in a flat. Typically the outer bead is the only one to pop free, but higher speeds or driving any distance with the flat will also loose the inner bead as well. That was our situation, but since we had the experience and proper tools, we were able to reseat the bead and still make it back to the Prairie Hotel for a feral feast. The video shows it best, but here are the critical steps.
So, you can follow the above steps, or just do this. . .
Resources: Extreme Outback – Ultimate Puncture Repair Kit – Link:
http://www.extremeoutback.com/product/27/Ultimate+Puncture+Repair+Kit.html ARB Twin Compressor With Tank – Link: http://store.arbusa.com/ARB-Twin-High-Performance-12-Volt-Portable-Air-Compressor-CKMTP12-P22666.aspx ARB Speedy Seal Tire Repair Kit – Link: http://store.arbusa.com/ARB-Speedy-Seal-Tire-Repair-Kit-10000010-P3580C17.aspx
0
Introduction
What is the feature of the directional tread pattern?
Advantages and disadvantages of
directional tiresHow to properly install directional tires
Conclusion
When choosing good tires, you often face the problem of not only a huge number of models, but also a variety of tread patterns, which also need to be sorted out. One of the most popular patterns is the traditional directional pattern, which has been used on the tread surface of a wide variety of tires for decades.
What are directional tires and why are they still in demand not only among motorists, but also among professional motorcycle racers? In the article, we will reveal all the secrets and technologies of directional tires, as well as show you how to install them correctly. Here, nuances and discoveries await us at every step.
There are four types of car tire tread pattern:
directional symmetrical,
non-directional symmetrical,
non-directional asymmetrical,
directional asymmetric.
Each drawing is designed for its own version of the road and has its own set of advantages. Different tread patterns have different functionality and behavior on the road. When mounting tires on wheels, their own installation principles also work, which will need to be strictly observed so as not to create an emergency. We will talk about them in the corresponding section.
The essence of the directional tread design is clear at a glance: the blocks, ribs and tread grooves of the V-pattern are directional, spinning the wheel in a certain direction. Most often, directional tires are found in winter models, but there are many of them among summer ones. In symmetrical tires, both halves of the directional tread are mirrored, in an asymmetric design, both halves have a different structure and different functionality.
It is necessary to mount the wheels only in the right direction, otherwise all the advantages will come to naught, and at the same time problems with handling and accelerated wear will be added. Excessive strong pressure will accumulate in the center of the working area, due to which the tire will begin to rise above the road and harm traction in how many areas.
The directional tread pattern is best suited for wet tarmac, as the grooves that widen from the center to the sides are much better at shedding water from the contact surface. This not only improves grip on wet surfaces, but also works in favor of protection against the effect of hydroplaning. This works even better for a rear-wheel drive car - the front wheels will quickly clear the water before the rear axle sets foot on the road. Accordingly, contact with the track in such a car will be much more thorough.
The directional pattern of the winter models excels in raking snow and removing dirt from the contact surface - ideal for snowy trails in the winter.
On a dry summer surface, they also give the car a couple of advantages - first of all, it concerns directional and lateral stability. For high-speed tires, this is one of the most relevant designs, as directional tires have a positive effect on the reactions of the car at high speed.
However, their driving disadvantage is the increased noise level during active work on asphalt, and the higher the speed, the stronger the rumble. Also, directional tires are more expensive than non-directional tires, but cheaper than asymmetric ones. It is better not to install directional tires if you often drive on dirt roads or are completely forced to drive off-road. They will not show effective work on soft and medium hard surfaces. For rural areas, a tread pattern with a non-directional arrangement of large lugs is better suited. Remember that, being put on disks, wheels with directional rubber can only be changed from the front axle to the rear and vice versa, but not rearranged on the sides. To do this, the tires will have to be disassembled and put as needed.
Although we've talked about directional tires, it's the symmetrical design that's most common. Asymmetric directional pattern is very rare. This is due to the fact that such tires are not only much more difficult and expensive to manufacture, but they have one serious drawback for car owners. Due to the very strict installation scheme for the car, constant difficulties arose with spares - I had to constantly carry two spare wheels with me instead of one, because you never know which tire will be damaged, and you can’t change directional asymmetric tires with sides. In addition, the warehouses constantly accumulated tires for only one side, which are completely useless without a paired wheel.
As mentioned above, one of the "secrets" of directional tires is their installation pattern. Simply put, you need to find the inscription Rotation (from the English. "Rotation") with an arrow on the sidewall. It is this marker that is an indicator - in which direction the tire pattern should “look” when installed on a car. If you make a mistake with the direction of rotation and put the rubber against the arrow, then the drainage system will rake in water like a mill, and not discard it, leveling all the advantages of the model, or even exacerbating them. The fact that the tires are installed incorrectly will tell you a sharply increased noise in the cabin.
If for some reason you could not find this marker, then you can do it even easier - pay attention to the tire tread pattern itself. The rubber of the directional design is a kind of "herringbone" that is directed forward. Simply mount the tires so that the tread pattern faces the direction of travel of the vehicle.
Rubber with an asymmetric device should only be mounted according to the marking, since each individual side is designed for its own tasks and should never be confused. The correct direction of asymmetric tires will help determine the labels:
Outside, or the outer side of the tire, must face outward.
Inside, or the inner side, respectively, looks inside the car.
Right and left asymmetric tires are much less common. Left (or simply L) will be written on one tire - it means that it must be placed to the left of the body, Right (R) - to the right. You can change them only on one side of the body - front with rear and vice versa.
But much more often, directional tires can be mounted on a rim on either side, the main thing is to follow the direction of the pattern.
And don't forget to balance freshly assembled wheels - tires will never show their advantages and characteristics without good balance. Only after that you can proceed to the installation on the hubs. After installation, go around the car in a circle and check the markings. Recall that we need the rotation direction under the Rotation arrow. If you have an asymmetric directional tire, then make sure that only the Outside is visible. Left (Left) and right (Right) asymmetric tires must show the sides of the body in the direction of travel.
You can learn a couple more tips about directional tires from this video:
Introduction
Asymmetric tread pattern - why is it needed?
Varieties of asymmetric tires
Correct installation of a tire with asymmetric tread pattern
Conclusion
More and more widespread are models with an asymmetric tread pattern. It looks quite stylish and aggressive. Does this design make sense or is it just another marketing gimmick?
In the article we will find out what an asymmetric tread pattern means, analyze its useful qualities, and also tell you how to put such rubber on a car.
There are several basic types of car tire tread design: symmetrical directional, non-directional and asymmetric in different variations. Each of them is designed for its own type of road, as it performs certain functions better. For example, a symmetrical directional tread pattern performs better on wet asphalt due to accelerated water drainage on both sides of the running zone, but on the ground it does much worse than an asymmetric one due to a design more suitable for long straight driving on the road.
Asymmetric tires have a different structure of the rubber compound in both areas of the tread zone - on the inside it is softer, and on the outside it is harder, since the main load on the wheels when cornering is applied precisely to this area. This means that it contributes to the expansion of the contact patch, and greater resistance to punctures, and better resistance to abrasive wear. Asymmetric models have a much longer resource and are able to cover a greater distance with minimal wear.
The difference between this type and others lies in the tread pattern itself, since the blocks on the outside are much larger than on the inside. Tires with an asymmetric pattern provide better grip on asphalt and ground and provide cornering stability. Winter options, thanks to enlarged blocks, are much more reliable for moving on icy road sections. The block system of the inside is much finer and most often designed to drain the tread. This advanced design of the outer and inner area allows tires of this type to become a universal choice for most road conditions, both on dry pavement (outer part of the tread pattern) and on wet (inner part). Also, the limited number of large blocks on the outer area and the multidirectional drainage slots reduce the noise level that the tire emits while driving.
Usually, the tread of asymmetric tires is divided into two halves, each of which has its own "pattern" and structure - one side can consist of multidirectional blocks, and the other can have a V-shaped direction of rotation.
There are also two types of asymmetry: directional and non-directional.
The non-directional asymmetric pattern, due to its special design, significantly improves contact with the track, especially under heavy loads and high speeds. Tires due to it well resist deformation in corners and sharp lane changes, and also keep the course more stable. It is perfect for high-speed riding, when good handling and lateral stability are vital.
Models with a directional asymmetric pattern have their own direction of rotation, and therefore they must be installed, guided by the markings (see below). This is an extremely rare type of pattern that combines the virtues of a directional and asymmetrical design.
In other words, there are a lot of options for an asymmetric pattern, and it is rather difficult to unambiguously classify them.
Tires with asymmetric tread patterns are somewhat less common than other options, but their popularity only grows every year, despite the higher price due to the complicated manufacturing process. The last point is the main disadvantage of asymmetric tires.
Asymmetric models, unlike symmetrical varieties, cannot be mounted on an arbitrary side. It is better not to try to guess the tread pattern, but to immediately look at the markings on the sidewall to find out how to properly mount the tire on the rim. All asymmetric tires have unified designations that contain information about what the tire is suitable for, what seasonality it has and when it was released.
We are interested in the Outside and Inside markings, which can be easily found among other markings on the sidewalls of the wheels:
Alternatively, they can be Side Facing Out (outer side) and Side Facing Inwards (inner side). The meaning is the same.
In no case should they be confused, since the very principle of operation of the drainage system and the coupling edges was conceived by the creators in a certain way. If you put the tire on the wrong side, then when driving through puddles, the drainage grooves will not begin to drain water from the contact patch, but rather rake it in even more actively, and the coupling edges will be wiped out on the road surface for nothing. The result of this will only be accelerated wear, handling problems, braking problems and an increased risk of aquaplaning effects.
Less often, tires can be left and right in relation to the location on the car. Tires marked Left are placed exclusively on the left side of the machine, a tire marked Right must be placed on the right. This is not the most comfortable tread device, used to make Nokian NRV directional and symmetrical at the same time, but due to problems with wheels and production cost, this model was discontinued.
If you have a directional model of asymmetric rubber, then also observe the direction of rotation - it is indicated by an arrow with the inscription Rotation.
Rubber with all these markers almost never occurs at the same time, but alternately quite often, so keep them in mind when you go to the tire shop or are going to change the wheels yourself.
The correct approach to the installation of asymmetric tires is easy to check on the same marking.