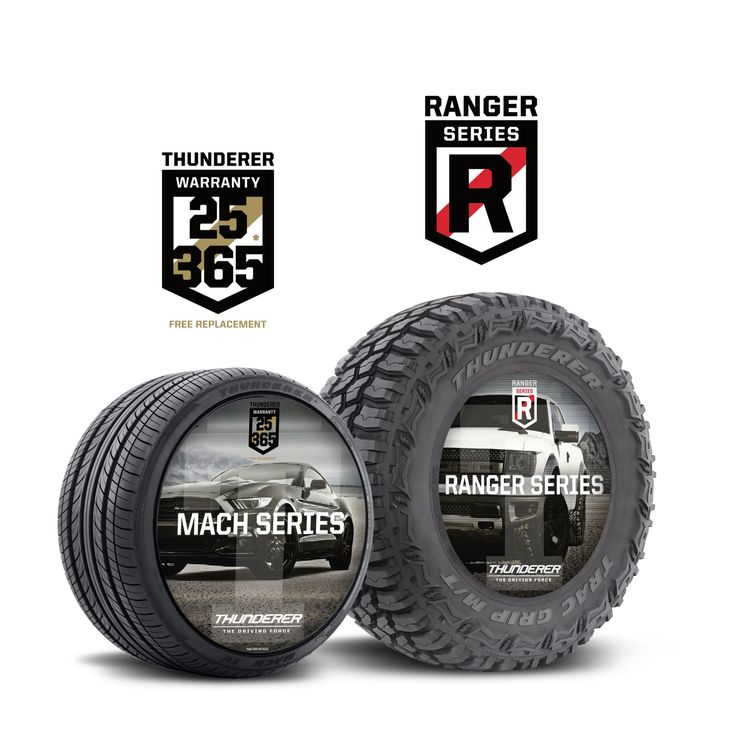
Red Armor-Dilloz Maximum Effect - Onewheel Tire Sealant
From $25.00
Blue Armor-Dilloz Extreme - Scooter Tire Sealant
From $29.99
Green Armor-Dilloz Protection - EUC & E-Bike Tire Sealant
From $20.00
Red Armor-Dilloz: Best choice for 30 MPH or less
Blue Armor-Dilloz: Best choice for faster than 30 MPH
Green Armor-Dilloz: Best Value
Protect yourself from flats with the most extraordinary tire sealant you can buy. Made to our extreme specification, this is the product made for those riders who know they're going to put it to the test, but it's also ideal for those riders who simply never want to deal with the headache of a flat tire and want the best in reliability and performance.
Developed and tested on worst streets and the gnarliest trails, you can count on our product to keep you rolling. Armor-Dilloz is dedicated to making sure you never lose another weekend day of riding, and won't be left walking your device home or taking an Uber. From our premium metal protective plates to our world class sealants, Armor-Dilloz products are specially designed to offer superior protection and performance.
Bead Buddy - Tire Mounting & Bead Seating Lubricant Gel
Regular price $7. 00
00
Red Armor-Dilloz Maximum Effect - Onewheel Tire Sealant
From $25.00
ArmorChilloz FluxFluid
Regular price $30.00
GT Overkill Power Button Cover
Regular price $13.00
XR Overkill Power Button Cover
Regular price $12. 00
00
This Is How We Roll - T-Shirt
Regular price $25.00
FLOWMingo T-Shirt
Regular price $25.00
Armor-Dilloz Sticker Pack
Regular price $5.00
XR Overkill Power Button Cover
Regular price $12. 00
00
Overkill T-Shirt
Regular price $25.00
Onewheel, E-Scooter, EUC, E-Bike or any other device with pneumatic tires - go where you want, and do so with the confidence of knowing that 96% of our customers never have another flat for the life of their tire. 99% are fixed with nothing more than a small additional amount of our sealant.
We are proud to be able say that all of our products are made in the USA. Our tire sealants and Bead Buddy are bottled at our headquarters in Miami, Florida and our armor plates, and Draggin' Tails are also manufactured locally.

Protect yourself from flats while riding, even on the worst streets and the gnarliest trails.
Armor-Dilloz is dedicated to making sure you can ride on no matter what. From our plates to our sealants, our products are specially designed to offer superior protection!
New tire got a small leak the other day. Put some Armor-Dilloz Red in after some instruction from Cory Boehne. Get you some dillo if you haven't already, folks. It's miracle goop. Pairs perfectly with this thin tire too!
- Austin S.
Another shout out for Cory Boehne and Armor-Dillo! Heading out the door yesterday for a Father's Day float and my Hoosier slick was flat as could be. Half a bottle and 5 minutes later I was rolling down the street to meet my wife for drinks at a brewery.
- Kevin B.
I want to give a shout-out to Cory Boehne for selling a product that definitely lives up to the hype. Armor-Dilloz is the real deal.
- Ryan M.
Flat tires blow. I mean that literally; whether a tire loses air slowly over time or quickly and all at once. Tubeless tire sealant is designed to stop that flow when it comes to punctures and tears, which is super helpful on the trail. At least, when it works.
Four years ago Singletracks contributor Patrick Goral conducted a long-term test to see how long various tubeless tire sealants lasted inside a tire before drying out or becoming ineffective, so I decided to follow up and see just how well they seal when they’re fresh. Despite witnessing plenty of tire sealant fails on the trail from various brands over the years, all of the sealants in this test crop performed similarly well, for the most part.
Check out a summary of the findings below, then read on to learn how I set up my test and how each sealant performed.

| Amount (oz) | Starting (psi) | Ride (psi) | 10-minute (psi) | Remaining (oz) | |
| Slime All Tire sealant | 4 | 19.9 | 12.9 | 12.1 | – |
| Orange Seal (Regular) | 4 | 20.1 | 19.3 | 18.6 | 3 |
| Finish Line FiberLink | 4 | 20.1 | 19.7 | 19.6 | 3 |
| Muc-off | 4 | 20.1 | 19.5 | 19.6 | 0.5 |
| Stans | 4 | 20.1 | 19.7 | 20.3 | 3.5 |
| Slime, second test | 4 | 20.0 | 19.2 | 18.7 | – |
You can read the details of my test setup below, but the jist is that I poked a hole in a tire to find out how quickly each sealant acted by noting how much air pressure the tire lost before the puncture was sealed. The chart above shows that in all but one of the tests, less than one PSI of pressure was lost, which is pretty impressive.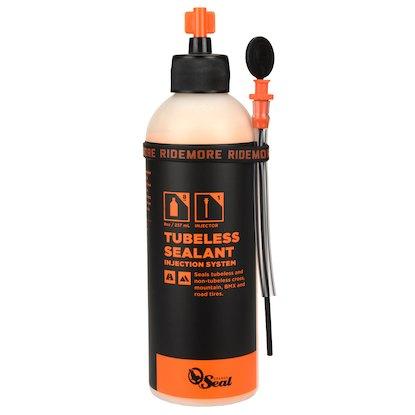 My experimental setup was way too loose to have better than a one PSI margin of error so I’m calling all of these good, and would recommend all of them — though some with caveats — for effectively sealing medium-size tire punctures.
From this test I learned a lot about how tire sealants work relative to one another, and perhaps the most telling test was actually the drip test shown above.
I’ll start by stating that while this test was inspired by science, I’m not a scientist by any means, and plenty of errors were likely introduced into my results. Put another way, I had fun using pipets, scales, gauges, and even a microscope but if the FDA were watching me, I would be banned from ever making baby formula again. Also, everyone’s Covid test would come out positive.
We’ve attempted other experiments in the past and one of the most common criticisms tends to be that the test isn’t real-world enough. IMO that’s exactly the point, you know eliminating variables and all, but I also understand where readers are coming from. Mountain biking is dirty, and messy, and just because something is proven under artificial conditions doesn’t mean the same will hold true out on the trail.
So rather than poke holes in tires and observe them on a work bench, I decided to do what most of us do on the trail whenever we get a puncture: spin the tire so the hole is at the bottom, wait for the sealant to stop spraying out, squeeze the tire for a quick pressure check, and then get back at it!
For the experiment I filled a well-used Vittoria Syerra tire, mounted on my hardtail in the rear, with 4oz. of sealant. I inflated the tire to 20PSI (or as close as I could get it, noted in the starting pressure column above) and checked for any initial leaks. Then I poked a 3mm hole in the tire using a pick tool. Upon removing the pick I spun the hole to the bottom and jiggled the tire a couple times until the puncture began to seal. Next, I hopped on the bike for a roughly one minute test track loop that included a three-foot jump, short rock garden segment, multiple sharp corners, a large log roll, and finally a climb back to the top.
Immediately after finishing the course I measured the pressure in the tire (the ride pressure column in the table above) using a digital gauge. Then I let the tire sit for 10 minutes, again with the hole at the bottom, to determine if the tire was still slowly leaking (the 10-minute pressure column).
Following the test I measured how much sealant was left inside the tire (the remaining column) and cleaned the inside of the tire and bead thoroughly. I also plugged the hole with a proper tire plug, and used water to verify that no air was escaping from the plugged location. And repeat.
In addition to the on-trail test I also tried to calculate the specific gravity of each sealant and did a drip test to visually get a sense of their viscosities. I even looked at a few under a microscope to see if I could find any clues about how they work.
I chose this batch of sealants based mainly on popularity and availability. Like in Pat’s test it was important to include Stans and Orange Seal since they are so well known, and also to add to his findings about their longevity. Here I’ll talk about each sealant based on the order it was tested since I suspect that may have influenced the results a bit.
| Specific gravity* | Max hole | $/oz.** | |||
| Slime All Tire sealant | 1.24 | 6mm | $0.53 | ||
| Orange Seal (regular) | 1.00 | 6.35mm | $1.28 | ||
| Finish Line FiberLink | 1.04 | – | $1.25 | ||
| Muc-off | 1.06 | 6mm | $0.89 | ||
| Stans (original) | 1.04 | 6.5mm | $1.06 |
Walk into the bike aisle at your local Walmart and you’re likely to find Slime products, which can’t be said for any of the other brands we tested. In preparing for this test I learned that Slime is offered in different formulations and packaging, including one that’s made specifically for bicycle tires. However, that’s not the one I used. Instead I opted for the “All Tire” version which is said to work for not just bicycle tires but also tractor, golf cart, and ATV tires. It seems this is the version you’re most likely to find in a pinch, so I wanted to know how well it works.
The 32oz bottle I tested says to add 8oz of sealant for a motorcycle tire, but doesn’t list an amount for bike tires. Looking online I found a chart that says to add 4oz for bike tires, but it also says a 16oz bottle fills two bike tires, which clearly doesn’t add up. Since 4oz is in line with the recommended range for all the other sealants in the test, that’s how much I used, and I think it turned out to be not enough based on the first run. To be fair I tested Slime again at the end of the test, and it performed much better which suggests the order of testing did affect the numbers.
The inside of my tire following a visit from Slimer of the Ghostbusters.Slime is the most dense, and the most viscous, sealant I tested. Not only that, it’s the only sealant that effectively had a zero recovery rate. That is, I couldn’t really slurp any of it up with a syringe after the test. Even measuring the liquid the first time was a chore; it just doesn’t want to flow. In the test the sealant proved to be slow to find the puncture, and once it did, there wasn’t a big pool of liquid since most of the 4oz was already coating the inside of the tire. It seems like this coating should be really effective, and it likely is, but the tradeoff is that it’s slow to seal. To compensate I would recommend adding 6oz or even 8oz for a typical 29er tire.
Priced at about $0.53 per ounce, Slime is by far the cheapest sealant I tested, but keeping in mind the need to up the dosage it’s less of a deal.
Stock up on Slime tire sealant at Amazon.
Orange Seal is a familiar sealant choice to most mountain bikers, second perhaps only to Stans. As you can see from the drip test, Orange Seal is the least viscous of the five sealants I tested, running completely off the plate.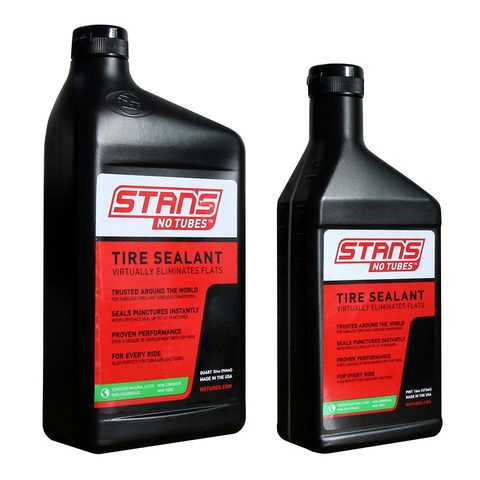 As measured, the specific gravity of Orange Seal is basically 1.0, the same as water. Like I said at the beginning, my measurements weren’t all that precise and the true specific gravity is probably a bit higher. The point is, it’s the lowest of the bunch and that doesn’t seem to negatively affect performance, so weight weenies take note.
Looking at the pressure experiment data, Orange Seal appears to have lost a bit more pressure than the others tested, though I can’t say definitively that’s true. Again, the order of testing could have have played a role, with sealants tested later performing best.
I wasn’t sure what to expect when comparing the price of sealants. As it turns out Orange Seal is the most expensive of the bunch on a cost-per-ounce basis when buying the 32oz size, though it’s just a few cents more than the next most expensive.
Stock up on Orange Seal at Amazon.
Finish Line sealant has undergone a bit of a rebranding since Pat’s long-term sealant test, where he found the product lived up to its claim of never drying, though the liquid suspension also separated over time and wasn’t that effective at keeping a seal.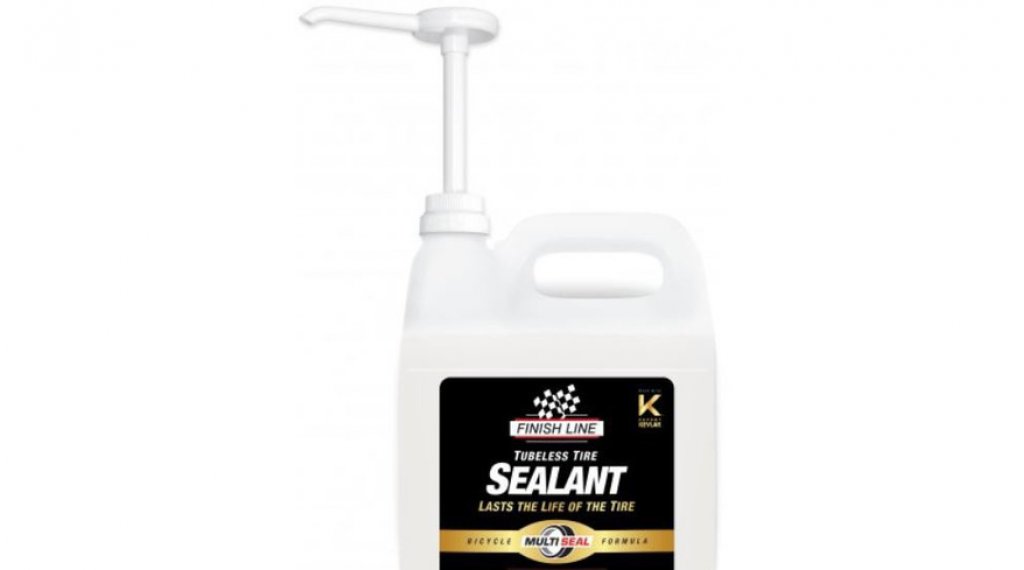 In my short-term test it performed just as well as any of the others, and its properties line up pretty closely with Stans and Orange Seal, just with a bit more density and viscosity.
FiberLink is said to include Kevlar fibers to help reinforce seals, though under the microscope I couldn’t really detect them. Finish Line provides a more detailed range for sealant amounts based on tire size than some of the others, suggesting 4-5oz of sealant for 29er tires, and 5-6oz for 29+ tires. With “standard” tire widths creeping up a bit these days, my best guess is that I should be using 5oz for my 2.5-inch tires. That’s an extra ounce compared to the Stans recommendation (4oz for tires up to four inches wide) and Orange Seal, and roughly on par with Muc-off. Priced at $1.25 per ounce, it’s the second most expensive sealant I tested, so that extra ounce per tire starts to add up.
Stock up on Finish Line Fiberlink at Trek and other online retailers.
In the spirit of full transparency, Muc-off has been my go-to sealant for a while now.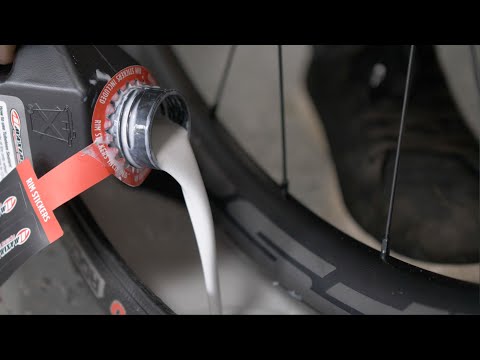 I haven’t had any unreasonable flats with it, and I think I just like the look and the smell, like a pop of neon with that new wall-to-wall carpet smell. That being said, based on my test there doesn’t seem to be any real performance benefit to it, and because it works a bit differently than the more mainstream sealants, it might not be for everyone.
Like Slime, Muc-off does a good job coating the inside of a tire. Following my test I was only able to recover about half an ounce of sealant, with the other three and a half ounces spread along the inner surface. However unlike Slime, I found Muc-off sealed rather quickly, sloshing its way to the puncture rather than just oozing. It’s clear from the drip test that Muc-off does have some movement to it, but it’s still quite viscous. It’s also the second most dense of the sealants I tested.
Under the microscope I saw what appear to be fibers of some sort. Muc-off says the sealant contains “cutting-edge molecules,” though I don’t think that’s them since my microscope was only set to 100x magnification. There’s also UV dye in the Muc-off sealant which is supposed to help identify leaks, and I’ve tried that, but haven’t found it to be very helpful compared to a good old fashioned soapy water test. In spite of all this tech, Muc-off is notably less expensive per ounce than all but Slime. I’ll continue using Muc-off at home, though I think I’ll add an extra ounce or so just to make sure it keeps flowing inside the tire.
Stock up on Muc-off sealant at Performance Bike and other online retailers.
The Stans tire lost the least amount of pressure in the ride test, and was the only one to actually gain pressure in the ten-minute test. The first is easy to explain; Stans was the last one to be tested so I got pretty good at checking the pressure with my digital gauge without accidentally letting too much pressure out of the valve. As for the pressure gain, the tire was sitting in direct sunlight during the ten-minute test, making the tire noticeably hot to the touch, and no doubt increasing the pressure in the tire. My takeaway: if you don’t have a pump on you but need to top off your pressure, just let your tire sit in the sun for a bit. I got more than half a PSI in just ten minutes!
Stans is notable for being the second runniest in the test (i.e. the least viscous) and it seems to be in good company with Orange Seal, the only sealant to completely run off the plate. As we all know, the stuff basically looks like milk, and as a point of reference I measured some actual 2% milk to compare. According to my calculations Stans has a specific gravity of about 1.04, compared to 1.02 for some 2% milk I had in the fridge (this page says 2% milk should have a specific gravity of 1.03 so I’m not too far off). At the end of the test I was able to Hoover up nearly 3.5oz with a syringe which suggests very little sealant was lost through the puncture, and that it tended to roll around inside the tire rather than sticking to it. This recovery rate was best in test.
Finally, I’ll note that Stans was one of just two sealants that completely sealed the hole without the need for a tire plug in between tests, as verified with a bubble test.
Stock up on Stans at JensonUSA and other online retailers.
Become a Singletracks Pro Supporter today and enjoy benefits like ad-free browsing.
With your support we can provide free worldwide trail information and original content created by our team of independent journalists.
Singletracks may receive compensation for purchases made through any affiliate links in this article.
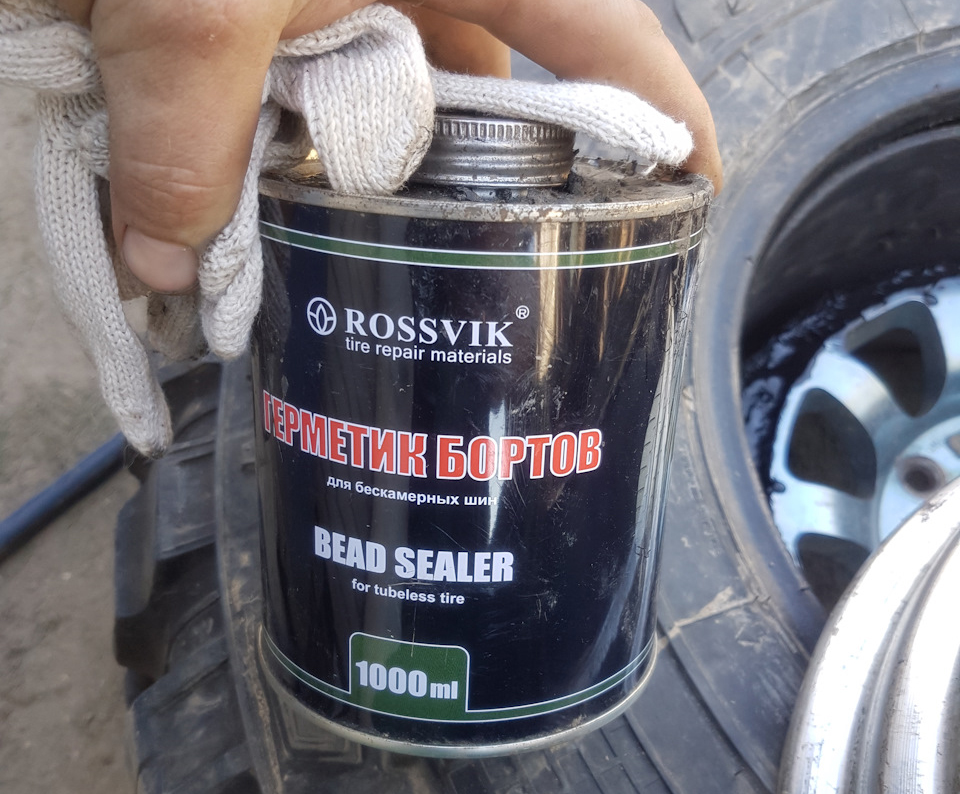
Sealant is an excellent remedy for punctures. It is easy to use and does not require special knowledge, just follow the instructions. According to the manufacturers, the anti-puncture liquid is able to close the gap, the size of which is up to 6 millimeters. Although practice shows slightly different results. Consider how to properly seal punctures, and which sealant for tubeless bicycle tires is better.
Contents
 The hole will be filled with anti-puncture fluid.
 How to fill a puncture on tubeless tires:
Check the results after half an hour.
If the nipple cannot be removed, you can purchase a special tool complete with a nozzle. Before the procedure, do not forget to slightly loosen the nipple nut.
Let's analyze how much sealant is required for different types of tires:
Sealant has gained a lot of popularity due to availability, effectiveness and ease of use. It is enough to follow a small instruction for use, then the tool will independently, without your participation, seal a hole on a tubeless bicycle tire.
But which firm to choose? It is easy to make the wrong choice and buy a low-quality anti-puncture fluid. Consider a list of the best sealants that performed well during the tests. During the experiment, 80 ml of a specific brand of product was poured into tubeless tires of the same size.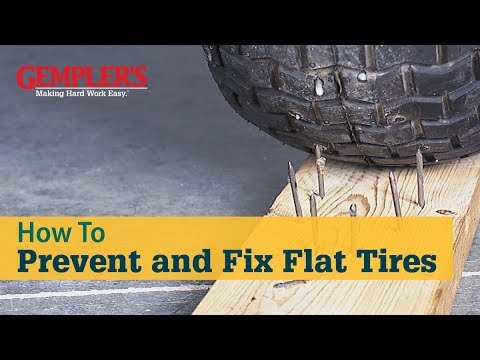 Then they were pumped up to 2 bar and pierced with a 6 mm screwdriver. As a result of this test, the best remedies were identified.
The cost is almost $15 for a volume of 227 ml or $75 per liter. It is a latex solution, which contains solid particles of various dimensions. During the test, it turned out that the sealing required two revolutions of the wheel, and the treated tire held a pressure of 2.8 bar.
At the time of the double puncture, performed from different sides, Orange Seal was able to cope with the task and close up the gap. The kit comes with a special tube that facilitates the filling process.
Disadvantages include high cost and a short operating period - up to 45 days.
The presented tool has a small price, especially in comparison with the top option. $29 per litre. It has a foamy structure, which allows the substance to be well distributed over the tire. The composition contains solid particles that fill holes. This sealant was able to seal a puncture made with a screwdriver in a short period of time. At the same time, the puncture was made with a trick - the tool was twisted in the tire.
It was expected that after a good shake, the sealant would foam and seal the gaps in the walls. But only the one that was located at the bottom of the tire was well sealed.
On the positive side, an acceptable cost is distinguished - $ 17 for a package of 473 ml or $ 28 for 950 ml. It is the most popular among other sealants. The tool closed the hole left by a six-millimeter screwdriver in just two turns of the wheel. After the filling process, it was inflated to 2.5 bar without leakage.
The price for 1 liter of RevoSealant is approximately $33.87. Developed specifically for Conti tires. But, the experiment showed that the tool does an excellent job with other brands, for example, Maxxis.
It is a latex sealant that also contains solid particles, which perfectly seal the gaps on the outside of the tire. A puncture made with a screwdriver was repaired after a couple of turns of the wheel. But when the wheel was inflated to two bar, it began to skip.
RevoSealant does a great job if the holes are only in the carcass. Through cracks cannot be sealed.
500 milliliters of sealant will cost about $17. This is the most economical option available. It is more liquid, which is why it is well distributed over the inside of the tire. Tightly closes the punctures made.
At the time of the test, several holes were made with different screwdrivers, differing in size. Anti-puncture fluid was able to close up a six-millimeter hole. True, when the tire was inflated to 1.4 bar, it again began to skip. To increase this indicator and increase the effectiveness of this sealant, you need to shake it well (do this more carefully and longer than other means).
The cost of the presented option is $ 16 per 300 ml.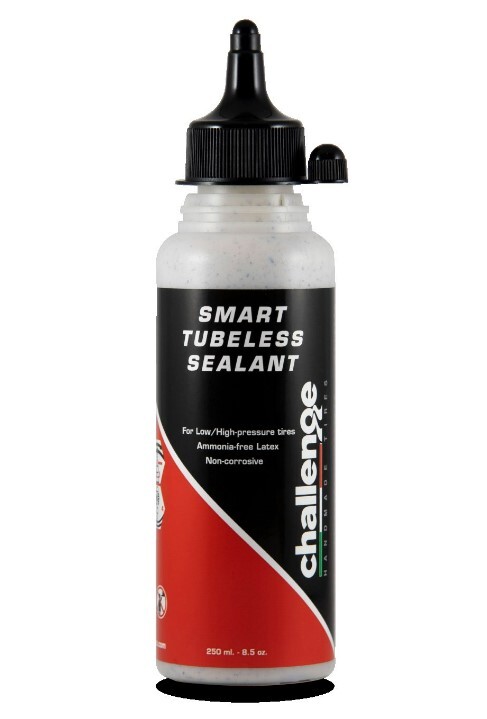 It has a thick consistency, contains increased solid particles. Showed good results when sealing large punctures. On the other hand, its density makes it difficult to seal too small cracks (can be mixed with liquid sealant).
When choosing a product, it is recommended to rely on performance. It is better to purchase a reliable sealant at an inflated price than a cheap one that will last a short period of time. When repairing, follow the instructions and advice of specialists, then you will not have to seek outside help.
KEVLON Anti-Puncture is a tire life extension product. Tire sealant is a chemical solution that is injected into a tire to provide permanent protection against air leakage throughout the life of the tire and to increase tire life.
Learn more at What is Kevlon Sealant?
Shelf life of KEVLON sealant is 5 years. But in practice, there were cases when KEVLON brand products were kept by thrifty drivers for 8 years and then were used for their intended purpose.
Yes, it is mandatory. Remove the object from the tire, check the air pressure in the wheel, after overcoming a certain distance, check the pressure in the wheel again.
yes, KEVLON sealant is guaranteed for one year. KEVLON sealant does not affect the tire manufacturer's warranty. In fact, KEVLON sealant even exceeds the tire manufacturer's warranty requirements.
KEVLON sealant warranty means that:
Your tires will never deflate due to a puncture less than 6.35 mm in diameter for the High Speed series and a puncture in diameter less than 20 mm for the Off Road series in the tread area for the entire period of normal tire life.
Your tires will never deflate due to porosity and rubber delamination;
KEVLON Sealant will keep the air in the tires and provide permanent protection.
Our clients are varied. KEVLON tire sealant is used by construction companies, police, municipal organizations, truck fleets, mining companies, industrial organizations, utilities, new car dealers, used car dealers, private owners.
liquid tire sealants are generally paste, solvent, latex based and freeze at temperatures below -10°C. Many liquid tire sealants cure and cause imbalance and damage to the rubber compound. And this, in turn, reduces the life of the tire. KEVLON anti-puncture sealant is based on ethylene glycol and will not deteriorate or dry out inside the tire. KEVLON Sealant, when properly filled, will keep the wheel balanced.
See tire sealant differences on the Glycol vs. Latex page
aerosol products are latex based and should only be used after a tire has been punctured. And even then they seal the puncture temporarily. After applying such a sealant, the tire will still need to be taken to a workshop for repair, where it will be dismantled, the sealant removed, the puncture sealed and installed back. And all this at the expense of the user.
KEVLON Tire Sealant is an ethylene glycol-based preventative designed to increase tire life. It is non-flammable and non-explosive. KEVLON sealant does not harden inside the tire and maintains balance. The KEVLON anti-puncture device is capable of operating in a wide temperature range down to -50°C. up to +150°С
KEVLON High Speed Sealant is sold in 20 liter cans.
KEVLON Off Road Sealant as an emergency sealant for passenger cars in 1.25l bottles. And also for special equipment in canisters of 5, 25 and 200 liters.
yes. KEVLON brand products are a registered European trademark.
Air escaping from the tire draws the sealant into the hole. The fibers and liquid accumulating in the hole seal the puncture.
yes. KEVLON Sealant covers the hole area after removing the item from the tire. The wheel must remain on the vehicle so that when rotated, the hole expands and passes the KEVLON sealant into itself. If you do not start driving immediately after removing the object from the tire, the tire may flatten.
no, KEVLON sealant is a homogeneous mixture with ingredients combined in such a way that they cannot settle to the bottom. This fact is a big advantage over other water based or latex based sealants.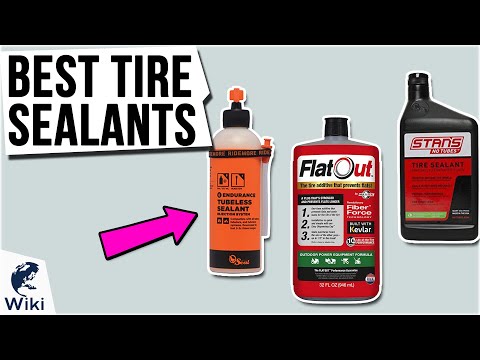
No. KEVLON tire sealant is chemically inert.
KEVLON Tire Sealant has been tested at -60°C (the lowest test temperature under these laboratory conditions) and has not frozen. It should also be noted that the sealant remains in a stable state when the tire is very hot, leading to tire damage.
Yes, because KEVLON Sealant does not chemically bond to the tire, it can be easily washed off with a hose. This is an important point as the tire can be washed, retreaded and welded on after using KEVLON sealant. In addition, if a tire puncture is too large, which cannot be repaired with KEVLON sealant, it can be washed, repaired and refilled with KEVLON.
Does not call. KEVLON Sealant contains anti-corrosion additives to prevent corrosion and eliminate existing corrosion.
HIGH SPEED Series Sealant - no, Off Road Series - yes. They have different specifications and different areas of application. KEVLON High Speed Sealant contains specially selected adhesive additives to prevent runoff. The sealant stays in place and coats the inside of the tire all the time, whether the wheel is spinning or not. To fully distribute KEVLON High Speed Sealant to the inner surface of the tire, it is necessary to drive about 20 km at the highest possible speed.
no. KEVLON Sealant can seal a puncture, but the sidewalls of the tire are subject to severe bending and deformation. In case of lateral damage, the tire must be disposed of.
no.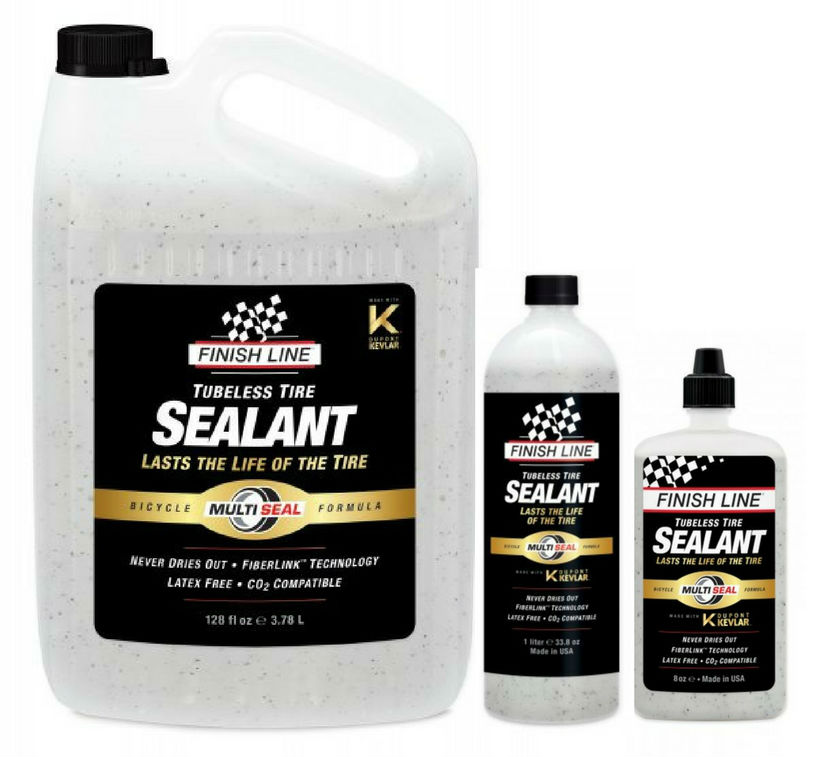 The cork will be elastic. It was deliberately designed this way as tires are prone to flexing and a solid cork (repair with harnesses) will not be able to flex with the tyre, which in turn will cause air to leak.
no. KEVLON Tire Sealant always stays in the same condition it was in when it was put into the tire, as the tire is a closed vessel with no liquid and no chance of evaporation.
this is possible, but rare, if polymer particles get into the nipple and create a plug in it. In such a situation, blow out the nipple to remove the plug. If air does not enter the tire, clean the nipple with improvised means or flush it with water.
no, tire pressure must not exceed 3.0 bar. After the introduction of KEVLON anti-puncture, the tire must be inflated to operating pressure. Or use a PERSOL pneumatic pump to charge the sealant.
yes, this requires high-tech equipment, which is used in mining enterprises operating super-heavy dump trucks. In this situation, it is not necessary to deflate the tires before applying KEVLON Tire Sealant.
the following tools are required:
no. KEVLON tire sealant is non-flammable. It is based on glycol, in other words, antifreeze. Antifreeze does not burn.
no. KEVLON Sealant is environmentally friendly, non-flammable, non-toxic and non-explosive. Not to drink. Keep away from children.
yes. After application, KEVLON anti-puncture remains in a liquid state for the entire period of operation of the tire and wheel. As the wheel rotates, the centrifugal force distributes the solution evenly over the inside of the tire. With any puncture, thousands of closure fibers will seal the hole and prevent air from escaping. Such actions will be repeated with each puncture.
KEVLON Tire Life Extender is injected quickly and easily through the nipple using a metering pump (average injection time into the tire is only a few minutes).
yes, but for older tires, apply 10-15% more KEVLON sealant than indicated in the table. Due to the presence of open pores in the old tire, a certain amount of KEVLON anti-puncture will be absorbed.
KEVLON Sealant should only be used on pneumatic tires. KEVLON Sealant can be used in tube and tubeless tyres.
Check with Kevlon staff at [email protected]
Or use the online chat in the lower right corner of the site.
This depends on the brand of the pump, please contact the supplier of the product for details. Proper operation of the pump is in the VIDEO section of this website.
this is impossible to predict as the answer depends on many factors such as hole size, air pressure, surface area, as well as the moment of puncture (in motion or not), tire size and amount of sealant poured
With multiple punctures, it is likely that a large amount of sealant will come out and the air pressure will decrease to a level at which it will no longer be possible to ensure a good sealing of the punctures.