Tubeless tires are much, much better than the alternative, but that’s not to say they’re perfect. Sometimes, just getting a tubeless tire to hold air can be a challenge, and diagnosing the problem — let alone fixing it — can be frustrating. If you find yourself staring at a flat tire in the garage and muttering “why” over and over again, here are some tips for getting rolling again.
This article won’t cover mounting tubeless tires; we’ll assume the tire has been mounted successfully, but that it won’t hold air for more than a day or so.
No, we’re not celebrating yet, but this will get us closer to our goal by allowing us to zero in on the part that’s leaking.
Fill a spray bottle with water and some dish soap, or really any soap that forms bubbles. Next, inflate the tire to 30psi or so. Spray or just pour the soapy water all around the tire and rim, one section at a time. Note any places where air bubbles appear.
If there is a puncture in the tire itself that is leaking, this is generally an easy fix. Make sure you have plenty of sealant in the tire and move it around until the sealant pools at the puncture. Larger punctures may benefit from a tire plug.
With a sidewall leak, you’re usually better off replacing the tire. It might be possible to patch it, or if you’re really lucky, plug it, but in my experience sidewall repairs rarely last very long.
While rare, some tires have been known to absorb or even weep sealant. Tiny pores in the tire compound fill with sealant when it’s initially added, so you may need to add a bit more liquid to replace what’s been lost. If a tire still leaks through the tread or sidewall in multiple locations despite having good sealant coverage and no punctures, you may want to check with your local bike shop or tire manufacturer to see if the tire should be replaced.
Check to make sure the rim wall isn’t dented.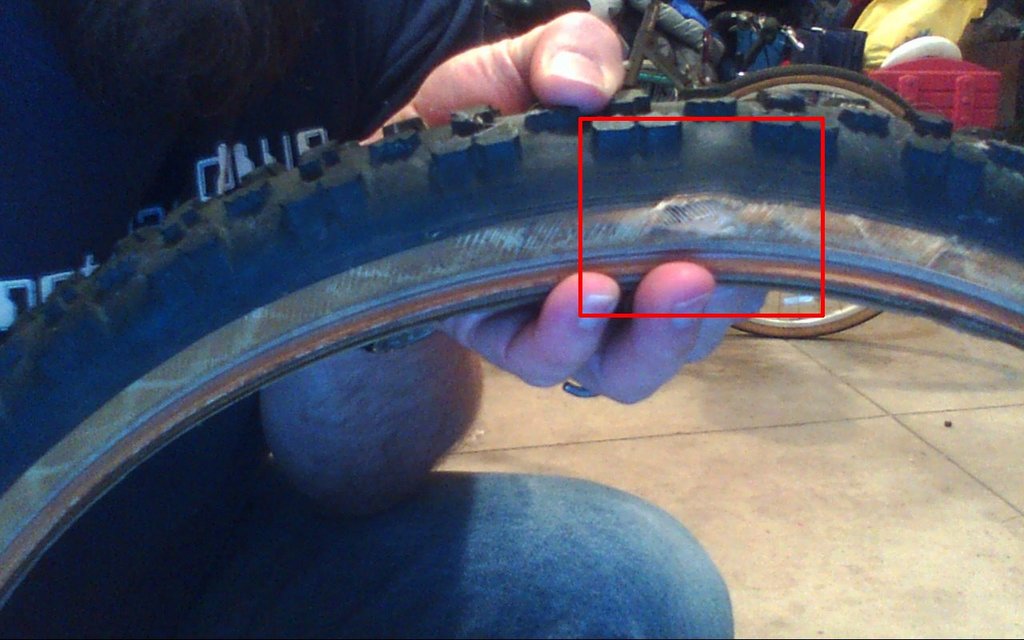 If it is, your tire won’t be able to seal. If you find your rim is slightly bent or dented, it might be possible to get things straightened out enough to hold air. According to Gerow, “a couple of small planks of wood, a vice, and a hammer will get you started.”
Even if the rim wall isn’t visibly dented or misshapen, there could be a small gap between the tire bead and the rim that’s leaking air. Make sure you have plenty of sealant in the tire, and hold it horizontally and tilted to allow the liquid to pool around the part of the rim where you saw the bubbles forming. Shake the wheel gently for a minute or so to let the sealant do its work.
In some cases, the tire-rim connection may not be tight due to buildup of old sealant. “Older tires can have a buildup of dry and hardened sealant at their bead that will create space between the rim and the rubber, causing air leaks,” says Gerow. “When mounting a tire that has already been mounted previously, be sure to remove as much dried sealant from the bead as possible. ”
”
Sometimes a tire bead may not be fully seated in the rim. Try pumping the tire up to maximum pressure. The loud popping sound you’ll hear is the bead popping into place. If you didn’t hear that noise the first time you mounted the tire, chances are that is the issue.
After running through the checks above, try soaping the tire again and checking the same spot to see if the fix was a success.
In my experience a leaky valve is often the cause of air pressure losses over time. If the soapy water reveals bubbles at the valve, it’s time to investigate further.
Tubeless valve parts with a valve core remover tool (red, right).First, check the easy stuff: Is the core screwed in tightly? Is the inlet screw loose or bent? A dedicated valve core tool is helpful for proper tightening, and if your fingers aren’t getting the inlet plunger tight enough, needle nose pliers can do the job. Just make sure you don’t over tighten and break the valve, or get it so tight you can’t add air later.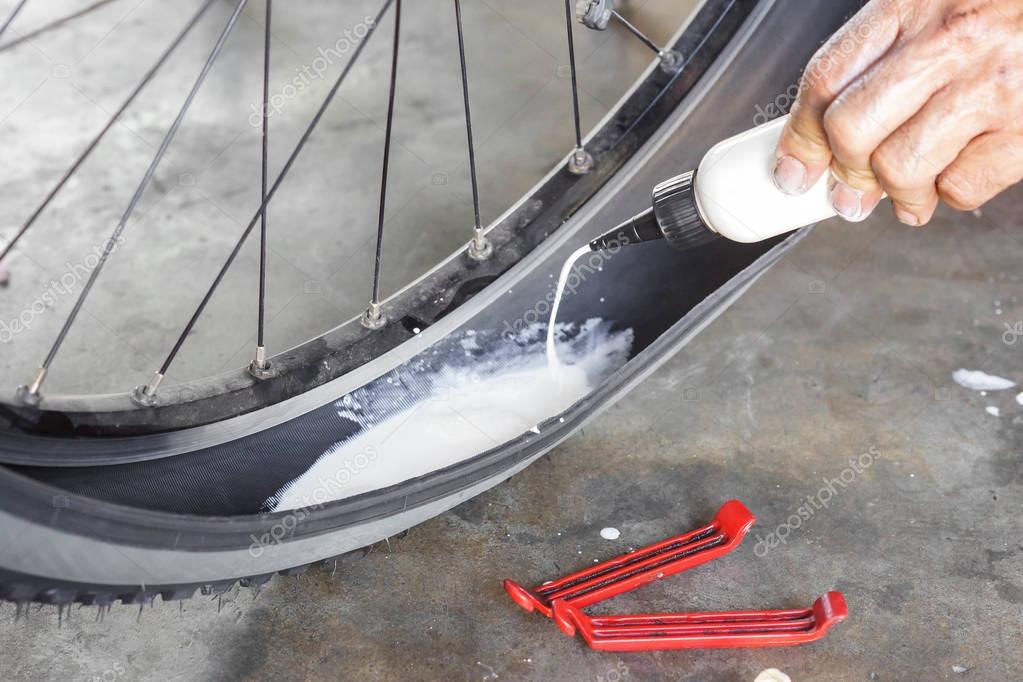 If any part of the valve is bent or broken, don’t try to fix it; it’s time to replace it.
If soapy bubbles are forming around the base of the valve, it may not be attached to the rim properly. Most valves have a nut at the base that tightens the valve to the rim. Get this as tight as possible with your fingers, and if necessary give it a slight turn with a wrench. Just be sure to avoid tightening too much because you could damage your rim, especially if it’s carbon fiber, and you may need to be able to remove the nut on the trail in the case of a puncture.
Check the gasket at the base of the valve to ensure that it’s properly seated, and that it sits flush in the rim channel. Add a bit of plumber’s/PTFE tape to seal things if the gasket is particularly troublesome.Next, investigate the valve from the other end, which means taking the tire off the rim. Most valves have a soft rubber gasket that forms a seal around the valve hole in the rim, so check to make sure the valve is seated properly in the rim channel. You can also add a bit of teflon tape around the base of the valve to seal things up.
Sometimes sealant can fill in small gaps around the valve. If you notice air leaking while on the trail, try rotating and shaking the tire so the liquid sealant can get to the valve.
If bubbles form around the spoke nipples, the good news is you’ve found your leak! The bad news is, there isn’t a quick fix. This generally means the rim needs to be re-taped, or at the very least the tape needs to be patched over. If the tape appears wrinkled, ripped, or punctured that’s probably what’s causing the leak. Tire levers can often puncture the tape while installing the bead, causing the tape to leak air through the rim.
There are many tutorials online for taping a tubeless rim, but in general, the idea is to get the rim as clean and as dry as possible before taping all the way around in one go. Be mindful of any gaps where air might be able to leak, keeping the tape flat and taut to avoid blisters or pockets.
Sometimes, tires can be sneaky leakers. Pump them up and they’ll stay rock solid in the garage for weeks, but as soon as you roll in the parking lot, or take a turn, they go soft. You soap ’em up, and there’s not a bubble in sight. In fact, this has happened to me a couple times in just the past few months.
This is usually due to a small cut that only opens up when there’s weight on the tire, or if the tire is pumped up to a higher pressure. In your garage, you can try to simulate the effect of riding by adding pressure above what you normally ride, or by deforming the tire with your hands and looking for air bubbles as the tire squirms.
Gerow notes, “Some tires need to be ridden immediately after setup in order to hold air properly. A new tire that won’t hold air in the garage might be good to go after a short romp on the trail.”
Once you find the sneaky leak, getting sealant to the right spot can do the trick, though a plug may work even better.
Ultimately, tubeless mountain bike tire systems are pretty straightforward and there are only so many spots where air can escape. Imagine that you’re the air inside the tire, and you’re looking for a way out. How would you do it? That’s exactly the mindset you need to solve this mystery.
Singletracks may receive compensation for purchases made through any affiliate links in this article.
Tubeless tires for MTB, cyclocross, gravel, and road bikes can leak for several reasons. While this is frustrating, the good news is that leaks are typically relatively simple and inexpensive to fix, and it won't take long to get back on the road or trail.
Let's take a look at some of the common causes of tubeless tire leaks and how to fix them:
Tubeless tire sealant is made with a liquid carrier.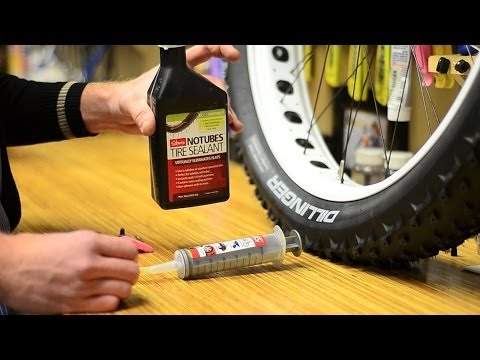 Over time, the liquid can dry up due to evaporation. This is especially common in the American Southwest, where dry weather with low humidity is common. When you remove the tire, you might find the sealant is gone entirely, or has congealed into lumps some riders call "Stan's Boogers", named after the popular Stan's NoTubes sealant brand.
If your previously reliable tubeless tire used to hold air but doesn't any longer, it's possible the sealant is completely dried up. Another giveaway of dried-up sealant is a tire that "self-repaired" punctures from thorns initially, but later stopped. If a thorn punctured your tire, and the sealant failed to fix it, adding fresh sealant will usually resolve the issue.
There are two techniques to add new sealant. You can:
1. Break a section of the tire bead with your fingers or a tire lever, pulling back just enough bead to make it possible to pour in new sealant from a cup or funnel. When complete, put the tire bead back on and inflate.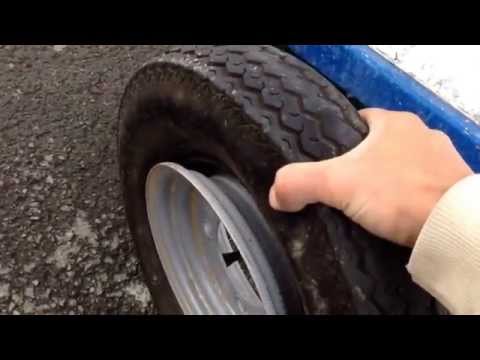 With a little luck, it will inflate with nothing more than a floor pump. If a bigger section of tire bead was unseated, you might need to use an air compressor.
There's also a way to add sealant without breaking the bead. This method keeps the bead/rim interface intact, and increases the chance of re-inflating using a floor pump:
2. Use a sealant injector to push sealant through the presta valve. To use this technique, first remove the presta valve core with a valve core remover tool. Then use a sealant injector (it works like a syringe with a plunger) to draw up fresh sealant from the container and inject it through the valve. When complete, re-install the presta valve core and re-inflate your tire.
For the tire/rim interface to be airtight, the bead of the tire must be flush and fit snugly up against the matching hook bead pocket in the rim. Sometimes when you are attempting to mount a new tire on a used rim, the hook bead on the rim can have dried sealant, mud, or grit stuck on.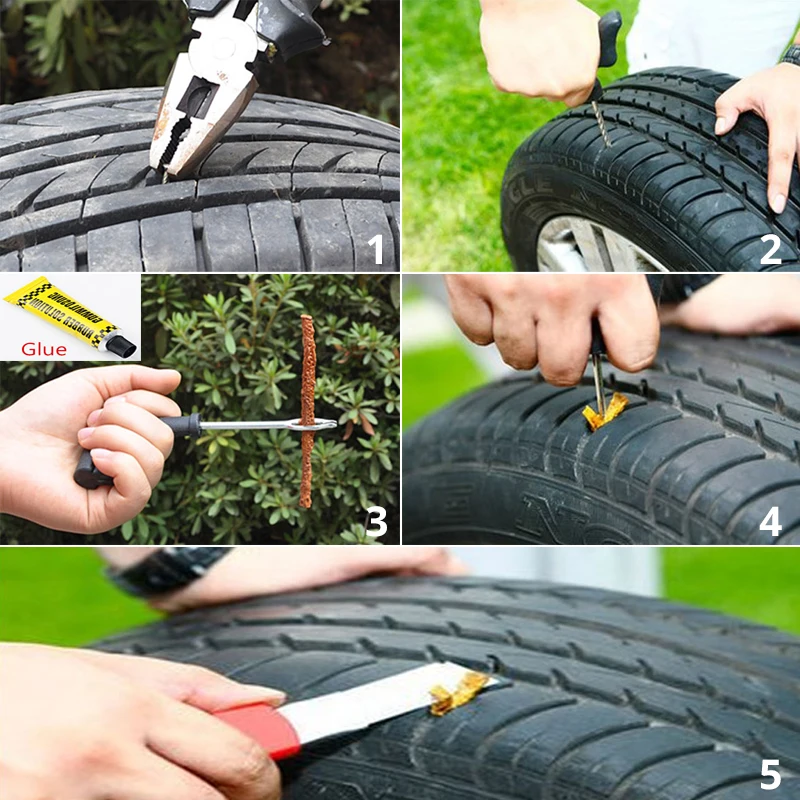
To fix this, remove the tire entirely, and drag a shop rag around the entire diameter of the hook bead, repeating this process on both sides of the rim. It should slide smoothly around without resistance. If you feel any bumps, investigate and make sure to remove them.
This issue can also affect used tires, which can have old, dried-up sealant stuck on the tire beads. As above, make sure to remove any old sealant so that the bead lies flat against the rim and then try remounting it.
Most bicycle rims have a hole drilled in the rim that allows the spoke nipple to be installed from the tire side. These holes allows air to escape and need to be completely covered for tubeless use.
New rims often come with tubeless tape already installed over the spoke holes for convenience, but it can shift under use. For example, if you had to use a tire lever to remove a tire, the tire lever can push the rim tape off-center, exposing the spoke holes.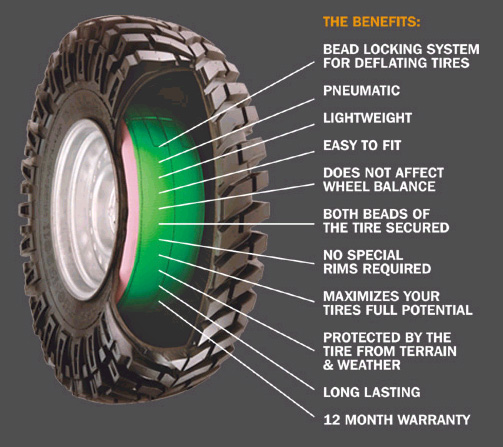 Once the spoke holes are exposed, the system is no longer airtight and will leak.
Sometimes you can push it back into position to cover the spoke hole, but if the tape has split (usually due to age) or the adhesive no longer holds to the rim, it's time to replace the tape. Pull the old tape off completely and thoroughly clean the rim before installing new tape.
As with the spoke holes, the rim is also drilled to allow the tubeless valve to pass through. There is a rubber grommet or fitting on either side of the rim to create an airtight seal. Check the locknut on the valve to ensure it's snug (but don't over-tighten) and well-sealed.
If you suspect air is escaping from the valve hole, try letting all the air out of the tire, press down on the tire just above the valve, firmly push the valve toward the hub, then tighten the locknut to hold that adjustment.
Using the wrong valve can also create a poor fit with the rim.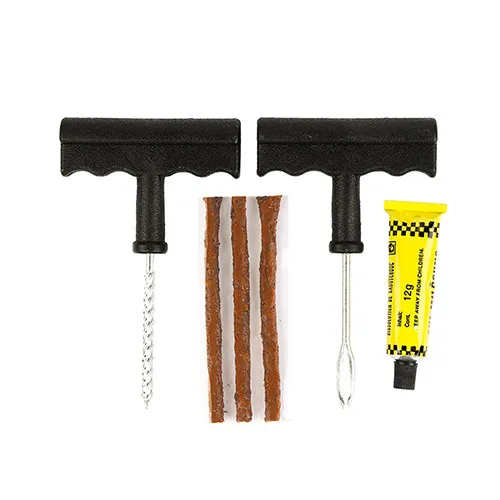 There are a few common rim shapes in use and the valve needs to match. For example, the tubeless valves that come with some Shimano wheels have a unique shape that doesn't interchange with others.
To avoid this issue, use the valves that were originally included with your rim/wheel, or the specific valve recommended by the rim manufacturer.
If the previous 4 causes have been ruled out, look to the tire itself. Check the sidewall and tread for cuts. Tires damaged in this way can sometimes hold air in a workstand, but will leak once ridden because the rider's weight causes the tire casing to flex, widening the cut.
Small cuts can sometimes be booted from the inside if the rest of the tire looks OK and has tread life left. If not, it's probably time to replace the tire.
Back to blog Modern passenger cars are equipped with tubeless tires. Tires with rubber chambers inside are extremely rare today, only on super-budget vehicle options.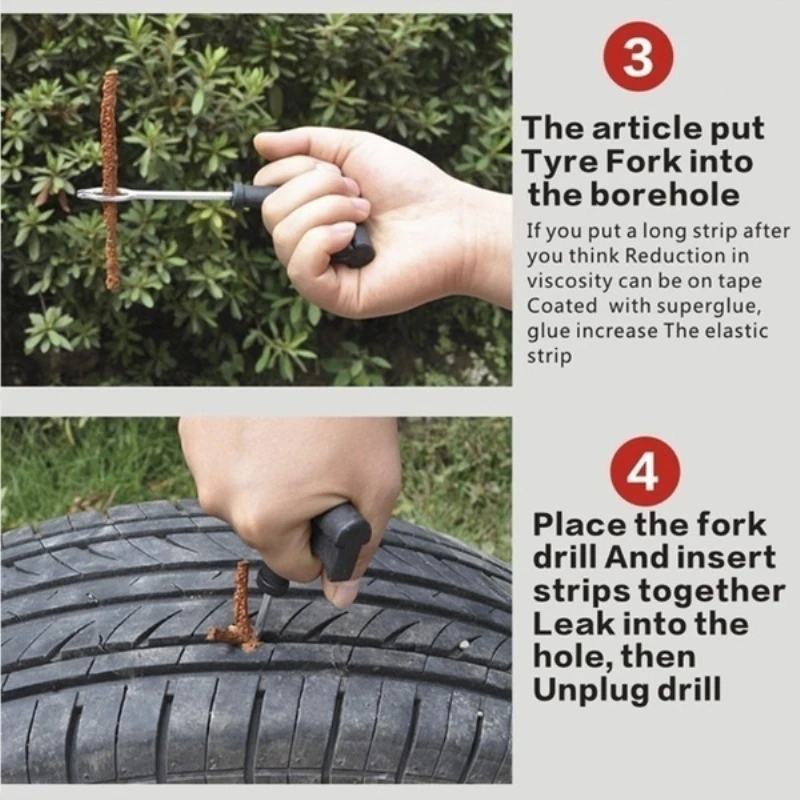 Car owners have long appreciated all the convenience and benefits that tubeless tires have. Unlike chambered rubber, they keep air in the wheels by being sealed to the rim. The tightness of tubeless tires is ensured by a two-millimeter layer of rubber applied to the tire from the inside. It is he who prevents the passage of air. The coating of soft rubber layer provides tightness at the junction of the tire with the rim of the rim. The tire bead sits on the so-called rim shelf, which is equipped with a special rounded ledge. Thanks to him, the tire is securely connected to the wheel rim, and complete tightness of the joint is achieved. A tubeless tire is filled with air through a valve installed on the rim, on its rim.
Why did tubeless tires become so popular that they gradually replaced tubed tires? First, tubeless tires are much lighter. This is a very important and great advantage, because heavy weight enhances the inertial movement of the wheel when driving on, to put it mildly, imperfect road surfaces, which we still have much more than smooth autobahns.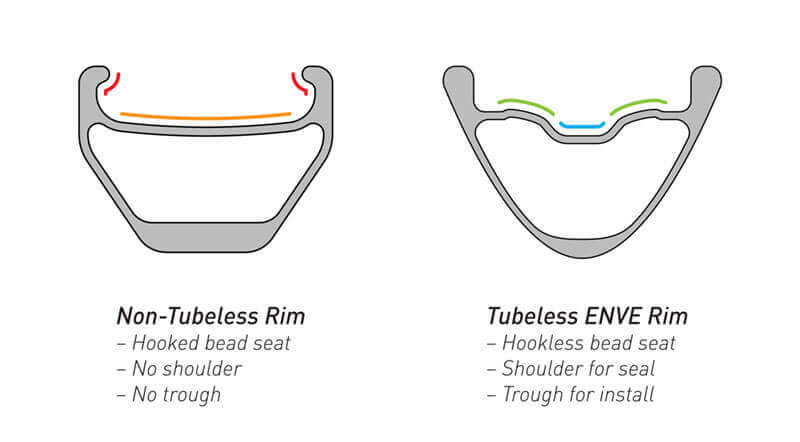 As a result, this affects the condition of the chassis, accelerates its wear. In addition, tubeless tires do not heat up during driving in the same way that chamber rubber heated up, in which the inner cylinder rubbed against the tire while driving. Such friction led to its rapid wear, and also increased the likelihood of tire rupture during movement. When a tube is punctured, the tube tire loses air very quickly, since it escapes not only from the puncture site, but also through leaky tire beads that do not fit snugly against the rim flange. In addition, if such a tire is punctured, you will not be able to stop the car immediately, it will travel more than a dozen meters by inertia until it comes to a complete stop. During this time, the tube and the tire can be damaged more thoroughly, the rubber of the inner cylinder will “chew”. With tubeless tires, this option is excluded. Even if a puncture occurs, thanks to the tightness of the chamber and its periodic pumping, you can get to the tire service.
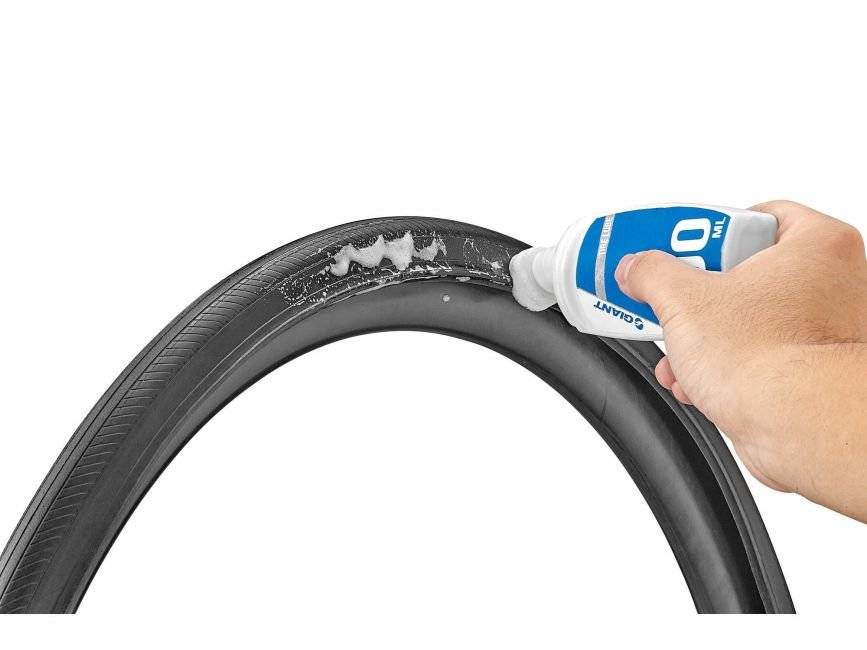
Tubeless and tube tires also differ in how they are mounted / dismantled. If chambered rubber can be freely disassembled or, conversely, installed at home, then such a number will not work with a tubeless one - the risk of damaging the side flanges is too high, damage to which will lead to depressurization of the tire. Due to the peculiarities of installation and dismantling, many motorists find it impossible to repair a tubeless tire with their own hands, especially on the road, not in a comfortable garage, but on the side of the road. And in vain. Of course, it will not be possible to completely eliminate the problem at a professional level without special equipment. But to make sure that the damaged tire still travels, and sometimes not only reaches the tire fitting center, but goes more than one hundred kilometers after an impromptu repair, is quite realistic.
To do this, use special tire repair kits, which can be purchased everywhere today by going to any car shop. Better yet, buy everything you need to repair a tubeless wheel yourself separately and always have it ready. By doing this, you will save some money, which is always nice. The fact is that manufacturers of ready-made repair kits, in an effort to make their kits more expensive and solid in appearance, include in them both really useful tools and materials, as well as those that you can easily do without. Using repair kits or separately purchased harnesses and tools, you can repair tubeless tires not only for cars, but also for trucks. This can also be regarded as one of the advantages of tubeless tires over tube tires. It is much more difficult to repair it with a puncture. It is necessary to disassemble the wheel, remove the chamber, find the puncture site, and then degrease the working area, cut out the patch, and seal the rubber balloon. After drying, the camera is installed in place, and the wheel is beaded. With a tubeless tire, everything is much easier.
RUNWAY Tubeless Tire Repair Kit, 7-Piece
If you find that your car's tubeless tire wheel is damaged, first assess the severity of the situation. If, in your opinion, you can do without repair, having reached a reliable tire service on periodic pumping of the wheel, then it’s better to do so. Tubeless tires were designed to hold air even with foreign objects sticking out of the cord. But do not forget that riding with a nail or other object in the tire causes the puncture to gradually expand and the tire around the damaged area begins to gradually collapse.
But, if it so happens that the damage to the wheel received on the road is too extensive, the chamber does not hold air and it will not be possible to complete the journey while inflating the tire, you need to choose the best method of temporary repair and start it immediately. A tubeless tire is repaired in the following ways:
When choosing a repair using a tourniquet, you need to decide what type of material will be used. The harness can be cord or rubber. Let's consider both of these options.
Wheel repair kit, 6 pieces
Cord harness has found wide distribution as a repair material for tubeless tires. With this harness, you can carry out repairs in any conditions: on a city street or on the side of a country road. It is a strip of high-strength nylon, which is richly impregnated with high-quality rubber-based adhesive. Such harnesses are supplied to the domestic market by many manufacturers, they have certain differences in technical characteristics and cost. But all cord harnesses are installed according to the same type of scheme:
First of all, they find the place of damage and mark it with wax crayon or another marker.
Remove the item that damaged the tire if it is stuck in the cord.
Then you should check the tire pressure, it should not fall below 0.5 atmospheres.
Take a spiral awl and use it to determine at what angle the tire is damaged.
Apply vulcanizing glue to the awl.
Using the awl inserted into the puncture, coat the puncture site with glue in the most thorough way, for which you need to rotate the tool lubricated with it clockwise. Perform this action three times - lubricate the awl and insert it into the puncture, then leave the tool in the cord for the time being.
In the meantime, select the desired harness and carefully remove the protective film from it.
Insert the tourniquet into a special needle, focusing on the center.
On both sides, cover the surface of the tourniquet with vulcanizing glue.
Remove the helical awl from the tire where you left it at the puncture site.
Install a pen with a needle and a tourniquet placed inside into the puncture.
By pressing the handle, install the needle with the tourniquet into the puncture, advancing to the stop at a given angle.
Remove the pen with the needle from the puncture site without rotating it.
Carefully cut off the parts of the tourniquet sticking out on the surface.
Then you need to determine how tight the tire is repaired. This can be done with the help of a special liquid, which is used to determine the puncture site. If, after applying such a liquid, no air bubbles appear, then the tire is temporarily repaired and can be used further. If air bubbles appear, try installing an additional tourniquet in the place of damage to the tire.
This method of temporary repair is inexpensive, but it has proven its effectiveness more than once. A tire repaired in this way without repair will serve you for a long time - up to 6 months.
A rubber harness costs more than cord, but it is also more reliable. They install it in much the same way as the cord one, but there are still some differences. For example, when installing a rubber band, do not use an awl in the form of a rasp, since it can damage the rubber band during installation. In addition, the rubber band must be mounted on the adhesive specified by the manufacturer in the instructions for the repair kit.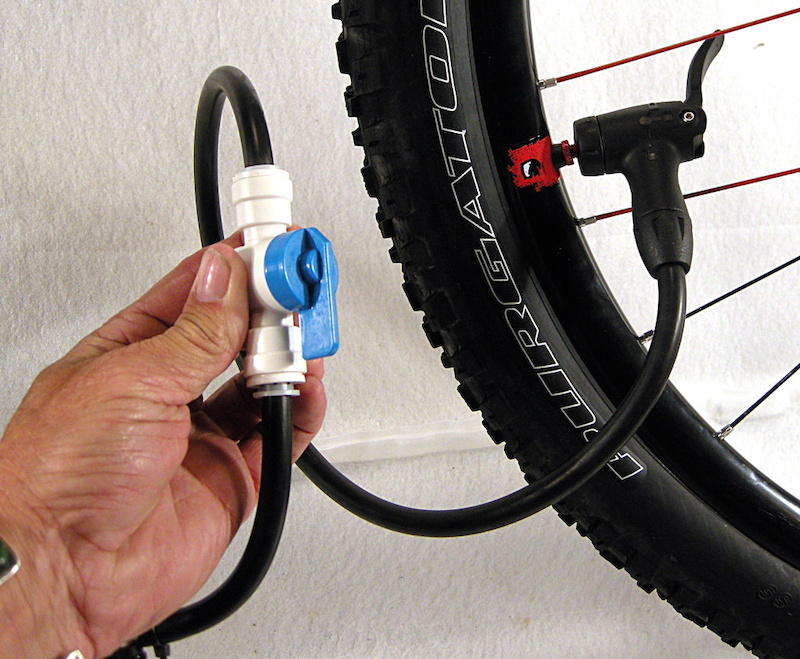
Raw rubber band for repairing RUNWAY tubeless tires, 5 pcs
In this case, an anchor is a special type of bundle, one end of which ends with a small patch. The anchor is installed in the same way as other types of harnesses, but in addition, it glues the puncture site with an internal patch. To do this, the tourniquet is pushed inward, and then pulled a little in the opposite direction. Anchor can only be installed using a special cutter with a diameter of 6 mm. It is purchased separately from the set. But your efforts will surely be crowned with success, because the anchor is considered the most reliable option for repairing a tubeless tire with a harness. But with the help of harnesses, you can not repair side punctures. And in any case, even if the repair is successful, it is necessary in the coming days to choose the time to visit the tire service. Remember that prolonged use of the harness will cause irreversible damage to the tubeless tire.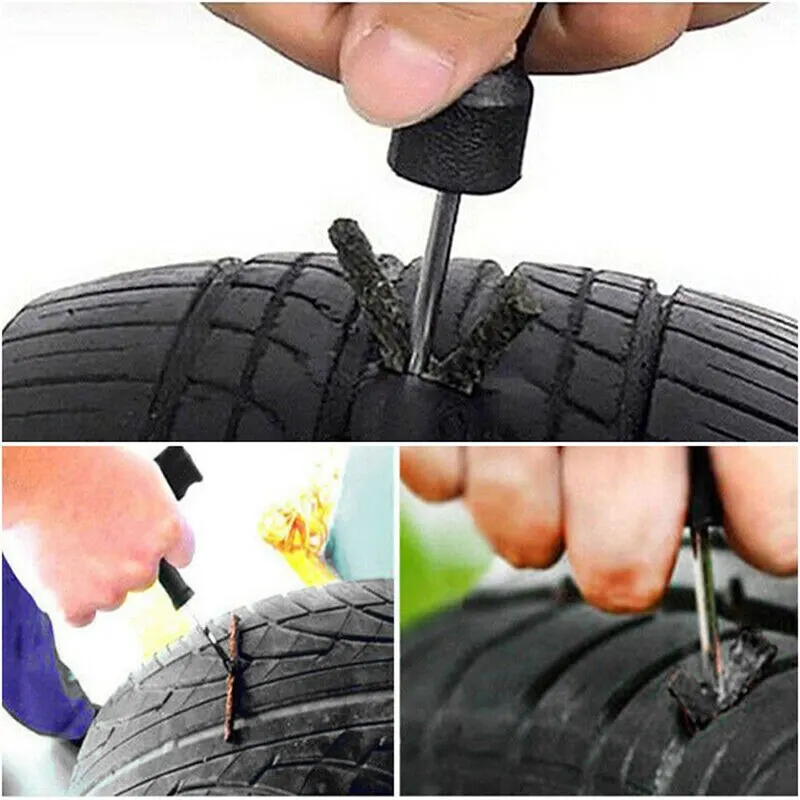 And until the problem is fixed, constantly monitor tire pressure.
The second option for repairing tubeless tires involves the use of sealant. This option cannot be called optimal, but it has become widespread, since tire repair in this way is carried out very quickly, literally in a matter of minutes. And the result of its implementation is guaranteed to allow you to get to the intended purpose of the trip, without first stopping by the tire service you met along the way.
The sealant is very easy to apply. In this case, it is not necessary to remove a nail or other object from the cord, due to which the tire was damaged. Simply attach a bottle filled with sealant to the valve on the rim of the wheel and see that the contents of the bottle are pumped into the wheel. Keep in mind that repairing a tire with sealant will significantly disrupt the balance, so choose a moderate speed. But on the other hand, repairs with the help of a sealant are easy, simple and very fast. You can use it even while standing in a traffic jam.
Today, you can easily buy different types of sealants. The most widely used gel, liquid, aerosol formulations. Gel ones are good because they can be used all-season, both in the summer heat and in the cold season. But at the same time, they significantly worsen the balance of the wheel. Liquid sealants are highly reliable, but they are not very convenient to use. Aerosol compositions make it possible to restore the performance of the wheel without a jack and a pump. But in the cold winter period, they will not work. If we compare the restoration of a tubeless tire, carried out with the help of sealants and harnesses, cord or rubber, then the latter are considered the preferred option, since they provide a fairly high quality of the repair performed with their help.
As you can see, do-it-yourself tubeless tire repair is possible, albeit temporary. You just need to stock up on funds for its implementation, without delaying the purchase of harnesses or sealant, because a lot of trouble awaits us on the roads.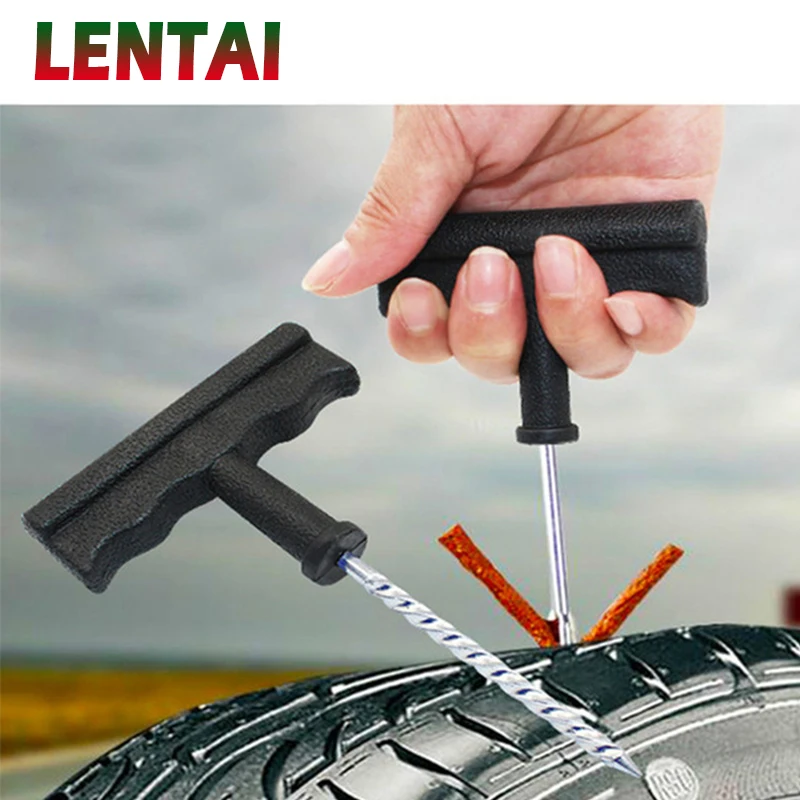 Meet them fully armed and quickly solve the problem. For guaranteed success, you must strictly follow the recommendations given by the manufacturer of repair materials in the instructions for use.
There is not always a way to call a tow truck, and driving on a flat tire, “chewing” the rubber and killing the rim is at least uncomfortable.
The very first replacement of rubber on a motorcycle or scooter gives reason to think - what is better in terms of quick repairs: tubeless ones that do not require wheel disassembly to eliminate a puncture, but leave the rider helpless if, along with damage, it “led” and flattened the edge of the disc? Or chambers - allowing sealing almost ring breaks (if only there were enough patches), but requiring the removal of rubber from the rim for this? The unequivocal answer is no. Few classics, straights or tourers today remain "loyal" to tube rubber models: tubeless tires are lighter, softer, warm up and cool down faster thanks to simplified heat transfer.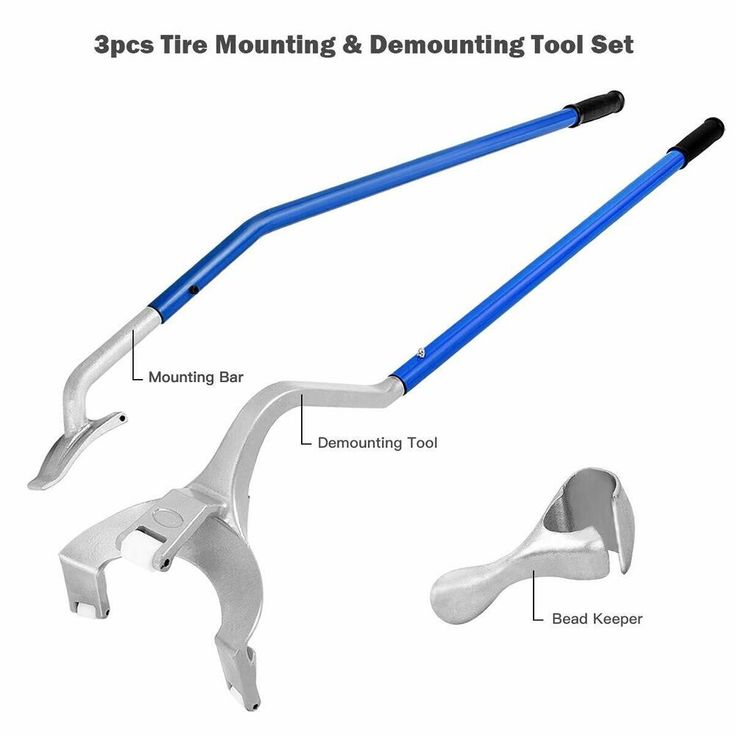 In sports, more precisely - enduro and motocross, chamber - on the contrary, prevail: only spoked wheels can "play", withstanding strong alternating loads during landings and impacts.
The nuance is that a tire with a chamber can be put on any spoked or cast disc, and a tubeless one can only be placed on a cast one, because only it can ensure tightness. Tube – can be installed in a tubeless tire as an emergency measure. In case of major damage to the sidewall, cracks or curvature of the edges of the rim, this will make it possible, after pumping up the wheel, to reach the nearest tire service (and there already - straightening, balancing and other maintenance according to the rules). True, for such a focus, it is advisable to take a camera with a face value one less than the diameter of the disk, otherwise it will create folds inside that will rub for a couple of hundred kilometers. The resource of such a “treatment” is large - until the next puncture, like a new one.
It depends on the magnitude of the damage whether it will be possible to eliminate it on your own, or whether you will have to “surrender” to the motorized tow truck. In tubeless - holes up to 5–6 mm are patched, in chambers - as much as there is enough glue and patches, the main thing is the condition of the tire. To determine the extent of the disaster - find a place where you can safely stop without violating traffic rules (where it is prohibited - you will have to sacrifice tires and drive on).
If the wheel deflates slowly, and the object that pierced it is still inside, you can try to carefully drive to the tire shop. A completely deflated "pancake" will have to be resuscitated on the spot, or - remove the wheel and take it to the service.
To find a hole in a tubeless tire, if it is very thin and not immediately visible, the wheel must be pumped up, slowly pouring water - bubbles will go. In place, tubeless tubes can be “harnessed”, or filled with sealant inside, without removing from the motorcycle.
With the second type of tires - more difficult. A torn balloon must be removed from the tire to detect a defect and seal.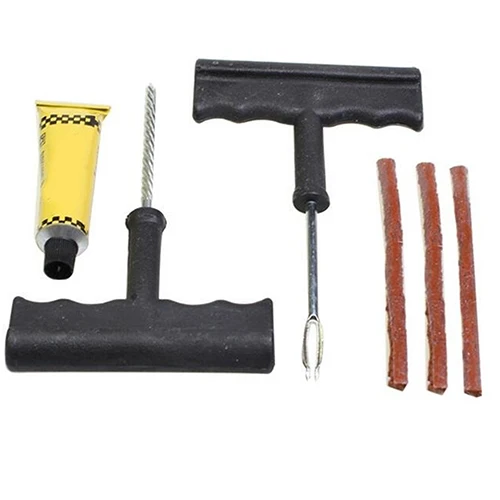 In a good way, the wheel must be removed from the motorcycle and disassembled on a clean, flat, hard base. Suppose such a “patch” can be provided even off-road, but how to remove the wheel on a motorcycle if it does not have a central stand? And shooting is not required. The motor must be carefully laid on its side, after making sure that the faucet is closed, gasoline does not flow out through the tank cap (antifreeze does not flow from the tank if the motor is “dropsy”), and removing the plastic or wardrobe trunk with fragile contents (if any).
You will have to unscrew the wheel from the motorcycle only if you need to replace the tire, or it is decided to patch the tubeless tube with a “fungus”. In the absence of a central stand, this will also have to be done on a lying bike, or - make this stand from improvised materials (bricks, stump, car jack), placing them under the crankcase protection from below, the central tube of the frame, the duplex jumper (but not under the plastic, itself engine crankcase or attachments!), under both footrests - if they are not folding, or - under the pendulum.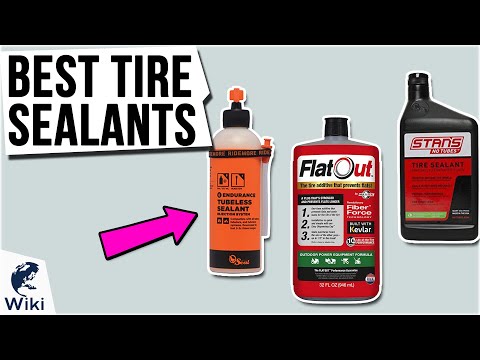 Before removing the rear wheel on a motorcycle, the front fork must be loaded with something, or an even higher lining is made.
In a motorcycle tire fitting shop, tubeless tubes are repaired by cold vulcanization. They are removed, disassembled, the puncture site is cleaned from the inside, degreased, lubricated with glue and a calibrated “fungus” patch is inserted into the hole from the inside. The fungus itself is a thin plate of rubber with a “leg” tube in the center. The leg - by the guide wire is dragged through the hole of the damage, and the "hat" seals it.
After half an hour - you can put the tire back. The reliability of such a repair is high, the patch does not cause a significant imbalance, the service life of a sealed tire does not decrease.
This method is also applicable on the road, the main thing is to have the necessary equipment and materials with you:
The fungus repair procedure does not require much experience. The main thing is to keep it clean, fully clean the place where the patch fits, let the glue dry slightly to a dull finish and press (roll) the surface of the fungus with high quality, expelling all the air between the layers. If necessary, you can degrease the place before gluing with gasoline, but without the rest of the above, it will not be possible to fully carry out repairs.
The compressor is sometimes replaced by a small cylinder of compressed air or carbon dioxide. Unlike a mechanical pump, it will immediately create a “throw” of pressure, pressing the tire beads against the rim flanges (in emergency cases, even a fire extinguisher was used to pump flat tubeless wheels). When connecting the compressor, start the bike's engine before you start inflating the tire - let it idle.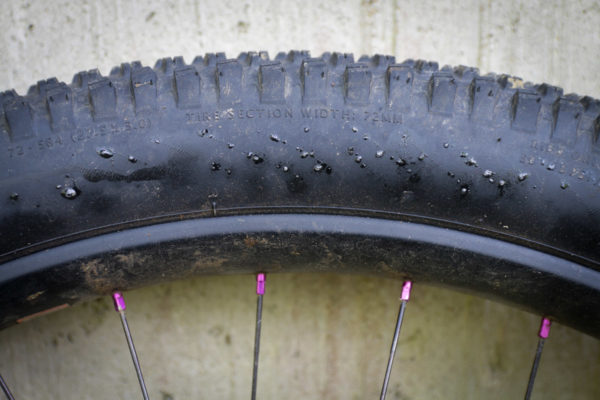 Otherwise, the motor can "land" the battery, and you will not start.
Manometer - needed for control. It is undesirable to pump over the repaired tire. It is recommended to "inflate" 0.2 atmospheres less than the nominal value. Inflating too little is also bad: a flat tire has a larger contact patch with the road, so the place of a fresh patch will deform more.
“Burning” a tubeless tube and sealing its internal cavity through a nipple are quick, simple methods that do not require special skills. To repair the damage, you only need the materials themselves, and how to pump up the wheel.
Now in Moscow, and not only, 6-5 varieties of cans with a sealant are sold - a quickly hardening "liquid rubber", with a volume of 800 to 250 ml.
Applying "Anti-Puncture" is simple: put a tube with a fitting on the nipple of the camera, turn the can over, and hold the button according to the instructions.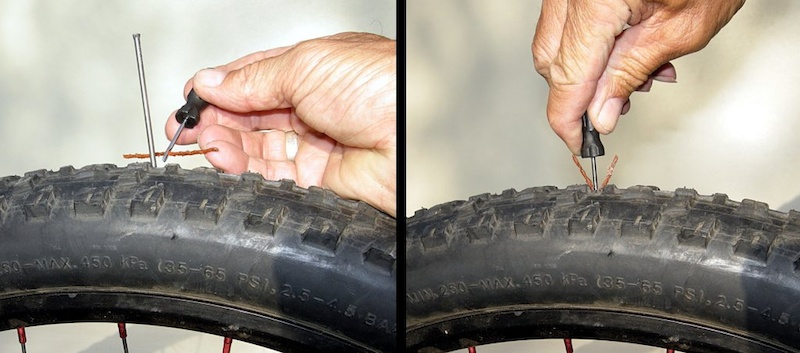 Then - pump up the wheel, cleaning the nipple from the foam, roll it, making a full turn to distribute it.
The sealant is blown out with air into the puncture hole and clogs it, solidifying. After 20 minutes - you can go. Reliability of repair is high. Resource - until the next puncture.
If you have a compressor, start immediately pumping up the wheel, so it will be easier to work with a puncture, insert a patch, and it will swell faster.
Procedure:

You can go in 5 minutes, you just need to make sure that it doesn’t descend anywhere else.
Outwardly identical, repair kits for harnessing wheels can differ in price by almost half. This variation is explained by different configurations - one will have only three items, the other - six or seven.
A complete tubeless tire repair kit contains:
Regardless of the cost, you need to choose a kit in which the harnesses will be reinforced, and the awl - with a deep spiral winding (notch), and not a “needle file”. Inserting a flagellum is sometimes easier with a regular thin screwdriver. If there is no glue in the kit, or it has dried up, the flagellum is moistened with gasoline.
At motorcycle service stations and car services, holes in the chambers are closed by hot vulcanization: a layer of raw rubber is applied to the cleaned, fat-free puncture site and, after squeezing it well, it is heated with a special “iron”. Iron - burns, layers - are fused into a single whole. Reliability of repair is high. The resource will be almost like a new one.
Cold vulcanization (patching) - used if the workshop is not equipped with a vulcanizer. In this case, the quality of the service and the reliability of the repair will depend on the accuracy of the master. For the convenience of gluing, the camera is completely removed in the service, but, I repeat, this is not necessary. It can be repaired on the spot in the same way (there are no other options except for replacing the camera), but without removing it from the motorcycle.
This can only be done if you have two metal mounting blades. At least one, the second can be replaced with another flat tool. You can still disassemble the wheel with a wide screwdriver and a “family” key wrapped with electrical tape. But this is only as a last resort, otherwise you can damage the cord.
Sequence of work:
 Let the glue dry for a minute.
 The fencing must be carried out twice as carefully and more slowly than dismantling, lubricate the side with water or soap, “help” more with your hands, otherwise there is a risk of picking up the edge of the chamber with a spatula and tearing it.
Important! If the wheels of the motorcycle are equipped with tow bars - before pressing the tire bead from the rim, you need to loosen this tow bar! But do not unscrew the nut completely, do not disassemble to the end.
A standard “first aid kit” (a set for repairing classic motor rubber) contains only patches and glue, so it is advisable to supplement it yourself with a piece of “skin” or a needle file. You can degrease with gasoline, or apply a little glue first and wipe off immediately, rolling up the dust with it.
Now there is no shortage of specialized motorcycle workshops not only in Moscow - in all major cities there are motorcycle helpers who help motorcyclists directly on the track, or tow to where you can quickly change the camera, or patch the tubeless correctly, so that there is no trace left. Where there is a guarantee.
Self-replacement of a tire on a motorcycle requires a certain physical condition, and for the first time - a “kilometer of nerves”. At the service station, instead of you, automation will “sweat”, which will not lock up the board and will not scratch the disc coating with a spatula. The main thing is to do it quickly (if you need to go urgently, the price sometimes does not matter).
Repair at the service - may be the only possible one if, due to driving on a flat tire, the tire nipple is turned and torn off. Especially if he flew off and got lost, but there is no spare. In mototiremontazhke - there is always a set of consumables for any wheel diameter. In the same place, in extreme cases, you can buy a new tire, or a used dokatka.
In addition to the patch, for normal operation of the wheel, balancing must be ensured. This is generally a useful procedure during any change of rubber, otherwise if there is a strong imbalance, the wheel bearing will inevitably break due to vibrations, and the hands will quickly get tired and “buzz” after long rides.
The first couple of tens of kilometers - do not drive, go at the speed of the stream.