Fewer Repairs But More Critical
Tire repairs have been a basic component of a tire dealer’s business ever since the beginning of the tire industry. Car owners could count on making a tire repair on nearly every drive they took in the 1890s because tires weren’t sophisticated. In those days, the repairs were made by the car owner, for the most part.
Today, “flats” are virtually a thing of the past. Manufacturers make tires that are technologically advanced and can withstand most road hazards. The advent of the radial tire, a much sturdier design than the old bias ply tire, reduced the need for repairs and supplied more miles per tire. But these higher tech tires do receive injuries from road hazards such as nails, bolts and other sharp metal objects.
Because of their more sophisticated construction, however, when today’s tires are damaged and must be repaired, the repair can’t be done by the average driver. It can and should be done by a tire service technician who has been trained to do a complete, proper repair.
This article includes sequential photos that show the accepted industry standards of how a tire should be repaired. The repair procedures are for passenger and light truck tires, but are virtually the same for medium truck tires (except for Step 17, as noted). The photos also concentrate on a standard two-piece repair, with one photo showing a one-piece procedure – essentially the same as a two-piece with the one exception.
Getting Started
We recommend that all tires be properly repaired per guidelines by both the RMAand TIA, and demonstrated here. Repairs should be limited to puncture injuries of not more than ¼-inch (6mm). Don’t make repairs where the injury damage extends into the shoulder/belt edge area or where the injury extends at an angle into the shoulder area. If the injury does extend into the shoulder/belt edge, scrap the tire.
Proper tools and repair materials must be used; we have included a list of the basic tools in this article.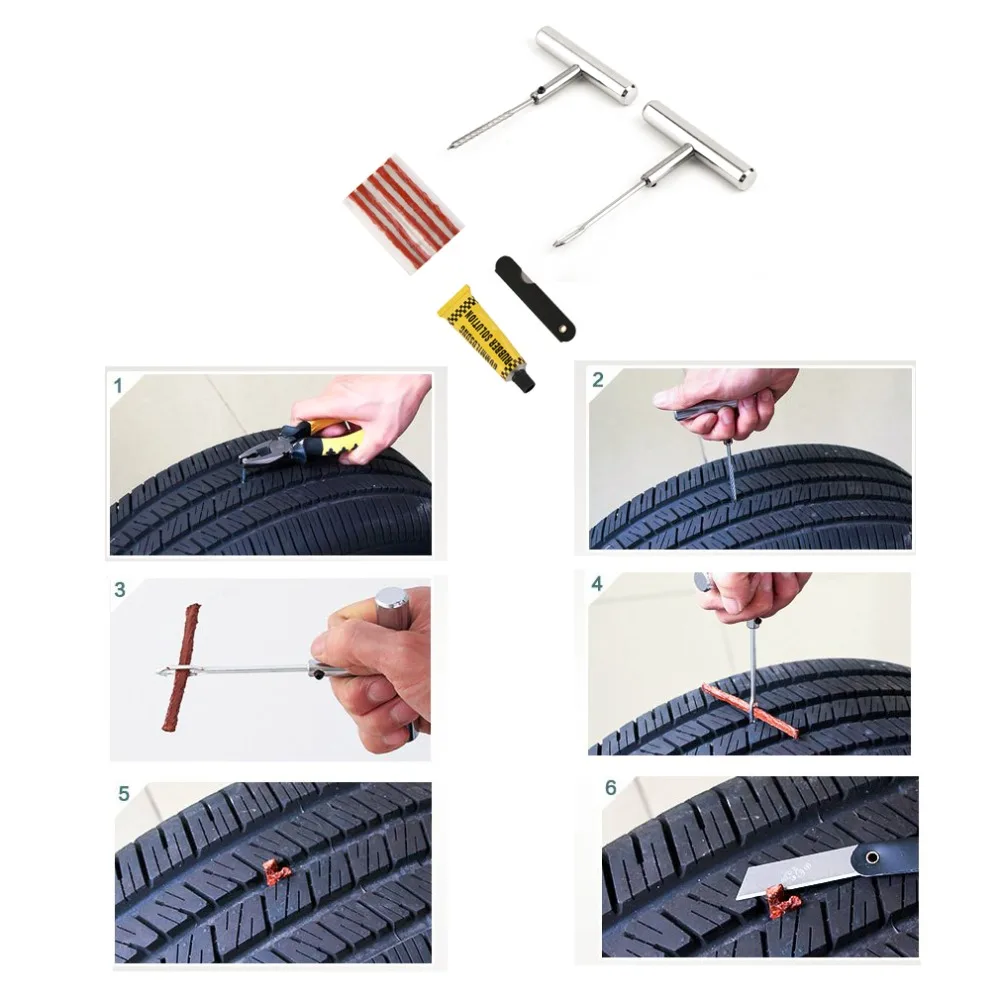
Improperly repaired tires can fail while in service, including tread-belt separations and/or detachments. These occurrences may cause an accident resulting in serious personal injury or death.
Remember that not all tires can be repaired. Specific repair limits should be based on recommendations or the repair policy of the tire manufacturer and/or type of tire service – service description, run-flat technology or commercial service applications, for example.
For all tires, repair units can’t overlap. The number of repairs should be limited first by the tire manufacturer’s recommendations and repair policy, then by the application and the tire’s condition as determined by the inspection process.
Some run-flat technology tires can’t be repaired. Technicians should consult tire manufacturers for their repair policies and, if applicable, for their recommended repair procedures.
Industry recommended repair methods include:
1. Two-piece plug and patch repair components.
2. One-piece patch/stem combination repair units.
For punctures angled greater than 25 degrees, RMA recommends two-piece plug and patch repair components.
Never Means Never
An old phrase states, “Never say never,” but “never” is alright when repairing tires, according to RMA.
• Never repair tires with a tread puncture larger than ¼-inch (6mm).
• Never repair tires worn to the tire’s treadwear indicators or to 2/32-inch remaining tread depth in any area of the tread.
• Never perform a tire repair without removing the tire from the rim/wheel assembly and completing an internal inspection. Do not perform an outside-in tire repair or on-the-wheel repair; these types of products are not considered full, permanent repairs and should be restricted to temporary use only. It is essential that only a specially-trained person remove any tire from the wheel when it has been damaged or is losing air. A thorough inspection for any internal damage can then be made.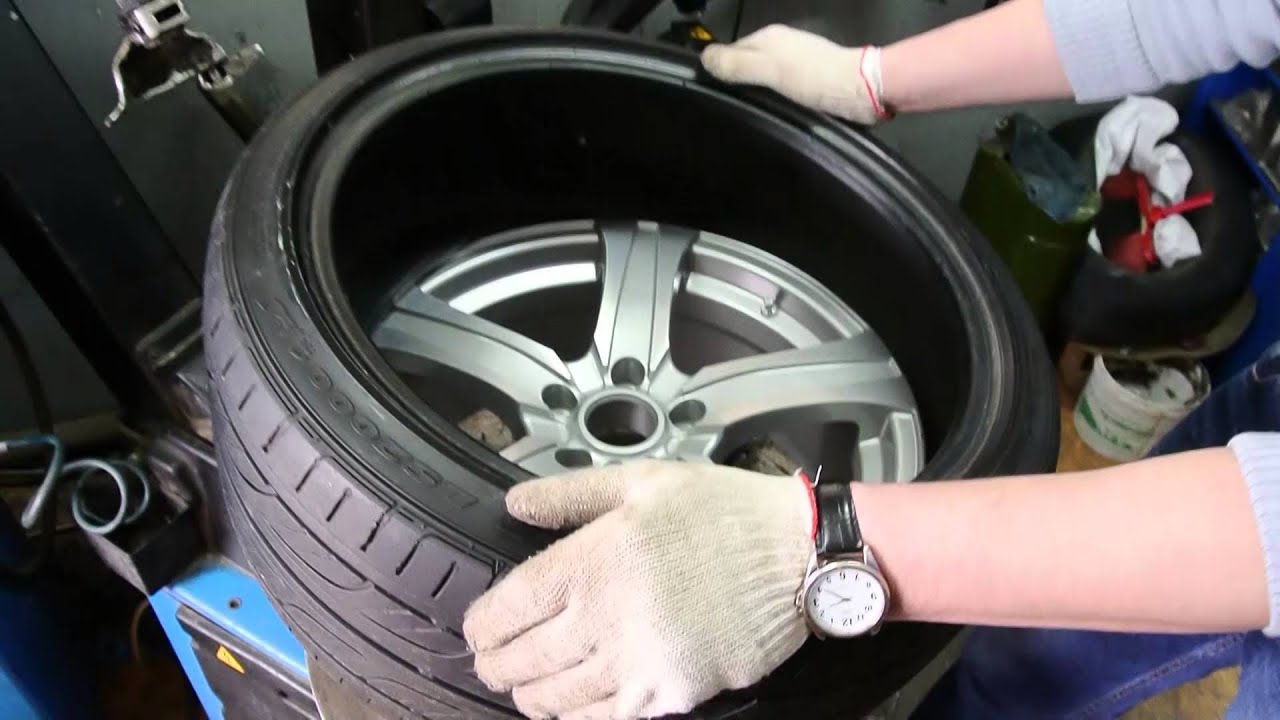
• Never use only a plug (stem) and never use only a patch to repair a puncture. The injury must be completely filled with a suitable vulcanizing material or a rubber plug/stem and a patch must be applied to the innerliner to prevent air loss.
• Never repair a tire that has an existing, improper (non-RMA) repair. The tire must be scrapped.
• Never substitute an inner tube for a proper repair or to remedy an improper repair.
• Never invert radial tires – and avoid excessive spreading of the tire or tire beads.
• Never buff the innerliner too deep, exposing the tire casing body (ply) cords. If this type of damage occurs during buffing, the tire must be scrapped.
For Safety’s Sake
Technicians should be aware of a few warnings communicated by RMA. As pointed out, tires must always be properly repaired as shown in the accompanying section with sequential photos. If improperly repaired, tires may fail in service.
When repairing a tire, adequate eye protection (goggles or face shields) should always be worn to prevent serious eye injuries. Ear protection should also be worn.
Permanent tire damage due to underinflation and/or overloading can’t always be detected. Ply cords damaged by underinflation or overloading may break and cause a “zipper” in the upper sidewall with instantaneous air loss and explosive force. These damaged tires should be inflated only when using a restraining device or safety cage that complies with OSHA regulations and an air line with a clip-on air chuck.
Products from different repair material manufacturers should not be mixed.
Step-by-Step Tire Puncture Repair Procedures
The following “how to” photos and captions show and explain accepted industry procedures for repairing tire puncture injuries. Additional information is available on RMA’s website – rma.org – and by requesting its Puncture Repair Procedures information, or by requesting information about TIA’s Basic Automotive Tire Service training series, which includes a module dedicated to puncture repair.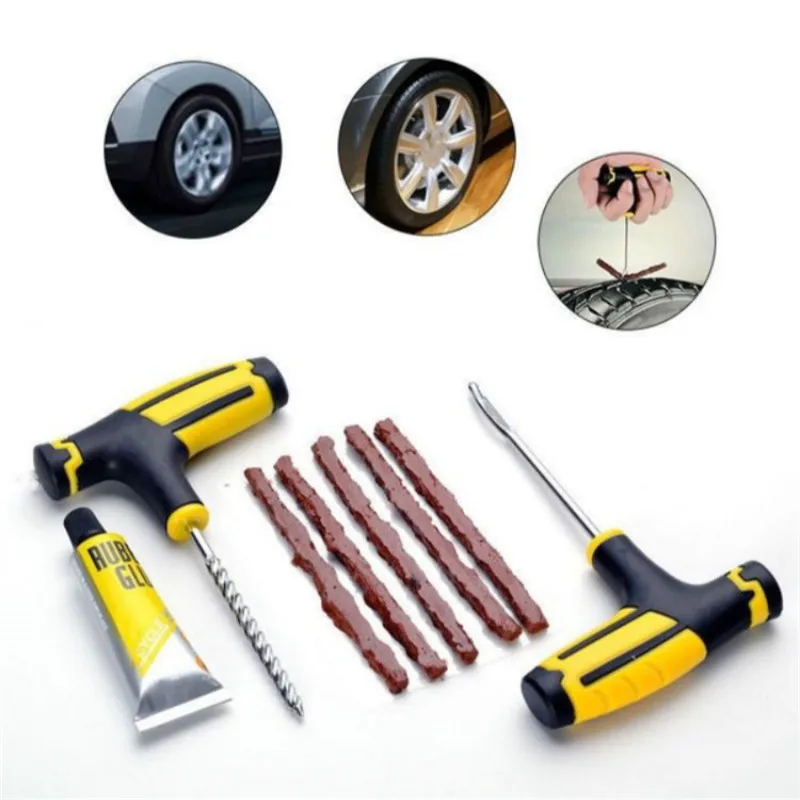
1. Consult information about repairability of tires.
2. Locate the injury and circle with a tire crayon. DO NOT INVERT RADIAL TIRES.
3. Remove the foreign puncturing object and probe the injury with an awl to determine the angle of penetration.
4. Clean the area around the injury with cleaner fluid and a scraper.
5. Using a low speed drill (max. 500-700 rpm) and a 3/16-inch tapered carbide cutter, ream the injury following the angle of penetration from the inside of the tire. Use proper eye protection.
6. Remove the poly from the plug stem. Hook the stem into the wire puller. Coat the entire plug with self-vulcanizing cement. NOTE: With one-piece repair units the patch section must be coated, as well.
7. While the cement is still wet, push the wire puller through the injury from the inside of the tire. Grasping the wire, use a steady pull until ½-inch of the gray rubber on the plug is exposed outside the tire.
7a. FOR ONE-PIECE REPAIRS: While the cement is still wet, insert the guide wire through the injury from the inside. Using pliers, grasp the stem behind the wire and pull until the patch is seated against the innerliner. Do not over-pull and cause the patch to dimple.
8. Using a flexible knife, cut the plug on the inside of the tire 1/8-inch above the innerliner. Be careful not to stretch the plug when cutting.
9. Making sure the bead arrows of the repair unit are pointing to the beads, center the proper size repair unit over the injury. Use a tire crayon and outline an area ½-inch larger than the repair unit.
10. Use a low-speed buffer (max. 5,000 rpm) and a buffing rasp to buff the plug and the outlined innerliner area. BE CAREFUL NOT TO BUFF THROUGH THE INNERLINER.
11. Use a vacuum to completely remove the buffing dust.
12. Apply a light coat of cleaner fluid to the buffed area, scrape clean and allow to dry.
13. Apply an even coat of self-vulcanizing cement to the entire buffed area. Allow cement to dry until tacky. Never use blow dryers, compressed air or heat lamps to facilitate drying. Drying time is affected by temperature and humidity.
14. When cement is dry, partially remove the poly backing from the repair unit, leaving just enough to hold the unit. Press the unit into place while removing the rest of the backing.
15. Stitch the repair unit vigorously from the center working outwardly. Use as much hand pressure as possible. Remove top cover film.
16. Apply repair sealer on the overbuff area, and over the edge of the repair unit.
17. Apply bead sealer to the bead of the tire before inflation to help prevent air loss around the bead. (NOT NECESSARYFORTRUCK TIRES.)
18. After inflating, cut the plug stem flush with the outside tread area. The tire is now ready to be returned to service.
Click on these links to download a full poster version of this illustrated two-piece tire puncture repair guide, as well as one that details single-piece tire puncture repair procedures.
After downloading, take the PDF file to a local office supply store (OfficeMax, Staples)or FedEx Kinkos location, where you can print out a full-color, 18×24-inch poster to hang in your tire service area and/or customer waiting area.
List of Basic Repair Tools:
Awl
White paintstick (truck tire)
Tire Crayon
Scraper
Safety Glasses/Shield
Low-Speed Buffer/Skiver
3/16-inch Carbide Cutter
3/16-inch Adapter
5/16-inch Adapter (truck tire)
Pulling Wires
Knife
Black Contour Cup – 60 Grit
Adapter with Spacer
Stitcher
When Not to Repair a Tire
• There is 2/32-inch or less of tread on any two adjacent tread grooves. The tire is not legal on U.S. highways.
• The tire cord or steel belt is exposed, there are flex breaks or severe sidewall abrasions.
• There is any evidence of a separation in the tread area or the sidewall of the tire.
• There is any evidence to indicate the tire has been run flat. Do not inflate, since inflation could result in serious injury. Demount the tire and inspect for innerliner damage.
• There are punctures or damage in the shoulder or sidewall areas.
• Never use any wheel with a rim that is bent, pitted from corrosion, cracked or worn.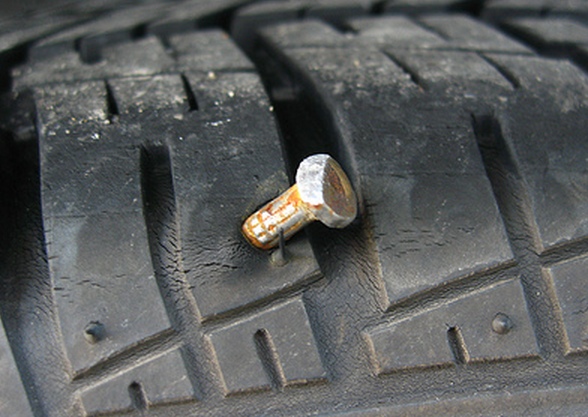 Remove rust, dirt and foreign materials from wheel/rim parts.
When ‘Always’ is right
• Inflate the tire to maximum allowed pressure. Do not overinflate.
• Check the surface and the valve for the source of the leak(s) by using water, soap solution or leak detector.
• Locate the injury and circle with a crayon.
• Remove the valve core to deflate the tire.
• Demount and inspect the inside of the tire on a well-lighted spreader for innerliner cracks, open splices, exposed tire cord or steel belts, broken beads or bead wires, bulges or blisters, or other interior damage. If any damage other than a ¼-inch maximum puncture injury in the tread is present, do not repair.
Final Inspection
The final inspection is your last chance to make sure a tire puncture repair job was done properly and within industry standards. A proper repair must completely fill the injury with a suitable vulcanizing material or rubber plug/stem and a patch must be applied to the innerliner to prevent air loss.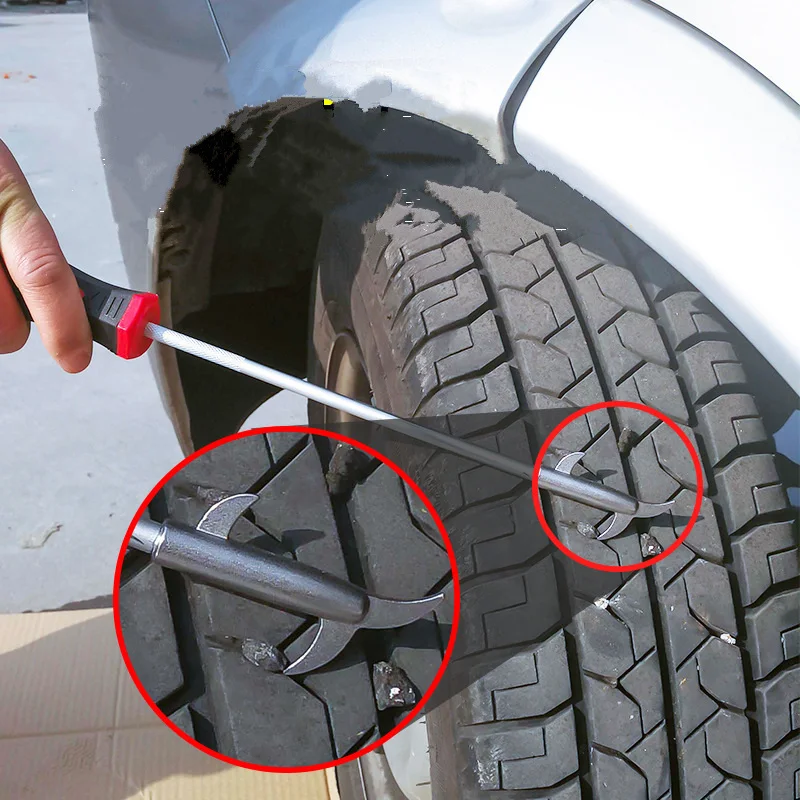
Inspect all of your repairs and rework, if necessary. After removing and inflating the tire/wheel assembly, inspect the assembly (tire/wheel/valve) for damage or leakage. Pay particular attention to the location of the repair, the beads and the valve. If the tire continues to lose air, it must be removed again from the wheel for a complete re-inspection.
Radial Section Repair
The procedures for repairing a more serious injury on a radial medium truck tire are notably different than when repairing a minor puncture. Section repairs may require special tools and repair materials, including strip gum rubber, an extruder, a spot curing press, specially designed repair units and more.
The process described here is very basic; special training is required to properly perform section repairs.
While the steps for probing an injury angle and buffing are the same, a grinding (skiving)step must be added to remove all damaged wires and the length and width of the damaged area must be measured to assist in selecting the proper repair unit.
For crown repairs, skives should be a cupped “Y” type with a 90-degree skive through the wire belts and ply. Stitching should be done as in a regular repair prior to curing the repair and allowing it to cool.
Next, a cleaner fluid should be applied and the innerliner should be scraped clean. When placing the repair unit over the injury, center it with the bead arrows pointing directly to the beads. Using a tire crayon, outline an area one-inch larger than the repair unit.
Perform the buffing step, vacuum the dust and use a light coat of rubber cleaner fluid and a scraper to clean the buffed area. Apply an even coat of self-vulcanizing cement to the entire buffed area and allow to dry until tacky.
Make sure the tire is in a relaxed position. Partially remove the backing from the repair unit, leaving enough to hold without touching the back. Apply the patch and press down.Then stitch the unit, working out from the center. Use as much hand pressure as possible. As a final step, apply repair sealer to the over buff area and over the edges of the repair unit.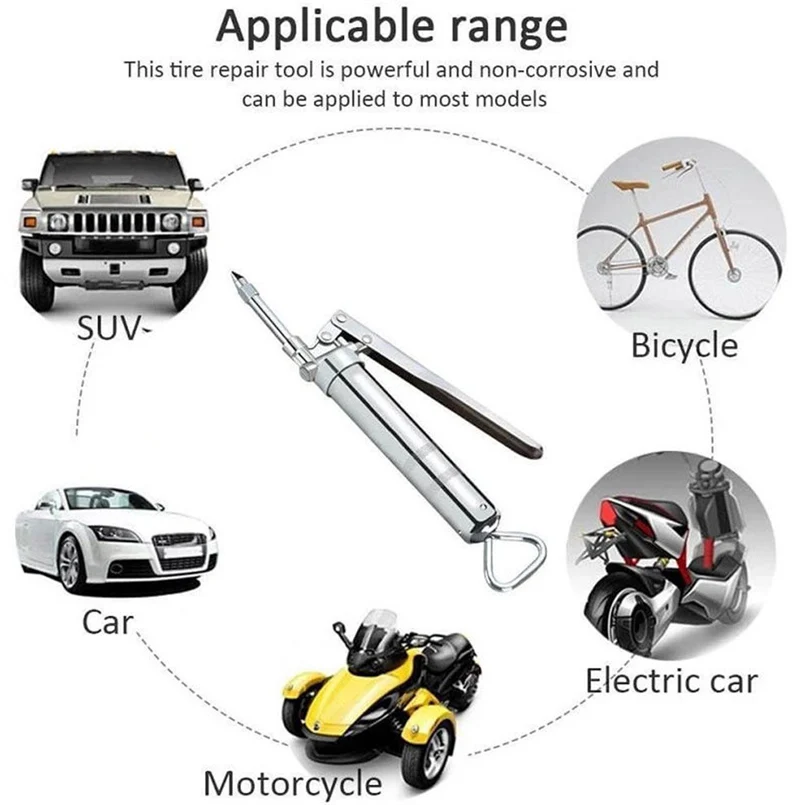
Disclaimer
Repairing a tire is serious business. The preceding article was researched and written using existing industry-approved procedures and material from both the RMA and TIA, and is NOTintended to be used as a substitute for proper tire repair training. The photos and additional information were supplied by Myers Tire Supply/Patch Rubber Co. The process shown here is consistent with those used by other major repair product makers, but consult their specific instructions before using. This information represents a consensus of tire industry experts. This article is meant for educational purposes and those who use the methods recommended are solely responsible for any injuries, deaths or losses resulting from their application.
In This Article
Several years ago, my fellow rescue technicians and I conducted a search-and-rescue operation. We were in the middle of transporting our subject out of the woods when we realized that our transport UTV was getting a flat tire and needed some tire repair. The escort ATVs were unable to safely evacuate the subject, so we needed to come up with a quick solution to get our subject out of the woods and to a proper ambulance. Thankfully, we had several viable solutions available to us, and we were able to get to safety with only minor delay. What did we do? More importantly, if you find yourself in an austere environment or off-the-grid scenario, what are your options and what can you learn from our event?
First, let’s talk about changing a tire. Some folks out there might not have ever needed to change a flat tire by themselves. While it’s not fun to do when you’re on-road, it’s even less fun when you’re off-road. If you don’t know how to change a tire, learn. Please. It’s relatively easy to do and can save you a disproportionate amount of heartache if you find yourself in this situation.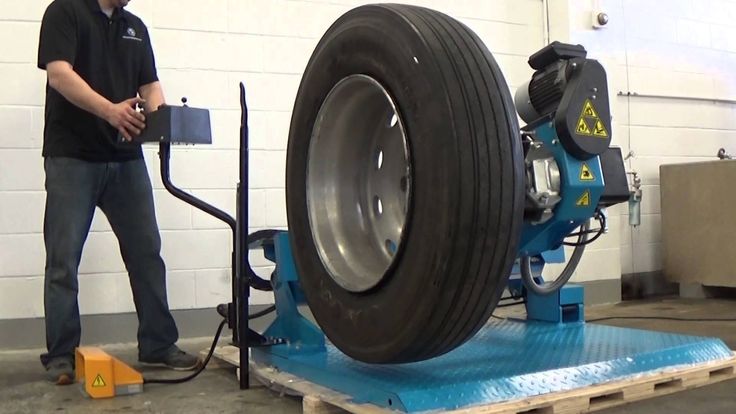 If you do already know how, you’d be remiss not to teach your spouse, children, and friends.
Your preparations need to start by making sure you have all the equipment needed to change a tire and the knowledge of how to do it safely. Naturally, having a spare tire helps a lot. Knowing where the spare tire is located and how to access it is a must. Spare tires may be located inside a vehicle, perhaps under the floor of an SUV, or covered by the plastic trim on the side. It could also be located in the trunk of a car or outside the vehicle, suspended underneath with a cable that you’ll need to crank down with a tool that should be included in the tire-changing kit that came with the vehicle. If your vehicle is like the latter, you’ll need to know the proper procedure to lower that spare. It’s not always obvious, and you should refer to the owner’s manual for instructions. Also, make sure to periodically check the tire pressure of your spare and top it off if it’s low. Note that some vehicles don’t come with a spare tire at all, instead relying on special run-flat tires or a tire repair kit.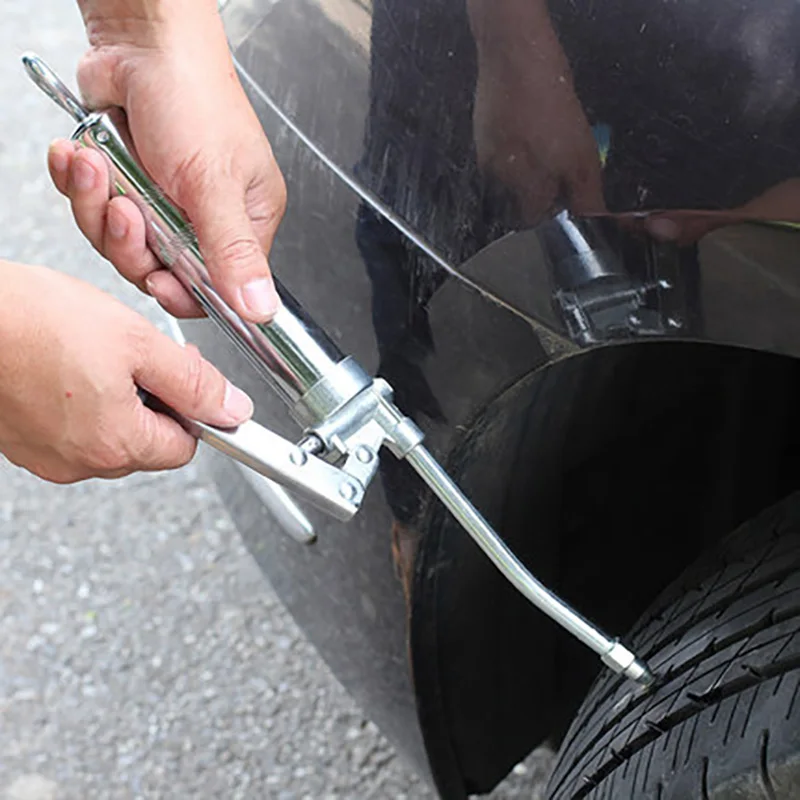
You’ll need an appropriate jack to lift the car and a lug wrench that’s sized for your lug nuts. Some people don’t know where their spare tire is, don’t know how to access their spare tire, don’t have a jack, and don’t have a lug wrench sized to fit their vehicle. This is a recipe for disaster.
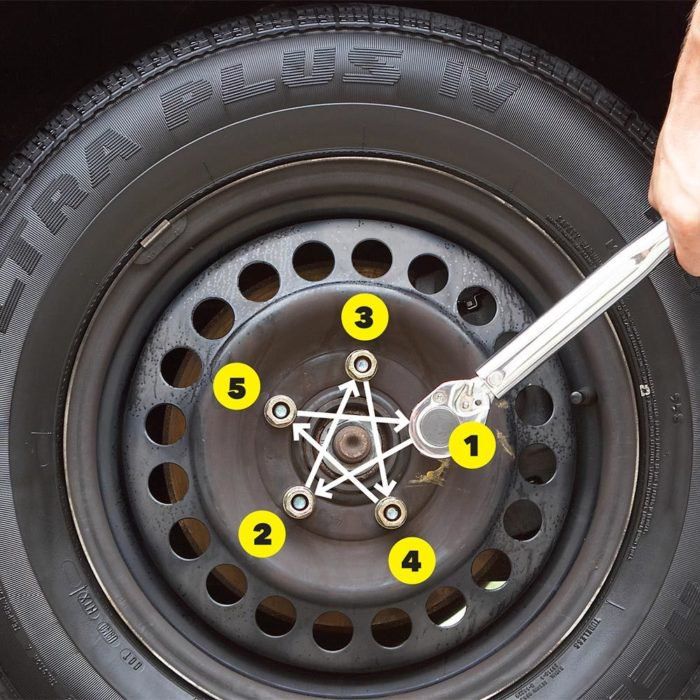
The basic steps to changing a tire are as follows: Choose a safe location with level ground. Turn on your hazard lights, then set the parking brake and block the tires so the vehicle can’t accidentally roll away while you’re jacking it up. Before you lift the car, use the lug wrench to begin loosening all of the lug nuts; it’s much easier to do this when the wheel is on the ground and can’t move. Just get them started; don’t remove them completely. Place your jack at the specified jack point for your car and raise the car. Remove the lug nuts, and then swap the spare tire for the flat. Read your owner’s manual for specifics; for example, some vehicles (like certain German cars) have lug bolts instead of lug nuts. If you’ve never changed a tire, it’s helpful to get hands-on instruction.
The natural next question becomes: What are your options if you can’t change the tire?
Above: A scissor jack, shown at left, is likely what you'll find provided by your car's manufacturer in the trunk. While working the crank is no fun and it also has a small base, these jacks are purely mechanical, so they're a reliable choice for emergency use. Hydraulic bottle jacks are compact and strong. However, their small bases compromise on stability and they might be too tall for low vehicles.
Compressed AirThe first possibility is to refill your flat tire with air. There are many inexpensive air compressors on the market that you can plug into your 12-volt power source to reinflate your tire. There are also compressed air canisters you can use, ranging from tiny CO2 cartridges that can fill a smaller tire (or use several for larger tires) to larger portable compressed air tanks that could fill large tires.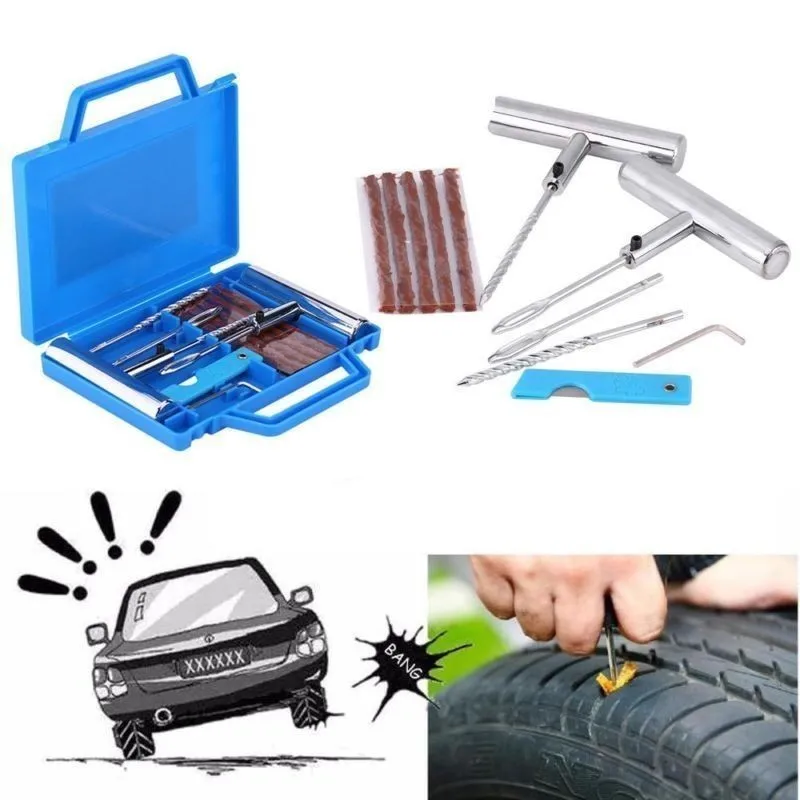 In a worst-case scenario, you could use a manual pump, like a bicycle pump, to inflate the tire. If the leak is slow enough, this could buy you time to get to safety. If the tire damage is more extensive, simply refilling a tire with air might not be possible and you’ll need to try a different method.
Above: There are many options to refill a tire, from compressed air to electric pumps to good old-fashioned elbow grease.
PlugsThere are several options to plug a damaged tire. The U.S. Tire Manufacturers Association (USTMA) outlines criteria for fixing a flat. Their Product Service Bulletin titled “Puncture Repair Procedures for Passenger and Light Truck Tires,” which includes a wall chart, shows the industry recommended puncture repair procedure. It basically advises that you can only repair holes up to ¼-inch diameter in the tread area of a tire (not the edge of the tread or sidewall). This standard should be adhered to under all normal circumstances.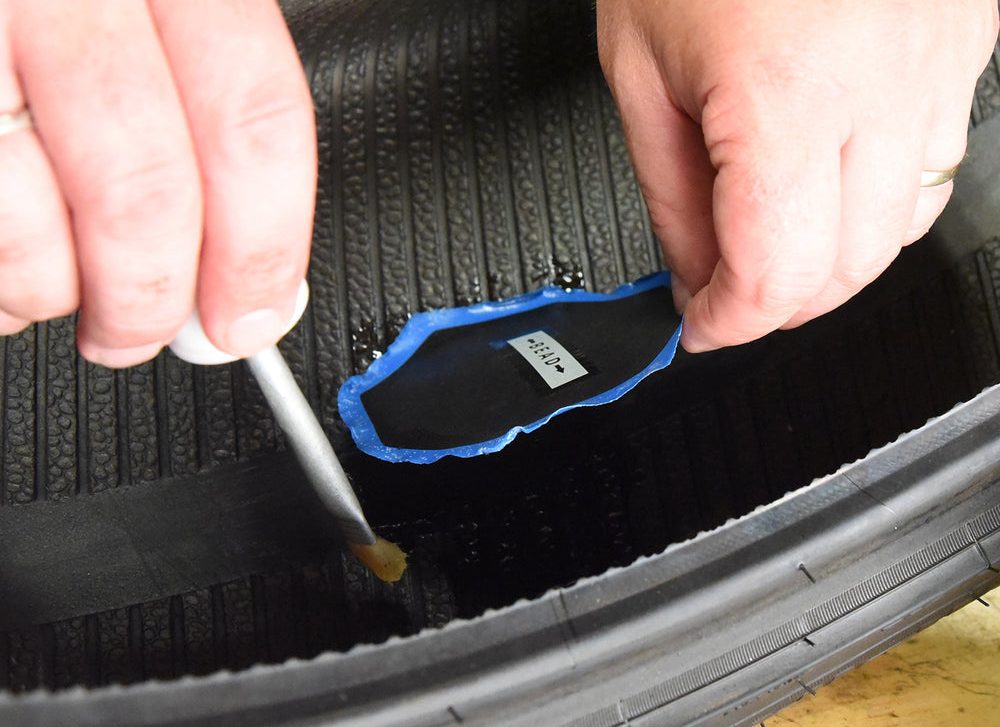 But you might not be in normal circumstances — you might be in an off-road, off-grid, life-and-death situation!
The best type of flat tire repair is a pull-through plug with an interior patch. These are installed from inside the tire and are the type of repairs performed at service stations. It involves reaming out the hole, putting a plug into the hole, using a vulcanizing compound (glue), and then putting a patch on the plug from the inside of the tire.
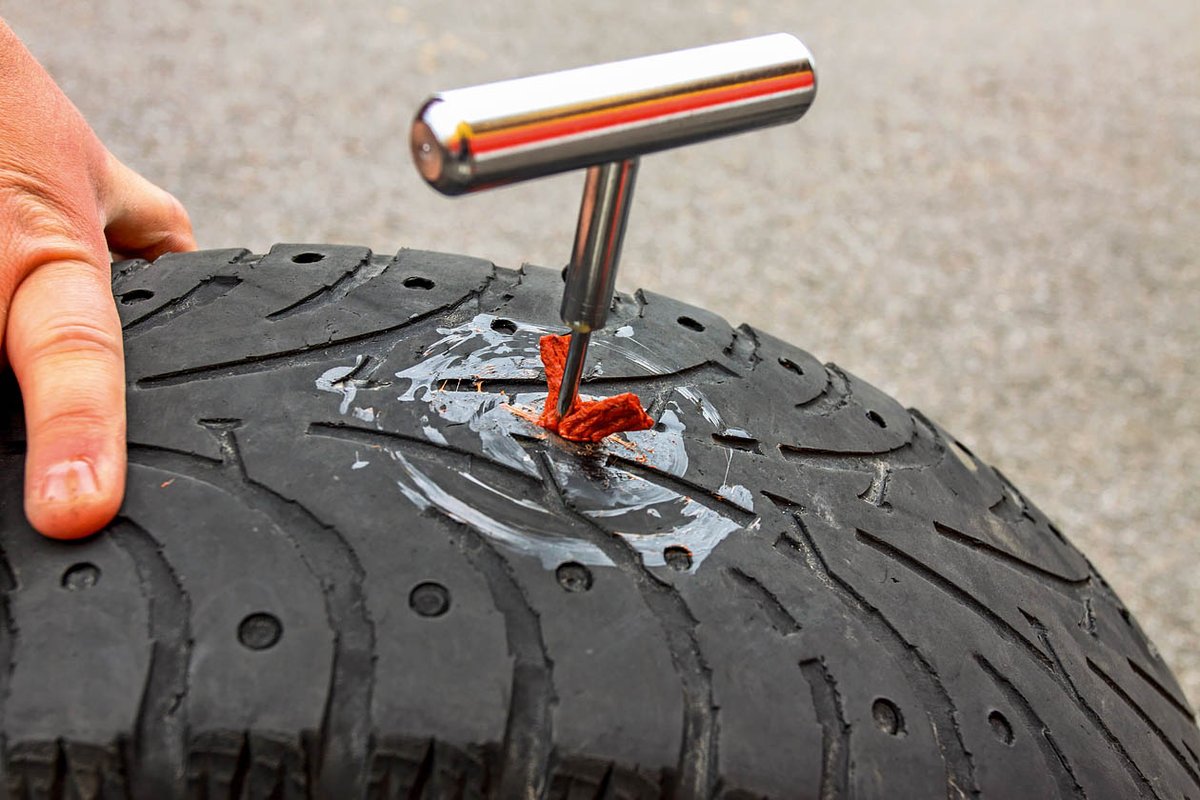
A simple external tire plug can be installed by the average person, with the tire still on the rim. First, through visual and physical inspection, locate where the tire is damaged. Once located, remove any debris, such as a screw or nail. Then, insert a probe tool, which is a rough file/rasp-type rod, into the hole that caused the flat to clean it out. Next, thread a repair plug onto the plug tool, which looks like a giant sewing needle. Spread a generous amount of rubber cement onto the plug and push the plug straight down into the hole, leaving about ½ to ¼ inch of the plug sticking out of the hole. Then, twist the plug tool and pull it out, leaving the plug in the hole. Allow the cement a few minutes to dry, and if the damage isn’t too severe, the hole should be plugged. This type of repair has been known to hold up for many years.
While it’s generally not recommended, if the tire is still leaking from that hole, you can try a second, third, or fourth plug. Additionally, the USTMA advises never to put a plug into a sidewall, and I wouldn’t advise it either — but I’ve seen it done on numerous ATV, UTV, tractor, and other off-road tires in an emergency. If you should ever need to do such a thing, drive no faster than a walking pace and only as far as you need to reach a place where a proper tire change can be done. Don’t drive at roadway speeds as there’s great risk of a catastrophic blowout with a sidewall repair.
There are plenty of generic tire plugs available, but plugs from Stop & Go International are a much better option. While they follow the same plug-the-hole concept as the others, these plugs offer significant advantages.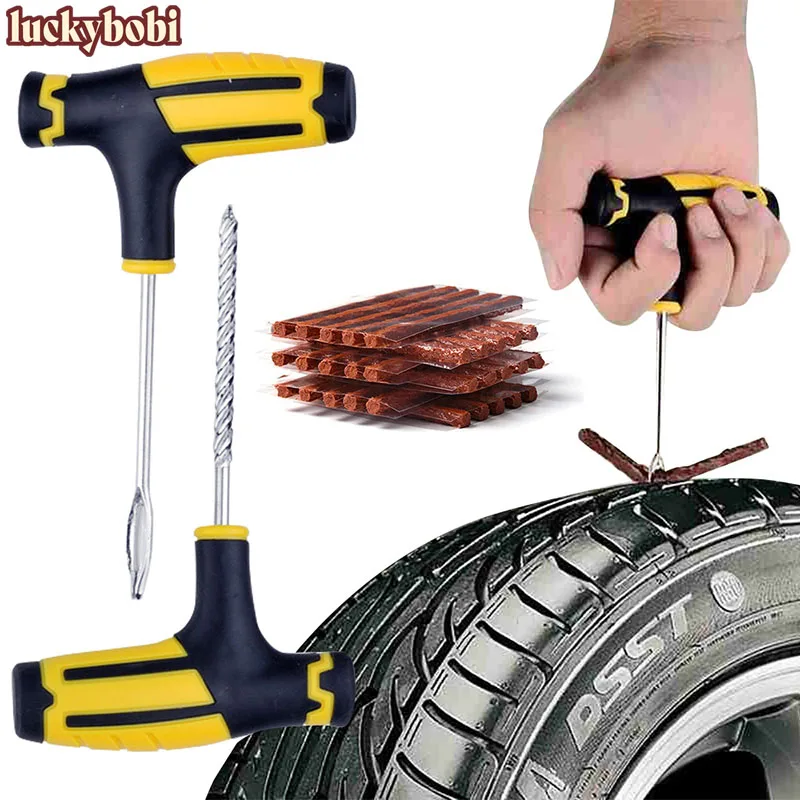 First, they’re available in two diameters (5/16 and 7/16 inch), the larger of which is much bigger than a standard tire plug. Second, they’re contoured in a mushroom shape, the head of which forms a better seal inside the tire versus a standard plug. Third, to achieve a tight fit, they require some mechanical advantage via a screw-in applicator or a springloaded “gun” applicator.
Above: The most robust repair method is to install a plug and patch from the inside. This will need to be done at a shop that can remove the tire from the wheel.
Chemical SealantsSome of you might say, “Why go through all that trouble; why don’t you just carry a can of Fix-a-Flat?” Well, that’s certainly an option, but historically one of the worst. Does it work? Sometimes. But before you put it to use, understand its downsides. In 2016, the formulation was changed, but according to the Safety Data Sheet dated 10/15/2000, the chemical mix of the previous version of Fix-a-Flat was corrosive.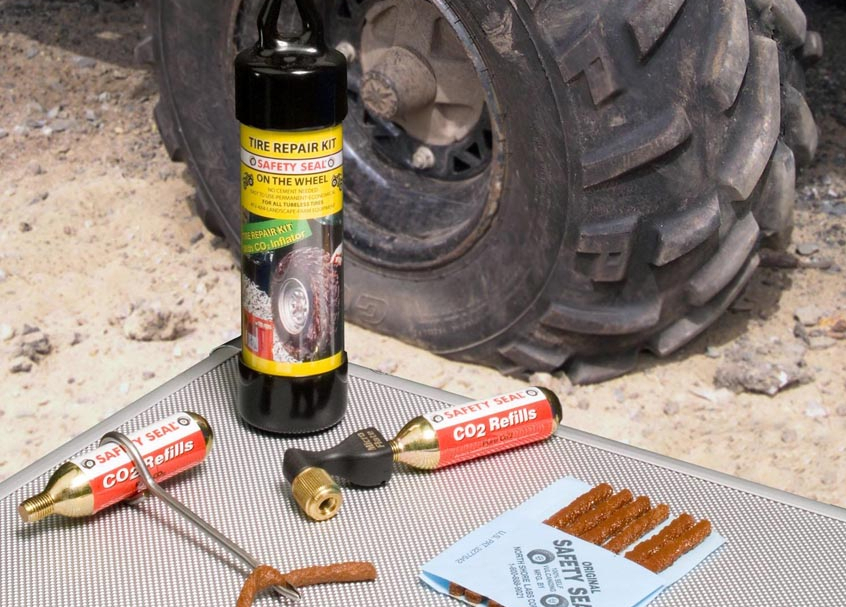 If you've had a can or two of this stuff sitting in your vehicle or garage for a while, it might be the older formula that can cause damage to your tire, and if left for an extended period of time, potentially corrode the wheel, too. And if you happen to have a tire pressure monitoring system (TPMS), which was mandated for vehicles in the United States after fall 2007, there’s a good chance you’ll cause damage to this component as well. Fix-a-Flat is a very temporary fix and should be removed from the inside of your tire as soon as possible. It’ll require cleaning out the inside of the tire, and some shops will charge you extra. Even with the new formulation, Fix-a-Flat instructions specify you have three days or 100 miles to get your tire professionally repaired.
Above: Slime's tire sealant, which you inject into your tire to seal a puncture, along with more traditional repair kits.
The chemical ingredients of the older Fix-a-Flat formula are tetrafluoroethane, heavy aromatic solvent naptha, amorphous polyolefin, aromatic resin, inert filler, and a trade secret emulsifier. The current chemical ingredients are Tetrafluoro-1-propene, glycerol, and cellulose. It’s a good idea to know which version you have.
You may have also heard of Slime tire sealant, a thick green goo that you can inject inside your tire to repair small holes or prevent the tire from going flat in the first place. The manufacturer claims that their product is TPMS-safe, contains rust inhibitors to protect your rim, and is effective for up to two years. From personal experience, this stuff works very well, and I know people who have left Slime in their tires for many years. To use it, you’ll need to pull the core out of your valve stem using a special tool and inject the sealant inside your tire. It’s a simple process.
The chemical ingredients of Slime are glycerol, attapulgite (binder), cellulose, and quartz.
TireJect tire sealant is similar to Slime; it’s a liquid that you inject into your tire through the valve stem and is said to be effective for two years. However, it’s a much thinner liquid and comes in two different versions.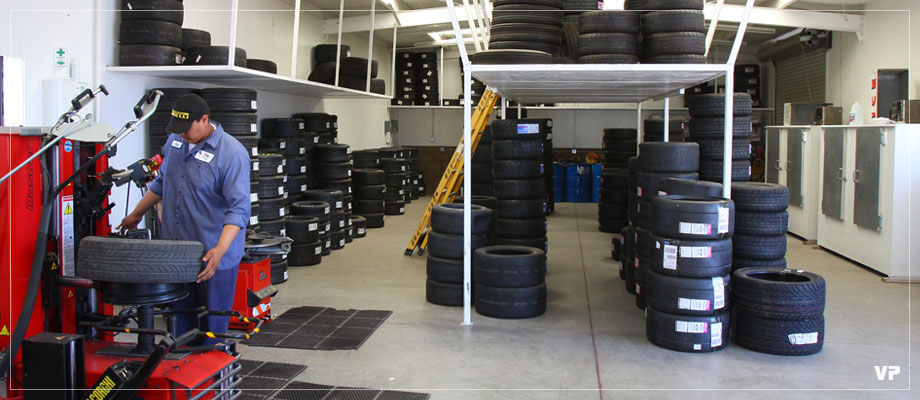 The automotive sealant will seal bead leaks and tread punctures up to ¼ inch, while remaining safe for tires, rims, and TPMS sensors. The off-road tire sealant will seal leaks up to 3/8 inch, including the sidewall and dry rot. This sealant is made with liquid rubber, active sealing particles, and aramid (Kevlar) fiber, but it’s not TPMS friendly. I tried this product on the dry-rotted tires of my lawn aerator, which would no longer hold air for more than a day or two. Thirty days after using TireJect, the dry-rotted tires are still holding air. Impressive.
The chemical ingredients of TireJect are propylene glycol and natural rubber latex.
While doing research, I found another product, FlatOut Multi Seal. I haven’t used it yet, but feel it deserves mention. Like Slime and TireJect, this liquid is injected into your tire through the valve stem. The manufacturer claims their sealant is good for 10 years but is formulated for off-road vehicles only, as it can damage TPMS sensors.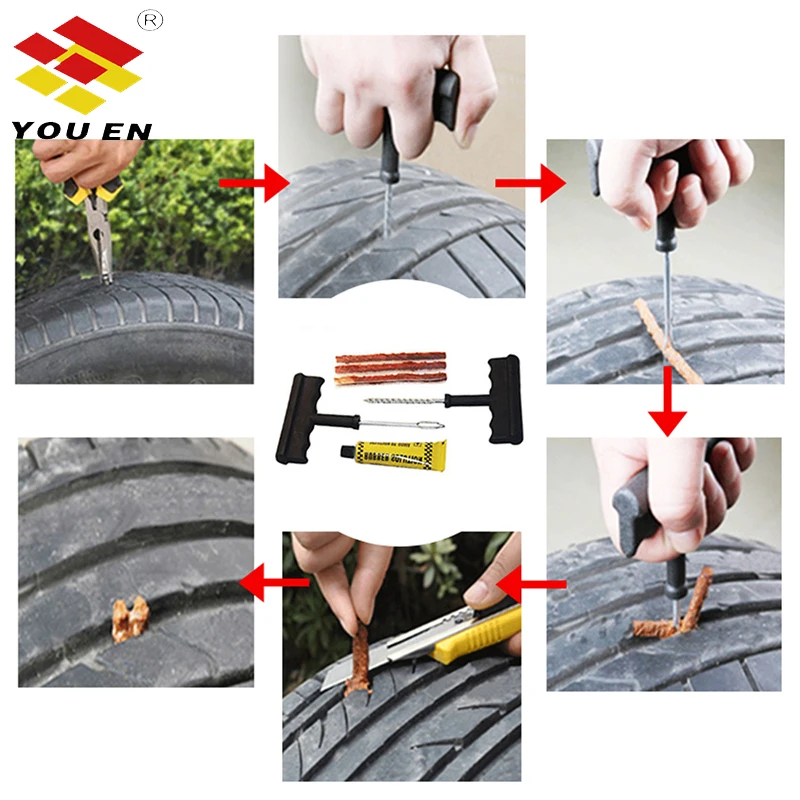 The Multi Seal Pro HD 2500 will plug holes up to ¾ inch, while the Multi Seal Armor 3500 will plug holes all the way up to a whopping 1¼ inches — that’s bullet hole territory. They have a video on their website showing them driving a 5/8-inch steel rod into a tire and FlatOut Multi Seal plugging the hole in seconds.
The chemical ingredients of FlatOut Multi Seal are approximately 50-percent propylene glycol with the remaining proprietary components not at reportable concentrations.
Above: You can use an external tire plug kit to repair a tire without removing it from the wheel. It involves removing the offending object, cleaning up the hole, then inserting a repair plug and applying cement. It's wise to have a patch applied on the inside surface of the tire afterward to reduce the risk of leaks.
Other Extreme RepairsA friend was out on an ATV camping trip when he put a gash into the tire. It was too big to be repaired with conventional means, and he hadn’t brought a spare tire with him. Rather than attempting to drive the trail on a flat tire or hiking many miles out of the woods, he sewed the gash closed. Yes, you read that correctly. Using a heavy tarp repair needle and thread, he put a bunch of stitches into the gash to hold it closed, applied a patch inside the tire, and then coated it liberally, inside and out, with vulcanizing cement. It held, and he was able to drive out.
In some third-world countries, they still repair flats with a torch and bits of rubber that they melt back into the tire. It takes a skilled hand to do it well, but tons of tires have surely been repaired this way. There's also the old-school trick of re-seating a completely deflated tire by spraying it with a flammable aerosol such as starter fluid, then carefully igniting it. The resulting fireball can pop the tire bead back around the wheel, but we wouldn't recommend trying this dangerous technique at home.
Damage to a tire's sidewall is usually catastrophic. Plugging a hole in the sidewall isn't advisable, but can be done as a temporary measure in emergencies.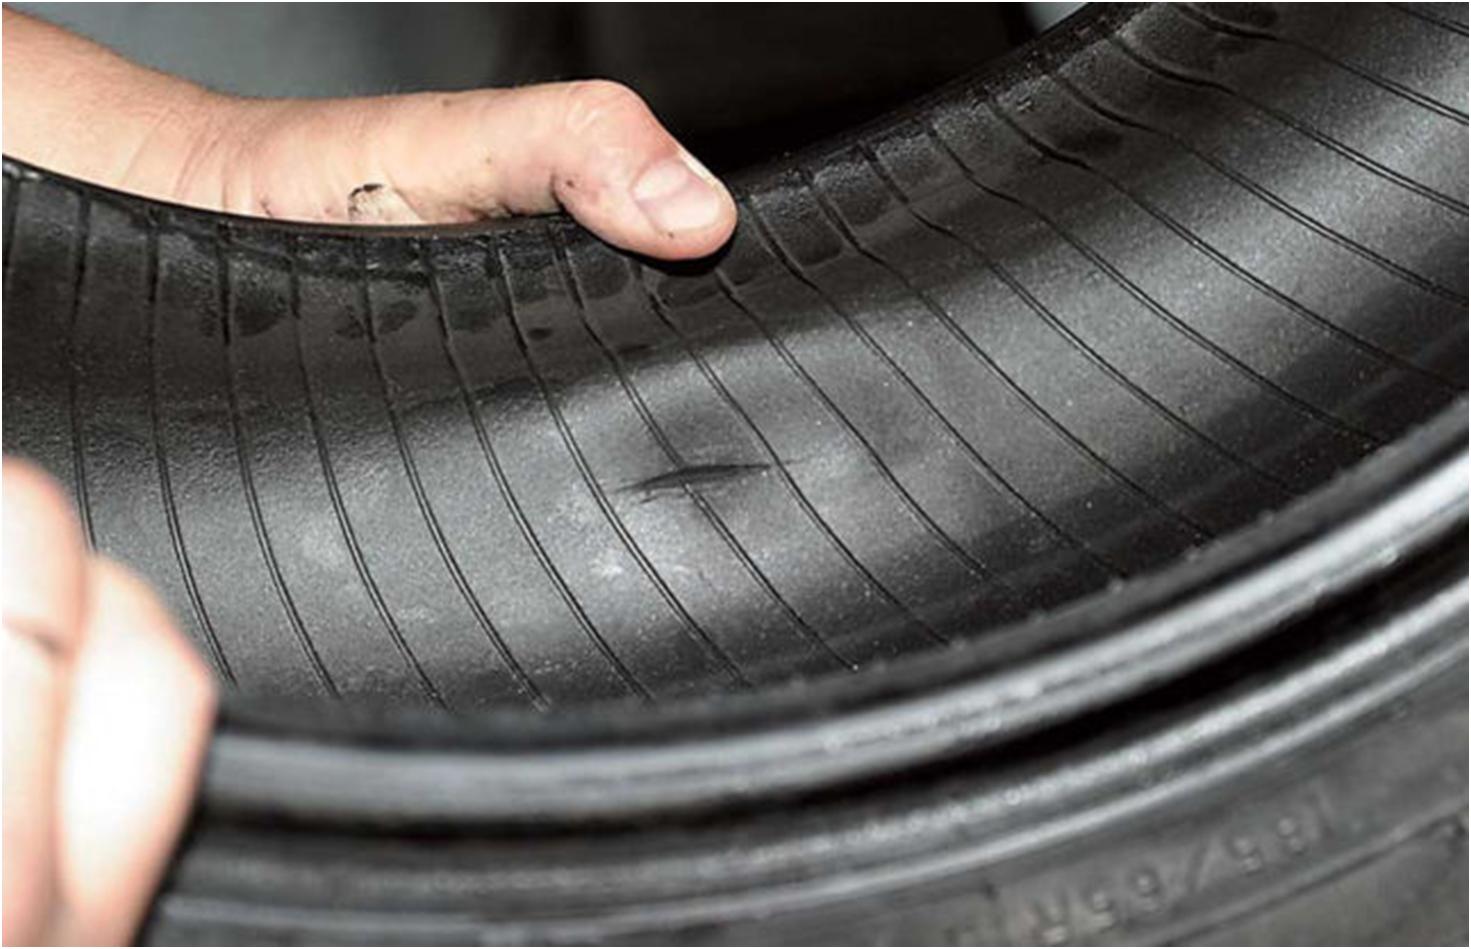
At the beginning of this article I mentioned having a flat tire on a mission, and that we had several options available to us to repair the flat in that situation. We could’ve patched the tire with a plug or worm, but it would’ve taken a little while to locate the exact cause of the leak and make the repair. We could’ve changed the tire, except we didn’t carry a spare tire on board any of our UTVs.
We could’ve dismounted the tire and put a new inner tube into the existing tire, but that would’ve required finding a lug wrench, jacking up the vehicle, and then replacing the tube. Well, we did have a spare inner tube, but we realized we didn’t have the lug wrench with us, and we didn’t have a jack, so this type of repair would take some improvising and a fair amount of time. We might’ve been able to take a good tire/rim from one of the ATVs and mount it on the UTV temporarily, but, again, we didn’t have the lug wrench or jack with us.
Above: High-lift jacks are particularly useful off-road with high-clearance vehicles. They have a wide range of articulation, and in addition to lifting they can push, pull, winch, and clamp.
In the end, we first set in motion our Plan B. We sent two of the four vehicles we had to retrieve the spare tire, jack, and lug wrench from our staging point along the paved road. As our Plan A, we went with the fastest and easiest short-term fix — we used the small air compressor we had on hand to add air to the tire. We had to fill it several times along the way, but it gave us several minutes of drive time between fillings. This was enough to get our subject to the ambulance waiting along the paved road. Admittedly, the process would’ve gone a lot faster if we’d had a couple more tools with us. But what we did have — a layered mission support plan and knowledge of multiple alternatives — allowed us to find a solution that worked for us in the moment. Knowledge is power, and being knowledgeable about what tools are available to repair damaged tires can go a long way to keep you rolling down whatever roads you choose to travel.
In issue 12, Offgrid Magazine took a hard look at what you should be aware of in the event of a viral outbreak. We're now offering a free digital copy of the OffGrid Outbreak issue when you subscribe to the OffGrid email newsletter. Sign up and get your free digital copy
Written by Joey Nickischer
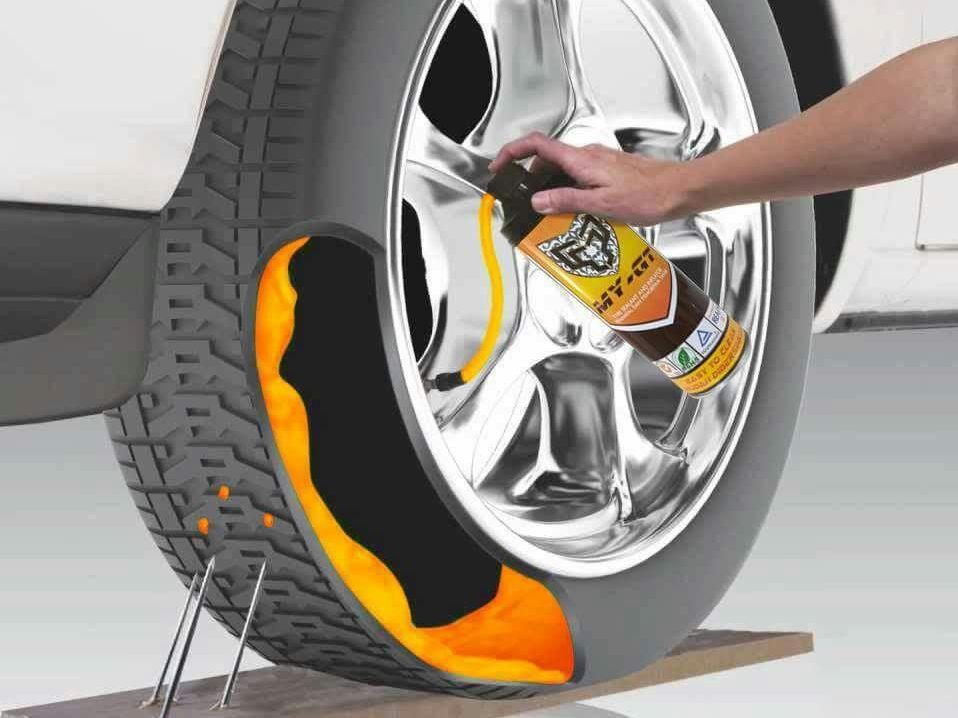
Technological instruction for tire repair using the cold vulcanization method
Technological instruction for tire repair using the cold vulcanization method contains complete information on how this repair is carried out.
The manual has an introduction which includes:
In addition, tire and tube repair instructions include:
First of all, let's consider the structure of a car tire.
Car tire design
All types of car tires are very similar in design. Modern tires also consist of a special rubber-cord shell, a toroidal chamber, and a rim tape.
In working condition, under a certain pressure, the chamber is filled with air. There are also tubeless tires that have a special sealing layer instead of a tube. Usually, a car tire works in rather difficult conditions. And for this, it must be characterized by elasticity, wear resistance, and high strength. In addition, tires must resist tread wear very well, and be able to withstand very complex deformations.
There are different types of tires in which the material and construction are quite different.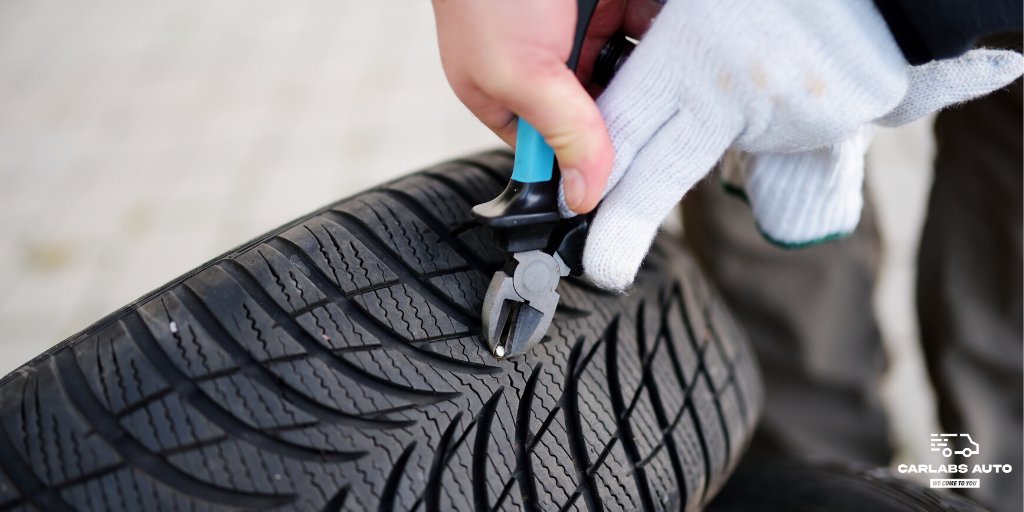 Passenger car tires are very different from tires that are designed for truck tires. Such tires have an elastic carcass, a different tread pattern, lower height and diameters.
Bias tires are presented in the form of crossed cords, as a result of which they are located at a certain angle. Thanks to this direction, excellent distribution of all forces during tire deformation and excellent shock absorption strength are ensured.
The design of radial tires is that the cords are located radially along the profile of the tire from one bead to another, as a result of which each layer of the cord does its work independently.
Tire configuration is quite complex, it includes several elements. The main part is the carcass, which perceives the loads that act on the tire. The main load that can act on a tire is the weight of the car, as well as the weight of the passengers or cargo that is carried in the car. This element must be strong enough and elastic.
The shape and number of plies are determined by a calculation that takes into account the air pressure, the purpose of the tire and its type, and the load.
The air cavity in the tubed tire is created by the sealing chamber. It has a valve that pumps, holds and bleeds air.
In a tubeless tyre, the air cavity is created by the tire as well as the wheel rim. With the help of a sealing layer of rubber, which is applied to the inner surface of the tire, excellent sealing is achieved.
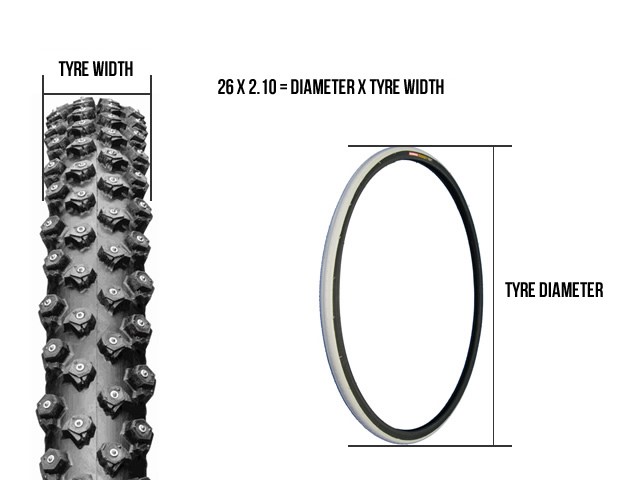
Any tire has a special designation that shows its dimensions. In most cases, these dimensions are indicated on the side of the tires, and are indicated by two parameters.
Car tire marking
These parameters are:
For radial tyres, the second number is followed by an "R".
It should be noted that usually there is such a marking on the tire:
Different materials are used to make tires. Tubeless and tube tires are made of rubber, metal cord, wire or cord technical fabric. In most cases, tires are made of rubber, which is based on synthetic rubber. Chambers are also made of rubber, and rim tapes are made on the basis of reclaimed car tires.
The production of tubes and tires consists of many different processes. Tire manufacturing is the most difficult of these moments. First of all, rubber, rubber compounds, treads, fenders and other parts that are necessary for assembling and forming a tire are prepared.
Repairing tires with special cold vulcanizing patches is a rather complicated process.
When repairing radial tires, visually inspect them. If you see some damage in the marked area, such a tire cannot be repaired. After inspection, carefully cut out the damaged rubber with a knife. After that, with the help of wire cutters, you can remove the damaged cord wire. Safety goggles must be worn when performing such work.
Before you work on the tire, dry it thoroughly in a drying chamber. The ends of all cracks that exist should be made round using a special sharpened tube.
Damage to a car tire
Use a cut-off wheel to cut off the funnel of damage, and only then work the rubber with a roughening ring. The surface of the rubber you have processed should not be smooth.
The rubber must not burn during the processing. Then the surface of the place where there was damage should be treated with a wire brush on the outside, as well as inside the tire.
Use a vacuum cleaner to remove all dust and crumb rubber. In this case, never use cleaning that is carried out with oil or moisture.
Now measure the exact size of your injury, choose a special patch, and mark its number on the tire with chalk.
Next, thoroughly mix the thermal solution, and apply it to the surface of the tire funnel. Let the tire dry for one hour. To check the drying, you can test the back side with your finger, as a result there should be no sticking. After the first layer is dry, you can confidently apply a second layer of mortar, which will dry for 15 minutes.
To fill the damage funnel, cut strips of raw rubber, the width of which should be 10-15 minutes, then heat them on a special stove. An extruder can be used to speed up this process.
Fill the funnels with heated rubber, and cover the funnel with wet rubber pads, then roll them in with a toothed roller. All irregularities should be trimmed with a knife, but the wet rubber level should be greater than the overall surface level.
Tire repair
Special lines ensure that the vulcanizer heater is centered on the area you are repairing.
Now we treat the surface of the funnel with Thermal Mortar and cover it with heat-resistant foil from the outside, as well as inside the tire.
After that, start curing, which consists of:
 thickness.
 Before you begin to install the patch, carefully check the quality of the rubber at the place of repair. To do this, remove the layer of welded rubber, and if you see a lot of air bubbles, you need to vulcanize again.
To install the patch, guide lines should be made to help center the patch on the repair site. Install the patch on the inside of the tire at the repair site so that the special lines on the tire and also on the patch are completely aligned.
Work the inside of the tire with a wire brush and position it so that the area you repaired is on the side. The tire should dry for 15 minutes.
Bias repair also has its own characteristics.
First of all, cut out the funnel-shaped defects at the repair site so that all layers of cord are removed. After that, dry the tire with a dryer.
Treat all damage with Liquid Buffer Cleaner and remove debris. Now round the cracks with a special sharpened tube. The surface must be rough. Vulcanization must be carried out using the Minimaster vulcanizer.
After the tire has completely cooled down, you can start installing the patch.
See also: 5 best manufacturers of car wiper blades according to the REMONTO5.RU project Author:
Ravil Salikhov
COMMENTS: (0)
* When taking tires for repair, carefully check their general condition. Explore all tires for hidden defects. Particular attention must be paid on the condition of the boards.
* To achieve a quality repair the following conditions are required: - organized in accordance with sanitary standards and workflow process places; - appropriate lighting sanitary standards; - past training and certification of personnel; - all materials must be recommended for use by the company “Thermopress” and tested for compliance with the warranty term. - storage of materials and equipment must be carried out with compliance with the relevant requirements, set out in the accompanying instructions and accompanying documents.
* The manufacturer reserves the right to any changes for the purpose of technical improvements.
* When choosing plasters, tools and equipment, use valid tables and instructions.
Attention: For car repair tires by hot vulcanization should use special thermocouples with black adhesive layer and index "t°" in designation.
Safety note:
* When working with tools, observe the requirements of the relevant regulations for safety, where it is necessary, use protective equipment such as safety goggles, gloves, respirators, etc.
* When handling solutions, observe safety measures indicated on the labels, exhaust ventilation is required.
* Operate only on serviceable equipment, use the correct tool.
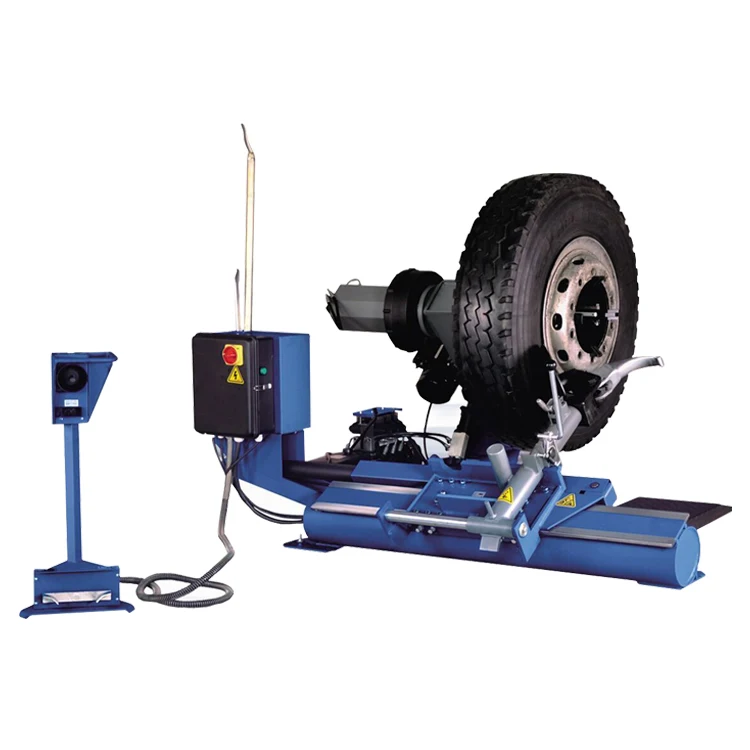
For car tire repair hot vulcanization recommended use vulcanizers "Complex""
Solutions listed in this manual can be supplied in packaging other than from that listed in the catalog.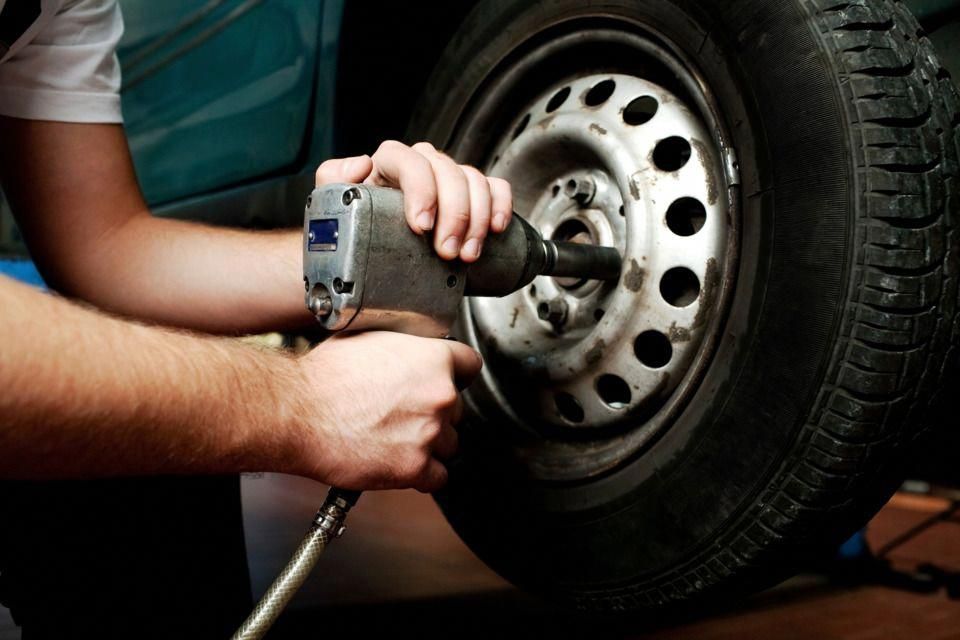
This manual introduces repair work that is carried out on the sidewall. Running track and tire shoulder are being repaired similarly.
1. When taking tires for repair, carefully check their general condition. Explore all tires for hidden defects. Pre-determine maintainability tires, for this measure the dimensions damage, and according to the table previously select patch number.
Measure the distance from the edge of the damage to the edge of the tire bead. The size must be greater than or equal to the value specified in the patch selection table.
If the damage exceeds allowable standards, then repair the tire it is forbidden.
2. The tire must be be dried thoroughly. Tire drying it is recommended to produce in a dry heated room. To speed up allowed to dry the damaged area a lamp or a jet of heated air using a fan heater (art. no. 05 010), while heating must not be allowed rubber above 80 ° C.
Wear safety goggles!
3. Treat the damaged area with inside and outside cleaner Liquid Buffer and use a scraper to remove pollution.
4. Cut out the damaged rubber with a knife or cap cutter (art. no. 04 008…04 0012). Remove damaged cord ends (Fig. 2). When repairing a treadmill remove loose, damaged or rusty breaker wire with wire cutters.
5. Round off the ends of the cracks with sharp pin rougher (art. no. 04 110) or a specially sharpened tube.
6. Treat the damage funnel in steel cord zone with a cut-off disc (art. no. 04 420) (fig. 3) or grinding cone (art. no. 04 400) and then process rubber surface with a rougher rings (art. no. 04 160) so that cup-shaped funnel (fig. 4)
ATTENTION! Finished rubber surface should be rough (by no means smooth). During processing, do not burn rubber, for this final roughening perform at low tool speeds (up to 750 rpm)
7. Properly Prepared Funnel damage (Fig. 5).
ATTENTION! Do not contaminate the stripped surface and do not treat with cleaner Liquid Buffer.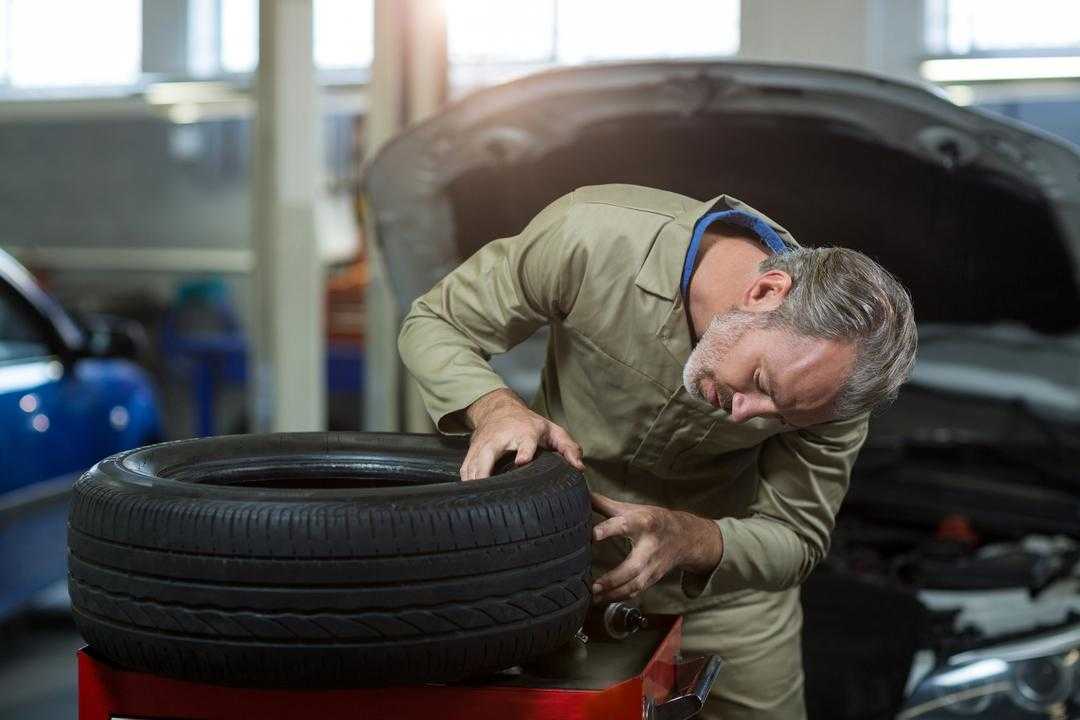 Do not allow intermediate storage to avoid contamination and surface oxidation.
8. Measure the size of the damage. At repairing bias tires find the number PR (number of cord plies) indicated on tire sidewall. Choose the one you want patch in accordance with current tables and mark the patch number on chalk tire. To calculate the time vulcanization measure the maximum wall thickness at the site of damage and make a mark on the surface of the tire.
9. For the correct installation of the thermal patch swipe on the inside of the tire in the center of the place of repair auxiliary lines in radial and axial directions (Fig. 6). When repairing the sidewall of the diagonal tires must use special side patches with the index “B”, which allow you to install them closer to the edge sides. For ease of use, spread tire bead with bead expander (art. no. 06 003).
10. Apply in the center of each side patch auxiliary lines (Fig. 7).
11. Install the thermal patch (arrow in the direction of the edge of the bead) to the inner side of the tire at the point of damage so that so that the auxiliary lines on the bus and patch matched. Circle the thermal patch along the contour with an allowance of 5-10 mm
12. Cases of damage. Sketches 8 a, b, c show the installation of a thermal patch on the principle of alignment of the center of damage and the center of the thermal patch. Sketch 8 g shows the possibility of repair damage near unrepairable zones, while the center of damage is not coincides with the center of the thermal patch. IN In this case, the edge of the patch should overlap as close to the edge as possible sides.
13. On the inner surface of the tire in repair site must be carefully Apply Liquid Buffer Cleaner to area larger than the selected thermal patch, carefully remove dirt with a scraper (art. no. 04 022). At the same time, avoid getting Liquid Buffer on the treated surface funnels (see warning to item 7).
Rotate the tire so that the repair turned sideways, and give dry for 10-15 minutes.
14. Process the tire inside the marked plot (Fig. 9) using contour circle (art.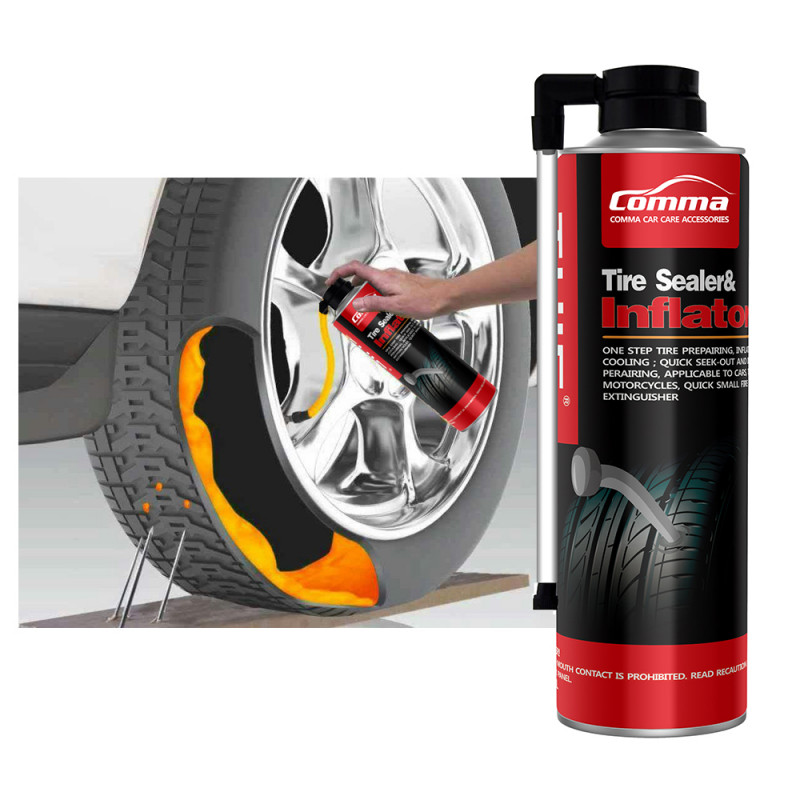 no. 04 300) or round metal brushes (art. no. 04 340). When repairing tubeless tires must be completely removed loose sealed layer to a layer of dense rubber.
ATTENTION! Processing very carefully so as not to damage cord threads.
15. Remove dust and crumb rubber inside and outside the tire at the point of repair using sweeping brush or vacuum cleaner (Fig. 10).
Do not clean with compressed air containing oil or moisture.
16. Check the quality of the rubber layer on treated area. Completely remove soft, rolling when peeled off rubber particles.
ATTENTION! Finished rubber surface should be rough (by no means smooth). During processing, do not burn rubber, for this final roughening perform at low tool speeds (up to 750 rpm) with a wire brush (art. No. 04 340).
17. Apply evenly to the prepared for installing thermal plaster surface tires first layer of thermal solution (art.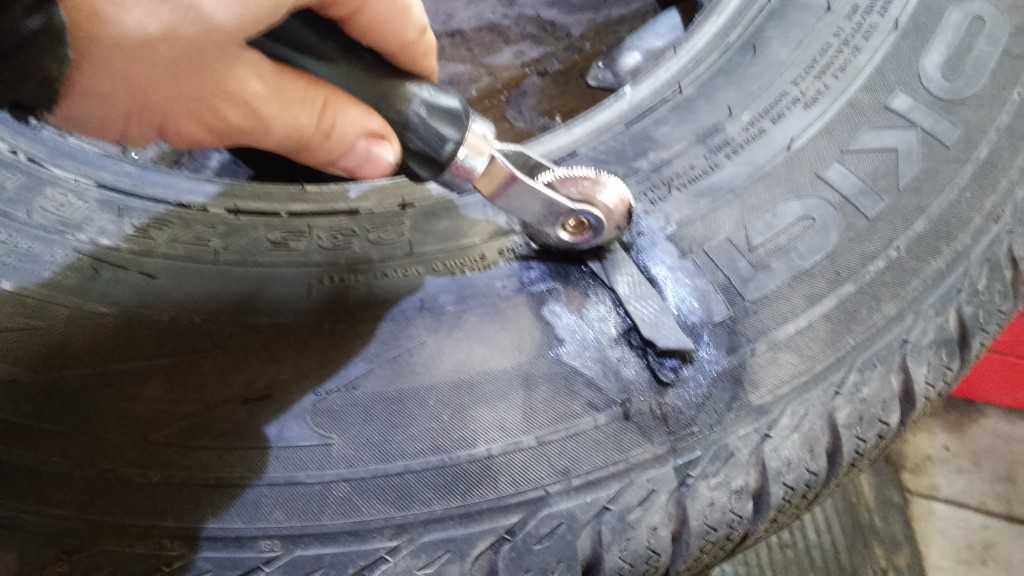 no. 10 600). Drying time - 60 minutes (rear side of the finger - sticking should not be).
18. After the first coat has dried thermal solution on the surface of the tire apply a second layer. Drying time of the second layer 15-20 minutes (sample back side finger should feel light adhesion). For timing use timer (art. no. 11 001)
19. Remove the protective film from the side adhesive rubber from the middle approximately 5-7cm in both directions (protective film from the top side of the thermocouple must be left).
20. Remove the onboard expander. Patch with free middle zone apply to the place of repair, combining auxiliary lines on the patch and splint. Roll on middle of patch with roller
21. Remove both parts of the protective cover one by one. adhesive films. With and without effort roll the entire surface patch with a roller (art. no. 05 002).
22. When repairing tubeless tires, remote during roughening the sealed layer inside the tire around the thermal patch needs to be restored. For this you need to cut strips of raw rubber (1 mm) and roll them with a roller around the perimeter plaster in such a way as to cover buffed tire surface around patch.
23. Coat the surface of the funnel with two thermal solution layer (art. no. 10 600). Time drying - 60 minutes (sample with the back side finger - sticking should not be). After the first layer has dried, apply second layer. Drying time of the second layer 15-20 minutes (test with the back of the finger you should feel a slight stickiness) (Fig. 12). To keep track of time, use timer.
ATTENTION! To reduce the time the first layer is allowed thermal solution simultaneously to the surface under the patch and on the damage funnel.
24. To fill the funnel damage tires cut strips of raw rubber (3mm) 10-15mm wide and heat them for special plate (art. no. 11 011) (Fig. 13).
25. Do a serial filling the funnel with strips of raw rubber (3mm), carefully rolling them to each other with the help of roller, preventing the formation of air bubbles (Fig.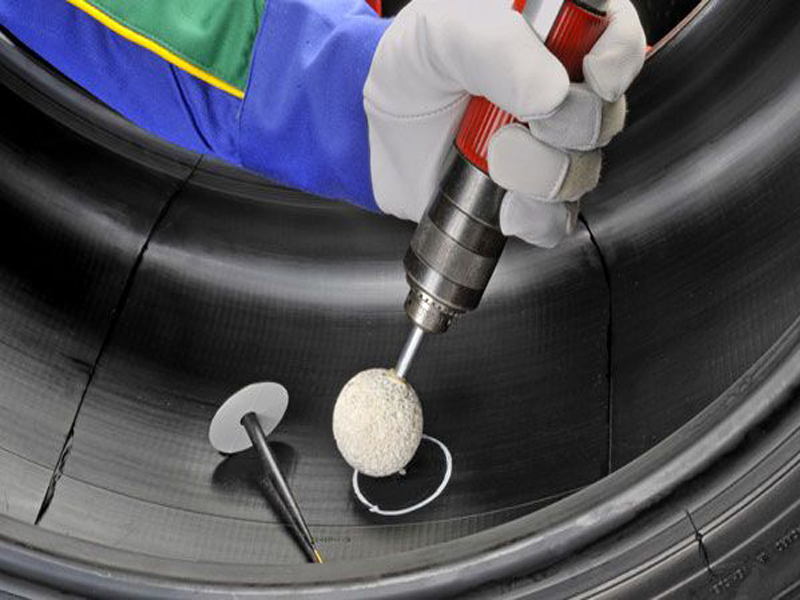 14).
14).
26. Trim the bumps with a knife, while the level of crude rubber filling funnel, must exceed the overall level tire surface by at least 3 mm for tires L / A and 5 mm for tires G / A (Fig. 15).
27. Vulcanize the site repair with vulcanizers "Complex-1", "Complex-2" or "Complex-3" providing mode simultaneous vulcanization of the patch and funnel damage.
Follow instructions for the operation of vulcanizers!
Tire curing time at temperature vulcanization 140 ° C develops from: - 30 minutes to warm up heaters - 5 minutes each millimeter of tire thickness, taking into account the thickness patch. - when repairing tractor and all-terrain tires with a deep profile it is necessary to increase the curing time by 50%.
28. After the curing regimen the tire must cool down under pressure to t = 90°C.
29. Remove repaired tire from the vulcanizer.
30. After vulcanization check the quality of the repaired surface.