While there are three main types of tire valves: rubber snap-in, high-pressure snap-in, and high-pressure metal clamp-in; which type is appropriate for the application depends on the vehicle, required tire inflation pressures, driving circumstances, and wheel design. The Tire and Rim Association in the United States have given valve design numbers to different types and sizes of valves.
Valves can be installed in any position on the wheel, from horizontal to vertical, to match the wheel’s appearance. To accommodate valve-mounted tire pressure monitoring system transmitters, the most common valve alignment is almost horizontal, employed by many wheel manufacturers.
While tire valves can operate at any angle, valves mounted on a vertical axis and used at high speeds are more prone to lose pressure because of centripetal forces pushing the valve core and enabling air to escape. In our guide, you can find all valve stems the same size and which sized tire valve stem sizes fit your wheels.
By the end, you’ll see it’s much easier to get the right tire valve stems when you use a valve stem size chart. (Read Drywall Screw Sizes Chart)
It used to be that if the tubeless valve stem fit the hole in the wheel, it was the right one. This isn’t true, but it’s what they thought at the time. Today, that assumption could cause a lot of problems.
The tubeless valve stems that are in use today haven’t had many problems over the years. The huge popularity of tubeless tires today is proof that they work well and that the valve stems they need work well, too.
Increased inflation pressures and higher speed limits make selecting the proper valve stem extremely important.
Light truck owners have told the International Tire and Rubber Association (ITRA) that their tires suddenly lose air, sometimes when they’re going at a high rate of speed. It turns out that these people were using the wrong valve stems.
In light-duty trucks, most of the complaints are about snap-in valve stems on tires with ply ratings of up to 95 pounds per square inch.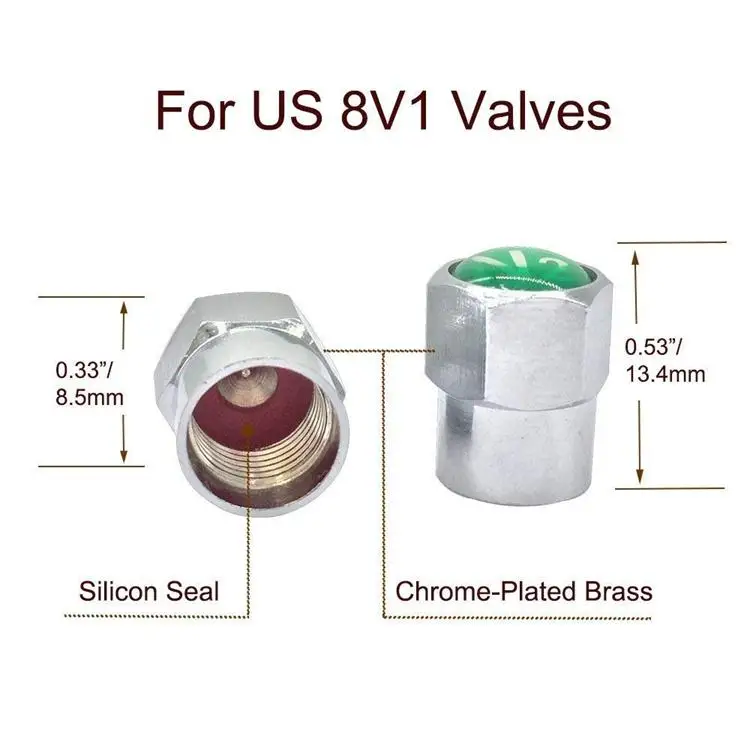 Most of the problems are with TR413 or TR15 series valve stems (6.6 bars).
These tires are now called medium- or even heavy-duty truck and bus tires because they have a lot of plys and are made out of steel. But because they can carry a lot of weight, some tires are still made in the sizes we used to think of as commercial light truck tires.
It’s sometimes the same size as the valve stem hole in a wheel for a passenger car. First, the TR413 series valve stems were designed to handle inflation pressures up to 60 pounds per square inch (4.1 bars).
However, they can only handle 65 psi (4.5 bars). Many old catalogs still in use say that the valve stems in the TR413 and TR415 series can only be used at 60 psi. This is not true.
One of the most likely problems you may encounter with the TR413 and TR415 series valve stems at any inflation pressure above 65 psi is the vale stem running at a higher than average temperature due to hot weather or other similar condition.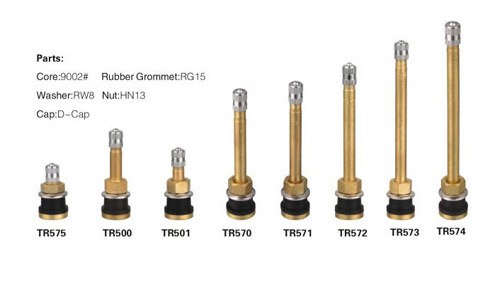
This can cause the valve stem to crack, blow out the rim hole, or become unseated.
In most cases, this can be fixed by replacing the old valve stem with a TR600HP or TR801HP high-pressure snap-in valve stem. These valve stems can handle up to 100 psi (6.9 bars). Another good idea is to use a metal valve stem that can be clamped in and has a 200 psi rating (13.8 bars).
The TR600HP and TR602HP valve stems have holes that are .453 inches wide. The TR801HP and TR802HP stems have holes that are .625 inches wide. (Learn How To Test Water Heater Element)
On wheels with stem holes that are more than .156 inches thick, the TR413 valve stem should not be used because it has a lower pressure.
The TR600HP high-pressure valve stems can only be used on wheels with a stem hole thickness of less than.205 inches. The TR602HP, TR801HP, and TR802HP valves all have the same tolerance.
Metal valve stems must be used when the rim thickness at the stem hole is more than .205 inches.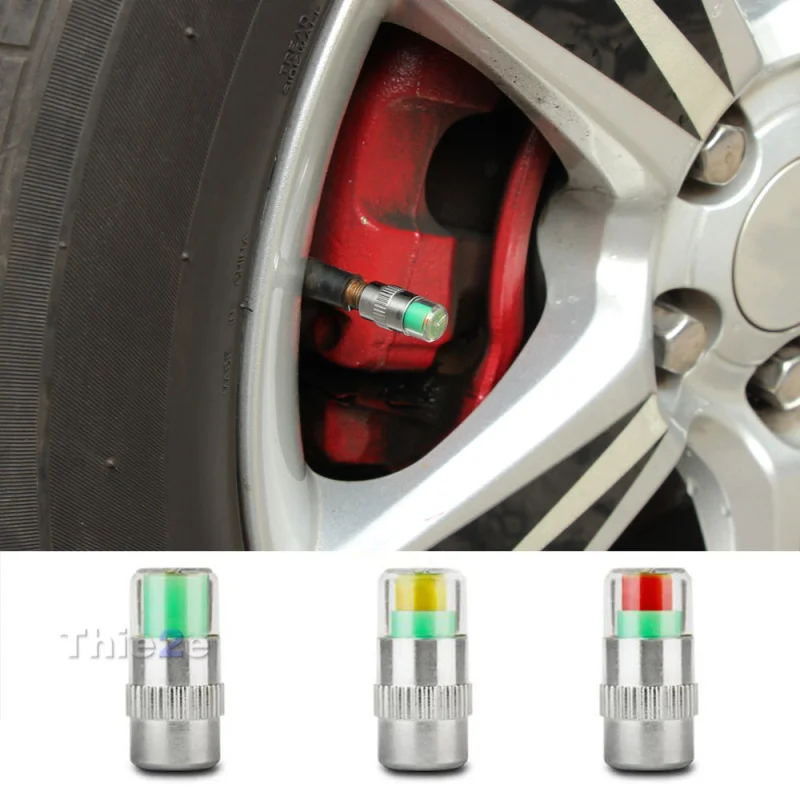 If the area around the hole is coined meets the requirements, the wheel can be thicker. However, you should use the stem that fits the wheel’s stem hole.
Metal valve extensions should never be used with the TR600HP and TR801HP series snap-in valves as the centrifugal force generated at high speeds by the added weight of the metal extension can break or crack the stem, causing it to unseat and result in a loss of air.
This can probably occur even if the inflation pressure is within the limits of the snap-in valve stem.
Only plastic extensions should be used on snap-in valve stems from the TR600HP or TR801HP series, which have snap-in parts. If you have valve stems that can be clamped into place with metal, you only need extensions made of metal. The metal extensions should not be longer than is necessary.
If a car is going to be used both on and off the road, it’s always best to use clamp-in valve stems made of metal that are as short as possible.
A lubricant that isn’t made from petroleum should be used on all snap-in valve stems before they are put in the stem hole.
In addition, the stem hole should be checked to make sure there are no sharp edges or metal slivers that could damage the stem. There should also be no rust, excessive paint drippings, or other buildup on the valve stem seating area.
If you follow procedures according to industry standards and still have problems losing air through the stem hole, check the specifications for the stem hole in the wheel, including the prementioned thickness limitations.
It might not be big enough to machine or coin around the stem hole on some wheels with a.453-inch stem hole. On this type of wheel, the coined area must be at least.125 inches bigger than the valve hole.
The Tire and Rim Association Yearbook has all the information you need about specifications. You can also ask your suppliers for help.
Never assume that the stem on the tire/wheel assembly you’re working on for a customer is the right one, even if it looks like it.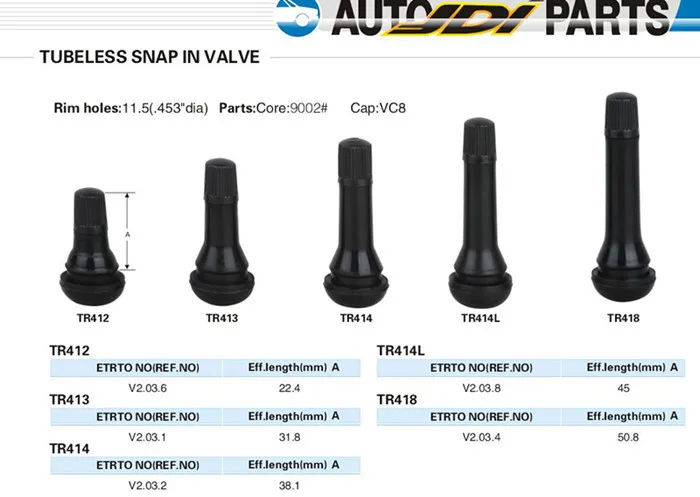 (Learn How To Clean Concrete Without Pressure Washer)
Someone who handled the tire/wheel assembly before you may have made a mistake or failed to fit the valve stem to the hole size, air pressure, or application. Installing the right stem can be as important as matching the wheel parts on a wheel with a lot of parts.
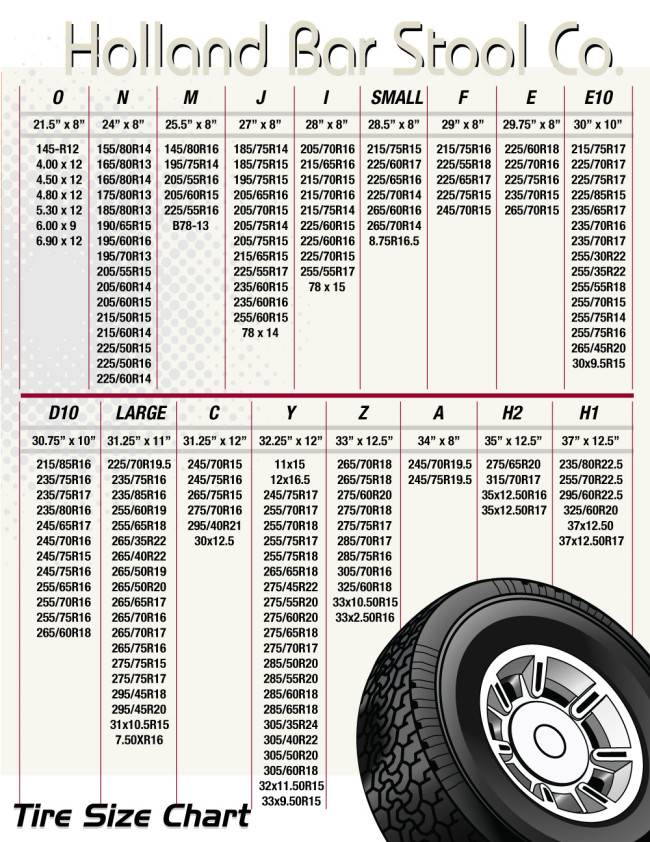
While there are no real standard sizes, here are some examples of valve stems you can find.
TR13
TR15
 618 and 0.633-inch rim hole.
TR 300
TR JS2
TR6
JS 89
Here are a few different varieties of valve stem types outside the above basic types.
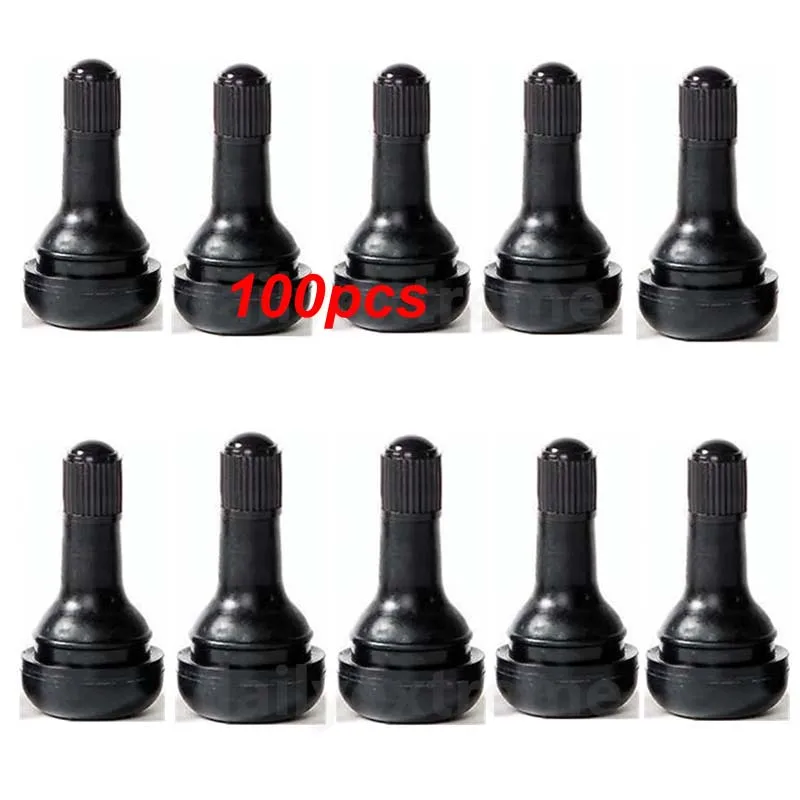
Tubeless rubber snap-in valves have a maximum cold tire inflation pressure of 65 psi. They are suited for passenger cars, light-duty trailers, and light trucks, as well as autocross competition.
Rubber snap-in valves with effective lengths ranging from 7/8″ to 2-1/2″ accommodate either.453″ or.625″ diameter holes in the rim. (Find the Best Pressure Washer)
While most rubber snap-in valves have a plastic cover, some have chrome sleeves and metal caps to match the look of a custom or alloy wheels.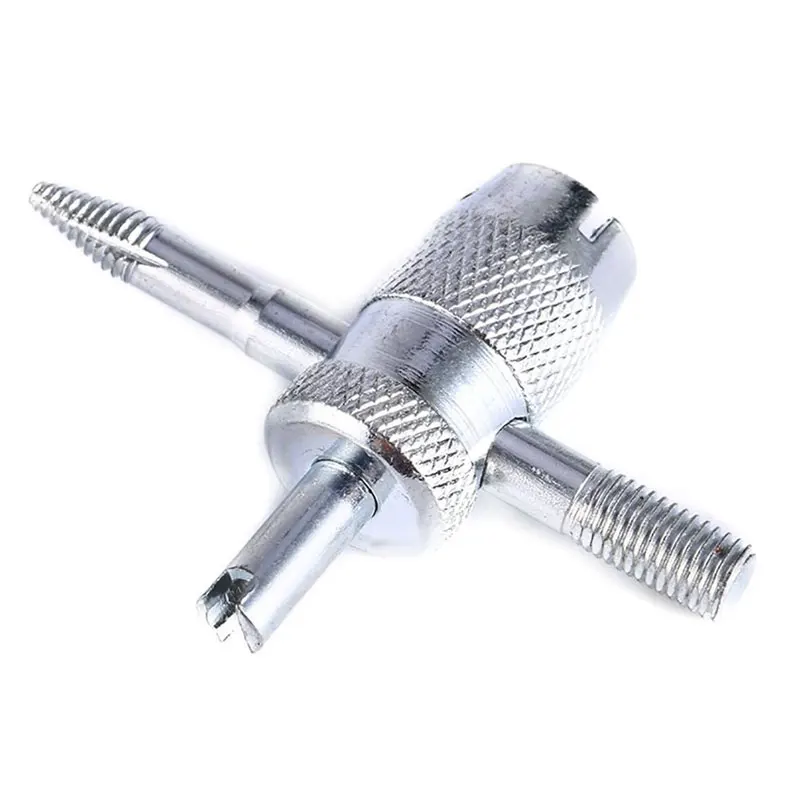
| Industry Valve Number | Max Inflation Pressure (PSI) | Effective Length (Inch) | Hole Diameter in Wheel (Inch) |
|---|---|---|---|
| 412 | 65 | 0.88 | 0.453 |
| 413 | 65 | 1.25 | 0.453 |
| 414 | 65 | 1.50 | 0.453 |
| 415 | 65 | 1.75 | 0.453 |
| 418 | 65 | 2.00 | 0.453 |
| 423 | 65 | 2.50 | 0.453 |
| 415 | 65 | 1.25 | 0.625 |
| 425 | 65 | 2.00 | 0.625 |
Tubeless high-pressure snap-in valves are designed for medium and heavy-duty trucks and trailers and must be used when the recommended cold tire inflation pressures exceed 65 psi.
The maximum cold inflation pressure for.453″ rim holes are 80 psi, whereas the maximum cold inflation pressure for.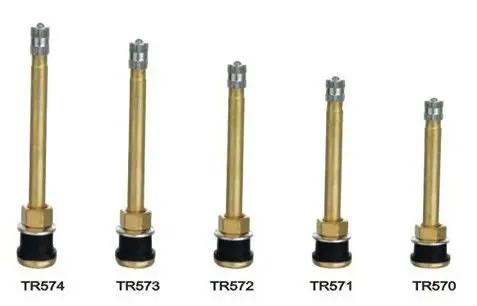 625″ rim holes are 100 psi.
In steel wheels, high-pressure snap-in valves have a thicker rubber base with a metal barrel and a plastic cap. This type of valve is often found in these types of wheels. There are effective lengths that range from 1-1/4″ to 2″ long.
| Industry Valve Number | Max Inflation Pressure (PSI) | Effective Length (Inch) | Hole Diameter in Wheel (Inch) |
|---|---|---|---|
| 600HP | 80 | 1.27 | 0.453 |
| 602HP | 80 | 2.00 | 0.453 |
| 801HP | 100 | 1.31 | 0.625 |
| 802HP | 100 | 2.00 | 0.625 |
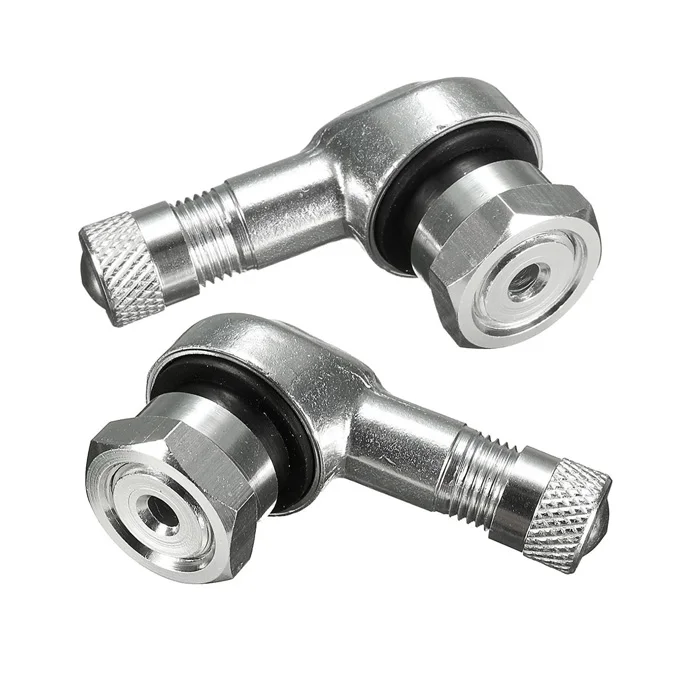
High-pressure metal clamp-in valves can be used with almost any wheel. They are recommended for all track activities and when the speed of the vehicle is going to be more than 130 mph.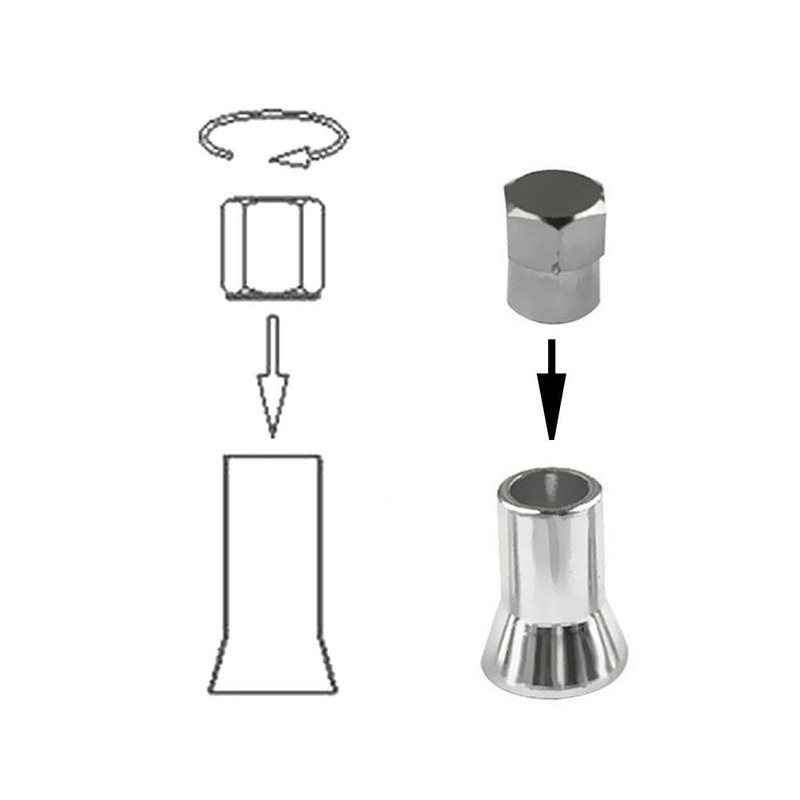
When the retaining nut on metal clamp-in valves is tightened, a rubber grommet seals against the wheel.
While metal clamp-in valve design and styling can result in retaining nuts being hidden inside the wheel or visible outside, those with the retaining nut on the outside have the advantage of examining and modifying retaining nut tightness without having to remove the tire from the wheel.
Metal clamp-in valves have a maximum operating pressure of 200 psi and are available in rim sizes 0.453″ or 0.625″, as well as custom sizes like 6mm (.236″) or 8mm (.315″).
In addition, metal clamp-in valves have a metal cap available in straight or bent configurations to fit wheels with unusual forms.
They have effective lengths ranging from flush to 2″ and in straight or bent configurations to fit wheels with unique geometries. For racing applications, low-profile and lightweight alloy clamp-in valves are also available.
Regardless of valve type, the valve core is the primary sealing component and should be fitted snugly into the valve core chamber.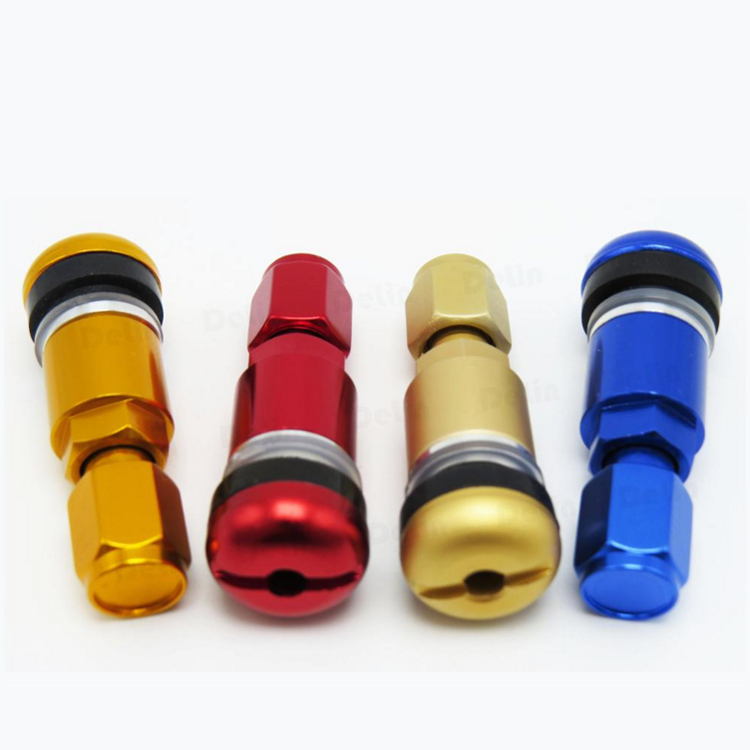 Valve cores are available in two lengths: short and long, with the latter being favored for high-performance applications.
Valve cores are offered in nickel-plated and brass finishes. A valve stem will experience galvanic corrosion if a standard brass valve core is used in aluminum; the brass valve core will eventually seize in the valve’s aluminum barrel.
Nickel-plated valve cores must instead of brass valve cores in the aluminum valve stems of tire pressure monitoring sensors to help avoid galvanic corrosion.
When inflating a tire, all valve cores have a seal coupled to a moveable, spring-loaded pin that permits pressurized air to flow while allowing air to escape when the pin is depressed to unseat the seal.
While valve cores can withstand a working pressure of 300 psi, grit, sand, and moisture must be avoided. Grit and sand may prevent valve cores from properly closing, and moisture can freeze and undermine the seal in freezing conditions.
Valve caps should always be used for various reasons, including high-speed pressure loss and core contamination.
If the cap on tire valve is compromised, the valve cap acts as a backup seal, preventing air from escaping.
While utilizing valve caps may make checking tire pressures in the pits at a racetrack take longer, the consequences of a tire losing pressure are far harsher.
Valve caps come in three different types: plastic dome, metal dome, and a metal “screwdriver” design for tightening and loosening valve cores.
If you want to drive on the racetrack, you’ll need metal valve caps instead of plastic dome caps. This is because racetracks can get very hot, and plastic dome caps can’t handle that.
Valve caps are knurled to make tightening and loosening easier, and some metal caps include hex head designs. To completely seal the valve, metal caps utilize a rubber washer or o-ring.
If the cap on the tire valve cap is missing, squeeze the valve core briefly to release a small amount of air before monitoring or adding air pressure. This will allow debris to be blown out of the valve by the pressurized air inside the tire.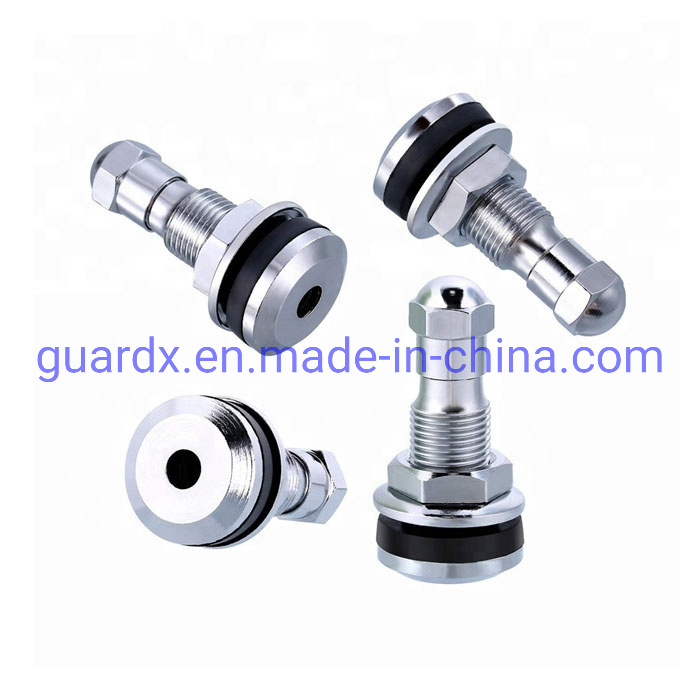
It’s more challenging to avoid wetness because it’s sometimes difficult to get a steady dry air source. Therefore, checking or adding tire inflation pressure outside during a blizzard is not suggested unless required.
Vehicles with wheel covers may also use nylon or metal extensions ranging in length from 1/2″ to 2″ to facilitate checking and adjusting tire pressures easier.
Mud, ice, and snow have packed into the tips of the nylon extensions and enable air to escape because they are exposed to the weather.
If the nylon extensions scrape against a curb, the damaged tip can depress the valve core, escaping air. Ideally, tire valves of adequate length or metal extensions threaded to take a valve cap should be used.
Tire valves should be inspected and changed if any cracking emerges. Rubber deteriorates with time, and tire valves are not intended to resist degradation throughout the life of two standard tires in typical service.
According to industry standards, tire valves should be replaced whenever new tires are mounted.
While Track & Competition DOT tires may only last a few weekends, the metal clamp-in tire valves should be replaced every other year.
Heat delivered to the wheels from the brakes is much higher than in everyday use, and even any valve type could suffer.
Even if you have these on a light-duty trailer, even if the inner tube or tire is fine, the tire valve could degrade because of the weather no matter how much you use your trailer.
Metal clamps or rubber snap-in valves are used to hold sensors and transmitters in place in many direct tire pressure monitoring systems (TPMS).
The threaded insert at the base of these distinctive metal clamp-in valves accepts the bolt that connects the sensor/transmitter to the valve.
Selecting the Right Valve Stem Not as Easy as It Seems
When tubeless tires first entered the commercial tire market years ago, technicians assumed that if the tubeless valve stem fit the hole in the wheel it was the right valve stem. Today, that assumption could lead to severe problems.
Over the years, very few problems have been associated with today’s tubeless valve stems, and the tremendous popularity of tubeless tires today is a testament to their success and that of the valve stems they require.
At the same time, increased inflation pressures and higher speed limits make selection of the proper valve stem extremely important.
In the last few months, calls have come into the International Tire & Rubber Association (ITRA) from commercial light truck owners complaining of a sudden loss of air in their tires, sometimes at high speeds. One major problem we found is that these individuals were using the wrong valve stems.
Most of the complaints involve light duty trucks with TR413 or TR415 series snap-in valve stems on heavy ply-rated tires that call for inflation pressures as high as 95 psi (6.6 bars). Because of their ply ratings and steel construction, many of these tires are now categorized as medium or even heavy-duty truck and bus tires. But because of their load carrying capacity, some tires are still produced in sizes we formerly considered as commercial light truck tires.
Watch Size and Conditions
In some cases, the stem hole in the wheels for these tires is the same size as the valve stem hole in a passenger vehicle wheel. The TR413 and TR415 series valve stems were originally designed to handle inflation pressures up to 60 psi (4.1 bars). Today, they are rated at a maximum of 65 psi (4.5 bars). Be aware that many old catalogs still in circulation rate the TR413 and TR415 series valve stems at 60 psi maximum.
One of the most likely problems you may encounter with the TR413 and TR415 series valve stems at any inflation pressure above 65 psi is the vale stem running at a higher than normal temperature as a result of hot weather or other similar condition. This can cause the valve stem to crack, blow out of the rim hole, or become unseated.
This can usually be corrected by installing a TR600HP or TR801HP high-pressure snap-in valve stem instead.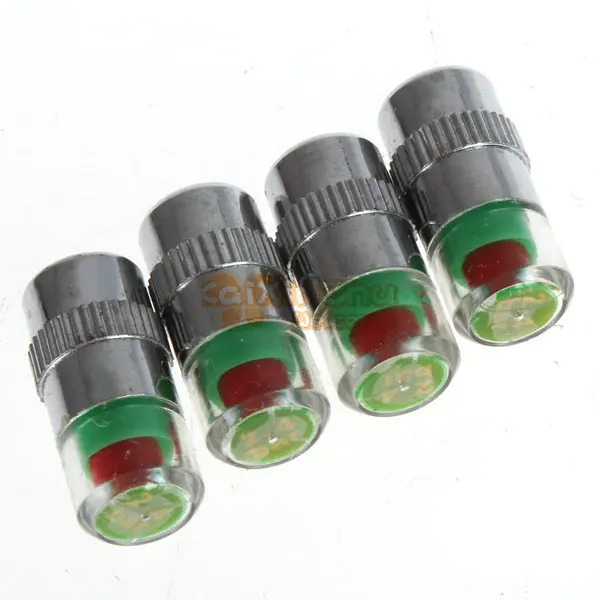 These valve stems are rated at 100 psi (6.9 bars) maximum. Another good alternative is the use of a clamp-in metal valve stem rated at 200 psi (13.8 bars).
The TR600HP and TR602HP valve stems are specified for .453-inch diameter stem holes, and the TR801HP and TR802HP stems are specified for .625-inch diameter holes. The lower pressure TR413 valve stem should never be used on wheels with stem hole thickness greater than .156 inches, while the TR600HP high-pressure valve stem series is limited to use on wheels with a stem hole thickness no greater than .205 inches. This same tolerance applies with the TR602HP, TR801HP and TR802HP valve series.
In any case where the rim thickness at the stem hole is greater than .205 inches, a metal clamp-in valve stem must be used. The wheel can be thicker if the coined area around the hole meets the required specifications. However, you should use the stem specified for the thickness at the wheel’s stem hole.
Using Extensions
Metal valve extensions should never be used with the TR600HP and TR801HP series snap-in valves as the centrifugal force that is generated at high speeds by the added weight of the metal extension can break or crack the stem, causing it to unseat and result in a loss of air. This can probably occur even if the inflation pressure is within the limits of the snap-in valve stem.
Only plastic extensions should be used on TR600HP or TR801HP series snap-in valve stems. Metal extensions are for metal clamp-in valve stems only, and the extensions should be no longer than necessary. If a vehicle will be used on- and off-road where the stems may come in contact with mud, snow, ice or other objects, it’s always best to use sturdier metal clamp-in valve stems as short as possible.
All snap-in valve stems should be lubricated with a non-petroleum-based lubricant before being installed in the stem hole. The stem hole should be carefully inspected to ensure no sharp edges or metal slivers are present that could damage the stem, and that no rust, excessive paint drippings or other buildup is present on the valve stem seating area.
Get the Torque Right
Metal clamp-in style valve stems come in different sizes and lengths to fit nearly any type of wheel manufactured today, but one of the most popular clamp-in valve stems for wheels with a .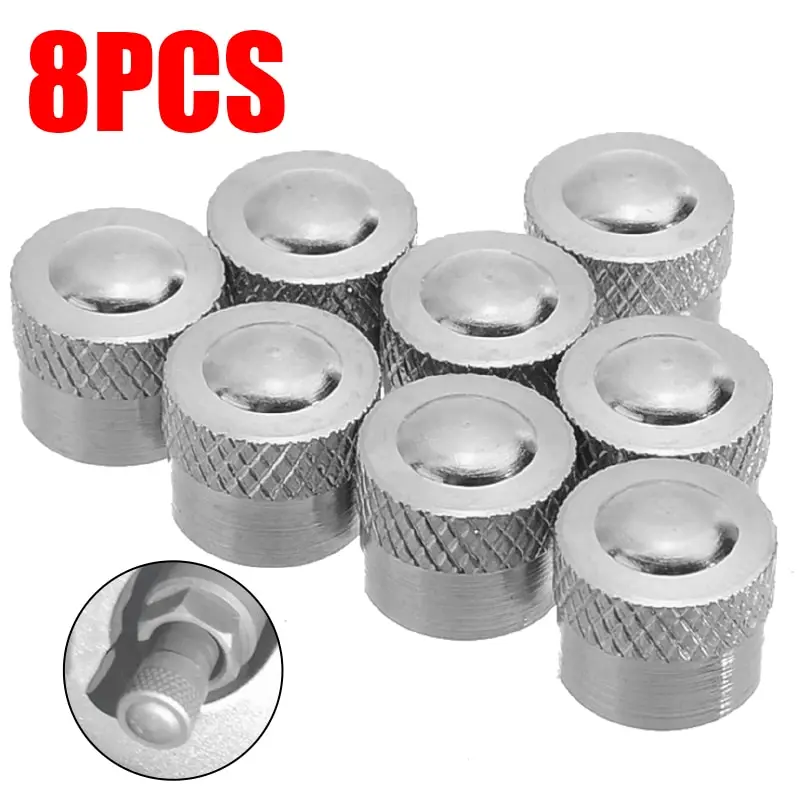 453-inch stem hole is the TR416S. This can be a long-life valve stem because both the sealing grommet and valve core are replaceable if they become damaged or aged.
Care should be exercised when installing the clamp-in valve as each has a specific recommended torque for tightening the nut. For instance, the TR416S has a recommended torque of 24-45 in/lbs.
A good way to get a feel for the right torque is to mount the stem in a wheel and tighten it to the specified value with a torque wrench. Then loosen and retighten it by hand with a hand wrench, and check it with a torque wrench. After repeating this procedure several times, you’ll get very close to achieving the proper torque without excessively over- or under-torquing the nut.
Check Hole Specifications
If you follow procedures according to industry standards and still have problems losing air through the stem hole, check the specifications for the stem hole in the wheel, including the prementioned thickness limitations.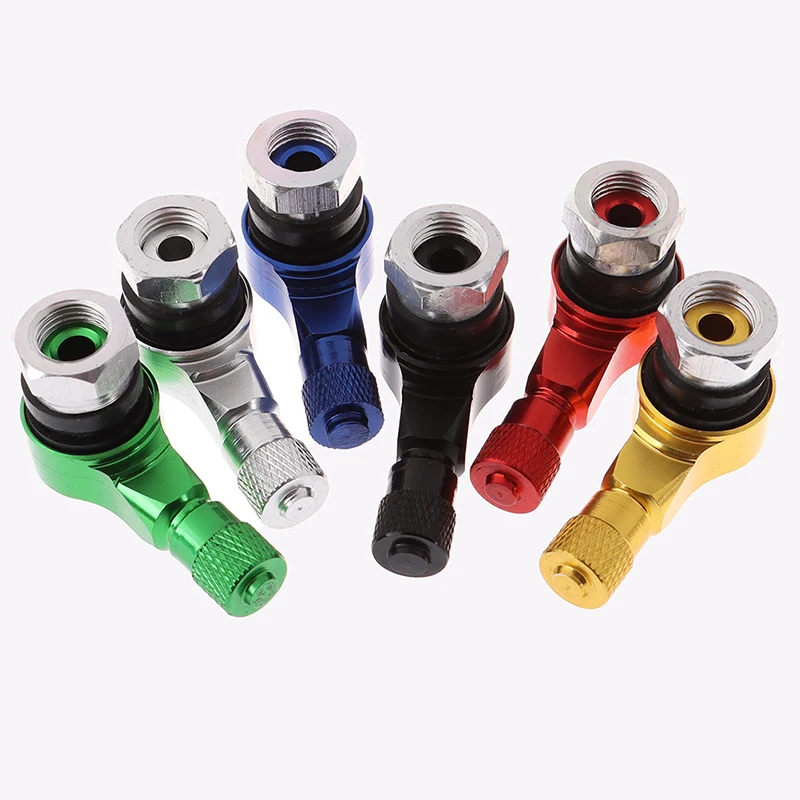 For example, in some cases wheels with a .453-inch stem hole may not have a large enough coined or machined area around the stem hole. On this type of wheel, the coined area must be a minimum of .125 inches greater in diameter than the valve hole. Complete information on specifications can be found in the Tire & Rim Association Yearbook or from your suppliers.
Never assume that the stem on the tire/wheel assembly you are servicing for a customer is the proper stem. Someone who serviced the tire/wheel assembly before you may have made a mistake or didn’t properly match the valve stem to the hole size, air pressure or application. Installing the proper stem can be as important as matching the wheel components on a multi-piece wheel.
Watch For Zippers
Another problem beginning to surface from improper valve stem selection and application is the potential for zipper ruptures in steel cord radial truck tires. More commercial light trucks are being fitted with all-steel radial tires rather than the fabric sidewall plies used in the past.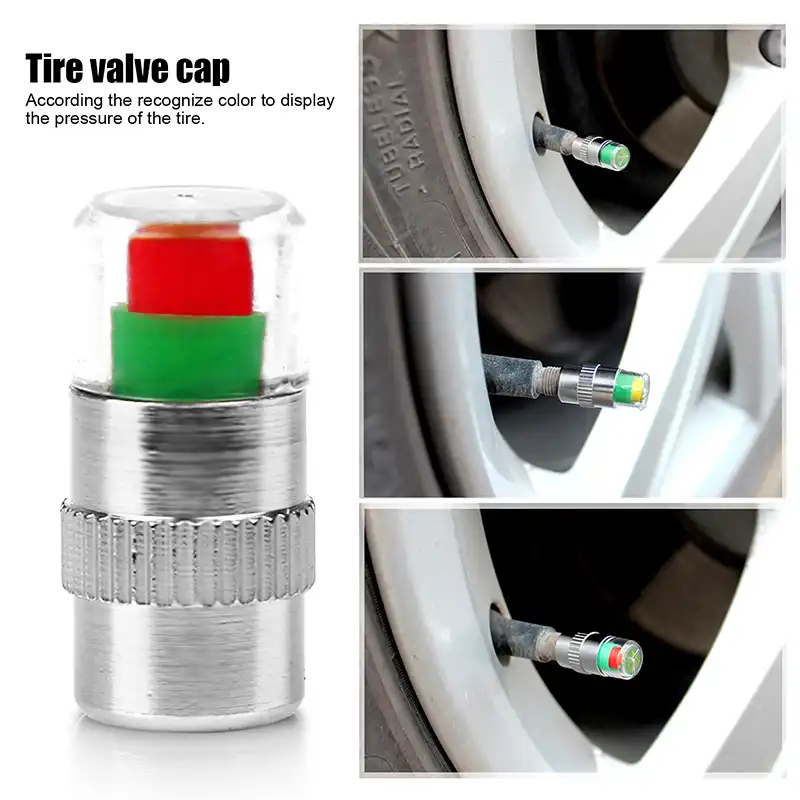 Zippers are not limited to long-haul medium truck tires, and are as dangerous on smaller size tires as they are on larger commercial units.
And remember there’s always a chance of zipper failure when steel cord tires are run underinflated. Don’t take any chances when mounting or inflating these tires. A small light truck tire can be just as deadly as a larger truck tire if it fractures in the sidewall.
Tell your customers that no matter what type of stem they use, there is an air pressure gauge to fit it. It’s a good idea to teach them how to use a tire gauge properly and explain why it is important.
Marvin Bozarth is executive director of the ITRA and a respected expert on commercial tires and service. This article originally appeared in ITRA’s Tire Retreading/Repair Journal. The upcoming World ITRA Expo – Apr. 19-21 in Nashville – will feature a workshop on Proper Tire Valve Selection and Installation.
In this article:
5/5 - (2 votes)
Once you get the hang of fitting tubeless tires, you can change them almost as easily as tube tires.
Tires are one of the most important factors in determining how a bike feels and behaves. Not only do they make a huge difference when it comes to performance, but they are also an inexpensive way to upgrade. The right tires can provide more comfort, more speed, and more puncture protection, and tubeless tires take this concept even further. Switching to better tubeless road tires can result in lower rolling resistance, fewer punctures, and the ability to use lower pressures for more comfort. It also means learning a new skill and understanding how to install tubeless tires.
With the right tools and an understanding of what to expect, installing tubeless tires shouldn't be difficult. Keep reading for tips and tricks for fitting tubeless tires. Very soon, you will be changing tires as easily as traditional inner tube tires.
Contents
Everything you need to install tubeless tires
When it comes to installing tubeless tires, you'll need supplies and tools.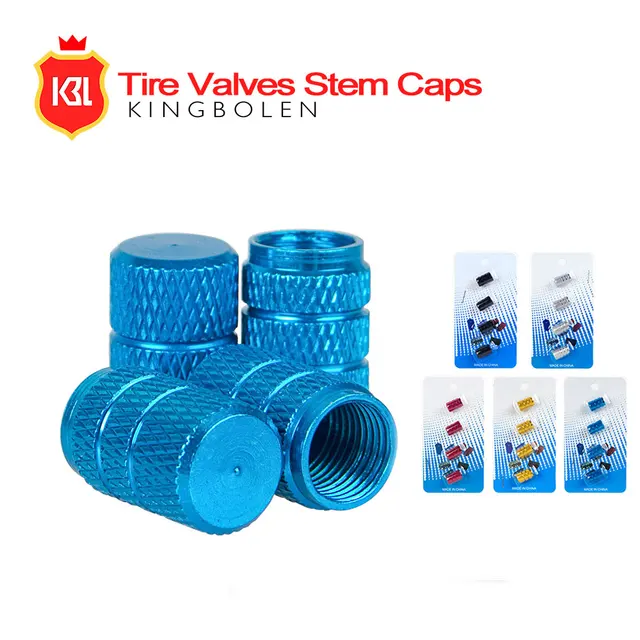
When it comes to tools, there is good news and bad news. The good news is that you may not need all of the tools we have listed below; with the passage of time and the spread of tubeless tires, they are getting better and easier to install. Higher quality wheels, along with better tubeless road tires, are often immediately inflated with a track pump, while others may require something more powerful.
The bad news, however, is that you won't know until you try a particular tire and rim combination, so it's good to have the right tools on hand.
Tubeless tires have a very tight bead that does not stretch, making it difficult to fit on the rim in some cases. When buying levers, you need to be sure that you are getting something thin yet strong enough to work with the tire/rim interface. Look for rounded edges that will prevent damage to the rim. Some tire levers are reinforced with a steel core for added strength.
You need a way to get enough air into the tire quickly so that it sits on the rim properly. If you win, the pressure will rise and the tire will sit correctly. To facilitate this task, you can use a floor pump, which has a built-in reservoir for charging tubeless tires. First, before inflating, you will close the charging tank, which will compress the air in the tank. You will then immediately release all the pressurized air into the tire.
If you are buying a new pump, get one that combines the pump and reservoir. If you already have a favorite pump, it is possible to purchase the tanks separately. Another option is an air compressor, which is the most convenient way when you need to use it, but be aware that most inexpensive tankless electric pumps won't work as they don't move air fast enough.
Most new wheels come already sealed, but this is not always the case. If you're having issues with a tubeless setup, it's almost always due to a tape issue. To solve this problem, we recommend re-gluing the inner rim from scratch.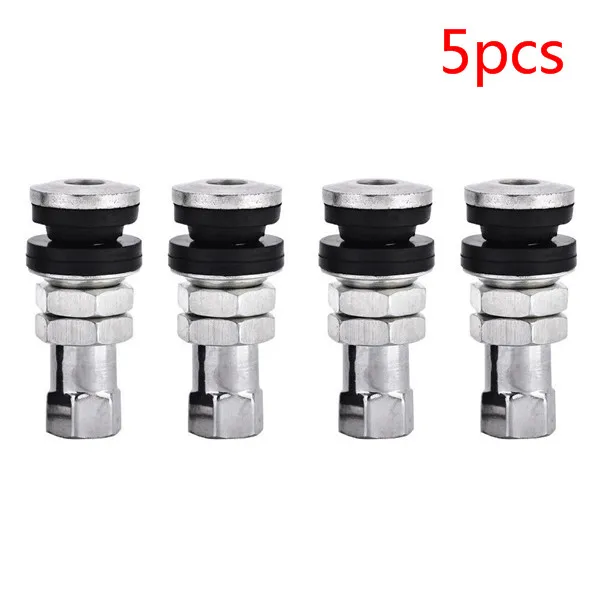
Also be aware that the tape comes in different widths, so make sure you order the correct one - it's always best to use the right size rim tape, as doubling a smaller width tape isn't always smart. The translucent tape will make it easier to find the valve hole in the right place.
Again, these often come with new wheels, but not always. Make sure you buy something long enough to go through the rim and leave room for the pump mount. A little extra length won't hurt, so if you can't find the perfect length, don't be afraid to go longer.
You can get by with a pair of pliers, but it's not worth the hassle. The right tool is inexpensive and makes life a lot easier. It's a good idea to have an extra tool in your emergency kit, as valve cores can get clogged over time and you may need to fix one that's leaking slowly during your trip.
Again, you can do without it, but it's much easier if you have the right tool.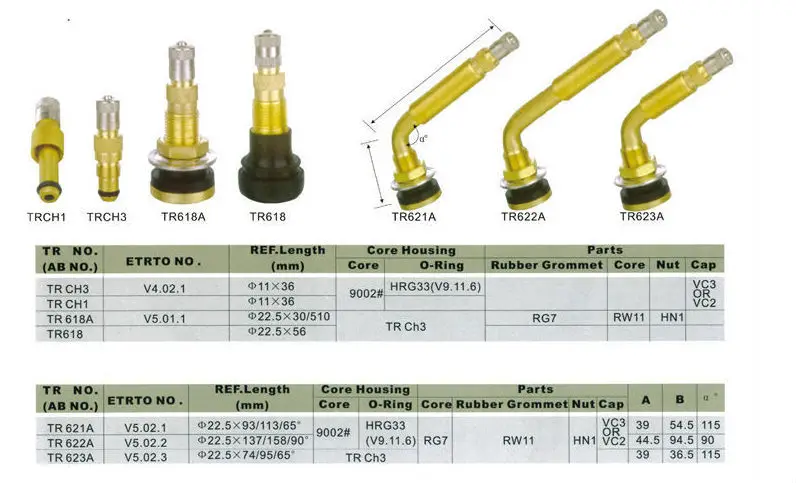 You can see instructions for pouring sealant into a tire and then trying to install, which might work, but it can be incredibly messy. Instead, use a syringe and inject the sealant through the valve stem. Some sealants come with a tube, but if you don't have one, we recommend adding one to your toolbox. The syringe is usually supplied with a valve tool and additional spools. It's also a convenient way to use just the right amount of sealant.
You probably already have these tools, but it's a good idea to prepare them. You will need scissors to cut the rim tape. A small towel will come in handy when sealing the rim. A soapy solution in a spray bottle will make life easier during installation. A small screwdriver or pen will come in handy to poke a hole in the rim tape to push the valve stem through.
A properly installed rim tape should be smooth and fill the channel.
The first thing you need to do is seal the rim. If the rim is already sealed, you don't need to seal it, but if you find you're having trouble sealing the tire, don't waste hours looking for it - just seal it.
Every time you rearrange things, there is a chance that you will open a leak in the tubeless belt. It also often happens that you seal the wheel perfectly and then make a subtle mistake when installing the valve core through the tape. If in doubt, reseal it.
Start tape about an inch before the valve hole in the wheel. You want to have enough space so that there is a good seal between the rim and the band up to the valve opening. Press the band against the rim with one hand, then pull the band out a little. Advance only as far as you feel comfortable holding the band, then gently lower it to the surface of the rim. You need to stretch the tape, and it's better to do it little by little, rather than trying to work the entire rim in one fell swoop.
After bringing the tape to the surface of the rim, hold it there.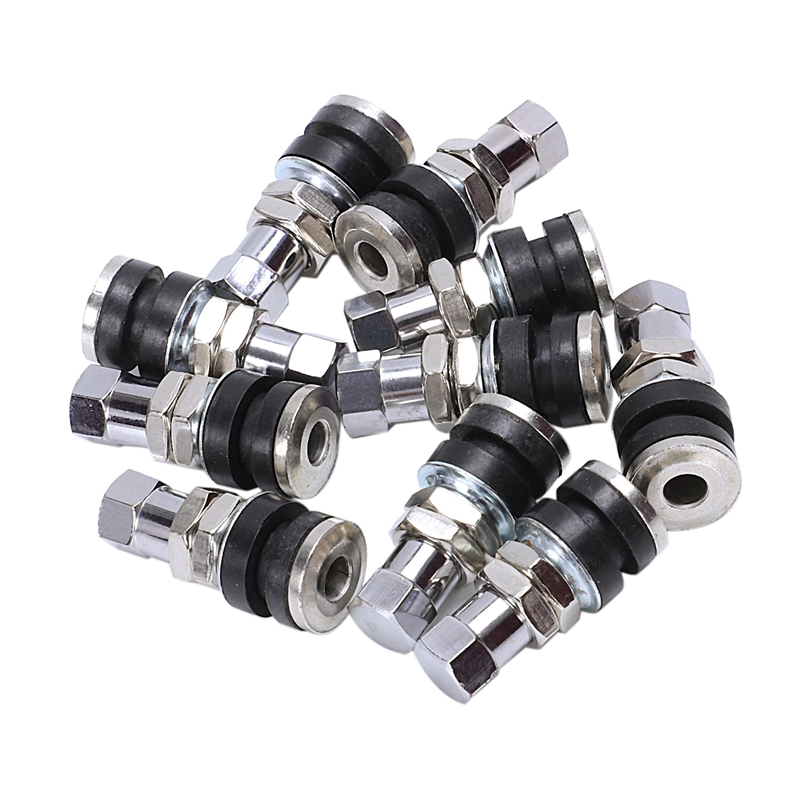 The tape is not very strong, so it will come off the rim if you don't hold on to it. Use a cloth or gloves so that the hand that you held the beginning of the tape with can slide over the rim tape. Press firmly on the rim to help the adhesive stick and move air bubbles to the end of the glued area.
When the two hands are together, repeat what you did from the beginning. Holding the tape against the rim with one hand, you are about to pull more tape from the roll. Stretch it out to the sides of the rim, then gently pull it back and repeat the process again. Continue these two steps until you have gone all the way around the wheel. When you get back to where you started, you should put tape over the vent hole by about the same amount as you started with. Then just cut the tape.
Some people and most bike shops make two layers of tape. If the tape is not wide enough, it is necessary to completely seal the space between the tire beads. Even if the band is wide enough, this needs to be done to increase the circumference of the wheel and create a tighter seal between tire and rim, but modern tires and rims are made to tighter tolerances so this is often not necessary. It can also make it difficult to fit the tire as it is very tight. It's one of those things you can't know until you try it. If you prefer to play it safe, then do so.
Push the valve stem through the band.
Start by locating the valve hole in the rim. This will be easier if you can see through the rim tape, but it's possible otherwise if you find a hole in the inside edge of the rim. Once you know where it is, press down on it with your fingers and you can make a small mark outlining the edge of the hole.
Once you know where it is, poke a small hole in the tape. You can use whatever you have. Hex keys, small screwdrivers, knobs, even the sharp end of a valve stem.
Remember that you want this hole to be as central and as small as possible and you don't want to damage the wheel. Any sharp object you use can cause damage, so be careful. This is combined with the fact that you don't try to open the hole completely, you just open it for the valve stem, and when the hole is ready, let the valve stem stretch it.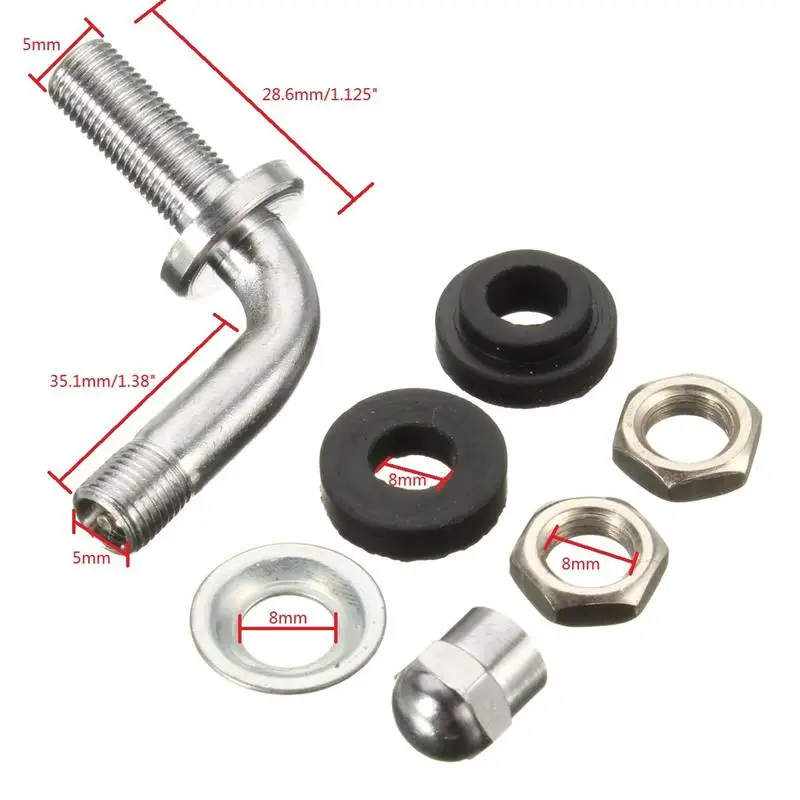
Once the hole is punched, push the valve stem back into place. There should be some kind of rubber seal at the base of the valve stem that presses against the hole you just pierced and with enough pressure it will seal. On the inner edge of the rim, where the valve now protrudes, you need to install a rubber seal, and then the nut that is attached to the valve stem. You don't need to tighten everything all at once, as you may need to push the rubber seal inside the tire away from the rim to get the tire into place.
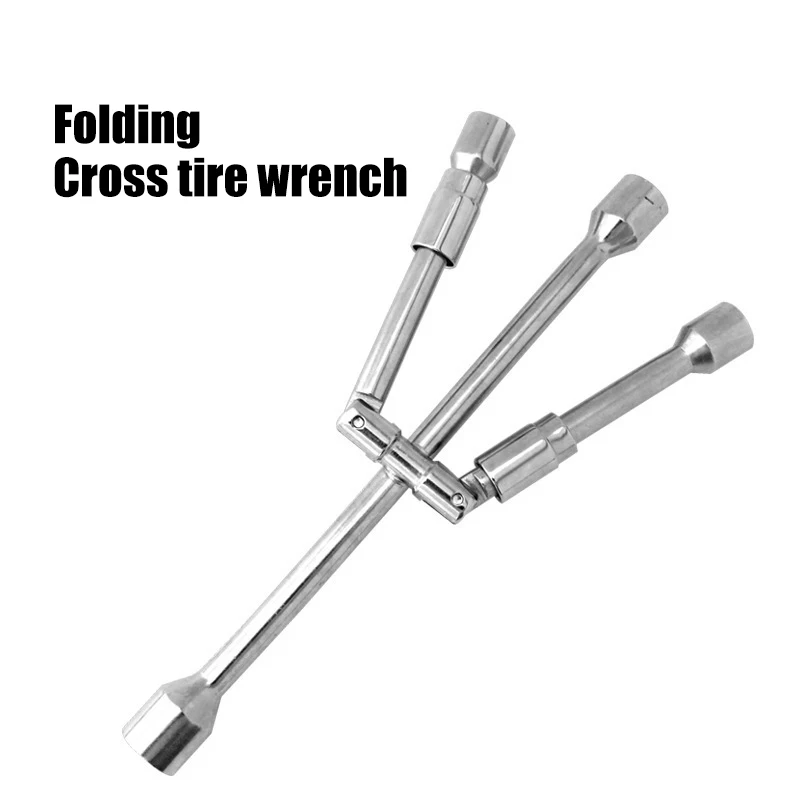
The extremely tight fit means you will likely need to use spudgers to fit each side of the tire to the rim.
The process is the same as for the tube tire. Don't forget to check the direction of rotation of the tire, and remember that it's fashionable to line up the logo and name so that the valve is in the middle (this also helps to find the valve when you need to inflate the tire).
Start at the valve and insert the washer into the space between the valve and the wheel sidewall. First on one side, then on the other. When you get to the other side, opposite the vent, things get more complicated.
The difference between a tubeless tire and a tubed tire is that the tubeless tire and the rim are closer together. Grabbing each side of a tire on a wheel is often a difficult task and the use of tire levers will most likely be necessary. To facilitate landing, moisten the edges of the tire with soapy water.
Soapy water helps everything slide. The tire will slide more easily over the tire arm and the tire arm will slide more easily between the tire and rim. Once the tire is in place, the soap solution will also help create a seal for the first inflation.
The tire should be in the center of the rim cavity but at the edges next to the valve.
The idea is to put the tire in the center of the rim. The less the tire will rise and fall from the edges, the better. However, it should be on the edges near the valve stem.
In reality, there is little you can do at this stage. Just look for obvious problems and do your best to fix them. A good way to get everything in proper condition is to roll an uninflated wheel with a tire on a carpeted floor, applying pressure on it. The pressure will help the tire sit properly in the channel.
Once you have the tire in place, make sure the valve stem nut is tight and the valve stem is in place.
If you are using a tubeless tire pump, it's time to pressurize the reservoir.
If you are using a standard pump, you need to pump quickly. If you are using a tubeless pump, then pressurize the tank before releasing the air in one shot. It's a good idea to inflate the tire, but be careful with the amount as tubeless tires and carbon wheels often have a lower maximum pressure than you'd expect.
You may or may not hear a pop as the sidewall snaps into place. This helps if the sidewall is wet and slips easily, but even then you may not hear anything. It's a nice sound when the bead snaps into place, but if you can't hear it, it doesn't mean it didn't work.
For initial inflation it may be useful to remove the spool. However, this is not always possible because depending on the pump you have, they do not always secure effectively if there is no valve core.
Using a sealant injector is the easiest way to add sealant to a tire.
If you have time to let the tire sit, this is a good idea. Sealant should not be needed to keep air in the tire. If you have time to let the tire sit with air, you can determine if it is losing air at a reasonable rate. If you left a tubeless tire inflated overnight and returned to a flat tire the next morning, then you need to troubleshoot. This almost always means new rim tape, and it's much easier and cleaner when there's no sealant. You can also check the tightness with a soap solution.
Once you've made sure the tire is installed correctly, it's time to add sealant.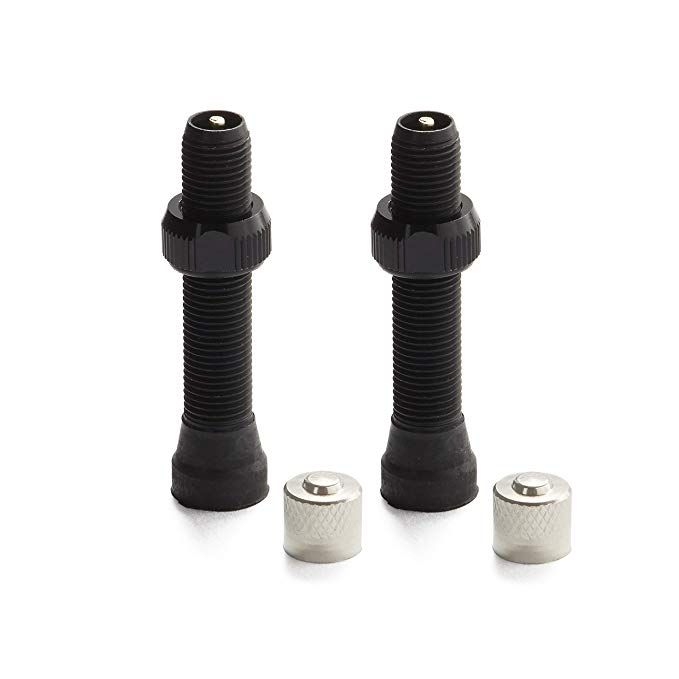 Release the air from the tire, and then unscrew the valve core.
Put some sealant into the injector and turn the tire so that the valve is not at the very bottom and not at the very top of the wheel. At the top, it can leak out of the valve, and at the bottom, the flattened tire leaves no room for sealant. Inject the sealant and install the valve core in place. Inflate the tire to the desired pressure and remove the pump. Spin the tire and give it a shake so that the sealant coats as much of the inner surface of the tire as possible.
Congratulations, you now have a tubeless tyre.
You might be interested:
 After all a damaged valve can lead to a decrease in pressure, which in turn can lead to a slow and irreversible destruction of the tire from the inside. Timely inspection will help to avoid such problems.
 The valve consists of the valve body, spool and cap. The materials used in these parts are rubber, metal and some plastic.
Unfortunately, over time, rubber dries out, cracks, and metal can be damaged by chemicals. In addition, do not forget about the harsh operating conditions. So, during the rotation of the wheel, a serious load acts on the valve - about 1.7 kg at a speed of 100 km / h.
It is therefore important to choose the valve that best suits both the disc and the vehicle.
Most common tire shops offer TR414 (for steel rims) or TR414C (for alloy rims) valves.
It is this type of sale of valves that is widely practiced. And there are two reasons for this.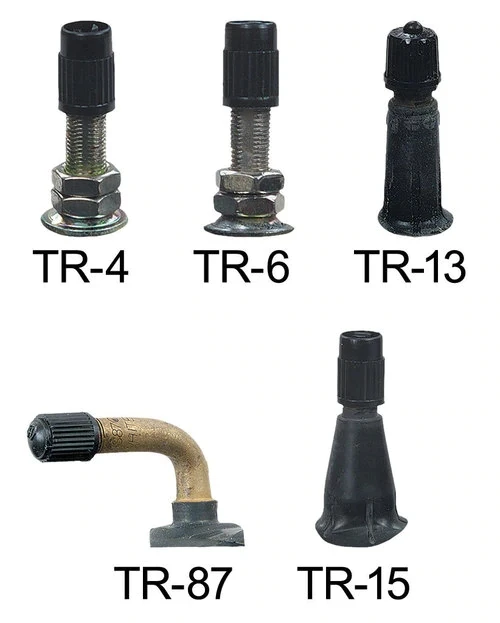 The first is the similarity in color, so chrome is not offered for stamped wheels (no one takes white metal to black), but only for cast ones (there are very few forged ones on sale). The second is the difference in price, chrome is more expensive, and stamped buyers take everything at a minimum.
Discs fit both types of valves, but the difference is how they are sold.
Attention! Many mistakenly believe that C is a commercial valve (C-commercial), but in fact, C means that the valve has a chrome lining (C-chromium). This valve has no other differences from the standard one. The TR414C can handle a maximum of 4.5 bar just like a conventional valve.
However, there are also TR413 for alloy wheels. This valve is smaller and, unlike the TR414, is less prone to buckling, meaning it does not cause slow loss of pressure during high-speed driving.
In addition to the above types of valves, there are several more varieties of valves :
 Due to the greater length, access to the valve is provided without the need to remove the cap.
 Attention! The use of standard valves on vehicles carrying people and goods may result in tire failure.
Attention! The metal valve is much stronger than the standard one, however, and will need to be replaced over time.
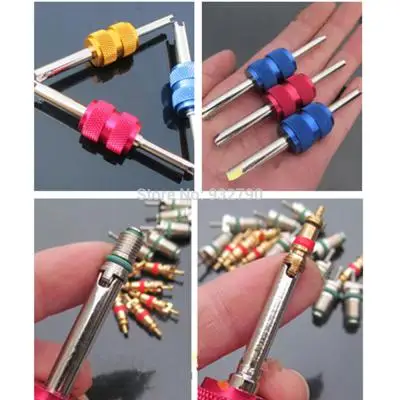
Spool is a device that directs air by moving the moving part relative to the body in which it slides.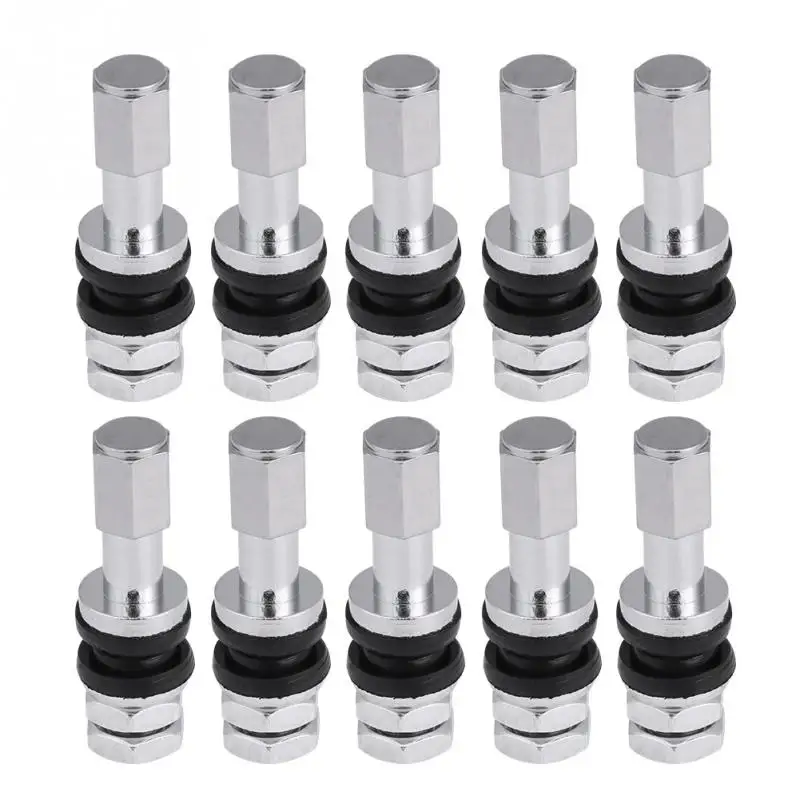
Types of spools
Given the load and intensity of work, the spools are also subject to aging and various damage. Therefore, it is necessary to change them regularly as well (as a rule, when you change the valve, you get a new spool).
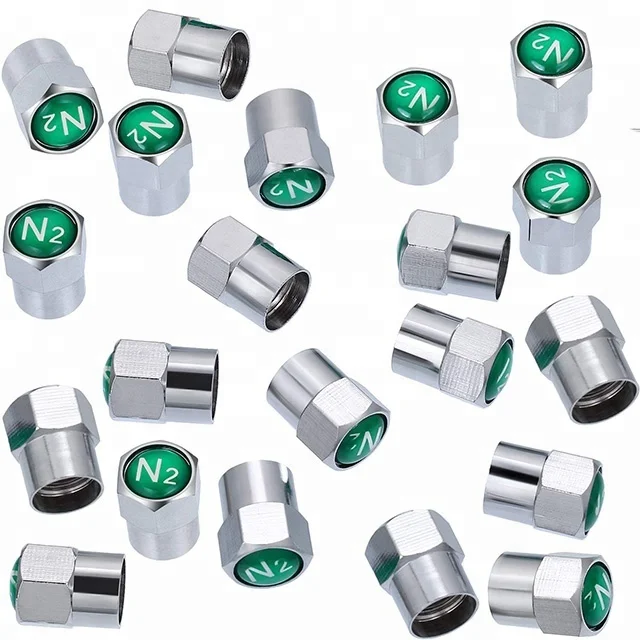
The main function of the cap - protect the spool from dirt. Therefore, it is necessary that each valve be equipped with a protective cap.
There are many different colored caps on the market, they can be metal or plastic. Recently, there has been a growing fashion for colored metal caps (usually made in China).