Every editorial product is independently selected, though we may be compensated or receive an affiliate commission if you buy something through our links. Ratings and prices are accurate and items are in stock as of time of publication.
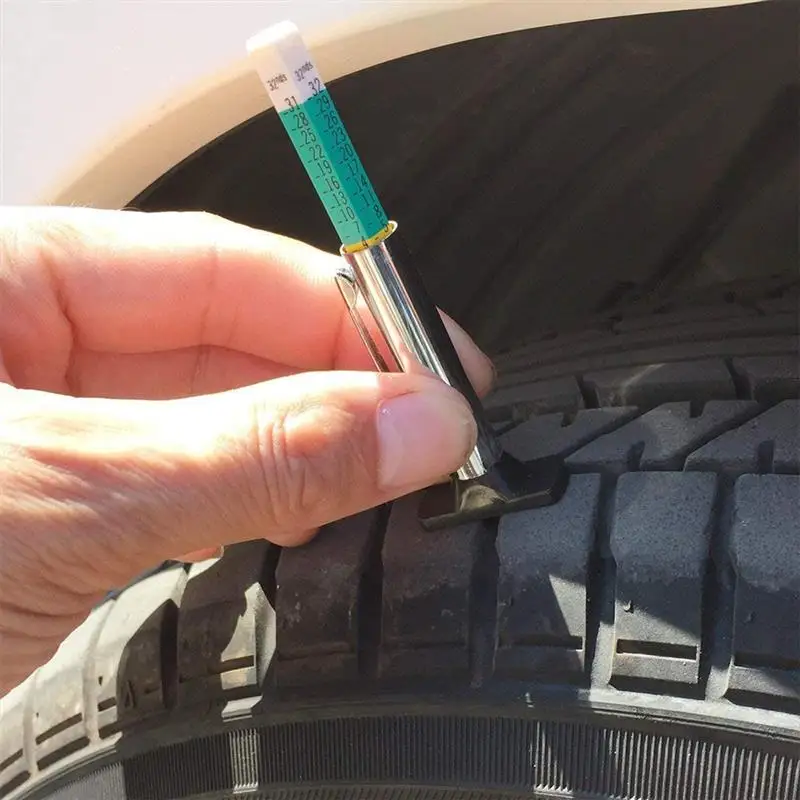
Modern vehicle tires are tough, standing up well to rough terrain and thousands of miles of driving. Trouble is, tires are not invincible. Every so often car tires spring leaks. Air can start leaking from anywhere on a tire, and the location of the leak determines whether or not you can fix it yourself. And if you can't fix it yourself, the location of the leak will also tell you if you need a professional repair or a new tire.
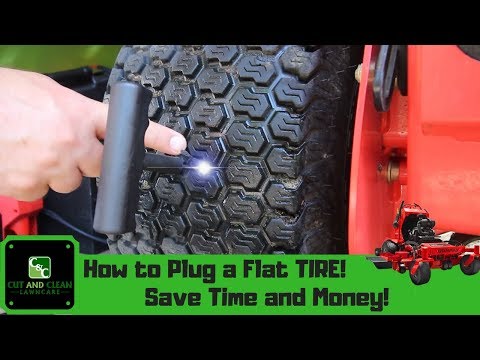
Whether or not your tire is tubed or tubeless affects things, too, because only tubeless tires can be repaired using the technique of plugging that we'll show you here. The good news is that modern vehicles always have tubeless tires, and this means that repairing with a rubber plug is often an option.
Plugging a tubeless tire is only a possibility when your puncture is in the tread area. If the air leak is where the sidewall of the tire meets the rim — this is called a "bead leak" — you'll need to visit a mechanic with a tire machine to dismount the tire from the rim and remount it with sealing liquid applied to the bead. If your sidewall has been punctured, you need a new tire, because damage there can lead to a blowout at highway speeds, even after repair.
Learn exactly how to plug a tire so next time you spring a leak between your treads, you'll be able to get up and running again in record time.
Total time completing the repair is about 15 minutes. Doing the work yourself will save you about $20 and the time spent driving to the garage and waiting.
Steve Maxwell for Family Handyman
Complete DIY projects like a pro! Sign up for our newsletter!
Do It Right, Do It Yourself!
Originally Published: August 27, 2020
| Tire Forge
The tires are one of the most essential parts of a vehicle – they are the artificial legs you need to get somewhere or anywhere.
While tires are tough and come in different types for various vehicles, they are not entirely free from hazards – they are likely to experience leaks.
One of the most vital parts, however, that needs to be paid close attention to is the tire plugs.
You need to know what to do when they are leaking and what happens if you don’t pay attention to them immediately. Find out in this article.
Page Contents
 2 When Do You Need Professional Repair?
When this rubber plug starts to leak, it can be annoying. The reason is that: it often comes with a slow tire effect (or slow leak).
This slow tire effect is a result of low tire pressure and running on it for a long time can be dangerous to the car and the driver – a serious blowout leading to an accident.
The signs of a leaking plugged tire is not any different from a slow leak or a flat tire. They include:
If you already plugged a tire because you had a tire leak and then it starts to leak again, you could fix the problem the same way you fix a flat tire.
The only thing you should bear in mind, however, is that: you shouldn’t take too long before visiting a mechanic or tire shop for a permanent fix or replacement.
If you have an old plug that needs to be removed because your tire has had a longer leaking period and want to replace with another one, here are the things you need:
Here is a step-by-step guide on how to proceed:
Apart from the site where the rubber plug is inserted, examine other parts of the tire. It is important that you do this to know the various leak sites and know how to repair each one of them.
Pump air into the tire and make sure it is finger-pressure firm.
Afterward, you can spray soapy water on the tire to know the various sites that need repair. By spraying this soapy water on the tread area, air leaks will create bubbles on the tire surface, indicating a leak.
With your t handle reaming tool, you can create a hole in the tire on the leak site.
The purpose of this hole is so that you plug the tire successfully; however, you should be careful not to ream too much. If you have a small puncture, a hand drill is good enough to create a tiny hole in the tire.
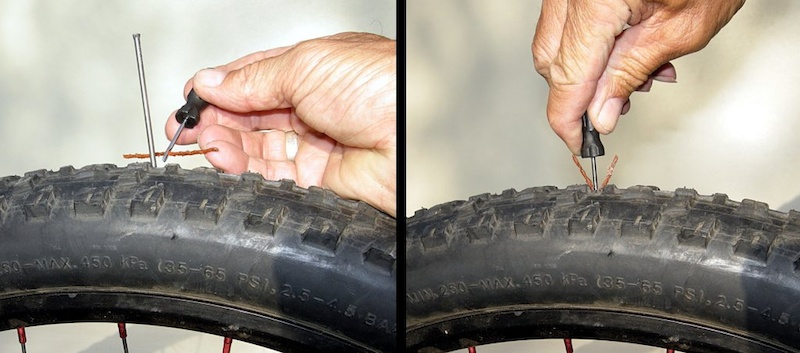
Get your plug strip set up into the eyelet of your plug insertion tool using your pliers if necessary. The next thing is to have the plug strip well-coated in the rubber cement, as well as the hole on the tire surface.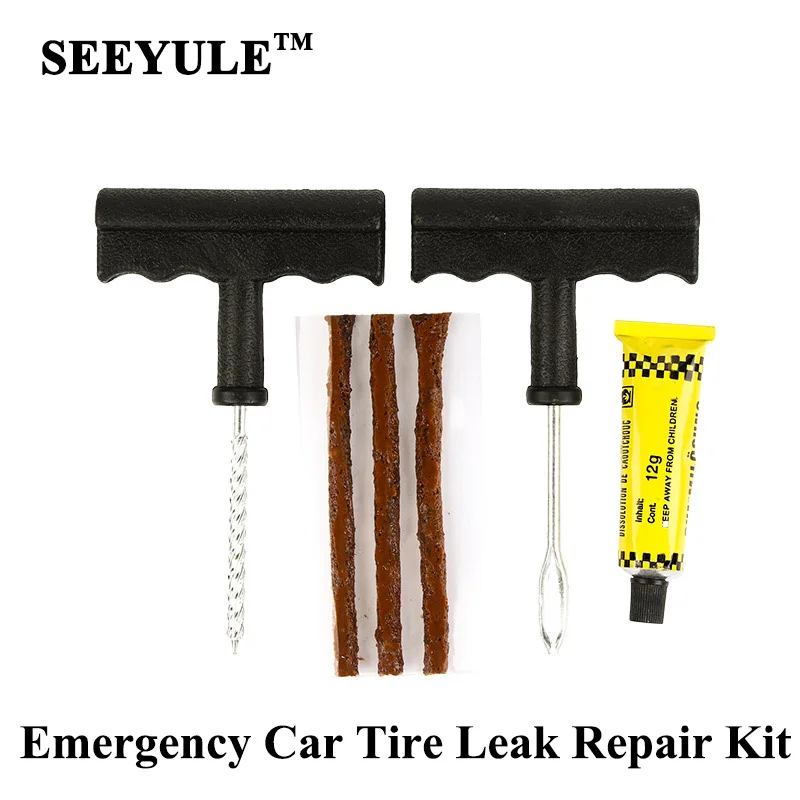
Using the plug insertion tool, insert the plug strip into the hole. Make sure it is deep enough. When the plug strip is in the hole, quickly pull the insertion tool out and ensure the plug is already in the tire.
When you finish installing the plug into the tire, the next thing is to fill it with air. The reason for doing this is to check if the tire repair procedure was successful or not.
If you’ve done a good plugging, the final thing you need to do is trim the plug and continue driving.
If your tire was punctured by a nail, screw, or any sharp object, you might end up plugging or patching it since they are the best quick fixes.
However, you should know that if your tire is plugged properly on the sidewall, it can last up to 10 years but plugging should be done once.
If you set a proper patch or plug on your tire, you should know they are only temporary until you have the resources to repair leaks.
If you do this more than once, speed rating reduces and you run a risk of a serious blowout.
In a situation where there is a small leak where the rim of a wheel meets the sidewall of a tire, it is called a bead leak.
This situation cannot be repaired as DIY because there are several mechanical components involved – you will need the help of a mechanic.
What the mechanic does in most cases is to dismount the tire, apply a sealing liquid to the bead, and install or remount.
You should only call in for professional repair if you don’t know your way around your tyre.
For instance, you will need to calculate the thread diameter before you proceed with tire repair. Another thing is figuring where the leaks are coming from so you can deploy the right fix.
Finally, you also need the assistance of a professional if it isn’t just any leak, i. e., if it is from the beads.
Diagnosing your tire is very important but not everyone can or will do that, especially if it is a new tire.
However, if you are ready to be invested in tire maintenance, here are some important things to look out for:
One of the things you should look out for on your tire is if it has been punctured by a nail or any sharp object. You can tell by the little amount of air coming out from the tire until it becomes obviously flat.
Another thing is if your tire starts making unusual sounds or thumps, it may be because the radial belt has been detached or there is a tire puncture.
One of the effects of a bad tire is that it comes with unnecessary pulling. Your vehicle could be pulled to a side because there is a good chance your flat tire caused an odd wheel alignment.
If you are stuck on a highway with tire leaks or flat tires, you don’t have anything to worry about as long as you have your rubber plug.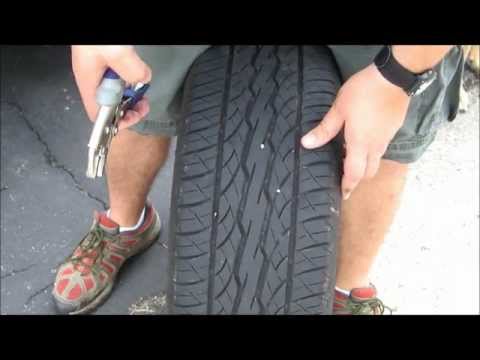
You can temporarily have your tyres repaired in no time and drive safely on the road.
However, you shouldn’t take too long before visiting a repair shop for a permanent fix.
Thanks for reading our article! We've written this article with a lot of thought and care. If you're interested in seeing more of our content, please check out our Tires section and find an answer to your questions!
Author: Oleg Polazhinets
A sudden puddle or a large spot under the car is a reason to think about what it might be. Indeed, in the units of the car there are a dozen operating fluids that may be outside. And if you are not completely sure that the stain is not left from a car previously parked in the same place, then it is worth classifying the type of liquid by appearance and smell, and also, if possible, identify the source of the leak. Let's figure out how to do this without tasting the puddle.
Engine oil
Oil leakage from the engine lubrication system is a fairly common occurrence, so in many parking lots the asphalt is literally dotted with characteristic oily spots. Recognizing an oil leak is quite simple: a small and thick greasy spot cannot be confused with water and even antifreeze. Under the hood, the problem usually reveals itself either as fresh traces of oil, if the leak is fresh or strong, or, conversely, as dirt growths covered with oil, if the engine has been losing oil for a long time and drop by drop. As a rule, oil flows out of the engine due to leaks in the crankshaft seals, as well as the sump.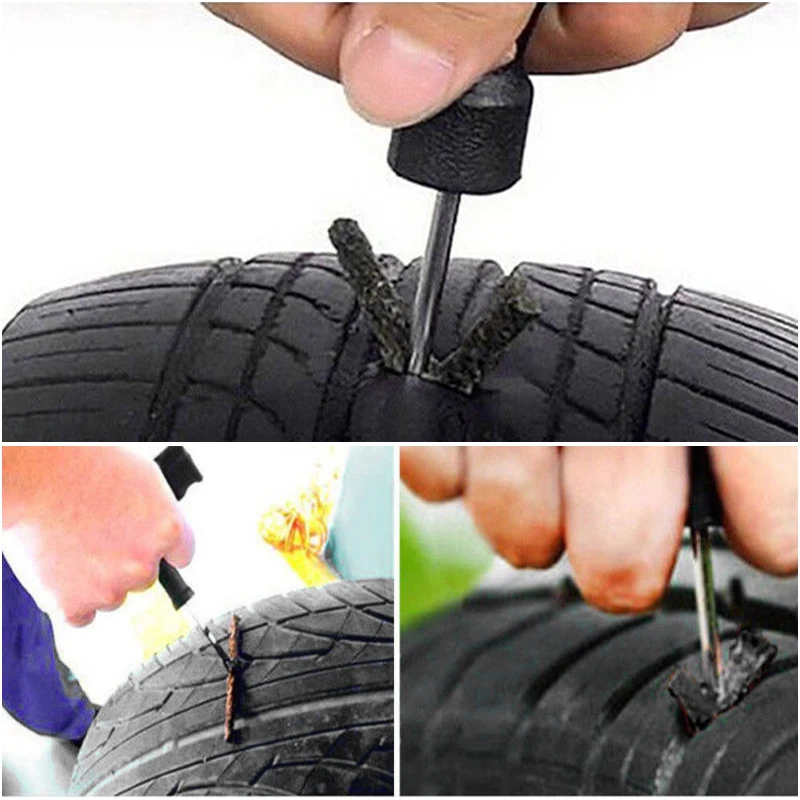 However, these are only the most common options: you need to inspect the entire engine, and if traces of oil on the crankcase protection are fresh and no leaks are visible, it is better to inspect the car on a lift.
If the puddle is large, then you need to carefully inspect the crankcase - it is possible that it was broken on the road. In any case, you need to check the oil level, as well as visually inspect the engine. Driving with a low level on the dipstick is more expensive for yourself, because many engine parts can experience oil starvation.
If the emergency pressure lamp is on or even blinking, it’s definitely not worth moving on: low oil pressure means its critically low level, capable of killing the engine in a few kilometers. In such a situation, you need to immediately turn off the car and then transport it on a tow truck. But even in the case when the level is normal, it is not worth delaying the repair, because due to the “hardened” crankshaft oil seals, oil can get on the drive belts or the clutch disc, and this will lead to completely different problems.
Transmission oil
Distinguishing engine oil from transmission oil is not easy, but there are still some features. Gear oil is usually noticeably thicker and remains light even after a long time after replacement, but engine oil darkens over time. Another way to distinguish the type of oil is to drop it into the water: the engine oil will remain there in the form of a droplet-lens, and the transmission will begin to spread. Well, to understand where the oil is flowing from, a careful inspection of the gearbox from below will help. An oily body is a reason to immediately check the oil level if the dipstick is provided structurally.
And although in Soviet times some lucky people managed to get to the garage practically on a “dry” box, turning on the fourth (direct) gear, modern practice knows many cases when even seemingly unpretentious mechanics fail prematurely due to that the owner drove several thousand with a low oil level, which gears really do not like - especially those that are located above everything in the unit.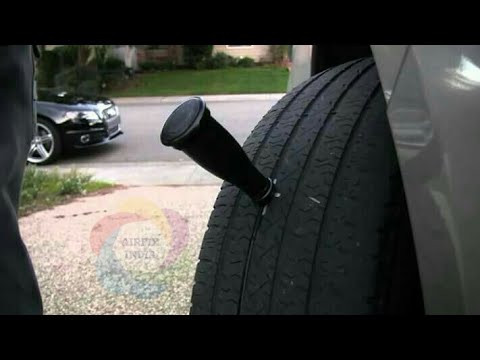
For automatic transmissions, the oil level is even more critical, so setting off on a journey with such a leak is literally condemning the machine. It is even easier to determine that it is an automatic transmission that has flowed than in the case of mechanics, by the characteristic color of the oil, which usually ranges from red to burgundy brown.
Obvious oil leaks from the "transfer case", center differential or rear axle gearbox indicate leaks in the seals or damage to the housing. A “dry” gearbox usually quickly starts to hum and howl, and in the worst case scenario, it can jam right on the go.
Coolant
In a liquid-cooled engine, antifreeze plays an important role and the system itself must remain sealed. However, due to high temperatures, its individual elements may lose their tightness, which is especially true for older cars. We talked in detail about the main causes of antifreeze leakage, and now we will remind you again. Bend your fingers: leaky radiators (main and interior heater), a leaky thermostat (engine or automatic transmission), a burst expansion tank, a malfunctioning expansion tank cap, cracked pipes and hoses, main or additional water pumps, and even the cylinder block itself can be the culprits!
Experienced drivers can recognize antifreeze by tasting a suspicious stain, as ethylene glycol, which is the basis of almost any antifreeze, has a sweet aftertaste.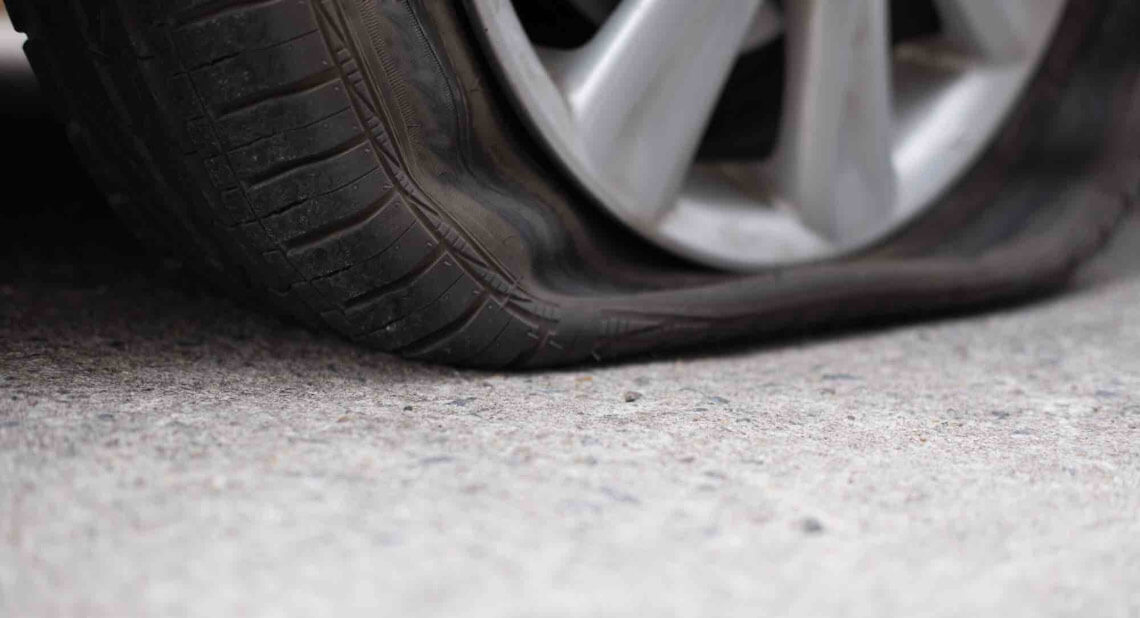 However, we will not advise you to engage in such organoleptics: even though ethylene glycol is a moderately toxic substance, and for poisoning you need to take a couple of sips, but in each case it is not known what other impurities may be present in a stain on asphalt. It is better to try the liquid to the touch: antifreeze is slightly oily. So if the stain is not purely oily, but also has a color (greenish, reddish, yellowish, and so on - there are many dye options) and is greasy to the touch, it is most likely antifreeze.
If the antifreeze leak is strong, then you can get to the house or the place of repair by simply adding water to the system. However, this is a rather risky business, since it will be necessary to constantly monitor the level of antifreeze and the temperature of the coolant in the system. If the coolant level drops below the minimum while the engine is running, the engine may overheat. The probability of “boiling” the engine in the heat and in traffic jams is especially high, so if the leak is strong, and it’s summer outside and there are still a few kilometers ahead, it’s better to immediately call a tow truck.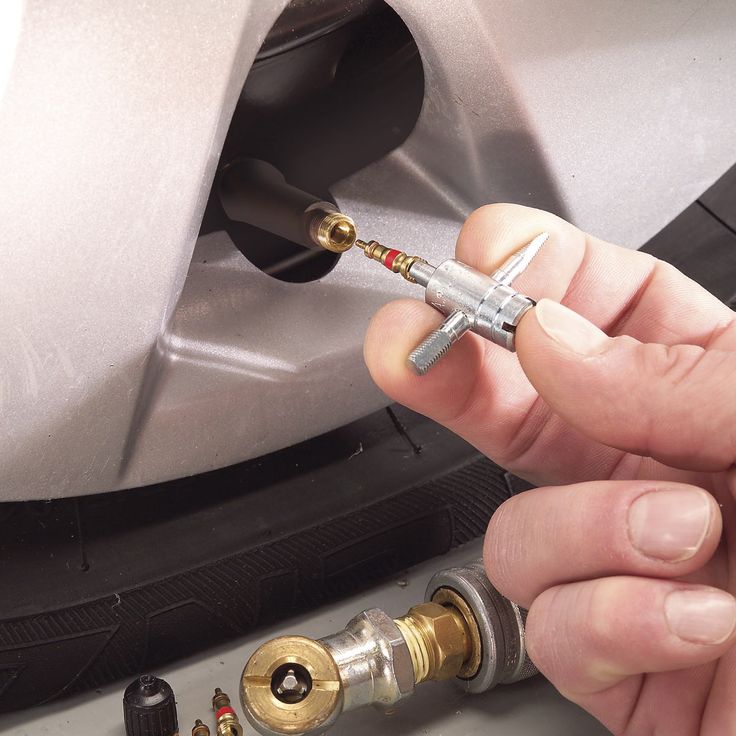
Brake fluid
The most dangerous leak is the loss of brake fluid. If it is already on the pavement, then this usually means that the car has no brakes in the literal sense, because the volume of the brake system, unlike lubrication or cooling systems, is very small - no more than a liter. As a rule, even a small leak of brake fluid leads to the failure of one of the circuits or the complete failure of the brake system, because it is immediately aired. It’s bad that it’s not always easy to notice the place of a leak - for example, the rear brake cylinders are inside the drums, and outside they are covered with shields. A sure and bad sign of a brake fluid leak is traces of fluid on the inside of the wheel.
A cracked brake hose or broken brake pipe will have the same effect - the brakes will simply stop working. In Soviet times, in order to get to the garage, failed brakes on individual wheels were turned off in any suitable way, and any liquid was poured into the hydraulic drive, up to water, castor oil or alcohol. However, we categorically do not recommend any of these "folk methods". Firstly, it is deadly: a drop in pressure in the system means it is impossible to slow down. And secondly, the traffic rules forbid to continue driving with a faulty brake system, and any leakage of “brakes” is a clear sign of a malfunction.
Fuel
It is possible to understand that fuel is leaking from the car by a sharp and characteristic smell - both in the case of gasoline and diesel. There can be several reasons: a rusted or damaged by a foreign object tank, a defect in the metal fuel line, a burst fuel hose, a cracked filter housing, or damage to the filler hose at the filler neck. The result is always the same: fuel flows into the street or, even worse, into the engine.
Loss of tightness in the fuel system can also occur after unskilled repairs - for example, when changing the fuel filter unknowingly on the fuel lines, they simply did not replace the penny sealing rings. It is unnecessary to talk about the high fire hazard of gasoline, so any such leak is a reason to sound the alarm and not only not to continue moving on, but not even to leave the car unattended, because someone may decide to smoke nearby.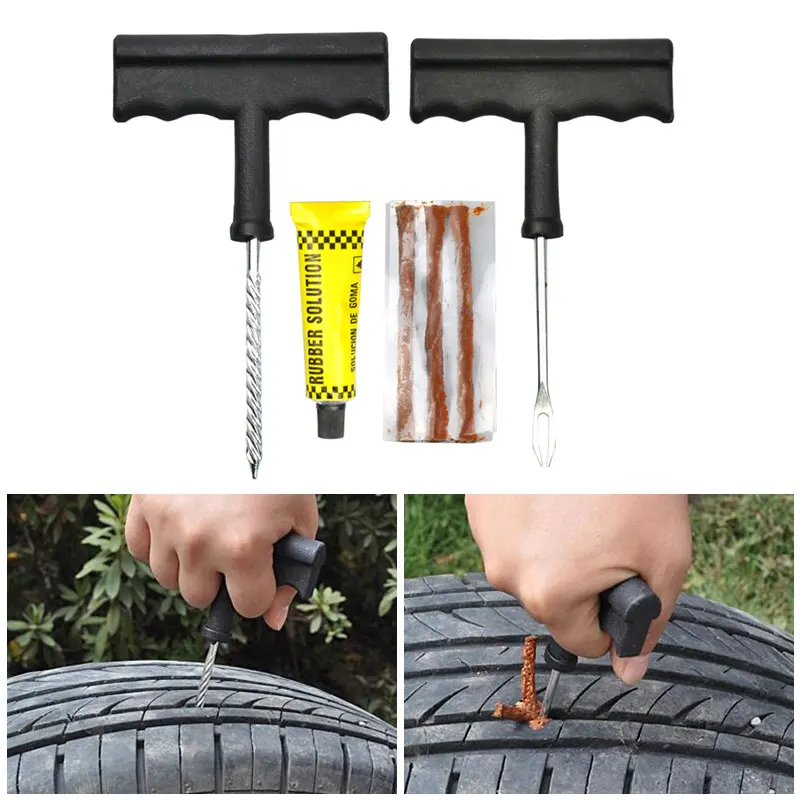 We will not recommend the “old-fashioned” way to fix a gas tank leak with soap: it was acceptable 40-50 years ago, but now the verdict is clear - only a tow truck.
Power steering
A leaking rail usually leaves marks on neighboring components - subframe, suspension parts, and so on, but reddish fluid from the power steering gets on the asphalt only if the system, as they say, “died”. Leakage can occur not only from the rail itself, but also from hoses and lines, both at the junctions and through cracks in the hoses themselves. Therefore, if there are oil smudges under the machine and a drop in the level in the hydraulic booster engine compartment, you need to inspect all lines for breaks and major damage. Typically, hydraulic boosters use the same red oil as automatic transmissions: this is worth bearing in mind to identify the source of the leak.
It is theoretically possible to drive further with a strong leak and an empty engine compartment tank: even in the absence of oil, the rack retains the ability to turn the wheels.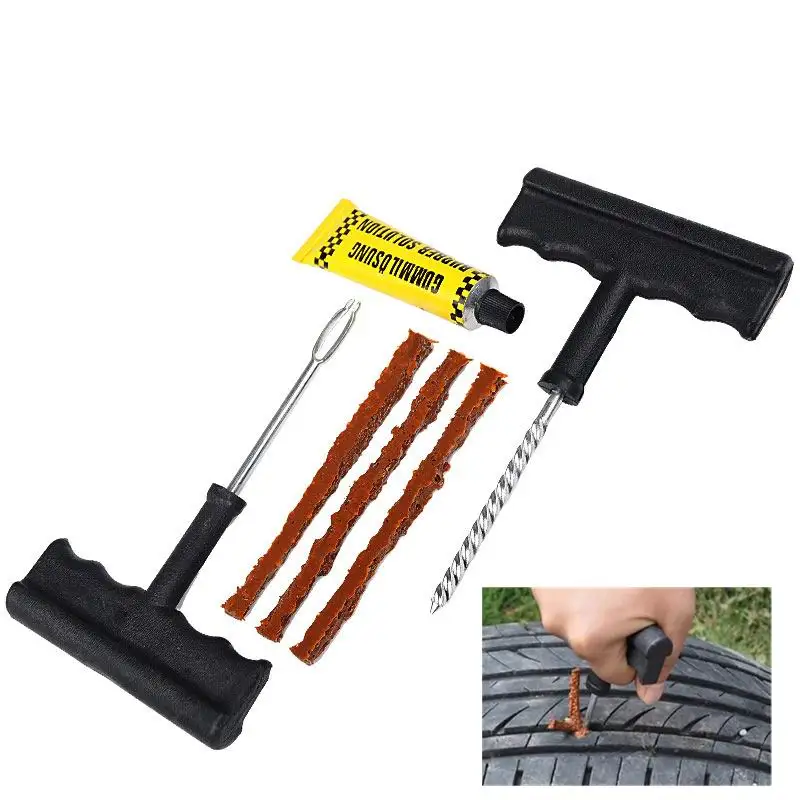 But from the point of view of the law, this cannot be done: traffic rules prohibit the operation of the car in the event of a malfunction of the power steering. Therefore, it is worth moving without oil in the system only as a last resort and for short distances, and at the same time safety measures must be observed. After all, a non-working power steering means that it will take much more effort to turn the steering wheel - even more than on cars without power. In addition, movement with a lack of oil in the system can provoke further breakdowns: the pump can jam or its drive belt breaks, on which, depending on the design features, other units can be tied. Having noticed a leak from this system, you need to do the same as in the case of the engine and gearbox - check the level and add fluid.
Air conditioner
Many drivers panic when they discover that something is dripping from a car with the engine running. In the case of an air conditioner, fears are completely unfounded: if the system is turned on, then the condensate is simply obliged to flow out.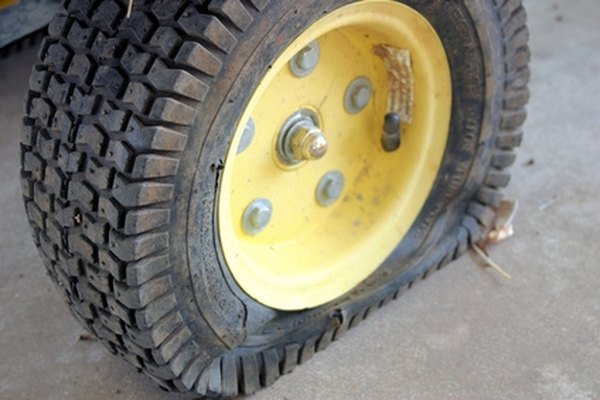 For complete peace of mind, you can make sure that it is water that is dripping onto the ground by tasting the liquid to the touch.
But no oiliness in the condensate and on the pipes should appear - this may indicate that the system will soon fail. Moreover, the fact that the air conditioner stops cooling the interior is not the biggest problem, because if the compressor jams, the drive belt may break, and we already found out what this is fraught with in the previous section.
Other options
There are several other sources in the car that can leave traces of a leak. The most non-trivial option is a leaky shock absorber, although usually this failed suspension unit only “sweats” and does not flow so that it drips to the ground. Much more often it flows from the washer reservoir, its nozzles or connections on the tubes - these streaks are generally harmless, but also indicate that not everything is in order.
The only exception is leaking headlight washers if they have just worked.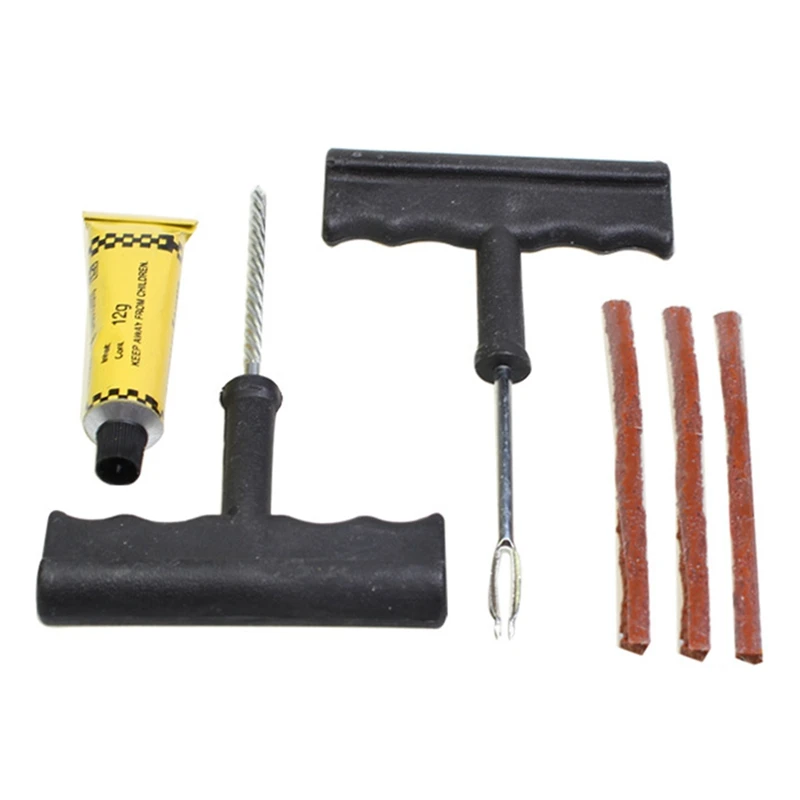 In cars equipped with a headlight hydraulic corrector, fluid leaks from the hydraulic drive are possible, but often the slave cylinders “leak” directly into the headlight. Well, we will finish with water from the exhaust pipe - this is a normal phenomenon, since it is ordinary condensate.
practice popular questions
Articles / Popular questions Not only dangerous driving: how and why traffic rules prohibit frequent lane changes Many people associate frequent rebuilding on the road only with dangerous driving, which, as you know, is prohibited by traffic rules. However, in fact, rebuilding is regulated even in conditions where ... 81 0 0 11/21/2022
Articles / Interesting 5 reasons to buy and not to buy Mitsubishi Pajero Sport I If you are exploring the possibility of realizing your old dream and buying a comfortable SUV just because it's cool - you can safely move on to reading some other material .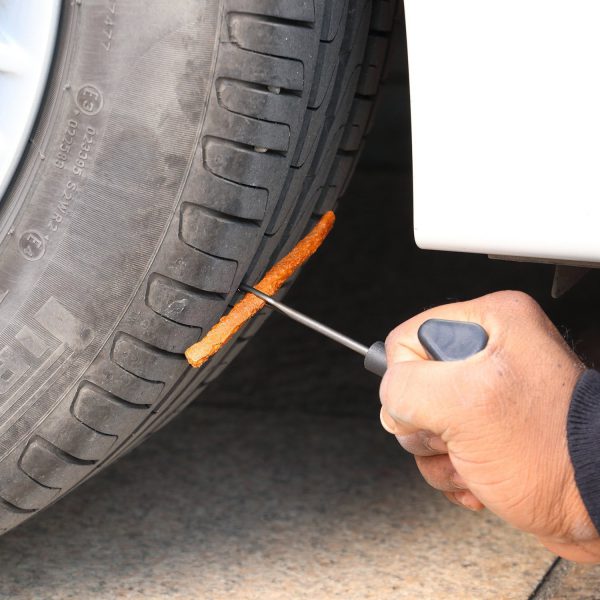 .. 4717 5 2 11/20/2022
Articles / History A hundred and forty, which has no equal: 10 of the most unique versions of the Mercedes S-class W140 The third generation of the Mercedes S-Class, with factory designation W140, is one of the most iconic Stuttgart starships. Firstly, in 1991, Eska first received a six-liter V12 engine, in ... 3275 3 6 19.11.2022
Test drives / Test drive Haval Dargo vs Mitsubishi Outlander: the dog is barking, the stranger is coming In the Haval dealership in the south of Moscow, life is in full swing: buyers look at cars, communicate with managers and sign some papers. While I was waiting for the test Dargo, the same cross... 16960 7 205 13.09.2022
Test drives / Test drive Motor from Mercedes, emblem from Renault, assembly from Dacia: test drive of the European Logan 1.0 It would seem that what's new can be told about the second generation Renault Logan, known to every Russian taxi driver, as they say, up and down? However, this car has... 13804 ten 41 08/13/2022
Test drives / Test drive Geely Coolray vs Haval Jolion: Free Cheese? If! Do you want to buy a car today with a full warranty, on credit at an adequate rate, without wild dealer markups? Now this is still a task, because a full-fledged chain of "representation - s.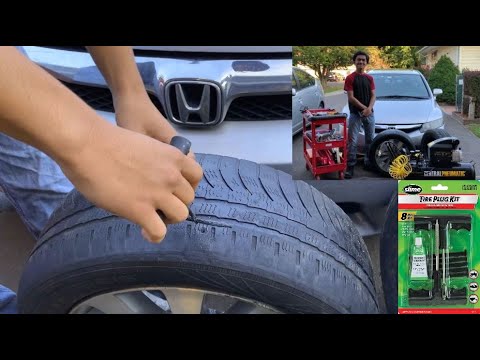 .. 10914 26 thirty 08/10/2022
The radiator cap (plug) is an inconspicuous detail under the hood, which many car owners do not attach due importance to. But this is not just a cover, but an important valve that regulates the pressure in the cooling system - any problems with it threaten the engine with big troubles. Let's figure out how the radiator cap is arranged and when it needs to be changed.
First, a word about terminology to avoid confusion. It is correct to call the radiator cap the cap, since the radiator plug is the drain plug at the bottom of the radiator. However, in everyday life, the radiator cap is often called a cork, and such a term is found in the technical literature. Therefore, both names are used among motorists, and sometimes you need to proceed from the context in order to understand which particular radiator cap we are talking about.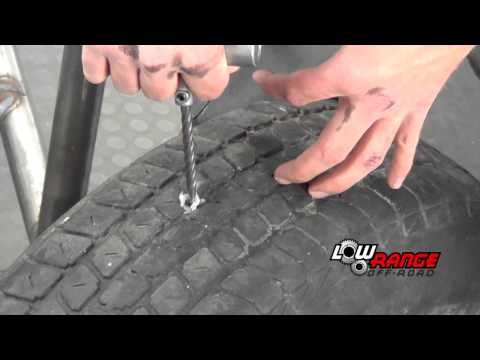
In addition to the obvious function of sealing the radiator against dirt and antifreeze leakage, the radiator cap regulates the pressure in the cooling system, maintaining it at the desired level. What for? It's all about physics: with increasing pressure, the boiling point of liquids also increases. If, at normal atmospheric pressure, antifreeze already boils at 105-110 ° C, then with increasing pressure, the boiling point of the coolant shifts to 125 ° C and above. And this difference is very important, since modern heat-loaded engines often warm up above 100 ° C, especially in traffic jams: for some motors, a temperature of 115-125 ° C is quite normal. Excessive pressure in the cooling system allows them not to boil.
In general, the operating temperature of engines is constantly rising - this is a direct consequence of increasing their power, efficiency and environmental friendliness. Motors of the last century rarely even heated up to 80 ° C, by the end of the century the figure had risen to 95-105 ° C, and for modern engines even 120 ° C is not the limit.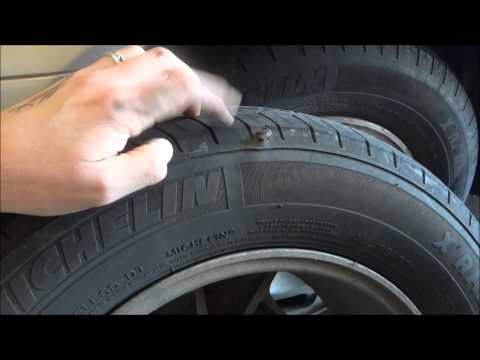 Therefore, the health of the radiator cap becomes critical: the cooling system must operate in a very narrow pressure range so that the engine does not overheat, boil or lose antifreeze.
The main part of the radiator cap design is a steam vent (exhaust) valve with a calibrated spring. The valve blocks the access of antifreeze to the expansion tank and ensures the tightness of the system. But with increasing pressure, the antifreeze pushes through the spring, opening the valve - thus, excess pressure is released from the cooling system, and the displaced antifreeze flows into the expansion tank. As soon as the pressure in the system stabilizes, the spring closes the valve again. The pressure in the cooling system, which is maintained by the radiator cap, depends on the stiffness of the spring.
Also in the design of the plug there is an air (inlet) valve with its own spring, which opens when the antifreeze cools and reduces its volume, so that excessive vacuum is not formed in the system.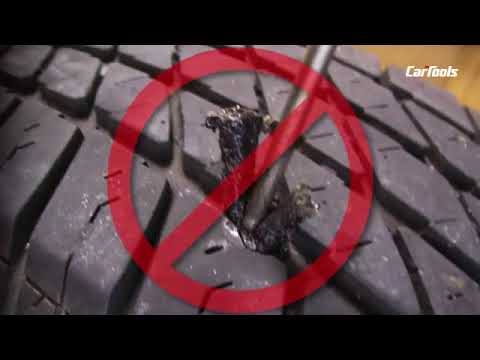 Sometimes both valves are structurally combined into one, but the principle of their operation does not change from this. There are also caps with a mechanical manual pressure release button.
In this way, the radiator cap maintains the correct pressure in the cooling system and bleeds its excess, protecting the radiator and pipes from damage. Sometimes the cap of the expansion tank performs the same functionality, and the radiator does not have its own cap and filler neck for antifreeze at all. And on some engines, both the radiator and the expansion tank have a cap - in this case it is important not to confuse them, since they are designed for different pressures.
The radiator cap valve is set to open at a certain antifreeze pressure - it is indicated on the cap sticker or squeezed directly into the body. The standard unit of measure is kilogram-force per square centimeter (kgf/cm²), aka Atmosphere.
It is worth noting that this is not a physical atmosphere (atm), but a technical one (at), which is approximately equal to 98.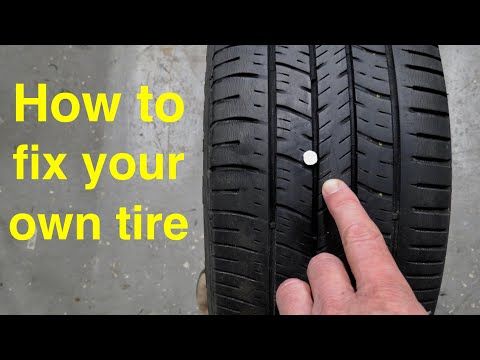 1 kPa. Therefore, on the cover, designed for a pressure of 1.1 kgf / cm², you can see an additional marking of 108 kPa. Sometimes the valve pressure is only given in kilopascals, so you need to correctly match the units of measurement when choosing a cap.
Most common cap pressures: 0.9 and 1.1 kgf/cm²; there are also intermediate options of 1.0 and 1.05 kgf / cm². Covers for 1.3 and 1.4 kgf / cm² are considered sports - as a rule, they are installed on cars for racing, where the cooling system is specially modified for high pressure.
The selection of pressure is guided by which radiator cap is installed on the car from the factory. Installing a cap designed for a different pressure is a serious intervention in the operation of the engine cooling system. You need to understand well what you are doing and why.
So, by setting the cover to 1.1 kgf/cm² instead of the standard 0.9 kgf/cm², you will increase the pressure in the cooling system. This will increase the boiling point of the antifreeze, which can help combat localized overheating and cavitation if this is a problem. At the same time, the load on the radiator and pipes will increase, which means the risk of damage to the elements of the cooling system and leakage of antifreeze.
Conversely, changing from 1.1 kgf/cm² to 0.9 kgf/cm² will reduce the pressure in the cooling system, which will help keep the radiator and pipes from leaking. But antifreeze will be able to boil earlier, which is unacceptable for heat-loaded engines. Therefore, engineers carefully select the pressure in the cooling system based on the design of the motor and its operating conditions.
Breakage of the radiator cap can create a lot of problems for the car owner. And their consequences depend on the nature of this breakdown and the speed of its elimination.
So, the lid valve may jam and not open at the design pressure - the lid will not release excess pressure into the expansion tank.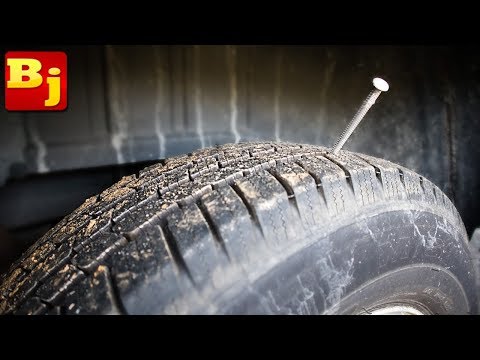 Usually this leads to damage to the radiator or cooling system pipes, and the problem is detected by a puddle of antifreeze under the car. Well, if on time - in this case, the car owner will get off with the purchase of a new radiator. If you continue to drive, losing antifreeze, then the engine will overheat, and the consequences will be much more serious - up to a major overhaul or replacement of the motor.
Radiator cap with a broken valve
The situation can be reversed: the cap valve will not stick in the closed position, but simply fall apart and depressurize the system. In this case, the pressure of the coolant will not be maintained: when the engine warms up, the antifreeze will expand and immediately begin to flow into the expansion tank, overflow it and pour onto the ground. And the antifreeze remaining in the system without pressure will begin to boil actively. The result is also deplorable: engine overheating and costly repairs.
Diagnostics of the radiator cap usually comes down to its visual inspection, checking the integrity and mobility of the valve.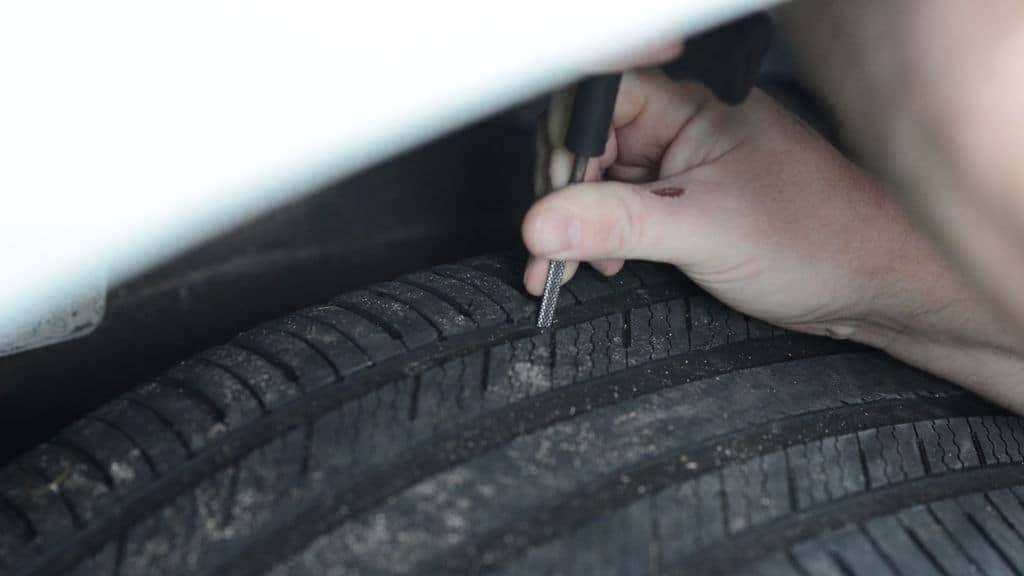 But it is impossible to find out at what pressure the valve works without special equipment. Therefore, it is necessary to judge the failure of the cover by indirect signs:
In case of any problems with the cooling system, it is better to immediately buy a new radiator cap, excluding this part from the "suspects" - fortunately, it is inexpensive. It is also recommended to change the cover and as a preventive measure every 2-3 years.
Radiator cap replacement is easy.