Pressing the Air System
The biggest cause of power complaints in the air tool world has nothing to do with the tool itself. It may seem obvious that air tools require enough air to work. But through the maze that your air navigates--from the compressor, through the driers, holding tanks, pipes, filters, fittings and hoses--knowing if you have enough air can be less than obvious. In this article we will tell you how to check your pressure correctly and give you a checklist to go through if your setup isn't keeping up with demand.
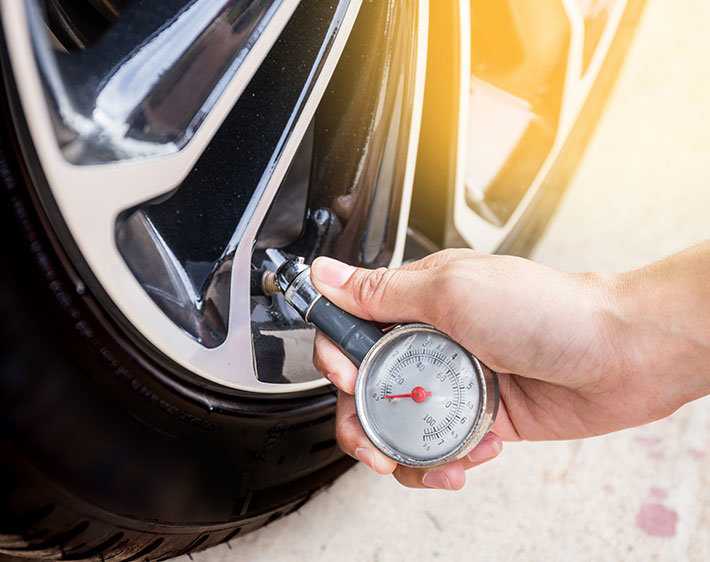
Air tools require 90 PSI air pressure to perform at their best. If a tool does not get all the air it needs performance suffers greatly. If your air system drops to 70 PSI your tools will lose almost 30% of their power and it keeps dropping fast as the PSI goes.
The problem is that you cannot just look at the gauge on your pressure regulator (or air compressor) and know that you have enough air. There are actually two problems with this. First is pressure gauge can be very away from where your tool gets its air and many unknown blockages may be in the way. Secondly that pressure gauge is just telling you the pressure when there is no air being run through the system. You really want to know the pressure when the tool is at its maximum airflow.
To get around the first problem we recommend mounting a pressure gauge right to the back of the tool. This can be done easily with some pipe thread adapters, a pipe tee and an air pressure gauge. With the air pressure being measured right as it goes into the tool, we have eliminated any confusion that can come from inefficient couplers, pipes or hoses.
The second problem needs to be handled differently depending on whether the tool has a governor. A governor limits the maximum (free) speed of the tool by shutting off the air when a set speed is reached. Therefore, a governed tool at free speed uses considerably less air than when it is at its horsepower peak. In the case of a 66 Series motor, the air consumption at free speed is less than 25 sCFM but it draws 75 sCFM at maximum flow. This leads us to testing governed tools under load. So put a wheel on it and do some grinding and make sure that the gauge stays at 90 PSI.
Non-governed tools are much easier as there is nothing in the tool changing the air requirement. Just plug the tool in and let it run at free speed. That is the maximum air usage and if your gauge stays at 90 PSI then you are set.
Air systems are incredibly complex systems and each item in the system will effect the performance of the items around it. Because of this, manufacturer's flow ratings are good guidelines but they do not guarantee that you will get the desired outcome. That is why we stress the test method above. If you can pass that test then your tool has the air it needs no matter what the system behind it looks like. Conversely, if the gauge doesn't say 90 PSI when you run the test, it doesn't matter what the ratings of that clever quick-disconnect is. The gauge is the final arbiter.
The following are a list of basic things to check when your pressure doesn't meet your needs:
1. Clean the screen handle bushings. The screens in the bushings are put there to keep the big contaminants from running through your tool. If you have rusty pipe air lines these will plug up and choke your tool.
2. Eliminate pipe reducers. The size of pipe thread at the back of a tool is the minimum size that the line running to it should be. So if the back of the tool is 3/8", putting a 1/4" reducer in it is a sure way to lose power.
3. Use high flow couplings. Make sure your couplings are high flow units built for air. Hydraulic couplings flow much, much less than their air brethren and can quickly choke your tool.
HP |
Example Models |
Normally Recommended |
|---|---|---|
. |
250GE, 280RA, 290RA |
1/4" |
.7 |
300GE, 300RA, 330RA |
|
.9 |
40G, 44RA, 46RA, 48RA |
|
1.2 |
400HGE, 400RA, 410RA, 420RA |
1/2" |
1.5 |
51H, 511H, 510WG, 57H |
|
2 |
5201H, 520RA |
|
3 |
54V, 56S, 58C, 56H |
|
4 |
64V, 66PC, 68C, 65H, 662 |
4. Use the correct size hose. Each page of our catalog shows the minimum size hose for the tool.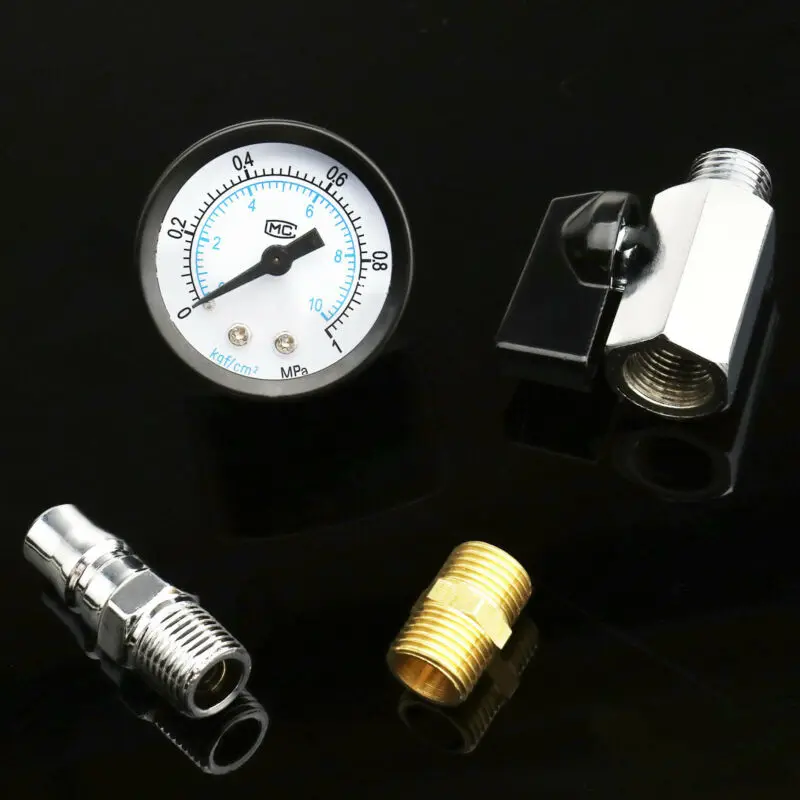 Going smaller will sap power.
HP |
Example Models |
Normally Recommended |
|---|---|---|
.4 |
250GE, 280RA, 290RA |
1/4" |
.7 |
300GE, 300RA, 330RA |
3/8" |
.9 |
40G, 44RA, 46RA, 48RA |
3/8" |
1.2 |
400HGE, 400RA, 410RA, 420RA |
1/2" |
1.5 |
51H, 511H, 510WG, 57H |
|
2 |
5201H, 520RA |
|
3 |
54V, 56S, 58C, 56H |
|
4 |
64V, 66PC, 68C, 65H, 662 |
1/2" or 3/4" |
5. Use a shorter hose. Hoses longer than 10 feet can cause a big pressure drop. Shortening up your hose can greatly increase the flow that hose can handle. But if you need the reach of a long hose, a quick fix is to use 10 feet of the correct hose size and then couple that to a larger hose for the long run back to the feeder line. This will minimize your pressure drop while keeping the hose weight low.
6. Check your filters. Make sure that your air filters are clean.
7. Make sure your filter/regulator/lubricator is the correct size for your application. The manufacturer of your unit should have the maximum CFM rating. If you are in the market for purchasing a new unit, buying a bigger filter will give you more capacity and therefore more time between filter changes.
Air compressors and pneumatic tools make it possible to achieve in seconds what might take hours to accomplish by hand. When it comes to cutting hard materials and loosening long-tightened bolts, an air-powered tool can instantly perform what would otherwise be impossible. However, it’s important to know the air pressure requirements of a given tool or application.
Contact Us Learn More Find a Dealer Near You
So how do you know how much air pressure is needed for a given application? Air tools made for general use with portable air compressors typically require 0 to 5 cubic feet per minute (cfm) at 70 to 90 pounds per square inch (psi), whereas with larger tools connected to stationary systems, the requirements usually exceed 10 cfm at 100 to 120 psi.
When used intermittently, standard-sized tools for certain applications have specific air pressure requirements. However, it’s important to remember the varying cfm levels should be multiplied by four when continuous usage comes into play.
Here are some of those applications, as well as their corresponding cfm levels:
In car maintenance and repairs or in metalwork, an angle grinder is used for cutting, grinding and buffing. An angle grinder can even be used for sanding surfaces and edges on certain materials, providing the tool is equipped with the right disc. Angle grinders can also be operated with one hand or two — a side handle is featured on most models to allow for the two-handed option. For general applications, a standard 7″ handheld angle grinder requires 5 to 8 cfm at 90 psi.
In construction and home renovation, this tool is used to drive deep — embedding brad nails into wall and door trimmings, as well as other parts of a house or building where regular nails would be deemed visually intrusive. The namesake nails of this tool are thin, headless nails that are far less assuming to the naked eye than regular, flat-headed nails. As a relatively lightweight pneumatic tool, a brad nailer generally requires only 0.3 cfm at 90 psi.
As a tool that’s sometimes used to cut through metal, an air chisel is one of the heavier-duty handheld pneumatic tools. With its flat, narrow cutting edge, an air chisel can also be used on stone or wood, which makes it a useful tool in the construction and renovation of homes and buildings. Chisels are especially handy for cutting out dovetail joints and mortises when constructing adjoining walls and shelf panels. In general uses, an air chisel requires 3 to 11 cfm at 90 psi.
If there’s one tool that requires power, it’s the cut-off tool, which is made to cut through sheets of metal for crafts work, home or auto maintenance and industrial applications. Whether you need to cut corners off of metal sheets or panels out of metal walls, an air-powered cut-off tool will perform the task in seconds. In a sense, metal appears like paper against the spinning discs on these tools, which require 4 to 10 cfm at 90 psi.
With hard materials, air compressors are especially helpful for drilling, which is widely considered a difficult task among the shaky handed.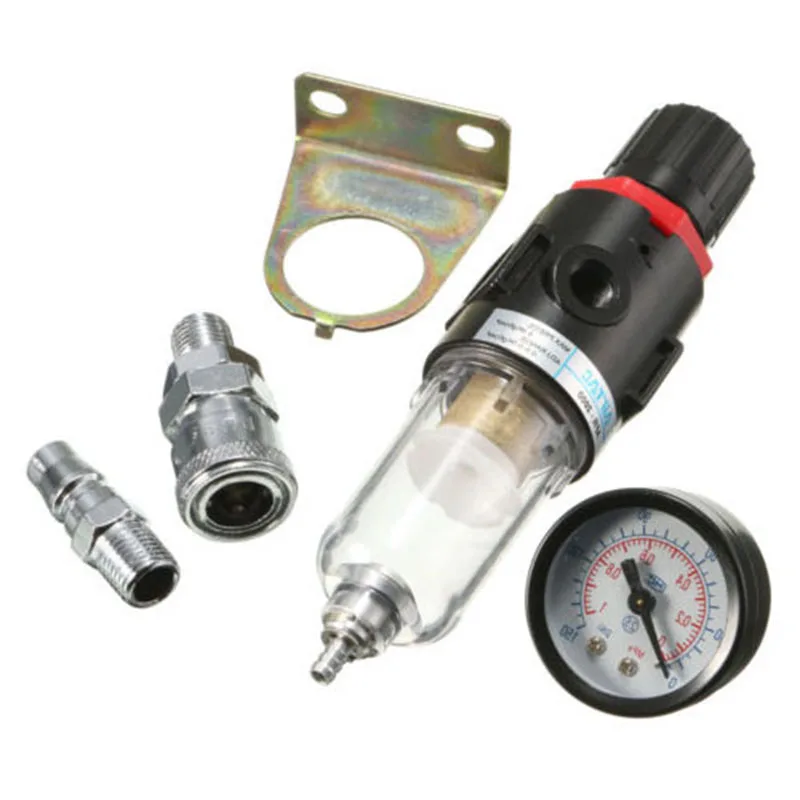 Thanks to the power and speed of pneumatic drills, the drill bits go in and come out so fast that there’s little time for the clumsy arm and hand moves that could otherwise send things in diagonally instead of straight. Whereas traditional electric-powered drills can only penetrate wood, pneumatic drills have the power to also drill into metal and rock. Whether straight-line or reversible, an air-powered drill requires 3 to 6 cfm at 90 psi.
Before the invention of power tools, few tasks were as exhausting to the palm, wrist and elbow as sanding. While most of the heavy lifting and pressure was concentrated in the sawing, cutting and nailing stages, more actual hand motion was needed just to get each raw-cut surface refined to a nice, smooth finish.
Thankfully, the intensive labor involved in sanding has since been liberated by air-powered dual sanders, which sand and buff in seconds flat. This can all be achieved by simply holding the tool above the surface. Great for metal and woodwork, dual sanders require 11 to 13 cfm at 90 psi.
When framing the interior of a house, you can go through dozens of nails within a few short minutes. With a framing nailer, you don’t have to keep nails on hand because nail belts load into the tool like bullet rounds into a machine gun. An air-powered framing nailer allows you to fasten boards together by the dozen in only a fraction of the time it would take with a hammer, whether you’re working on the wall frames or rafters. Most amazingly of all, a framing nailer only requires 2.2 cfm at 90 psi.
The moving parts of machinery rely on lubrication, which is the only thing that protects rubbing metal surfaces from friction wear and consequent heat. In vehicles, for instance, grease guns are used to lubricate door hinges and engine parts. Applying grease manually could be a messy operation, but an air-powered grease gun makes the whole job neat and tidy. A grease gun is also a simple and relatively low-pressure pneumatic tool to operate, as it only requires 4 cfm at 90 psi.
People often stare in wonder at furniture, fixtures and artwork comprised of carved and uniquely cut sheet metal. If you see a metal wall-hanging in the form of a silhouetted sun, moon, flower or animal, chances are it was done by hand with an air metal nibbler. In a similar manner to how X-Acto knives and ion cutters carve shapes out of paper and cardboard, nibblers make cutting metal as easy as cutting paper.
Additionally, nibblers are good for trimming inches off metal surfaces and contouring the corners of otherwise sharp metal ends. When properly guided along sheet metal with minimum arm pressure, an air nibbler requires 4 cfm at 90 psi.
Even the smallest of metal and wood objects are sometimes in need of maintenance. Whether you’d like to grind and smooth out the edges on certain trays or polish and buffer the surface of an old coin, the mini die grinder is an ideal pneumatic tool. A mini die grinder can also be used for moderate-relief wood stenciling and other crafts work. From sanding tips to buffer wheels, the tool is lightweight regardless of the attachment. A mini die grinder requires 4 to 6 cfm at 90 psi.
Even though metals are the strongest material type, they’re still prone to rust, scale and other residues that stem from exposure. Comprised of numerous rattling steel needles, air needle scalers have the power to remove weld slag, rust, paint and various other signs of wear from hard surfaces. If you see welds on a metal bracket, it can all be removed by gently running an air needle scaler back and forth a few times over the surface area. The needle scaler allows you to restore metal surfaces to shiny smoothness in seconds, and it only requires 8 to 16 cfm at 90 psi.
It’s hard to imagine sufficiently smooth wood surfaces without the invention of the orbital air sander. Designed to make the often exhausting task of sanding as easy as waving your hand across a surface, an orbital sander takes the roughness out of wood panels before they’re finally sold as shelves, tables and bookcases.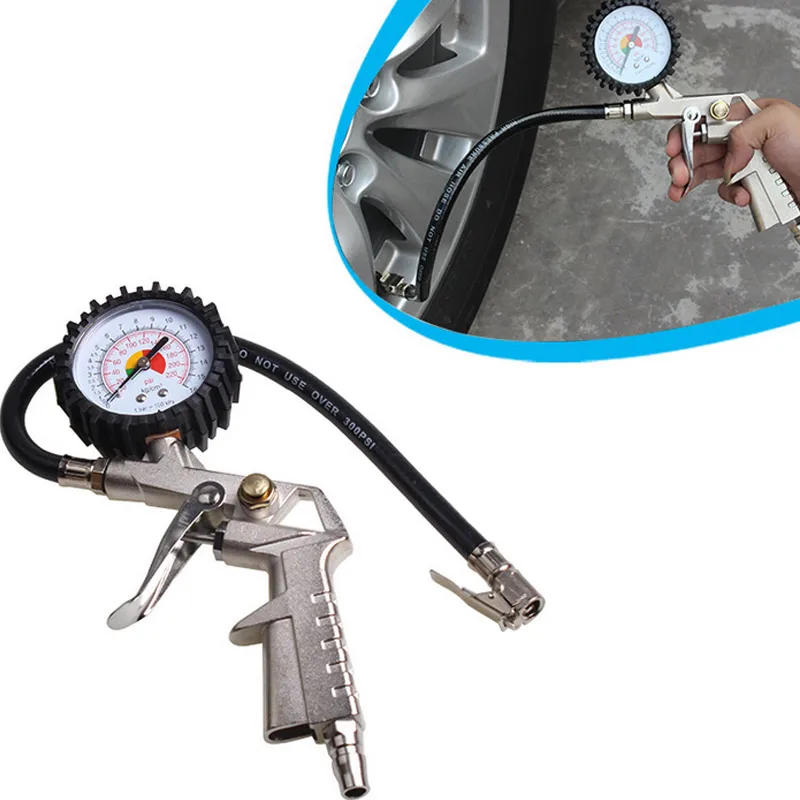
Ideal for artisans and industrial woodworkers alike, the round-disc head of the sander moves in ellipses across each surface, which ensures smoothness by never running over the same spots in the same way twice. With only modest amounts of hand pressure, a pneumatic orbital sander requires 6 to 9 cfm at 90 psi.
Perhaps the greatest of all pneumatic tools is the air paint brush, which eliminates the streaks, splotches and inconsistencies that are often hard to prevent when painting by hand. As one of the most delicate steps in the final stages of vehicle, building and furniture completion, the flow of paint needs to be free of dirt and moisture. These requirements are made possible with a pneumatic airbrush, which allows you to apply layers of paint and glaze at a perfect standard that could never be matched by rollers, brushes or aerosol spray cans. For some of the finest colors and finishes, an airbrush requires 3 to 11.3 cfm at 90 psi.
The tightened bolt can be a stubborn beast, especially when it’s been in place since the day the parts in question were fresh off the assembly line. With its short handle and sideways jack, the socket wrench (or ratchet) allows you to dislodge bolts in tight, narrow places that would be hard to reach with a larger, perpendicular tool.
If you’re having problems with your vehicle, for example, an air ratchet makes it easy to remove and replace the problem pieces under the hood without having to take the vehicle in for service. For all the money that home mechanics save with this handy tool, the per-size requirements of a 90 psi impact wrench are as follows:
Some people assume that the rivet went the way of the dodo once welding came along, yet the permanent fastener is still used in plenty of industrial applications. For instance, rivets are preferred in constructions where fastening must be as strong as possible, but where weight must be kept to a minimum, such as with airplanes. A hydraulic riveter can also be used in home construction, such as when attaching corrugated metal roofing. As one of the less consuming pneumatic tools, the hydraulic riveter requires 4 cfm at 90 psi.
On some metal projects, all that’s needed is a clean, simple slice or corner cut, without the metal confetti strips that fall to the wayside during air-shear applications. Contemporary pneumatic saws average 9,000 strokes per minute, which allows for speed and precision when cutting through layers of 16-gauge sheet metal, as well as through plates and strips of aluminum, copper and plastic. From garden ornaments to pipe art, an air-powered speed saw can serve as a vital tool in the construction of various forms of copper and metal crafts, not to mention automotive and industrial applications. In order to run at optimal capacity, an air speed saw requires 5 cfm at 90 psi.
When it comes to heavier-duty metal cutting, you need more than a mere nibbler. With an air shear, you can slice, trim and outline sheet metals for industrial and craft projects. Armed with pistol-grip shears, today’s versions of the pneumatic tool can make roughly 2,600 cuts per minute. Whether you’re working on metal furniture or fixtures, the standard air shear can cut through cold-rolled steels as thick as 20 gauge, as well as 16-gauge sheet metal and 14-gauge aluminum. An ideal tool for metal workshops of all capacities, an air shear requires 8 to 16 cfm at 90 psi.
When a screw or bolt seems welded into place, the truth is somewhere in the middle. While time and the elements can make a tight bolt impossible for even the strongest person to unscrew manually, an impact wrench will perform the job in a matter of seconds. If there’s a hitch on the back of your truck for a boat or trailer that you no longer use, that hitch could easily be unbolted — regardless of how much rain and harsh temperatures it has endured — with a 1.5″ impact wrench.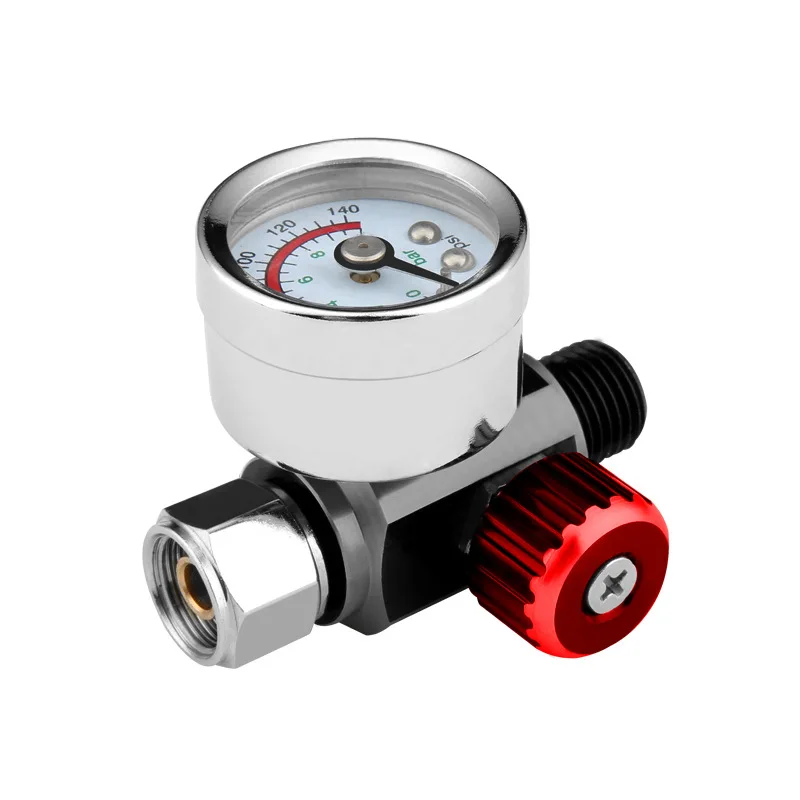
An impact wrench can also be used for applying or removing hubcaps as well as for putting together and taking apart fences, decks and outdoor structures. Best of all, an impact wrench requires virtually no strength or strain on the user’s part, regardless of whether it’s used for reverse or forward applications. Per nozzle size, the requirements of a 90 psi impact wrench are as follows:
Your pneumatic tools and air compressor are rated for cfm. This rating indicates the volume of air required by the air tool or produced by the compressor at a given pressure level. Knowing how much psi you need for an air compressor application will help determine how much cfm the compressor requires to operate your air tools effectively.
Your tools’ cfm requirements can provide an idea of the cfm needed from your air compressor, but you will also need to consider the pressure levels required for the specific function this tool will be performing. Simply matching your air tool’s rating to the compressor’s rating will not always be enough. That’s where this guide and our handy air compressor cfm chart come in.
How much cfm your air compressor needs is determined by a few factors — the type and number of tools you need to power and whether your tools are required for continuous or intermittent use.
Consider the cfm requirements of your specific air tool or tools. The manufacturer’s guidelines should specify this information in the tool manual. If you’re using a single air tool, be it a 1/2″ drill or a 90-pound jackhammer, your air compressor’s minimum cfm rating should be the highest cfm marked for that tool.
It’s crucial to account for the duty cycle when determining your air compressor’s cfm requirements. In this case, the duty cycle refers to the percentage of time an air compressor can run before needing a break to catch up or cool down. The average cfm rating for air tools is usually based on a 25% duty cycle. Because of this, it is often recommended that your compressor’s cfm rating is 1.5 times that of your air tool. This adjustment will prevent your air compressor from overworking.
If your team must use tools for extended periods, consider your compressor’s cfm requirements on a 100% duty cycle. Additional calculations may be necessary, so it is vital to assess what tools you use and how you use them.
Using multiple tools at once will impact your compressor’s cfm requirements. This situation is common in factories and workshops where two or more people work a single job or jobs in close succession. The ability to run multiple tools can significantly boost your team’s effectiveness, so it is essential to plan for this possibility.
If you’re running multiple tools from the same air compressor, you’ll need to add the individual cfm ratings of each tool to determine your compressor’s total cfm requirement. For example, a team that simultaneously uses a 2″ grinder that requires 30 cfm and a 1″ impact wrench that requires 60 cfm will have a total demand of 90 cfm. This means the workers must have an air compressor that reliably produces 90 cfm of air to power both devices.
In this example, the air tools’ cfm ratings are already calculated at a 100% duty cycle. It is important to consider whether your tools will be used continuously or intermittently, especially when using multiple devices at once. If you are aiming for continuous operation of more than one tool, you may need to multiply the total cfm by 4 if the individual tools are only rated on a 25% duty cycle. Using multiple tools continuously can require a significant volume of air.
How you use your tools is vital. When determining your air compressor’s cfm needs, it is important to examine how you and your team operate daily. Do you work in quick bursts with short breaks, or must you use your tools for lengthy periods? Does the air compressor have adequate time in between use periods to catch up and cool down?
Asking yourself these or similar questions will ensure you operate your tools with their intended use in mind.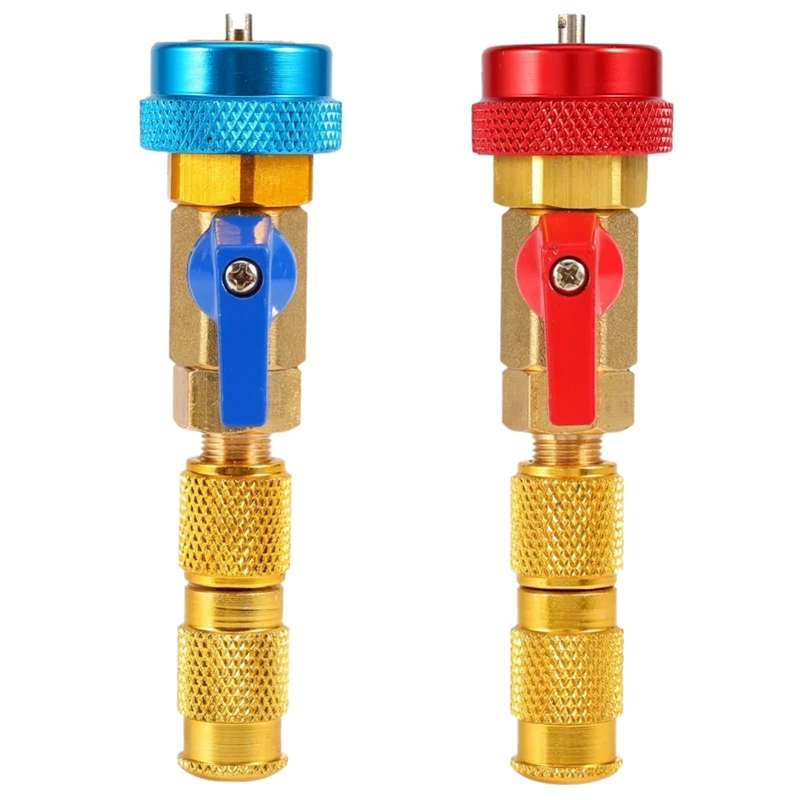 If your application requires you to run air tools for an extended period, you must calculate your air compressor’s cfm requirements on a 100% duty cycle. In contrast, general air tools used for intermittent bursts may get by with a less powerful but more cost-effective compressor.
See how much cfm you would need to operate some of the most common tools at peak performance. This air compressor cfm chart outlines the air pressure required for particular applications.
From grinding, chiseling and drilling to sanding, painting and greasing, it’s crucial to have an air compressor that can provide the right amount of air pressure for each application. Whether you run an auto repair shop or a metal-working studio, or you simply do metal or woodwork in your home garage, Quincy Compressor supplies numerous machines that cover the needed specifications for a vast range of pneumatic tools.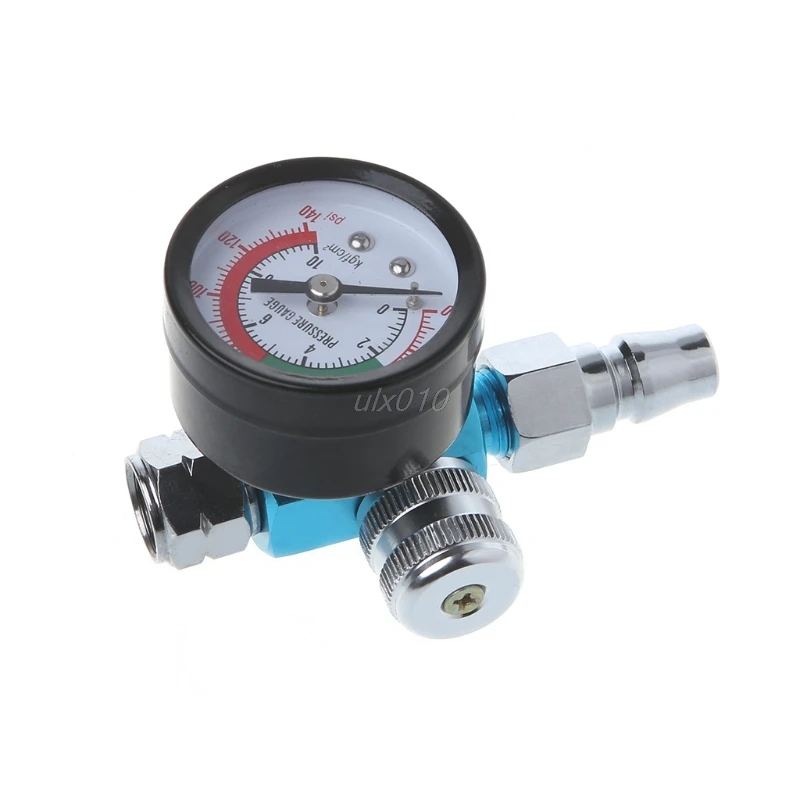
Since 1920, Quincy has been at the forefront of all the latest innovations in air compressor technology. Throughout the United States and abroad, our machines and tools have been used at factories, assembly plants, repair shops and in private workshops. For operations large and small, Quincy air compressors have allowed mechanics, technicians and artisans to get optimal results with just the right pressure for each application.
Quincy compressors have saved money and time while relieving strain and providing optimal results for companies, work teams and private users, and our products can do the same for you. If your equipment arsenal has given you lackluster results and you need a system that provides moisture-free compressed air for various tools, check out the Quincy products page to learn more about our offerings. Then, contact our sales representatives who can assist you in getting the air compressor that will allow you to complete your necessary tasks with ease.
Last Updated on October 26, 2021 at 3:10 pm
Contact Us Learn More Find a Dealer Near You
K category:
Power tools
P Publication:
Air Tool Brief
H read more:
Drilling machines for construction
Brief information about pneumatic tools
Pneumatic machines are driven by compressed air, the pressure of which is adopted at domestic enterprises 5 kg/cm2.
Fig. 1. Pneumatic rotary tool. 1 - starting device; 2 - pneumatic engine of rotational type; 3 - spindle head; 4 - centrifugal regulator; 5 - gear reducer
Due to possible losses in the factory pneumatic networks, the pressure of compressed air, especially in places remote from compressor stations, often does not exceed 4-4.5 kg / cm2, which somewhat reduces the power of the tool.
It is also possible to operate pneumatic tools at lower pressures, but with a significant loss of power and therefore a decrease in productivity. Thus, one of the main conditions for the effective use of pneumatic machines is to ensure normal pressure in the factory network.
The main parts of a rotary pneumatic hand tool (fig. 1), mainly presented in this Handbook, are: a starting device, as a rule, simultaneously acting as a handle; a rotary type pneumatic motor and a spindle head in which a working tool (drill, screwdriver, abrasive wheel, etc. ) is fixed. These parts are mounted in two or more housings made of aluminum alloys (rarely steel), connected to each other by threads or bolts on flanges.
Fig. 2. Design of rotary air motor. 1 - rotor; 2 - stator; 3, - scapula; 4 - covers
Fig. 3. Pneumatic motors with power from 0.1 to 2.5 liters. With. for pneumatic tools
Rotary air motor RPM at idle is almost twice the RPM at normal load. At idle, air consumption increases significantly, engine blades and other rubbing parts wear out faster, there is a danger of abrasive wheel scuffing and vibration increases.
Large air tools are therefore equipped with a centrifugal governor that automatically maintains the idle speed close to the working stroke.
The speed of the machine spindle must in some cases be several times less than the speed of the rotary pneumatic motor. In this regard, a gear reducer (most often planetary) is mounted between the engine and the spindle with a gear ratio from 5 to 200 and a module from 0. 6 to 3.5 mm, depending on the power of the machine and the required spindle speed.
2 shows the construction of a rotary air motor; its main structural elements are the rotor, stator, blades and two covers that limit the stator on both sides. The rotor is mounted on ball bearings, which are installed in the covers.
Compressed air flows from longitudinal holes A and a series of holes B into the cavity C of variable cross section, formed due to the eccentric location of the rotor relative to the inner surface of the stator. Air, exerting pressure on the blades, causes the rotor to rotate, in the grooves of which the blades are able to move in the radial direction.
In practice, deviations of the speeds, power and air consumption from those indicated in the table are possible. These deviations can be caused by different designs of the starting device and the exhaust device.
When creating hand-held pneumatic tools in shipbuilding, they proceed from special requirements caused by the need to use tools in cramped places (between bottom spaces, small compartments, etc.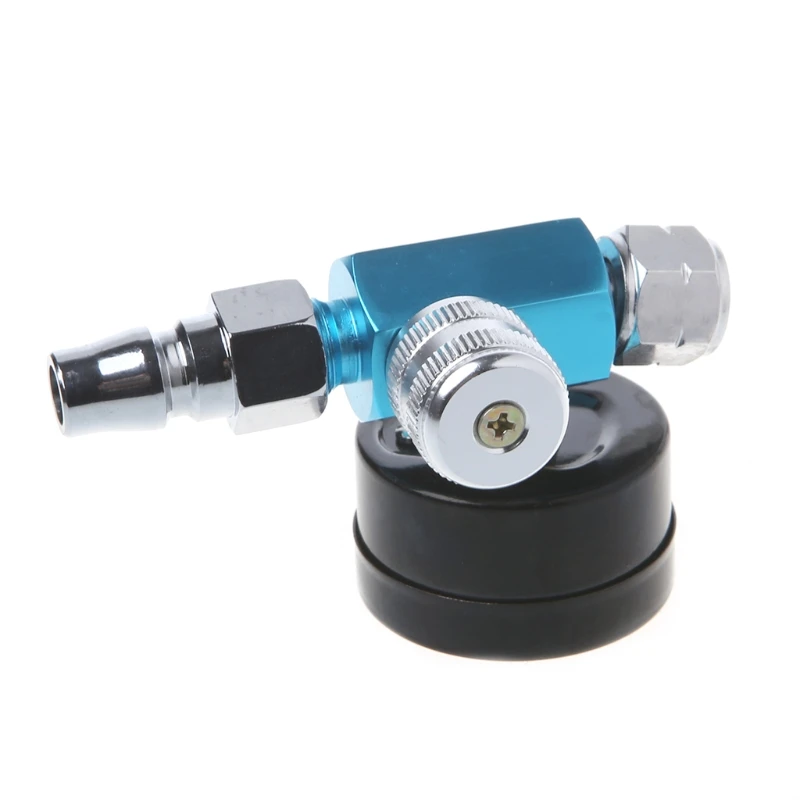 ), transportation along steep and narrow ladders, through small hatches, etc.
Since a large range of work performed simultaneously on a ship often leads to crowding of workers in one area, in addition to these requirements, special attention is paid to the safety of the tool. For this purpose, reliable fastening of a rapidly rotating working tool and its maximum possible protection by casings and other safety devices are provided.
The balance of fast rotating and reciprocating parts has a great influence on both the health of the worker and the quality of the work performed. When working with a highly vibrating tool, the worker quickly becomes tired, labor productivity decreases, and most importantly, the so-called vibration disease may occur.
Various types of balancers, counterweights and other devices are used in the developed tools to dampen vibrations.
The issue of reducing noise from compressed air exhaust is solved by installing various mufflers, the designs of which are very diverse.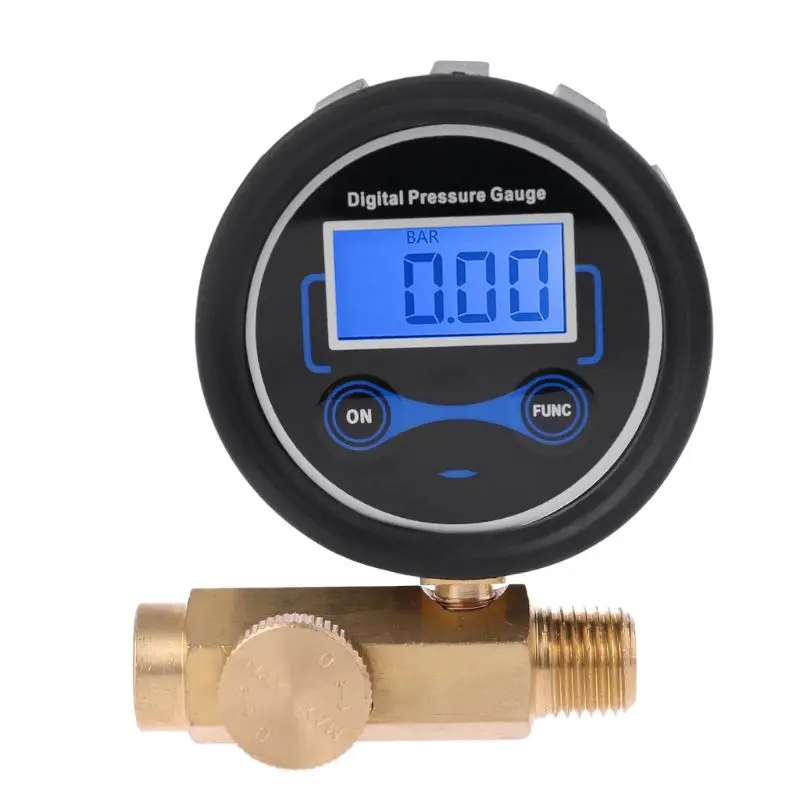
In order to be able to start pneumatic tools in any of their working positions, the engine design provides for the supply of compressed air under the rotor blades.
Toggle Nav
Back
Recommendations for the selection and operation of pneumatic tools and equipment
In this section we would like to explain how to ensure the greatest reliability and high performance when working with pneumatic equipment.
Always read the instructions carefully before using.
1. Compressed air: requirements and quality
To ensure the reliable operation of your pneumatic tool, it is important to have a properly sized compressed air supply system.
The most important guidelines to consider when designing an air supply system are:
the power and pressure generated by the compressor must be sufficient to ensure proper working conditions for the tool;
, the pressure applied to the tool must not exceed 10% of its maximum operating pressure. Otherwise, a pressure regulator must be installed;
The supply system must always be equipped with a dehumidifier to remove vaporized moisture from the air. It is recommended to check the dryer, filters and oils in the oil sprayer weekly, as well as drain the condensate from the line;
main pipelines, branch pipes, and fittings must always be of the correct size and type. In addition, make sure that all connecting hoses have the correct internal diameter, as specified in the air tool connection requirements.
Lack of these devices and regular monitoring will result in clogging, deposits and corrosion in the line as well as in your tool.
2.Impact Wrenches
When choosing an impact wrench, you must pay attention to the quality of the product, which includes: impact mechanism, raw material and weight / power ratio.
The impact mechanism must be highly resistant to vibration, wear and corrosion. This is achieved through thermal, mechanical and chemical surface treatment, which increases the durability and reliability of the tool.
The smallest weight to power ratio will make it possible to obtain the required tightening torque with the lightest tool weight. This will reduce operator fatigue and ensure high productivity when using the tool.
Torque setting and monitoring are equally important elements.
The setting of the torque depends solely on the personal experience and opinion of the operator, on the one hand, but on the other hand, it is possible to achieve torque using torsion shafts that transmit the exact tightening torque. All excess torque transmitted from the tool to the impact head will be absorbed by the special design of the torsion shaft.
3. Types of impact mechanisms
Impact mechanisms are classified into double impact systems and 3-jaw systems.
Double impact system
The main feature of this system is the balanced force distribution due to double impact on both sides of the shaft. This system is recommended for quick tightening of various threaded connections.
3-jaw system
Each cycle, the 3-jaw system makes one stroke on all three jaws. The main distinguishing feature is the low level of vibration, which allows you to comfortably and efficiently perform the operation. It is recommended for tightening rigid connections.
4. Impact sockets
The performance and durability of an impact wrench is directly related to the quality of the impact sockets. The processing method, the material used and the tolerance limit are the main factors that are taken into account in the production and selection of heads. The use of alloy steels in the production of Norgau impact sockets gives them increased hardness and impact resistance.
For high impact loads and maximum torque, it is necessary to fix the head to the seat square with a pin and a rubber ring.
When choosing a head, it is very important to take into account the size of the landing square, the length and diameter of the head.
A competent approach to the choice of pneumatic tools is the key to its uninterrupted high-performance operation with a minimum of effort on the part of the user.

 4
4