If your ATV engine is sputtering, rapidly losing and increasing power, blowing black smoke, or losing power while retaining speed, you probably need to adjust your ATV carburetor. Read this post to learn how to do that in both ideal and emergency situations.
Before you examine the ATV or try to adjust the carburetor, turn off the machine and let it completely cool. You don't want to burn yourself.
When learning how to adjust your ATV carburetor, you'll have to learn about your ATV's individual requirements. Get out your manual and start getting to know the locations of this machine's parts and its tension specifications for the jets and air valves.
Image from www.blog.pro-x.com
There is an ideal fuel to air ratio your carburetor is working to achieve, and when the ratio is off, it allows too much or too little fuel to pass into the engine. This is called having a rich mixture or a lean mixture.
A rich mixture will cause the sputtering and fluctuating power, and if the situation is bad enough, it will cause black smoke. The black smoke comes from so much fuel being let into the engine that it has nowhere to go and just burns up. Anytime you have a rich fuel mixture, you can check the spark plugs and find a black, sooty plug.
A lean mixture causes the ATV to lose power while retaining speed. The spark plug will have a white or blistered spark plug.
If you aren't already familiar with your spark plugs, they should be tan.
To fix rich or lean mixtures, you will be adjusting the carburetor to increase or decrease the amount of fuel, depending on your needs.
ATV are waterproof & breathable riding gear
Find out the items that suit your needs
Image from www.blog.pro-x.com
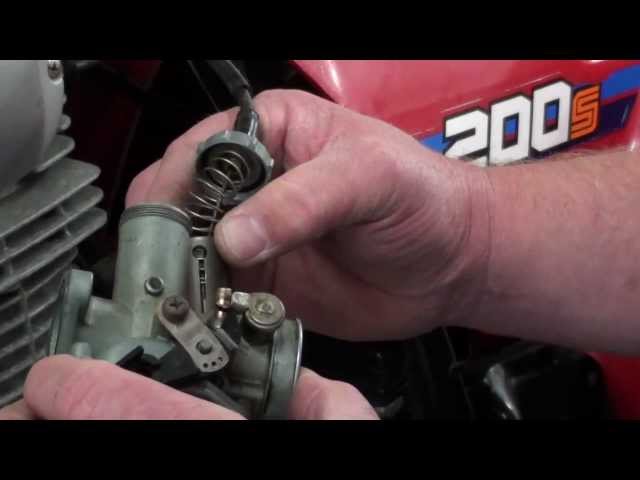
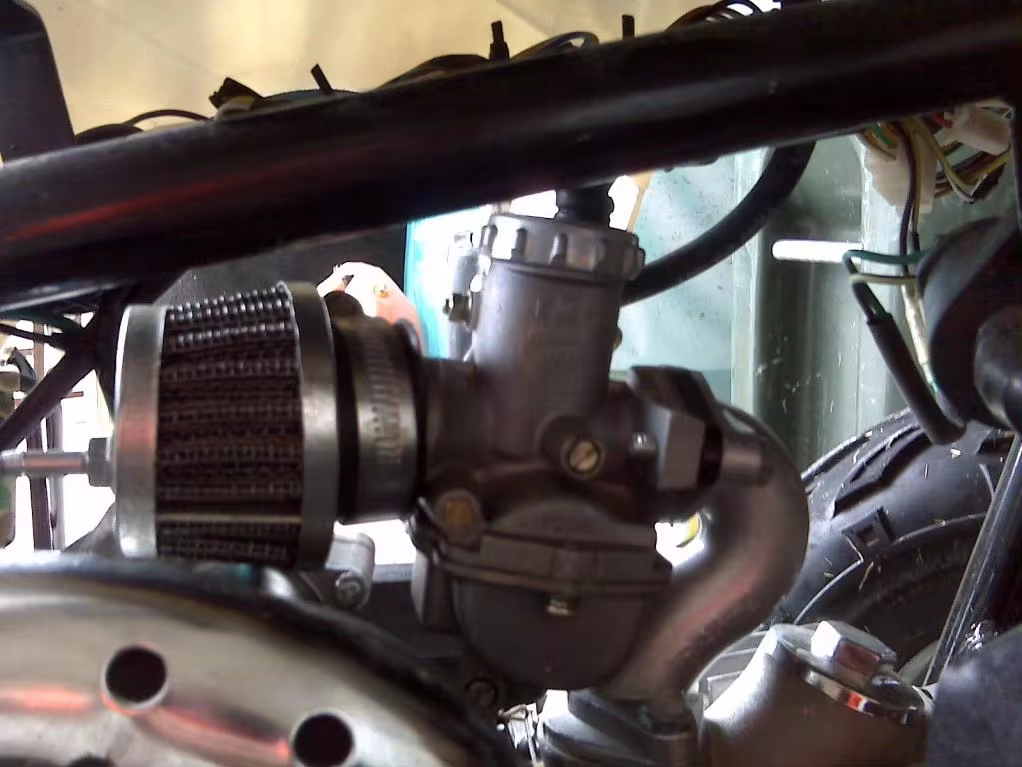
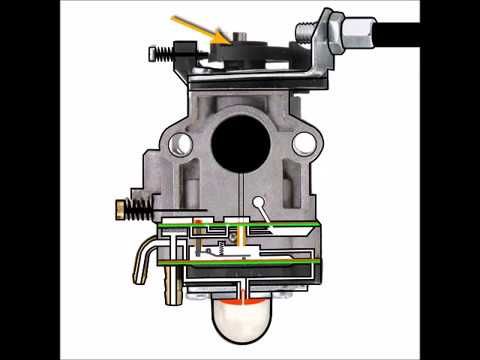
First, locate the carburetor. The owner's manual can tell you exactly where to find it in your model, but it is usually under the seat and the air box.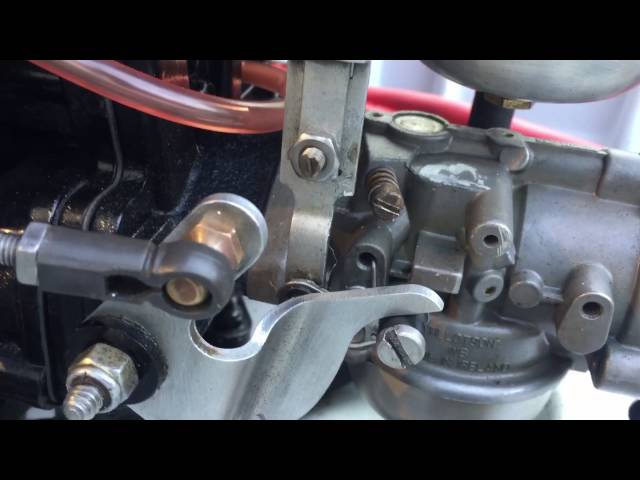
The carburetor contains several pins/screws that control the fuel and air ratio for different aspects of the carburetor functions. One controls the fuel to air ratio at idle to 1/4 throttle, one controls from 1/4 - 3/4 throttle, and one controls from 3/4 to full throttle.
Of these, the jet pins will be clearly visible, and they look like little gold pins. The air adjustment screw will be on either the lower left or right side of the carburetor.
Image from www.blog.pro-x.com
Your ATV's manual will tell you the specific turns of the screws needed to achieve the right balance and how to achieve that balance for your altitude.
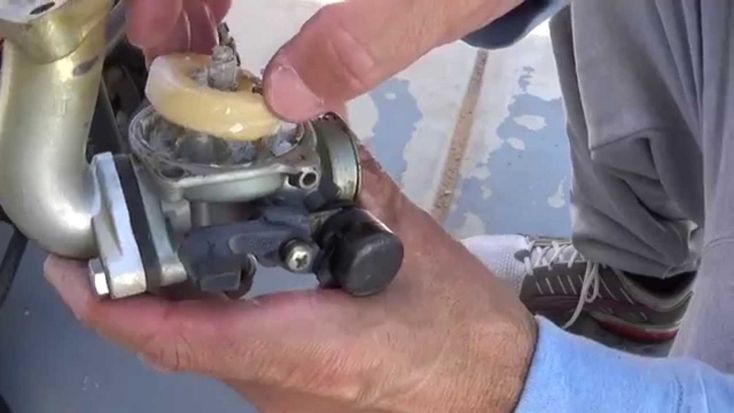
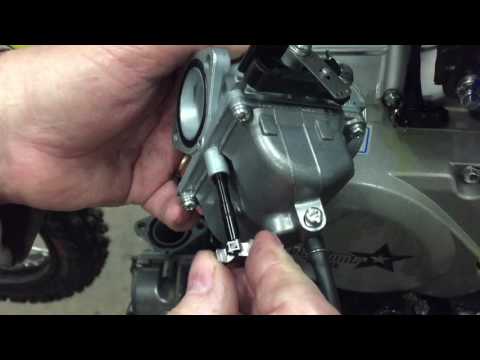
The first step is to tighten the jet pins with a screwdriver until they touch the carburetor. Over tightening serves no good purpose and will make the instructions in your manual incorrect. You want to start from the turn just where the pin met the frame. This is the leanest position, and each turn "measures" a certain amount of fuel mixture.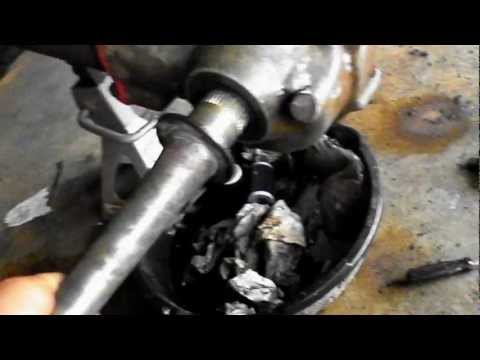
Now unscrew the pins whatever number of times the manual states.
You will repeat this same process with the air valve screw.
ATV are waterproof & breathable riding gear
Find out the items that suit your needs
Image from www.blog.pro-x.com
You'll want to adjust your carburetor at home or in the shop, but if an emergency strikes while you're riding, you may have to tend to it so you can get back home.
In a pinch (again, not recommended), you can wing your ATV carburetor tuning by utilizing the same technique as above but doing it a little at time and trying out the results.
Pick the pilot screw that seems to correspond to your problem. If you seem to be running rich, pick the pilot screw on the engine side of the carburetor. If you're running lean, pick the pilot screw nearest the airbox.
Take a screwdriver, if you have one, or a key, credit card, whatever you can make work, and turn the pilot screw corresponding to your problem until it is flat to the carburetor.
Be very careful that you don't turn it the wrong way and let the screw fall out where you might lose it!
Having the screw flat to the carburetor starts you in the lean position, where you can then loosen the screw to let a little more fuel or air in. You'll want to turn the screw in one quarter turns. Do this 1 and half time and start your engine to see how it runs. If it turns on and doesn't sputter or stall, you're good to go. If not, turn it in one quarter turns until it does. Get your engine to run as well as normal without overdoing it and flooding it. If you can get back to your truck or hauler, you can work on it or have someone else work on it to get it perfect later.
If you bring your manual with you on your rides, you can eliminate most of the trial and error here.
SPORTSMAN
36 EUR
ENDURO
the most durable
577 EUR
AQUAMASTER-ZIP LIGHT
with central zipper
568 EUR
ENDURO LIGHT
the most durable
378 EUR
AQUAMASTER LIGHT
reliability & comfort
438 EUR
NEODRY
16 EUR
ENDURO
the most durable
229 EUR
AQUAMASTER
reliability & comfort
567 EUR
-30%
HIT
AQUAMASTER
reliability & comfort
259 EUR
181. 30 EUR
BELT
8 EUR
ENDURO BF
bootfoot waders
468 EUR
ENDURO BF
bootfoot waders
289 EUR
ENDURO
29 EUR
NEOSENSOR
14 EUR
9.80 EUR
MUDWAY
179 EUR
MUDRIDER
299 EUR
209.30 EUR
WADEMAN
lightweight waders
159 EUR
MUDWAY NEW
199 EUR
URBAN
79 EUR
NEW ATHLETIC PLUS
229 EUR
160.30 EUR
Explore all
ATV Carburetor Adjustment involves tuning your ATV’s carb for maximum performance. How do I know my jetting is off? My ATV bogs down a lot, is jetting to blame? I have performance parts, what now? These are all common questions so lets get you up to speed on ATV carburetor adjustment.
You can tune your own ATV jets and avoid common jetting mistakes if you understand some jetting basics, explained below. A comprehensive installation guide will come with the jetting kit you purchase for your make and model of ATV so instead this guide will focus on explaining the basic principles of how ATV jets work. How jetting works…
#1 – The first thing you need to remember is that ATV jetting refers to throttle position, not engine rpm. Each jet is effective for a specific throttle position range. The pilot jet, or pilot screw as it is sometimes referred to, controls the flow of fuel between Idle speed and about one eight of wide open throttle (WOT). The needle jet controls the flow of fuel from the one eight position up to about the three quarter throttle position. Lastly your main jet controls the flow of fuel between the three quarter and wide open throttle positions.
#2 – The second thing you need to know is that aftermarket performance parts will change your jetting requirements. Increased engine performance usually means an increased demand for fuel so learning ATV carburetor adjustment techniques is important.
Other factors that affect jetting are rev limiters, altitude and fouled plugs if your jetting is off. Altitude directly affects engine performance because the higher you go from sea level the thinner the air gets.
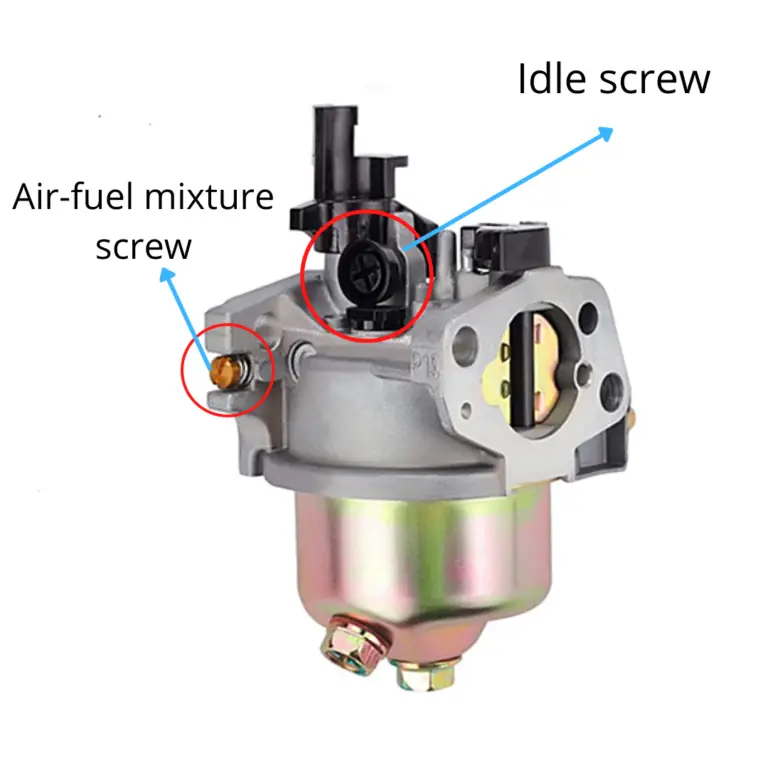
The pilot jet, also referred to as pilot screw, controls carburetor fuel/air mixture between Idle and 1/4 throttle. Turning the screw IN makes the fuel/air mixture leaner. Turning the screw OUT makes the fuel/air mixture richer. Lean means less gas, rich means more gas.
Every jet is identified by a number and that number relates directly to the size of the opening inside the jet.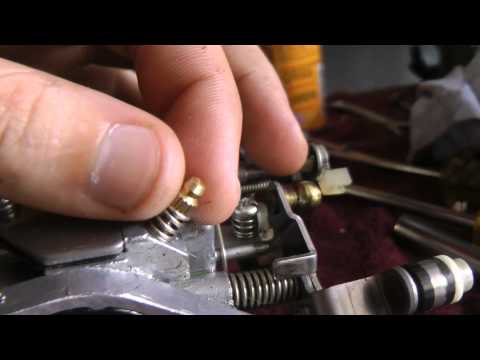 Again smaller is leaner, larger is richer. When jetting your carb if you find that you need to turn the pilot jet all the way in to improve response then you likely need to switch to a smaller number of screw.
If on the other hand you need to turn it more than 2.5 turns out you likely need a larger numbered screw. When your engine bogs down at the smallest increase in throttle position your pilot jetting is likely too rich.
The needle jet and its needle controls the fuel/air mixture from the 1/8th throttle position all the way up to the 3/4 throttle position. The needle within the needle jet is a long tapered pin. As you increase the throttle position the pin pulls out of its jet allowing the fuel/air mixture to become richer. There are several different shapes and diameter of needles/needle jets but the needle jet is often left alone during tuning as it doesn’t affect idle or top end performance. The same rich/lean characteristics apply as with the pilot screw.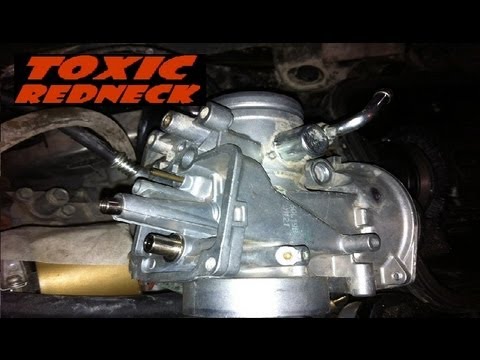
The main jet controls the fuel/air mixture from 3/4 throttle position up to wide open throttle. Again the main jet is numbered and a larger number indicates a larger hole and a richer mixture. A stock engine will perform well with a stock main jet but once engine performance parts are added its likely that you will need to revisit at least the main jet of your carburetor. Different performance part combinations will create different demands from your carburetor. Anything that increases horsepower will also increase fuel demand.
All the performance parts in the world won’t improve performance if you don’t tune your carb. If you have a rev limiter in place you may need to tune or upgrade that as well because a rev limiter will tend to bog down the engine at full throttle. Make sure to follow the instructions included with most jetting kits.
Now that you, hopefully, understand a bit more about the basics of how ATV carburetor parts work these are the steps to take if you’re in a jam on the trails. Blockage, damage, fuel contamination, mud in the air intake system and other conditions can cause your ATV carburetor to be unable to deliver the right amount of fuel to your ATV engine. You always want to tune your ATV carburetor at home or in the shop but that’s not always possible. If you’re in a jam, this is what you can do.
 This is not attaching the carburetor to the engine, it’s going to turn freely if you adjust it.
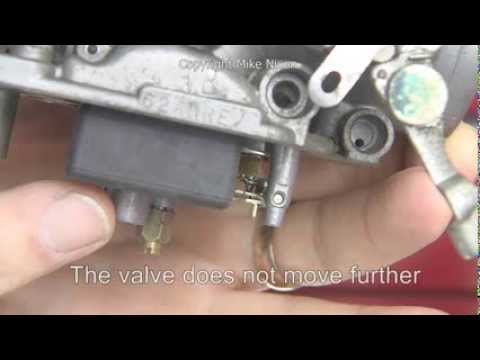 You can continue to adjust it a bit until the engine sounds better and runs without hesitation. If you turn it too much you will eventually flood the engine with too much fuel and this will make it bog down and be hard to start as well. A flooded condition will require time for the fuel to evaporate.
Carburetor jets control the amount of fuel which is mixed with air inside the throttle body of your carburetor. This carburetor jet size chart shows you how effective each jet is at specific throttle levels. A Pilot jet is effective at idle speed up to 1/4 throttle(low-range). A needle jet is effective from 1/4 throttle to 3/4 throttle(mid-range). A main jet is effective from 3/4 throttle up to wide open throttle(top-end).
See also
When diagnosing a carburetor or tuning problem look at the jet responsible for the range in which the problem is occurring.
ALWAYS follow the manufacturer’s specifications whenever possible. Jet size is usually stamped onto the jet itself, typically in milimeters(mm), ranging from small to large. Changing a carb jet for a smaller sized jet will reduce fuel flow. Likewise, installing a larger jet will increase fuel flow and may help a performance engine run more smoothly. Note: an engine that runs rich is less likely to sustain heat damage than and engine that runs lean.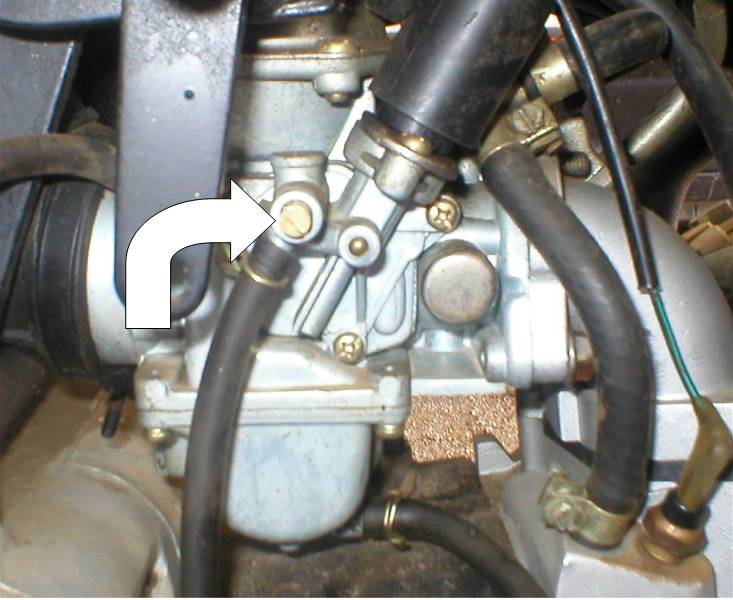
I hope that this carburetor tuning guide helps you understand how jets work so that you can best dial in your ATV for maximum performance(and fun!).
 Note: compressed air is extremely helpful in clearing obstructions.
Carburetor jets become clogged naturally over time and a periodic carburetor cleaning is required. Always consult with your ATV owner’s manual for specific maintenance instructions. Always check the fuel lines, filter and gas tank for contaminants and clean as required at the same time to avoid further clogging.
The majority of carburetor problems are a result of blockage and worn out parts. Troubleshooting a clean ATV carburetor is also much easier than troubleshooting a dirty carb. Typical tools required include a flat head screw-driver, compressed air, an 8mm wrench and carburetor cleaner. Note: Some gaskets and plastic components will swell if exposed to carb cleaner so remove these prior to use.
How to adjust the carburetor on an ATV? What to pay attention to? What are the signs of misuse of the device? About this today in our article. Using the proposed instructions, you will be able to set up the carburetor step by step without the help of specialists.
For stable operation of the ATV, it is necessary that the engine receives the optimal amount of combustible mixture corresponding to its rev range. Otherwise, the following problems may occur:
What needs to be applied in this case:
Important! Carry out tuning only when the carburetor is cleaned outside and inside, as well as when the engine is warmed up to operating temperature.

Note. The location of the bolts on each carburetor model may vary, so read the instructions that came with your machine.
1. Start the ATV and test ride. Wait until the engine has completely cooled down.
2. Check the condition of the spark plug. To do this, unscrew the cap and inspect the candle.
What to look for:

3. Unscrew the needle cover at the top of the carburetor. Pull the needle. This is the main element that regulates the supply of fuel to the combustion chamber, since the needle is connected to the gas trigger. When the trigger is pressed, the needle rises, slightly opening the hole for supplying the fuel mixture. This directly affects the growth of power and speed of the ATV.
4. Remove the cable, then press the needle to pull it out.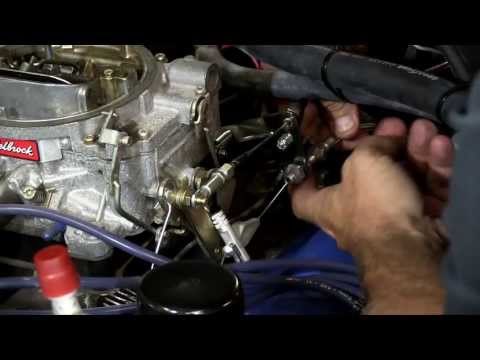 The needle has 5 grooves and a retaining ring. By default, it is set to medium. The lower the retaining ring is located, the higher the needle is raised, which means that a lot of gasoline and little air is supplied. Accordingly, the higher the ring - the less gasoline and more air.
5. Reposition the circlip in the desired direction to optimize carburetor performance. Insert the needle into place.
6. Start the engine and press the throttle trigger. With proper adjustment, the engine should not stall from a sharp pressure.
And remember, you should resort to adjusting the needle only as a last resort, when adjusting the quality and quantity screw does not bring results.
The performance of a four-wheeler depends on the correct level of gasoline in the carburetor. An excessive amount will flood the candles, spill onto the ground and lead to unnecessary expenses. If there is too little fuel, the engine simply will not start.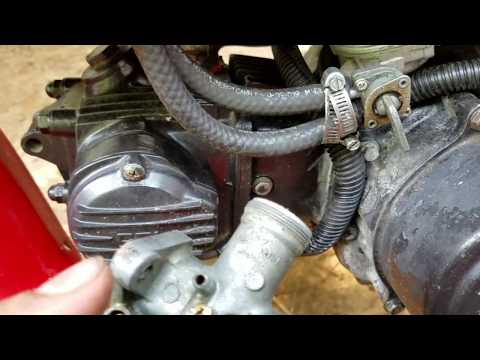
How to optimize the fuel supply
 Over time, the system starts to work incorrectly, which increases fuel consumption, worsens dynamics and other problems appear. So how do you adjust an ATV carburetor?
 The operation and life of the engine directly depends on the quality of the fuel mixture. The carburetor is responsible for the preparation of the composition, but after prolonged use of the equipment, the settings “go astray”. This results in:
 The quad becomes "sluggish" and reluctantly picks up speed. In addition, jerks appear when accelerating.
 Many riders who decide to buy an inexpensive ATV simply do not spare the technique and ignore this procedure. But even if you plan to change your device in 1.5-2 years, adjustment is needed. The reason for this is increased fuel consumption. A quad with an untuned carburetor "eats" 30-40% more gasoline, and these are tangible costs.
So how do you adjust the carburetor on a Chinese ATV? For this you need:
However, it is important to remember that all adjustments are made only with a "clean" carburettor. This means that the rider needs to remove all the dirt from the node and flush the system to remove condensation and sediment from it.
Note: The engine must be warmed up to operating temperature immediately before adjustment.
To set the carburetor idle speed, the float chamber must first be cleared of fuel. To do this, start the ATV, close the fuel cock and wait until the machine stalls (5-10 minutes). To speed up the process, you can take a little ride on the quadric. Of course, gasoline can be drained, but in any case you will have to warm up the device, so the first method of "removing" gasoline is more effective.
Then:

Read the manual before adjusting the carburetor on a 125cc ATV to be sure. Remember that the location of the bolts is different in different devices, so read the documentation in advance.
To evaluate the quality of the fuel composition, make a test run. After that, unscrew the candle, and evaluate its condition. If it is:
Also look out for these "symptoms": damaged tip (electrode failure), oil deposits (damage to rings and caps), chips and inclusions (sign of motor failure).
To adjust the mixture you need to twist the needle cover and pull it out. To get the needle, pull out the cable. After that, move the ring in the required direction (lower - more air, but less fuel and vice versa).