Don't miss a moment from Paris-Roubaix and Unbound Gravel, to the Giro d’Italia, Tour de France, Vuelta a España, and everything in between when you join Outside+.
Q. Dear Lennard,
So earlier this week, I upgraded to road tubeless using an Ultegra wheelset and a pair of Fusion 3s. I inflated the back tire using a CO2 cartridge, and the front I had to take to a bike shop so they could fill it with their compressor (the mechanics gave me a look when I said “road tubeless” and told me I was suicidal, but filled my tire anyway).
So now, my front tire is great, but my rear wheel keeps losing most of its air overnight. I think the bead is seated correctly, because I can pump it up with a hand pump. And I can ride an hour on it just fine, and it still feels hard when I get back. It just won’t hold air overnight. (And yes, I have sealant in there, Effetto Mariposa Espresso).
I can’t figure this one out. What could be the matter? And is it even safe to be riding it?
— JL
A. Dear JL,
Yes, the bead is probably now seated correctly if you can pump it with a hand pump. Cover the tire and rim with soapsuds and inflate the tire. See where the air is coming out, and rotate and tilt the wheel appropriately so that the place where air is bubbling out is at the bottom so the CaffeLatex can go there and plug the hole. That will fix your problem unless the rim is leaking.
If air is bleeding out of the rim around the spoke nipples, the seal on your valve stem is leaking. It probably simply needs a bit of sealant, but it could also be a bad valve stem. Remove the valve stem, put some CaffeLatex around the rubber seal at its base, and put it back in. That has fixed every one I’ve ever had leakage there with, other than on rims that had gotten corroded around the valve hole by a corrosive tire sealant. Only hand-tighten the valve-stem-retaining nut; you want to be able to remove the valve stem without tools should you need to install a spare inner tube on the road.
I suspect that it’s simply the time frame that makes it seem like it’s behaving differently when sitting than when riding. I’ll bet it leaks while you ride, too, and if you were to ride all night long, it would be as soft in the morning as when you leave it sitting inflated overnight.
Assuming you’re using current tubeless-compatible Ultegra wheels and those Fusion 3s say “tubeless” on them (I don’t know why Hutchinson uses the same model names for tubeless and non-tubeless tires…), then yes, it should be safe to ride on. The beadlock of the road tubeless tire with a tubeless-compatible road rim is very good and generally keeps a deflated tire on the rim better than a deflated standard clincher stays on.
One thing to keep in mind is that road tubeless tires are folded tightly in the packaging, leaving kinks in the bead at many places around the rim that tend to not seal along the rim shelf. For a tire that won’t seal, simply put a tube in it and ride it for a while. It will take the proper shape soon enough. Then take the tube out, wet the beads, put in the tubeless valve stem and a couple tablespoons of CaffeLatex sealant, and pump it back up. It may not even require an air compressor or a CO2 cartridge to seat the bead, once it’s been ridden a while.
As to your interaction at the shop, I absolutely cannot understand why so many bike shop employees try to discourage customers from using road tubeless tires. I’m convinced it is simply because they have not used them successfully themselves. I think that indicates rather poor shop training on the part of road tubeless tire and wheel makers and a lack of interest in keeping up with what is current on the part of the shop personnel.
I was super irritated when one of my Bay Area customers ran into roadblocks like this with his own local bike shop. He has Fulcrum 2-Way Fit (meaning they are tubeless-compatible as well as compatible with a standard clincher and tube—characteristics shared by all road tubeless wheels) wheels and Hutchinson Fusion 2 Road Tubeless tires on a bike we built for him. He wanted to replace his worn tires and wanted a shop to do it for him. Thinking ahead more than most customers would, he looked on the Fulcrum website for Fulcrum-authorized retailers in his area and went to one of them.
An employee there started right off telling him how he thought road tubeless tires suck and recommended against using them. But at 6-foot-8 and 245 pounds, this customer is prone to flat tires and wanted the same reliability he’d gotten used to. I think the shop didn’t even have any road tubeless tires in stock and had to order some in, requiring a second trip for the customer. Finally, the shop went ahead and slapped on a pair of road tubeless Hutchinsons without wetting the beads and without using sealant inside (Hutchinson even sells its road tubeless sealant by the gallon with a twist spout — couldn’t be easier for a shop to use it!).
My customer managed to get all of about eight miles down the road on his first ride before one tire went flat and he ended up calling me. I spent some time on the phone bringing him up to speed on how to do it himself. The bummer is that he’s a busy executive who would rather not spend his time working on his bike and would like to leave that to somebody else. Now he understands the system and can educate the bike shop employees who stand in his way on how to use a simple system that they should already know. I’m still shaking my head at how an “authorized retailer” of a wheel brand that makes road tubeless wheels does not understand how to use them.
I ride Hutchinson tubeless tires on all (three) of my road bikes and never have bleed-down issues unless I haven’t ridden one of them in months. (I also ride tubeless tires on my mountain bikes, and often on my cyclocross bikes.) On bikes that don’t get much use and hence don’t run through tires during the course of a season, I do replace the sealant at least annually.
Besides providing a very nice ride with good grip and lower rolling resistance due to the ability to run lower pressures without fear of pinch flats, road tubeless tires have completely eliminated flat tires for me.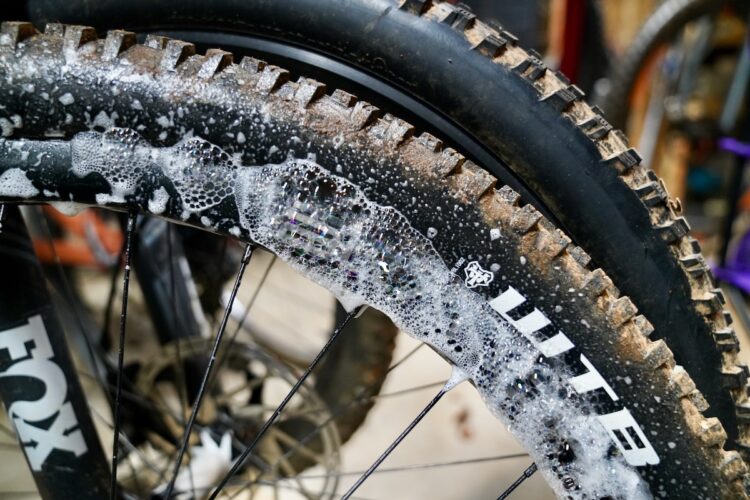 I simply do not get flats anymore on my road bikes, and I’m a big guy. One of the things that was a pain for me when doing all of that testing of carbon clincher wheels for VeloNews (you did read that test in the magazine, didn’t you?) was that I couldn’t use road tubeless tires in them. I was constantly having to fix flats out on the road, since we have a lot of sharp stuff on the roads here in the wintertime. There are few things I dislike more than changing road tires in cold weather.
I have discovered that if I wear through the tread to the point that I can see the casing, a road tubeless tire no longer holds air. And once, I hit a sharp rock at high speed that cut my rear sidewall, requiring, of course, installing a tube and a boot to get home and then replacing the tire. This would have destroyed any tire, but it was cool to see that the tire stayed on despite the high speed and curvy descent. Wanting to see what it would do, I rode the rest of the way down the mountain—over a kilometer, and the tire stayed on until the final switchback, when one bead finally came off.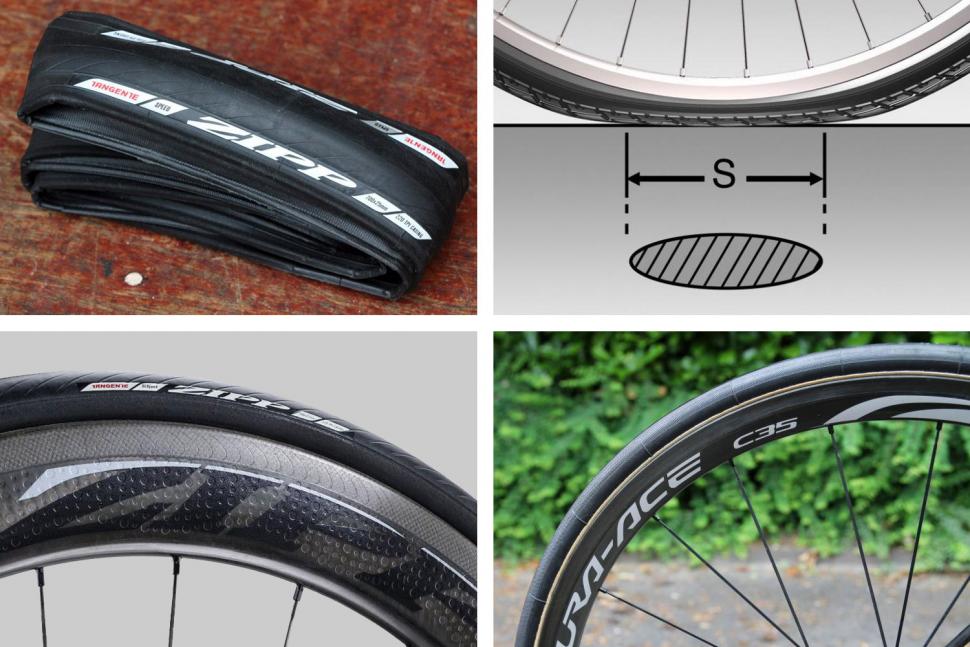
I only wish that road tubeless tires were offered in larger diameters and road tubeless wheels were offered in bomb-proof models. I have many customers who are near or over 300 pounds and who climb in very low gears. High rider weight combined with lots of torque due to pedaling a low gear with lots of leg power can snap spokes in short order on the available tubeless wheels. And while Stan’s NoTubes makes a road tubeless rim strip that would seal up any road rim, including on bomber wheelsets we build here for customers like that, I’m a bit leery from a liability perspective about selling tubeless tires with rims not specifically made for that application. I also am more comfortable philosophically with having the little beadlock ridges that road tubeless wheels have on the inboard edges of the bead shelves to lock and seal the bead.
The (un-stretchable) carbon fiber bead on a road tubeless tire is square, rather than having rounded corners, and it snaps into the square shape of a road tubeless rim’s bead hook and is further retained by the hump. Stan’s rims have a lower bead hook specifically for tubeless use, but his rims are known for being lightweight, not for being ideal for 300-pound riders. So, rather than sending a 300-pound guy out on road tubeless tires on wheels not made for it, I just tell him that he’s simply going to be dealing with frequent flat tires unless he uses super heavy-duty tires and tubes that ride like a truck. It’s a real shame to not be able to offer riders like this the rolling and cornering performance, comfort, and freedom from punctures and pinch flats that road tubeless tires offer.
I’ll get off of my soapbox now. JL, if you get those tires and rims sealed properly with that CaffeLatex (same stuff I use, BTW) and don’t continue to ride them after the tread is completely off, you can expect great performance and flat-free riding with them. Don’t give up, and don’t listen to bike shop employees who try to convince you to not use them!
— Lennard
Re: Regarding overpronation:
Dear Lennard,
An orthotic is a device that controls excessive foot motion during ambulation. Locking the rear foot in place with a varus post will prevent the mid tarsal joints from unlocking and pronating. Bicycling is not a true weight-bearing sport, and the foot does not go through its gait cycle. The only place to control the foot on the pedal is in the forefoot, hence the varus wedges.
The other way to control the amount of rear foot motion on the bike might be to make sure the seat is adjusted at the higher point of the acceptable range therefore limiting ankle dorsiflexion. After that, our anatomy is what it is, some things just cannot be changed. Some are sprinters, some can go the distance, some can hit a 100 mph ball, some can’t. Sometimes if you try to change the dynamics of the foot on the bike, you affect the knee.
— Alan Shier, DPM
Podiatric Medicine & Surgery
Re: Dear Lennard,
Just thought I would add my two cents.
This scenario is fairly common. In addition to a varus forefoot being common this person may also have a slightly higher Q angle.
Maybe a slightly more narrow hip, but the solution is most often a simple one.
— Paul Swift
Founder, Product Development, BikeFit.com
www.bikefitpro.blogspot.com
Follow Lennard on Twitter at www.twitter.com/lennardzinn
Tubeless tires are much, much better than the alternative, but that’s not to say they’re perfect. Sometimes, just getting a tubeless tire to hold air can be a challenge, and diagnosing the problem — let alone fixing it — can be frustrating. If you find yourself staring at a flat tire in the garage and muttering “why” over and over again, here are some tips for getting rolling again.
This article won’t cover mounting tubeless tires; we’ll assume the tire has been mounted successfully, but that it won’t hold air for more than a day or so.
No, we’re not celebrating yet, but this will get us closer to our goal by allowing us to zero in on the part that’s leaking.
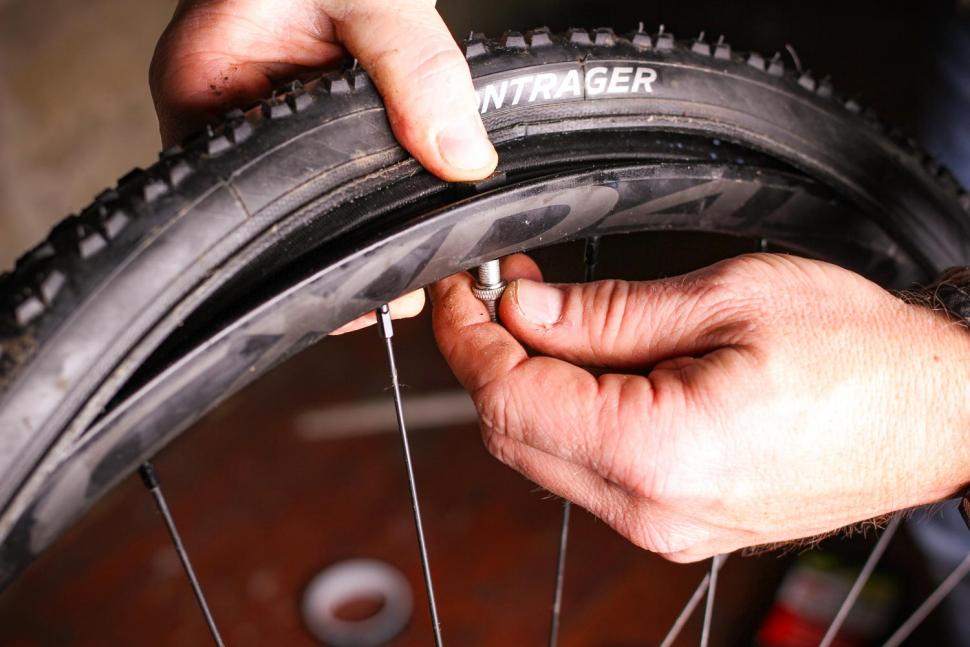
Fill a spray bottle with water and some dish soap, or really any soap that forms bubbles. Next, inflate the tire to 30psi or so. Spray or just pour the soapy water all around the tire and rim, one section at a time. Note any places where air bubbles appear.
If there is a puncture in the tire itself that is leaking, this is generally an easy fix. Make sure you have plenty of sealant in the tire and move it around until the sealant pools at the puncture. Larger punctures may benefit from a tire plug.
With a sidewall leak, you’re usually better off replacing the tire. It might be possible to patch it, or if you’re really lucky, plug it, but in my experience sidewall repairs rarely last very long.
While rare, some tires have been known to absorb or even weep sealant. Tiny pores in the tire compound fill with sealant when it’s initially added, so you may need to add a bit more liquid to replace what’s been lost. If a tire still leaks through the tread or sidewall in multiple locations despite having good sealant coverage and no punctures, you may want to check with your local bike shop or tire manufacturer to see if the tire should be replaced.
Check to make sure the rim wall isn’t dented. If it is, your tire won’t be able to seal. If you find your rim is slightly bent or dented, it might be possible to get things straightened out enough to hold air. According to Gerow, “a couple of small planks of wood, a vice, and a hammer will get you started.”
Even if the rim wall isn’t visibly dented or misshapen, there could be a small gap between the tire bead and the rim that’s leaking air. Make sure you have plenty of sealant in the tire, and hold it horizontally and tilted to allow the liquid to pool around the part of the rim where you saw the bubbles forming. Shake the wheel gently for a minute or so to let the sealant do its work.
In some cases, the tire-rim connection may not be tight due to buildup of old sealant. “Older tires can have a buildup of dry and hardened sealant at their bead that will create space between the rim and the rubber, causing air leaks,” says Gerow. “When mounting a tire that has already been mounted previously, be sure to remove as much dried sealant from the bead as possible.”
Sometimes a tire bead may not be fully seated in the rim. Try pumping the tire up to maximum pressure. The loud popping sound you’ll hear is the bead popping into place. If you didn’t hear that noise the first time you mounted the tire, chances are that is the issue.
After running through the checks above, try soaping the tire again and checking the same spot to see if the fix was a success.
In my experience a leaky valve is often the cause of air pressure losses over time. If the soapy water reveals bubbles at the valve, it’s time to investigate further.
Tubeless valve parts with a valve core remover tool (red, right).First, check the easy stuff: Is the core screwed in tightly? Is the inlet screw loose or bent? A dedicated valve core tool is helpful for proper tightening, and if your fingers aren’t getting the inlet plunger tight enough, needle nose pliers can do the job. Just make sure you don’t over tighten and break the valve, or get it so tight you can’t add air later. If any part of the valve is bent or broken, don’t try to fix it; it’s time to replace it.
If soapy bubbles are forming around the base of the valve, it may not be attached to the rim properly. Most valves have a nut at the base that tightens the valve to the rim. Get this as tight as possible with your fingers, and if necessary give it a slight turn with a wrench. Just be sure to avoid tightening too much because you could damage your rim, especially if it’s carbon fiber, and you may need to be able to remove the nut on the trail in the case of a puncture.
Check the gasket at the base of the valve to ensure that it’s properly seated, and that it sits flush in the rim channel. Add a bit of plumber’s/PTFE tape to seal things if the gasket is particularly troublesome.Next, investigate the valve from the other end, which means taking the tire off the rim. Most valves have a soft rubber gasket that forms a seal around the valve hole in the rim, so check to make sure the valve is seated properly in the rim channel.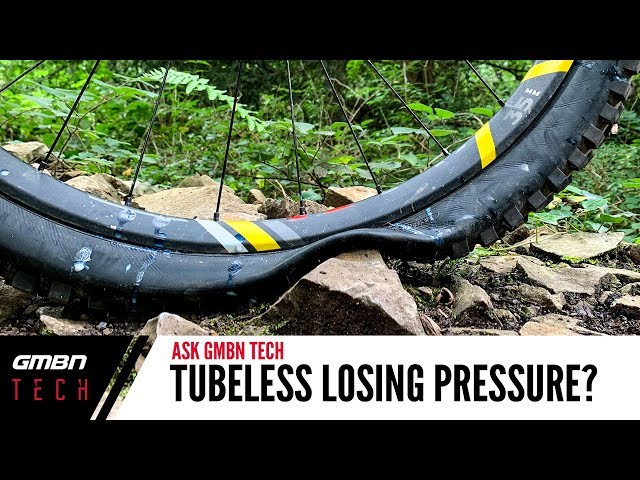 You can also add a bit of teflon tape around the base of the valve to seal things up.
Sometimes sealant can fill in small gaps around the valve. If you notice air leaking while on the trail, try rotating and shaking the tire so the liquid sealant can get to the valve.
If bubbles form around the spoke nipples, the good news is you’ve found your leak! The bad news is, there isn’t a quick fix. This generally means the rim needs to be re-taped, or at the very least the tape needs to be patched over. If the tape appears wrinkled, ripped, or punctured that’s probably what’s causing the leak. Tire levers can often puncture the tape while installing the bead, causing the tape to leak air through the rim.
There are many tutorials online for taping a tubeless rim, but in general, the idea is to get the rim as clean and as dry as possible before taping all the way around in one go. Be mindful of any gaps where air might be able to leak, keeping the tape flat and taut to avoid blisters or pockets.
Sometimes, tires can be sneaky leakers. Pump them up and they’ll stay rock solid in the garage for weeks, but as soon as you roll in the parking lot, or take a turn, they go soft. You soap ’em up, and there’s not a bubble in sight. In fact, this has happened to me a couple times in just the past few months.
This is usually due to a small cut that only opens up when there’s weight on the tire, or if the tire is pumped up to a higher pressure. In your garage, you can try to simulate the effect of riding by adding pressure above what you normally ride, or by deforming the tire with your hands and looking for air bubbles as the tire squirms.
Gerow notes, “Some tires need to be ridden immediately after setup in order to hold air properly. A new tire that won’t hold air in the garage might be good to go after a short romp on the trail.”
Once you find the sneaky leak, getting sealant to the right spot can do the trick, though a plug may work even better.
Ultimately, tubeless mountain bike tire systems are pretty straightforward and there are only so many spots where air can escape. Imagine that you’re the air inside the tire, and you’re looking for a way out. How would you do it? That’s exactly the mindset you need to solve this mystery.
Singletracks may receive compensation for purchases made through any affiliate links in this article.
Contents
Problems that are associated with wheels are constantly accompanying outdoor enthusiasts. If professionals have a whole staff of employees involved in servicing bikes, then amateurs have to decide on their own the question of why they flatten a wheel on a bicycle.
An annoying nuisance that seems impossible to avoid. But this is only at first glance. Often we ourselves are to blame for the flat tire of the bike. What is this about? Read on.
There are at least five reasons that can spoil your mood before a bike ride or during a bike ride:
Let's look at each problem separately and find out what's wrong.
The most common tire on a bicycle is a flat tire that has outlived its useful life. The surface of the tire becomes more viscous, collecting various debris, small glasses, and so on. All the little things gradually penetrate inside, up to the camera. As a result, another puncture.
In addition, holes are formed on the used rubber, through which the bicycle tube is visible when inflated. It can simply come into contact with the road when driving. This will inevitably lead to another unpleasant situation.
They sealed the tube after a puncture using a flipper tape, but the working element still constantly deflates. Perhaps there was a piece of glass in the tire. It is difficult to detect and constantly creates problems for the cyclist.
Note!
Before beading, carefully check the wheel for small stones, glass and other foreign debris.
Beading and disassembling the wheel, you need to use a special tool - beading blade. Avoid screwdrivers, wrenches, and so on.
In this case, there is not enough shock absorption. You can get a puncture by running into, for example, a pointed pit.
Another reason why a flat tire on a bicycle. On the inside, the rim is glued with a flipper tape. It is she who guards the camera. An overfilled element may tear the flipper or burst.
It's true that protective tape can be a problem. It is tough with sharp edges. If installed incorrectly, the chamber can be cut.
Please note! Continuous use of the anti-puncture chamber reduces the wear resistance of the tire.
A bicycle first aid kit or repair kit is available from retailers and specialist shops. "Technical treatment" after finding a puncture does not take more than 5 minutes.
Camera needs to be removed. Pump it up and grease it with glue. Then apply on the patch. Wait for the glue to set, and after 5 minutes the camera can be mounted.
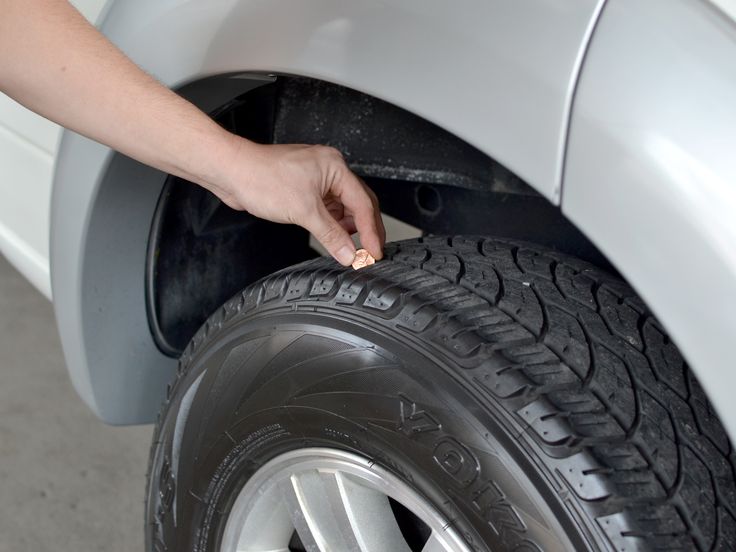
To prevent a flat tire, it is important to follow the manufacturer's recommendations. Tires are marked with (min/max) recommended pressure range.
If you follow the inflation instructions, the number of unpleasant surprises will be drastically reduced. Proven in practice. Good luck!
Tubeless tires can hardly be called the know-how of the bicycle industry, however, they still raise questions for many. The topic itself, as a rule, is surrounded by a lot of skepticism and distrust, which are more often explained by a lack of understanding of basic things and a lack of experience in riding such wheels. To dispel all these doubts, we answer the main questions related to tubeless technologies.
These are bicycle tires that do not have a tube. At the same time, tubeless technology is not only about tires. We are talking about a whole wheel system, which also includes a special rim and a sealant that gives the wheel anti-puncture properties. The tubeless concept makes the bike more comfortable to use and improves its riding performance, which will be discussed in order.
How long ago did this technology appear and can it be trusted?
Those who hear about bicycle tubeless for the first time usually tend to be suspicious of them. You can dislike this technology for subjective reasons, but you definitely shouldn’t distrust it. Tubeless tubes have been massively used for cars and motorcycles for several decades, and during this time they have not given reason to doubt their reliability.
The first tubeless systems for bicycles appeared in 1999, when the French rim brand MAVIC collaborated with tire manufacturer Hutchinson to present their concept of a simple and efficient tubeless wheel. In the 2000s, this technology remained the prerogative of mainly professional athletes, who quickly appreciated its main advantages: lighter weight, more air in the wheel, good "traction" and durability.
In recent years, tubeless has finally ceased to be perceived as something exotic. For example, today a significant part of the MTB and almost all touring cars come with such wheels as standard. A wide variety of sealants are also available on the market, and the number of those who are discovering the benefits of tubeless technology is steadily increasing.
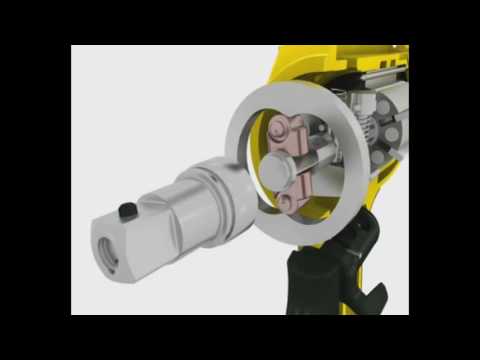
The tubeless system provides a special rim and tires that are labeled tubeless ready or TR. However, the rims themselves are easy to distinguish visually - they have a low side and characteristic walls with recesses, forming a kind of lock in which the tire cord is wedged when air is injected. Due to this, in the inflated state, the rubber reliably and hermetically “sits” on the rim, without breaking off the wheel even at low pressure. The rim itself is additionally glued with a sealing tape, after which the nipples are installed separately.
The benefits of tubeless wheels are revealed no matter how often and what kind of bike you ride: whether it's weekend trips, extreme downhill or long-distance touring. Nevertheless, for certain categories of cyclists tubeless still open up more opportunities: first of all, we are talking about those who are seriously passionate about off-road.
When actively driving off-road with tubeless tubes, you can ride on lowered wheels and at the same time not be afraid of such an unpleasant type of puncture as a snake bite. Low tire pressure, in turn, gives better handling, dampens vibrations more effectively and generally provides more comfort on difficult tracks. If we are talking about cyclists, then they appreciate tubeless for their anti-puncture qualities.
Road bikes also use tubeless wheels. Moreover, they are the pioneers of this technology. But road tubeless tubes are a different story: they are designed for different operating pressures and have tangible design differences. Therefore, further we will talk mainly about those tires that are put on mountain, touring and city bikes.
These are the two rim formats that define the features of a tubeless wheel assembly. BST is a standard that involves the installation of a special sealing tape that prevents air from leaking through the holes in the spokes. This is the most common version of tubeless systems.
UST is a blind rim in which an additional bridge isolates the spoke holes. Thus, there is no need for laying a sealing tape. In practice, this greatly simplifies life, because when installing a tire (especially without proper experience), the tape tends to crush, which is why you have to reassemble the wheel. It is easy to guess that such rims also have a drawback - their price.
The tubeless system in the form in which we wrote it above is already a full-fledged wheel, it can be installed on a bicycle and hit the road. But there is an important nuance. First of all, tubeless tubes are valued for their anti-puncture qualities: for this, a small amount of a special liquid, a sealant, is poured inside the tire.
Yes, you can. But you should not do this. Firstly, this is illogical: for no reason you are depriving yourself of the main advantage of tubeless - the anti-puncture effect. But more importantly, it is very difficult (or even impossible) to inflate such a tire in a completely flat state with a portable pump: to do this, you need either a strong floor pump or a booster. Naturally, no one will take such bulky things with them on the road. Filled with sealant 95% of punctures "seal" without a critical loss of pressure, and in most cases there is no need for even light pumping. Thus, the probability of being with a flat tire is very low.
So, if you put tubeless, sealant is still needed. Such fluids are easy to find in any bike shop, they are inexpensive and require replacement on average once every three to four months, so there is no need to talk about any inconvenience. Yes, in order to cope with the fill, you need to acquire a certain skill, but this is much easier than constantly changing broken cameras. In addition, sealant can be replaced once a season in a specialized service.
Bicycle sealants are based on fine particles (rubber or polymer fibers) suspended in a liquid carrier.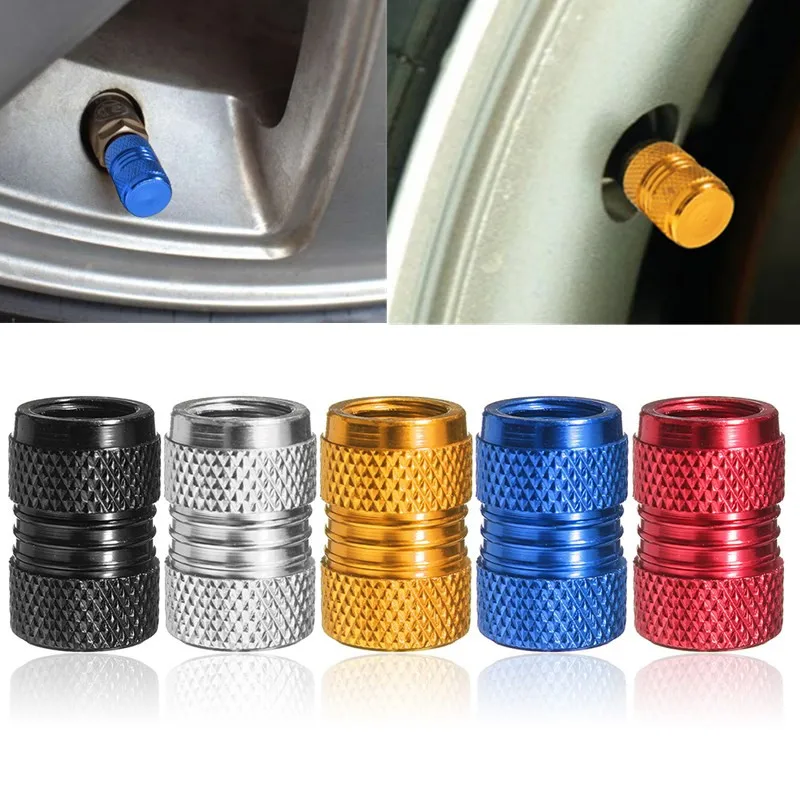 Inside the wheel, the sealant does not polymerize: it is in a liquid state and is distributed along the inside of the tire during movement. When a puncture occurs, the air flow begins to push the solution out. A fine suspension clogs the hole, and the sealant dries quickly. Thus, there is a reliable "sealing" of the puncture.
If we talk about typical punctures - collisions with thorns, wires, small glasses - such damage is self-healing without a noticeable loss of pressure. Usually, a puncture can only be guessed from a small spot on the surface of the tire. Naturally, the sealant works with more complex damage. You can count on it even if you pierce the wheel with a thick nail, 4-5 mm in diameter. If you don't understand how a liquid can seal such holes, you can watch numerous crash tests on YouTube that demonstrate the miraculous properties of sealants.
The consumption per tire is from 50 to 100 ml. If we are talking about standard MTV tires, the golden mean is about 60 ml per wheel. The exact dosage will always be written on the bottle. It is difficult to get confused even for those who do not like to read instructions: most sealants have measuring containers or a dosage scale on the bottle itself.
Here, too, everything is conditional and depends on the characteristics of the specific composition and intensity of punctures. In the absence of serious damage that entails the leakage of a large volume of sealant, you can easily skate a whole season on one fill. Some cyclists prefer to do an incomplete start-up gas station and gradually add 20-30 ml of fluid every two to three months. You can also navigate by how effectively the sealant works: if you see that small punctures are sealed with a strong deflation of the wheel, it may be that the composition is no longer enough and it needs to be added. Be that as it may, sealant is a very economical thing that lasts for a long time.
The sealant inside the tubeless tends to dry out, forming a characteristic film. Whether or not to clean the tire cavity is up to you. This is a purely aesthetic moment, which does not affect the operation of the anti-puncture fluid. The sealant can simply be added as it dries and not bother with unnecessary worries. It is more likely that the tire will completely wear out than it will have time to completely clog with dried filler.
Serious damage - large diameter punctures, small cuts, run over nails with subsequent tire rupture - are repaired using special repair worms. These are rubber or fibrous bands that are inserted into the hole to reduce its area and allow the sealant to seal the puncture.
With long longitudinal cuts it is more difficult. Here you need to either sew up the dissection with nylon threads, or stick a patch on the inside of the tire. You don’t have to worry about the tightness of the repair site - the sealant will do this work, of course, if it does not have time to leak out. But being able to inflate a completely flat tire with only a portable pump will require skill.
In fairness, we note that such complex injuries are rare for most cyclists. But for those who are seriously passionate about off-road, it is better to play it safe with a spare camera. In this case, having caught a cut, you can always drain the sealant, unscrew the nipple from the rim and install a regular camera. And in order not to drive with a “hernia” protruding outward, we recommend placing, for example, a bill folded in half under the cut on the tire.
Tubeless allows you to forget about such an unpleasant form of damage as a "snake bite" forever. It usually happens when at full speed you catch a pothole in the pavement, unsuccessfully jump onto a curb or run into a stone on a downhill. Hitting the edge of a hard object, the tire is crushed, and the rim walls work like incisors, damaging the chamber in two places.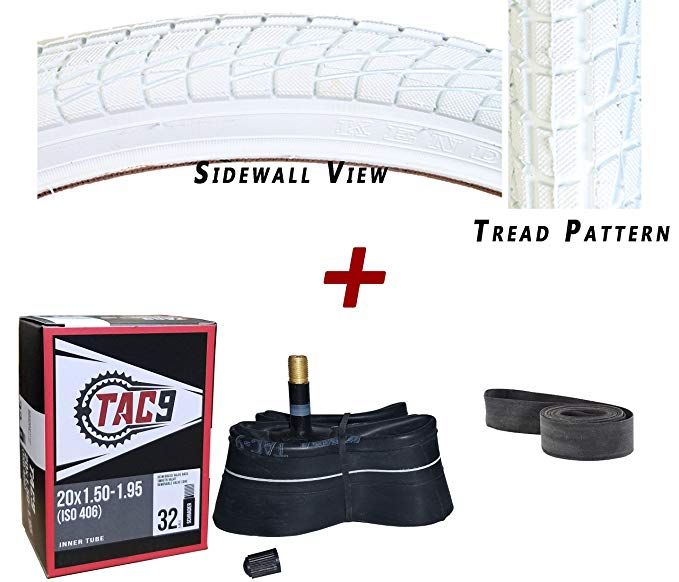 In tubeless wheels, this scenario is excluded, because. there is nothing to break through here. Of course, it can be assumed that the rim will cut the tire itself, but this should be a blow of enormous force, which is almost never encountered in practice.
Rejection of the chamber increases the volume of air in the wheel. This changes the contact patch (it becomes flatter) and allows the wheels to better absorb off-road bumps. Add here the ability to ride at low pressure, without being afraid of a snake bite, and it becomes completely clear why tubeless lovers of hard off-road riding so idolize. Soft tires with a large contact patch "fit" all the bumps in the road, giving excellent traction on rocks, forest primers and other off-road.
In addition to traction, tubeless tires improve shock absorption, dampen vibrations better, and generally provide more off-road comfort. At the same time, to get the most out of this rubber, you need to experiment a lot with tire pressure, trying to find the indicators that will best suit your individual riding style.
Finally, the camera is extra grams. By refusing them, you can save an average of 70-100 g of weight on each wheel. For some, this may seem like a formality, but it is worth considering the fact that extra grams on the periphery of the wheel have a stronger effect on driving performance. This difference is especially felt on road bikes: road bikes, gravel, touring.
They also exist. Moreover, it is far from formal. First, it's the price. The difference becomes especially noticeable when you buy tubeless systems separately: rims, tires + small things (tape, removable nipples, sealant). For tubeless you will have to pay an average of one and a half times more than for ordinary wheels, plus or minus the same class. And if we are talking about more advanced UST rims, then this means another + 30-40% to the cost.
With tubeless by default, everything is more difficult in terms of installation (here we are talking about conventional BST systems). You need to learn how to properly glue the tape, accurately insert the nipples, carefully install tight rubber, making sure not to displace the tape and not fill everything with sealant. On the other hand, all this comes with experience, but what you will always have to put up with is the difficulty with pumping a completely flat tire.
A tubeless tube cannot be inflated until its landing board snaps into place on the rim. To do this, you need to sharply introduce air into the tire. The tire should straighten up and fall into the grooves with a characteristic click - then it can be safely pumped further. This all sounds simple if there is a compressor in the garage. Putting a tubeless tube into the grooves by pumping air with an ordinary floor pump is quite difficult, and almost impossible with a portable bicycle pump.
All this makes life much more difficult. But there are solutions. In the field, a compact can of compressed air can help out. At home, installing tubeless tubes greatly simplifies the booster.