in: How To, Skills
Brett & Kate McKay • May 26, 2022
The bicycle is one of the greatest tools of self-reliance.
Without any need for electricity or gas, it can carry you far distances.
But bikes only work towards your self-sufficiency if you know how to maintain them. They may have fewer complications than an automobile, but they’re still machines that can break down and need to be repaired.
Several years ago Kate and I bought some bikes for ourselves (our kids already had them) so we could take family rides on Tulsa’s many pleasant bike paths. But I realized that I didn’t know beans about how to maintain our new purchases. If one of us got a flat tire, I wouldn’t know how to patch it. If my brakes were acting wonky, I’d be hosed.
So I set out to learn some basic bike maintenance and repair. It’s been fun. I thought I’d share what I’ve learned with you all in a new series: Bike Maintenance 101.
In today’s inaugural class, we’re kicking things off with how to patch a hole in your inner tube. I remember watching my dad patch a hole on one of my bike tires as a kid. It looked like a huge pain in the butt. But I learned that it’s surprisingly easy. Here’s how to do it.
Let’s get that wheel off so we can get to our flat inner tube.
I like to flip my bike upside down. It makes it easier to work with your wheel. I don’t have one of those fancy bike holders you use to work on your bike.
Getting wheels off a bike is a breeze with today’s quick-release systems. It’s pretty much the same for all bikes. The only difference you’ll encounter is how you’ll disconnect your brakes. That will depend on what type of brakes you have on your bike. Here’s how I removed the wheel on my bike with v-brakes.
It’s really easy to disconnect a v-brake. You squeeze the two brake arms together and unlatch the cradle from the noodle (that’s the thing with the rubber tip on it).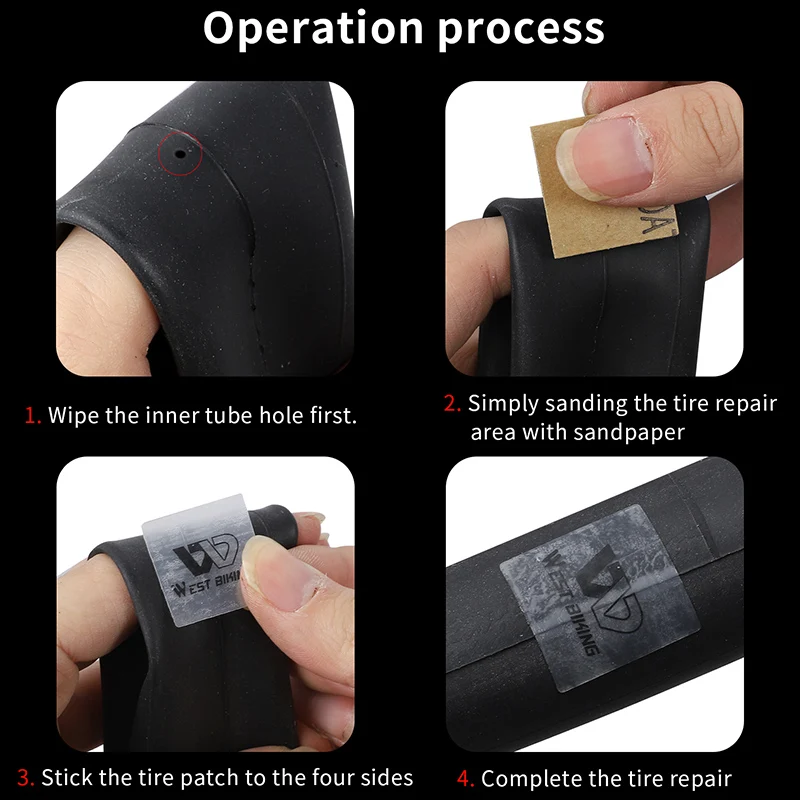
Flip the quick-release lever open and unscrew it until you have enough space to remove the wheel.
You don’t have to take the quick-release rod out of the hub, but if you want to, that’s fine. I think it’s easier to work with the tire without the quick-release rod still in the hub, so I take it out.
Wheel removed!
Time to get the tire off the wheel so we can get to the inner tube. Tire levers will make this job much easier. You can buy them on Amazon. They’re cheap.
Place your first tire lever between the wheel and the tire. You want to get the lever underneath the lip of the tire so you can pry it away from the wheel.
To keep the lip of the tire from going back into the wheel, hook the tire lever into one of the spokes. This will keep your tire and wheel separated, making it much easier to get the rest of the tire off of your wheel.
Place the second tire lever next to your first tire lever.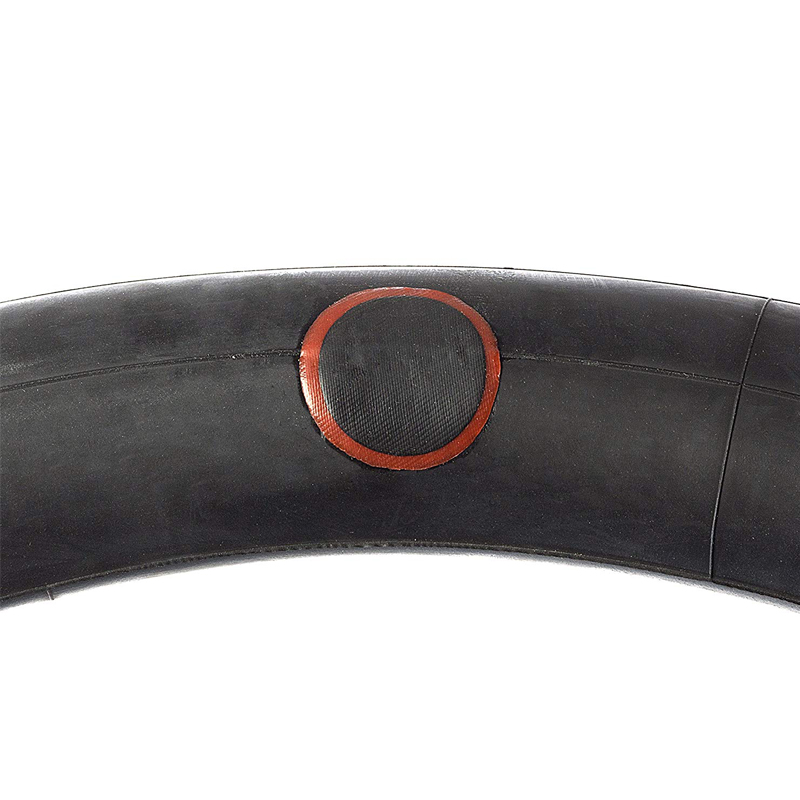 Get it under the lip of the tire. You’ll slide this lever around your wheel to separate the rest of the tire from the wheel.
Here’s what your tire will start looking like as you slide that second tire lever around your wheel. It’s hard at first, but gets easier as you progress. As you can see, more and more of the tire lip is over the rim of the wheel.
Tire successfully removed from wheel. Now it’s time to remove the inner tube from the tire.
Inner tube will be tucked inside your tire. Just pull it out.
There’s the hole.
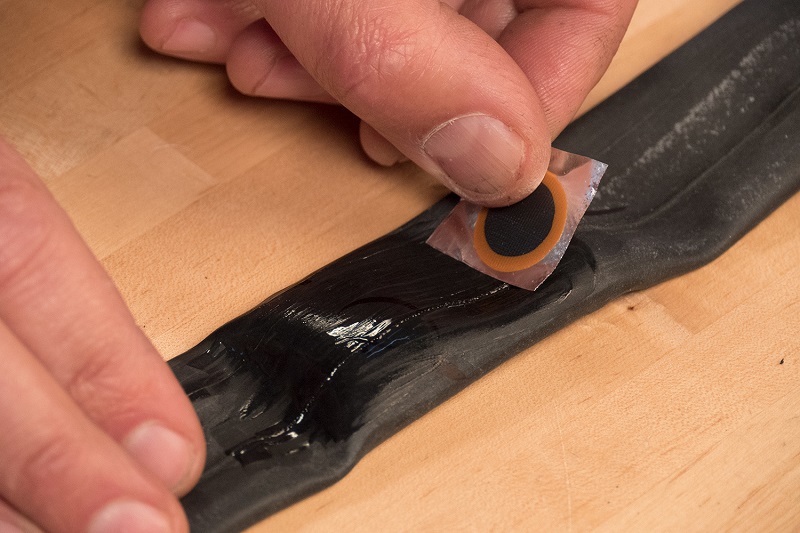
Get your patch kit.
Inside my patch kit is a metal square that has a bunch of little bumps on it. It’s almost like a cheese grater. Use it to lightly scuff up the area on and around the hole. If you don’t have a little metal cheese grater in your patch kit, you can use sandpaper to prep your patch area. The scuffing will give greater adhesion to the patch.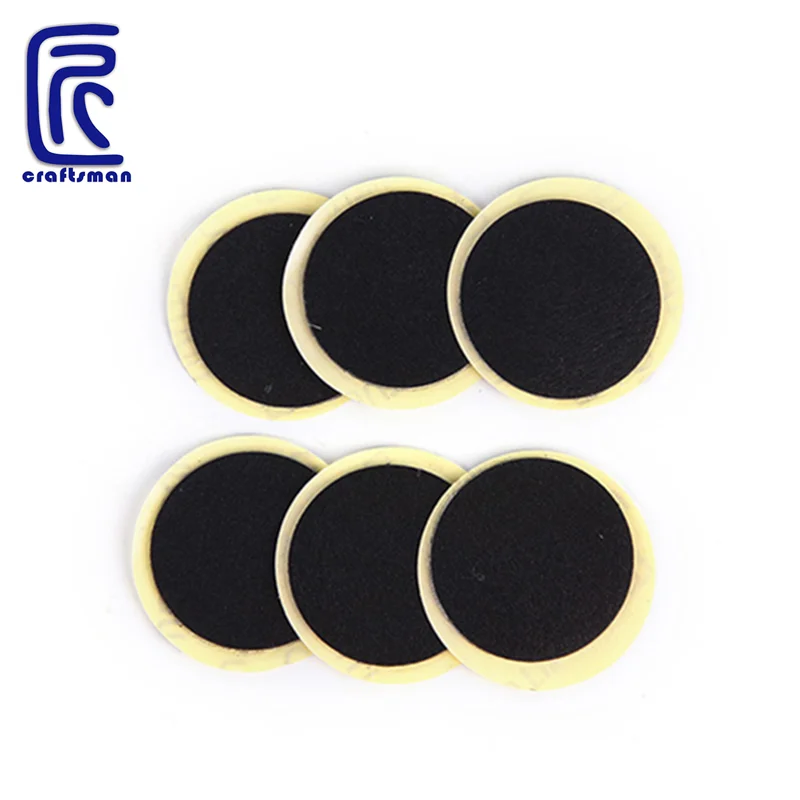
Use a moderate amount of rubber cement. Spread it evenly around an area 1/2″ around your hole.
Pick an appropriate sized patch for your hole. Since mine is so small, I used the smallest patch. Remove the foil backing and stick patch onto the hole.
Peel away the plastic film on top of the patch. Press edges down firmly. Bam! Hole is patched.
Inner tube back in tire.
Tire back on wheel. Getting the tire back on the wheel can be a bit tricky. You may need to use your tire levers to help you get the lip of the tire inside the wheel’s rim. Just make sure you don’t pinch your inner tube between the tire and the wheel. You’ll risk creating a puncture in your inner tube. Once you get your tire back on the wheel, inflate your inner tube and then put your wheel back on your bike.
You can patch your inner tube a few times and not have a problem.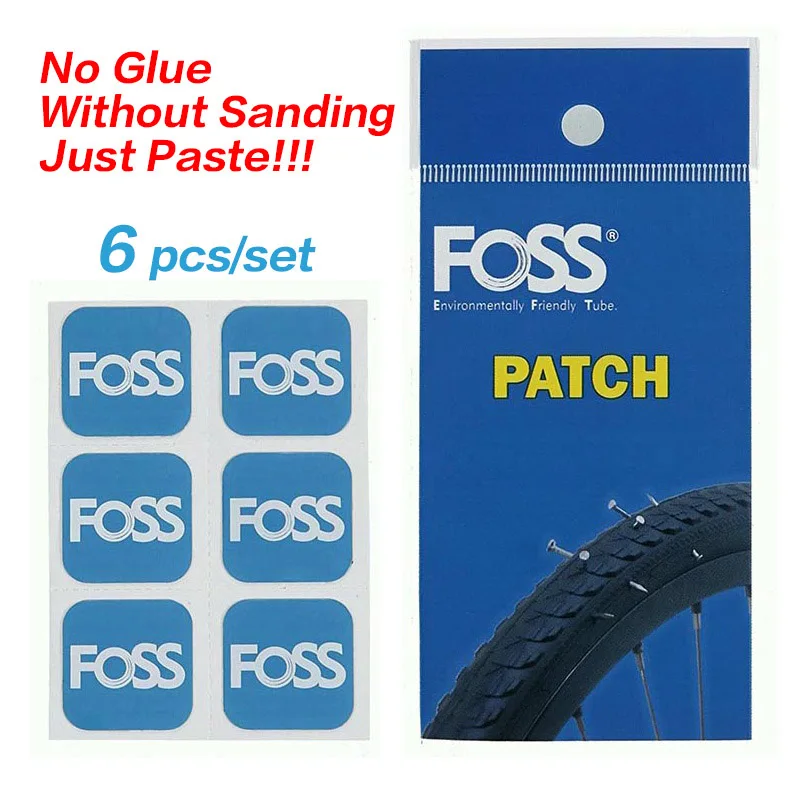 If you have more than three patches, you might start noticing that your tire goes flat overnight and you have to pump it up if you want to use it. After your third patch, chuck your old inner tube and replace it with a new one.
Want to start taking action on the content you read on AoM?
Join the Strenuous Life
Learn More
Anyone who has been riding bikes for a while can tell you that sooner or later, you’re going to get a flat. Even with tube sealant that prevents flat tires for up to two years, it’s just an unavoidable occurrence. When flats occur, the best thing you can do is be educated and prepared to patch the tube so that you can quickly get back on the road. Let's get started:
Materials NeededConsider these different flat tire scenarios: The at-home repair scenario where you're walking your bike into the garage and notice that the back wheel is sagging a little bit—you have a flat. Or, the on-the-trail repair scenario where 20 miles into a 50 mile ride, you go down hard on a rock and get a nasty pinch flat.
We’re going to walk you through some of the materials you’ll need for either situation, and then how to use them for both. Here’s a list of some things you will need to repair your tube.
Follow these 4 easy steps to patch your bicycle tube and repair your flat.
Step 1. Remove Your Tire
Take your tire lever and hook it around the outer edge of the tire (the bead) to get it off of the rim. Once you have the tire lever under the tire rubber, hook the other end of your tire lever around one of your spokes to keep the tire elevated. With a second tire lever, work your way around the rim, taking the tire out of the bead until one side has been completely removed from the rim.
Step 2. Find the Leak
If the puncture or gash in your tube is not easily apparent, you’re going to need to fill the tube back up to locate where the air is escaping from. There are a couple of different ways to find the leak. The layman’s way would just be to run your hand along the tube and try to feel it out.
The bucket of water method that we mentioned earlier, however, is a more accurate way. If you’re at home, fill your sink or a large bucket full of water and submerge each end of the tube. Watch for air bubbles escaping from your tire to locate your problem area.
Make sure you submerge each side, as there may be more than one puncture. Be sure to check the inside of the tire to make sure that the puncture-causing object has been removed. Once located, mark that spot with your tire marking chalk.
Step 3. Patch the Hole
When patching the hole in your bicycle tube, make sure that the area around the puncture is clean so that the patch will stick.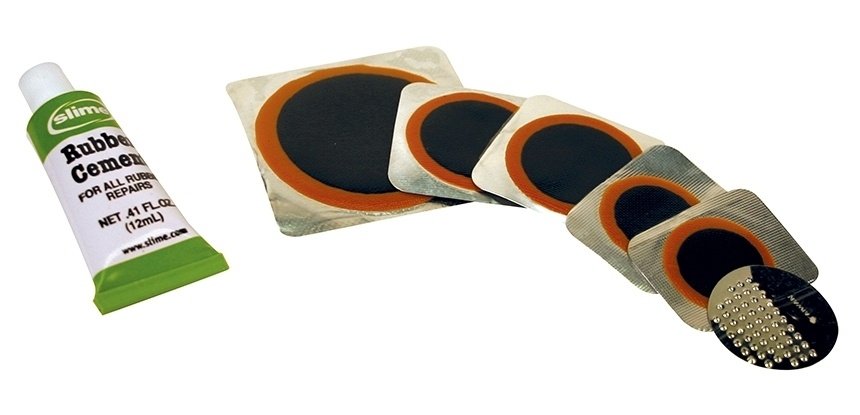 Using the scuffer from your patch kit (sand paper or emery paper will also do the trick), rough up the area around the puncture so that your adhesives have something to grip.
If your patches don’t require glue, simply press them firmly over the hole. For patches that do need glue, add a layer of glue and spread it evenly around the area. Wait for the glue to get a little tacky, and then press on your patch. If you have the materials available to you at home, some cyclists will sprinkle talcum powder on top of the patch so that that patch/adhesive doesn’t stick to the inside of the tire.
Step 4. Put It All Back Together
Put a little air into your tube and then put it back in the tire, making sure, again, that there are no foreign objects remaining in the tire. Be sure to insert the tube and tire back into the rim using only your hands, as the tire levers may pinch the tube and cause another flat (we certainly don’t want that after all your hard work).
Once you’ve pushed the tire back in and the valve stem is securely inside the tire, inflate your tube back to maximum pressure, being sure to check the tire one more time to make sure that the bead is installed snugly.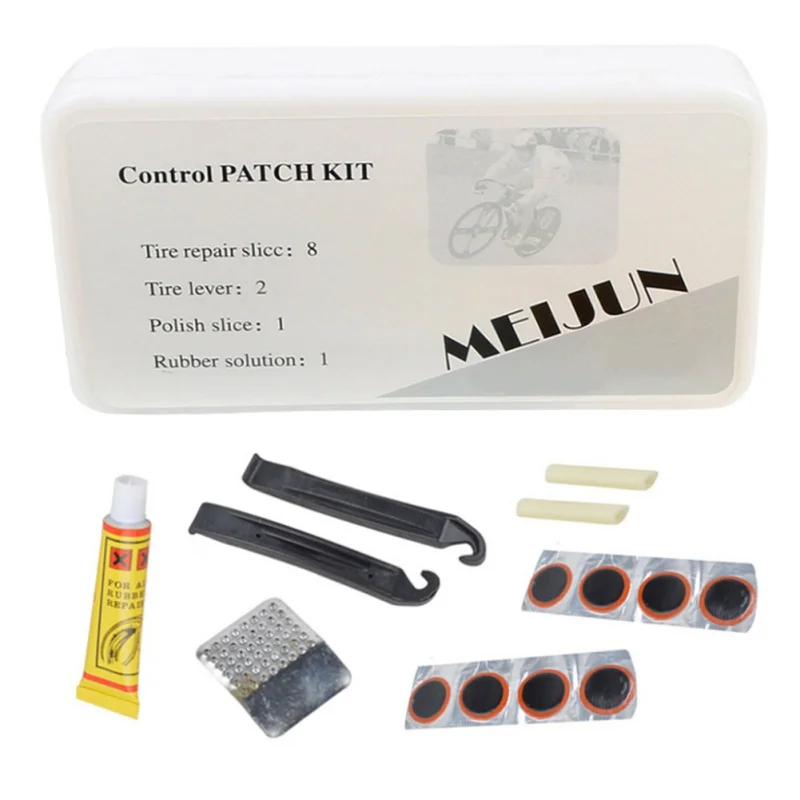 Ready to ride!
← Previous page one 2 3 Next page → View all
13
answers
Which type of tires can prevent goat heads?
We have a lot of goat heads in the area1 and they tend to do something like this with bike tires: Goathats https://i.stack.imgur.com/M1Fw4.jpg Unfortunately I ride a road bike (especially the Kona Dew) so I have much more...
eight
responses
How long should a road tire hold pressure?
How long should a road tire withstand about 100 psi? inch, and what factors can reduce this time? Background: My tire pressure constantly drops to 60 psi. inch in about a week (three trips, a total of ~...
eleven
answers
Can I use a Presta tube in a Schrader rim?
I keep losing pressure in my tires, and among other things, I look at the valves in the pipes. It's an old mountain bike with 26" tires. Can I use Presta pipes (https://en.wikipedia.org/wiki/Presta_valve) on rims drilled for valve...
ten
answers
Do glueless tube patches work the same as glued ones?
Quite a few years ago I tried some glueless patches to repair my punctured pipes while on the road and found that they rarely stayed on for very long. I know technology has advanced a lot since then and I'm wondering...
7
answers
When should tires be changed after a descent?
A nail went through a rear tire while driving today. My question is how do you know if you need to replace a tire or just repair it with a tube repair kit? The hole looks pretty bad. The nail cap has entered the tire...
eight
replies
Does the plastic cap on the Presta valve serve any purpose once fitted to the rim?
I see the use of a cap on the Presta valve when the tube is still packed (this obviously stops the valve from punching the tube), but does it do anything other than look nice (or not) when you have the tube installed on the rim? .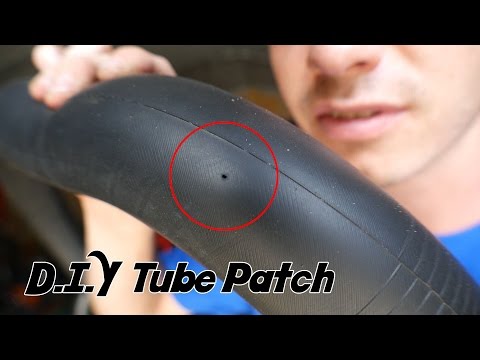 ..
..
eleven
answers
Patch or tube replacement?
Should I patch the tube on my mountain bike, or just replace it with a new one? There are a lot of 1/2" - 3/4" spikes here in Texas and I use 26 x 1.95 tubes. Any particular type/brand of patch is better? Can you recommend any methods to...
four
answers
Should the inner pipe be oversized?
I recently changed the stock 700x35 tires and 35mm Schrader inner tube to 700x25 clicks with 25mm Presta inner tube.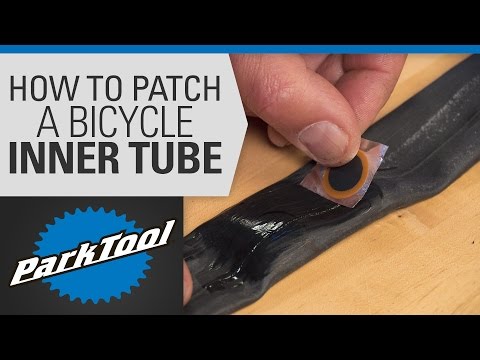 However, during the installation of a new tire and inner tube, I noticed that the inner tube was about an inch or two too...
5
answers
Can I use an inner tube that is too narrow for the tire?
I recently got a puncture and when I went to replace the inner tube I discovered that I had bought the wrong size tube. My tire is 700 x 40 cm, tube is 700 x 28-35 cm. What happens if I use this camera? Will the camera explode when I try...
3
answers
I have 27 inch wheels and need new inner tubes, what size can I use
I have 27 x 1 1/4 inch tires on my bike and need to buy new tubes. Can I use 700s or only 27 inches? ...
← Previous page one 2 3 Next page → View all
© 2022 Ask lobster . All content is licensed under CC BY-SA 3.0 with attribution required. By using our site, you accept our Privacy Policy.We use cookies to make our website more useful to you.
Learn more Accept
Product code: 1100016
Available
*Price is valid while stock lasts.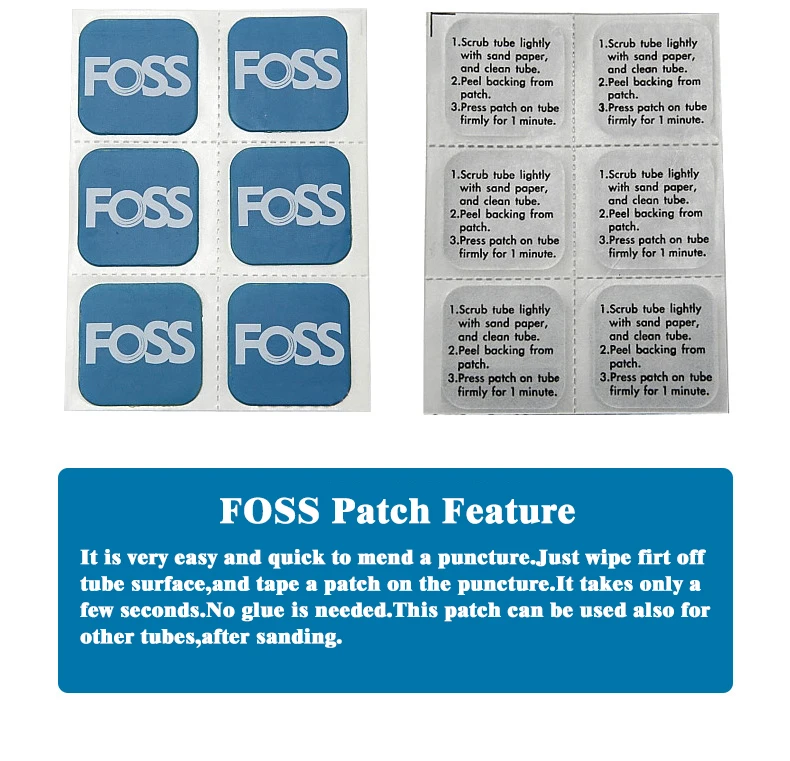 If this product is not in stock, our experts will tell you the delivery time and price information.
* Below is the availability of goods at Elektrika branches. If the goods are in the supplier's warehouse, the delivery time to Elektrika's warehouse may take 2-5 working days.
* Pictures are informative
Manufacturer
Evopipes
Manufacturer code
1030601650002C08002
SKU EAN
4752053008583
LV certificate
Product parameters Description
Halogen free
Yes
Inner diameter
11. 4 mm
4 mm
UV resistance
No
Rope
No
Corrugated halogen-free pipes of medium mechanical strength EVOEL FMs-0H-SMART
Flexible pipe for electrical installations made of a special, halogen-free material, ideal for laying in concrete.
The pipe is sheathed with a plasticized material, so it is characterized by medium impact resistance and moisture resistance. Special structure of the inner surface of the pipe with exceptionally low coefficient of friction for a significant increase in cable pulling distances, as well as to reduce the time required for installation. The color of the pipe sheath is light gray (RAL 7035).
Physical properties:
Material: special plastic, low mechanical strength, low impact resistance, operating temperature range -25°C to +105°C, self-extinguishing, halogen free.
Range of application:
The pipes are especially recommended for laying cables in concrete, they can be used for laying cables in hollow walls, partitions or suspended ceilings. Pipes of this type are the best solution for open and hidden installations, underground installations, when connecting machines and equipment in schools, kindergartens, hospitals, hotels, theaters, cinemas, museums, stadiums, arenas, shopping centers, airports, train stations and office buildings.
*pipes available with metal wire for cable pulling.
Login Registration
Get the ability to view and track all your orders, as well as download invoices.
Your personal representative of the company, with whom it is easy to communicate.
Get additional pleasant discounts just by registering.
Save your most frequently ordered items to make your next order even faster.
Get the ability to view and track all your orders, as well as download invoices.
Your personal representative of the company, with whom it is easy to communicate.