So you’ve pressed the life out of the auto-scan option on your TV but it’s still not able to find any channels. Take a look at the 8 tips in this article that will help you get back to your normal TV viewing.
Here are 8 things you can do if your TV is not able to find any channels
If your TV is struggling to find channels, there are a few things you can do to help it. Take a look at these 8 tips in more detail below.
So your TV can’t seem to find any channels. Don’t despair, as you won’t have to look for any board games or books for this weekend’s entertainment. Coming up are 8 things you can do to help your TV find the channels you love to watch.
Our first tip is, make sure that you’ve plugged the antenna in well. Now, I know that this sounds obvious. But it is so easy for something to jolt the cable and for it to become loose without you noticing. If your home is anything like mine, with dogs, cats, and children running around, this is an important step.
You should ensure that you plug the antenna firmly into the TV’s tuner. You should plug it into the “Antenna In” jack. If you’ve plugged yours in properly and you still can’t find any channels, move on to the next tip.
Make sure that you plug the cable well into the antenna jackAre you seeing some TV channels on your TV screen but perhaps not all the channels you hoped you would? Then it is important you check which channels you should be getting.
The channels you are offered will vary according to your location. You can find a bunch of free channel checkers online. These services will provide you with a list of the channels you should be seeing in your area.
If you are missing some of the channels from the list you see online, you should perform a rescan. Sometimes stations change the frequency they use to broadcast. A rescan will help you to find the station’s new signal.
Ok, but what can you do if you’re not sure how to perform a rescan? Then here are all the instructions you will need to do so.
If you are not seeing any of the channels in the list you see online, move on to some of the other fixes in this article.
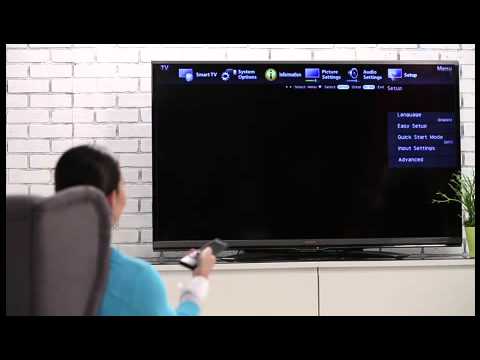
Using the auto-scan button is the most convenient and fastest way of looking for channels. But if your TV is having difficulty, you can also perform a manual scan. This scan should restore the list of channels that are available for your TV.
Here’s everything you will need to perform a manual scan.
These numbers vary depending on where you live. If you are not sure what yours are, you will have to contact your service provider.
Restarting your TV is a good way for you to clear it of any problems that might be stopping it from searching for channels.
You can restart your TV by doing the following.
After restarting your TV, try to perform an automatic channel search. If the TV is not successful, move on to the next fix in this article.
One of the most common reasons why TVs are not able to find channels is because there is a problem with their cable boxes. Restarting your cable box could clear it of any glitches that are stopping it from working as it should.
But how can you go about restarting your TV’s cable box? Here are all the instructions you need.
There’s nothing like seeing a job being completed with your own eyes. So take a look at this handy tutorial video that will walk you through this step.
After performing a cable box reset, you should try to auto-scan for TV channels. If the auto-scan doesn’t bring up any results, you can conclude that there isn’t a problem with the cable box itself. You can now move on to the other fixes in this article that will help you solve the problem.
Checking your TV’s tuner is a really important step that will help you find out if it is working correctly.
You can check your TV’s tuner by doing the following.
Did running the scan on a different TV prove difficult? If the scan didn’t work, then you may have a problem with your TV tuner.
What if you didn’t have a problem auto-scanning for channels on another TV? Then the problem most likely lies with the TV itself. To solve this issue, you may need to contact a technician.
A damaged coaxial cable will not show any results when you search for TV channels. You should check your cable for the following signs of wear and tear.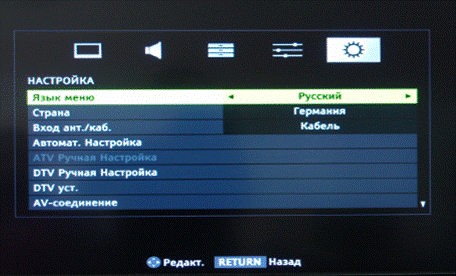
If your coaxial cable is showing any of these signs, you will need to replace it. After you have replaced the cable, try performing an auto channel search. If the channel search is successful, then you will have solved the problem.
Aligning your antenna well is really important. If your antenna is facing the wrong direction, you might not be able to find any channels whatsoever. This is especially true if you live in an area where there is a lot of signal interference.
Ok, but which direction should your antenna be facing? This will all depend on where you live and where your broadcast towers are. To find out, you can check a station locator online. The station locator will tell you the following information.
Once you know where your broadcast towers are, grab a friend and follow these steps.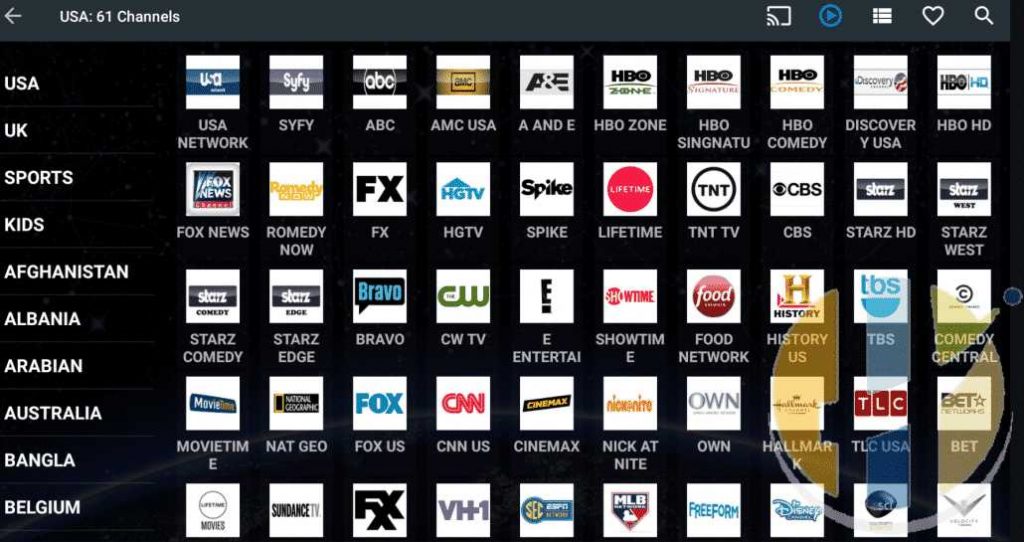
Is your TV struggling to find any channels? Is the auto-scan option failing to bring up any results? Then I’m sure the 8 tips in this article have shown you that you are not doomed to an evening of 19th-century entertainment. I’m sure the tips have helped you to find the TV channels that are available in your area.
Has this article been helpful to you? If so, then make sure that you check out some of our other articles and free guides. You could even sign up to our email list.
Have a great day!
-Craig
The exciting Disney+ streaming platform is a sturdy competitor to the most popular streaming services, including Google TV, Netflix, Amazon, and Hulu.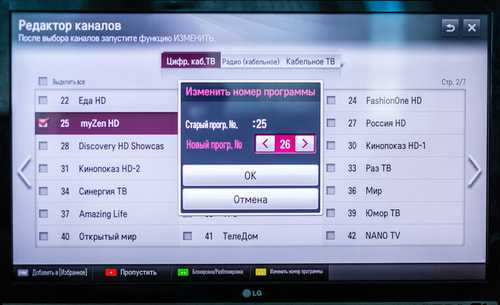
The release of Disney+ brought some bad news, too. Not all smart TV owners can download the app directly to their devices. Some smart TVs, such as LG and Samsung models, support the service, but others have to wait.
If you have a Sharp smart TV, you’ll probably need additional help to stream Disney+ content. This article provides several solutions when your TV does not include the Disney+ app.
The majority of Sharp TVs aren’t compatible with Disney+. This means you need a streaming device to watch your favorite shows and movies. Still, a particular Sharp smart TV series allows you to watch Disney+ directly: the Sharp AQUOS series. These TVs are currently the only Sharp models that run the Android TV operating system, allowing you to download Disney+.
If you own an AQUOS TV, you can download the app on the Android TV platform and stream away.
Since most Sharp TVs in use are not Android devices, the alternative option is to use one of the better streaming platforms and connect it to your smart TV. This option provides better performance and enhances your overall experience.
If you want to connect your Sharp smart TV to one of the streaming devices since it doesn’t include Disney+, you can choose anything from Roku, Chromecast with Google TV, and XBOX One to PlayStation 4, Apple TV, and Amazon Fire TV Sticks.
If you own a streaming device, you can start installing Disney+ right away. If not, you will need to pay up for the device in addition to the Disney+ subscription.
When you decide which streaming service you’ll use, you can go to the Disney+ website, create an account and pick a subscription. After that, it’s time to download and play the service on one of the platforms.
Roku and Chromecast are probably the most popular streaming devices, and both can stream Disney+ in high-quality resolution.
All Roku devices released since 2013 should be compatible with Disney+. When you set up a Roku stick or a set-top-box, follow these steps:
The Disney+ channel will appear on the Home screen among the available channels. Simply go to the channel and enter your Disney+ credentials to access the content.
If you get or have the ‘Chromecast with Google TV’ dongle, you can use it to download and watch Disney+ on your Samsung HDTV.
If you have a Chromecast dongle and not the model with Google TV, you can cast Disney+ from your PC, iOS, or Android device. To mirror Disney+, follow the steps below.

The image should appear on your TV screen. Of course, you need to switch to an HDMI input.
Your gaming console can also be your gateway to Disney+ content since both PS4 and XBOX One are compatible with the service.
When the app downloads, it will appear on the app list. Just lunch it and sign in to your account.

AppleTV and Amazon Fire TV are both compatible with Disney+.
You can open the app as soon as it downloads, or you can return to the Home screen and launch the app from there.
Overall, If you own a Sharp TV running the Android OS, subscribing to Disney+ would be a much easier choice. However, when additional gadgets are necessary, some may reconsider.
On the other hand, some of the most exciting upcoming TV shows and movies are exclusively available on Disney Plus. A platform such as Roku includes some of the best free and premium channels and plenty of other features. Therefore, using a third-party streaming device is very beneficial.
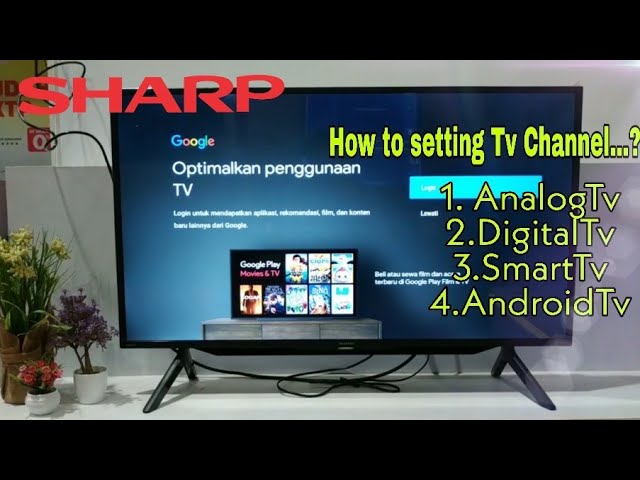
Sharp is one of the most popular brands of consumer television and radio equipment. Many models of TV receivers of this brand give owners the opportunity to watch terrestrial and cable television. We tell you how to set up digital and analog channels on your Sharp TV, as well as organize them conveniently.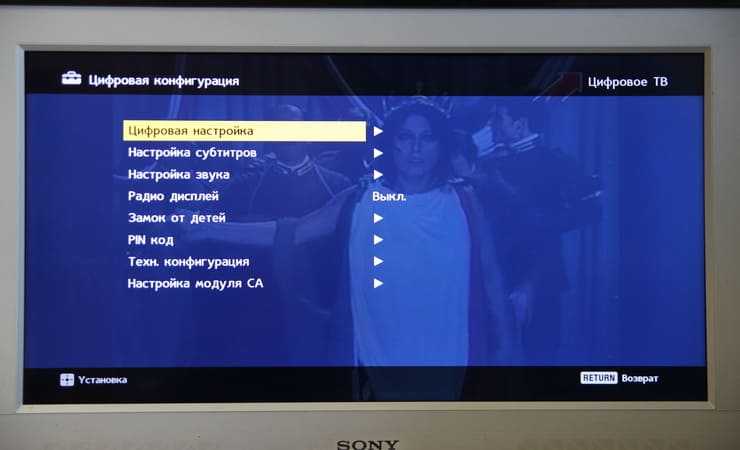
Contents
First of all, you need to determine whether your device is capable of receiving a digital signal on its own or is required. The fact is that Sharp Corporation is a Japanese company, so the TV may well be adapted only to the Japanese ISDB standard.
Is SHARP a cool TV?
Cool! Sucks!
Find the model name of your Sharp TV. It is indicated on the box, in the instructions and on the back of the device.
There are 2 easy ways to check:
| TV model Sharp | Diagonal | 32 | + |
|---|---|---|---|
| LC-39LE351E-BK Black | 39 | + | |
| LC-39LE651 | 39 | + | |
| LC-39LE651 | 39 | + | |
| LC-39LE751 | 39 | + | |
| LC-40CFE4022 | 40 | + | |
| LC-43CFG6002E | 42 | + | |
| LC-42LE761E | 42 | + | |
| LC-50LE651 | 50 | + | |
| LC-50LE751 | 50 | + | |
| LC-52LE831 | 52 | + | |
| LC- 60LE360X | 60 | + | |
| LC-60LE636 | 60 | + | |
| LC-60LE651 | 60 | + | |
| LC-60LE741 | 60 | + | |
| LC-60LE751 | 60 | + | |
| LC-60LE841 | 60 | + | |
| LC-60LE857 | 60 | + | |
| LC-60UHD80R | 60 | + | |
| LC-60PRO10R | 60 | + | |
| LC-70LE741 | 70 | + | |
| LC-70UHD80R | 70 | + | |
| LC-70LE857 | 70 | + | |
| LC-70LE747 | 70 | + | |
| LC-70LE751 | 70 | + | |
| LC-70LE360X | 70 | + | |
| LC-70PRO10R | 70 | + | |
| LC-80LE857 | 80 | + | |
| LC-80LE844 | 80 | + | |
| LC-80LE657 | 80 | + | |
| LC-80LE646 | 80 | + | |
| LC-80LE633 | 80 | + | |
| LC-80LE632 | 80 | + | |
| LC -80PRO10R | 80 | + | |
| LC-90le757 | 90 | +
If the TV was released after 2015:
If the receiver was manufactured before 2015:
If something did not work out, read the detailed one.
If it turned out that the existing model of the Sharp TV receiver is old and does not receive digital signals, there are several ways to act:
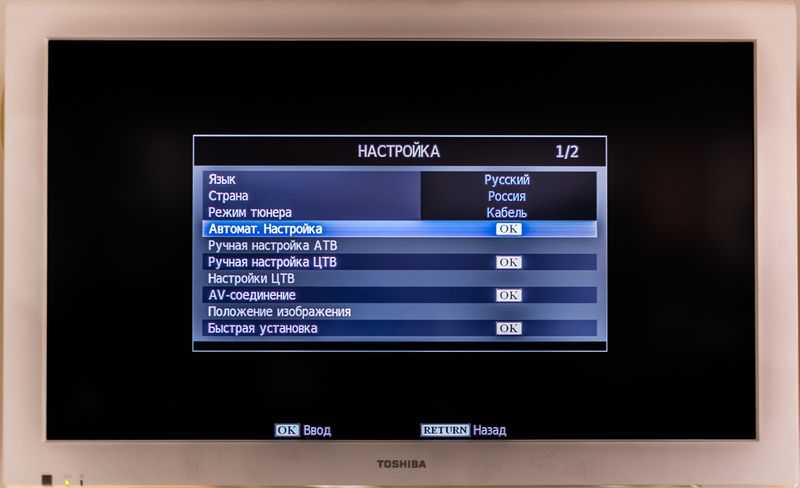
If the TV allows you to receive digital TV, the channel setup is as follows:

Another setting that is also used for cable TV:
Does your Sharp support digital?
Support! Seems not
Setting up a Sharp TV to receive digital TV looks like this:
In the event that, in addition to federal digital multiplexes, local analog TV channels are broadcast from the repeater, their reception can also be configured. To do this, do the following:
To watch analogue broadcasts, you may need to switch the mode using the remote control.
You can sort channels in two ways:
Channels are deleted using the same editing function. Required:
previous
Connecting and Setting4 Best Ways to Connect Multiple TVs to Digital TV
Next
Connecting and Setting Up How to Solve Digital TV Freezes and Stutters
Sharp is a popular Japanese brand for quality household and television equipment . The range of Sharp TVs allows you to connect to analog and digital TV broadcasts. As part of the article, options are considered that allow you to set up digital channels on a Sharp TV.
Contents
First you need to understand if your TV can work with a digital signal on its own or it will need a receiver. Many TV devices, if they can support "digit", then only with the help of the Japanese ISDB standard.
You can learn about the capabilities of a TV by identifying its model. Its number can be found on the back panel, in the instructions or on the Sharp box.
Having determined the number, find out about the support of the DVB standard by deciphering it.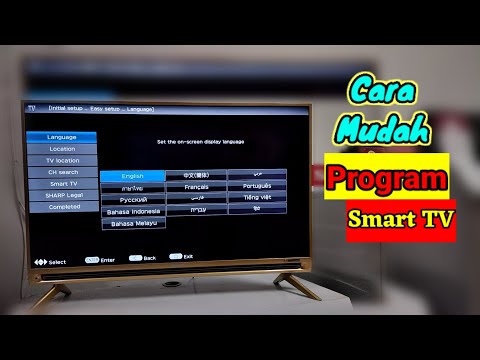 If the TV was released after 2015:
If the TV model was released before 2015:

Useful: How can I find out if I can watch digital TV without a set-top box
If the TV turned out to be without built-in support for the modern DVB-T2 digital TV standard, there are two ways to solve the issue:
Read also: How to connect and set up digital TV through the receiver
After connecting the antenna to a DVB-T2-enabled Sharp Aquos device, you can start tuning digital channels.
Useful: How to connect and set up digital TV
The TV itself will help you to do the basic settings in automatic mode:
 Select DTV MENU among others. If nothing happened, then in the TV settings, specify another country belonging to continental Europe instead of Russia. For example, Sweden. Then try to go to the menu again.
 The procedure takes up to 10 minutes.
If the DTV menu is not activated, you can search for channels in the general menu:

Setting up an old Sharp TV to receive "numbers" is carried out as follows:
You can also add analog channels to digital channels like this:

On some Aquos Sharp devices, digital channels along with analog ones cannot be in a single list, so they need to be switched through the remote control.
Channel sorting can be done in two ways:
Digital channel tuning on Sharp TVs is easy. The main thing is that the TV supports the DVB-T2 standard.