Home »
Misc »
How do i install front cv axel on 2001 yamaha kodiak atv
How do i install front cv axel on 2001 yamaha kodiak atv
Sixity How To: ATV and UTV Axle Replacement
Sixity How To: ATV and UTV Axle Replacement | Sixity.com
The store will not work correctly in the case when cookies are disabled.
JavaScript seems to be disabled in your browser. For the best experience on our site, be sure to turn on Javascript in your browser.
Search
Search
Most ATV riders will at some point need to replace their machine’s axles. This how-to guide is intended to show you that this repair can be done as a DIY project, saving you professional labor costs and even enhancing your overall ATV experience.![]()
The steps we provide below are general in nature and are not meant to replace the instructions found in your OEM owner’s manual. Different brands may have different torque specifications and axle mounting configurations. When in doubt, follow the OEM instructions.
Please read these instructions thoroughly prior to working on your vehicle to prevent damage and/or injury from occurring. These axles come with a sure-lock mechanism designed into the inner joint which requires special handling in order to be properly removed and installed into the casing.
If all goes well, this procedure should take an hour start to finish, even if it’s your first experience.
CAUTION
Do not use any form of mechanical force when removing the inner joint from the gearbox or damage may occur. We recommend that sure-grip work gloves be worn while working on your vehicle.
THINGS YOU'LL NEED
- A reliable jack and safety blocks
- Torque wrench
- Needle nose pliers
- Socket wrench set
- Rubber mallet
- A cotter pin (if not provided)
- Contact cleaner, rags
- Safety glasses and sure-grip gloves
- Copy of your OEM Service Manual
- Penetrating oil (if old axle is stuck)
Front Axle Removal & Installation
Rear Axle Removal & Installation
FRONT AXLE REMOVAL
- Place your ATV into park.
 Raise your machine so that the wheels are off the ground with a jack. Make sure you have a reliable jack that can take the sideways pull required to remove the axle. Use wheel blocks to secure the ATV.
- Remove the lug nuts and pull the wheel off.
- Place the lug nuts back on the hub and lightly tighten.
- Some hubs have a plastic cap covering the axle nut, also called a castle nut or castellated nut. Remove the cap. Then use needle-nose pliers to remove the cotter pin on the axle nut securing the hub. To remove the axle nut, you may need to have someone press and hold the brake to provide the resistance you need. Use a socket wrench (typically 27 mm) to loosen the nut. Remove any washers as well.
- Remove the brake caliper by removing the fasteners. It is not necessary to disconnect the brake hose from the caliper. Take note of the way the brake line is routed so you can put it back together in the same way. If you’d like, secure it with a zip tie out of the way.

- Remove the hub.
- This step is to free up the axle from its attachments. To do this, remove the steering’s tie rod end (if applicable) from the spindle. Remove the upper steering knuckle joint from the bearing carrier to free the lower carrier assembly. Swing the carrier assembly down and back, carefully working the axle from the spindle. Since models vary, consult your service manual for their recommendations. Note: Depending on the make and model of your ATV (and the extreme angle of the axle), you may prefer instead to remove the upper sway link connection and lower shock mounting bolt to move the shock up out of the way and swing the carrier assembly up rather than down to gain enough clearance to free the axle. Or you may choose to remove both the upper and lower ball joints, along with the tie rod end to remove the knuckle completely.
- Once the axle is free, it’s time to pull out the axle from the housing. First, make sure you’re pulling at a straight angle.
 Also, ensure your ATV is secure and will not fall off the jack. Holding onto the axle shaft, give it a few swift tugs, and it should come free. You may need to push in first. There’s a snap ring holding the axle into place, so it could take a little force to remove the axle.
- If the axle is stuck, try spraying the area at the casing with penetrating lubricant and wait a few minutes before trying again. Be careful not to damage the casing.
- Once the axle is removed, clean up the seal face on the casing. Spray contact cleaner around the outside. Be sure not to get any contact cleaner inside. Wipe clean with a rag.
- Carefully compare the axle you have removed with the new axle to make sure they are the same.
FRONT AXLE INSTALLATION
- Reverse the directions above for installing the new axle. Put some grease or anti-seize on the inner splines.
- Then, insert the axle into the casing, lining up the splines.

It might take a couple hits of a rubber mallet on the end to drive the axle into place. You’ll know it’s in position when you hear and feel it click. Give the axle a slight tug to make sure the clip is locked into place.
- Now that the inner joint is in place, thread the outer joint through the hub the same way you took it apart.
Optional: This is a good time to clean the knuckle/spindle at the wheel bearing with some contact cleaner to inspect your ATV components for wear and tear.
- Lift up on the axle and the lower carrier assembly to fit the knuckle back on the upper arm, refastening the steering knuckle joint in place. Use a jack underneath the carrier assembly to make refastening easier. Reconnect the tie rod end to the knuckle. If applicable, reconnect the shock to the upper A-arm, along with the sway bar link. Since models may vary, consult your service manual for their recommendations.
- Reinstall the hub onto the knuckle.
 You may need to pull on the axle to line up the outer splines with the hub. Reinstall the brake caliper onto the rotor and thread in the new fasteners.
- Install the washer onto the hub followed by the castle axle nut and tighten. Have someone hold the brakes down to tighten the nut if needed.
- Insert a new cotter pin in the new castle nut, securing the hub. Install the plastic cover if there is one.
- Reinstall the tire, and secure with lug nuts. Ensure everything is clear before you lower the ATV to the ground.
- Your Sixity Axle is now installed – enjoy!
We encourage you to use caution on your first ride to ensure your axle has been properly installed. Happy riding!
REAR AXLE REMOVAL
- Place your ATV into park. Raise your machine so that the wheels are off the ground with a jack. Make sure you have a reliable jack that can take the sideways pull required to remove the axle.
 Use wheel blocks to secure the ATV.
- Remove the lug nuts and pull the wheel off.
- Place the lug nuts back on the hub and lightly tighten.
- Some hubs have a plastic cap covering the axle nut, also called a castle nut or castellated nut. Remove the cap. Then use needle nose pliers to remove the cotter pin on the axle nut securing the hub. To remove the axle nut, you may need to have someone press and hold the brake to provide the resistance you need. Use a socket wrench (typically 27 mm) to loosen the nut. Remove any washers as well.
- Remove the brake caliper by removing the fasteners. It is not necessary to disconnect the brake hose from the caliper. Take note of the way the brake line is routed so you can put it back together in the same way. If you’d like, secure it with a zip tie out of the way.
- Remove the hub.
- Just like the front axle removal, this step is to help you free the axle from the trailing arm.
 Since models vary, consult your service manual for their recommendations. If applicable, remove the toe link, followed by the upper and lower radius rods at the trailing arm. Support the trailing arm on small jack stand. Let the upper and lower radius rods down. Move the trailing arm away from the vehicle, working the axle free. You may need to remove the lower shock bolt to allow the trailing arm to move out far enough.
- Once the axle is free, it’s time to pull out the axle from the housing. First, make sure you’re pulling at a straight angle. Also, ensure your ATV is secure and will not fall off the jack. Holding onto the axle shaft, give it a few swift tugs, and it should come free. You may need to push in first. There’s a snap ring holding the axle into place, so it could take a little force to remove the axle.
- If the axle is stuck, try spraying the area at the casing with penetrating lubricant and wait a few minutes before trying again. Be careful not to damage the casing.

- Once the axle is removed, clean up the seal face on the casing. Spray contact cleaner around the outside. Be sure not to get any contact cleaner inside. Wipe clean with a rag.
-
Carefully compare the axle you have removed with the new axle to make sure they are the same.
REAR AXLE INSTALLATION
- Reverse the directions above for installing the new axle. Put some grease or anti-seize on the inner splines. Then, insert the axle into the casing, lining up the splines.
- It might take a couple hits of a rubber mallet on the end to drive the axle into place. You’ll know it’s in position when you hear and feel it click. Give the axle a slight tug to make sure the clip is locked into place.
- Now that the inner joint is in place, thread the outer joint through the hub the same way you took it apart.
Optional: This is a good time to clean the knuckle/spindle at the wheel bearing with some contact cleaner to inspect your ATV components for wear and tear.
- Pull the trailing arm out and then slide the axle back into position. Slide the lower radius rod into the hub, followed by the upper radius rod. Install the radius rod bolts. Lastly, install the toe rod if applicable. Tighten all fasteners.
- Reinstall the hub onto the knuckle. You may need to pull on the axle to line up the outer splines with the hub. Reinstall the brake caliper onto the rotor and thread in the new fasteners.
- Install the washer onto the hub followed by the castle axle nut and tighten. Have someone hold the brakes down to tighten the nut if needed.
- Insert a new cotter pin in the new castle nut, securing the hub. Install the plastic cover if there is one.
- Reinstall the tire, and secure with lug nuts. Ensure everything is clear before you lower the ATV to the ground.
- Your Sixity Axle is now installed – enjoy!
We encourage you to use caution on your first ride to ensure your axle has been properly installed. Happy riding!
DISCLAIMER
Our axles are designed and intended for use as OE-replacement axles only. These axles are not warranted if installed improperly, a modification has been made to include a lift kit, the installation of oversized tires, or if racing or performance enhancements are made to the engine other than the OE design. Read our full warranty policy here.
- End of Procedure -
Return to all Repair & Install Guides
Copyright © 2013-present Magento, Inc. All rights reserved. Moose Racing LM6 Front Axle Yamaha Kodiak 400 2000-2002
JavaScript Disabled
To get the full Cycle Gear experience, enable JavaScript in your browser settings and refresh this page.
This product is vehicle specific. Click here to select your vehicle to ensure fitment.
Fullscreen Zoom
$184.95
Fast Lane
Type: Front Left / Right Select TypeFront Left / Right
Blemished/Refurbished
This item is available as a Blem/Refurb. These are items that cannot be sold as "New" merchandise and are limited to stock on hand. See the product details for a description of the product's condition.
Ships Free to Cycle Gear Stores!
Ship to an Address:
Please select a to view availability.
Add to Cart 123456789 Qty
Pick-up in Store:
Cycle Gear Pacheco Check Nearby Stores
Please select a to view availability.
Reserve for Pickup
The Cycle Gear Difference
- 30-Day Best Price Guaranteed
- Free Shipping Over $49
- No-Hassle Returns View Details
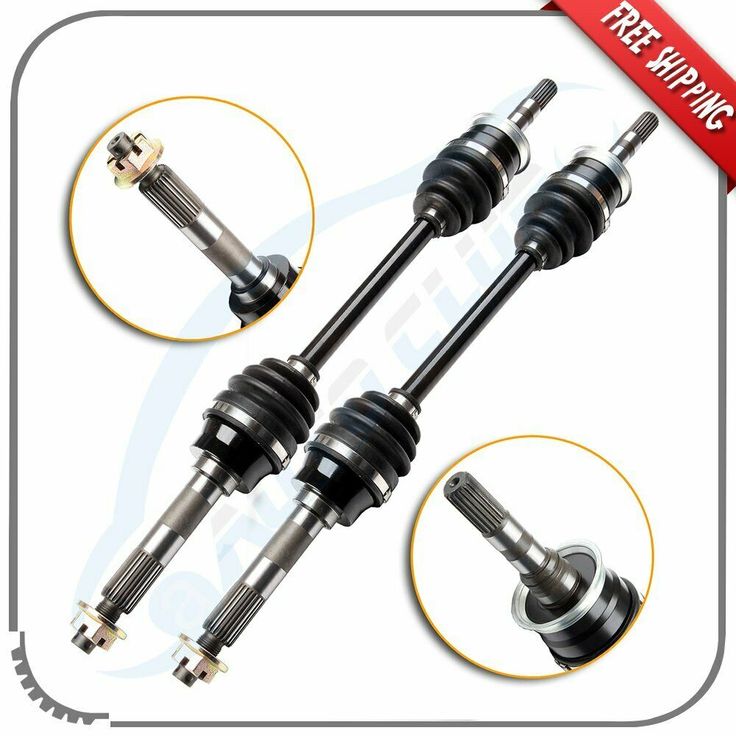
Moose Racing LM6 Front Axle Yamaha Kodiak 400
Moose Racing LM6 Replacement Axle Shafts use six heavy-duty, heat-treated ball bearings at every CV joint. Paired with a solid chromoly axle shaft, Moose LM6 Axles promise higher strength and longer life than factory drive components. OEM-style quality control standards and the latest manufacturing methods in ISO-certified facilities guarantee precision. Kits arrive ready to install - saving you down time, costs and frustration - with factory-lubricated joints and pre-installed stainless CV boot clamps.
Features:
-
Easy to install, pre-assembled axle half shaft
-
6 precision ball bearings allow for smoother operation and increased joint strength
-
4340 chromoly-steel axle bar
-
Up to 35 percent larger cages and races - increasing strength and durability
-
Factory-lubricated using high temperature moly grease
-
Pre-installed low profile stainless steel clamps
-
Includes spindle nut and washers where applicable (vehicle specific)
-
ISO/TS16949 - ISO 9001 registered manufacturing facilities
-
Sold each
-
Replacement Part for OEM Number(s) 5Gh3510F0000, 5Gh3510J0000
Note: Image for reference only.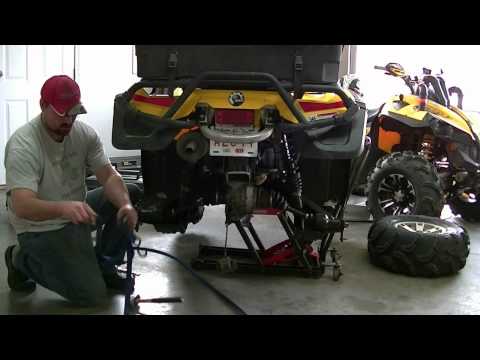 Actual product varies with application.
Read More
This product is vehicle specific. Click here to select your vehicle to ensure fitment.
- Yamaha
- Kodiak 400 2000, 2001, 2002
- Kodiak 400 Hunter 2001, 2002
- Arctic Cat
- Wildcat 1000 GT 2012
- Wildcat 1000 LTD 2014
- Wildcat 4 2013-2014
- Wildcat 4 LTD 2014
- Wildcat 4X 2014-2016
- Wildcat 4X LTD 2014-2015
- Wildcat X EPS 2013-2016
- Wildcat X LTD EPS 2014-2016
- Honda
- Rancher 350 4x4 ES TRX350FE 2000-2005
- Rancher 350 4X4 TRX350FM 2000-2005
- Rancher 420 AT DCT TRX420FA1 2014
- Rancher 420 AT DCT w/EPS TRX420FA2 2014
- Rancher 420 AT TRX420FA 2009
- Rancher 420 AT TRX420FA 2012-2014
- Rancher 420 AT w/EPS TRX420FPA 2011-2014
- Rancher 420 ES TRX420FE1 2014
- Rancher 420 ES w/EPS TRX420FPE 2012-2013
- Rancher 420 TRX420FM1 2014
- Rancher 420 w/EPS TRX420FM2 2014
- Kawasaki
- 400 Mule 610 4x4 2005-2009
- 620 Mule 3010 4x4 2001-2008
- 620 Mule 3010 Trans 4x4 2005-2008
- 620 Mule 4010 4x4 SE 2016-2018
- 620 Mule 4010 Trans 4x4 SE 2016-2018
- 950 Mule 2510 Diesel 2000
- 950 Mule 3010 Diesel 4x4 2008
- 950 Mule 3010 Trans Diesel 4x4 2008
- 950 Mule 4010 Diesel 4x4 2009-2013
- 950 Mule 4010 Trans Diesel 4x4 2009-2013
- Bayou 400 4x4 2000-2004
- KLF400 Bayou 4x4 1993-1999
- Mule 4010 4x4 2009-2022
- Mule 4010 Trans 4x4 2009-2022
- Mule 4010 Trans 4x4 Camo 2014-2022
- Mule 4010 Trans 4x4 FE 2021-2022
- Mule 610 4x4 XC 2010-2016
- Mule 610 4x4 XC Camo 2014-2016
- Mule 610 4x4 XC SE 2014-2016
- Mule SX 2018-2022
- Mule SX 4X4 2018-2022
- Mule SX 4X4 SE 2018-2021
- Mule SX 4X4 XC 2019-2022
- Mule SX 4X4 XC Camo 2019-2021
- Mule SX 4X4 XC LE 2019-2022
- Prairie 300 4x4 2000-2002
- Prairie 400 4x4 2000-2002
- Teryx 750 4X4 2008-2013
- Teryx 750 LE 4X4 2008-2013
- Teryx 750 NRA Outdoors 4X4 2008-2009
- Teryx 750 Sport 4X4 2010-2013
- Polaris
- ATP 330 2004
- ATP 500 2004
- Hawkeye 300 4x4 2006-2007
- Magnum 325 4x4 2000-2002
- Magnum 330 4x4 2003-2004
- Ranger 400 Mid Size 2010-2014
- Ranger 500 Carb Mid Size 4x4 2007
- Ranger 500 EFI Mid Size 2011-2013
- Ranger 500 EFI Mid Size 4x4 2006-2007
- Ranger 500 EFI Mid Size 4x4 2008
- Ranger 500 EFI Mid Size 4x4 2009
- Ranger 500 EFI Mid Size 4x4 LE 2006
- Ranger 500 Mid Size 2018-2022
- Ranger 500 Mid Size Crew 2011-2012
- Ranger 500 Mid Size Crew LE 2012-2013
- Ranger 570 Mid Size 2015-2020
- Ranger 570 Mid Size 2014
- Ranger 570 Mid Size Crew 2015-2021
- Ranger 570 Mid Size Crew 2014
- Ranger 570 Mid Size Crew EPS 2015-2021
- Ranger 570 Mid Size Crew EPS LE 2014
- Ranger 570 Mid Size EPS 2015-2021
- Ranger 570 Mid Size EPS Hunter Edition 2016
- Ranger 570 Mid Size EPS LE 2014
- Ranger 700 4x4 2006
- Ranger 700 4x4 Browning 2006
- Ranger 700 4x4 LE 2006
- Ranger 700 EFI 4x4 2007
- Ranger 700 EFI 4x4 Browning 2007
- Ranger 700 EFI 4x4 Browning 2008
- Ranger 700 EFI 4x4 LE 2007
- Ranger 700 EFI 4x4 LE 2008
- Ranger 700 EFI 6x6 2008-2009
- Ranger 700 EFI Crew 2008-2009
- Ranger 800 6x6 2010-2016
- Ranger 800 Crew 2010-2014
- Ranger 800 Crew EPS 2010-2014
- Ranger 800 Crew EPS LE 2012-2013
- Ranger 800 Mid Size 2013-2014
- Ranger 800 Mid Size EPS LE 2014
- Ranger 800 Mid Size LE 2013
- Ranger 900 Crew 2014-2016
- Ranger 900 Crew 6 2015
- Ranger 900 Crew 6 EPS 2015-2016
- Ranger 900 Crew EPS 2014-2016
- Ranger 900 Crew EPS LE 2014
- Ranger Diesel 2014
- Ranger Diesel 2015-2016
- Ranger Diesel Crew 2012-2014
- Ranger Diesel Crew 2015-2018
- Ranger Diesel DLX 2014
- Ranger ETX Mid Size 2015-2016
- Ranger EV Li-Ion Mid Size 2016-2018
- Ranger EV Mid Size 2015-2022
- Ranger XP 1000 2017
- Ranger XP 1000 Crew EPS 2017-2018
- Ranger XP 1000 Crew Northstar Edition 2017-2018
- Ranger XP 1000 EPS 2017-2018
- Ranger XP 1000 EPS Hunter Edition 2017
- Ranger XP 1000 EPS Northstar HVAC 2017
- Ranger XP 1000 EPS Ranch Edition 2017
- Ranger XP 570 Full Size 2016
- Ranger XP 570 Full Size EPS 2016
- Ranger XP 800 2012
- Ranger XP 800 EPS 2012
- Ranger XP 800 EPS Browning 2012
- Ranger XP 800 EPS LE 2012
- Ranger XP 800 LE 2012
- Ranger XP 900 2013-2018
- Ranger XP 900 Crew 2017-2018
- Ranger XP 900 Crew EPS 2017-2018
- Ranger XP 900 EPS 2013-2018
- Ranger XP 900 EPS Browning 2013-2014
- Ranger XP 900 EPS Hunter Edition DLX 2015-2016
- Ranger XP 900 EPS LE 2013-2014
- Ranger XP 900 EPS Northstar Edition 2015-2016
- Ranger XP 900 LE 2013-2014
- RZR 570 2012-2019
- RZR 570 EPS 2018-2019
- RZR 800 EFI 2008-2014
- RZR 800 EFI EPS 2011-2014
- RZR RS1 2022
- RZR RS1 EPS 2018-2019
- RZR RS1 Premium 2020-2021
- RZR S 570 EPS 2017
- RZR Trail 570 Premium 2021
- RZR Trail 570 Sport 2021-2022
- RZR XP 1000 EPS 2014-2016
- RZR XP 1000 EPS High Lifter Edition 2017-2022
- RZR XP 1000 EPS High Lifter Edition 2015
- RZR XP 1000 EPS Trails and Rocks Edition 2018-2022
- RZR XP 1000 Premium w/Ride Command 2020
- RZR XP 4 1000 EPS 2014-2016
- RZR XP 4 1000 EPS High Lifter Edition 2017-2022
- RZR XP 4 1000 Premium 2020-2022
- RZR XP 4 1000 Premium w/Ride Command 2020-2021
- RZR XP 4 1000 Sport 2021-2022
- RZR XP 4 900 2012-2013
- RZR XP 4 900 EPS 2012-2014
- RZR XP 4 900 Jagged X Edition EPS 2013
- RZR XP 4 Turbo EPS 2016-2021
- RZR XP 900 2011-2013
- RZR XP 900 EPS 2012-2013
- RZR XP 900 EPS Walker Evans Edition 2013
- RZR XP Turbo EPS 2016-2021
- Scrambler 400 2x4 2000
- Scrambler 400 4x4 2000-2002
- Scrambler 500 4x4 2000-2009
- Scrambler 850 2015
- Scrambler XP 850 2014
- Sportsman 300 2008-2010
- Sportsman 335 2000
- Sportsman 400 2005
- Sportsman 400 HO 2011-2012
- Sportsman 400 HO 2014
- Sportsman 450 2006
- Sportsman 450 2007
- Sportsman 450 HO 2016-2017
- Sportsman 450 HO EPS 2016-2017
- Sportsman 500 EFI 2006
- Sportsman 500 EFI 2007-2009
- Sportsman 500 HO 2003-2005
- Sportsman 500 HO 2006
- Sportsman 500 HO 2008-2012
- Sportsman 500 HO HD 2013
- Sportsman 550 2013
- Sportsman 550 EPS 2013-2014
- Sportsman 570 2015-2017
- Sportsman 570 6x6 EPS Big Boss 2017
- Sportsman 570 EFI 2014-2017
- Sportsman 570 EPS 2014-2017
- Sportsman 570 EPS Utility Edition 2017
- Sportsman 570 SP 2015-2017
- Sportsman 600 2003-2005
- Sportsman 6x6 500cc 2000-2008
- Sportsman 700 2002-2004
- Sportsman 700 2005
- Sportsman 700 2006
- Sportsman 700 EFI 2004
- Sportsman 700 EFI 2005
- Sportsman 700 EFI 2006
- Sportsman 700 EFI 2007
- Sportsman 800 EFI 2005
- Sportsman 800 EFI 2007-2012
- Sportsman 800 EFI 2013-2014
- Sportsman 800 EFI 6x6 2009
- Sportsman 800 EFI DLX 2007
- Sportsman 800 HO EFI 2008-2009
- Sportsman 850 SP 2015
- Sportsman ETX EFI 2015
- Sportsman Touring 500 EFI 2008-2009
- Sportsman Touring 500 HO 2010-2012
- Sportsman Touring 500 HO 2013
- Sportsman Touring 550 EPS 2010-2014
- Sportsman Touring 800 EFI 2008-2009
- Sportsman Touring 850 EPS 2010-2014
- Sportsman Touring 850 HO EPS 2013
- Sportsman Touring 850 SP 2015
- Sportsman X2 500 EFI 2006-2009
- Sportsman X2 500 EFI DLX 2007
- Sportsman X2 550 2010-2013
- Sportsman X2 550 EPS 2014
- Sportsman X2 570 EPS 2015-2017
- Sportsman X2 700 EFI 2008
- Sportsman X2 800 EFI 2007-2009
- Sportsman X2 800 EFI DLX 2007
- Sportsman X2 850 2011
- Sportsman XP 550 EFI 2009-2012
- Sportsman XP 550 EFI w/EPS 2009-2012
- Sportsman XP 850 EFI 2009-2014
- Sportsman XP 850 EFI w/EPS 2009-2012
- Sportsman XP 850 HO w/EPS 2015
- Xpedition 325 2000-2002
- Xpedition 425 2000-2002
- Xplorer 250 4x4 2000
- Xplorer 300 4x4 2000-2001
- Xplorer 400 2001
- Suzuki
- LT-A450X KingQuad 2007-2010
- LT-A500X KingQuad 2011-2018
- LT-A500X KingQuad 2019-2021
- LT-A500X KingQuad AXi 2017-2018
- LT-A500X KingQuad AXi 2019-2021
- LT-A500XP KingQuad 2011-2021
- LT-A500XP KingQuad AXi 2015-2021
- LT-A750X KingQuad 2008-2018
- LT-A750X KingQuad 2019-2021
- LT-A750XP KingQuad 2009-2021
- Yamaha
- Big Bear 400 2002-2006
- Big Bear 400 2000-2001
- Bruin 350 2004-2006
- Bruin 350 Hunter 2005-2006
- Grizzly 350 4WD 2007-2011
- Grizzly 350 4WD Hunting 2008-2011
- Grizzly 400 2007
- Grizzly 400 Hunter 2007-2008
- Grizzly 550 2009-2014
- Grizzly 550 EPS 2009-2014
- Grizzly 550 EPS Hunter 2009-2013
- Grizzly 550 Hunting 2009-2014
- Grizzly 700 2014-2015
- Grizzly 700 2007-2013
- Grizzly 700 Ducks Unlimited 2007-2008
- Grizzly 700 EPS 2015
- Grizzly 700 EPS 2008-2013
- Grizzly 700 EPS Ducks Unlimited 2009
- Grizzly 700 EPS Hunter 2014
- Grizzly 700 EPS Hunter 2008-2013
- Grizzly 700 EPS Hunting 2014
- Grizzly 700 EPS SE 2015
- Grizzly 700 EPS SE 2009-2011
- Grizzly 700 Hunter 2014-2015
- Grizzly 700 Hunter 2007-2013
- Grizzly 700 Outdoorsman Edition 2007
- Grizzly 700 SE 2007-2008
- Kodiak 400 2003-2005
- Kodiak 400 Hunter 2004-2005
- Kodiak 700 2016
- Kodiak 700 EPS 2016
- Kodiak 700 EPS Hunter 2016
- Kodiak 700 EPS SE 2016
- Kodiak 700 Hunter 2016
- Rhino 700 2008-2013
- Rhino 700 Ducks Unlimited 2008-2009
- Rhino 700 Hunter 2008-2013
- Rhino 700 SE 2008-2009
- Rhino 700 Sport 2008-2013
- Viking 2014-2021
- Viking EPS 2018-2022
- Viking EPS Hunter 2018-2021
- Viking EPS Ranch 2018-2022
- Viking EPS SE 2015-2019
- Viking VI EPS 2018-2022
- Viking VI EPS Hunter 2018-2021
- Viking VI EPS Ranch 2018-2022
- Wolverine 2016-2018
- Wolverine 350 2000
- Wolverine 450 2006-2010
- Wolverine 450 SE 2008
- Wolverine EPS 2017
- Wolverine EPS Hunter 2017
- Wolverine Hunter 2016
- Wolverine R-Spec 2016
- Wolverine R-Spec EPS 2016-2018
- Wolverine R-Spec EPS SE 2016-2017
- Wolverine R-Spec Hunter 2016-2018
| Product Style | Item # | Store SKU | Manufacturer Product # | Availability |
|---|
| Product Style Front Left / Right | Item # 10153105 | Store SKU | Manufacturer Product # LM6-YA-8-308 | Availability Available: Ships in 1-2 business days |
Yamaha grizzly 660 frame, yamaha grizzly | Festima.Ru
Auto parts
Table List Tape
I sell the frame assembly from Yamaha Grizzly 660, in working condition, mileage at the time of parsing 4500 km, completely complete, not rusty, not corrected, not boiled, seams without cracks, psm sold, it is possible to send to the regions, bargaining also has a lot of this ATV, call, write
We found this ad 3 years ago
Click Follow and the system will automatically notify you of new offers from all bulletin boards
Go to announcement
Complaint type OtherCopyright infringementProhibited informationAd out of datePornographySpam
Comment
Show original
Address (Click on the address to view the map)
Moscow, Zamoskvoretskaya line, metro Rechnoy vokzal
More ads
ATV snow plow.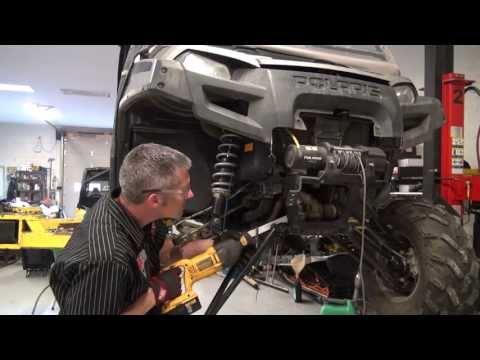 Universal, suitable for any model ATV, UTV, STELS, CF MOTO, POLARIS, YAMAHA Raises, lowers with a winch. Dimensions 1000*500 metal thickness 3mm. Weight 20 kg. volume 0.24m3 At the bottom of the blade is a knife or a belt, your choice. Easy to mount with two bolts to the frame, between the front gear and winch. Call, write, I will answer with pleasure. We send daily, Russian post, dpd, air delivery. We have production! Video on demand.
Auto parts
20 days ago Source
Protection kit for Yamaha Grizzly 700 ATVs ( 2008-2014 MY) Maximum possible protection of the frame thanks to the front stamping with stiffeners. Installation in the regular places of the frame. Reductions under the heads of the bolts in the attachment points. There are holes for draining oil and holes for mounting a snow plow platform. Thickness-4 mm, Weight (kg)-11.7 40. 1673- Bottom protection (stamp) (11.7 kg) 40. 1552 - Arm protection for models up to 2013 (4. 6 kg) 40. 1551 - Threshold protection (3 .4 kg)
Auto parts
4 months ago Source
Analysis Yamaha fz 400 1997 There are documents. ✌Motor parts Perm. Welcome to our import motorcycle parts store🏍️ Why choose us: -We have been successfully working for more than six years. -Professional approach to each order. -Fast dispatch from the Perm Territory by mail, SDEK, TC. -Detailed photo and video reports. -Large selection of spare parts. - Reliable packaging from small boxes to crates.
Auto parts
5 months ago Source
Sliders CRAZY IRON HONDA CBR650R 2019- new. Article 1093 We are the official dealer of Yamaha, as well as Mercury, Kawasaki, Honda! We have the largest selection of spare parts, consumables and equipment in stock! In stock. Delivery and pickup available. Call and write - we are always happy to answer and help with ordering! Suitable for motorcycles: Honda CBR 650 R (RH01) 2019 - Protective sliders are designed by us for those who are familiar with the race track and intend to take steep turns on their knees. Regardless of the level of training of the pilot, the motorcycle must be equipped with sliders, because other protection, such as cages and arcs, is officially prohibited on the tracks. It is for this reason that we have made the most durable construction, which is mounted through an aluminum plate with two bolts to the frame. Thus, the shock received by the motorcycle at the time of the fall will be evenly distributed over a couple of points and partially extinguished through the deformation of this plate. Please note: To install the sliders on this motorcycle model, a slight modification of the inner surface of the side plastic is required. In order to fix the plate, it is necessary to cut a small segment in the fairing. The price is for a complete installation kit on both sides, including all necessary hardware
Auto parts
5 months ago Source
Sliders CRAZY IRON HONDA CBR650R 2019- new. Article 1093 We are the official dealer of Yamaha, as well as Mercury, Kawasaki, Honda! We have the largest selection of spare parts, consumables and equipment in stock! In stock.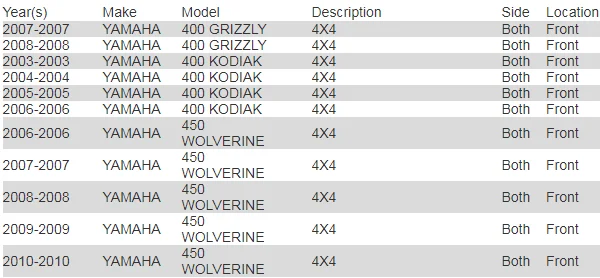 Delivery and pickup available. Call and write - we are always happy to answer and help with ordering! Suitable for motorcycles: Honda CBR 650 R (RH01) 2019 - Protective sliders are designed by us for those who are familiar with the race track and intend to take steep turns on their knees. Regardless of the level of training of the pilot, the motorcycle must be equipped with sliders, because other protection, such as cages and arcs, is officially prohibited on the tracks. It is for this reason that we have made the most durable construction, which is mounted through an aluminum plate with two bolts to the frame. Thus, the shock received by the motorcycle at the time of the fall will be evenly distributed over a couple of points and partially extinguished through the deformation of this plate. Please note: To install the sliders on this motorcycle model, a slight modification of the inner surface of the side plastic is required. In order to fix the plate, it is necessary to cut a small segment in the fairing.
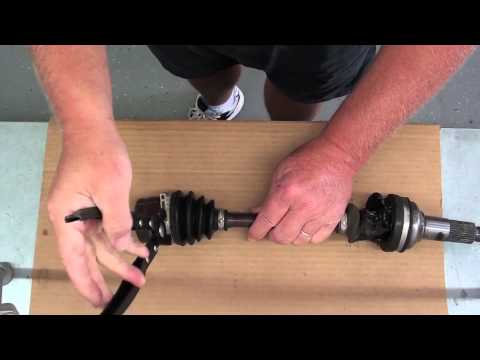 The price is for a complete installation kit on both sides, including all necessary hardware
Auto parts
5 months ago Source
Tool box for trailer Type 2 medium Medium 427x217x194 (6.6 kg) __________________________________________________________💰It is possible to purchase goods on CREDIT!!! ⏱You can call ☎ us or visit our salon from Monday to Friday from 10:00 to 19:00 and on Saturday from 10:00 to 16:00. And also ask us your question in the Avito chat 📩 _____________________________________________________________ "BOAT TRADE" is a direct representative of PRAKTIK PRO products in Volgograd! Volgograd, st. Cherepovetskaya, 1D __________________________________________________________ Steel boxes are reliable and practical structures that are ideal for storing and transporting things you need on the road. Hanging luggage boxes are effortlessly mounted on the trailer frame and allow you to store additional accessories and even batteries. Made of galvanized steel, not subject to corrosion and various harmful factors. If you want to add convenience and functionality to your boat trailer, crates are a great solution and a very useful purchase. __________________________________________________________ Specifications: Material: galvanized steel. Scope of delivery: Roller cradles, hydraulic pump, Factory packaging: Rigid packaging Sea Pro (Sea Pro), Volzhanka (Volzhanka), Finval (Finval), Albacore (Albacore), Victory (Victory), (Navigator), Riviera (Rivera), Hunter (Hunter), Yukona (Yukon), Lowrance (Lawrence) , Humminbird (Hamminberd), Garmin (Garmin), MZSA, etc...
Auto parts
6 months ago Source
Left over from a motorcycle. Complete without scratches or defects
Auto parts
6 months ago Source
READ CAREFULLY!!!!!!!! Only documents, the most complete set (it was not registered and is not worth it, two DCTs are included, respectively 2 owners .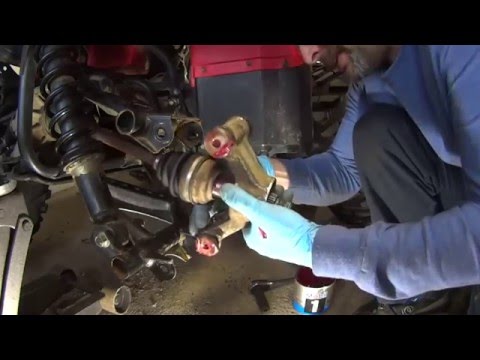 .), there are 4 free places in the TCP! There is also much more from this and other Japanese motorcycles! Your guarantees are our reviews in our VK group (more than 690 pcs) there is a shipment to Belarus, Kazakhstan
6 months ago Source
Yamaha R1/M 2015-2021 Protective Sliders Manufacturer: Evotech-Performance (UK) Evotech-Performance is the world's leading manufacturer of protective accessories for motorcycles. Even an amateur can install the products of this brand, thanks to the highest quality of workmanship of all details. We have been a dealer of Evotech-Performance for more than 5 years. Suitable for Yamaha YZF-R1 2015-2021 Yamaha YZF-R1M 2015-2021 Yamaha MT-10 2016+ Yamaha MT-10SP 2016+ Yamaha FZ-10 2017+ We send to the regions by CDEK on the day of payment for the order.
Auto parts
6 months ago Source
Frame Yamaha R6 06-07, without documents. in excellent condition, no defects, wine number is available and not cut down. Sending to the regions of the shopping mall. There are other parts for this bike.
Auto parts
7 months ago Source
YAMAHA Grizzly/Kodiak 700 front bumper for models from 2016 (STEEL Rival equivalent) Easy installation Maximum protection of headlight frame plastic
Auto parts
9 months ago Source
Frame for Grand Majesta 400 2006 with Title, is registered 25 region (Primorye) in excellent condition.
Auto Parts
10 months ago Source
Any spare part from the Puig catalog is available to order Puig Pro series frame sliders for Yamaha MT09 / Tracer 900 21+ The sliders are mounted on metal plates, which, in turn, have 2 attachment points to the frame on each side, thereby providing additional strength when the motorcycle falls. Thanks to their larger area, they allow you to protect the maximum possible surface of the motorcycle. Article: 20670N Applicability: Yamaha MT-09(2021) Yamaha MT-09 SP (2021) Yamaha MT-09 TRACER (2021) Yamaha MT-09 TRACER GT (2021) Manufacturer: Puig Country of origin: Spain
Auto parts
11 months ago Source
Frame with documents Yamaha T-max XP500 Yamaha Tmax 2001 color yellow 5GJ-21110-20-00 Some damage, see photo
Auto parts
a year ago Source
frame with TCP Yamaha TT-R 250 Raid 4GY
Auto parts
a year ago Source
frame with TCP Yamaha TT-R 250 Raid 4GY
Auto parts
a year ago Source
frame with pts Yamaha TDM850-2 RN03J
Auto parts
a year ago Source
Frame in excellent condition, sandblasted and painted.
Auto parts
a year ago Source
Yamaha XJR 400 R2.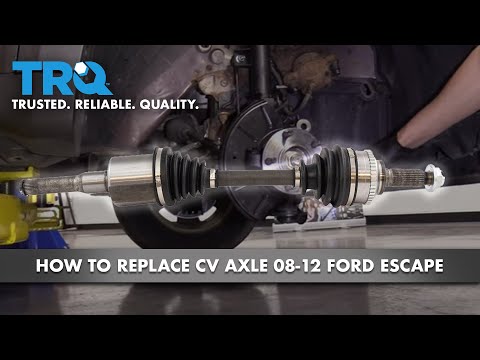 Frame + Title + certificate of registration + state number. (according to pts 1994th century). Frame without welding or cracks. The geometry is not broken. Additional questions by phone or avito messages. Sending to the regions by transport companies. yamaha xjr 400 yamaha xjr 400 yamaha yamaha xjr 400 yamaha xjr 400 higer frame
auto parts
a year ago Source
Attention! Festima.Ru is a search engine for ads from popular sites. We do not sell goods, do not store images and personal data. All images belong to their respective authors Denial of responsibility
Login
All services become available without restrictions
You will be able to use the Festima.Ru service on different devices.
It's convenient and free
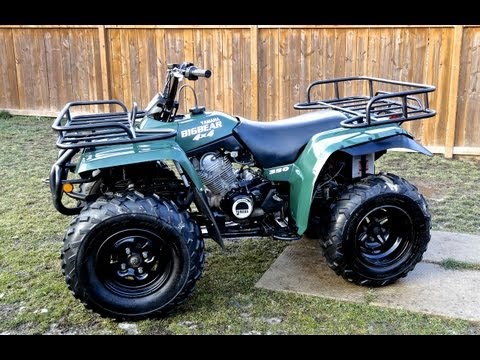
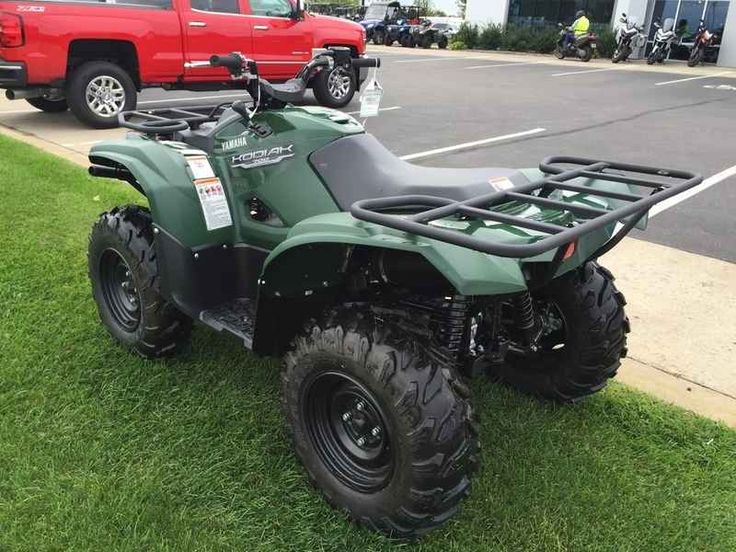
Yamaha 350 Big Bear Specifications
The Big Bear 350 from Yamaha Motor Company is an all-terrain vehicle.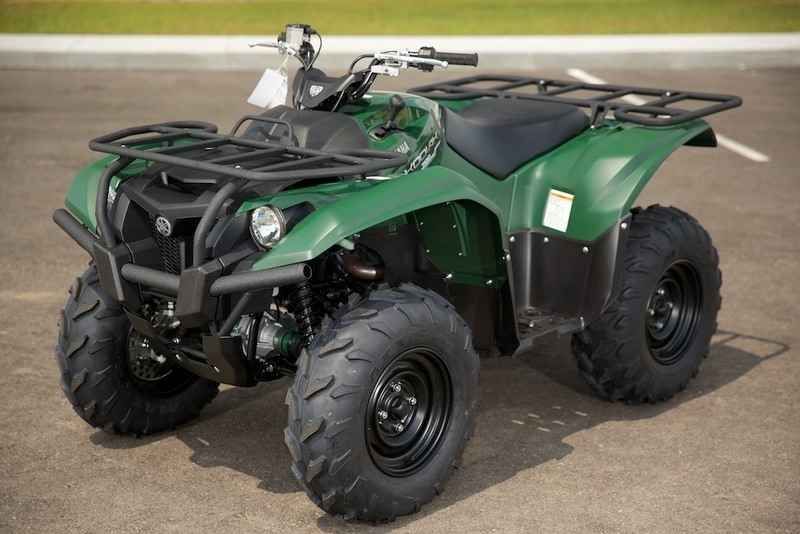 It was introduced in 1987 in two colors - red and white. 350 - Yamaha's first 4x4 ATV - made until 1999, but with some modifications during its production. For example, the 1997 model came with all-wheel drive and was available in gray or blue.
Content
- 0.1 Main characteristics
- 0.2 Engine
- 0.3 Appearance and dimensions
- 0.4 Security Specifications
- 1 Warnings
Main characteristics
The Big Dipper 350 can carry a maximum load of 175 pounds. The ATV is equipped with an odometer, which makes maintenance possible depending on the mileage of the engine. The vehicle has a 10-speed high and low range transmission equipped with reverse gears, which facilitates off-road maneuverability by enhancing the vehicle's ability to decelerate. Other general ATV features include:
- Torque management The front wheel differential provides the necessary torque for off-road manoeuvres.
- The car has an electric start for reliable starting of the engine, as well as regular sparks for every stroke, which increases the performance of the engine.
- The car is easy to stop as it has hydraulic brakes on the front axle and a mechanical drum brake on the rear axle.
Engine
The 350 Big Bear has a 350cc four-stroke engine. See with oil cooling system. The intake, power, compression, and stroke phases of the engine occur with each complete revolution of the crankshaft. It has a single overhead cam design that allows the camshaft to be mounted inside the cylinders. This makes it lighter than overhead valve engines. Engine Specific Specifications:
Engine capacity 21.3 cu. Inches, that is, the volume that the gun sweeps in one movement inside the engine cylinders. The engine cylinders are 3.3" in diameter, the guns move 2.5" inside the engine cylinders. Five-speed transmission system delivering engine power to the wheels.