By the staff of Dirt Wheels
HOW-TO: CHANGE A YFZ450R HANDLEBAR
Virtually any component of your favorite ATV can be exchanged for a part that was designed to improve your riding experience. Yamaha spent countless hours making sure that adding a 1 1/8-inch fat bar to their YFZ450R would improve its overall handling and ride quality, and it certainly did.
However, the aftermarket innovates and adds products to our world of off-roading that can considerably improve the handling of our favorite machines.
One such product is the Fasst Company Flexx handlebar. It offers what we consider an extra bit of suspension that further smooths out the already plush ride of the Yamaha. The Flexx bar has a hinge system with elastomers that soak up hard hits and rough chop, all while cutting down on vibration.
You can get the bar for almost any ATV with a 1 1/8-inch-size bar clamp, or you can upgrade your 7/8-inch clamps to the correct size to fit the Flexx bar or any other handlebar you choose. In this “How-To,” we are showing you how easy it can be to change out a handlebar on a 2019 Yamaha YFZ450R, and the knowledge can be transferred over to many other ATV brands and models!
HOW-TO: CHANGE A YFZ450R HANDLEBAR
The best way to start this process is to figure out what tools you will need. After looking everything over, we gathered up a #2 Phillips screwdriver (the one in your stock toolkit will fit best on the Japanese screws), a ratchet wrench with an extension, 8mm and 12mm sockets, 12mm combo wrench, and, in our case, Allen wrenches for our lock-on ODI grips and Pro Design ATV kill switch.
You can change your Yamaha handlebar to a bar from many different manufacturers for a different height and sweep for your riding comfort and control. We wanted the extra smoothness the Fasst Co. bar provides. You will need the proper tools to adjust the bolt the elastomers ride on. You will also need new grips to install on your new handlebar.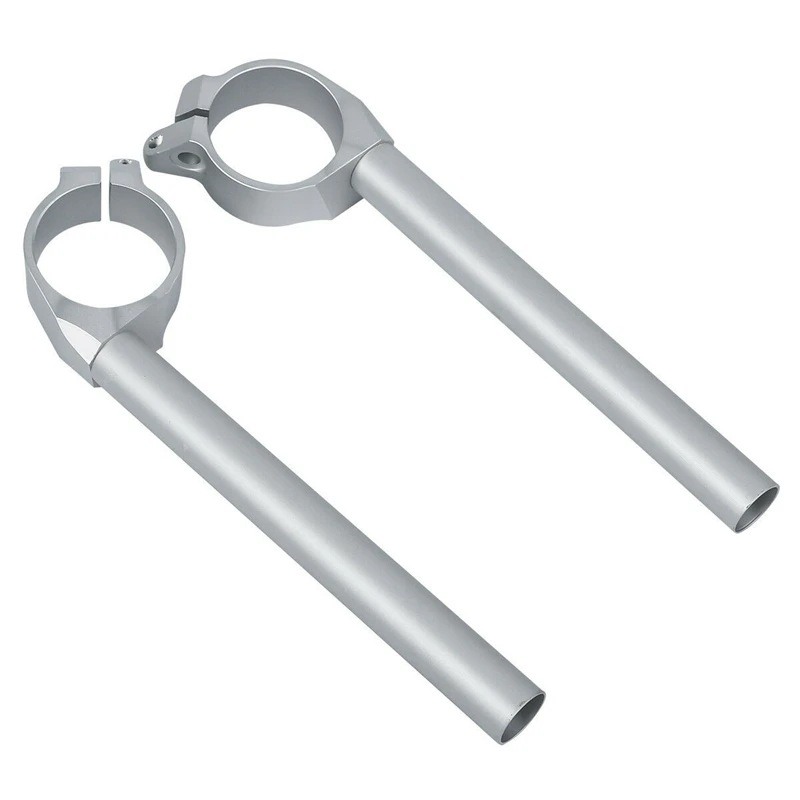 We utilized the ODI lock-on grips that we were already using on the Yamaha.
HOW-TO: CHANGE A YFZ450R HANDLEBAR
Begin removing any items that get in the way of mounting hardware and wiring attached to the stock handlebar. You maybe be able to reuse the components like the zip-ties, so do not discard them until the job is done. On the Yamaha, a plastic cover needs to be removed and two zip-ties.
We started on the clutch side. Most perch mounting bolts will have 8mm or Phillips heads. We removed the clutch perch first.
It is a great idea to reinstall the mounting hardware loosely to the part you just removed so all components are in the correct direction to reinstall. This aids in not losing parts as you perform your tasks.
HOW-TO: CHANGE A YFZ450R HANDLEBAR
Most handlebar-mounted switch blocks utilize Phillips head screws in the plastic to mount to the bar. Remove both screws on the Yamaha’s block, spread it, and remove it from the bar.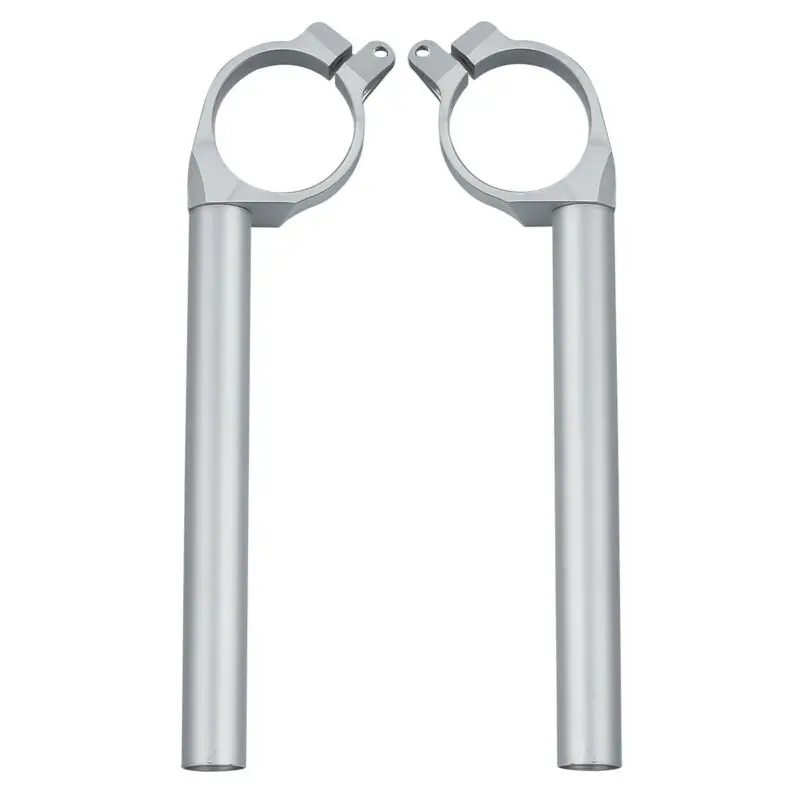 It is a good idea to either use compressed air to blow the dirt out of the inside of the block or grab a can of contact cleaner and spray the inside. The cleaner will dry up quickly. It is also beneficial to put some dielectric grease around any electrical contact points inside the block to resist corrosion later.
Now that the clutch side is done, we began by removing the YFZ450R’s thumb throttle, which required the removal of two Phillips-head screws. If you run into a screw that will not come loose, place the screwdriver firmly in the screw head and lightly tap the bottom of the screwdriver handle with a dead-blow hammer.
This shocks the wedged threads into a slightly different position. That can release their hold on each other and allow the screw to come loose. You could also utilize an impact driver that can be purchased at your local auto parts store or tool store.
The brake perch was the next piece of the puzzle to be removed. Take note that the perch clamp may have a direction that tells you which side should go up when reinstalling later.
HOW-TO: CHANGE A YFZ450R HANDLEBAR
We lightly drape the components over the hood of our machine while changing out the handlebar. This keeps the parts properly separated for reinstallation. It is a great idea to replace your throttle and clutch cable at this time, or clean and lubricate them.
If your machine is older, we suggest changing the cables, but if it’s only a few years old, lubrication and cleaning are in order. If you do lubricate the cables with the proper type of cable lube, then you will have to do this again after every cleaning due to dirt and debris sticking to the lubrication inside the cable.
More than likely you won’t need to remove the handlebar clamps from the steering stem unless your older ATV requires bigger clamps for handlebars like the Flexx bar or other fat bars. We removed mounting bolts from the bar clamps so the bar could be taken off the quad.
Mounting clamps tend to be shorter on one side than the other. This allows the clamp to “pinch” the handlebar in the brackets tightly without using a large amount of torque on the bolts. Generally, the side facing the front of the machine will be longer, and it needs to be tightened securely first. (Note: Purchasing a mechanic’s manual for your machine will tell you all the torque values needed to tighten all components).
On the top side of the clamp, either there will be an indentation signaling which side should be placed forward, or you can mark the clamps before you remove them.
HOW-TO: CHANGE A YFZ450R HANDLEBAR
Place the new bar in the clamps and begin by placing all four screws and clamps in the proper location. Always hand-thread screws a few turns before utilizing a tool on them. This ensures you don’t ruin the threads. Tighten the top mounting bolts enough to where you can still move the new handlebar forward and back in the clamps easily, but it stays in position easily.
Handlebars generally have adjustment markings on them, and bar clamps may have arrows or points that help you line up the bar in a central location and tilted to where it’s most comfortable for you. We usually take note of where the stock bar was lined up prior to removal so we can easily put the new bar in a similar location. Once the bar is where you want it, you can fully secure the top bolts, and then tighten down the rear ones to spec.
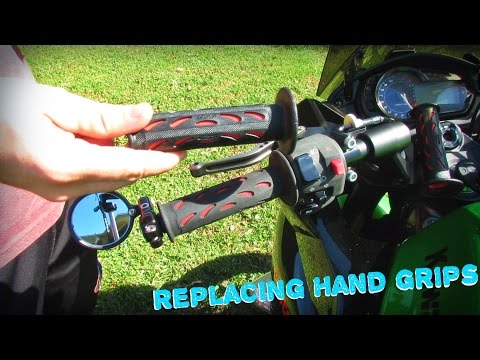
After loosely reinstalling the throttle, clutch/brake perches, and switch block, we fit on the grips. If you have lock-on grips, it’s easy to slide them on, set your controls properly and tighten everything down. If you have to glue your grips on, it is best to perform that task prior to remounting all of the components.
HOW-TO: CHANGE A YFZ450R HANDLEBAR
At this point, set all of your controls where you want them. Make sure you tighten the top bolts of your perches before the bottom ones. They also tend to work like handlebar clamps and pinch the perch onto the handlebar. We put a small amount of grease on the end of the bolt’s threads upon installation. Perches are generally made from aluminum, while the bolts are steel.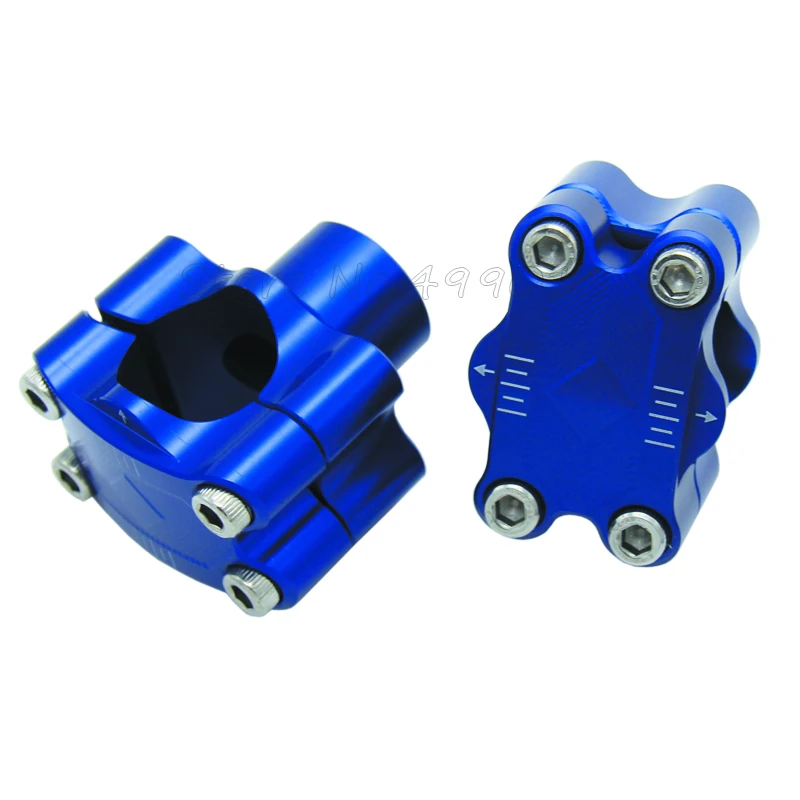 These two metals in contact will corrode over time. The grease prevents that.
Now your task should almost be complete! Reattach the wires with the zip-ties (if required) to the handlebar. Check that all controls and mounting bolts and screws are tightened properly. Cables should be able to move freely.
We suggest going for a ride and feeling out the controls. Readjust where you want them to be. Handlebars with different heights, sweeps, or functions may encourage you to set your lever or throttle heights differently.
Foe more info > https://www.fasstco.com/
.
.
When You'll Want to Change Your ATV Handlebars Step-by-Step Instructions to Replace ATV Handlebars
Want to buy aftermarket handlebars as a repair or an aesthetic upgrade? This post will lead you through the steps to replace your ATV handlebars.
You may need to upgrade your handlebars if they get bent in an accident or freak mishap. This could impact both their appearance, but most importantly, it can influence their effectiveness. Out of shape handlebars position the components and the grips in odd ways that may limit your ability to use them.
It's not a bad idea to upgrade your stock handlebars to aftermarket handlebars anytime just because they look cool.
The exact details of handlebar replacement will vary depending on your ATV model and your upgrades, but the information below should give you a solid idea of the general process.
It is not very difficult or time-consuming. It seems more complicated than it actually is. You do need some strategic planning to make it as simple as possible and we'll discuss that here.
ATV are waterproof & breathable riding gear
Find out the items that suit your needs
The handlebar grips are designed to stick to the handlebar with friction or an adhesive and may be difficult to remove.
Many people assume they have to cut them off. Sometimes it is necessary, but most of the time, you can remove them without cutting them.
If you have an air compressor with a suitable nozzle on it, you can use a screwdriver to lift the edge of the grip up or stick the nozzle in the hole in the end of the grip and force air under there. This will loosen the hold between the grip and the handlebar. You may need to twist the grip while forcing the air in.
Grips that have been attached with adhesive probably need a solvent or solvent substitute to remove. A substance that degraded the adhesive and adds some lubrication works best.
You can try any of the following:
Use a screwdriver to lift the edge of the grip while tilting the ATV so you can pour the solvent inside the grip. Again, you may need to twist the grip while you add the solvent.
If the grip is too tight for this, you can use a kitchen syringe to force the solvent inside the grip.
You'll need to carefully detach or slip all the attached components from your handlebars. This will include the clutch lever, brake lever, kill switch, and throttle assembly and may vary depending on upgrades you've added.
When you remove screws to remove a part, you can temporarily screw them back in the part while you work so you don't lose them or forget what part they went with.
You can carefully let components hang or lay them on a towel spread across your ATV, depending on your machine and the length of the component cables.
Some parts must be taken apart to be removed, but some may be able to just be loosened and then slid off when you're ready to remove the handlebars. This can save you time and potential problems. So, see how many parts you can just loosen enough to slide..jpg)
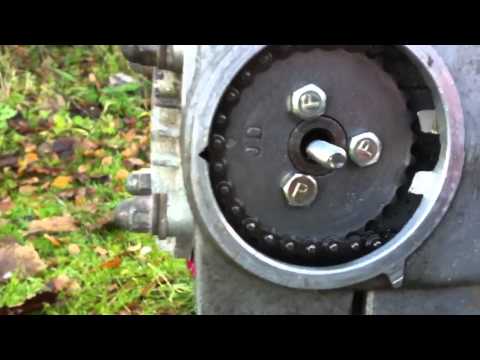
There should be metal caps at the center of the handlebars fastening them to the machine. Remove those now.
If you still have components attached loosely to your handlebars, tilt the handlebars one way to gently remove the ones on that side and then do the same on the other side.
Depending on the components on your machine and your aftermarket handlebars, you may need to remove plastic caps from the ends of the handlebars so they can accommodate your components. If so, it's easier to do this before you put the handlebars on the ATV. They can be popped off by hand or with a flathead screwdriver or knife.
It may be easier to put the components on the handlebars while you can still fully tilt the handlebars. If so, slide them on or attach them now. Don't fully tighten anything because they will probably need to be adjusted later.
Position the handlebars and use the metal caps to fasten them to the ATV. Don't tighten the caps all the way. You'll want to get everything on the handlebars and make sure everything's lined up perfectly while the handlebars can still move under the caps before you fully tighten them.
If there are still parts you need to install, install them now.
Sit on the seat, center the handlebars and pretend to use all of the controls. Make sure the handlebars are comfortable and easy to use. Position them until they are. When you're done, tighten the metal caps all the way.
Fine tune the positioning on all the components and tighten them all the way. Everything should be comfortable and effortless to use. Zip-tie your cables so they're secure.
You're done! Enjoy your new handlebars.
SPORTSMAN
36 EUR
ENDURO
the most durable
577 EUR
AQUAMASTER-ZIP LIGHT
with central zipper
568 EUR
ENDURO LIGHT
the most durable
378 EUR
AQUAMASTER LIGHT
reliability & comfort
438 EUR
NEODRY
16 EUR
ENDURO
the most durable
229 EUR
AQUAMASTER
reliability & comfort
567 EUR
-30%
HIT
AQUAMASTER
reliability & comfort
259 EUR
181. 30 EUR
BELT
8 EUR
ENDURO BF
bootfoot waders
468 EUR
ENDURO BF
bootfoot waders
289 EUR
ENDURO
29 EUR
NEOSENSOR
14 EUR
9.80 EUR
MUDWAY
179 EUR
TARGET 20L
32 EUR
22.40 EUR
MUDRIDER
299 EUR
209.30 EUR
WADEMAN
lightweight waders
159 EUR
MUDWAY NEW
199 EUR
URBAN
79 EUR
Explore all
To be able to control your motorcycle when it rides on any road, you must use the handlebars. This type of part is specially designed for two wheelers. There are still some exceptions such as ATVs and similar vehicles. You should be aware that there are several types of handlebars on the market. Each of them has its own characteristics. However, their main function remains the same. Each steering wheel has a control mode for your motorcycle. Normally, for brakes, turn to the left, and for acceleration, to the right.
Several configurations must be considered before selecting the type of handlebar for your motorcycle. Compatibility, price, shape and various characteristics of your motorcycle. However, it is quite normal to expect a product with a good quality / price ratio. The only problem is that there are really too many steering wheel models. Therefore, we can easily get lost when making a choice, sometimes we risk making a mistake. You should know that in most cases there are 4 types of handlebars, custom handlebars, cross country handlebars, roadster handlebars and classic handlebars that are flat.
In this article, we will take a closer look at the different categories and different types of handlebars. This will make it easier for you to make a choice. However, you should know that before buying a handlebar, if you want to replace yours, you should always take the same sample.
content
As the name suggests, this type of handlebar is specially designed for motocross motorcycles. This refers to sport bikes that are both sport and off-road. They are usually made from materials that make them easy to grip, yet are quite strong. They can cope with extreme shock cases due to various vibrations and turbulences caused by uneven competition tracks. So even if you jump quite often, the grip remains pleasant. All this makes it easier to control. However, it should be noted that for this type of activity one should never forget to wear special gloves.
Our recommended products:
Here is a selection of motorcycle handlebar related tools you might be interested in.
Motocross Moto Pit Dirt Bike Handlebar Guard. Size 22 mm. Gross weight 240 g.
Handrail kit for Dirt Bike models, suitable for handlebars from 22 to 28 mm.
Motorcycle balancer, for universal handlebar. Including accessories for watches and thermometers.
Browse all handlebar hardware models available on Amazon.
We can say that this is the most classic version that we can see on the current market. It's easy to find, especially if you have a sport bike. The type of material used in its construction is based on stainless steel or aluminum. The shape of the steering wheel is also classic, the rider will lean forward slightly while riding. We see that on this type of steering wheel, there is practically no bending. However, this depends on the type of model. Manufacturers have undoubtedly taken care of optimizing the driving of sports cars.
Our recommended products:
Here is a selection of motorcycle handlebar related tools you might be interested in.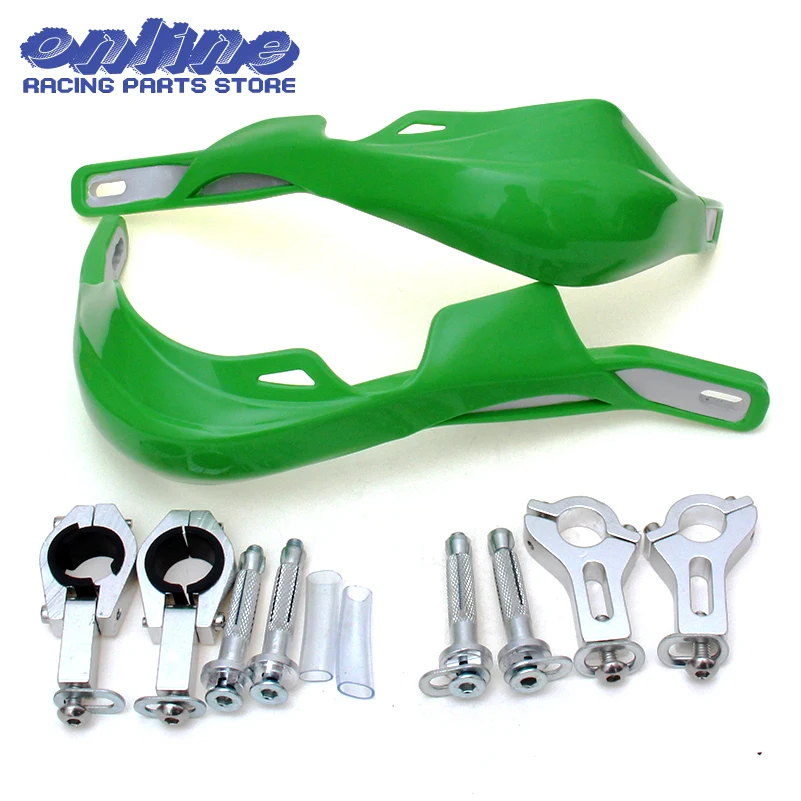
Mo
Clock and thermometer for motorcycle handlebars. Universal design, suitable for all types of handlebars. Weight 165g.
28mm motorcycle handlebar kit with accessories such as clamp, pad, motocross grips, etc.
22mm aluminum alloy motorcycle handlebar. The material is resistant to all tests. Total weight 1.000 g.
Browse all steering wheel components available on Amazon.
This type of handlebar is specially designed for roadsters. However, there can always be exceptions. It depends on your choice and your expectations. In any case, the handlebars for this type of motorcycle can vary greatly from one model to another. This difference is mainly in the location or installation of the latter. We are not talking about the architecture itself. The choice of height is based on the desire and choice of the driver of the two-wheeler. To do this, it is quite possible to find a setting higher on one motorcycle and lower on another. It also depends on the type of mount on your motorcycle.
Our recommended products:
Here is a selection of motorcycle handlebar related tools you might be interested in.
Metal bar for off-road motorcycle handlebars with a clamping area of 22 mm. Materials from strong steel alloys.
High quality aluminum alloy tire with a total weight of 1 kg for off-road or off-road motorcycle models. Size 22 mm.
Pair of left/right aluminum and glass mirrors for 22 mm handlebars. Durable and quality materials.
Browse all steering tool models available on Amazon.
This last handlebar type is slightly different from the others mentioned above. It is characterized by a rather high installation, slightly elevated. This allows the driver to have both good traction and a comfortable driving position. As a rule, steel or aluminum is always used in the construction of the latter. We can say that this kind of steering wheel is used everywhere, it could well be made for roadsters or sports cars. Finally, this type of handlebar is closest to a bicycle handlebar. Without a doubt, it should be remembered that the motorcycle was inspired by the bicycle.
Our recommended products:
Here is a selection of motorcycle handlebar related tools you might be interested in.
25mm dia. 720mm wide aluminum handlebar shaped flat bars for custom motorcycle Bobber etc. Gross weight, 1kg.
Mount for devices like GoPro Camera on the handlebars of a motorcycle. Good quality aluminum alloy materials.
High quality aluminum and T6 glass mirrors. Portable, attached at the ends and resistant to all tests.
View all handlebar models available on Amazon.
Select a handlebar according to your type of motorcycle. This means that if you have a competition or motocross bike, a flat or custom handlebar won't work for you. In this case, you will need a handlebar that provides good handling and is resistant to the shock caused by jumping.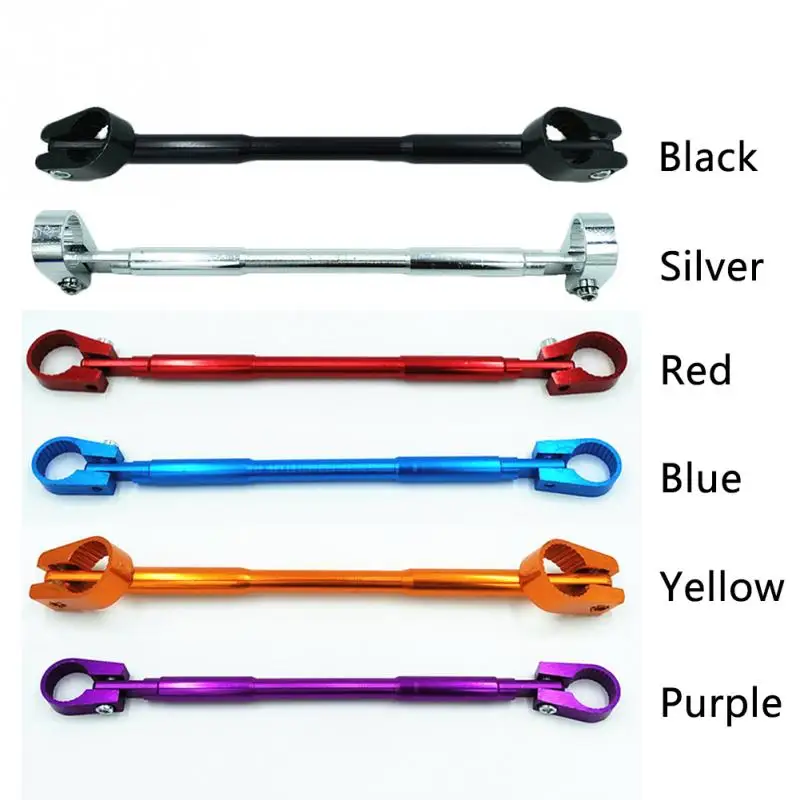 In addition, you must consider the inner and outer dimensions of the handlebar tube. In addition to this, it is necessary to check the compatibility of the handlebar with the part known as the fork bridge. You should know that it is impossible to create an adaptation, even a professional will not succeed.
It should be noted that it is necessary to adapt the type of handlebars to your type of use, if you have a sport type motorcycle, setting the handlebars for cross-country is not logical. Knowing that athletes do not need to ride on the track with significant drops. For this, the steering wheel of the latter must always be flat. This shape is probably not for everyone, but it allows for easy driving and good traction. All this helps to avoid any risk of an accident, or at least helps to reduce it.
Handlebar materials range from the most affordable to the most expensive. Therefore, we have a choice between durable steel that is easy to find. The only downside to this is that it is quite heavy. Thus, for sports cars, it makes sense to choose a material such as aluminum. Aluminum is lighter but more expensive than steel. For those who want optimal lightness, the last option, which can be very expensive, is carbon. However, you should be aware that carbon is less durable and can wear out faster.
We have come to the part that is one of the most interesting in this article. It should be noted that the price of the steering wheel depends on the type of material from which it is made. We may also take into account other factors that may slightly affect the price, but the material takes precedence over all of these. For an aluminum steering wheel, on average, count one hundred euros. Subsequently, you should be aware that a handlebar for non-standard motorcycles can cost more, from 60 to 300 euros.
For one reason or another, you may need to change your steering wheel. You won't want to hire a professional, so do it yourself. In a few steps we will see how to do this.
Our recommended products:
Here is a selection of motorcycle handlebar related tools that you might be interested in.
Pair of black handlebars for Yamaha MT 09 and MT 09 SP. Diameter 22 mm.
Pair of handlebars for Yamaha XSR 700 motorcycles from 2016 to 2020. Good quality and durable material.
Aluminum handlebar riser up to 30 mm thick. For BMW R1200GS LC motorcycle models from 2013 to 2019.
Browse all steering wheel components available on Amazon.
This black aluminum alloy bar in the transverse position is an integral part of the motorcycle handlebar. This keeps your motorcycle in balance. For agility. This device reduces any vibrations. Made from good quality materials for durability. Resistant to dust, scratches and shock.
This black aluminum flat bar is designed for retro motorcycles.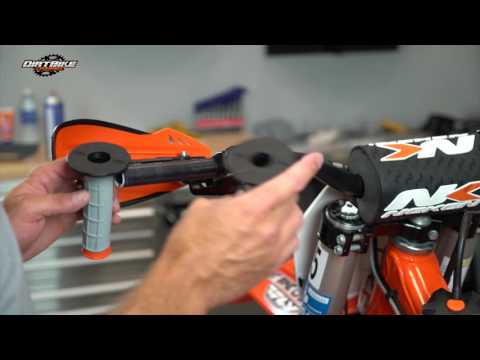 Made of high quality materials, durable and strong. The handlebar diameter is 22mm, which is the standard handlebar size. This will allow you to benefit from excellent compatibility when replacing a defective part. The length of the rod is 70 cm. Its weight is 680 grams.
Two black metal bars for Guzzi V7 motorcycle handlebars. Ideal for 40mm motorcycle fork. The length of the tubes is 300 mm each. The total weight of the rod is 650 grams. Designed with strong and durable materials. Used to replace original Guzzi motorcycle fork handlebars and similar models.
This steel motorcycle handlebar is specially designed for motorcycle models such as Harley Triumph. The materials used in the construction of this bar have been chosen to ensure durability. Handlebar dimensions 22 mm. Resistant to corrosion and scratches. the shape mimics the Z style on both sides of the latter.
25mm steel motorcycle handlebar. Z-shape for Harley models such as Custom, Chopper, Cruisers or Bobber etc. Beautiful black powder coated with very high quality material resistant to all tests. The total weight of the steel pipe is 1.48 kilograms.
To do this, you must have a hex wrench. Start by removing the various components of the handlebar, namely the end caps and all fasteners. After that, you will need some lube to demonstrate the handles, soapy water will do. Pour it on the part that comes into contact with the steering wheel. Back and forth outward and slide the handles until they come off. Subsequently, chests of drawers and mirrors must be removed. To complete the disassembly, do not forget to unscrew at the level of the trigger guard.
You can now install the new handlebar, making sure it is properly centered. So, it must be well put on the trigger guard. Once you're done, you can tighten the trigger guard screw. Remember to check the stability of the entire assembly and the straight position of the handlebar. Feel free to do some tests and some tweaks if needed. Once everything is in place, you can move on to the next step, which is the final step.
This is the last step to complete the job. Install the knobs using the same hex wrench, then you need to put the controls and mirrors back. In case the commodo is difficult to set up, you will have to set it up. You should bring a drill and mark the spot where you are going to place it. Then you need to make a hole to insert the pin. Unfortunately, the operation must be performed on both parts of the steering wheel. So, congratulations on your new steering wheel.
Our recommended products:
Here is a selection of motorcycle handlebar related tools you might be interested in.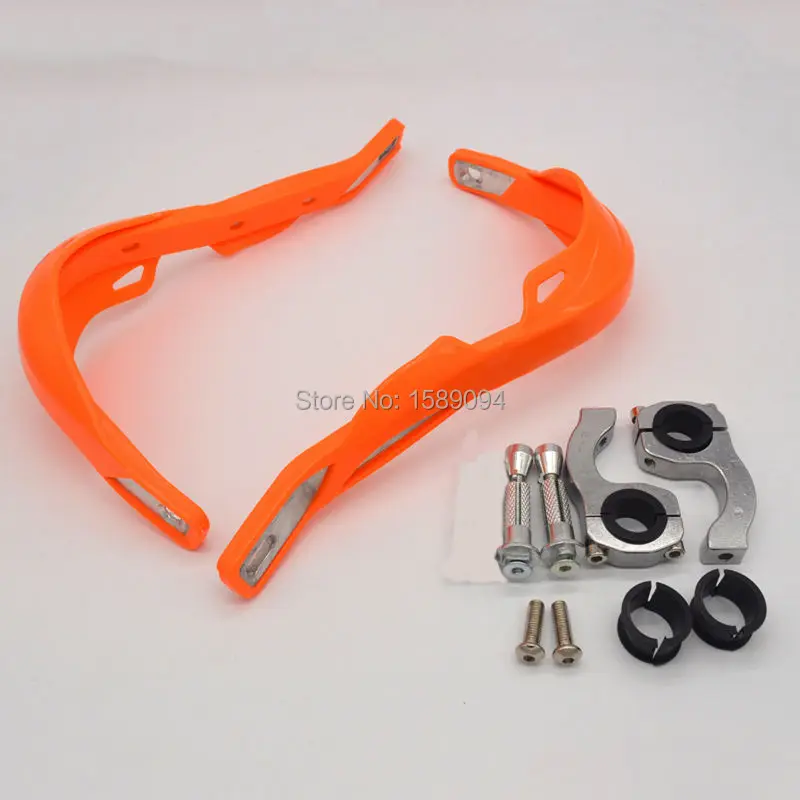
22 mm handle made of durable metal. Ideal for pitbike or SUV type motorcycles. Total weight 500gr. 4 colors to choose from.
Aluminum alloy and plastic brake or clutch lever. For 22mm handlebars. Total product weight 395 g.
Switch for signals, lights, etc. Attached to the motorcycle handlebar Compatible 22mm for mounting. total weight of the product 420 gr.
Browse all steering tool models available on Amazon.
| The world of tuning is quite wide and constantly evolving, so even professionals in their field may not know about all the innovations. Professional motorcycle racers prefer clip-ons, but this steering element is not recognized by all motorcyclists. |
This steering kit includes metal tubes and fasteners - brackets. In some cases, clip-ons serve only as a decorative element. For sportbikes, this is an indispensable control element that provides complete control over the vehicle.
Clipons were originally designed for sports bikes driven by professional riders. They were made from durable and lightweight materials. Due to the simplicity of the fasteners, the clip-ons are easy to replace with new ones.
If the clip-ons are damaged, not the whole mechanism is changed, but only the tube. Since the entire steering gear does not need to be replaced, the cost of repairs is greatly reduced. In some cases, branch pipes of suitable diameter are selected, modified to the desired length, and installed instead of the deformed ones.
There is quite a selection, but manufacturers such as Vortex, Harris Performanc and Gilles Tooling make really reliable, time-tested units. Some brands offer products with non-standard shapes, designs and fasteners, but professionals recommend opting for classic options. Novice motorcyclists should pay attention to Vortex products (Ukraine), which are characterized by such advantages as low cost and excellent quality.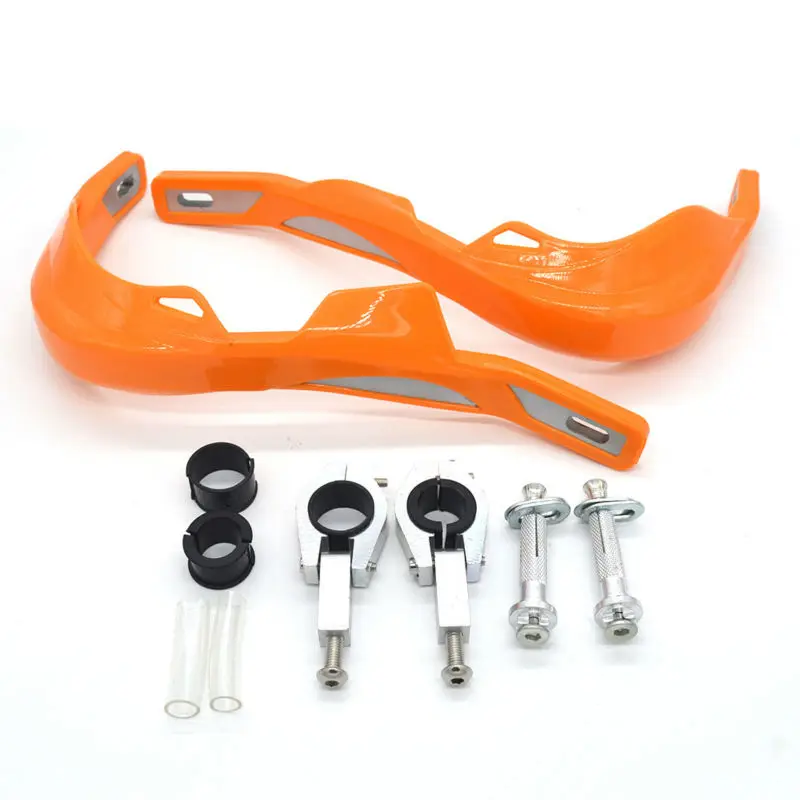
Factory models of clip-ons may contain technological holes on the pipes, due to which the strength of the structure is reduced. Professionals prefer to remove the protrusions to increase the life of the clip-ons.
These products must be installed level with the handlebar bridge and wheels of the motorcycle, and must be symmetrical. This is not possible for every biker. Using the trial and error method, it is possible to find the ideal location.
According to motorcyclists, clip-ons are the best choice for sports bikes for riding on special tracks. If the products are damaged, they can be quickly replaced at an affordable price.