As an ATV owner and off-road riding enthusiast, it makes sense to learn how to do basic maintenance tasks yourself. This not only saves costs but will allow you to make adjustments when you are out on the trail, and something goes wrong. Learning how the brakes work on you ATV and making your own adjustments is the perfect place to start.
Tightening the brakes on your ATV can be achieved by a simple 5 step process.
The process for adjusting the front and back brakes differ slightly from each other. The back brake also has the hand brake, if your ATV is fitted with one, which will require adjustment as well. We detail this process for the front and back brakes and also the adjustment of the rear brake pedal and handbrake.
Establishing whether your brakes are drum brakes or disc brakes is essential because if the brakes are disc brakes, they cannot be adjusted.
Disc brakes work on a hydraulic system that does not require adjustment. If you have disc brakes on your ATV and they are causing you problems, then you should check fluid levels in the brake fluid reservoir or check to see if the brake pads have worn down.
If the brake pads have worn down, you would usually be warned by a squealing noise when you apply the brakes.
Other problems can go wrong on hydraulic disc brake systems such as replacing seals and pistons I the master cylinder of the system, but this is probably best left to professionals if you are unsure how to tackle it.
If your ATV has drum brakes, then we are in business and can make adjustments to the brakes. This brake system is mechanical as opposed to hydraulic, and we can adjust the distance of the brake shoes from the drum.
A jack or a stand that can lift the ATV so that all four wheels are off the ground is the ideal position to work on the brakes of your ATV, and it makes the job quicker and safer!
If you don’t have this equipment, jack up the end of the ATV that you will be working on. Remember, for safety, place chocks behind the wheels that are still on the ground to prevent the ATV rolling off the jack and potentially causing injury to you or damage to the ATV.
With the wheels you are working on lifted off the ground, you will easily be able to turn the wheels by hand while you are adjusting the brakes. In this way, you can make sure you have not tightened the brakes too much, causing the wheels to bind and not spin freely.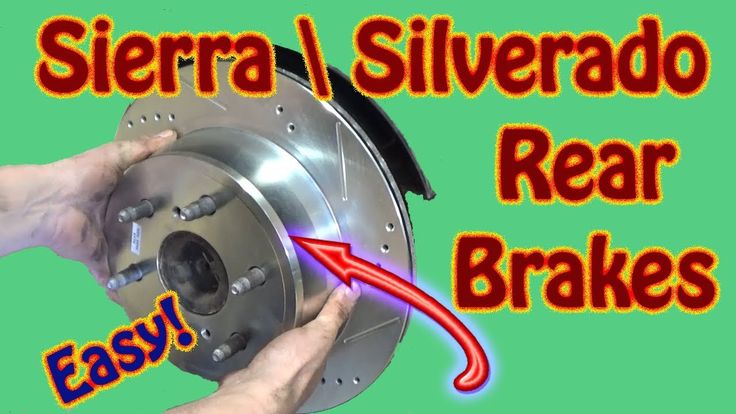
The front brake adjustment and the back brake adjustment processes differ due to the different adjustment mechanisms for the two brakes.
Each of the front wheels has an access port through which you can reach the adjustment wheel for the brakes. You can remove the front wheel for easier access, although this is not completely necessary. This access port is often covered with a dust-plug, which on some models of ATV is red. You will need to remove this dust-plug to access the adjustment wheel through the access port.
It is handy to have a small torch on hand to shine into the access port so you can locate the adjustment wheels inside the drum.
With the plug removed as per the previous step, turn the front wheel by hand so that the access port is located at the six o’clock position. From this position, you can move the wheel to access each of the two adjustment wheels, one to the right of the 6 o’clock position and one to the left of the 6 o’clock position. The adjustment wheels have little arms on them, so they look like a cog. You can use a flat screwdriver through the opening to turn the wheel in the required direction.
Once you have the adjustment wheels located, move on to the next step to make the actual adjustment.
The rear brakes have two adjustment points, one for the pedal brake and one for the hand brake. Both these are cable adjustments and can be accessed via the rear brake panel, on the right rear axle of the ATV.
The adjustment can be accessed without removing the wheels, as the adjustment nuts face the rear of the ATV. The rear brake panel will have two cables coming into it, one for the hand brake and one for the foot brake.
Each of the cables will have a wingnut at the end, which is used for adjusting the tension or length of the cable.
Due to the difference in procedure between the front and rear brake adjustment, we will cover them separately.
You will need to turn both the adjustment wheels to get the correct adjustment on the brakes. Turning the adjustments in one direction will pull the brake shoes in, effectively tightening them. Turning the adjustment wheel the opposite way will push the brake shoe away from the drum, effectively loosening the brakes.
The direction to turn to tighten and loosen depends on your ATV, so you will need to turn it one way to see if it tightens or loosens to establish which direction works for your ATV.
When adjusting the rear brakes, you will have to adjust both the foot brake and the hand brake. Both these brake mechanisms are activated with a cable, one running to the foot pedal, and one to the hand brake mechanism. The adjustment for both cables is via the wingnuts on the brake panel on the rear axle.
The wingnuts are usually one above the other, with the top wingnut being the adjustment for the hand brake and the bottom for the foot pedal.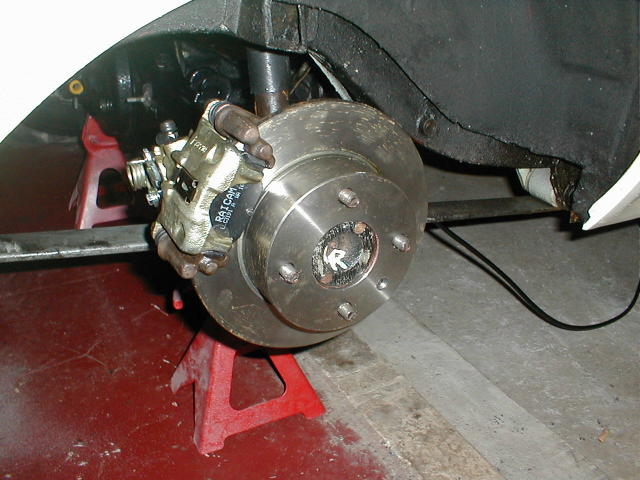 This configuration may differ for your ATV, so you may need to trace the cables to confirm where they go.
The adjustment is achieved by tightening the wingnuts to tighten the brakes or loosening the wingnuts to loosen the brakes. Tightening the cable effectively pulls the brake shoes closer to the brake drum, and loosening the cable allows the shoes to move further away from the drum.
While adjusting the wingnut, hold the cable with a small wrench or a pair of pliers to stop the cable from twisting. There is a hex-shaped section on the cable for this purpose. If the cable twists while you are tightening the brakes, it can weaken the cable and cause it to snap, which will require the cable to be replaced.
Adjust the foot pedal cable till the pedal engages the brake without having to be depressed very far. Then, with the ATV in neutral, spin the back wheel to make sure the brakes are not binding on the wheel. If they are binding, slacken the cable off a half turn at a time until they are no longer binding.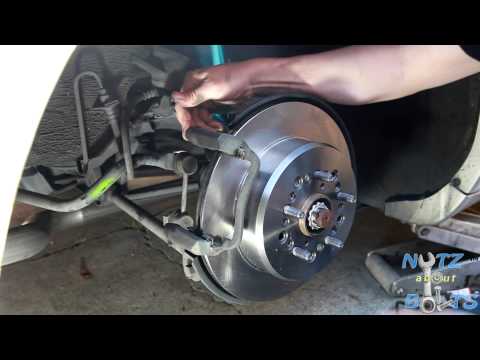
Then adjust the tension on the hand brake cable to accommodate the changes made to the foot pedal cable.
If the adjustment of the cables does not tighten the brakes sufficiently, then the drum and or shoes may be worn to the point that they need to be replaced. If you are uncertain how to do this job, rather take it to a professional who can fit the new parts for you.
Lower the jacks and remove them from under the ATV. As a final check, put the ATV in neutral and push around a little to make sure there is no binding of the brakes.
This is important because if the brakes bind, it will wear them out faster, generate heat, which could cause a fire, and use more fuel.
If there is still binding, repeat the adjustment procedure to alleviate the problem, if there is no binding, you have successfully set your ATV brakes!
Mastering these basic maintenance tasks on your ATV will make you more confident when you need to make adjustments while out on the off-road trail. Set yourself some goals to learn how to do more of these types of tasks and basic maintenance, you will be a more confident off-roader as a result!
Happy ATV’ing!
Keeping your brakes in good condition is critical for ATV maintenance. Once your brakes start to wear out, you could be putting yourself into dangerous situations. You need to be able to stop quickly and successfully at all times on an ATV.
Mud and moisture is the main killer of ATV brake pads, as well as excessive use. Brake pads do their job best under dry conditions. I’m not saying avoid mud, that’s the best part of off-roading, but it’s just something to be aware of.
To complete a successful brake pad swap out, the first thing you need to be aware of is if you have disk brakes or drum brakes.
Most newer quads you will see with disk brakes for every tire. Hydraulic disk brakes are the norm now a days, but you still see drum brakes here and there, and more on older four wheelers.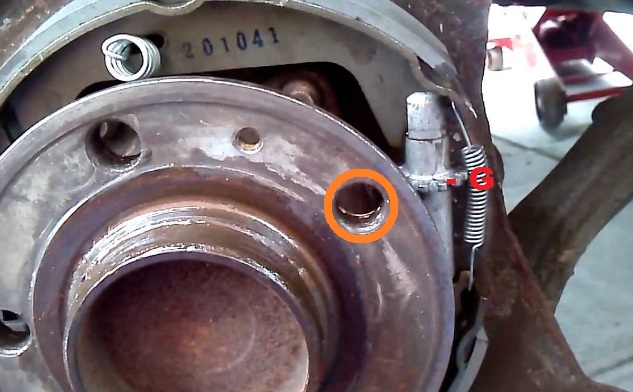 The hydraulic disk brakes are so popular because they stop so much more effectively, limiting the amount of ATV accidents and injuries.
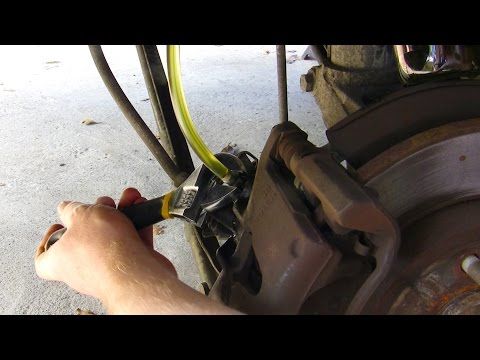
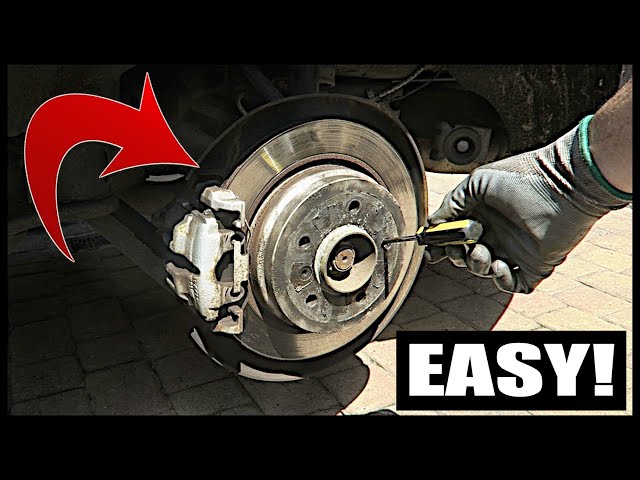
You will be able to easily tell if your brakes are disk or drum brakes by looking for the brake system behind the tire or on the axle. Here are some examples:
ATV Disk BrakesYou will notice where the ATV disk brakes got their name, there’s an actual disk that the brake pads press against to slow the machine down.
These are very common for sport or racing quads. The front disk brakes will very similar except they will most likely be behind the front tire, usually on both sides of the front wheels.
This is because the front brakes are used more often and are so much more critical to slowing the machine down quickly.
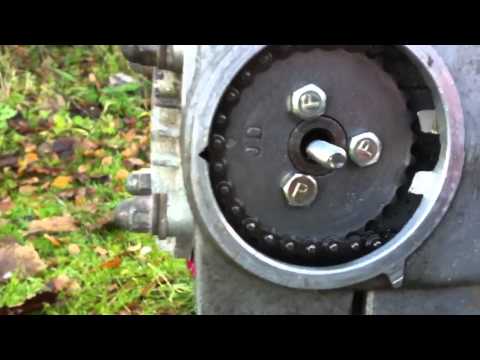
ATV Drum BrakesThe drum brakes will look like this picture, they are enclosed with the brake shoes being pressed onto the the wall of the drum inside the drum itself.
These are more often found on older quads or on utility ATVs on the rear wheels.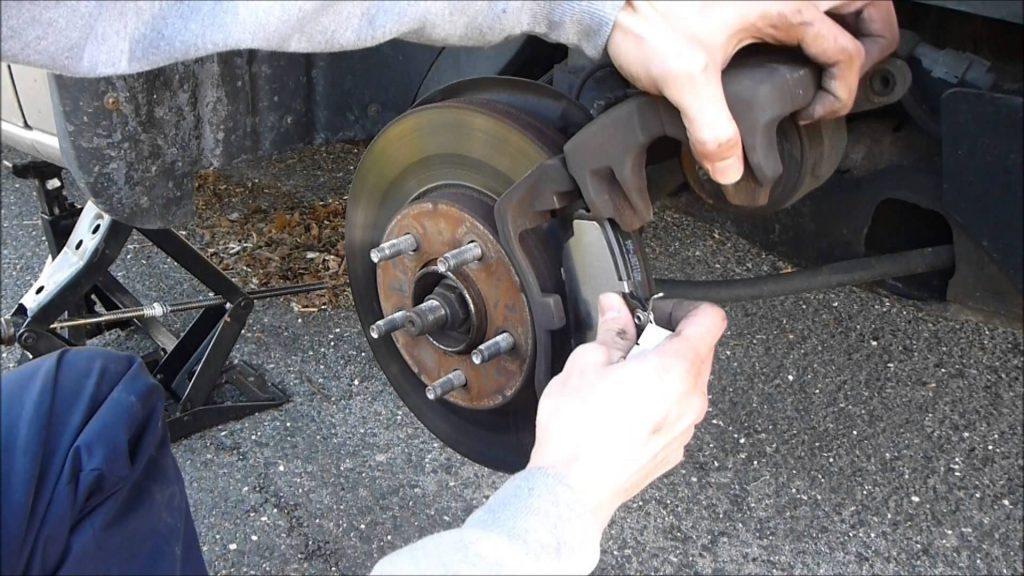 Since the front brakes are most important, it’s usually fine for the the back brakes to be the less effective drum style brake system.
After you figure out which brake system you have, drum or disk, you can get the parts and do a brake pad change.
If you do have drum brakes but want disk brakes, they sell pretty good Disk Brake Conversion Kits on Amazon, just make sure to get the right kit for your make and model.
But what type of pads will you want to get? Let’s talk about the different brake pad materials.
There are three common types of brake pad material to choose from. Ceramic, Metallic, and Organic. Ceramic are usually the most expensive but run a lot cleaner. They create less brake dust which in turn causes less wear and tear to your other brake system components.
Metallic brake pads are popular for sport quads because of the high temperatures they can withstand. But they tend to be noisy and rough on the rotors. Semi-Metallic brake pads are optimal for an everyday rider.
Organic brake pads are the cheapest option of the three. They are easy on the rotors, and contain no metallic material. The down side is they offer the least performance and slowest braking time.
Semi-Metallic brake pads are the most common and best for everyday use. Here is a link to Semi-Metallic ATV Brake Pads on Amazon to help get your search started. Make sure you get the right set for your make and model.
First step is to make sure you have all the tools you need to complete the job. Unless you like running out to the parts store in the middle of a job. Most of these tools are very common and already in most garages.
Once you have all your tools and parts ready, it’s time to replace the brake pads. This is a pretty easy straight forward process.
First remove the ATV tire and wheel assembly from the machine. It’s best practice to loosen the lugs while the ATV is on the ground. Then lift the quad and remove the lugs and wheel.
This is usually done with a socket set, sometimes with an allen wrench. Look on the back of the caliper and you will notice two bolts that hold the brake assembly on.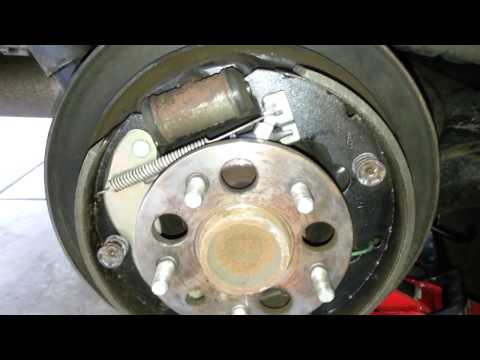
Remove these bolts and the whole assembly comes off the rotor. The pads may still be on the caliper held there by two pins.
You will need to suppress the pins on the caliper to remove the brake pads. This is where you’ll use the vice grips or clamp. Once suppressed the brake pads will easily fall right out of the caliper housing.
This part can be a bit of a pain, but if you get the vice grips on just right you won’t have any problems.
You will need to compress the caliper piston with a c clamp or something to get the new brake pads in the caliper.
Once you compress the caliper piston you can remove the clamp and insert the new brake pads.
Remember to set the pads back on the caliper pins just the way the old ones were installed. You will need the vice grips again to compress the pins to put the new pads on.
Simply put the brake assembly back onto the machine by bolting the caliper back into place. There you have it, you just changed your brake pads. Not that difficult of a job, and can be easily done in less than an hour once you know what you’re doing.
Put the wheel and tire back onto the machine and lower the jack. It’s best to loosely put the lugs on while the machine is jacked up, and then firmly tighten the lugs after you’ve lower the quad back to the ground.
Press the brake down to be sure that your brake is working properly. The first or first two pumps on the pedal are soft as the piston started at a new point on the backside the brake pad.
This might be a good time to check your brake fluid and replace or add any if needed. If you want to bleed the brakes and get all new fluid in there check out this article on How To Bleed Your Brake Fluid On An ATV.
The average rider can go a few years before needing new brake pads. It’s not a good idea to judge if you need pads by how long it’s been since last replacement though.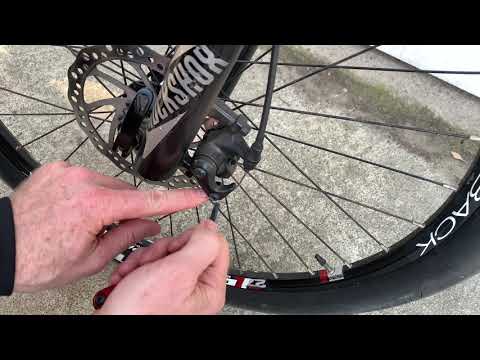 Since everyone rides their machine differently and with differing frequency, there are better ways to check of you need to do a replacement.
The best way to tell if you need to replace your ATV brake pads is by looking at the thickness of the pads. You could always measure them by hand, but a quick look is enough to tell if they’re worn out.
In this picture the pads on the right are worn and the pads on the left are new.
Another way to tell is if you hear a scraping noise while using your brakes when you’re riding. If you press down hard on the brakes and notice a jittery feeling in your handle bars, that’s another sign you should check out your brake pads.
Sharing is caring!
We all are well aware of the principle of operation of the drum brake system, it is based on the expansion of the pads, and the mechanism is driven by a brake cable. Disc brakes work differently. The brake mechanism actuates the brake fluid, which is developed according to a special technology and does not respond to temperature changes. Serviceable disc brakes are many times more reliable than drum brakes, that's a fact.
Most ATV models are equipped with a mixed brake system. For example, disc brakes are installed on the front wheels, and drum brakes on the rear wheels. But it is also not uncommon for both circuits to be either drum or disc.
It should be said that under the condition of hard use of the ATV (jumping, increased shaking, unstable position of the wheels), it is necessary to use a disc (hydraulic) brake system, since when using drum brakes, sometimes one hand effort is not enough. Whereas when using disc brakes, you will only need a slight effort of your hand to apply and brake unhindered.
So, let's look at the mechanism of the disc brake system.
Brake fluid is filled into a dedicated brake expansion tank (located on the handlebars or attached to the ATV frame).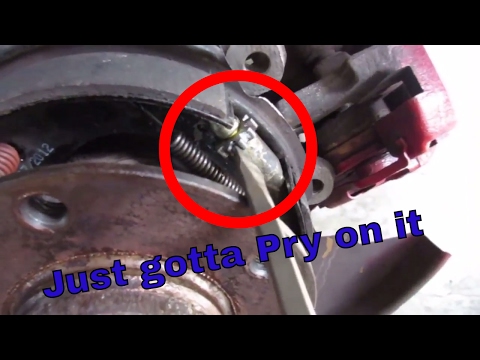
What happens when you press the handle or the brake pedal?
Manual brake control.
Foot brake control.
The handle or pedal presses on a piston, which in turn drives the brake fluid in the hoses, creating pressure that is transferred to the brake caliper, which has its own piston.
Rear brake caliper.
Front brake caliper.
Under pressure, the brake caliper piston moves the pads, which compress the brake disc.
Brake shoes.
When braking, there is a lot of pressure on the pads that can stop the ATV.
Of course, under such loads, you should pay attention to the lining of the brake pads. High-quality braking is possible only with the use of serviceable brake pads, which are regularly serviced. You can read about how to make your own brake pads here.
The brake disc is made of durable steel. Along the perimeter, the disk has holes for ventilation and self-cleaning from dirt.
Remember to be safe, regularly inspecting your ATV's braking system is essential for the health of you and your passenger. When inspecting, special attention should be paid to the brake hoses, the condition of the pads, the level of brake fluid in the reservoir, and the condition of the brake disc.
We recommend DOT 3 brake fluid.
"Cleaning and replacement of ...
... "
Buying a reliable ATV is great. But in order for it to be really reliable and not fail at the most inopportune moment, it must be regularly serviced, and in particular, the brakes must be bled after the repair of the elements of the brake system.
To bleed the ATV brakes yourself, you will need the following tools:
ATV's brake circuits operate from the front and rear brakes. The first is located on the frame of the vehicle, and the second is on the steering wheel.
To complete this procedure, and Linghai ATVs are no exception, you need the help of a friend. Bleeding the rear and front brakes of the ATV is as follows:
 These actions must be continued until all the old brake fluid has poured out of the barrel and a new one has come out;
 Checking if the ATV's brakes have been bled properly is quite simple, just press them. If you feel a moderate hardness, then everything went well, and if they are still soft, then this means that air has entered the brake system. To get rid of it, slightly loosen the brake hose fasteners.
Among the most common breakdowns of the ATV brake system, it is worth highlighting:
If your ATV's disc brakes are deteriorating, it is recommended that you bleed them by changing the brake fluid. Preliminary check all elements of the brake system for serviceability and absence of damage in order to exclude the possibility of their wear. If any part of the ATV is still out of order, then it should be replaced with a new one.
Brake pads break more often than other functional motorcycle components because they are made of composite materials instead of metal. The pads can be replaced both independently and by contacting a service center. Quite often, the brake calipers of the ATV also break. With sudden braking, they overheat, which negatively affects the service life of this component. In order not to have to repair the brake calipers too often, it is recommended to change the oil regularly. Sometimes calipers from OKI are put on ATVs, but before that they need to be somewhat modified on a milling machine. A good option if the original calipers cannot be repaired.
Bleeding the brakes on children's ATVs is the same as on full size motorcycles. The main thing is to choose a high-quality and reliable brake fluid that will cope with its task at a decent level.
The most wear and tear-prone component of a child's ATV is the brake pads. Fortunately, you can determine this malfunction by eye. If the pads look frayed and worn, then it's time to change them. Among other signs it is worth highlighting:
Although children's motorcycle brakes are not subjected to excessive stress, they should be checked for stability and performance at least twice a season.
Diagnostics and timely repair of the brake system of an ATV should always be given special attention, since the safety of the rider largely depends on its operation. Regular maintenance of the rear and front brakes of the vehicle can be done both on its own and by contacting the services of service center specialists for help.