Ask a question, get an answer ASAP!
☰
×
GET A QUOTE
asked by
F1RED U
on August 11, 2017
I've been riding my KFX 450R around and I did a huge jump and all of a sudden the four wheeler stalled. I took it back to our camp and I found out it had something to do with my fuel pump. I checked the fuse and it was blown so I replaced it. I rode for an hour and it was ok. So I try to go out again and the same thing happened again. Can I please get an idea why this keeps happening?
| Save Big on Auto Repairs | Get a Quote |
Jeff Engstrom
Automotive Mechanic
13 years of experience
It is quite possible that during a jump, some of the wiring may have been jarred loose or potentially caused a grounding problem for the fuel pump resulting in the fuel pump fuse continuously popping when the current is not consistent. I would suggest taking the quad to your local Kawasaki dealer to have the problem diagnosed and inspected.
The statements expressed above are only for informational purposes and should be independently verified. Please see our terms of service for more details
Our certified mechanics come to you ・Backed by 12-month, 12,000-mile guarantee・Fair and transparent pricing
Get a quote
Apply Now
How do you use the song seek menu on the satellite radio?
If your car is equipped with satellite radio, you have access to a number of different features, including one called “song seek”. Essentially, this system allows you to save the names of songs you like and receive notifications when they’re...
What does the all-wheel drive (AWD) lock light mean?
The all-wheel drive (AWD) lock light means that the all-wheel drive system (https://www.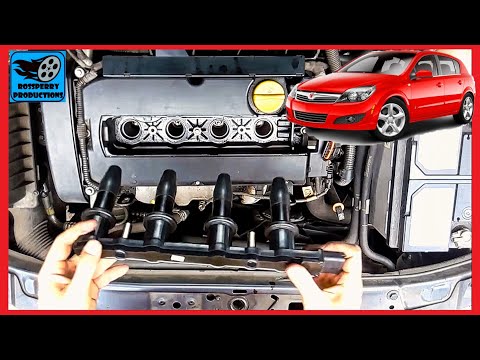 yourmechanic.com/article/how-all-wheel-drive-works) is locked. In this condition, power is continuously sent to all four wheels. On the other hand, when the system is in auto all-wheel drive, the distribution...
How do I adjust the rear view mirror?
The rear view mirror provides added visibility out of the rear window. Before driving, you should always adjust your mirror to the ideal position, so that you have maximum visibility. To adjust the mirror, manually tilt it up or down,...
Driver's power seat not moving forward or backward
The driver's seat will need to be repaired with the power seat motor repair kit. The kit requires the driver's seat track to be removed, and involves over three hours of work. The power window motor switches could be sticking....
ECU computer
Hello. The main question is why does you think your computer needs to be reset. If you have engine idling issues, then there is a relearn procedure procedure which can be performed with an advanced aftermarket scan tool such as.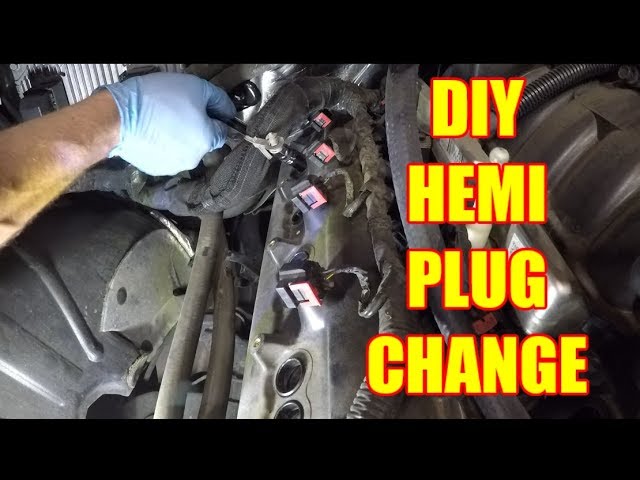 ..
..
Rear tailgate doesn't lock properly and opens while driving
Hello. It sounds like the first step is to have the rear tailgate ajar switch replaced. Then, have the rear tailgate latch adjusted so the door will close properly. It is also possible that the rear tailgate support shocks aren’t...
Clutch goes to floor and now car dies when putting it in hear
I'm going to assume your car dies because when you manage to get it into gear, you can't feather the clutch to get going. This would be normal in this situation. The reason your clutch is acting the way it...
Low idle, lots of smoke from the exhaust, feels like no power. Mechanic looked at it and said to change my oil grade?
Hi there. From the description you have provided, there is a combination of things happening with your vehicle. If the exhaust smoke is oil smoke, increasing the oil viscosity could help reduce the oil consumption. It could be, the piston...
Engine code P0430 and losing oil
Diagnostic Trouble Code P0430 (https://www.yourmechanic.com/article/p0430-obd-ii-trouble-code-catalyst-system-efficiency-below-threshold-bank-2-by-spencer-clayton) means that the ECU is detecting below threshold performance from the catalytic converter. The ECU monitors the catalytic converter closely and when a low performance threshold is detected the Check Engine Light will be displayed...
A Buyer’s Guide to the 2012 Kia Rio
The The Kia Rio has a new style and look for to attract buyers and compete in the subcompact car ranks. It offers outstanding fuel economy with great value that has a nice price tag for a variety of budgets....
The Best Used Cars to Buy If You Live in a Tropical Climate
If If you live in a tropical climate, most of your vehicle purchasing concerns will be essentially the same as if you lived anywhere else – you want a car that looks good, offers decent gas mileage, and suits the.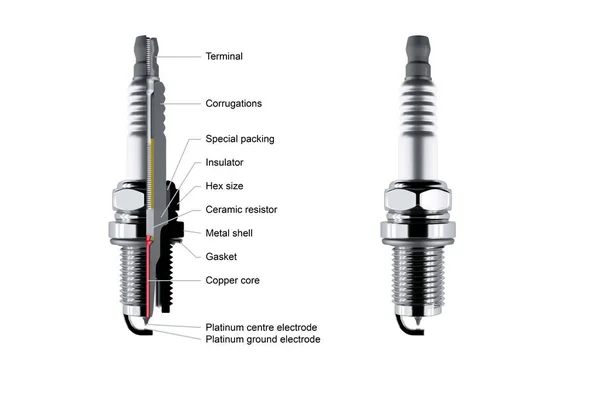 ..
..
The Best Used Cars to Buy for First Time Car Owners
Owning Owning your very first car is an exciting time in a person’s life. Likely you want to put a lot of thought and research into the process to ensure you get something that meets your needs, is fun to...
Maintenance
Estimates
Cities
Yes, you need to properly tune your motor.
When you put an aftermarket higher-flowing exhaust on a vehicle, it throws off the current air/fuel mixture that the vehicle is setup from the factory with.
The aftermarket exhaust is designed to allow more airflow to pass by significantly less restricted than the stock muffler does. Also, generally the mid pipe and head pipes of most aftermarket systems are larger diameters than stock which allow for added airflow to pass through quicker.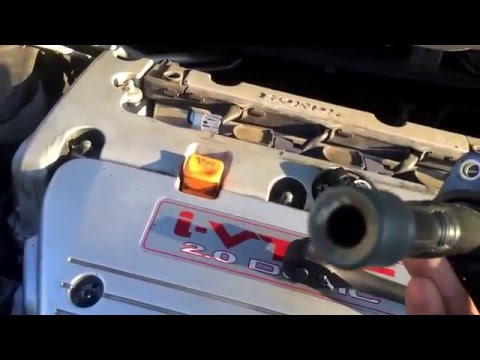 This changes the air/fuel mixture that is set up for the stock exhaust system.
When the air/fuel mixture is changed, your motor will have a tendency to run lean. Running lean generally means that your motor is not getting enough fuel to balance out the added airflow and equates to your motor and exhaust system running at higher-than-normal temperatures.
When a motor is running lean, it is not getting the ample amount of fuel that it needs to function at its best. This leads to increased overall exhaust and motor temperatures and also decreased overall performance. It is never a good idea to run a motor or our exhaust at higher-than-normal temperatures since it can lead to failures down the road.
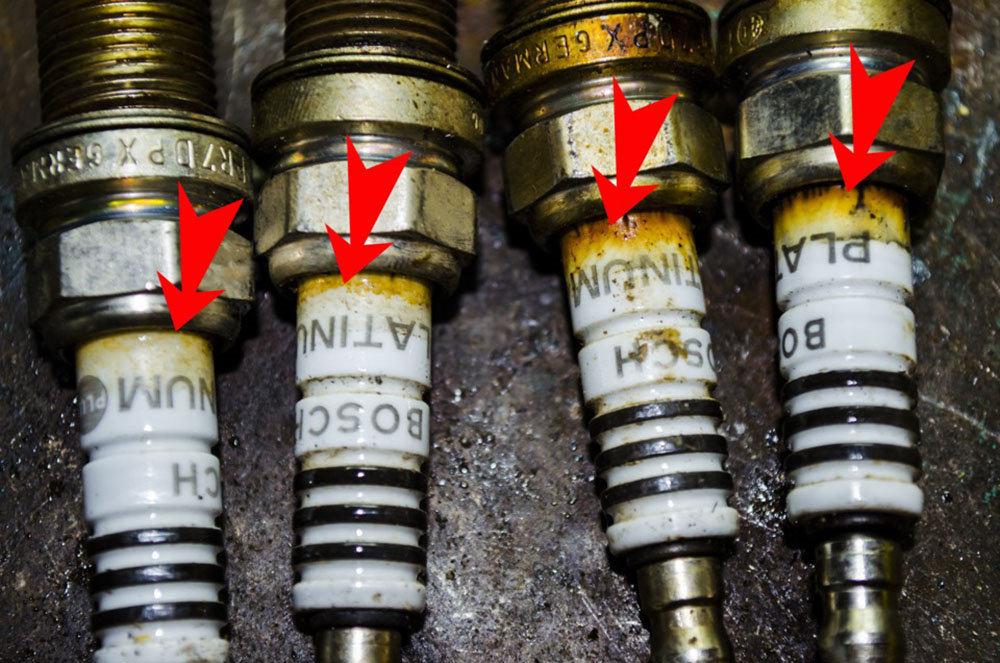
Generally the tell-tale signs while riding are popping and backfiring, especially on deceleration. Hotter motor temperatures and a whitish firing end of your spark plug are also good indicators.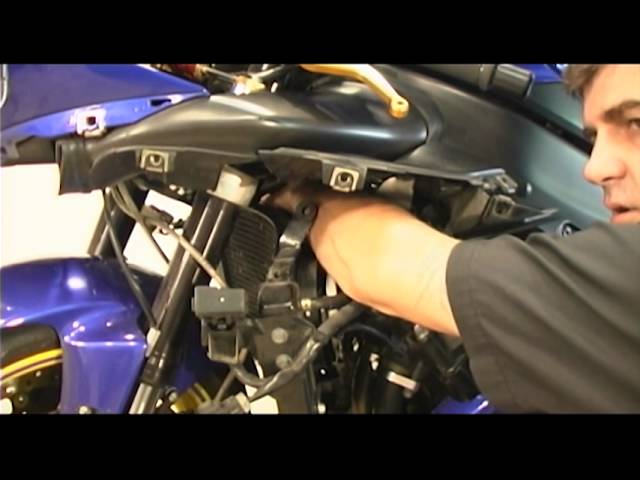
When we refer to proper tuning, we are referring to adding enough fuel to compensate for the added airflow. In doing so, this will allow you to eliminate the lean issue and bring your motor back up to having a proper air/fuel mixture.
Yes. The biggest increase of airflow will come from the less-restrictive aftermarket muffler(s) and not the head pipe(s). Given that, your motor will still run lean and requires proper tuning.
This is an incorrect assumption. Just because your stock exhaust system has an O2 sensor in it does not mean it is self tuning. The stock O2 sensor is an emissions compliant component that keeps the vehicle running at 14.7 AFR (which is lean) only during light engine load conditions. The O2 sensor makes the vehicle run lean during idle, low RPM and steady cruise.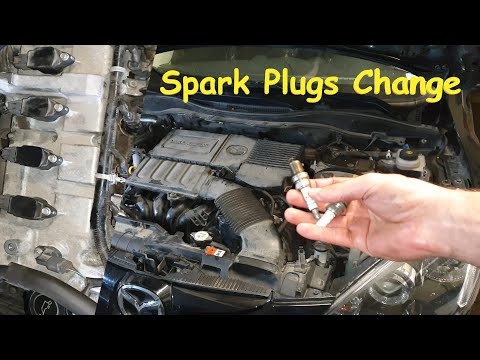 The O2 sensor does not function under engine load (acceleration & full throttle). By eliminating the O2 sensor, we are able to richen up the low end with our TFI Power Box and then fine tune the fueling for acceleration and full throttle now that the performance mods (exhaust) have been added. By eliminating the O2 sensor and correcting the fueling, the vehicle should run cooler, have improved low end torque and overall smoother drive-ability.
You need to properly remap your fuel system in order to add fuel to compensate for the added airflow of the new exhaust.
By using a fuel controller (aka programmer), you can remap and tune your motor.
We sell fuel controllers known as TFI Power Boxes for many of the fuel injected models that we offer exhaust systems for.
You do not have to buy our controller and can opt for a competitor’s module instead, but do still need to properly tune.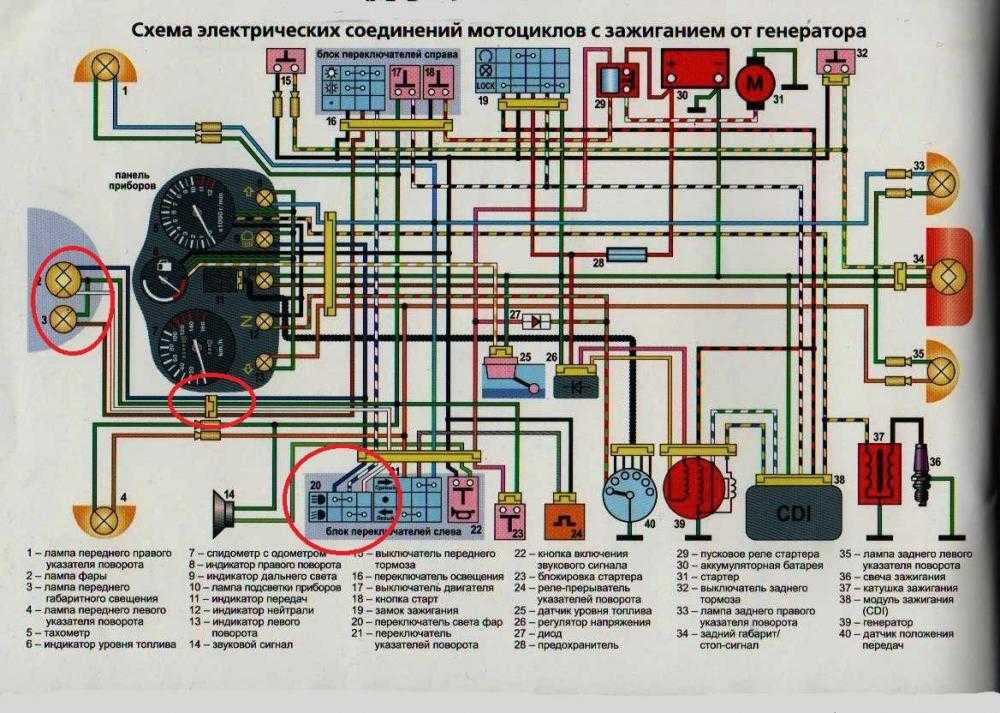
Our TFI Power Boxes come pre-set with a middle of the road setting already compensating for the aftermarket exhaust. Generally, about 80% of customers that we speak with don’t feel the need to adjust any further after installing it. That’s not to say you can’t fine tune and try to change adjustments even further if you feel comfortable.
Our boxes are designed as plug-and-play units that plug directly in line with your stock injector harness. The plastic clips on the ends of our Power Box wiring harnesses make it easy to unplug your stock harness and plug our clips directly in line. The only other thing aside from routing the module to your desired location would be hooking up the ground wire; usually the best place being the battery.
We recommend taking it to a certified mechanic or someone that you feel comfortable with working on your vehicle. Don’t let not knowing how or not feeling comfortable installing a controller be an excuse to not properly tuning your vehicle.
You need to re-jet your carburetor in order to add fuel to compensate for the added airflow of the new exhaust.
Every model is different and will require different jetting specs according to various factors like altitude, the exhaust system that you have, air box modifications and the use of aftermarket air filters.
Since it is nearly impossible to have exact jetting specs for every model while taking into account the various different potential setups, we have made a great effort to have jetting specs for as many models as possible. Please call us to find out what specs we have determined for your particular model.
Given the vast amount of potential setups, we feel it is best to give specs directly to each customer after hearing the exact setup that you have / are going to have on your vehicle. This way, we can work to give you the best recommendation for jetting on your vehicle.
We recommend taking it to a certified mechanic or someone that you feel comfortable with working on your vehicle. Don’t let not knowing how or not feeling comfortable re-jetting be an excuse to not properly tuning your vehicle.
Big Gun exhaust systems are warranted against manufacturing defects for material and workmanship for 1 year from the date of purchase from Big Gun or from any authorized Big Gun dealer, distributor, or exporter. During the warranty period, the warranty is limited to the repair or replacement of defective products. The warranty shall be void if the exhaust has been mounted on a vehicle and run, or it is determined that any alleged defect is the result of misuse, neglect, abuse, or modification of the product. There is no warranty for how the exhaust sounds (i.e. too loud), normal wear and tear of products, or for any damage that may have come about from a crash, or from improper maintenance of the muffler and/or packing.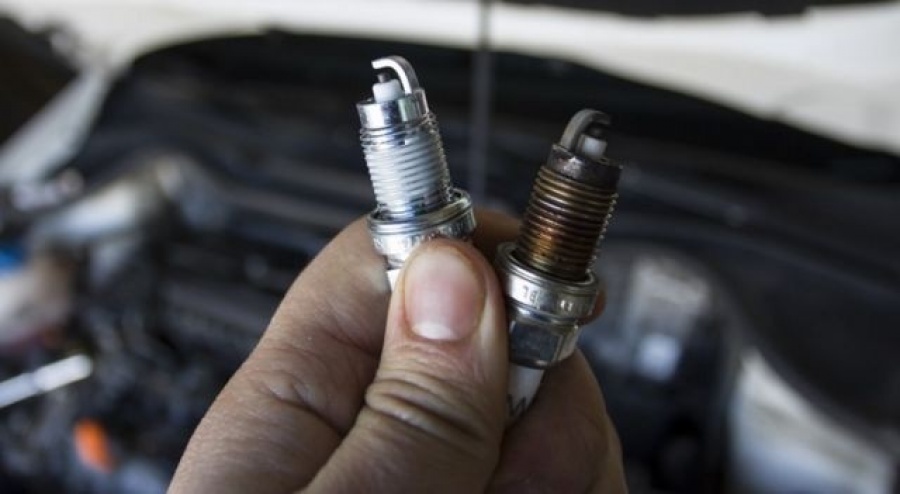 There is no warranty on exhaust with regard to any form of discoloration or bluing which are caused by tuning characteristics (i.e. cam timing, carburetor jetting, over heating due to lack of packing and incorrect fuel/air mixture) and is not caused by a defect in manufacturing.
Proper tuning is a must! Now that you’re getting a performance exhaust system, be sure to tune your vehicle in order to maintain the Big Gun warranty. If you have a carbureted vehicle, proper jetting is required. If you have a fuel injected vehicle, the use of a fuel controller / programmer is required. Without proper tuning, your motor and exhaust will run hotter than normal due to running “lean,” a condition that adds unneeded wear on your exhaust system and motor. For more information, check out the Tuning tab. To learn more about using our Power Box, visit our Power Box 101 page.
All Big Gun Exhaust mufflers come with the highest quality high-temperature fiberglass packing inside. Repacking your muffler every 15 – 20 hours of ride/drive time is required. Failure to properly check and repack your muffler as required will void the warranty. A muffler with little to no packing will have nowhere to dissipate the heat of the exhaust. Signs of packing deterioration can include: increase in overall sound, discoloration of the muffler and end tip, peeling and/or discolored decals/badges, a slight echoing and loose rivets or screws.
To view our entire Warranty Policy, click here.
Proposition 65 requires businesses to provide warnings to Californians about significant exposures to chemicals that cause cancer, birth defects or other reproductive harm. These chemicals can be in the products that Californians purchase, in their homes or workplaces, or that are released into the environment. By requiring that this information be provided, Proposition 65 enables Californians to make informed decisions about their exposures to these chemicals.
Proposition 65 also prohibits California businesses from knowingly discharging significant amounts of listed chemicals into sources of drinking water.
Proposition 65 requires California to publish a list of chemicals known to cause cancer, birth defects or other reproductive harm. This list, which must be updated at least once a year, has grown to include approximately 900 chemicals since it was first published in 1987.
Proposition 65 became law in November 1986, when California voters approved it by a 63-37 percent margin. The official name of Proposition 65 is the Safe Drinking Water and Toxic Enforcement Act of 1986.
For more information, visit, https://www.p65warnings.ca.gov/
The spark plug plays a vital role in igniting the combustible mixture in an internal combustion engine. It doesn't matter if you own a new car or not, spark plugs require periodic checks, cleaning and replacement. In modern cars of foreign manufacturers, the motor is closed with a plastic partition, but do not let this scare the car owner - self-replacement of candles in this case is also possible.
The choice of a new spark plug by the car owner is a responsible occupation, since the quality of the engine will largely depend on it. Pay attention to the brand of the manufacturer and do not hesitate to check the performance of the elements with the seller. Especially in the automotive markets or in small shops where they sell faulty ones under the guise of new candles. Large car dealerships that value their reputation offer candle testing themselves. They use catalogs to simplify the selection of spark plugs for your car model.
If you are new to the choice of candles, focus on two main components - the geometric shape and glow number. Everything is clear with the shape - a minimum of differences from the previous one, otherwise you will not be able to screw it in or the electrodes will not reach the chambers in the engine. A spark plug that is too long is also detrimental to the engine, as it will disable either the spark plug or the internal combustion engine.
The heat number displays the heating mode of the element - with a low value, the candle quickly overheats. The recommended parameters are written in the service book for the car.
The classic version of the candle is a ceramic body, a metal cup with threads and two petals at the bottom. There are candles with a large number of petals that are easy to recognize - there is a central electrode in the middle, which is surrounded by three or four electrodes on the side. This allows the fuel in the cylinder to ignite evenly and burn well. In addition, engine power is increased, as are environmental indicators.
There are no special safety regulations for replacing ignition elements in a vehicle. It is recommended to start it with a cooled motor so as not to get burned. Since spark plugs operate at extremely high temperatures, it is best not to try to replace immediately after stopping the vehicle, but to wait two to three hours for the engine to finally return to normal temperature.
For those who have never changed spark plugs, it does not hurt to know that there is nothing complicated in this procedure - the main thing is to do it carefully, in the correct order of actions.
The first step is to search for candles. On engines with four cylinders, they are usually located on one side of the internal combustion engine or on top, in V8 engines - on the side so that there is one candle for each of the cylinders. When looking for candles, focus on wires surrounded by black insulation. Finding them, you can easily find what you are looking for.
The next step will be the preparation of the necessary tools. Prepare a car key with a special nozzle for working with candles and a couple of new ignition elements. To facilitate the work, take a can of compressed air, a rag and industrial alcohol. If in the future you don't want to have trouble removing the spark plugs the next time you change them, apply a little spray lubricant to the threads before screwing in the spark plugs.
To prevent dirt from getting inside the cylinder, it must be removed before the old spark plug is removed, so clean the engine near the ignition element before starting the procedure. Debris and dust is removed with compressed air, which makes cleaning much easier. If there is a lot of dirt, use a rag soaked in technical alcohol.
The spark plugs themselves are connected to the ignition distribution box with wires that need to be disconnected. To do this, grab its cap and pull with a little effort until the wire is disconnected. Remove the wire from only one candle so as not to get confused, as they are connected by special connectors that cannot be mixed up when connecting. Putting a nozzle for candles on the key, fix it on top of the element and turn it counterclockwise. After removing the candle, it is necessary to clean the dirt from the place where it stood. To do this, you will need a rag soaked in technical alcohol.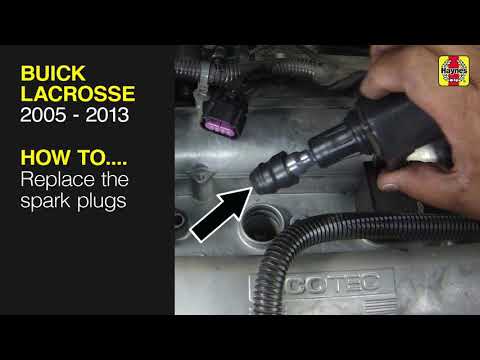
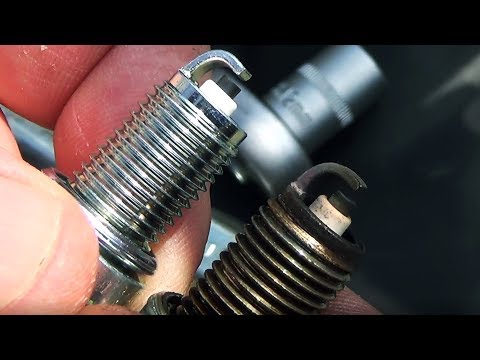
Be sure to inspect the spark plug electrodes. Make sure that the space between them is not clogged with dirt. Possible problems with the rings are indicated by an excess amount of oil on the candle. In this case, it is not superfluous to show the car to the auto mechanic. If the old candle has a brownish tint, there are no problems in the operation of the motor.
Be sure to visually compare the old spark plug with the new element before starting installation. They must match. The size of the thread on the candle and its pitch must also be identical, as well as the gaps on the ignition elements. Lubricate the threads with a small amount of grease, but do not get on the electrodes themselves, as this is fraught with damage to the performance of the candle. After that, clockwise tighten the element by hand until there is enough strength. Use a wrench to tighten, but do not overtighten, as this can also damage the candle. Make sure that the washer on the spark plug is below the level of the head on the engine.
After installing the spark plugs, put the previously removed high voltage wires on them. The caps should be tight. To verify this, pull the wire towards you. It should not easily jump off the installed candle. After the procedure with one, repeat it with the rest of the candles.
The procedure for replacing candles is within the power of every motorist, but if you are not confident in your abilities, any service station will readily undertake this, so the choice is yours - to change it yourself or trust auto mechanics.
Spark plugs create a spark in a vehicle's ignition system to ignite the air/fuel mixture in an engine cylinder. More about it here.
 Ordinary change after 30 thousand km. run; iridium, platinum - 60-100 thousand km. run;
 Change spark plugs as a set, not just replacing broken ones.
If the car had single electrode spark plugs (pictured), change them to spark plugs with a platinum tip or multi-electrode spark plugs with 2 or more electrodes. Multi-electrode spark plugs, as a rule, do not need gap adjustment, they are slowly replacing the old ones. For example, the Audi engine installed in the R18 VTG uses only multi-electrode.
Multi-electrode spark plugs are 2 or even 3 times more expensive, but will last longer. They are also suitable for operation in harsh climates, in desert and sandy areas.
Step 1. Look in the vehicle owner's manual for the location of the spark plugs in the engine. Determine their number, whether it is necessary to set the gap between the contacts, the size of the gap, what is the diameter of the thread of the candle in your car (usually 14 mm, but there are also 10-12 mm).
Step 2. Find the article of suitable spark plugs in the car model catalog or ask for help with the selection of an auto parts store seller. Arm yourself with a socket wrench with a rubber bush or magnet, spark plug sockets or a spark plug wrench, extension sockets or a swivel to get to the spark plug in the spark plug well.
Step 3. Find out in the technical documentation of the car, according to the information on the candle packaging or from a specialist, whether it is necessary to set the gap in the candles. Some spark plugs don't have a gap, some have it adjustable depending on the number of cylinders, their location, etc.
Step 4 Park the vehicle, turn off the engine, open the hood and allow the engine to cool for several hours. Especially if the engine has an aluminum cylinder block. After an engine has been running for a long time, the spark plugs can be the hottest part of the engine. It takes a couple of hours to cool the engine, and a week to heal the burn. It's not for you to change the air filter.
Step 5. If you need to set the spark plug gap, take a gap gauge and adjust the distance between the two electrodes. It is in the space between the electrodes that a spark occurs. One electrode is L-shaped (looks like a hook), the other electrode - the central one - is directly opposite the first. Set the gap between the two electrodes from 0.028 to 0.060 inches.
Step 6. Check that the spark plug matches the socket wrench gasket.
Step 7. Using the vehicle owner's manual or repair manual, locate the high voltage wires (armoured wires) connected to the spark plugs. The number of wires will be equal to the number of candles. Often the wires are red or black.
Step 8. Using stickers or a pencil, mark which armor wire was connected to which spark plug.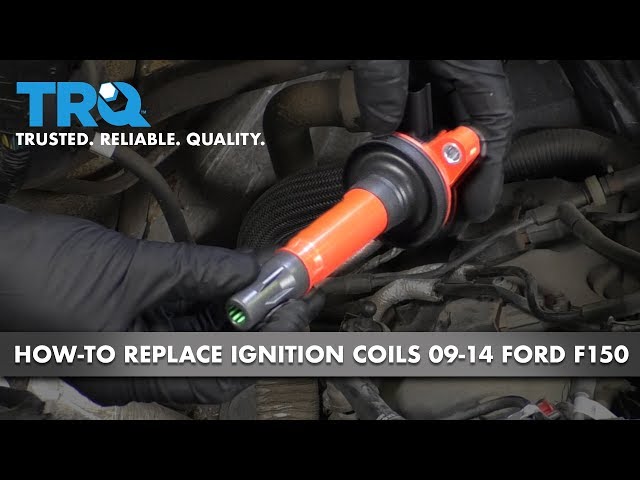 By relying on memory, you can get distracted and easily forget the order in which the wires are connected. Crossed wires will cause the engine to run rough. In an engine with 8 cylinders, it is generally impossible to guess the combination of wire connections. If you confuse the order of connecting the armored wires, you will have to go to the service station or read the manual on car wiring.
Step 9. Disconnect each high voltage cable by pulling on the cover at the very base of the wire to avoid damage.
Step 10. Clean the spark plug with compressed air or a brush.
Step 11. Using a spark plug wrench, remove all spark plugs from the engine and replace each with a new one. Don't overstretch the candle. 1/16 of a turn of the key is sufficient after tight finger tightening.
Step 12. Install the high voltage wires in place, removing the tip stickers.
Step 13. Remove all tools from the engine compartment, close the hood and start the vehicle.
To consolidate, read how to change the candles in the BMW 5 Series.