Absorbent Glass Mat (AGM) batteries are commonplace in powersports applications nowadays.
There’s a big reason why: These AGM batteries are virtually maintenance free. Back in the day, a flooded lead acid battery needed to be routinely checked and filled to ensure it could maintain a charge. On the other hand, AGM batteries are pretty much hands off—provided you follow the proper steps to prepare them for the initial charge, that is.
That’s why we’re writing this quick article. If you buy your AGM battery from a walk-in store or dealership, there’s a good chance it’s already been properly charged and is ready to drop into your motorcycle, snow mobile, lawn mower, or whatever.
But if you buy your powersports batteries online, you’ll probably have to set up your AGM battery yourself. And this initial prep and charging process is critical; if you don’t follow the instructions, you risk permanently damaging your battery.
And while your battery will likely come with its own instructions, we wanted to emphasize three tips to ensure your battery has a long service life.
3 AGM Battery Initial Prep & Charging TipsFor this AGM battery, you remove the heavy rubber plugs from the top of the battery first (do not discard this!), which exposes the pointed fill ports on the battery below. Leave the foil on the electrolyte vials too. (Image/OnAllCylinders)1. Fill Your Battery with the Right Amount of Electrolyte (Not Water!)First off, electrolyte is essentially a fancy word for battery acid. It’s corrosive and can burn the skin, etch surfaces, and dissolve paint—so make sure you take the appropriate precautions when handling and filling your battery, and dispose of excess electrolyte properly.
It’s vitally important to realize that electrolyte isn’t water. Yes, unlike AGM batteries, flooded lead acid batteries get topped-off with distilled water as part of their regular maintenance process, but not before being filled with acid first.
More importantly, don’t confuse traditional lead acid battery maintenance procedures with any of the steps involved with prepping an AGM battery prior to its initial charge. No water, distilled or otherwise, is involved in an AGM battery’s filling process. You need to use electrolyte, AKA battery acid.
When you’re ready to fill the battery, simply invert the vials (with the foil covering still over the vial caps), position them over the individual fill ports, and press down. The foil on the chamber openings will get punctured and battery acid will start filling the battery. Easy peasy. (Image/OnAllCylinders)In all of our initial battery charging experiences, the AGM battery manufacturer has included the electrolyte with the battery purchase.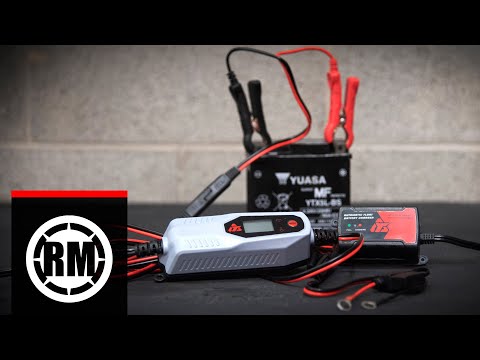 But if yours didn’t, you can buy your battery acid separately.
Either way, you want to make sure you fill your battery to the proper levels.
This is a traditional flooded lead acid-style battery. But much like its AGM counterparts it needs to be filled with the proper levels of battery acid prior to its initial charge. Then, you can add distilled water as the levels fall later. Note the fill lines near the top of the battery’s case. (Image/OnAllCylinders)2. After Filling the Battery, Wait for the Acid to be Fully AbsorbedThis is probably the step that’s overlooked the most. After the electrolyte has drained into the battery…wait! This allows the acid time to absorb into the glass mat. Remember, it’s exactly what the “A” is in AGM, after all.
If you immediately throw the battery on the charger, it could damage the battery and shorten its lifespan. You may not notice it at first but over time, the battery could develop issues like weak starting performance and a rapid discharge rate.
How long you should wait depends on the battery manufacturer, but in our experience it’s about an hour or two. After the wait, you’re now ready to hook it up to a battery charger.
Once the vials are empty, pull them off and replace the rubber plugs that originally came on the battery. Just use moderate hand pressure here—the cap should slide right on flush with the battery surface, sealing it forever. (Image/OnAllCylinders)3. Use the Proper Current (Amperage) to Charge Your BatteryHere’s another simple aspect of battery prep that folks can overlook.
If you read our earlier story on EV Battery Life, you already know that batteries don’t always like being charged at high current levels.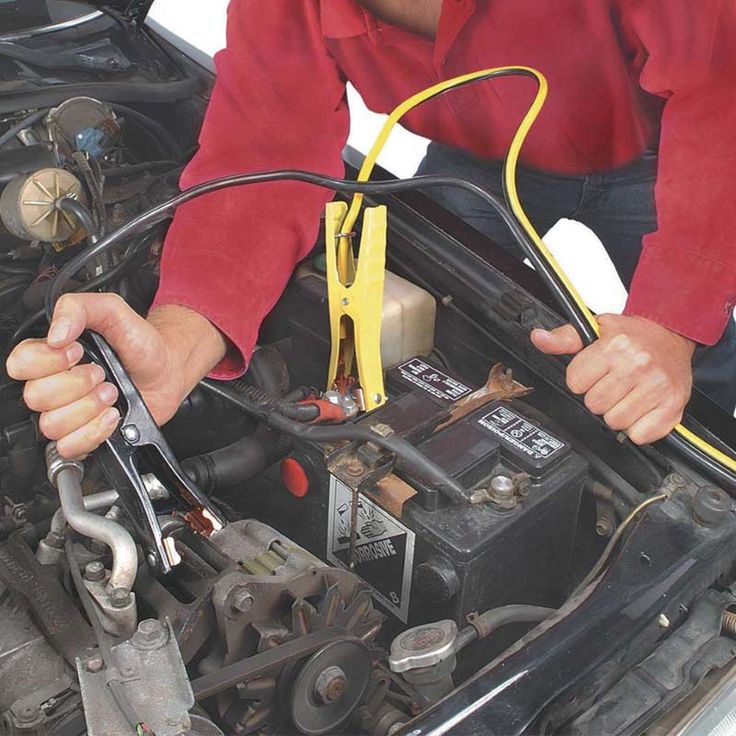 And that’s especially true for new AGM batteries getting an initial charge. While a lot of battery charger models have selectable current levels in excess of six amps, in our experience, many initial charging instructions call for a lower current rate, more like two amps.
Slamming too much amperage into a new battery can fry the acid inside, which again, could significantly reduce its usable life and cause other performance issues. While there’s no universal current rating for every battery, each battery manufacturer will spec the particular battery’s preferred initial charge amperage in the instructions.
In addition to charging current, your battery manufacturer will also indicate how long you should leave the battery on the charger for its initial charge. It’ll usually vary between five to 10 hours, again at a low amp rating.
Hooked up to the charger at low current, our AGM motorcycle battery should be ready to go in a few hours. (Image/OnAllCylinders)Follow Your Battery’s Charging Instructions
While these three tips are important, consider them a supplement to your original battery manufacturer’s instructions. You should always read your particular battery’s initial changing and maintenance manual thoroughly before beginning, to ensure you’re hitting all the proper steps.
All told, it’s not difficult to prep and charge an AGM battery for the first time, it’s just critical that you follow all the instructions precisely. Doing so will ensure your battery has a long, happy service life.
From time to time, you may need to charge your ATV or UTV battery using an external charger. The bike’s own charging system does not always have the capacity to keep up with the battery drain even from regular use. Some new batteries will also need charging before use.
This guide will tell you how to charge any ATV or UTV battery and answer some of the most common questions people have about the charging process.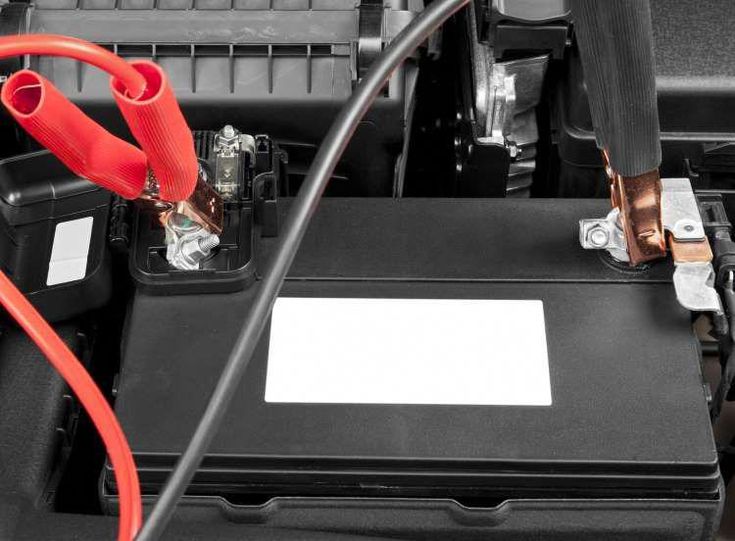
Page Contents
ATVs do have a built-in charging system that is powered by the bike’s engine. But the current it provides is not very high.
You can charge the battery by going for a long ride, but it’s not always practical. Instead, you may use an external battery charger.
Tools and gear required:
The battery and charger must stay dry during the whole charging process.
Also, the battery must be somewhere well-ventilated to vent out any gases from the charging process.
Overcharging or even just charging a battery causes a chemical process that releases explosive hydrogen gas. With proper venting, you minimize the risk of the gas gets ignited by a spark, which may cause an explosion.
A garage or shed where you can leave the garage door open would be a good location.
If you don’t have a dry and well-ventilated area that will fit your whole ATV, consider removing the battery from the bike to charge it.
The ATV and all accessories should be turned off when charging to prevent sparks.
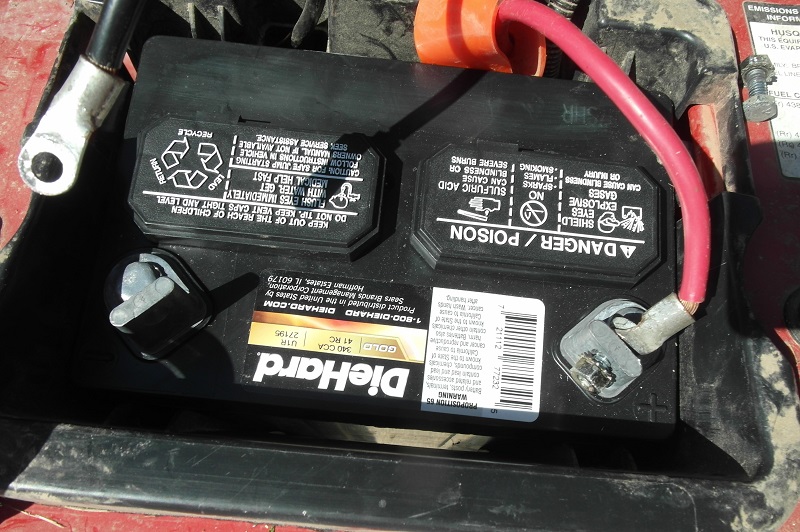
You need to make sure you have proper access to the battery. Some ATVs will have their battery hidden behind a plastic cover that needs to be removed for access. Others have the battery readily accessible without removing any parts.
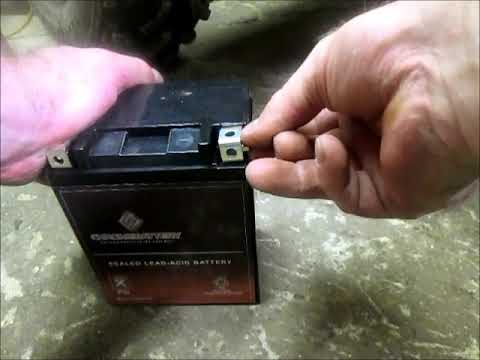
The battery on my Polaris Sportsman XP1000 is hidden under the front cargo rack cover.After locating the battery you should visually inspect it to look for cracks or other damages. Never attempt to charge a damaged battery!
Before you hook up the charger, you need to identify what type of battery you have.
Some types of batteries require a specific type of charger to charge properly, or that you add a few additional battery-specific steps to the charging process.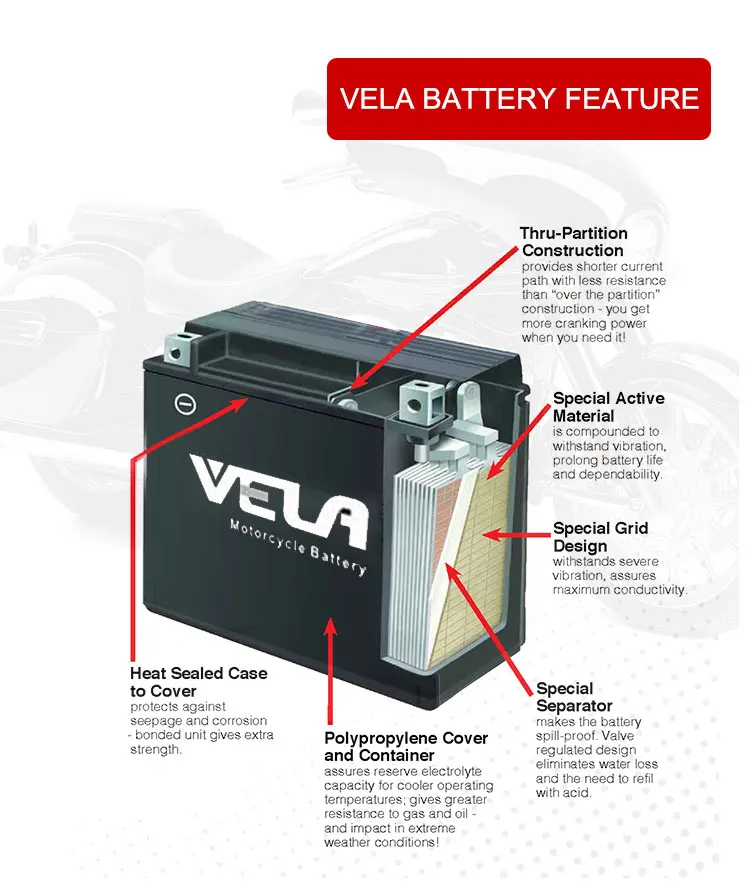
Here is a list of the different types of batteries you may find on an ATV or UTV, and how to tell them apart.
All batteries should have a label that indicates the battery-type, but sometimes these have worn off. Check out this post to learn what ATV battery numbers mean.
Also, look for a part number. A quick google search will tell you exactly what battery you have if you enter this number.
FLA batteries are a non-sealed wet-cell style of batteries that uses lead plates and liquid battery acid as an electrolyte. On top of the battery, there are removable caps, one for each cell. The caps are either threaded or pull-out style.
Another way of telling that you have an FLA battery is by its semi-transparent casing, where you will see the water level inside the battery. There are marks to indicate the maximum and minimum level of electrolyte.
FLA batteries only: Before you begin charging you should remove the caps to verify that the lead plates are covered by electrolyte fluid.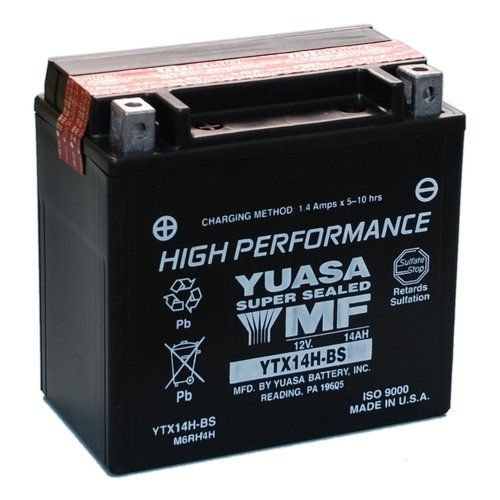 Add distilled water if the level is below the minimum mark.
SLA and VRLA are different acronyms for the same type of battery. Their construction is quite similar to conventional flooded batteries, but there is one main difference.
If you overcharge a sealed battery, there is no way to open it to add more fluid. They have a flat top with no filling ports or caps. Never try to pry-open a sealed battery!
Type 3: Lithium-ion batteryThe easiest way to know that you have a Lithium-ion battery is to feel its weight. They weigh about 1/10th or less of other types of batteries.
Lithium-Ion batteries are much lighter than other ATV batteries.Gel-cells are also lead-acid batteries. But instead of being a liquid, the electrolyte is in gel form. GEL-cells are not that common on ATVs because they are more expensive and do not offer the same power capacity as the others on this list.
A GEL-cell battery looks very similar to an SLA battery because of its sealed flat top. One way to tell them apart is by shaking the battery. You should hear the battery acid splashing around inside an SLA battery, while you will hear nothing when shaking a gel-filled battery.
GEL batteries are not the best option for ATVs, but some use them.AGM batteries are another variation of a lead-acid dry-cell battery. They are completely sealed and have a fine sponge-like mesh of glass fibers inside.
As with the GEL battery, you won’t hear any movement inside when shaking an AGM battery. Other than their labeling, it may be hard to tell them apart. Look up the model-number online if you are not sure.
The battery on my Polaris Sportsman XP1000 is a real pain to reach. But luckily, I was able to see the part number through the wires. A quick google search reveals that it’s a YUASA 18.9Ah AGM battery.If you use the wrong type of charger for your battery type, or set up a manual charger incorrectly, overcharge or undercharge the battery which may cause permanent damage.
Using a good quality, intelligent charger that is compliant with your type of battery is the easiest way to charge your battery safely. Under certain conditions, you may also use a manual bench-style charger.
A quality intelligent charger will be able to charge a variety of different battery types.Here are some guidelines to what type of chargers you may and may not use on different types of ATV and UTV batteries:
For all ATV and UTV batteries
Flooded lead-acid (FLA) battery
These batteries are the least picky when it comes to choosing a charger. If you overcharge a flooded battery, you may just add distilled water. Any manual or automatic charger will work as long as they are the right voltage and have low-amp settings.
Absorbed glass mat (AGM) and sealed lead-acid (SLA) batteries
While it is possible to charge both AGM and SLA batteries with a manual charger, it is not recommended. If you don’t monitor the charging process carefully, you may overcharge, which would cause gassing and water depletion.
Sealed batteries cannot be topped off, so the damage is permanent. That’s why it’s better to always use an intelligent charger for any sealed battery like AGM and SLA batteries.
Some, but not all intelligent chargers, will have a dedicated AGM charge mode. AGM and SLA batteries have a very similar charge profile. Therefore most brands of AGM batteries, as well as SLA batteries, will have no problems with any 12-volt intelligent battery charger as a charge source.
According to Optima (https://optimabatteries.com), a high-quality AGM compliant charger may improve battery performance and lifespan, but most battery chargers and maintainers will work just fine on Optima brand batteries and other AGM batteries.
GEL-cell battery
GEL-cell batteries are the most sensitive and require a very specific charge profile. The higher voltage from a flooded or AGM charger causes permanent hydrogen bubbles in the gelled electrolyte, which reduces battery capacity or ruin the battery altogether.
Never use a constant current manual charger to charge a GEL-cell battery, only a GEL-cell compliant intelligent charger. The charger should have reliable temperature sensing, voltage regulation, and a specific GEL-cell mode.
Lithium-ion battery
Technically you can charge a lithium-ion battery with a manual charger, but it is not recommended. If you don’t follow a specific procedure, you will damage the battery permanently.
It’s recommended that you only use a Lithium-ion compliant charger.
Lithium-ions charge fast and at a higher voltage. A manual charger or even a standard intelligent charger will likely undercharge a Lithium-ion battery, which may damage the battery over time.
This step is not mandatory if you use a fully automatic charger that you know is compliant with your type of battery. The charger will do the job of choosing the right charge profile for you.
But if you use a constant current manual style of a charger, you need to know the battery’s voltage to be able to monitor the charging process.
In any case, the state of charge will tell you if your battery is completely dead or if it just needs to be topped off. It will also give you an indication of what charge time to expect.
Note that different types of batteries reach the same state of charge at different voltage levels.
| State of charge | Charge time |
| New (0%) | 14 – 20 hours or more |
| 75% | 3 – 6 hours |
| 50% | 6 – 10 hours |
| 25% | 10 – 14 hours |
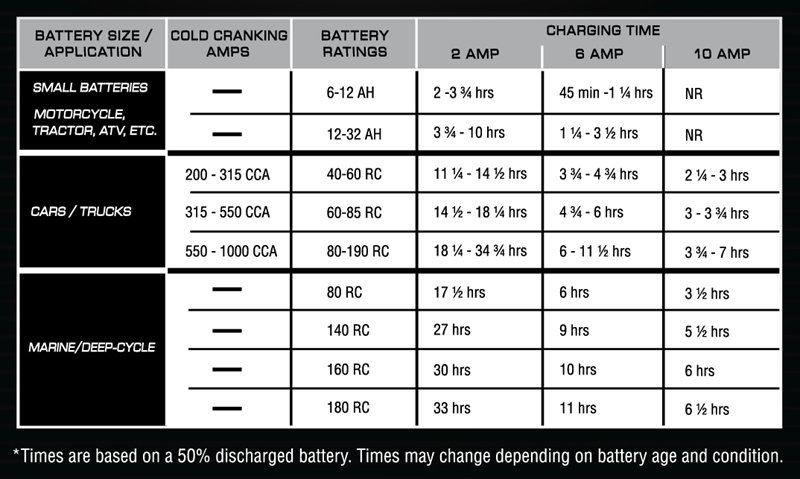
A simplified formula to calculate the charge time of an empty battery is by dividing battery Ah rating with charging current in A (ampere). Charging a completely flat 15Ah battery with a 1,5A charger would take 10 hours.
Charging times will vary depending on various factors:
If you have a smart battery charger, it will stop charging automatically as soon as the battery is fully charged. Usually, this should take no more than 12-16 hours unless the battery was completely flat.
Do not plug the charger to a wall socket yet.
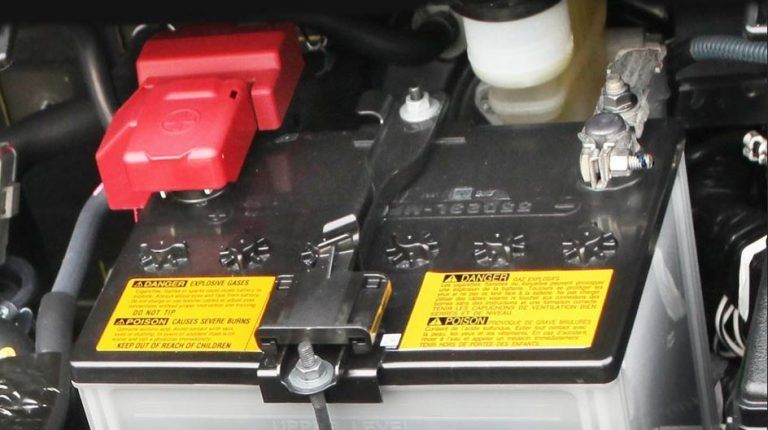
Your charger has one positive lead and one negative lead. The positive lead will have a red clamp and the negative lead clamp will be black.
The red clamp will be connected to the positive battery terminal. To identify the positive battery terminal, look for one or more of these markings:
Make sure the terminal is clean to ensure a proper connection. Use a wire brush, and remember to wear your eye protection.
The negative will be connected to frame ground. Look for a bare, solid metal part of the frame or engine. Bare metal bolts are often good options. Make sure your ground connection is clean as well.
When removing the first lead after charging, there might be a small spark. It’s best if this spark happens somewhere away from the battery where there is less risk of gas build-up from the charging process.
Modern intelligent chargers are designed not to overcharge the battery, so you will most likely have no issues if you choose to connect the negative lead directly to the negative battery terminal instead of the frame. After all, this is what most charger manuals will tell you to do.
Connecting it to the frame or engine instead just adds one more layer of safety.
From an electrical point of view, the battery will charge just as well whichever of the two options you choose.
Your negative battery terminal will have either:
Now that your connections are clean you can connect the charge leads.
Now plug the charger to a wall socket, but make sure it is not charging yet.
Manual charger
You need to set the charge rate (current) manually. A good rule of thumb to know what amperage your battery should be charged at is to divide its Ah- rating by ten. A 15Ah battery should use a charger with a power output of no more than 1,5A. You should never charge an ATV battery with more than 3A.
Intelligent charger
Choose the right charge-mode for your type of battery. Using the wrong mode on an intelligent charger or may overcharge or undercharge the battery.
You are now ready to initiate the charging process. Make sure you have enough time to charge the battery to full charge, or it will sulfate.
Do not attempt to start an ATV or UTV when connected to an intelligent battery charger.
For all types of batteries
You want to make sure the battery does not overheat during the charging process.
If the battery becomes warm to touch, turn off the charger, let it sit for a few minutes to allow any gasses to vent out before removing the charge leads. Let the battery cool off before you continue charging it.
For flooded lead-acid batteries
The electrolyte levels should be monitored during the charging process. If it falls under the specified level in any of the cells, you should remove the cap and add distilled water until you reach the correct level.
For manual battery chargers
A manual charger won’t turn off when the battery is fully charged. You need to monitor the voltage to keep track of the battery’s current state of charge. Use the table from step 5 as guidance.
When the state of charge is about 80%, you should turn down the amps to about half of what you started with. A lower amperage at the final part of the charging process will give you a slightly higher final charge rate, as well as reducing the risk of overcharging the battery.
When you reach a full state of charge according to the table, the charger must be switched off or put in a maintenance-mode if available.
Unplug the charger and let it sit for a few minutes to let any gasses vent before disconnecting the leads.
Use a piece of cardboard as a fan if you suspect gas buildup over the battery.
As long as the charger is unplugged, it doesn’t really matter which lead you to remove first.
But it is best practice to always start with the negative lead. There is no harm done if you accidentally touch ground with a negative lead.
Wait a few hours and use a voltmeter or multimeter to check if the battery still holds a charge. If the voltage drops, there might be a problem with internal sulfation.
It may be worth trying to charge the battery with a charger that has a specific desulfation mode before discarding the battery.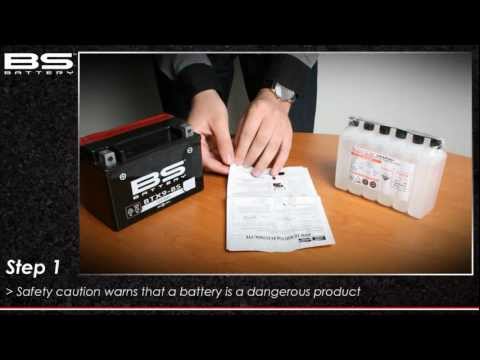
Read this guide to troubleshoot a battery that wont charge or won’t hold a charge.
The charging system on an ATV is not as effective as the one you will find on a car, so it will need more time to charge the battery properly.
Unless you do hour-long rides every time you start up your bike, it will likely draw more power to start the bike than it will be able to charge while you are running it.
In addition, ATV batteries are relatively small in both size and capacity to keep the overall weight of the bike down.
Combine that with a few power-hungry accessories like your ATV winch, and you will soon find your battery too low on power to start your bike. Leaving the battery on a low charge over time will also cause damage to the battery.
That’s why it’s a good practice to charge it now and then to save you from problems down the road.
ATV batteries should be charged any time the battery voltage drops below 12. 4 – 12.6 volts. Top off the battery each fall and each spring, and use battery tender to keep the battery healthy when the ATV is sitting for long periods without being used.
A battery should be charged at three different stages for optimal performance and service life. An intelligent charger switch between the stages automatically.
Automotive-style manual chargers do not have proper regulation for charging in stages. If you charge the battery too hard at the final stage, it won’t be able to reach a full charge.
The three charging stages are:
Bulk stage: At this stage, the battery will be charged up to about 70-80% of its capacity. The charger will be putting out a constant current determined by what charge mode or amp settings you have chosen. The voltage will increase gradually.
Absorption stage: At this stage, the charger will maintain voltage to the battery, but will taper off the charging current gradually as the battery gets closer to a full charge.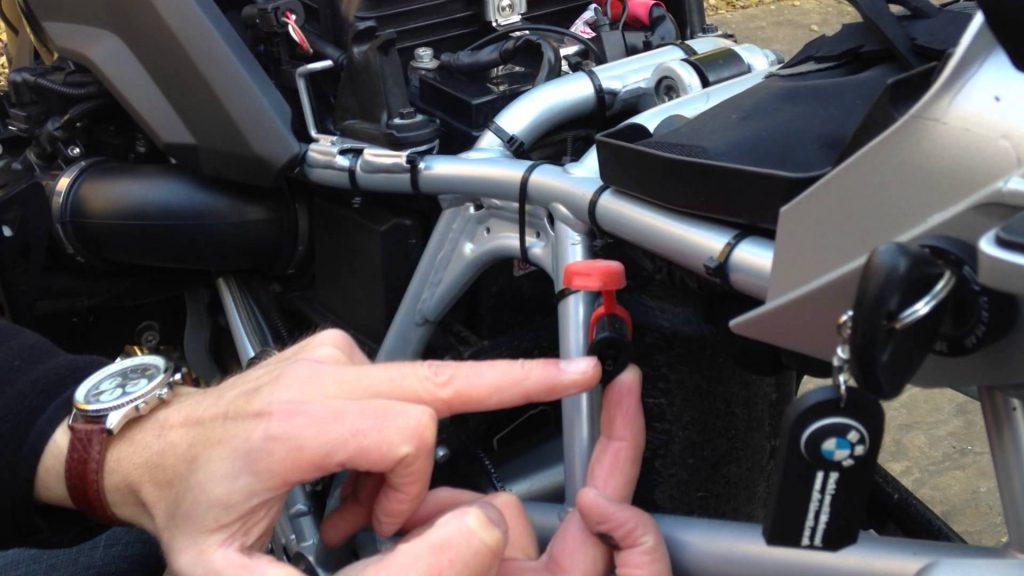 This allows you to reach a higher state of charge without the risk of overcharging the battery.
Float stage: At this stage, the battery will be fully charged. All the charger is doing providing a small maintenance charge to keep the battery fully charged. Both voltage and current will be reduced.
Intelligent chargers usually have different charge modes to choose from. Each charge mode will have a specific set of parameters that are optimized for different types and different sizes of batteries.
The charger uses microprocessors to collect information from the battery to see its current state of charge and to adjust the voltage and current accordingly.
For example, a lithium battery reaches 80% state of charge at a different voltage than a flooded lead-acid battery and needs the voltage input to be adjusted accordingly. And a gel battery cannot take as high of a charge rate as an AGM battery and will require a lower amperage.
All of these parameters are controlled by which charge mode you choose. Your chargers user manual will tell you more details about each charge mode your specific charger offer.
In general, there is no need to disconnect the battery terminals when you are charging an ATV or UTV battery, as long as you are using a fully automatic charger or a trickle charger at 1,5A or less.
Hooking up a high current booster charger, however, may cause a voltage spike that may damage your bike’s electronics. But you should never use a high-amp manual style charger on an ATV in any case, so this should be a non-issue.
If your bike, for some reason, has a high phantom drain, you may struggle to get any power to the battery. In this case, you should remove the negative terminal before charging your battery. Then you need to do some troubleshooting to identify what is draining your battery.
Also, please note that boosting your battery by hooking it up to another ATV using non-protected jumper cables may create a voltage spike that has the potential to damage your bike’s electronics. Always use cables that have built-in electronic protectors, and you should be fine.
For basic maintenance charging, where you are just topping off a battery that seems a bit low on power, there is no need to remove the battery from the bike.
When you are charging a brand new battery that has never been charged before or a battery that has gone completely dead, you might want to consider removing it.
When doing a deep-charge, there is a slightly bigger risk for explosive hydrogen gas to build-up, as well as possible overheating.
By removing the battery from the ATV, you won’t cause any harm to the bike in the unlikely event that something goes wrong.
Flooded lead-acid batteries have removable caps to add more electrolyte fluid (distilled water) if needed. There is one individual cap for each cell or a strip that ties several caps together.
Some believe that you always need to remove these caps when you charge to let out any gas build-up. This is usually not necessary. Those caps are designed to vent any gas produced while charging, or there will be a separate vent.
Refer to your specific battery’s safety instructions to verify whether the caps need to be removed or not.
As long as the vents are not blocked (stuffed with mud, anyone?), you should have no issues leaving the caps in.
The only time you need to remove the caps is when you wish to check the level of electrolyte or top off one or more cells that are low on fluid.
When using a manual charger, you can remove the caps for a short period to give you an indication of when the charging process is finished.
When you see hundreds of bubbles forming on top of the battery cells, you know that the battery is full. Any further charging is overcharging.
PS! Remember that the gas you see forming is flammable, and the fluid is acidic. Never remove battery caps without wearing eye protection and vinyl gloves.
The charging process described at the top of this post will work both for doing a deep charge on a new battery as well as doing a refresh charge to top off a battery where the voltage has dropped a bit too low.
There are, however, a few things to keep in mind.
 Before you can charge the battery, you need to activate the battery by adding the battery acid to the battery according to the manufacturer’s instructions. The process of adding the battery acid to the battery is usually thoroughly explained in the instructions that come with the kit, so we won’t cover this process in this post.
 If you hook up the charger, but it fails to initiate it’s charging cycle, the battery voltage may have dropped below the minimum threshold recognized by the charger.
To solve this, you can use a fully charged battery to trick the charger into starting the charging process.
Tools and equipment required:
Follow these steps:
 Connect the other end of the negative lead to frame ground, or the dead battery’s negative terminal if the battery is not installed in the ATV.
You should not use a car charger or a typical trickle charger to charge an ATV unless it has specific settings to limit the amp output as low as 1-3 amps. Car chargers typically come with an output of 10A. Charging an ATV battery at 10 amps would overheat it and damage it permanently.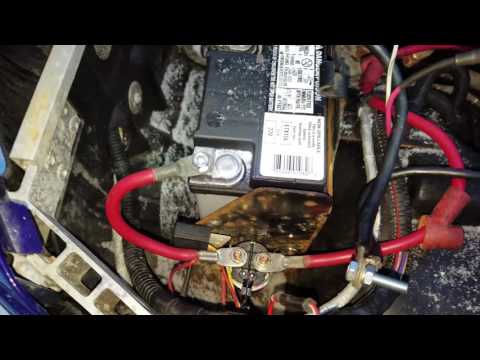
You can use jumper cables to jump-start an ATV battery from a car battery, but it is not a suitable method for doing a full charge. The car must stay off as long during the whole process.
The battery on a scooter or bike needs to be recharged periodically. It is not worth bringing the battery to full discharge, because this can lead to extremely negative consequences. Finding a dead motorcycle battery is quite unpleasant, but there are methods that will help you deal with this problem effectively.
First, let's figure out why the battery can lose power:
Before charging the motorcycle battery, you must measure the voltage in the on-board network with a voltmeter. This is done with the engine running. If you find it's time to charge, don't try it with a car charger. The voltage in it is much higher than required, which can lead to overcharging of the battery.
When choosing a motorcycle charger, we recommend products with a voltage stabilization function.
It is important to remember that batteries of different quality require different charging rates. For example, lead-acid batteries - once every one and a half months or a month. Gel ones hold a charge longer, so it is enough to charge once or twice for the entire season.
Before removing, it is important to write down the connection diagram of the terminals. This will save a lot of time when you put the battery back in place. Next, you need to wait until the battery warms up to room temperature. Charging itself should be carried out away from sources of fire or sparks. When connecting, observe the polarity.
There is a rule that works effectively for lead batteries: the current should be equal to 10% of the battery capacity. The desired value can be set on the corresponding regulator.
Often beginners don't know how much to charge a motorcycle battery. As a rule, this operation should be stopped when the voltage reaches twice the number of cells of the battery, i.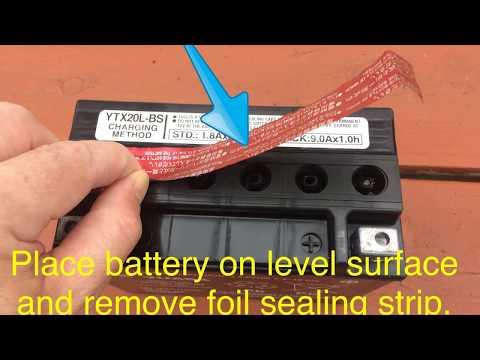 e. 10. Visually can be determined by the bubbles that begin to appear on the surface of the electrolyte. After that, the current strength is reduced by half and the battery is recharged for about 2 hours.
There is sometimes debate about how to properly charge a dry-charged motorcycle battery. The standard duration of the procedure is up to 9-10 hours. If the battery is new, then 3-4 hours will suffice.
Gel batteries are also charged at a current of 10% or less of the battery capacity. The main nuance is that the voltage should not exceed the threshold value of 14.4 V (even less on scooters). Even when charging a gel battery, no current reduction is used for recharging.
When preparing to charge, avoid silly mistakes such as incorrectly connected poles. Sometimes the battery is overcharged. In such a situation, use the current strength two times lower than usual - 5% of the battery capacity.
The success of this operation depends on the stage of neglect of the battery. Before you restore the battery for a motorcycle, it is worth reconsidering the feasibility of this operation. If this is a quality product, then this is appropriate, but if it is a cheap fake, then you are just wasting your time here.
If the plates are covered with sulfate, you can charge and discharge the battery several times. Sometimes this does not help and you have to use a charger that sends a charge in a pulsed mode.
With accelerated self-discharge, you will have to wipe the surface of the battery or replace the electrolyte (do not mix up the density).
One of the few faults that cannot be corrected is electrolyte freezing. Therefore, choose a denser composition or take the battery to a warmer place.
In order not to have to restore the battery, check the charge level and charge it correctly, then the battery will last the allotted time.
If the battery is beyond repair, you can always find:
Electric ATVs are rapidly gaining popularity due to their economy and environmental friendliness. But many riders still do not know how to charge an ATV on a battery. Improper charging reduces the battery life or the battery loses its capacity quickly. Therefore, let's figure out how to charge a children's ATV and consider the key recommendations of experts.
There are two ways to charge your ATV battery. The first and easiest is to connect the charger to the appropriate connector. All electric cars and scooters are charged in a similar way, although not all quadrics have a similar socket.
If the ATV does not have a charging port, the rider will have to connect the battery directly to the charging station. To do this, you need:

It is important to note that lithium batteries have a charge level control board. This means that after a full charge, the process stops. Although overcharging the battery is still not recommended.
Another important question many riders are wondering is how to charge an ATV battery with an in-car charger. Yes, such a procedure is possible, but you need to properly configure the charger. For recharging, you can only use devices with adjustable charging current and the ability to set its minimum level (0.5-0.7 A).
Important : The optimal current for battery charging is 1/10 of the battery capacity (in Amps).
Each vehicle's user manual lists the optimum battery charging time. On average, this figure is 6-12 hours. The charging time depends on the generation of the battery, its capacity and the characteristics of the charger. Don't forget to charge the battery, though. If the battery has 30-40% capacity left, the recharging time should be reduced.
But what if you don't know how long to charge your ATV battery? In this case, you need to almost completely discharge the battery and charge it for 8 hours. After that, the battery should be installed on the quadric, and the charge level should be assessed. If the indicator shows 100%, next time you need to charge the battery for 6-7 hours. In this way, you can determine the optimal recharging time.
Also remember that overcharging is the main enemy of batteries. It is strongly not recommended to leave the battery connected to the network for 15-20 hours. This leads to a decrease in battery capacity and, accordingly, a decrease in the operating time of the quadric.
Knowing how long it takes to charge an ATV, you can make a schedule for recharging it. For example, the battery can be connected to the network in the evening or after each trip. You can also purchase a replacement battery, thereby increasing the riding time on the ATV.
The battery of any electrical equipment must be properly maintained. Violation of the recommendations may lead to a decrease in battery capacity or damage to it. To avoid such problems, it is recommended:
Separately, it is worth mentioning the "buildup" of the battery.