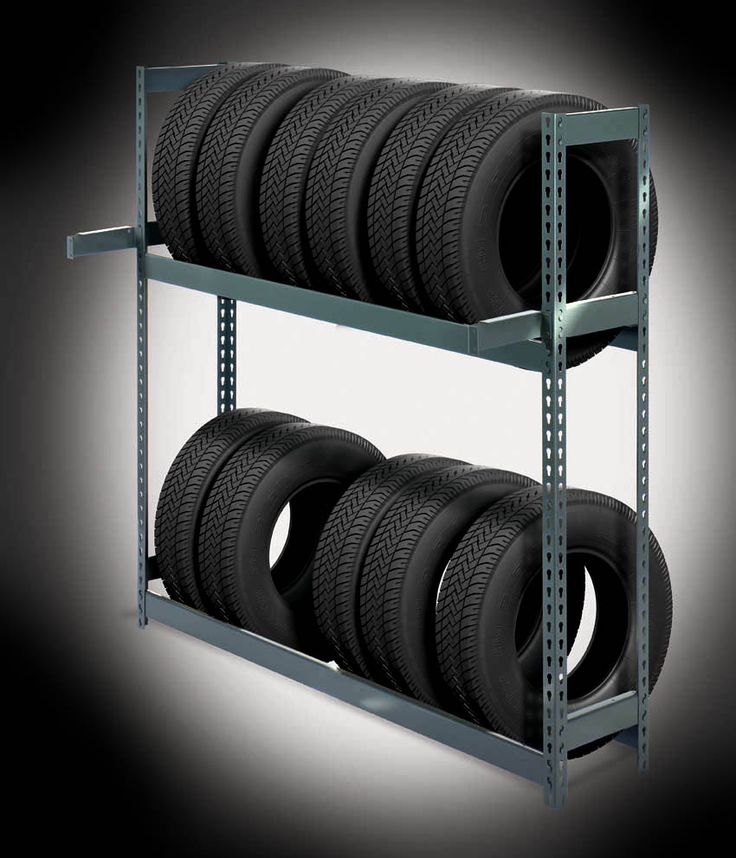
All bike tires slowly leak air every day. Even if you’re an occasional rider, and you only take your bike down from the bike rack once a week, the tire pressure will still decrease. Before you ride, you should always check your tires’ PSI and, if needed, inflate them with a floor bike pump or a handheld pump.
On the sidewalls of your tires, you’ll see the manufacturer’s recommended pressure range for PSI (pounds per square inch). Different bike tires have different ranges, and narrow tires need more pressure than wide tires. The recommended PSI for different tires are:
Experienced cyclists can often estimate whether their tires need to be pumped by pinching the tire between their thumb and forefinger. The more accurate way of knowing when your tire should be pumped is by measuring its pressure with a pressure gauge; if the air pressure is measured below the recommended PSI, it’s time to pump.
First pump your bike tire to the middle of the range for the recommended PSI. You also need to take your body weight into account. Tires that bear a heavier rider need more PSI. Weather conditions and terrain also affect how a bike rides, so you’ll need to experiment with different PSIs to feel what’s most comfortable to you.
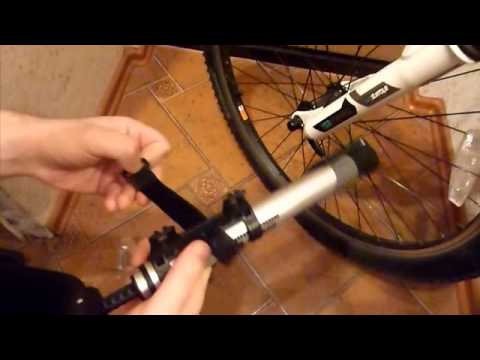
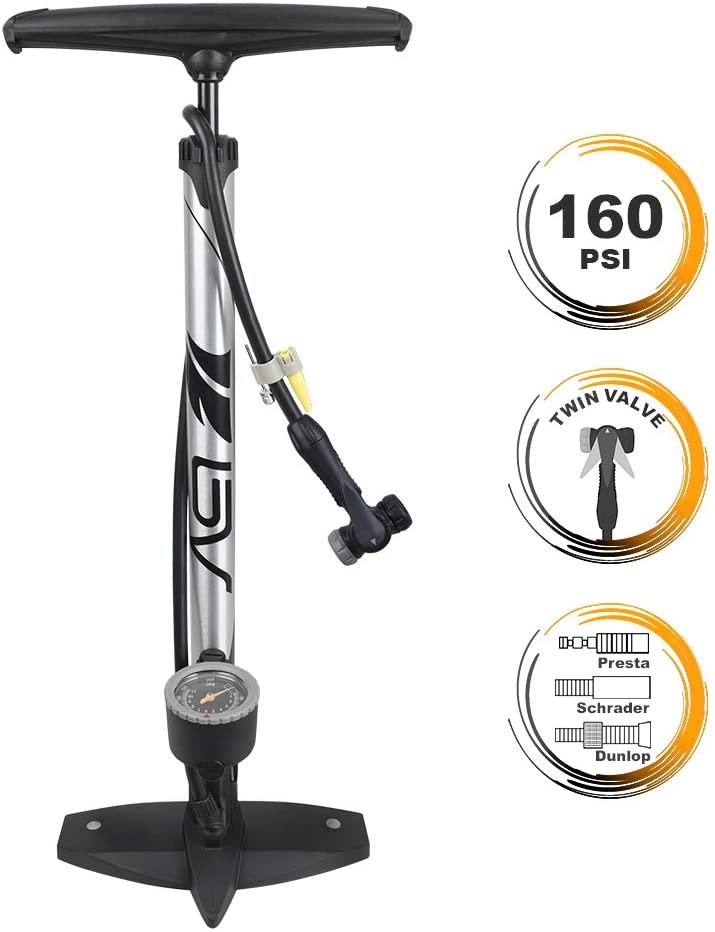
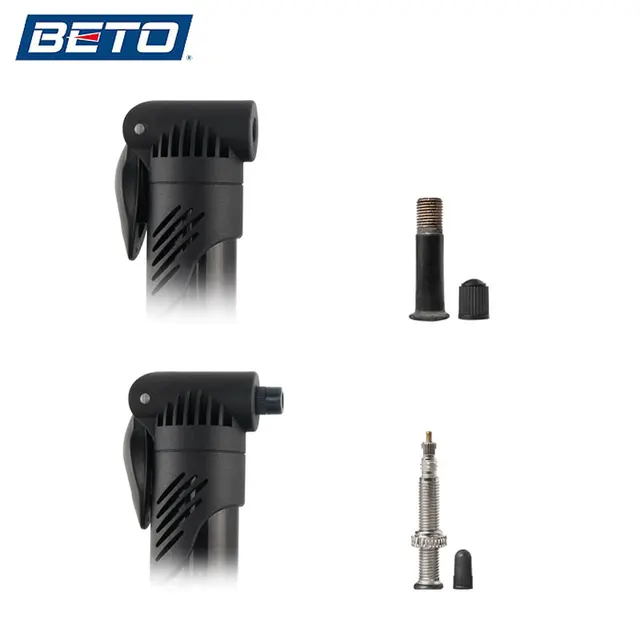
A Schrader valve is the type of valve you’ll find on car tires, older bike tires and mountain bikes. It consists of a metal pin in the center of a threaded valve, and a rubber cap that’s screwed onto the valve. Most bike pumps like those we reviewed have a dual head to accommodate both Schrader and Presta valves or a single head with an adapter.

A Presta valve is found on road bikes and some mountain bikes. It’s a slender valve with a nut at the top that is loosened and tightened before and after inflation. Almost all new bike pumps have a head with openings for both Schrader and Presta valves, or they have an adapter for switching from Schrader to Presta, like one of our top picks, the Topeak – Road Morph G.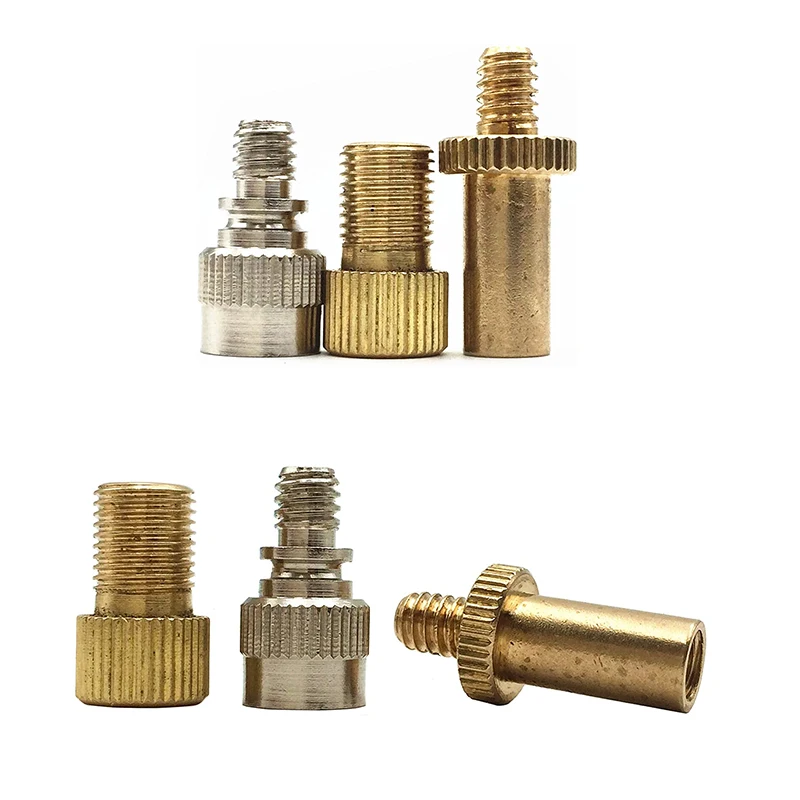
If you’re out riding and your tires need air, you could give them a quick inflate with a CO2 injector, like the one we reviewed. But if you don’t have a CO2 injector in your bag, and you forgot your mini pump, then you can pull into a gas station and inflate your tires there.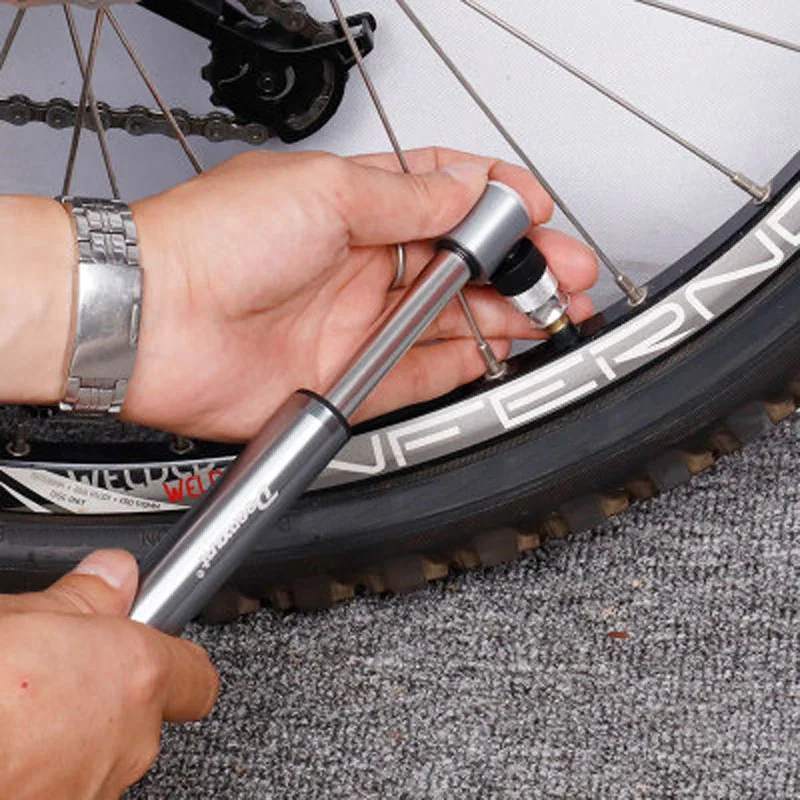
If you don’t have a pressure gauge, ask the station attendant for one. Inflate your tires to optimal pressure in short bursts; a gas-station air pump has very high pressure, and you run the risk of popping your tire.
A gas-station air pump will only fit a Schrader valve. But if your tires have Presta valves and you don’t have a Presta valve adapter, there’s still a way to inflate them.
Share this Review
Gene Gerrard, Writer
Gene has written about a wide variety of topics for too many years to count.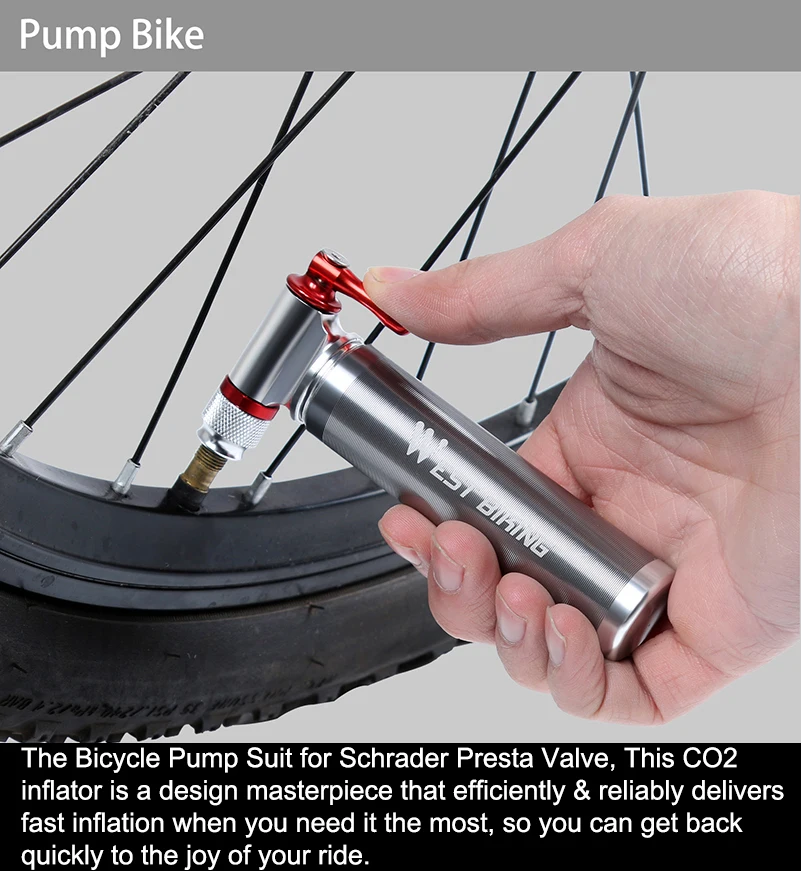 He's been a professional chef, cooking-appliance demonstrator, playwright, director, editor of accountancy and bank-rating books, Houdini expert and dog lover (still is). When he's not writing for Your Best Digs, he's performing as a magician at the Magic Castle in Hollywood.
I headed off from my house one Saturday early in my biking career, drooling with excitement for the mountain bike ride I’d been awaiting all week. Then, before I had reached the trailhead, I noticed my rear tire was significantly low. I felt like I was riding through mud – on the pavement! Remembering a gas station with an air pump on my way to the trailhead, I figured I could easily pump up my tire without a wasted trip back to my house.
But, when I tried to inflate my mountain bike tire… AAACK! Foiled! The gas station had a standard car pump and, new biker that I was, I forgot my bike tires have a presta valve. A week of hungering for a mountain bike ride… RUINED! All because of a puny little valve. Oh, the angst. Do NOT let this happen to YOU!
Unless you grew up biking, most of us are so familiar with car tire valves, we assume it’s the only type of valve. In truth, car tires use what’s called a Schrader valve. It’s about the diameter of a pencil and has a tiny “button” in the center that, when pressed, allows air in or out, but holds air pressure relatively steady when not compressed.
Presta valves, on the other hand, are significantly skinnier than Schrader valves. They don’t have a button in the center of the valve and instead have an attached screw mechanism at the tip. When screwed closed, it holds air pressure in the tire. When unscrewed, you can pump air in or release air out.
Presta ValveCurrently, presta valves are the most common type of valve on high-end mountain bikes. Racers and high performance cyclists prefer them. They’re becoming increasingly common – even on mountain bikes on the low-end of the price spectrum.
Why, you ask. (Perhaps with a significant number of swear words as you kick your flat mountain bike tire or throw your useless Schrader pump.) Why use an uncommon, obscure valve that doesn’t fit a standard pump? Is it just to make mountain bike newbies suffer? Why? Why?
No, it’s not just to frustrate you.
Presta valves are generally more reliable and allow pumping your tires to a more precise pressure. By virtue of design, all Schrader valves release tiny amounts of air over time, requiring occasional “topping off”. Having a cap on the valve can significantly decrease the air loss, but it still means, at any given moment, your tire may not have the pressure you pumped it to.
A casual mountain bike rider may not know what pressure they should be riding or even notice when the pressure is off. But for high-speed riders, tire pressure can have a significant impact on speed, race performance and riding safety.
The screw on the tip of the presta valve allows a rider to close off the tube at the desired pressure and not require a cap.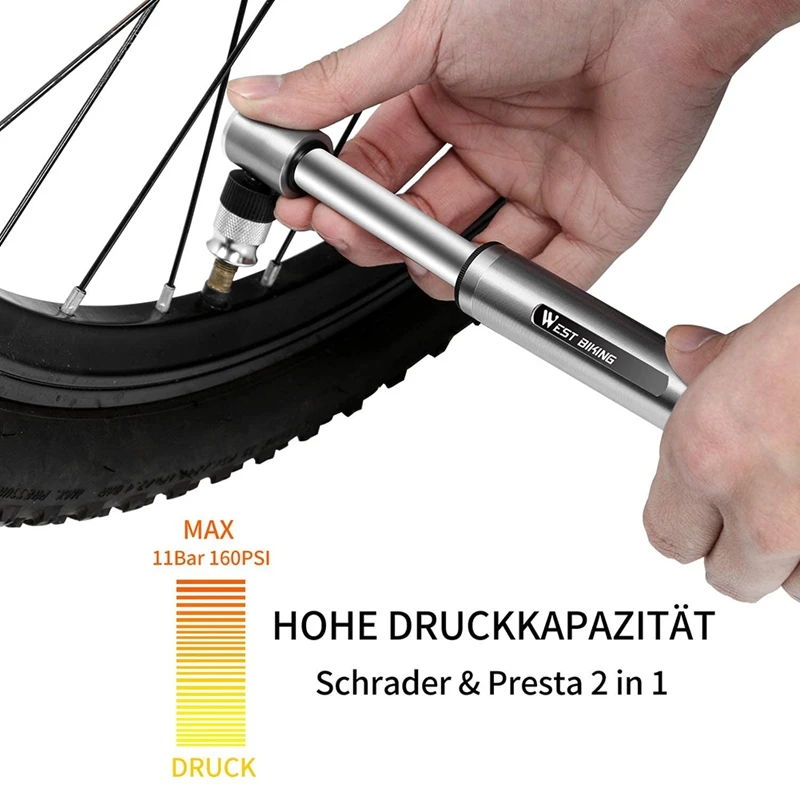 Barring an unnoticed leak or a puncture during a ride, the tire will now reliably hold the pressure you want.
You can inflate a presta valve with a common air pump, such as at a gas station or portable air compressor. However, you need an adaptor that’s ridiculously small in size but huge in importance: a presta valve adaptor.
Presta valve adaptorHere are the steps to inflate a presta valve with a standard pump:
Since more and more mountain bike tires use presta valves, most bike pumps are either universal (meaning one hole works on both presta and Schrader valves) or they have two separate holes, one for each valve type. However, you should always carry a valve adaptor when you ride for situations when a standard pump is the only option. Some cyclists do this by keeping a valve adaptor screwed on their tire valve all the time. Just make sure the valve is screwed closed before putting the adapter on!
Presta valve adapters are extremely tiny and portable. This also means they’re easy to lose. The good news is they’re fairly cheap. I usually buy a handful at a time and keep one in my garage bike tools and one in my portable tool kit for rides. Having one in your glove box isn’t a bad idea, either!
All bike shops sell valve adapters and some general sporting goods shops and hardware stores carry them as well. You can also buy valve adapters online easily and cheaply.
This simple question actually does not have a straightforward answer. The simple rule is to refer to the tire manufacturer’s specs on tire pressure that are printed on the sidewall of your tires. Consensus of riders is that mountain bike pressure should be 30 psi on the front tire and 33 psi for the rear tire. This information should serve you well if you have only a casual interest in mountain biking and are doing entry-level to intermediate trails two or three times a month.
However, if you spend a significant amount of time on your bike (and an equally significant amount of time dealing with pinch flats, blowouts or skidding out on corners), you’ll want to dive deeper into the science of bike tire pressure. DIY Mountain Bike has a fabulous, in-depth article and survey results examining appropriate bike tire pressure.
The fastest and easiest (and cheapest) way to check your tire is with your hand. When you squeeze it, it should be hard in the center with only a tiny bit of give farther out on the tire near the treads. A hand test, however, is – not surprisingly – not very accurate!
If you want to be precise, a tire pressure gauge will be necessary. But be warned: tire pressure gauges are notoriously unreliable and the sensitive sensors are easily broken. For my recommendation, read my tire pressure gauge product review.
If you’re in a pinch (perhaps literally!), and you don’t have a universal pump or a valve adapter, you can modify a tube cap to create a functional adapter using a presta valve CAP.
Remember to screw the tire valve shut after inflating! I know you’re tired of hearing that, but it’s important.
Now that you know everything you need to about how to inflate a presta mountain bike tire, you’ll never find yourself hungering for a ride and find yourself deterred by a standard tire pump!
And don’t forget to screw the presta valve closed…
Professional writer Kat Jahnigen was 2 miles from the nearest village – and roughly 2,310 miles – from the nearest English-speaking town – when her bike tire burst. At that time, she was a college student on a bike trip across the desolate, rocky island of Crete. It suddenly occurred to her that it would’ve been good to learn some basic bike repairs before setting off on a solo bike trip.
Check out Kat’s website WriteHire at writehire.net.
Contents
 Presta valve
 In an article on the correct assembly of a tubeless bicycle wheel, I mentioned that there are Presta 9 nipples0066 (FV, French) and Schrader (AV, regular car). Below is an image of these nipples for clarity.
After this article, several people asked me by mail and telegram the question: “How to pump up a wheel with a Presta nipple (FV, French), if there is a pump only for a car nipple?”
Don't despair, there are options and very affordable .
Let's talk about the modern pump first. Usually they are adapted for both types of nipples, but not everyone knows about it. Check if you can on the valve holder Unscrew the cap , remove the sealing rubber and unfold the plastic adapter, which means that both FV and AV nipples can be pumped with this pump.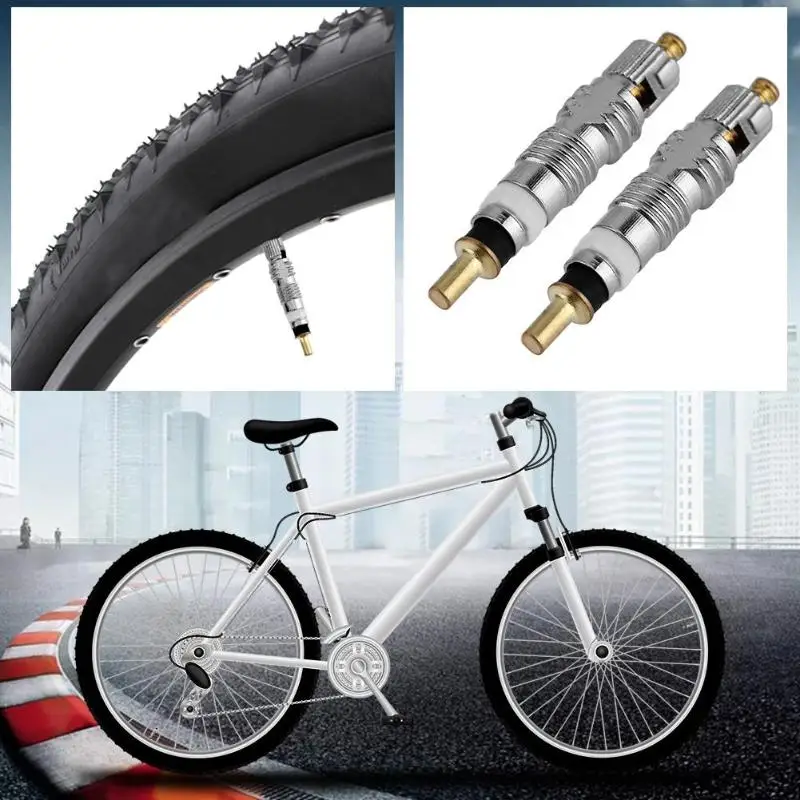 Below I took a photo for clarity, what needs to be unscrewed and turned over.
i.e. on most modern pumps, you need to unscrew the cap on the valve , unscrew the adapter and unscrew the sealing rubber . Screw the valve back on. Slightly unscrew the valve on the wheel nipple so that you can press it, put on the pump holder and pump. I draw your attention to that you need to unfold not only the plastic adapter, but also the sealing rubber, otherwise it will not fit into place.
If the pump is old and only for automobile nipple , then in general it is still easier. Remove the valve-holder from the hose, and put the hose itself on the nipple . At the same time, do not forget to unscrew the nipple slightly so that you can press on it. And most likely you will need a small clamp so that air does not pass through.
You can also buy a adapter from Presta to Schrader (from French to automobile / from FV to AV) for a pump that pumps only through car nipples.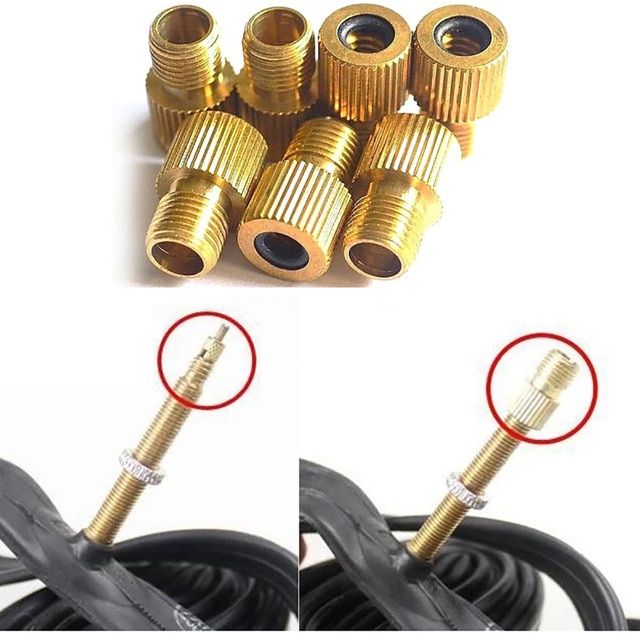 The adapter is simple, cheap, available in almost all bike shops. Therefore, you should not immediately buy a modern pump, you can buy just an adapter.
The adapter is screwed onto the French nipple on one side, the valve holder of the car pump is put on the other side. Also do not forget to unscrew the nipple a little ...
I hope now you can pump up the wheels with Presta nipples 🙂 Share the article on VK, Facebook and other social networks. networks.
Source
Bicycles today are full-fledged vehicles, these are high-tech products, in the design of which there are many elements that fully show the imagination and engineering talent of a person. Bicycle nipples are the details from which the automotive history actually began. For the first time, rubber wheels were used specifically for bicycles. In order not to make a mistake when choosing a camera, you should familiarize yourself with the types of nipples.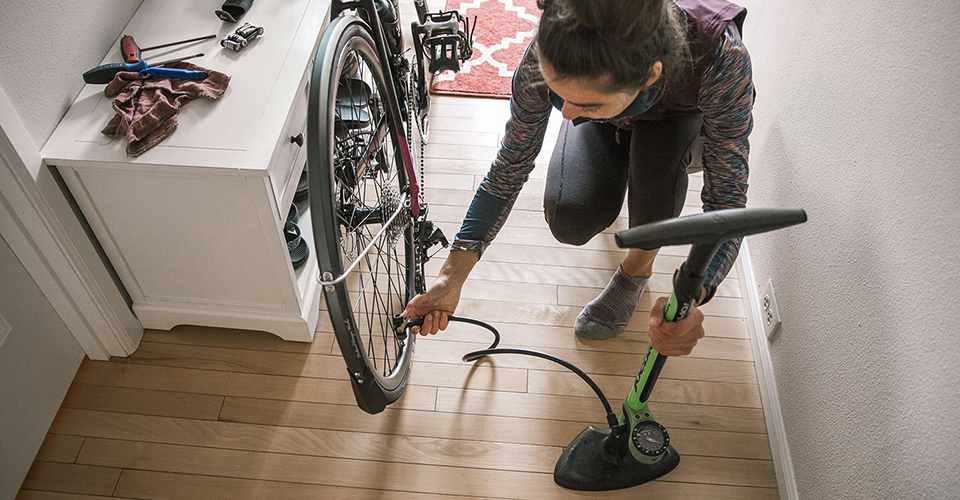
Presta, French (SV, FV)
The most modern and elite valve, mainly for tubeless tires. Tires with Presta valves are often used on narrow rim cyclists found on expensive road, racing or hybrid bikes. The hole in the rim of this type of wheel is 6 mm, and this helps to avoid a critical weakening of strength. For this reason, they are not adapted for chamber wheels with an autovalve. This is technically possible, but for this you need to increase the diameter of the hole to 8 mm.
Presta is distinguished from the American Schrader autovalve by the locknut that secures the spool. There is no spring that closes the valve. In order to pump in air, you need to unscrew the protective cap a little and press on the top of the valve. It is not necessary to unscrew the middle working body, like with an auto-nipple. The valve closes due to the air pressure from the tire. It makes it very easy to inflate the tire with airflow, even with a small displacement hand pump.
Attention! Presta has been around for a while and is designed specifically for bikes. However, auto pumps will not inflate this type of nipple. In this case, you need to have an adapter from Presta to autonipple. The spare part is very small and light, so it is not difficult to carry the adapter with you in a bike bag with other tools.
Schrader, Automotive (AV)
The most common and practical type. It was invented by American August Schroeder. A patent for the device was received in 1893 years in America. For this reason, this valve is called American, but more often it is simply called automobile. Most of the wheels of modern cars and motorcycles are equipped with this device. Fits also on wide tubes, kids bikes, hardtails or touring bikes.
The nipple is also used for air conditioners and refrigerators, where refrigerant refilling is required, and for other systems as special units for bleeding excess air pressure. The main advantage of the device is its great practicality, the disadvantages include quite a lot of weight.
The design includes a tube into which the working unit is screwed - the core, which is a poppet valve that closes the air outlet from the chambers under the influence of spring force. If you adjust the height of the protruding spool, you can control the air pressure in the tires. The spool is screwed in with a special tool, a protective cap - a metal cap with a plastic seal. An innovation in the system is the built-in pressure control sensor.
Dunlop (DV, EV)
An outdated look used in Soviet times. The entrance in the rim, at the location where this old-style valve is connected to the bike chamber, has a diameter of 8 mm. It is a metal tube with an external thread and a diameter slightly smaller than the hole in the rim, in which there is a spool with two holes, called a metal fitting. At the top is an inlet that allows air to pass through.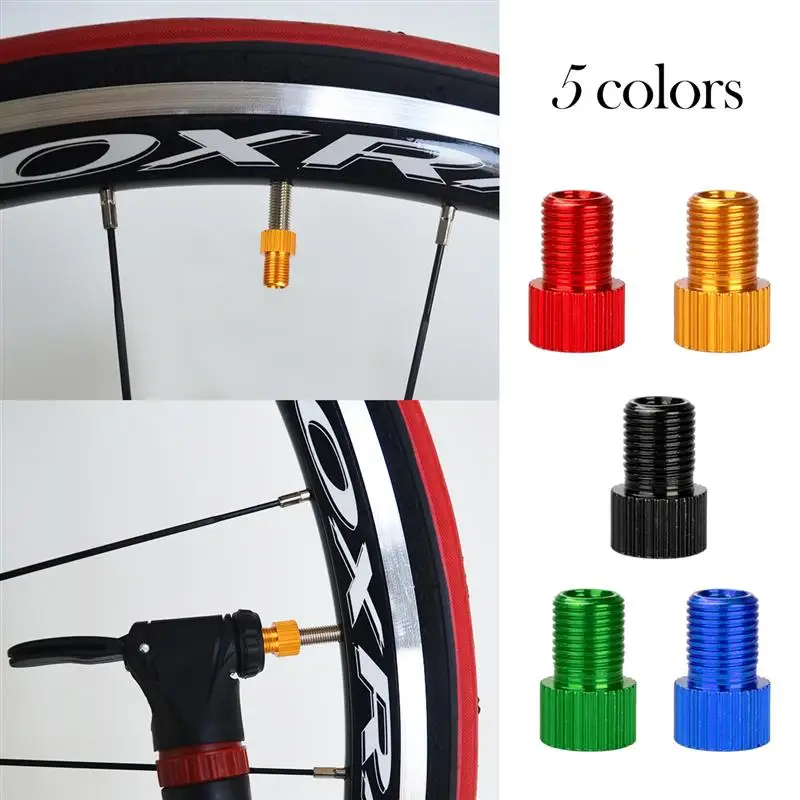 It is protected from dirt by a cap located on the thread. Another hole in the fitting, the original one, located on the side, is closed with a thin rubber tube - this is the nipple, which acts as a one-way valve. The fitting is fixed on the inlet tube with a round nut.
The main disadvantages of this valve are that it has an extremely unreliable design, and is also very sensitive to dirt. Any small pebble or sand that has clogged under the rubber of the valve can block the air.
For inflation, you need an adapter for a bicycle nipple with an initial diameter of 3 mm. This can also be done using a standard retro-hose screwed onto the spool. Modern pumps with Presta nipple adapters will also work.
Important! Most of the bicycle pumps currently being manufactured are designed in such a way that they can inflate tubes with any type of nipple. However, some pumps are not designed to inflate tires with Dunlop (Woods) nipples. When choosing a pumping unit, consider this.
Therefore, today the cyclist is advised to choose between two valve options - Schrader and Presta. With the help of these special mechanisms, preparing two bicycle wheels for a trip is very simple, it does not take much time and special care and effort.
Source
Imagine the situation: you take a bike, start riding and realize that the bike does not accelerate well, it has become somehow soft and it behaves differently in turns. Before you realize that you have lost all your cycling skills overnight, check the tire pressure - it may be time to pump up not only the wheel, but also your hands!
A common mistake cyclists make before inflating their tires is choosing the wrong nipple nozzle. They try to put a nozzle on the machine nipple under the presta and vice versa - they try to put on the nipple for the machine nipple on the presta.
In the production of bicycle inner tubes, 2 types of nipples are used - wide and flat at the end " Schrader" , which is also used in automotive inner tubes, and a thin high nipple " presta" with a lock nut. It often happens that even at a tire shop they cannot help with pumping the wheels through the presta nipple - this requires a special adapter, which the tire shop may not have.
Modern bicycle pumps are designed in such a way that they have a design that allows you to change the type of nozzle for the nipple in half a minute. Both portable pumps and large floor pumps with a hose have this design.
This information is located on the side of the tire itself. The required pressure is indicated in the system PSI (pounds-per-square-inch) . The average recommendations look like this:
However, each cyclist can inflate the wheels to the pressure that he likes best, based on road conditions and the weight of the cyclist.
Install the hose head on the nipple. There is a special latch on the hose heads that holds it in place so that at high pressure it will not be torn off the nipple.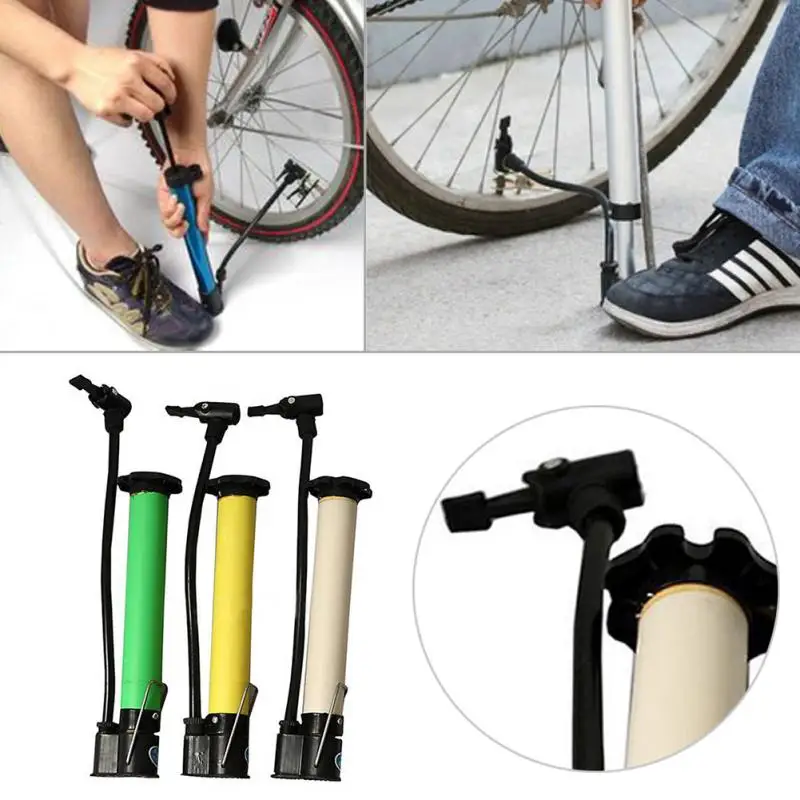 Depending on the manufacturer, the head snaps either up or down. If you notice that the air does not enter the wheel, but exits somewhere halfway, repeat the operation again.
Inflating wheels, especially road wheels where high pressure is required, requires some physical effort from you. You can connect both arms and legs - squats on straight arms can even be used as a small warm-up! But remember - you are pumping wheels, not muscles, so keep an eye on the pressure on the pressure gauge.
After inflating the wheel, remove the hose head from the nipple, tighten the nut and screw on the protective cap. Your tires are pumped up and you're ready to go! If road conditions require lowering the wheels, unscrew the cap, nut and push on the stem, controlling the pressure in the tire with your other hand to the touch. Don't get carried away if you don't have a small pump with you - you can release too much pressure, which increases the chance of blowing a wheel.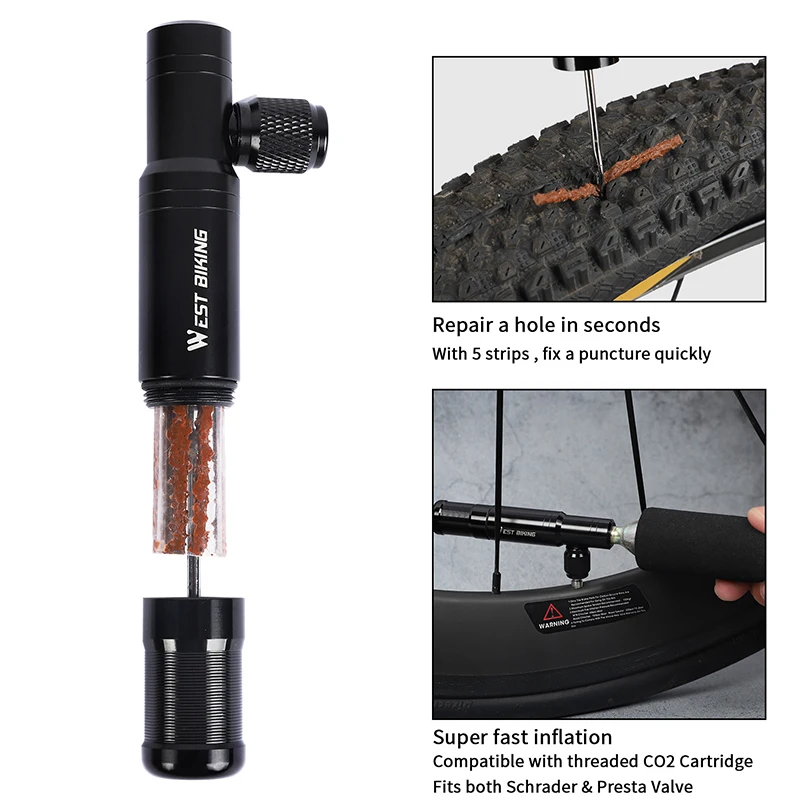 And, of course, check the tire pressure before every ride!
Source
wikiHow is a wiki, which means many of our articles are written by multiple authors. When creating this article, 25 people worked on editing and improving it, including anonymously.
Español: inflar las llantas de una bicicleta, Italiano: Gonfiare le Gomme della Bicicleta, Português: Calibrar o Pneu da Bicicleta, Deutsch: Fahrradreifen aufpumpen, Bahasa Indonesia: Memompa Ban Sepeda, Français: gonfler des pneuderenlands de vélo,ets oppompen
This page has been viewed 115,115 times.
Was this article helpful?
Here are a few tables to help you navigate in difficult situations, namely:
 06-3.27
 Pressure should be much higher for a road bike, usually between 6.5 and 6.5 9 atmospheres (up to 130 Psi), up to the maximum specified by the manufacturer.
Seasonal adjustments are quite serious, mainly for mountain bikes. In the summer, you should slightly underestimate the pumping and not rest on the maximum. Hot asphalt also heats the air inside the chamber, which increases the volume and, consequently, the pressure. Also, the pumped tire wears out very quickly.
In winter, sometimes you should exceed the maximum a little in order to achieve maximum tread work, especially if the rubber is chosen with studs.
For heavy riders or heavily loaded bikes, adding pressure is very important, as more weight will compress the bike's wheel and problems with under-inflated tubes can come out much sooner. The recommended pressure to add on weight is +1% for every kilogram of rider weight over 50
The recommended pressure to add on weight is +1% for every kilogram of rider weight over 50.
You can also give advice on how to inflate wheels with different tires.
For slicks and semi-slicks, the use of pressure below the maximum is allowed only in hot weather - a quarter shortage already negates the entire effect of such rubber, because it is "sharpened" for the maximum diameter and lack of resistance.
Classic cross-country treads 2-2.3 inches wide inflate up to 3-4 BAR, depending on the track and habit, a lower value will make riding a strength training, and higher values are simply not allowed by manufacturers, as they lead to a real "explosion" » at peak load.
Extreme tires, be it downhill 2.3+ wide compound treads or trick BMX models, should be inflated medium between max and min to have enough traction and then subtly varied for each trick or descent.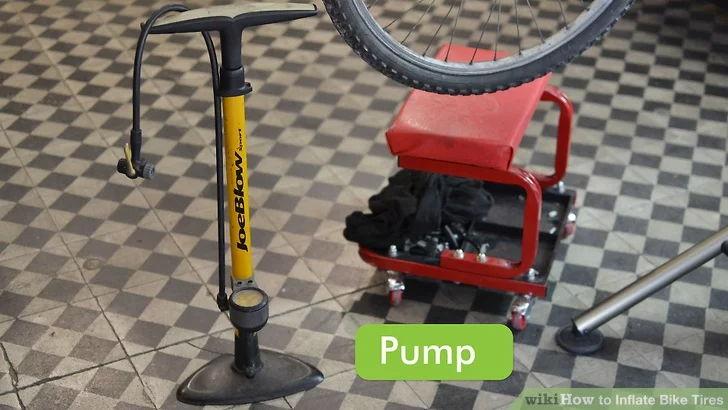
Bicycles can be fitted with a variety of nipples, not all of which will fit conventional hand bike pumps. The most common are automotive nipples and Dunlop. Thin wheels are often fitted with Presta valved elements. When working with such a valve, care must be taken and cleanliness must be observed. Such specimens are often found on road bikes and hybrids. Here it will be possible to bring the air pressure back to normal with the help of a special pump, which is designed for a small volume. The use of a conventional pump will be possible due to a special adapter.
Cycling with flat tires is not permitted. It is not even worth thinking about such an option here. So that you do not have to drive your two-wheeled friend to the nearest place for pumping wheels, you must always have a pump at hand and know how to use it.
Pay attention to the pressure you need. If you are pushing off your real wheel, look at the side of the tire, it always indicates the minimum and maximum pressures possible for this tire
Rim pressure restrictions are less common, some are not rated for more than three atmospheres.
Cylinder volume. The larger the diameter of the cylinder and piston of the pump, the faster the pumping will be done. On the other hand, too large a diameter means more physical effort is needed. If the diameter is too small, it will be easier to move, but longer.
Pressure gauge. The absence of a pressure gauge has a positive effect on the cost of the product. On the other hand, the desire to control the pressure will require the purchase of a separate pressure gauge. The third side shows that individual pressure gauges show pressure much more accurately.
The most accurate are modern electronic pressure gauges.
Size. Home pump can afford to be big. For the race - ultra-compact allows you to take other important things with you.
For other cases, the compact pump is ideal, which makes it relatively easy to deal with a flat tire.
Serviceability. It is very convenient if the pump can be dismantled and serviced. Maintenance by itself means replacing the rubber bands or lubricating them, which significantly increases the life of the structural components.
The secret of the right choice is very simple: just look at the tire being inflated. Next to the information about the tire size, there will also be information about the allowable pressure range in the chamber.
Why is this information not printed on the camera itself? Because in it the only point that is subjected to real load is the nipple, and its mechanism is very reliable. Otherwise, the normal pressure, which increases by an order of magnitude with fast skating, is taken by the tire, and how much it will be squeezed is the main limitation.
Chamber marked with limits in Psi
So, if the pressure is too low, the tire will break closer to the rim, bite the chamber, leading to breakdown, and at high pressure, it may simply burst on one of the bumps or when driving on hot asphalt. Psi In English sources, it is usually simplified to “pound”, or pound, that is, when they say that the pressure is 2 pounds, they mean exactly Psi. This unit of measure is obsolete, used only in the USA, but, as they say, "more alive than all living things."
Data from an intelligent pressure sensor on the screen of a smartphone European. This unit of measurement is actively used, as it echoes the “atmosphere”, which is quite convenient for measurements.
Pascal is the only metrically correct unit in the list, but is rarely used in bicycle notation.
The ratio between all units is as follows: 1 Bar = 100,000 Pa = 14.504 Psi.
What do they write on tires? For example, (2.38-4.0) is clearly atmospheres, or BAR, and (95-135) is Psi. If the number has more than 3 digits or the prefix "k" (kilo), we are talking about metric Pascal. Most often, the desired value is located under the size designation and is duplicated in BAR and Psi as a range, clearly indicating to what pressure you can pump.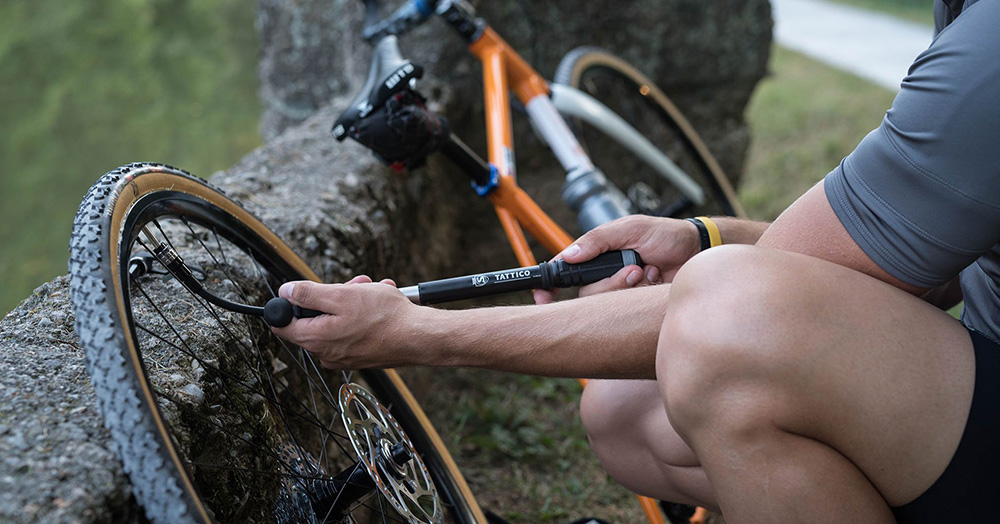
Actually, the manufacturer indicates the range within which the tire can function, then the freedom of the cyclist.
In general, a bicycle pump is a must for every cyclist. With the help of this simple device, it will be possible to inflate the wheels on your own, and not roll your bike to a service or gas station.
Hand pumps are divided into two types: simple and with a recording device (pressure gauge). It is recommended to purchase the second option, however, if a separate pressure gauge was lying around in the cabinet, you can buy a cheaper pump.
Universal hand pump with dial gauge
For ease of pumping with a conventional hand pump, you can immediately count the number of air inlets until the optimum pressure is reached and then pump exactly like this, even without additional use of a pressure gauge.
How to correctly pump air into the chambers:
By the way, the latter will not be superfluous to do with a pressure gauge, since the pressure inside the pump may increase during pumping, but air does not enter the chamber (the valve is not completely closed) or exit through a hole in her.
Common bicycle nipples are automotive and Dunlop. For thin wheels, a Presta nipple with a valve is used. It requires cleanliness and accuracy in handling.
Presta thin nipple tubes fitted to road bikes and some hybrids
Fitted with a special low volume pump. A regular bike pump may not fit or you may need to use an adapter.
1. Connect the bottle to the pump adapter.2. Screw/put the pump tip onto the nipple.3. Press the trigger (if with a valve) or press against the nipple.4. Monitor tire inflation. It should be well-boarded, and the tube should not be biting anywhere between the tire bead and the rim, otherwise you will have a sudden and very unpleasant surprise in the form of a strong BANG!
P.S. By the way, some manufacturers recommend not to drive for a long time on carbon dioxide. It passes through the rubber faster and escapes from the chamber.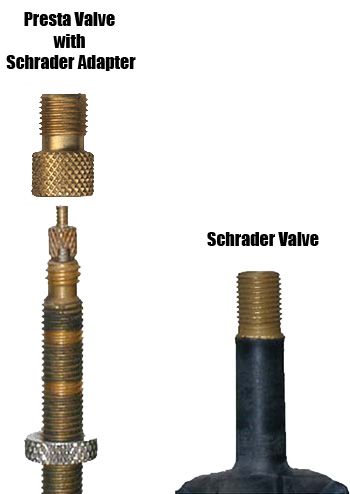 The option is to lower it and pump air.
The pump is very important for long-distance cycling trips, and cyclists have learned from their own bitter experience that they are even indispensable! Who will help if a wheel puncture occurs on a bike trip or just far from home? And in general, what to do in this case?
Experienced cyclists or cyclists who are not used to circling around the house will give you the following tips if you ask them:
1. Take self-adhesive patches with you.2. Take a spare wheel tube with you if you go on a bike tour for several days, with an overnight stay.
3. Take the pump with you. But here some problems appear. The first is that, as a rule, powerful bicycle pumps, although not very large compared to car foot pumps, are nevertheless not very convenient for transportation.
Especially considering that you will have to use them at best twice a season, the rest of the time the device will be lying around like ballast in a backpack or hanging on the frame of your bike, and this is excess weight, the competent distribution of which on long exhausting trips literally worth its weight in gold.
The second problem is diametrically opposed. Compact hand bicycle pumps are really small in size and weigh a little. But you will curse everything in the world while you pump a tire blown to zero with such a pump. You may catch up with the atmosphere, but then everything will be very, very difficult. It's just a hell of a job - to inflate a tire with such a pump. Those who have tried will understand. In general, a half-measure and in some cases will not be suitable for full use.
As a general rule, all motorists keep a pump in the trunk. But there are times when the pressure in the tire has dropped, but for some reason there is no pump. If this happened on a highway where the flow of cars is significant and you can always stop a passing car to provide assistance, or there is a service station in the immediate vicinity, then this is not as scary as getting stuck in a forest where there is not a soul, and there are dozens of kilometers.
But there is no limit to human imagination, so the craftsmen came up with a way to inflate tires using a conventional car carbon dioxide fire extinguisher. But this idea is not the easiest and not the safest. To do this, you must have a special hose that will serve as an adapter between the fire extinguisher and the nipple. The hose can be disconnected from a failed compressor by providing it with a threaded sleeve so that it can be screwed into the fire extinguisher fitting.
As a rule, carrying an OU-2 fire extinguisher is a mandatory fire safety requirement. Its pressure is about 5 megapascals, the volume is up to 2 liters of extinguishing agent. If you press the trigger guard, then the substance from the fire extinguisher will quickly rush outward, turning into a gas. This method will help inflate the wheel in a matter of minutes. But such actions cannot be called safe, so it is not recommended to use it. As soon as carbon dioxide passes from a liquid to a gaseous state, a strong cooling of both the fire extinguisher itself and the hose is obtained. Therefore, after such inflation, it is necessary first of all to get to a gas station or to a tire fitting shop, bleed carbon dioxide from the wheel and pump in the usual air.
For more information about this method of tire inflation, see the video:
1. The French valve (Presta) or the name Sclaverand is commonly found on high performance road bikes. Compared to a Schrader valve, this one is longer and narrower in diameter, and has an outer stem that is capped instead of being surrounded by a core.
2. Valve opening. To open the Presta valve, unscrew the dust cap. Then you need to loosen the brass cap on the valve stem a little, it will not be able to come out completely, and you will have to lift it up a little. If you want to check if the cap is loose, you just need to press on the valve stem, and if you hear that the air comes out in sharp gusts, then this is a sign that you can stop.
3. Calculate the recommended tire pressure for the bike. This is usually a relief mark, which is located on the sidewall of the tire. Most often, these readings are written in bars or PSI. Do not let the pressure go to the bottom line, and also to the highest, which exceeds the maximum.
4. Pump installation. You can use the pumps of any gas station stations or borrow from friends. And as an option - buy in the store "everything for bicycles".
If you have a bike pump with two ports, the smaller one is for the Presta valve.
Universal pumps with one orifice automatically adjust to the Presta valve.
This pump may need to turn back the inner rubber stop to accommodate the French valve. Locate the rubber stop by unscrewing the outer cap of this type of valve.
5. Inflate tires. Open the Presta valve by unscrewing the dust cap and loosening the smaller brass cap.
6. To deflate a tire with a Presta valve, open the brass cap and press the springy valve stem until all air is expelled.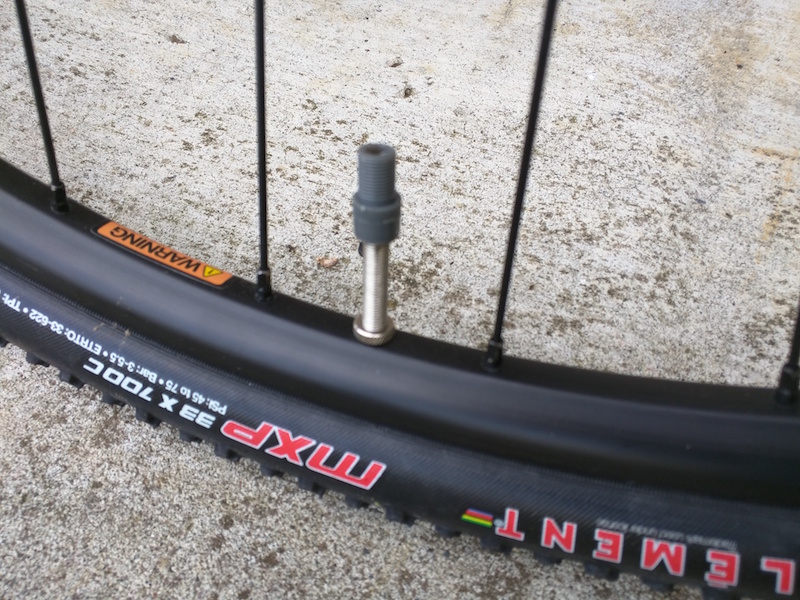
When inflating tires, use the values shown above. The manufacturer writes a range on the tire so that you can choose the right value for the road surface. It is considered that the maximum indicated value is for a hard asphalt road. It is better to leave the minimum value if you ride on a country road or in a forest.
If you ride with minimal pressure on asphalt, you will lose speed and have to work harder with your feet. On a dirt road, additional cushioning is needed, which gives light pressure. It also improves traction, which is an added benefit.
There are different types of tires and bicycles. For each type, recommended values \u200b\u200bare developed, which have been tested by the experience of many cyclists.
For mountain tires designed for extreme sports, the pressure must be chosen experimentally. It is individual for each cyclist.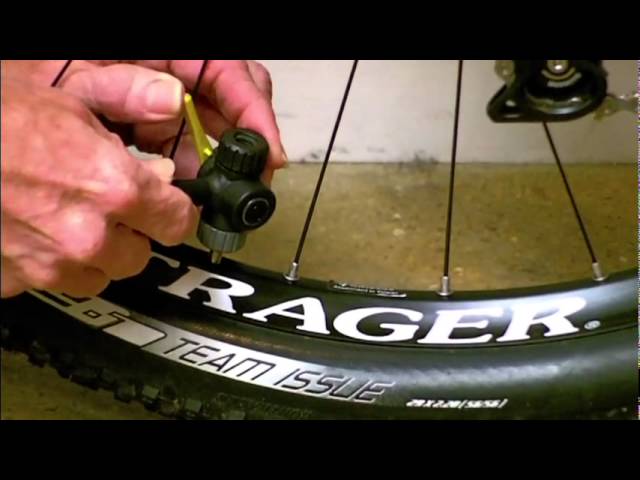
Cross country tires are universal, they are usually pumped up to 3-4 bar. They can be ridden in the countryside and on tough city roads.
The most comfortable pressure should be in the tires of a mountain bike. It depends on the weight of the cyclist and on the degree of roughness of the terrain. You also need to consider the width of the tires. The larger it is, the higher the pressure should be.
The best way to find the best value for yourself in practice, riding through the mountains with a pressure gauge.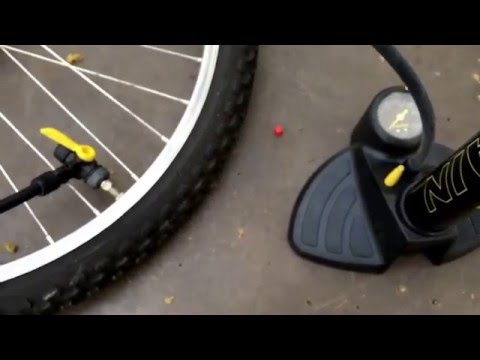
Recommended bicycle tire pressure according to weight:
| Rider weight in kg | Pressure in bar |
| 50-60 | 2.4-2.9 |
| 60-70 | 2.9-3.2 |
| 70-85 | 90EA 3.7|
| 85-100 | 3.7-4.0 |
| 100-120 | 4.0-4.1 |
Pressure in the tire of bicycle 26 dums depends who rides on it.
For children it is better to inflate tires to the maximum permitted value. This will make it easier to learn to ride a bike, as well-inflated tires have a smaller contact patch and require less effort for the rider.
Source
How to inflate the PRESTA nipple! Three ways!
How to inflate a Presta nipple without an adapter.
How to inflate presta, dunlop, schreder what is the difference between bicycle nipples, spools
How to inflate Presta or Soviet nipple with one pump? | Veloparts.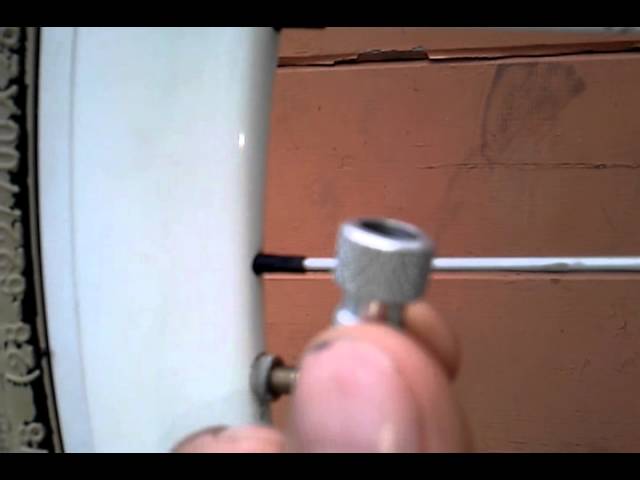 com.ua
HOW TO PUMP WHEELS ON A BIKE | PRESTA and SHRADER NIPPLES
How to inflate a bicycle nipple
What pressure should I pump into the bicycle wheels?
How to inflate a bicycle tire. Tips for newbies.
PRESTA-SCHRADER. ADAPTER.
How to inflate a Presta valve
4.5/5 - (2 votes)
It may be elementary, but being able to inflate bike tires is an essential skill for any cyclist.
Many of you already know how to do this, but for those who don't, the different types of valves, pumps, and more importantly, how much pressure to inflate your tire can be a little overwhelming. Let us help you through this process.
Contents
Pneumatic tires were invented to overcome the harsh "ride quality" of massive wheels.
The air inside acts like a spring, giving you suspension and allowing the tire to adapt to the terrain for better traction.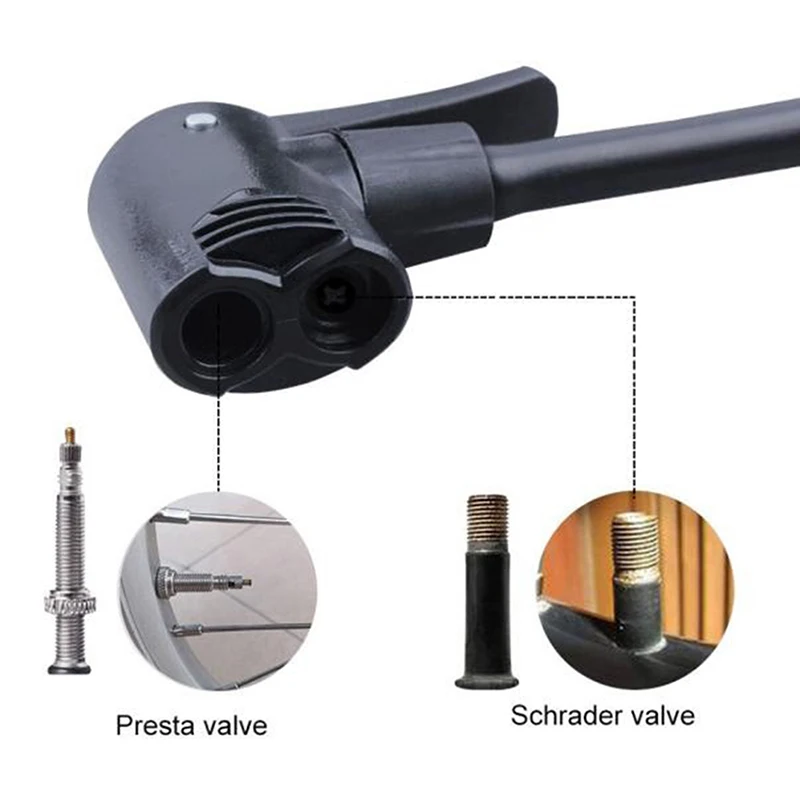
Tire inflation is a quick job that can easily improve your driving pleasure. Incorrect tire pressure will adversely affect cycling and make it more prone to punctures.
If you've never repaired a puncture before, you may not have thought about how your tires hold air in.
The vast majority of bikes will use a tube. It's a donut-shaped airtight tube that sits inside the tire with the inflation valve you see on the outside.
Inflated tire rests on the ground and provides puncture protection.
You may have heard of tubeless tires which do not have a tube but use a special rim and tire to seal air without using a tube. This usually requires tubeless sealant, which is a liquid that plugs any air outlets.
Tubeless tires are more commonly used on mountain bikes, but the technology is moving to road bikes.
Tubeless sealant also seals punctures, and no tube means much less risk of pinching flat surfaces - that's when your inner tube gets pinched by the rim, causing a puncture.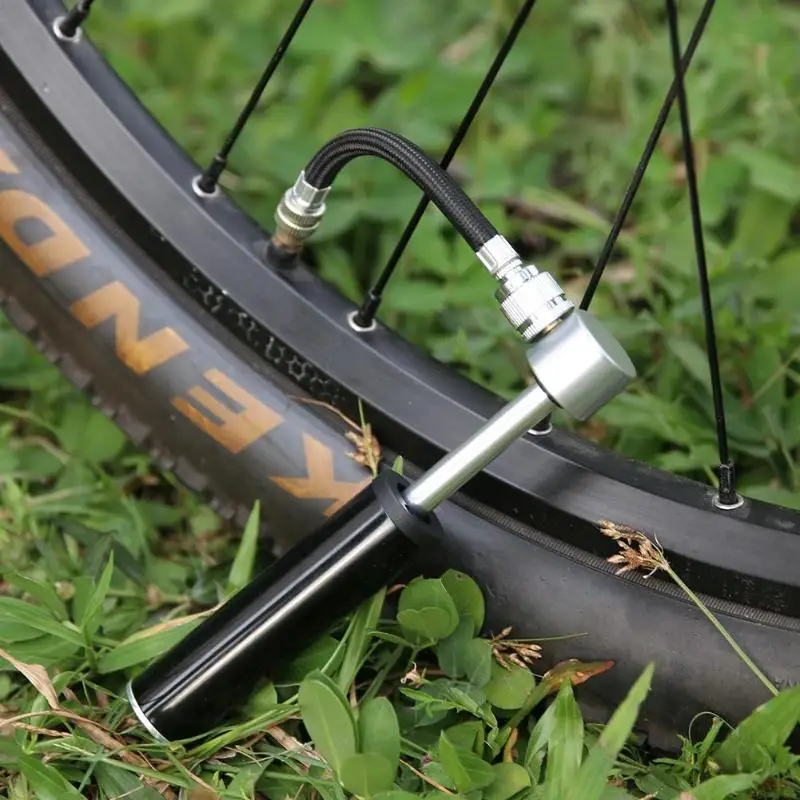 Thus, tubeless tires can run at lower pressures than inner tube tires to improve comfort, speed, and traction.
At the highest level, you also get tubular tires. They are essentially a tire with a tube built into it, but they are rarely seen or used outside of professional racing.
Inflating tires to the correct pressure is an important part of bike maintenance.
Running tires at too high or too low pressure can be potentially dangerous and can also affect your bike's handling.
Later we will discuss the correct pressure, but for now let's look at possible problems.
An under-inflated tire will reduce your efficiency and leave you vulnerable to annoying punctures.
If you drive with tires at too low pressure, the tire may wear out prematurely. Excessive sidewall deflection can lead to carcass cracking and tire brittleness. This can eventually lead to tire blowout.
Excessively low pressure also increases your susceptibility to punctures and can even cause your tires to literally jump off the rim if you turn at speed (the pressure inside is what keeps your tire on the rim).
Damage can also be caused by tire deflection up to the rim. This can lead to dents or cracks, which can compromise your wheel and require a costly replacement.
Conversely, too high pressure can cause the tire to come off the rim with explosive consequences. This pressure can also compress the wheel because if it is too high, the compressive force on the wheel can be too great.
From a drivability point of view, low pressure can lead to poor drivability due to the tire squirming under load. Your bike will be difficult to control and will be slow and sluggish.
On the other hand, too much pressure can lead to poor traction and a rough ride, leading to fatigue and in turn poor handling.
There are two possible reasons for your flat tire. Either you have a puncture or your tire has deflated over time.
The adhesiveless patches are great for a quick fix, while the more traditional kit is a versatile option when you have a bit more time.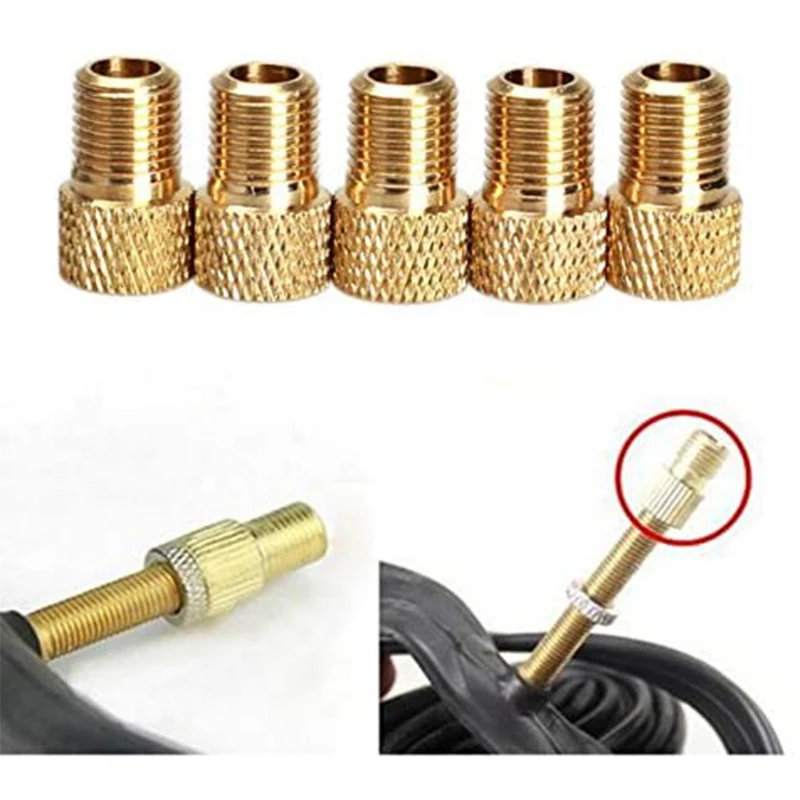
All tire systems will bleed slowly because the tubes are not completely sealed. For example, standard butyl tubing retains air fairly well compared to lightweight latex tubing, which bleeds relatively faster. Even tubeless setups will slowly leak air.
Old tubes will pass more air than new ones, so if they haven't been replaced in a while, it's worth taking a look at them. It is less likely, but also possible (especially on older tubes), that the valve is no longer sealing properly.
The best way to check what's going on is to try pumping up the tire. If it's holding air, you probably have nothing else to do. If this does not happen, most likely you have a puncture.
If air leaks slowly overnight, you have a slow puncture or just an old tube that needs to be replaced.
The first thing you need to know before inflating a tire is the valve type.
The valve is the key part that keeps the air in the tire but also allows the tire to be inflated (or deflated).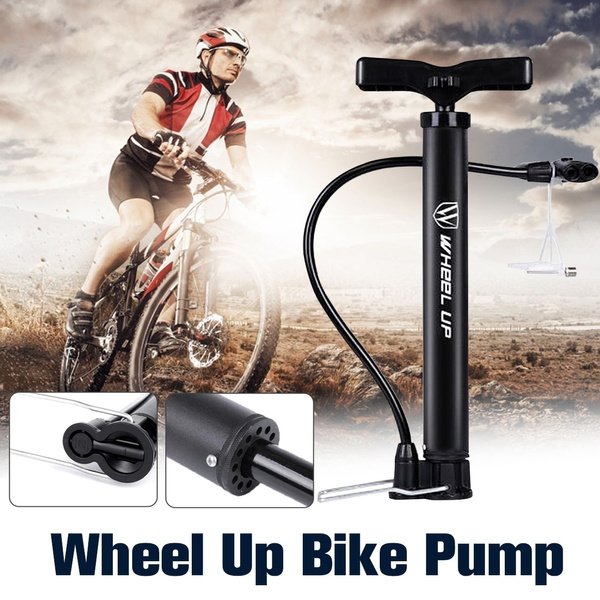
The Schrader valve is also used for car tires.
Schrader valves are more common on lower end bikes and in the past mountain bikes. The same valves are used on car tires.
The valve assembly is a hollow tube with a spring loaded valve that automatically closes and screws into the outer housing. The pin comes out of the valve and is usually flush with the end of the outer tube. This pin can be pressed to release air.
The dust cap on Schrader valves is an important part of the design that can help close the valve completely if it is not fully sealed. Essentially, it provides a secondary "backup" seal.
The spring-loaded design of the valve is slightly susceptible to contamination from dirt or sand, so it is important to protect it as well.
These Presta valves are longer and narrower than the Schrader style valve.
Presta valves are only found on bicycles.
They originated on road bikes where a narrower valve (6mm versus 8mm for the Schrader) meant a smaller valve hole (usually the weakest part of the rim).
Today they can be found on both mountain bikes and road bikes. Instead of using a spring, the valve is held in place by a nut that holds it closed, although the valve itself seals "automatically" when the pressure inside the tire forces it to close.
With a schrader valve you can simply press the pin to release the air, but with a Presta valve you first need to unscrew the small lock nut. Don't worry about the nut coming off the end of the valve body because the threads are rounded to prevent this from happening.
There seems to be a myth that Presta valves handle high pressures better - this is probably not true given that there are Schrader valves that can handle many hundreds of psi (much more than you'll ever need). in your tire).
However, Presta valves are definitely a bit more fragile than Schrader valves.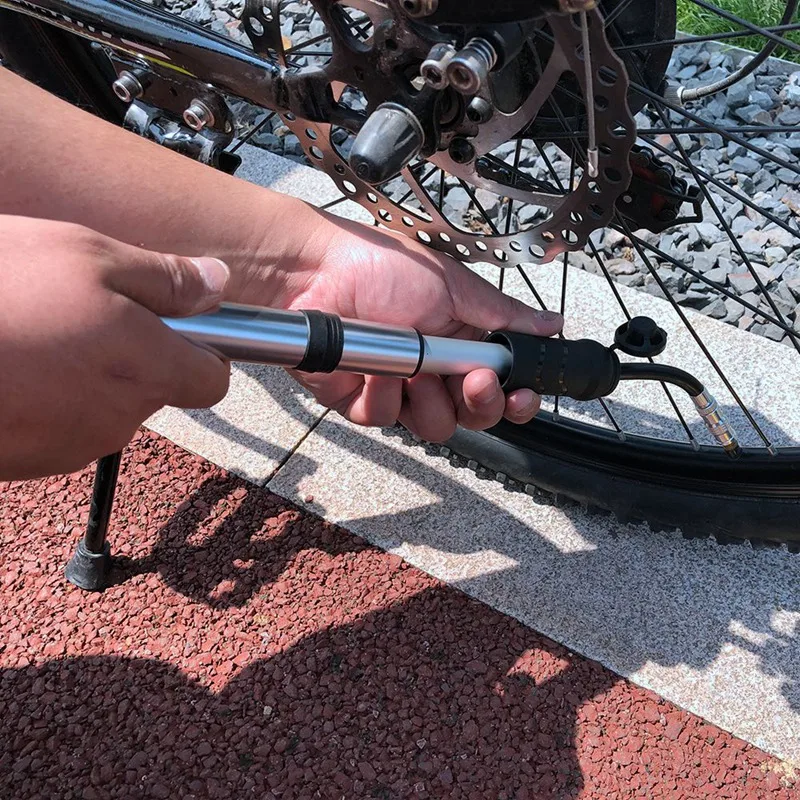 It is very easy to hit the threaded inner body of the valve, bend or break it, so care must be taken. However, valve cores are easily replaced with standard tools.
Compared to Schrader valves, this requires a special tool.
Presta valves can be supplied with a retaining ring that secures the valve body to the rim. This can make them easier to inflate. The dust cap is not essential to sealing it, but helps keep the valve clean.
The only other type of valve you may encounter is the Dunlop (also known as Woods) valve. The base diameter is the same as the Schrader valve but can be inflated with the same pump as the Presta valve.
They are very popular on city streets in Europe and elsewhere in the world, but you are unlikely to find one in the UK or the US.
The tubeless valve is difficult to distinguish from a normal Presta valve.
Valves for tubeless tires are attached directly to the rim, not part of the inner tube.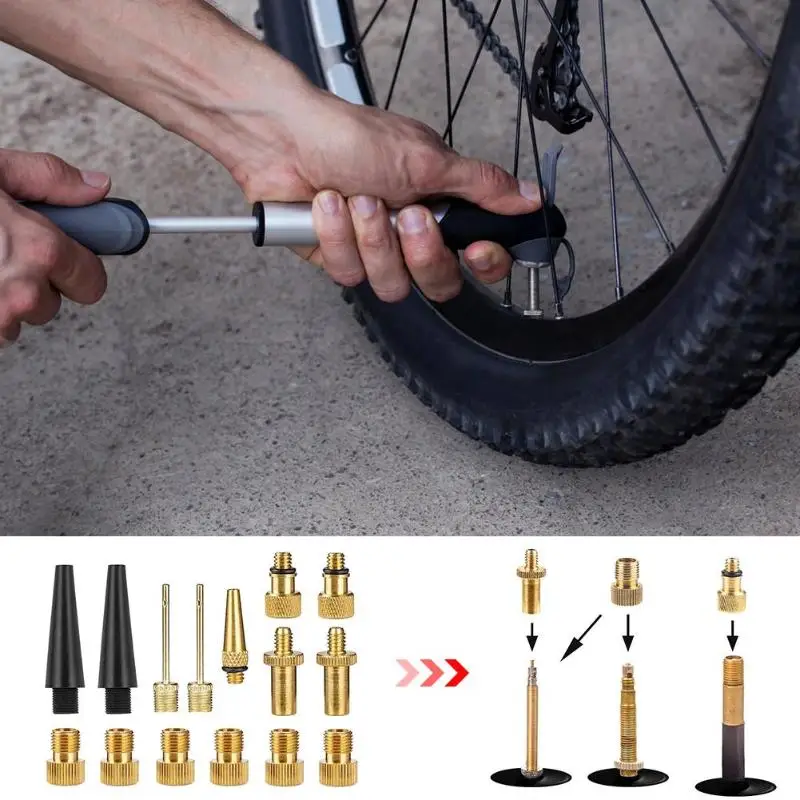
Most often they are of the Presta type, but there is also a Schrader.
If you have a Schrader type valve like the one shown above, the first thing you need to do is remove the dust cap (if there is one).
Simply unscrew the cap counterclockwise to open the valve.
Now attach the pump head.
Inflate the tire to between the minimum and maximum indicated on the tire sidewall and remove the pump. Ready!
If your bike has a Presta type valve like this one, you will first need to remove the plastic valve cover (if any).
The plastic cover will open another threaded valve cover.
Loosen the threads, but be careful not to damage them in the process.
Now attach the pump head of your choice to the open valve and inflate the tire to between the minimum and maximum pressure indicated on the sidewall of the tire.
Inflate the tire to the desired pressure and remove the pump.
Finally, close the valve by turning it clockwise and install the plastic valve cover.
If you have a tubeless tire or a tube with sealant inside, there are a few extra steps you should take to avoid clogging your pump.
Turn the wheels so that the valves are at the bottom and leave for a few minutes to allow the sealant to drain.
Turn the wheels so that the valves are up and inflate the tires. The same thing happens when the tires are deflated to prevent the sealant from splattering all over the place.
We would say that if you can only own one type of pump, get a foot pump for home use because it is efficient, fast and easy to use.
However, there is no doubt that having an extra mini-pump for the duration of the trip is very useful - otherwise you risk getting stuck on the side of the road in case of a puncture.
There is no limit to pump selection. Basically, they all do the same job, some of them look better than others.
From budget to outrageously expensive, you'll find something to suit your needs.
Mini pumps work but are much more difficult to use. Again, there are many options that will fit in your pocket. We prefer hose mini pumps because it reduces stress (and potential damage) on the valve.
Another option for your inflation needs is the CO2 pump. They use compressed carbon dioxide in a small cartridge to inflate or fill a tire very quickly. Not something you would like to use on a regular basis, but perfect for emergency repairs.
The first thing to do is attach the pump to the valve.
Remove the valve cap, and regardless of valve type, we find it useful to let some air out to make sure the valve doesn't stick and opens and closes cleanly.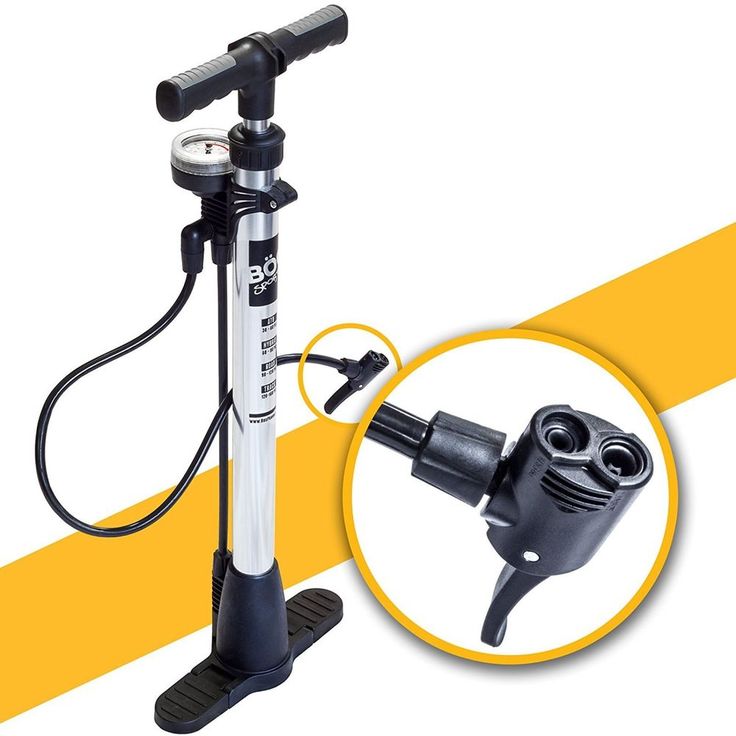 Screw on the chuck, or push it in and lock it.
If your tire is completely flat, it may be difficult to install the cartridge at first because the valve tends to move back into the rim. Simply hold the valve at the back while pressing down on the outside of the tire so you can lock the cartridge in correctly.
The locking ring on Presta valves (if equipped) can also help by preventing the valve from dropping, holding it in place for you.
The connection to the valve must be tight. It is normal for a small amount of air to escape when installing the pump, but this should not last long. If so, remove and reinstall cartridge. If the problem persists, it might be worth checking the rubber seal in the chuck to make sure it's not worn out and needs to be replaced.
Remember to be careful with the valves - they are fragile. This is especially true if you are using a mini pump without a hose.
Be sure to secure the pump by hand to avoid applying too much force to the valve, which could cause damage.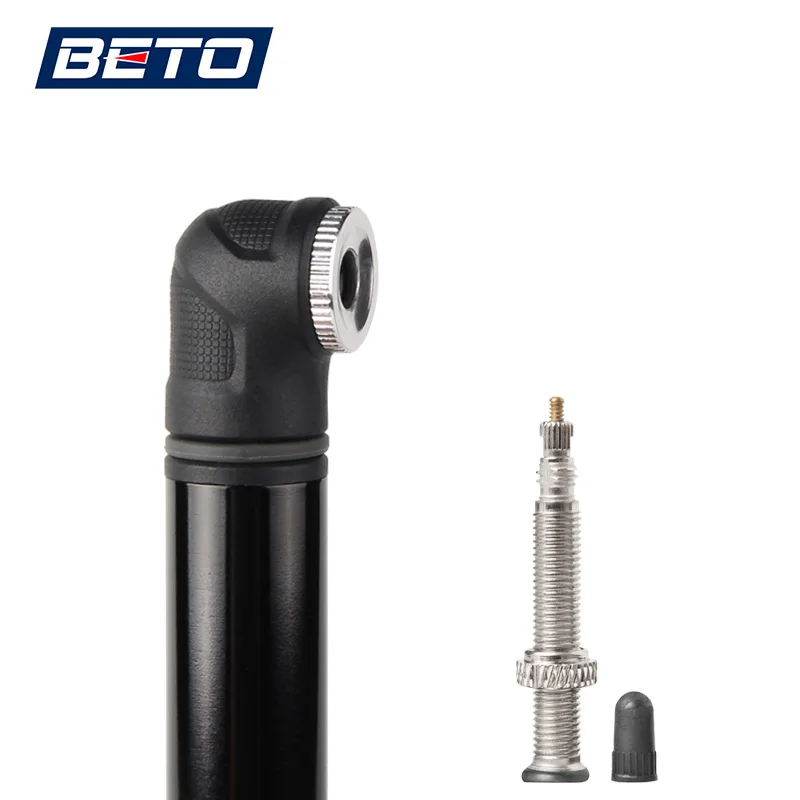
When you start pumping, make sure you use the full stroke of the pump. You will find that most of the stroke is compressing the air to the point where it will be forced into the tire.
If you don't run the pump all the way, the air won't be forced out of the bottom - you need to pressurize to move the air from the pump to the tire. Instead, you'll just end up wasting your energy to no avail.
With a floor pump, don't just use your hands, use your body weight to push down and pumping becomes much easier.
Sometimes you may find that the pump does not hold pressure, especially when inflating a tire from a fully deflated position. This may especially apply to older pumps where the seals may be slightly worn.
We find that vigorous inflation first helps to create enough back pressure (i.e. tire side rebound) in the system to ensure that the valves actuate properly and seal the tire. Keep going until you get the right pressure.
When the cartridge is removed from the valve, a hiss of air loss can usually be heard. This usually happens on the pump side, not the valve side. The pressurized air from the hose and cartridge just comes out.
The pump pressurizes air into your tire. The principle of operation is simple; you increase the pressure inside the pump until it exceeds the pressure inside the tire. This "overpressure" forces air into the tire, which also increases tire pressure.
The pump is simply a manually operated piston. As the pump moves down, a check valve (allowing air flow in one direction) seals the piston chamber, causing the air pressure to rise as the pump is compressed. This pressure increases until it exceeds the pressure inside the tire.
At this point, the second one-way valve will allow air to flow from the pressure pump chamber into the tire. You extend the pump again, the check valve opens to fill the chamber with air, and you repeat the process.
To prevent leakage of tire pressure, the second check valve at the base of the pump closes.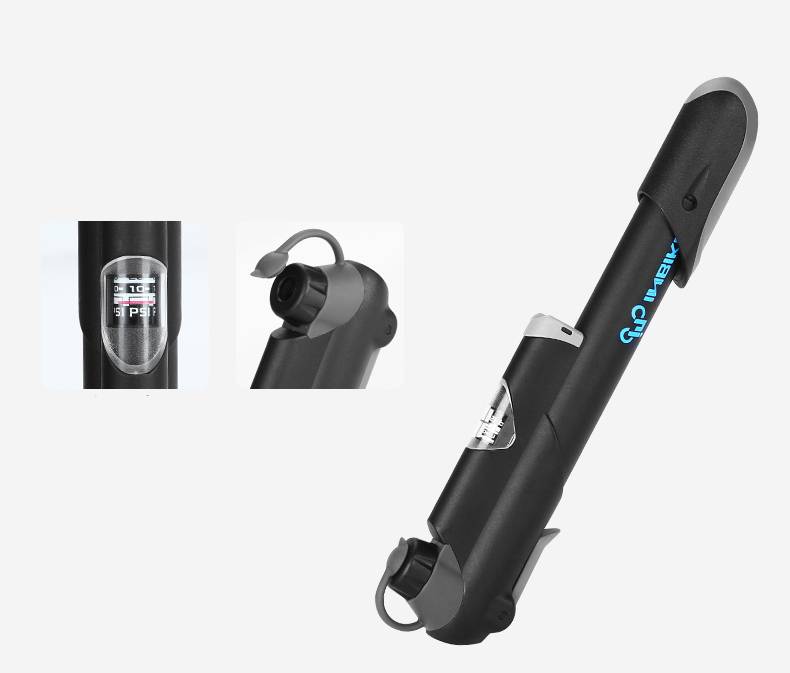 If it wasn't there, the pump would just open up again.
Presta valves close automatically, but spring-loaded Schrader valves are usually held open by a pin in the valve mount (meaning you don't need any additional inflation force to overcome the pressure exerted by the spring).
The pump head is also known as the cartridge.
The cartridge is the part that attaches the pump to the valve and forms an airtight seal over the valve. There is one of two designs: threaded or push-on with a locking lever. Most pumps nowadays can also be adapted to Schrader or Presta valves.
They will either have two different mounting points or a cartridge that can be changed for both types.
For large pumps (and many mini pumps too) the cartridge is often on the hose, preventing your force from damaging the valve.
Pumps are often equipped with a tire pressure gauge.
Proper tire pressure is perhaps one of the most controversial topics, but there are a few guidelines you can use.
As a rule of thumb, your tire should be strong enough to prevent it from flexing all the way to the rim, yet malleable enough to provide some suspension - after all, the beauty of a pneumatic tire is that you don't have an incredibly hard ride.
Most tires have a minimum and maximum pressure marked on the side. It is advisable not to go below or exceed these limits, because manufacturers have indicated them for a reason. Of course, this means there is still plenty of room to play around with the pressure and what works for you.
For mountain bikes, the problem is relatively easier to solve, as the goal is usually to improve traction, cornering, and damping.
As a rule of thumb, riders try to run as low pressure as possible without making it so soft that the tire squirms under load in a corner or flexes enough to damage the rim.
Things get a little tricky for road bikes because along with grip and comfort, rolling resistance (how efficiently the tire rolls) is an important factor.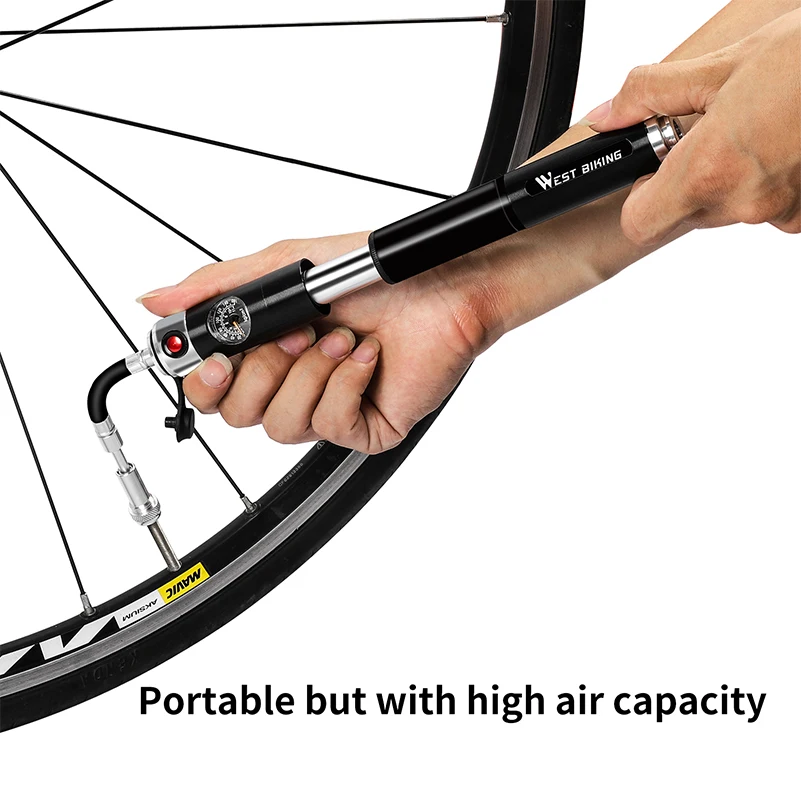
On all but the smoothest surfaces, a stiff tire will have no advantage, and instead of the tire being able to lean and conform to the bumps, causing the bike to move forward, you will bounce.
On all but the flattest surfaces, lower tire pressure can provide greater comfort and efficiency.
Testing showed that 20 percent tire compression (the amount of tire compression when a load is applied, measured by the height from the ground to the rim) was the optimal balance.
Incidentally, some manufacturers recommend the same level of tire compression, although this figure is somewhat controversial.
This value is indeed a good starting point for experimenting with tire pressures.
You don't always have to remove the pump/gauge to check tire pressure.
We recommend that you check your tires before every ride. Usually, you just need to squeeze them with your hand to check the pressure.