How much would it cost me to change my tire rims? They’re a little cracked and they look pretty bad, but I’m worried that it will be really expensive to replace them.
Liz Jenson · Answered on Nov 26, 2021
Reviewed by Shannon Martin, Licensed Insurance Agent.
Changing and replacing your tire rims can cost anywhere from $200 to $500 per wheel, or $800 to $2,000 for your entire car. The exact price of the service will depend on the kind of car you drive and the shop that you choose, but it’s unlikely that you’ll find a shop that will replace them for less than $200.
If your tire rims are just slightly cracked or scratched, though, it’s possible that they can be
repaired rather than replaced. In this case, you could pay significantly less, sometimes as little as $75 per wheel. To learn more about your options, talk to your mechanic about the problem.
While you’re looking to save on your car repairs, why not save on your car insurance too? The Jerry app makes it quick and easy to find the best rates available on the insurance coverage you want! Just download the app and answer a few questions to see a comprehensive cross-analysis of the best car insurance policies from top providers like State Farm, Progressive, and Allstate.
MORE: How to remove scratches from car paint
Car RepairCar Tires
View full answer
WHY YOU CAN TRUST JERRY
Jerry partners with more than 50 insurance companies, but our content is independently researched, written, and fact-checked by our team of editors and agents. We aren’t paid for reviews or other content.
Browse More Content
Stabilizer Bar Bushings Replacement
Car Hesitating and Bucking Inspection
Grinding Sound From Transmission Inspection Cost
Alternator/Serpentine Belt Replacement
Car Making a Noise: Inspection
Porsche Cayenne Insurance Cost
Dodge Ram 1500 Insurance Cost
Chevrolet Impala 2Lt Insurance Cost
Mini Cooper Coupe S Insurance Cost
Chevrolet S Truck S10 Insurance Cost
Iola Car Insurance
Raven Car Insurance
Meriden Car Insurance
Fulton Car Insurance
Pitts Car Insurance
How much will it cost me to replace the side mirror on my car? I got into a small accident in my driveway and my driver’s side mirror came right off.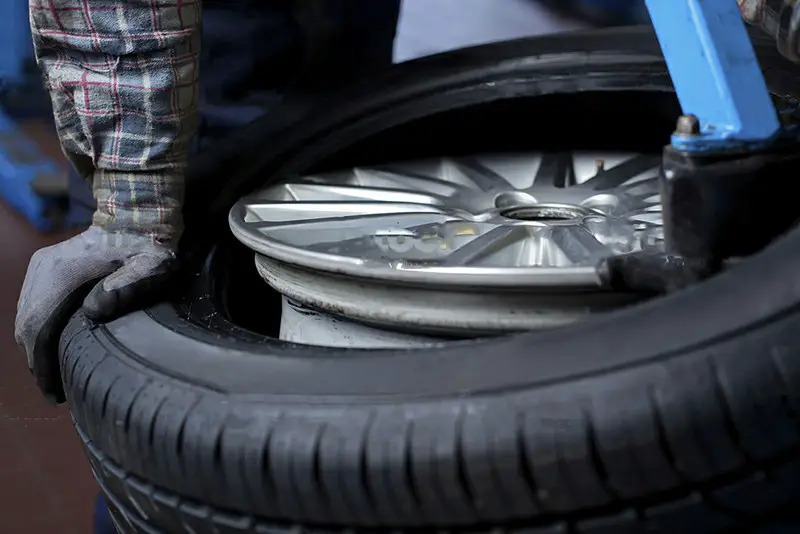
Liz Jenson
Nov 26, 2021
How much would it cost me to get my car lowered? I want to do it but someone told me it’s super expensive and I don’t know enough to do it myself.
Liz Jenson
Nov 26, 2021
How much would it cost me to get a welder to fix my car frame? It has some damage to it from an accident a while ago but my son just got his driver’s license so I’m looking into the possibility of repairing it so that he has a car.
Liz Jenson
Nov 26, 2021
Browse All Questions
The 2022 Dodge Ram 1500 comes with two different bed size options: a 5.7-foot bed, and a 6.4-foot bed.
Liz Jenson
Oct 05, 2022
From the low cost of living to the maddening rush hour commute to all the essential moving tips, here’s everything to know before moving to Boise.
Liz Jenson
Oct 05, 2022
The redesigned 2023 Toyota Sequoia has arrived—and it’s not here to play.
Liz Jenson
Jan 01, 2019
Car Body Repair
Chevrolet
FS-1 Form
Valuable Articles Insurance
Foremost Insurance
Drivers Licenses
Wind Damage
Toyota
Kemper Preferred
Vehicle Modifications
Credit Score
Car Parts
Artificial Intelligence
Consigners
Hippo Insurance
Bodily Injury
Finance
Motorcycles
Car Damage
Toyota Prius
Car Leasing
Ridesharing
Jumpstarting
Driving Record
Massachusetts
Proof of Insurance
Car Loan
No long forms
No spam or unwanted phone calls
Quotes from top insurance companies
Find insurance savings — it's 100% free
Toyota
Hyundai
Mercedes-Benz
Subaru
Chevrolet
Mitsubishi
Over time and with frequent use, even the best tires will wear out.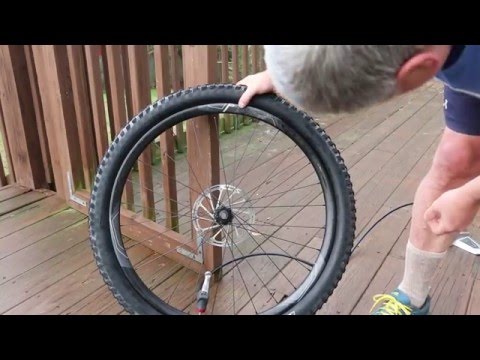 When your tires wear out, it’s best to change them as soon as possible, as worn-out tires reduce the vehicle’s efficiency in braking, increasing the chances of an accident.
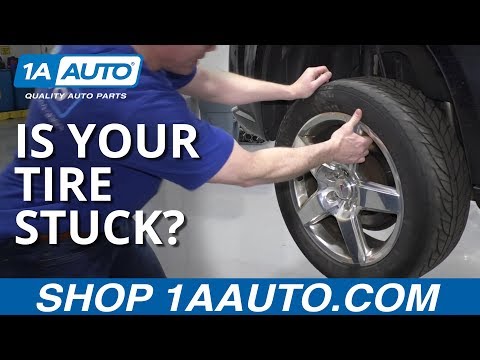
Of course, to change a tire, you must remove it from its rim (or wheel). Removing a tire from the wheel is relatively easy and does not require highly specialized skills or equipment. It can be done manually, by hand or with a manual tire changing machine.
Removing a tire from the rim is a relatively straight forward process:
Here’s what you’ll need to remove a tire from a rim:
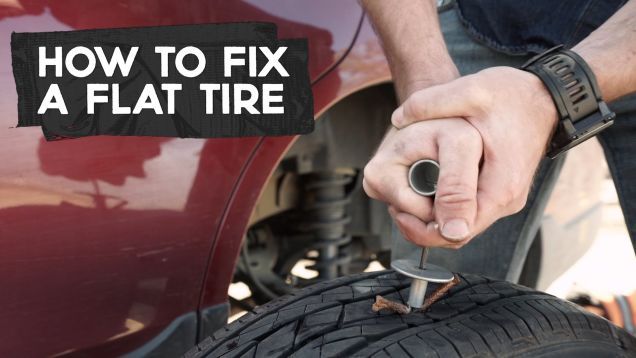
Place the tire on the ground or any level surface, and locate the air valve—a small rubber or metallic device. The valve has a cap, which you will need to take off (by twisting anti-clockwise) to reveal the valve core inside. The core is a metal cylinder in the valve, by which the tube in tire gets inflated, and removing it releases the air in the tire.
You will need to use a core removal tool to remove the core from the valve. The tool is similar to a small screwdriver; you put the end into the valve and again twist anti-clockwise to let out the air. The tools are inexpensive and are available in auto stores and online.
The bead is the edge of the tire attached to the rim. When the tire’s air pressure is sufficient, it keeps the bead firmly attached to the rim. Therefore, deflating the tire and with the application of force, you can separate the bead from the wheel and remove the tire.
There are several ways to remove the bead after deflating the tire. Some of these methods include:
This method is perhaps one of the simplest ways to disengage the bead from the rim without using any additional tools. Set the tire on the ground and drive over the tire. Doing so forces the edge down and out of the groove.
Sometimes you may need to repeat the process a few times before the bead breaks. However, take care to drive only on the rubber and not the metal, which may damage the rim.
Lowering a vehicle over the tire is another relatively simple way to break the bead. It involves raising the car with a jack and then pushing part of the tire under the vehicle. The car gets lowered, resting on the rubber right next to the metal wheel, consequently pushing the edge of the tire out of its groove.
However, do not attempt this method if you do not fully understand how to jack a car, as there are some technicalities involved.
You can also cut through particularly tough beads using a sharp knife. However, cutting through will cause largely irreparable damage to the tire. To cut, lay the tire flat on the ground, and saw along a section nearest to the edge, taking care not to veer toward the metal wheel to avoid damaging it.
As the name suggests, a tire bead breaker is a tool designed to detach the tire from the wheel. This tool is the easiest way to detach the bead without damaging the rim.
You may use any available lubricant such as oil or dish soap, applying generous amounts around the edges of the rim and tire. Ensure that the lubricant gets under the rim too.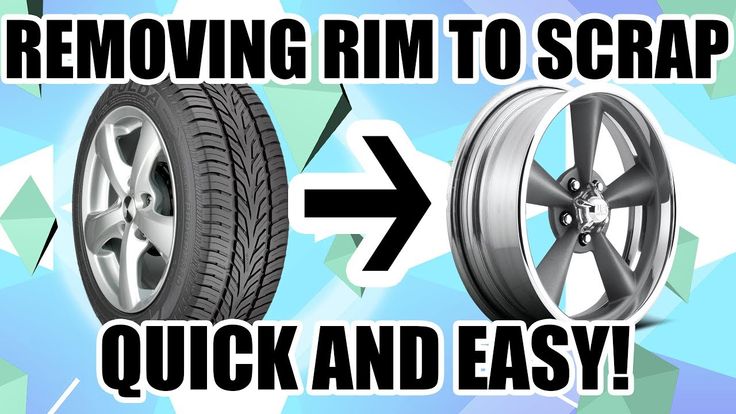 The purpose of lubricating is to make it easier to pull out the tire over the rim’s edge.
Having lubricated the wheel and tire edge, use your feet to press down on the rubber, creating an opening. Carefully push the pry bar into the newly created opening, and lift the tire up and over the edge of the rim.
Hold the pry bar in place, and insert the flat-head screwdriver next to it, using the screwdriver to pull out the edge over the entire circumference of the wheel. Flatter pry bars and screwdrivers work best for this task.
After successfully extracting the bead, you will need to do the same thing on the other side. Start by applying generous amounts of lubricant to the edge of the rim and bead, again ensuring that the lubricant gets under the rim.
Like before, press down the tire and insert a pry bar into the opening, lifting the tire over the rim’s edge. Again use the screwdriver to pry the tire out on all sections. At this point, the tire should be entirely free of the wheel, and you can easily lift it from the tire.
While removing the tire from a rim by hand is not an overly complex procedure, it is a rather hands-on process, and not everyone prefers this method.
One other way to remove the tire from the rim without going to the mechanic is to use a manual tire changing machine.
This compact machine allows you to skip the greater part of the tedious process of separating the wheel from tire, and is manually operated, unlike those found in a mechanic’s shop. Manual tire changers are cheap and available in stores and online. The machine also comes in handy if you don’t know how to put a tire on a rim by hand.
In addition to the machine, you will need:
Place the machine over the plywood board and use a pencil or pen to trace the outline onto the board, indicating the bolt positions. You may use boards other than plywood, just ensure that it is of sufficient thickness (at least ¾ inches).
Screw the bolts into the wood, at points marked for holes. Using 5 inch long bolts with ½-inch diameter works best for this.
Flip the wood over and position the machine over the bolts, securing each bolt with a nut and washer.
An alternative to wood is to bolt the machine to a concrete floor. This option affords greater stability, but it is more tedious to achieve, as it requires the use of a masonry drill.
Locate the air valve on the side of the tire, removing the cap to expose the core within. Insert the core extraction tool into the valve and twist counterclockwise to deflate the tire.
Set the now deflated tire and rim on tire changing machine. Ensure that you hook the rim to the small triangular-shaped nub at the base, and that the front of the wheel faces upward. Next, drop the machine’s arm onto the rubber at the edge of the rim. The arm resting on the rubber is wedge-like, to fit between the metal wheel and the rubber.
Typical tire changing machines come with a changing rod to help in removing the tire. However, any metallic rod with a pointed end will suffice. Insert the changing rod into the open end of the arm, and slowly apply pressure; this will cause the arm to press down on the rubber and reveal the wheel.
Rotate the tire, pressing down the tire changer arm on all points along the edge of the rim. Afterward, flip the tire and repeat the process to break the bead on the other side.
Set the tire over the machine’s top by sliding it over the central tube connected to the machine arm. Next to the central tube is a smaller spoke that should pass through one of the rim’s lug nut holes.
Place the bracket piece, which is a large ring with four spokes attached. The spokes prevent the tire from tilting or turning when you start to pull the bead over the rim. Finally, place the cap over the bracket piece and twist clockwise to secure the tire firmly.
Before you attempt to remove a tire, apply generous amounts of lubricant to the edge of the wheel and adjoining rubber, ensuring that the lubricant gets under the rim as well.
Gently push the pointed end of the changing rod between the rubber and the rim, then lift the bead over the rim’s edge. Slide the rod along the circumference of the rim, using the central tube as leverage.
When all the tire sections are free from the wheel, push the rod down to the bottom of the tire and repeat the process to free the tire on the other face of the wheel.
You can remove a tire from a rim either by hand or using a manual tire changing machine. Hand removal can be tedious and requires screwdrivers, pry bars, lubricants and a core removal tool. You will need the same set of tools when using the changing machine for removing the tire.
The manual changing machine also comes in handy if you do not know how to put tire on rim by hand.
Whichever way you choose, the processes of removing a tire from a rim are fairly simple and easy to follow.
0003
Related materials
Tire inflation with nitrogen and 7 more wirings at the tire fitting
In the middle-end of autumn, car owners storm tire shops. However, you can disassemble the wheels yourself. We'll show you how to do it. We will need a special tool, as well as a screwdriver to unscrew the wheel valve, and a couple of pliers to help remove the tire from the rim.
To rid the rim of the tire, we bought a simple but very useful device - a mechanical wheel beader. There are several options on the market, but we chose the one produced by the Sorokin company. It is inexpensive. Thanks to the ability to adjust the retractable linkage, tires can be removed from discs of different diameters. You only need to select the desired position of the rod and tighten the two bolts holding it, after which you can start working.
Related materials
Is it possible to pump up a wheel without a compressor - the experiment "Behind the wheel"
We took a 16-inch wheel. It is more convenient to remove the tire if you put it on the floor. In order not to scratch the aluminum disc during work, we will place a sheet of foamed polyurethane under it, which is used in construction for sound and heat insulation. We unscrew the cap on the valve, holding it with a finger, unscrew the spool so that it does not pop out under air pressure. The tire starts to deflate.
Before carrying out work with the help of a special tool, it is necessary to moisten the working edge of the disc with a penetrating liquid. Otherwise, we risk damaging the disk. Also, the liquid, having seeped under the edge, will facilitate the removal of the wheel from the humps.
We apply our device to the disk. Its hook in this case should protrude from the mandrel by 7–8 cm. For reference, this is one hole on the retractable rod. With a hand, we press on the device from one side so that it goes under the protrusion of the disk, and we wind the hook under the disk from the opposite side. We spread the levers of the device in different directions. The main thing is not to try to throw off the tire immediately, but to move it off the hump gradually. Otherwise, the tire may be damaged. Please note that the device should not be inserted near the wheel valve.
Related materials
Changing shoes correctly: everything you need to know about discs
Pulling out and moving the tool, slowly move the tire off the hump around the entire circumference. You can hold the side of the flight attendant, where there is no hook, with your foot. Having removed the tire on one side, turn the wheel over and do the same work on the other. Don't forget about lubrication. By the way, it is not necessary to use a liquid, a silicone composition is also suitable.
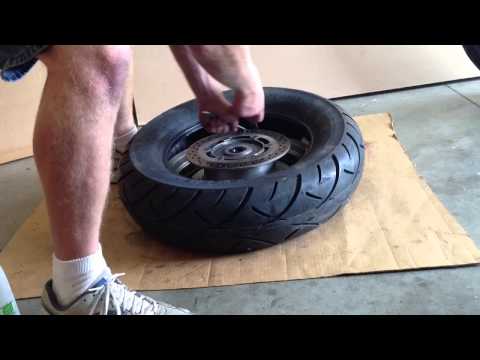
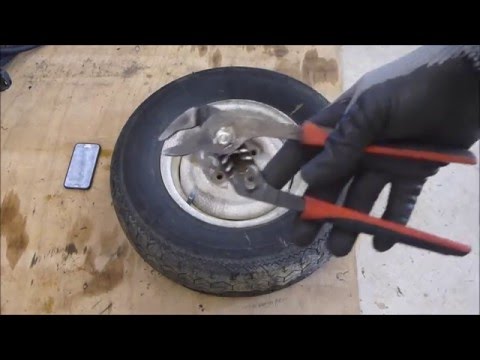
We removed the tire from each side of the humps. It remains to take mounting blades and completely remove the tire from the disk. We process the belt with penetrating lubricant. It is advisable to get on the inside of the rim, this will make things easier. We start the first blade under the tire. It is convenient to do this in the area of the wheel valve. We take the assembly aside in advance so as not to damage it during work. Hold the mount with your foot. We insert a second spatula next to it and lift the edge of the tire with it. We do this along the entire inner circle, also gradually. We removed the tire from one side of the disc, it remains to do the same on the other. We turn the wheel. We wind the blade behind the disk and begin to remove it from the tire. As soon as we succeeded, we can consider that the work is over.
Taking apart the wheels yourself is easier than you think. The main thing is to stock up on the right tool and free time, as well as take into account the characteristics of rubber.
Please send all questions and suggestions regarding the Technical Environment series to: [email protected].
Our new video
Test of the most modern in the history of the Volga GAZ-3111
Anti-crisis UAZ Patriot: the pros and cons of "simplification"
3 good reasons to buy the old Vesta instead of the new Grants
Like the article? Subscribe and you will always be in the know!
Driving in Zen
News smi2.ru
Vladimir Gavrilov
Estimated reading time: 3 minutes
9179
Category: Auto Service
Many drivers are in no hurry to buy additional wheels for winter use, they use the same wheels they used in summer. Well, tires twice a year go through a harsh operation of disassembly and reassembly, which does not improve their condition. Vyacheslav Subbotin, an automotive expert, captain and engineer of the GazReid Sport rally team, tells what kind of damage a wheel can get due to poor-quality work.
The vast majority of tire shops use old and worn equipment. People who work there are not always highly qualified, because the working conditions are difficult, and the turnover is high. As a result, not everyone and not always can remove and put the tire on the disk well. There is a high risk of damage to the side rings of the tire.
The point is that the tire beads must not stretch. When installed correctly, the tire fits snugly against the rim of the rim and ensures the tightness of the tire. For these purposes, split or continuous bead rings are made of several layers of strong steel wire, which are then covered with a hard cord and a layer of rubber.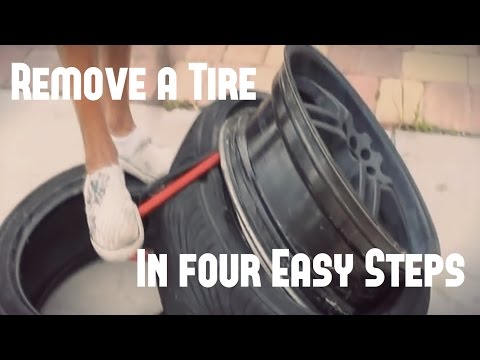 The rings create a solid profile that holds the tire firmly to the rim. However, if the rings are pressed through, the tire will lose strength and begin to bleed air. A little at first, and then a daily swap will be required. Naturally, driving on such a wheel will already be problematic.
One wrong beading can ruin a tire. Damage is most often caused on a broken mounting machine. In addition, the disk itself deteriorates during tire fitting. If the light-alloy wheel is hit or dropped, then scratches and even chips of the upper lacquered layer appear on it. The disk is losing its former appearance.
Therefore, it is better to use a set of conventional stamped discs for winter, which can be closed with plastic caps. Winter tires are installed on them once. As a result, the wheels may not be disassembled for years, unless, of course, a puncture or breakdown occurs.
Stamped wheels are much cheaper than cast wheels and better suited for winter. They won't crack on hard hits if you don't see a hole on a snowy road and you fly into it at full speed.
Stamped wheels are easy to repair in any workshop. They will also save tires from breakdowns, because they will absorb the load from impacts. In winter, stamping is much more preferable than cast wheels.
winter tiressummer tires
Next article