ATV Carburetor Adjustment involves tuning your ATV’s carb for maximum performance. How do I know my jetting is off? My ATV bogs down a lot, is jetting to blame? I have performance parts, what now? These are all common questions so lets get you up to speed on ATV carburetor adjustment.
You can tune your own ATV jets and avoid common jetting mistakes if you understand some jetting basics, explained below. A comprehensive installation guide will come with the jetting kit you purchase for your make and model of ATV so instead this guide will focus on explaining the basic principles of how ATV jets work. How jetting works…
#1
– The first thing you need to remember is that ATV jetting refers to throttle position, not engine rpm. Each jet is effective for a specific throttle position range. The pilot jet, or pilot screw as it is sometimes referred to, controls the flow of fuel between Idle speed and about one eight of wide open throttle (WOT). The needle jet controls the flow of fuel from the one eight position up to about the three quarter throttle position. Lastly your main jet controls the flow of fuel between the three quarter and wide open throttle positions.
#2 – The second thing you need to know is that aftermarket performance parts will change your jetting requirements. Increased engine performance usually means an increased demand for fuel so learning ATV carburetor adjustment techniques is important.
Other factors that affect jetting are rev limiters, altitude and fouled plugs if your jetting is off. Altitude directly affects engine performance because the higher you go from sea level the thinner the air gets.
The pilot jet, also referred to as pilot screw, controls carburetor fuel/air mixture between Idle and 1/4 throttle. Turning the screw IN makes the fuel/air mixture leaner. Turning the screw OUT makes the fuel/air mixture richer. Lean means less gas, rich means more gas.
Every jet is identified by a number and that number relates directly to the size of the opening inside the jet. Again smaller is leaner, larger is richer. When jetting your carb if you find that you need to turn the pilot jet all the way in to improve response then you likely need to switch to a smaller number of screw.
If on the other hand you need to turn it more than 2.5 turns out you likely need a larger numbered screw. When your engine bogs down at the smallest increase in throttle position your pilot jetting is likely too rich.
The needle jet and its needle controls the fuel/air mixture from the 1/8th throttle position all the way up to the 3/4 throttle position. The needle within the needle jet is a long tapered pin. As you increase the throttle position the pin pulls out of its jet allowing the fuel/air mixture to become richer. There are several different shapes and diameter of needles/needle jets but the needle jet is often left alone during tuning as it doesn’t affect idle or top end performance. The same rich/lean characteristics apply as with the pilot screw.
The main jet controls the fuel/air mixture from 3/4 throttle position up to wide open throttle. Again the main jet is numbered and a larger number indicates a larger hole and a richer mixture. A stock engine will perform well with a stock main jet but once engine performance parts are added its likely that you will need to revisit at least the main jet of your carburetor. Different performance part combinations will create different demands from your carburetor. Anything that increases horsepower will also increase fuel demand.
All the performance parts in the world won’t improve performance if you don’t tune your carb. If you have a rev limiter in place you may need to tune or upgrade that as well because a rev limiter will tend to bog down the engine at full throttle. Make sure to follow the instructions included with most jetting kits.
Now that you, hopefully, understand a bit more about the basics of how ATV carburetor parts work these are the steps to take if you’re in a jam on the trails. Blockage, damage, fuel contamination, mud in the air intake system and other conditions can cause your ATV carburetor to be unable to deliver the right amount of fuel to your ATV engine. You always want to tune your ATV carburetor at home or in the shop but that’s not always possible. If you’re in a jam, this is what you can do.
 This is not attaching the carburetor to the engine, it’s going to turn freely if you adjust it.
 You can continue to adjust it a bit until the engine sounds better and runs without hesitation. If you turn it too much you will eventually flood the engine with too much fuel and this will make it bog down and be hard to start as well. A flooded condition will require time for the fuel to evaporate.
Carburetor jets control the amount of fuel which is mixed with air inside the throttle body of your carburetor. This carburetor jet size chart shows you how effective each jet is at specific throttle levels. A Pilot jet is effective at idle speed up to 1/4 throttle(low-range). A needle jet is effective from 1/4 throttle to 3/4 throttle(mid-range). A main jet is effective from 3/4 throttle up to wide open throttle(top-end).
See also
When diagnosing a carburetor or tuning problem look at the jet responsible for the range in which the problem is occurring.
ALWAYS follow the manufacturer’s specifications whenever possible. Jet size is usually stamped onto the jet itself, typically in milimeters(mm), ranging from small to large. Changing a carb jet for a smaller sized jet will reduce fuel flow. Likewise, installing a larger jet will increase fuel flow and may help a performance engine run more smoothly. Note: an engine that runs rich is less likely to sustain heat damage than and engine that runs lean.
I hope that this carburetor tuning guide helps you understand how jets work so that you can best dial in your ATV for maximum performance(and fun!).
 Note: compressed air is extremely helpful in clearing obstructions.
Carburetor jets become clogged naturally over time and a periodic carburetor cleaning is required. Always consult with your ATV owner’s manual for specific maintenance instructions. Always check the fuel lines, filter and gas tank for contaminants and clean as required at the same time to avoid further clogging.
The majority of carburetor problems are a result of blockage and worn out parts. Troubleshooting a clean ATV carburetor is also much easier than troubleshooting a dirty carb. Typical tools required include a flat head screw-driver, compressed air, an 8mm wrench and carburetor cleaner. Note: Some gaskets and plastic components will swell if exposed to carb cleaner so remove these prior to use.
Jetting is critical in carbureted dirt bikes and ATVs and it's important to understand how carburetor tuning works to make sure your machine is running optimally. Check out our guide to carburetor jetting adjustments here.
Over the years, two and four-stroke carburetors designed for powersports machines have evolved into technological marvels with numerous features that allow engines to deliver state of the art performance. However, most carburetor designs still require proper tuning to deliver that performance. The difference between a properly jetted carburetor and one that is out of tune can result in consistent race wins or consistently bad performance, or worse yet, engine failures. So, we wanted to cover the basics of jetting, including an overview of why jetting is important, where to find the necessary info to make good jetting decisions, tools required to re-jet, where to buy jets, and tips and tricks to make carburetor adjustments easy.
To understand the criticality of jetting, we only have to go so far as to understand the function of the carburetor. The carburetor’s job is to precisely and repeatedly deliver the appropriate amount of fuel to the engine throughout its entire speed and load range. To do this, carburetors utilize several different circuits that control different parts of the speed/load range of the engine. These circuits are metered by small brass inserts called jets and by a needle situated in the slide of the carburetor. Jets come in different orifice sizes so that the amount of fuel being delivered to each circuit can either be increased or decreased. Needles are offered with various profiles but are predominately adjusted by altering their height within the carburetor. This is done by changing the needle’s clip position.
The amount of fuel that must be delivered to the engine is dependent on the atmospheric conditions in which it operates. Specifically, engine performance is dependent on ensuring the air to fuel ratio is optimal. While carburetors are very good at metering precise amounts of fuel, most of them cannot account for changes in air conditions. There are two variables that affect the ambient air conditions: temperature and pressure. Temperature and pressure ultimately affect the density of the incoming air, which has a significant effect on the engine’s air to fuel ratio.
A couple of practical examples that highlight how air density changes include when temperatures or elevation changes from the baseline conditions the carburetor and engine were tuned for. As temperatures increase, air density decreases and when temperatures decrease, air density increases. Similarly, as the operating altitude of the engine increases, air density decreases due to decreasing air pressure. The opposite is true when altitude decreases.
Since the world is a diverse landscape and atmospheric conditions are always changing, it is not possible to set up a carburetor correctly for all conditions. Instead, manufacturers utilize jetting charts which provide the operator guidance on how to configure the carburetor for specific temperatures and elevations. Jetting charts can be found in the operator’s manual that comes with the machine or in the service manual which is usually sold separately. A standard jetting chart for two and four-stroke carburetors provides guidance on the attributes of the pilot screw, slow jet, needle clip position, needle type, and main jet.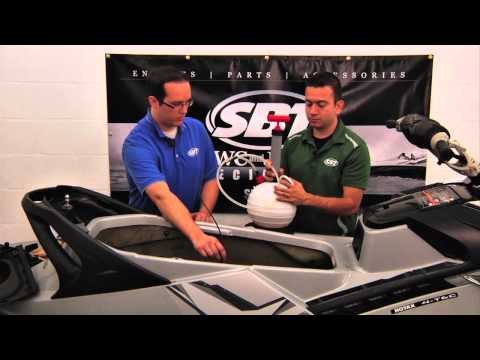
Jetting requirements can also change when engine modifications are carried out. When engine modifications, such as the addition of a performance exhaust system, are incorporated the air flow through the engine changes necessitating carburetor adjustments. Depending on the modifications being made to the engine, fueling adjustments may need to be richened in certain throttle ranges and/or leaned out in others. When adjusting carburetor settings to account for engine modifications, it is always best to start with the setting recommended by the supplier of the aftermarket components, and then test to confirm optimal performance.
Technically, none of the metering circuits found within a carburetor are completely independent of one another, which means that any changes made to one circuit will have a small impact on another circuit. However, from an adjustment standpoint, the circuits and what parts of the speed/load range they primarily effect are shown below:
The tools required to re-jet a carburetor are basic in nature and predominantly consist of the usual tools needed to service your machine such as sockets, wrenches, allen wrenches, and screwdrivers. A set of small medium-length flat head screwdrivers is necessary to remove the small jets found within the carburetor. On machines with limited space between the carburetor and engine cases, a low-profile float bowl wrench may be necessary to remove the float bowl plug.
Whether you're working on the carburetor on the bench or on the bike, be sure you have the proper tools. There are many fasteners that can easily be stripped out or rounded without the correct tools.
ProX offers jets for Keihin and Mikuni carburetors in a wide range of sizes so that no matter where you ride or what modifications you make you can precisely adjust your carburetor to ensure your engine runs optimally. ProX provides jets for all types of two and four-stroke carburetors which include FCR, PWM, CR roundslide, PJ, PWK, and PWM to name but a few. ProX jets are manufactured in Japan to exact OEM specifications and are available at cost effective prices.
Click here to find available jets and jet kits for your machine.
ProX has OEM replacement jets available in individual sizes as well as in size assortment kits. These are available for most popular dirt bike and ATV carburetors.Before making jetting changes, it is best to ride and warm up the machine. Whether you’re putting in laps or tearing up trail, be overly cognizant of how the engine is running at various throttle positions. Take note of idle quality, transitions, mid-range, and wide-open throttle. Note any areas of concern then compare your notes to the conditions for the day and determine how they compare.
The layout of your machine will greatly influence how much work is required to make jetting changes, however, most machines are designed so that the carburetor jets can be changed without completely removing the carburetor. For specific information on how to service your carburetor to make jetting adjustments, refer to your machine’s factory service manual. The following information is provided as an overview. To gain access to the slow and main jets, the intake clamps are loosened and the carburetor can be rotated to expose the bottom of the float bowl.
To gain access to the the jets, the carburetor can usually be rotated with the float bowl out toward you to after loosening the intake clamps.To service the needle, the carburetor may be able to be rotated so the slide cover is oriented outside of the frame, otherwise, the seat and fuel tank can be removed to gain access from above. When adjusting the position of the carburetor on models equipped with a throttle position sensor, make certain that the wires are not pinched or strained in any way. Prior to making any adjustments, ensure the fuel supply is turned off. If the carburetor is equipped with a float bowl, it should also be drained.
 This should be able to be adjusted without removing any components and the setting is defined by how many turns out. Don't confuse this with the pilot (slow) jet, they are two different things!
Slow (Pilot) Jet
Needle

Main Jet
 Typical tightening torque is 1.1 ft.lbs (1.5Nm).
Once jetting changes have been completed, carefully reinstall all components and hardware. Repeat the warm-up and test riding process, then carefully note differences in engine performance from the previous session. If the jetting charts or instructions provided were adhered to, engine performance should notably improve.
After the next refueling, you may encounter a problem: the engine began to “pull” worse. This means that the engine "sipped" fuel with a high content of tar and other heavy fractions, low-quality additives, or a low octane or cetane number. It contributes to the formation of soot and other deposits on the elements of the fuel system. Injectors suffer the fastest from substandard fuel.
Nozzle (or injector) - a device that sprays fuel into the combustion chamber. The amount of fuel supplied to the engine and the efficiency of combustion depend on its purity. If the injector is dirty, the machine loses power, and consumption, on the contrary, increases.
Injectors are a particular headache for owners of vehicles with engines equipped with a direct injection system. And they are now used on almost all gasoline turbo engines. Cleaning sprayers on them is a jeweler's work that requires special equipment and the skill of a craftsman. Moreover, it is not always possible to repair nozzles in principle - some of them are not repairable.
Buying new injectors will cost even more. If you have relatively simple electromagnetic nozzles, you can be considered lucky - replacing 4 pieces will cost 50-70 thousand. More complex piezoelectric injectors, which are also structurally integrated with individual high pressure pumps, can increase costs by several times. Such nozzles are used on many modern turbodiesel engines.
It is impossible to completely eliminate the factor of natural wear of injectors. Sooner or later they will have to be repaired or replaced. But at what mileage: at 100 thousand or at 250? To delay costly repairs as much as possible, nozzles should be cleaned periodically. In addition to seriously delaying the repair or replacement of these parts, properly functioning clean injectors contribute to fuel economy.
Fast Injector Cleaner is capable of removing carbon and other contaminants from injector nozzles and restoring their performance in one application. In addition, the drug has a beneficial effect on the work of other nodes. It also removes spongy deposits from valves and cleans the combustion chamber.
Hi-Gear Injector and Fuel System Cleaner is recommended for direct injection vehicles. Thanks to him, fuel consumption is normalized and the smooth operation of the power unit is restored. This unique formulation is versatile and effective for both diesel and direct injection gasoline engines.
Hi-Gear Injector Cleaner has been developed especially for diesel engines. The composition not only cleans the nozzles, but also prevents breakdowns of the injection pump. It can also be used for common rail diesel engines with piezoelectric pump injectors.
For diesel engines with mileage over 150,000 kilometers, use "SMT 2 Injector Cleaner with Metal Conditioner" Hi-Gear. It slows down the wear of the parts of the cylinder-piston group and extends its service life. And a special converter in the composition reduces the emission of harmful substances into the atmosphere and reduces the load on the catalyst and particulate filter.
Photos from open sources
Usually, drivers do not attach importance to the cleanliness of injectors and valves, remembering them when the car has already begun to twitch during acceleration and it became obvious that there were clearly problems with the engine. The AvtoVzglyad portal tells what driver carelessness leads to and how to prevent a serious breakdown.
Viktor Vasiliev
Any, even the best motor, eventually becomes clogged with dirt and deposits. This dirt can cause serious trouble. Even after a short downtime, it prevents the valves from working normally. There is a so-called sticking, and from this there are interruptions in the ignition. After a couple of minutes, the valve naturally releases and continues to work. But the dirt does not go anywhere, so the problem does not disappear, and when restarting, the symptoms repeat.
In addition, dirt accumulates inside the nozzles, and then uneven operation of the motor cannot be avoided. If the injectors are very clogged, they do not begin to spray fuel into the cylinders, but literally pour. From this, detonation begins, which can lead to burnout of the pistons and a major overhaul of the unit.
And if you do not drive a car for a long time, say, three months, oxidation processes can begin in the engine, and dirt will literally “weld” the valves to the seats. Then, at the first start, the starter may simply not turn the crankshaft. You will have to disassemble the motor and clean the accumulated deposits.
Public photo
Fuel economy is often the main cause of deposit formation. The fact is that low-quality or diluted gasoline at high temperatures releases additives that settle in the form of dirt and clog valves and injector nozzles. To reduce pollution, you need to flush the engine from time to time. Servicemen recommend doing this every 60,000 km using an ultrasonic cleaning stand.
Therefore, if you drive often and in large quantities, regularly clean the nozzles in the service or fill the tank with special additives. If you plan to park the car for a long time, then before that, fill the tank with the right auto chemicals and go on a long run. So you will definitely clean the engine of dirt and the valves will not turn sour after a long stop. True, not every additive can be used, because many of them develop dependence on the motor.
Manufacturer's photo.
119276
To avoid such a dependence, it is necessary to select preparations of directed action for cleaning the motor. For example, the composition of Ventil Sauber, developed by the German company Liqui Moly. This high performance fuel additive is specially formulated for valve cleaning. It includes washing, anticorrosive and other high penetrating components.
The tool is universal in its application, as it performs several other important functions. For example, it cleans deposits from not only the working surfaces of the intake valves, but also the combustion chamber, nozzles, fuel jets (in carburetor engines), and the walls of the intake tract. All this in combination contributes to the normalization of the engine operation, which is manifested in the confident start-up of a cold unit, economical fuel consumption, stable idling of the engine, and also the achievement of its standard power.
Ventil Sauber's principle of operation is based on the use of special solvents that neutralize resins that bind carbon deposits into a dense mass.