I’ve recently been getting back into driving a four wheeler but I forgot how to put it in reverse. So, I did some research about how to do it, and here’s what I found.
As a general rule, start in neutral, then squeeze the clutch, press the reverse button, and press the gear lever down. To get it out of reverse squeeze the clutch in and pull up with your foot to put it in neutral. In some 4 wheelers and ATVs, you put it in 1st gear first before you press down again with the reverse button pressed in.
The tricky part is that on virtually all 4 wheelers reverse is the exact same gear as the first gear. The major difference is that before putting it into first gear, you first hold down the reverse button. The reverse button is almost always located on the left handlebar, close to where your thumb would rest when you’re holding the handlebar normally.
If you already know how to put in first gear, it is exactly the same as putting it in first gear, however, you just hold the reverse button at the same time.
In this article, I will explain everything there is to know about changing gears on a four wheeler or ATV.
So you have a good idea about how to put a four wheeler in reverse. However, you may be wondering how all the gears work in general. So, here’s how to change the gears on a four wheeler:
To change gears you squeeze the lever on your left handlebar to engage the clutch. From neutral – you should always start your four wheeler in neutral – you press the foot lever on your left to put it in first gear. To go into second gear, and each gear after that you pull up with your foot rather than pressing down like you did to go into first.
To change down gears, you hold in the clutch and press down on the foot lever. The one tricky thing about going from first gear to second is that as you go up to second gear you go through neutral. So you need to give it a bit of pressure to go up through neutral and click into second gear. Here’s a diagram to show how it works:
3rd and higher gears
↑ – pull up with your foot
2nd gear
↑ – pull up with your foot
Neutral
↓ – press down with your foot
1st gear – but also Reverse if you press in the reverse button at the same time
↓ – press down with your foot
No other gears, nothing happens
But, reverse is a bit different. From neutral, you hold the special reverse button that is located on the left handlebar while squeezing the clutch. And press down with your foot on the gear lever.
Just remember when you get to 2nd if you press down softly it will click into neutral. To go from 2nd to 1st you need to push down through neutral into 1st gear.
The most important thing to remember is to always hold the clutch in when you want to change gears. The clutch is virtually always the left squeeze lever on the left handlebar. It looks the same as the front and rear brakes on a bicycle.
The same squeeze lever on your right handle is the handbrake. Interestingly, you hardly ever use the handbrake when riding and only typically only when you’re parking your 4 wheeler. The normal brake that you’ll use consistently is the right foot lever that you press down.
It’s a bit tricky to get used to changing gears on a 4 wheeler in the beginning. When I was first learning I would get it wrong a lot, and it’s fine to stall the engine while you’re learning.
The most common thing that would happen is that I’d forget to go down two clicks when going from 2nd to 1st, and end up in neutral. Then I’d rev the engine but because it wasn’t in gear I would just rev the engine.
If you do this yourself, it actually ends up being quite funny especially if you’re riding with others or when others are watching because they’ll think you’re trying to show off by revving the engine.
The other thing that takes a bit of getting used to is the right speed for each gear. For example, you might change it into 2nd gear but you’re going too fast for 2nd gear and you need to almost instantly change it up to 3rd gear.
It takes a bit of getting used to because a motorbike is much quicker off the mark than a car. You might have noticed this if you’ve been at the traffic lights and there has been a motorbike in the front of your lane. When the light goes green they take off WAY faster than a car. And are miles away before the cars have barely gotten rolling.
A major difference between the clutch on a 4 wheeler/ATV and a car is that you can’t skip a gear. For example, you can’t go from 1st gear to 3rd gear in one go. You have to first click it into 2nd gear, and then pull up again with your foot to switch it into 3rd gear.
The other major difference is the positioning of the gears. But, other than that it works virtually the same as a car. You release the clutch slowly and make sure you’re giving it some gas. And try to get a good balance between giving enough gas, and release the clutch at the same time.
If you’re giving it too much gas it will jerk forward, but if you’re not giving it enough the engine will struggle to stay going and can stall out. When that happens just brake or roll to a stop and start the engine again.
One of the first things you’ll need to know to drive a four wheeler is how to put it in neutral. Here’s how to do that on virtually all four wheelers.
Either go down one gear from second gear or go up one gear from 1st gear to neutral. Neutral is located between 1st gear and 2nd gear. Always remember to squeeze the clutch as you’re changing gears. The clutch is a squeeze lever on the left handlebar. When a four wheeler is in neutral, the neutral light on the dashboard will stay on.
It’s always best to put your four wheeler in neutral before turning it on, and when you turn it off. Like a car, if you attempt to start the engine in a gear, the four wheeler will lurch forward which can be a bit dangerous.
There are a few exceptions for example if you’re trying to start a 4 wheeler that has a flat battery. In that case, you will have a friend push the 4 wheeler with you on it and you’ll try to start the engine while in first gear.
Well, that about covers everything you need to know about how to put a four wheeler in reverse, and how to change gears on a four wheeler or ATV.
by Lee
Putting an ATV in reverse can be tricky, especially if it’s a manual transmission.
Shoot, I’ve even had people have a hard time getting an automatic ATV to go into reverse because they didn’t know the trick.
Let me show you how to put your ATV into reverse.
Before I show you how to put your ATV in reverse, you need to know if it’s automatic, manual, or even semi-automatic. Learn more about ATV transmissions here.
An automatic ATV will have a gear selector on the side of the ATV that you move with your hand. It will be labeled P, R, N, H, L, as shown in the picture below.
A manual transmission ATV will have a gear selector that you move up and down with your left foot. You will also have a clutch on the left side of the handlebars.
A semi-automatic transmission is a combination of automatic and manual. You may have a gear selector at your left foot but won’t have a clutch on the left side of the handlebars. Another option may be a push-button for selecting gears, often located with an up and down button on the left side of the handlebars.
To put a manual transmission ATV into reverse is simple once you know the trick.
The reverse gear is below the 1st gear, but you get into that gear by pressing a button or moving a lever/switch. You will need to make sure you have your foot on the foot brake.
To explain this here is a great video showing you how to put a manual ATV into reverse.
Some manufacturers have the reverse release near the clutch, and others have it off to the side. You may need to refer to your owner’s manual for the exact location if you can’t find it.
To put an automatic ATV into reverse is very much the same as a car.
Put your foot on the brake and then move the gear selector by hand into the reverse gear.
Note: Most ATVs won’t start unless you’re in park, neutral, or on the brake. Also, make sure the kill switch is turned to run; this one gets many people.
If the gear selector is giving you trouble or feels like it won’t move into reverse, then you need to give the ATV a little shake back and forth. Sometimes a little wiggle is required to get the ATV to move into the correct gear.
If a little shake doesn’t work, sometimes the gear selector is off and needs to be corrected. Another possibility is that the gear selector or transmission is broken.
Semi-automatic ATVs are common on Honda ATVs, Yamaha, Suzuki, and older ATVs.
Models like the Honda use a footgear selector at your left side, and the handlebar has a reverse button, often on the brake lever; It’s a brake lever and not a clutch. This video below will show you how to shift into reverse on Honda’s like the Fourtrax models.
The other kind of semi-automatic ATV uses push-button shifters. It’s the same thing on the manual where you hold in the reverse button near the left side of the handlebars but you instead push the downshifter button to go into reverse.
One more type of semi-automatic ATV uses foot gear selectors but has another lever you pull to put it in reverse, but you instead put it in 1st gear, as this video shows.
2. Do not park in reverse or forward gear, always put the ATV's shift lever in P.
3. Avoid using the ATV's emergency brakes while standing, you may put your body on the throttle and make things worse.
4. When unwinding the winch cable, use the electric drive, not the drum lock. Do not unwind the winch by hand and it will last a long time, especially the WARN winch.
5. When packing things in the trunk, especially a thermos or food, fill any remaining empty space with rags or something useful. Take extra clothes, shoes, gloves, rope, etc.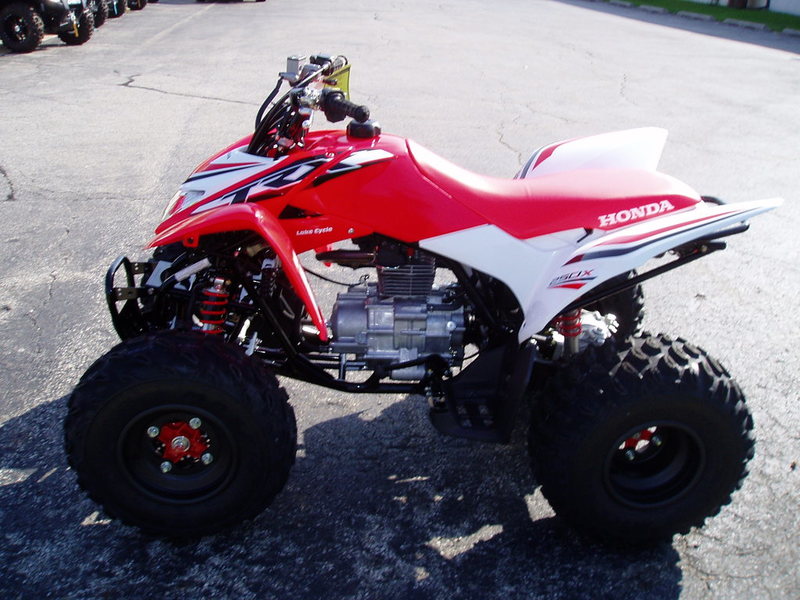 There should be no free space in the case. Otherwise, everything will be broken, scattered and damaged.
6. Drive on asphalt with rear wheel drive only. Drive on the ground only in full drive. Be sure to downshift L before mud, large puddle, swamp, etc.
7. BRP Can-Am owners, do not get carried away with slipping, try to move in tightness or propulsion. Skidding - back up or use a winch. The variator belt will "say" you thank you.
8. Do not ride the Yamaha Grizzly together with a loaded case. The grizzly becomes very unstable and easily flips back. Over time, the frame bursts. Grizlik is a single-seat ATV!
9. Do not ride the ATV alone, especially in the woods and off-road. The ATV rolls over easily and can crush the rider with its weight. The weight of the ATV is from 350 to 500 kg, it is difficult to get out from under it without help.
10. Always wear a helmet. It's not even a matter of falling, in the forest you can be hit on the head by a branch or a stone that has flown out from under the wheels of the ATV in front.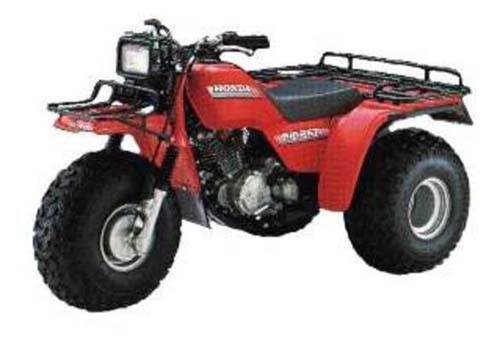
11. Do not fly at speed into an unfamiliar puddle, there may be a step, a pit, a stone, a log.
12. Do not force an unfamiliar ford without checking. Walk it on foot first and check the depth.
13. When driving out of a puddle, ditch, pit, or just driving over a hill, do not step on the gas abruptly, especially if the ATV is on rear wheel drive. The ATV may roll over backwards and crush you.
14. Always clean the muffler and drive boots from peat and dirt, especially before leaving the road after the swamp and mud. When the muffler is heated at high speeds, peat particles can ignite and cause a fire.
15. If the ATV sinks in the water, and there is no chance to leave, you need to have time to turn off the engine. Repairing a disabled engine will cost less.
16. Use beadlock discs if you're riding in the mud. With beadlocks, the risk of “taking off your shoes” is minimal, in addition, on some tires, such as Assassinator or Cryptid, punctures are not terrible and you can drive with zero pressure to a garage or tire fitting even on asphalt, no consequences for the tires will come.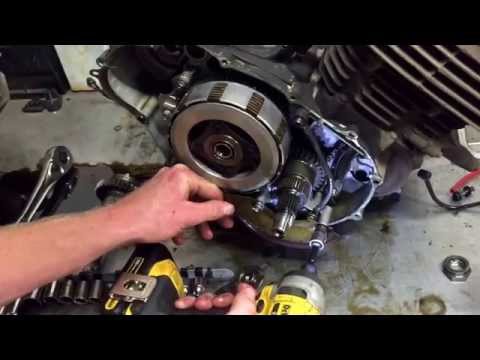
17. Do not trust homemade snorkels from the plumbing range, such plastic is not designed for vibration and heat.
18. Never stop the ATV in water or mud unless it sinks. After driving out of the mud or water, blow the muffler mesh, put the gearbox in neutral and turn on the gas.
19. Be sure to wear goggles in the woods with a cross helmet. The branch can get under the visor and further into the face and eyes.
20. Always carry a first aid kit, clamps, adhesive tape, drinking water, etc. with you. Detailed list of required items.
21. Be sure to unwind and dry the winch cable after use, in the garage or in the parking lot.
22. Do not use a straight-through muffler without a controller, it is not good for the engine, and the temperature of an unadjusted muffler and exhaust will usually exceed all acceptable limits, which will lead to plastic melting and other damage.
23. When arranging a barbecue with friends at the dacha or at home, do not let them ride a quad bike.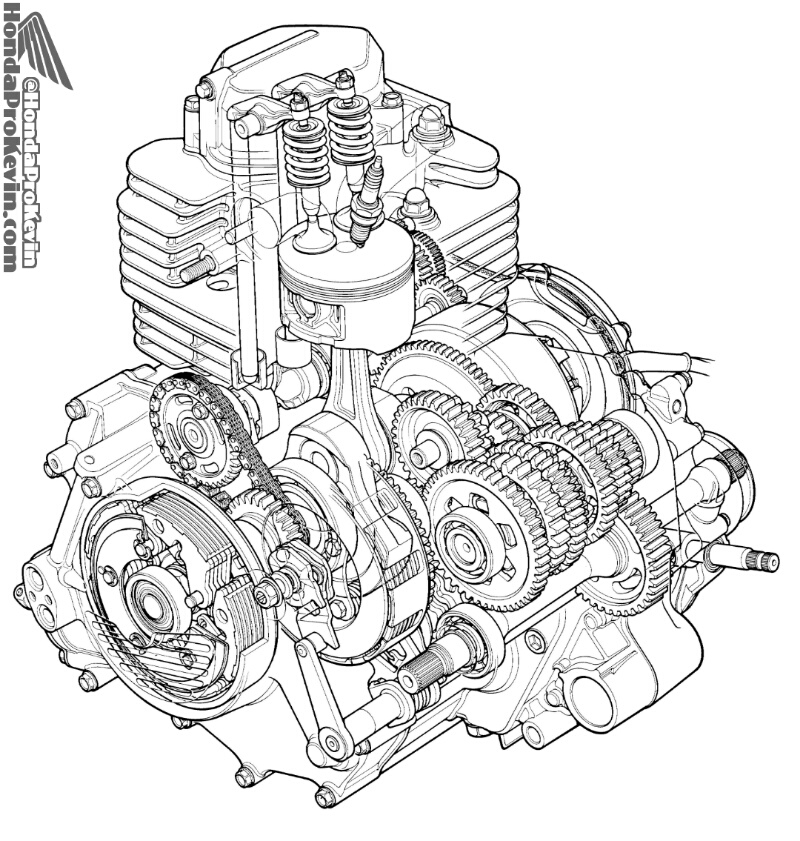 Something will definitely be broken and perhaps relationships with friends will be ruined. With rare exceptions, this is exactly what happens.
24. When transporting the ATV on a trailer, do not secure it with a winch cable, as this will damage the winch over time. Use special cables, rope, tie-down straps, etc., but not a winch.
25. Be careful in the forest in spring, after winter there are various traps, spikes, nails, stretched wire, etc. in the forest. The reasons for the appearance of these items are different, now we will not talk about it. Be attentive and careful!
Together with ATV club NorthWay
Creative video about INTERPARTS actuators
Watch with sound, cover your children's ears, buy actuators here after watching
03/16/2015
BRP Can-Am Maverick Interparts Drive Installation Instructions
Step-by-step instructions for installing or replacing an Interparts drive, with commentary. Recommended for viewing on your own. ..
..
02/26/2015
You can save a person!
01/22/2020
Yamaha 2019 - the latest news
For Yamaha, 2019 turned out to be a fruitful year: several new products for lovers of two appeared on the Russian market at once...
Is everything all right here? Why are snowmobiles in the water?
08/21/2019
Taiga Motors - new electric snowmobile
Taiga Motors, the developer of electric snowmobiles, has announced a third generation electric snowmobile line called...
06/13/2019
Introducing the new SHERP
SHERP MAX all-terrain vehicle - the new model has grown in size and has become more comfortable.
05/26/2019
Nikola NZT electric buggy
Nikola Motors introduced the NZT off-road buggy. The novelty is equipped with four electric motors, capable of accelerating ...
04/18/2019
2020 Yamaha snowmobiles
After the release of the 2019 line, many people wondered what Yamaha had in store for the future. Last year's adjustment looks like... 9Sergey Kubanov What malfunctions can provoke such behavior of the ATV and how to fix them.
From time to time, the ATV will be naughty and behave differently than you would like. Nothing beautiful lasts forever, right?
One of the most common faults you may encounter is the ATV suddenly pulling to the left or right.
If you're lucky, your problem may have a simple solution)
Let's take a look at some of the most common causes of ATV pulling to the side, and of course, here's how to get rid of these problems.
The most common problem that causes the ATV to pull to one side is the difference in rolling resistance due to different tire pressures. Also, the problem may be associated with natural wear or damage to various components of the chassis of the ATV and, as a result, a violation of the angle of the wheels.
So how do you determine what is causing problems when riding an ATV?
As you probably already understood, there can be several reasons.
To understand why an ATV wants to pull off the road and dive into a ditch when you really don't want to, you need to do a number of checks.
Although I don't have exact statistics to tell you which malfunction occurs most often, I still recommend that you start with what is easiest to check and fix before spending time and money on more unusual and potentially more complex searches.
In my experience, the most common cause, and by far the easiest problem to check and fix, is uneven ATV tire pressures.
Let's look at what happens when ATV tires have different pressures.
A flat tire has a larger area of contact with the road surface than a normally inflated wheel, as a result of which the friction force, and hence the rolling resistance force, applied to such a wheel will be higher. The wheel will roll more slowly. The opposite wheel will run ahead and try to turn the ATV around the slow wheel. That is, if the ATV pulls, for example, to the left side, most likely, the fact is that the left wheel is lowered.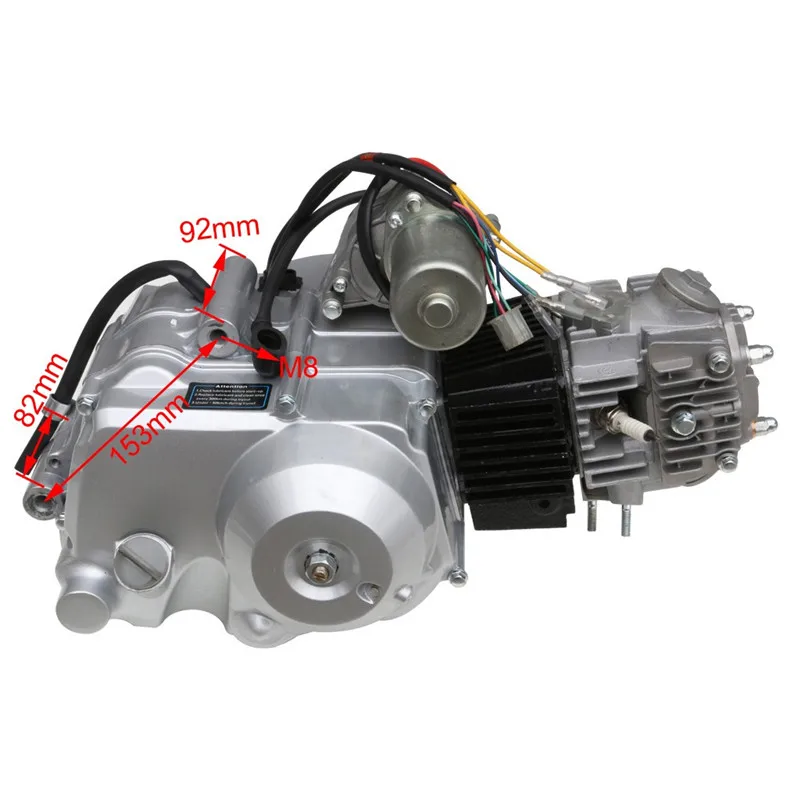
To solve this problem, you need to equalize the air pressure in the ATV tires. It is best to refer to the operating instructions, which must indicate the required air pressure in the wheels recommended by the manufacturer. The pressure in the wheels installed on the same axle of the ATV must be the same.
At the same time, you should be aware that due to the design features and weight distribution of the ATV, the tire pressure on the front and rear axles may differ. MOTAX and YACOTA have these sensors in the standard tool kit. If there is no such device in your kit, I recommend that you definitely purchase it. A very slight difference in air pressure in the tires may well be the reason that the ATV pulls to the side when driving in a straight line.
The air pressure should be checked in both the front and rear tires. True, uneven pressure in the rear tires, most likely, will not be the reason for the withdrawal of the ATV from a straight path. Different pressure in the rear tires can provoke another malfunction - premature wear of the rear differential, due to the increased load on it. But this is a story for a separate review.
I always keep this inexpensive instrument in my tool kit, its accuracy is good enough to use.
Also make sure that the maximum tire pressure is not exceeded.
Over time, ATV wheels can wear differently, resulting in the diameter of one wheel being different from the diameter of another wheel. This can also cause the ATV to pull to the side.
To check if the front wheel diameters are the same, you can do a simple check: place the ATV on a level surface and use chalk to make a mark on the sidewall of each front tire at the lowest point.
Wheels must be pointing straight ahead, gear lever in neutral position. Roll the ATV forward until one of the wheels has made two or three revolutions and the mark you just made is back to the very bottom, to its original position. Look at the mark on the opposite tire. Ideally, it should also be at the very bottom. If this is not the case, the wheel circumferences do not match.
If the reason for the ATV pulling to the side lies in the difference in wheel circumference, then when driving to the right, the right tire should have a smaller circumference, and when driving to the left, the left one.
The circumference of the wheels can differ not only due to uneven wear, but also due to the difference in air pressure in the tires.
The wheel is like a balloon, the higher the pressure, the larger its diameter and vice versa.
For this operation, you need to lift the ATV, put it steadily on the supports so that all the wheels are in a suspended state.
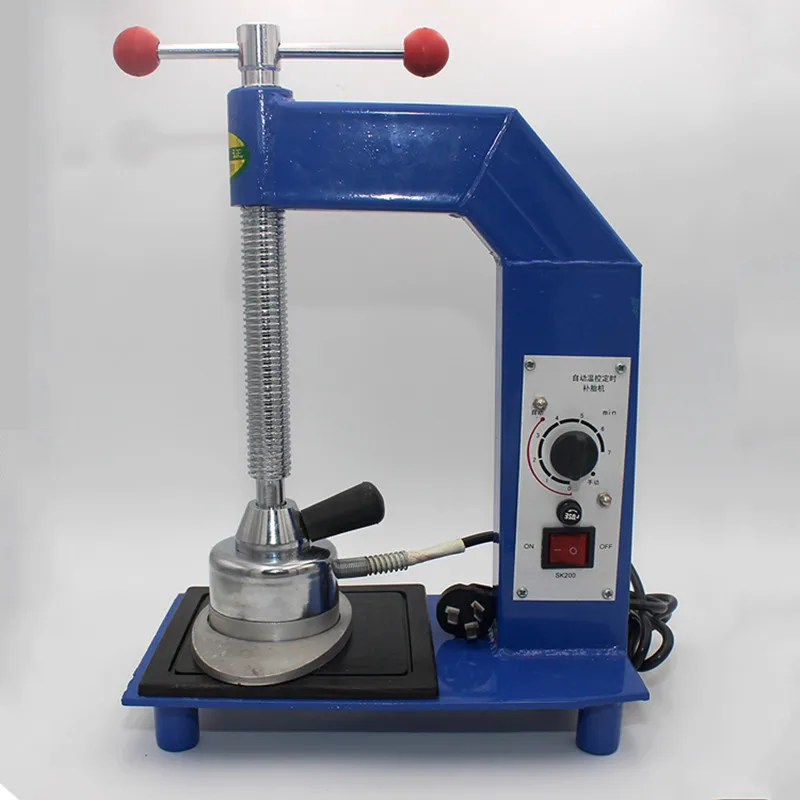
It is very convenient to use a motorcycle stand to lift the ATV. If you do not have them yet, and you plan to service the ATV yourself, I recommend purchasing them.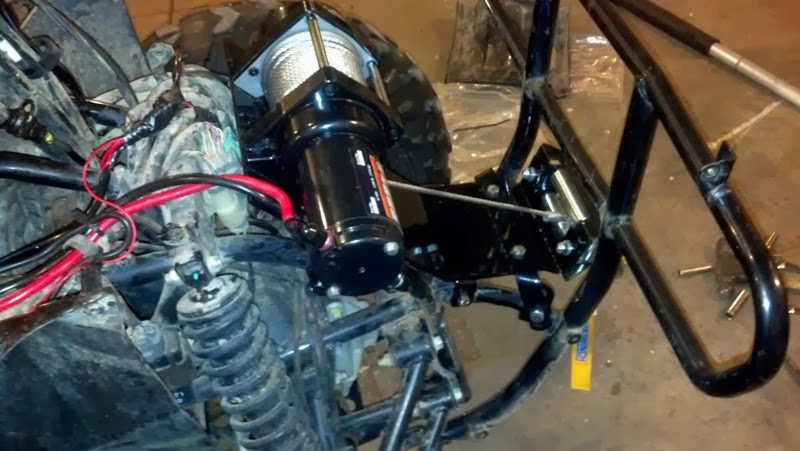 They are relatively inexpensive. Tackles will greatly simplify the ATV maintenance process.
Check that there is no excessive play in the ATV suspension and steering joints. Start with the tie rods and steering rack. This operation is more convenient to carry out with an assistant. Have an assistant move the ATV handlebars to the right and left, often and with a small range of motion. And you, in turn, keep your hand on the swivel, which are subject to verification. Check the steering tips and tie rods one by one. You will feel the excess play in the hinge with your hand. If the ATV steering wheel has excessive play, but the tie rod and steering tip are in order, then the steering rack itself or the steering shaft bushing may have play, which can also be checked by hand. The steering column bushing usually wears out over time. The same goes for the ball joints on the tie rods.
Tighten any loose bolts and replace worn parts. Worn parts can break soon, so replacing them won't be a waste of money, even if their wear isn't the reason your ATV pulls to one side.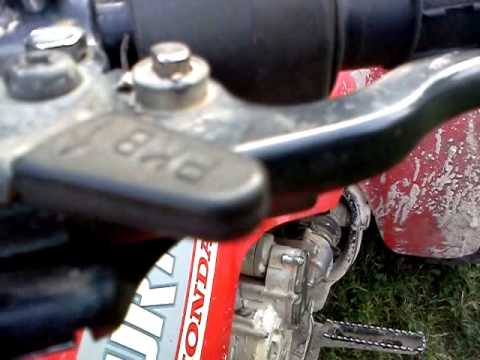
In addition, the wheel bearings must be checked for excessive play.
To do this, have a helper grab the top and bottom of the wheel and shake it while you check for play in the ball joints and wheel bearings.
Check how easy the wheels turn. The wheels should rotate freely, without noise and crackling. The presence of noise indicates wear on the hub bearing. And the tight running of the wheel is about bearing wear or souring of the brake pads. As we said, if one of the ATV's wheels is spinning at a slower speed than the other wheel, the ATV will pull towards the slow wheel.
If necessary, replace the bearings and service the front brake calipers. Sometimes the caliper is easy enough to clean, and sometimes you can’t do without replacing the brake cylinders or the caliper bracket itself.
Finish with suspension lubrication. The running gear of ATV brands YACOTA , MOTAX , AVANTIS is equipped with special grease fittings through which you can easily lubricate the desired suspension unit. We have already told, in one of the reviews, using the example of a gasoline 125 cc ATV MOTAX T-REX , about the features of maintenance of the ATV suspension. Regular maintenance of your ATV will definitely prolong its life.
Control check three: checking the running gear for geometry violations.
If you use the ATV for active riding or sports, then it is possible that you have bent some part of the suspension on the next jump. ATV front suspension A-arms are especially prone to damage if you hit a stump or rock while riding. "Fast-growing" trees suddenly appearing in front of the ATV as you drive, a common story!)
A-arms are designed to absorb heavy suspension shocks and, through their integrity, retain more expensive and hard-to-find ATV parts that are more difficult, more expensive or even impossible to repair, for example, an ATV frame. It is not always easy to see if the suspension arm is bent or not. It happens that the levers do not have a symmetrical shape, because the ATV suspension was originally designed this way by the manufacturer.