| Solve Your Wheel Woes With This Important Skill |
Bicycle wheels have come a long way since the days of wooden spokes and metal tires in the early 1800s when two-wheelers first appeared. Today’s hoops, whether made for the rigors of trail riding or for the thrill of carving blacktop, are so light they’re nearly effortless to pedal and so strong, they hold up for years. What’s more, in the case of standard wire-spoke models, the type found on most modern bikes, today’s wheels are much easier to fix should something go wrong. That’s what this article is about.
Understanding basic wheel repair enables you to keep your rig riding smoothly, efficiently and stopping effectively.
Leave The Superwheels To Us
There are a wide variety of wheels available today and some are easier to true than others. Here, we offer basic wheel-truing instructions applicable to all wire-spoke wheels. If you have a high-tech racing wheelset, one with very few spokes and/or hidden nipples, we recommend bringing it into the shop for repairs, or at least calling for advice. These wheels are specially built by the manufacturer and usually require unique tools and techniques (for example, some have locked nipples). You can do more damage than good if you try working on these types of wheels.
Truing Tools
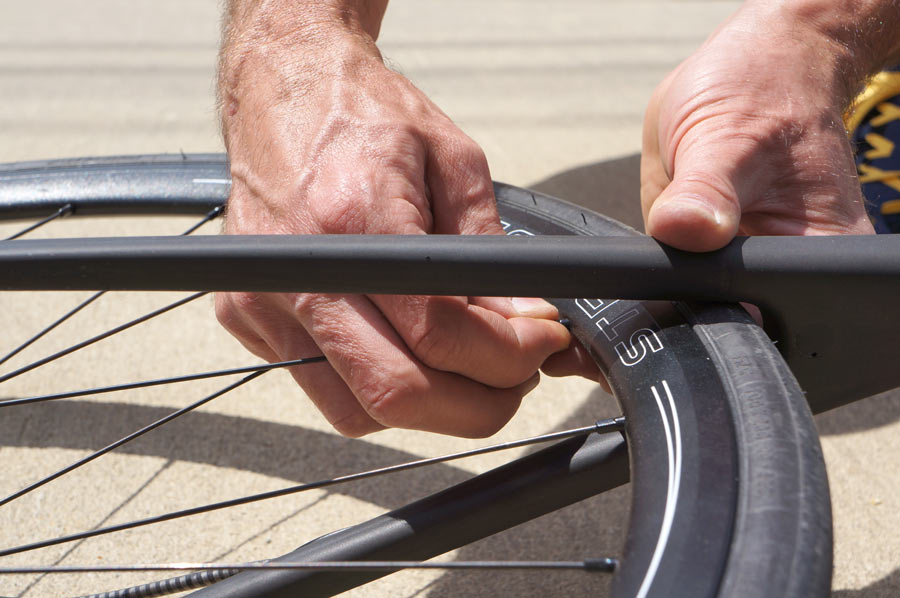
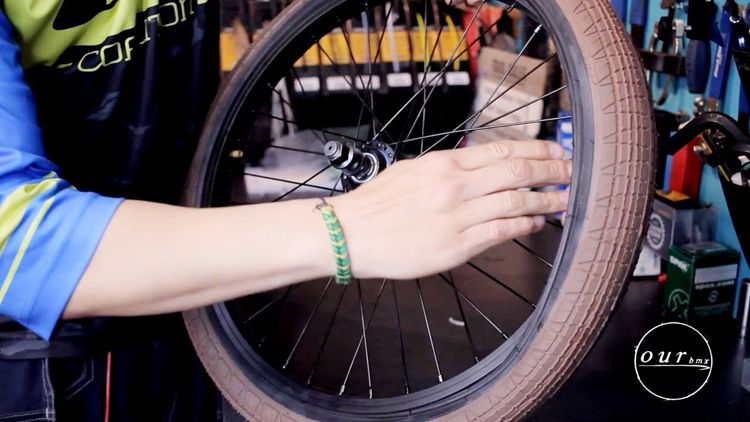
A spoke wrench is the only tool required for truing (the term for straightening a wheel). This is a small wrench that grips the spoke nipples and lets you tighten or loosen the spokes to align the wheel (photo). More about that in a minute. Nipples and wrenches come in different sizes so be sure to get a wrench that fits your wheels. Ride in or bring a wheel in and we can pick out the right tool for you.
To fix wheels, our professional mechanics use a device called a truing stand (see top photo) that supports the wheel and makes it easier to see imperfections.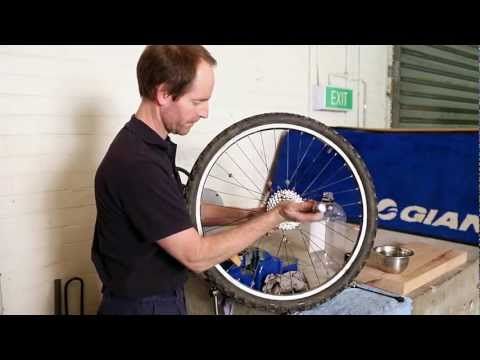 You can do the job just fine by leaving the wheel in place and using your bike as a stand. Just suspend the bike so that the wobbler is at about chest level. And be sure to move a good light next to the bike so you can see what you’re doing.
Typical Wheel Problems
Under normal use, wheels remain true because the spokes are evenly tensioned to keep the rim aligned. Subjected to rough roads/trails, bumps and jumps, however, spokes may loosen, and when this happens, wheels can develop side-to-side wobbles. This is called a “warp,” as in, “my wheel is warped,” and is something you’ll be able to repair following our instructions and with a little practice.
It’s important to understand that it’s also possible to bend wheels. This is usually the result of a serious impact from slamming into a hole or crashing. If you suffer this type of damage, truing the wheel probably won’t work because it’s become structurally unsound (the rim is crooked). You can recognize serious wheel damage by dents and/or bulges in the rim and significant defects in roundness and/or lateral alignment.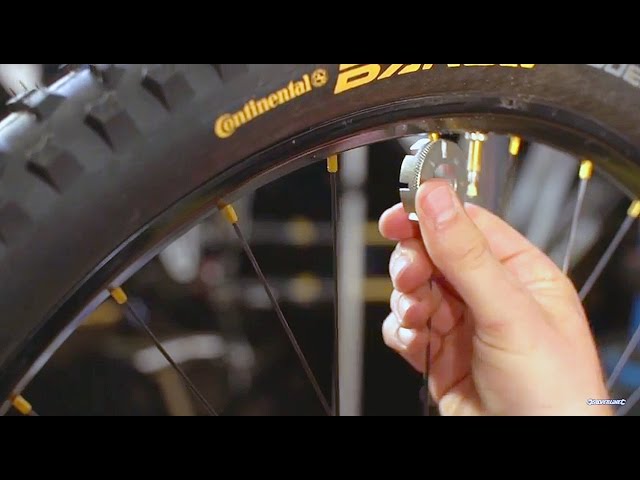 In most cases, this type of damage requires rim or wheel replacement. So you should bring your wheel in to us for an estimate.
Getting Oriented
With your bike suspended and the wheel needing help in easy view, look closely at how the spokes leave the hub. Notice that there are spokes on the right and left sides of the hub. You can usually notice that the spokes are offset to the left and right at the rim too (photo; rim only shown so you can see the offset). The key to truing is adjusting the spoke(s) on the correct side of the wheel.
Note that the spokes have nut-like devices at the rim called nipples. When viewed from above, nipples are turned clockwise with the spoke wrench to tighten spoke tension and counterclockwise to loosen it. To ensure that you turn the nipple the correct way, always rotate the wheel to bring the nipple to the top first.
Also, when truing, it’s best to turn nipples no more than ½ turn at a time, check your progress to see how you’re doing, and repeat as necessary.
Locating The Wobble
Usually, the easy way to find the problem area (the loose spoke) is to spin the wheel and watch for the wobble by watching the gap between the rim and one brake pad. When you see the wheel wobble to one side you’ve located the problem spot. (You can also rest a thumb against the brake pad as the wheel spins to feel for the wobble.)
When you find the bad spot, stop the wheel and wiggle the spokes in this area to feel for ones that are significantly looser than their neighbors. You’ll probably discover that if the wheel is warped to the right, a spoke or two on the left side will feel looser. The opposite will be true for wobbles to the left.
You can also find wobbles/problems by starting at the valve stem and going around the wheel wiggling each spoke in your fingers feeling for loose ones. On a good wheel the spokes will feel evenly tensioned (note that on rear wheels, by design, the left-side spokes are not as tight as the right ones; what’s important is that the spokes on each side are evenly tensioned compared to each other).
Truing
Truing the wheel is just a matter of turning the right nipples just the right amount to tighten the loose spokes until they’re as tight as the other spokes on that side of the wheel. A simple way to keep track of the spokes that you’re tensioning is putting a piece of tape on them. That way, you won’t lose track of them when you spin the wheel to check how the wheel is improving.
Remember to turn the spokes in small increments and spin the wheel to check your progress. After a few adjustments, you should find that the wheel is nice and true again. The most common mistakes are turning nipples the wrong direction or turning the wrong nipple. So, remember to double-check that the spoke you're adjusting is on the correct side of the wheel and that you always bring its nipple to the top of the wheel and turn clockwise.
Truing By Pitch
If you’re musically inclined, you might prefer another truing technique involving plucking the spokes with your finger and listening to the noise they make. You’ll find that the loose spokes sound “dead.” If you tighten them until they make the same sound as their neighbors, you’ll quickly straighten the wheel.
The wheel does not have to be perfectly round or true; slight runouts are acceptable (a few millimeters). As long as there are no loose spokes and the wheel is reasonably straight (the rim and tire mustn't rub on the brake pads), it will ride nicely and hold up fine.
Obviously, these instructions are for basic wheel repairs, however, it can be very satisfying to fix a wobbly wheel and it can make you a big hit with your friends if you can get their wheel round enough for them to keep riding when you’re out on the road or trail. If you have any questions, we’re happy to advise. And, if you have more serious wheel problems, our wheelsmiths can help.
The first two photos are courtesy of Park Tool.
If your wheel has a wobble, it’s either been hit by something which has dented it, or the spokes have loosened, causing the rim to lose its shape.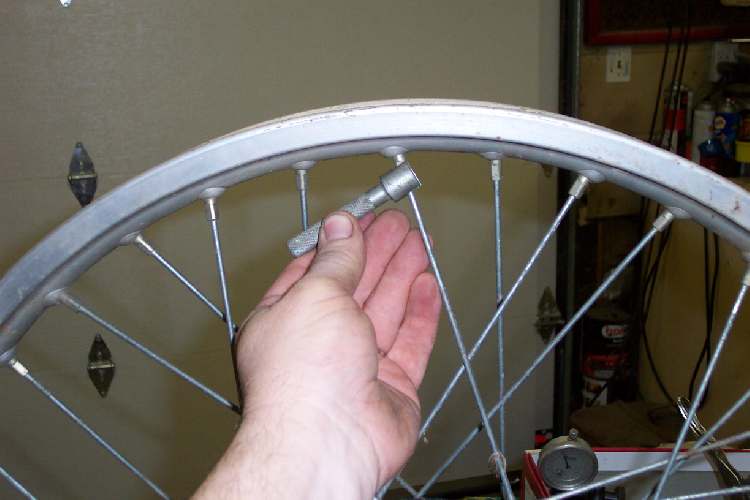 The procedure below won’t help fix a dented rim, but it can be used to get rid of a wobble or compensate for a broken spoke.
The spokes on a bicycle wheel run from the rim to alternate sides of the hub. In order to pull the rim back into true, you have to tighten the spokes that lead to the side of the rim opposite the bump.
To tighten spokes, you don’t actually turn the spoke. Instead, you turn the nipple that holds the spoke into the rim. Turning the nipple means you really have to concentrate on what you’re doing, because it’s easy to mix up “tight” and “loose.”
Nipples still turn clockwise on the spoke to tighten, but clockwise is referenced from the tire side of the rim, not the spoke side. Imagine using a screwdriver to tighten the nipple from the tire side of the rim, then turn the nipple the same way using a spoke wrench on the spoke side of the rim, and you’ll be fine.
Talking of spoke wrenches, make sure you have the correct sized wrench for your spoke nipples. Wrenches come in several different sizes, and using the wrong one (or a crescent wrench) will easily round off the soft metal of the nipples. The wrench should be a tight fit on the nipple.
Wheels can normally be trued while still in the frame. Support the bike off the ground and spin the wheel. Use the rim brake pads or a stick attached to the chain stay next to the rim as a reference point to find where the rim wobbles.
When you find the point where the wheel is closest to your reference point (brake pad or stick), you need to tighten the spoke that goes to the other side of the hub at that point, by about one half turn. Because the spoke will try to move with the nipple, it’s often best to turn the nipple three quarters of a turn tighter, and then back it off one quarter of a turn. Clamp bladed spokes with a crescent wrench
If there’s a big bump, or the wobble extends along the rim for several spokes’ distance, you may need to tighten more of the spokes that go to the other side of the rim. Always start with the most raised part of the bump, and adjust the spokes on either side less (one quarter turn, then one eighth turn) as you move away from the wobble area.
Really pronounced wobbles may also require you to loosen spokes close to the bump which lead to the same side of the rim. Try not to loosen spokes unless you really have to – it’s unlikely that the spoke worked itself tighter over time.
Now spin the wheel again, find the next highest bump, and do the same thing to it. Unless a spoke is noticeably looser than the ones either side of it, try not to turn any one spoke more than a whole turn because otherwise you may start to make the wheel egg shaped.
Continue with this process until there are no noticeable kinks in the wheel, or at least until it is good enough to ride home.
Tip: When you first get back on the bike after truing the wheel, you may notice some cracking noises coming from the wheel – this is the spokes relieving tension along their full lengths and rubbing against each other as they find their new positions.

Bicycles with alloy wheels have already appeared on sale, but collapsible modifications, which include spokes, are traditional. These are steel bars that connect the rim to the hub, forming a single piece - the wheel. To ensure a given strength, they are used in the device in a large number, which are evenly distributed over the entire circumference. The use of spokes allows you to significantly lighten the design of the wheel, thereby making it possible to lighten the bike itself as a whole. The spoke is the ideal solution for lightening the wheel and providing it with the necessary strength, but it is still a weak point, as the rim can move to the side in case of significant impacts. Solving this problem is quite realistic and on your own. By properly tightening the spokes, any defect is easily corrected, but this should be done correctly.
On sale there are several varieties of knitting needles, which differ among themselves not only in length, but also in thickness.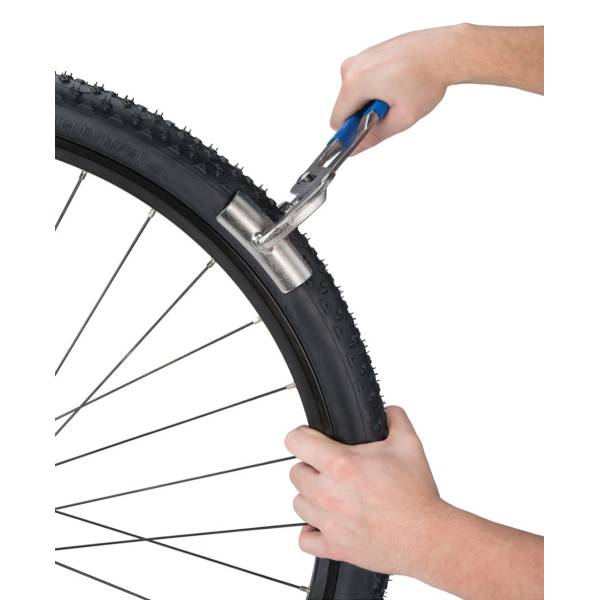 You can buy spokes for repairing bicycles with a thickness of 1.5 mm, 1.6 mm, 1.8 mm, 2 mm and 2.34 mm. The greater the thickness, the stronger the part, but its weight also increases.
The spokes are chosen for fastening the wheels in accordance with the category of the bike itself. For example, if it is used exclusively for extreme driving, then the wheel must be durable, so thicker ones are used.
The needles also differ in the type of head into two categories: curved and straight. The first type is more common and is used on most bicycle models. These models are also the cheapest.
Straight spokes are usually installed in branded bikes, but the so-called wheelsets. In addition, they also differ in the shape of the body into flat and cylindrical with butting.
It should be noted that butting refers to the narrowing of the spoke towards the middle. This technology allows to reduce the weight of the product, but at the same time retain all the practical qualities, such as strength, reliability and resistance to stress.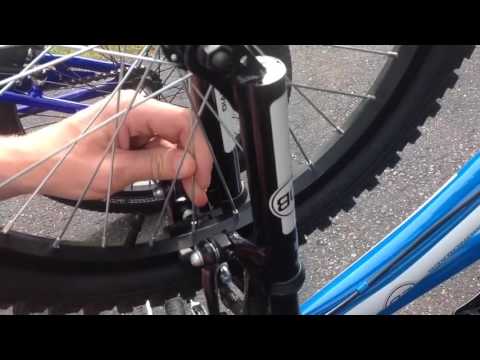
The knitting technology is quite complex because it involves knowledge in the design of this product. However, tightening is often easier than installing a new set of spokes and performing this procedure around the entire circumference. Therefore, usually everyone decides to turn to the services of specialists who produce such repairs for a long time.
As for experienced cyclists, they have probably already encountered a similar situation more than once, because in the process of riding they often run into various obstacles, which leads to deformation of the rim.
It is important to know that the spokes on the front and rear wheels differ, first of all, in length. At the same time, their size on the back also differs depending on the degree of inclination relative to the axis. Therefore, it is highly recommended not to disassemble the wheel.
Experienced craftsmen will say that you can make a wheel spoke in various ways, but it is worth highlighting the most durable schemes.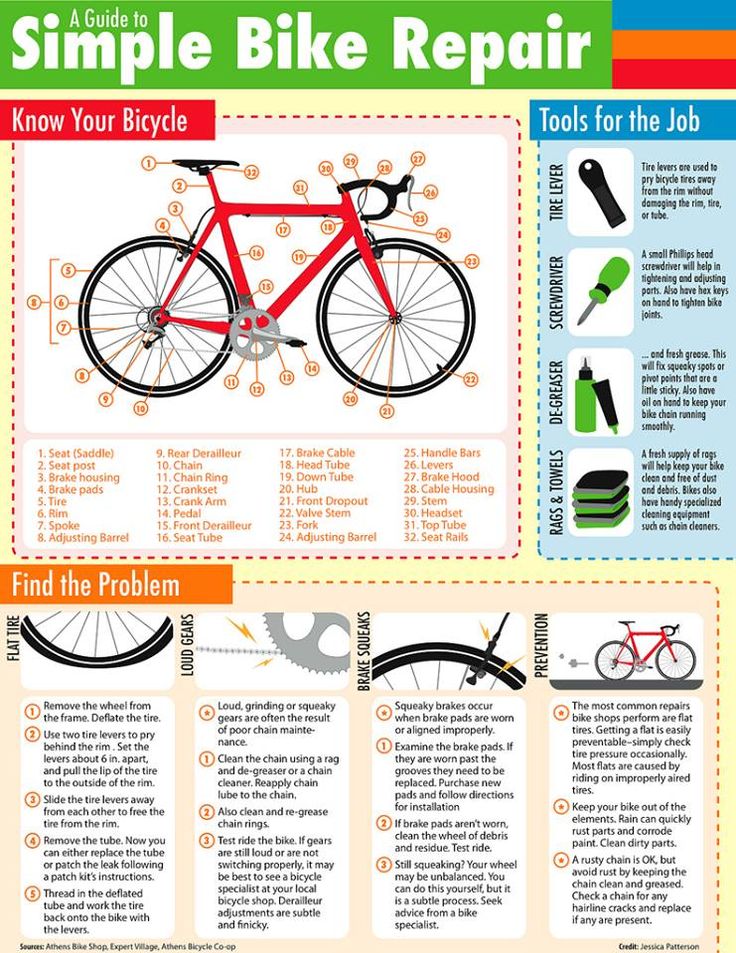 These include: radial and cross. Also on many bicycles you can see options for the arrangement of spokes in a three-cross way. With this arrangement, they cross adjacent spokes three times.
To perform a high-quality tightening of the knitting needles, you must use a special key. It used to be bundled with homemade bicycle repair tools, but today it can be bought separately at the appropriate store.
To carry out the process of installing and tightening the spokes, you must perform the following steps:
To simplify the process of selecting parts for wheel repair, it is recommended to use a convenient online calculator.
Further, after determining the parameters of the spokes, you can proceed to their installation. This is done in the following order:
All other parts are mounted on the wheels in the same order, without breaking the rhythm. When tightening, the nipples turn two turns.
The last step is stretching. As a rule, all previous actions are simpler. An important point is the twisting of the nipples for the same number of turns. To finish adjusting the tension of the spokes, it is recommended to use a special machine or the bike itself.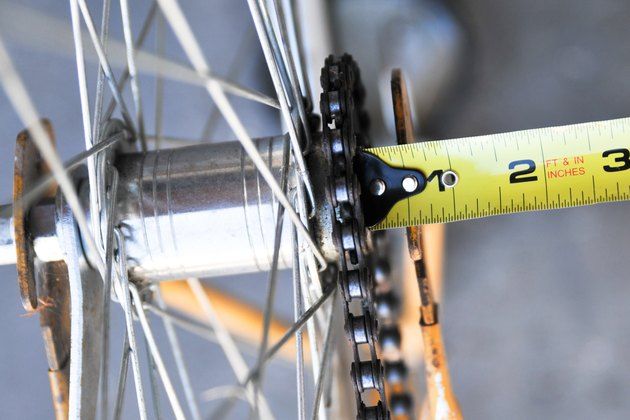
That is, the wheel is mounted on a bicycle and when turning it, the distance to the forks is controlled. If there is a figure eight on it, then you can stretch it out by pulling the knitting needles in the opposite direction and at the same time relaxing with the opposite one.
We welcome cyclists of all ages!
In this most interesting section of our site you will find articles about bicycles carefully collected and written by us. They reflect all the most necessary technical knowledge about bicycle technology, advice from professionals from the world of cycling, interesting facts and many other entertaining things.
If you are a beginner and do not yet understand complex terms or can not catch technical subtleties, then our experts will always assist you in choosing a bike or explain this or that article - just leave a comment.
Our collection of articles about bicycles and everything related to them is constantly updated and is added, and we strive to ensure that you have no questions left.