Incorrect idle adjustment on your ATV can lead to all sorts of issues. If the idle is set too low, the engine may stall and struggle to stay running. On the other hand, an idle set too high causes premature drive belt wear, shifting may become difficult, and you may even experience unwanted vehicle movement.
Keep reading to learn how to get your ATV to idle correctly for optimal vehicle performance.
An ATV is running idle when the engine is turning slowly, at no load, with no throttle applied, and usually out of gear.
Too high idle is when the engine turns faster at idle than recommended (higher RPMs).
Too low idle is when the engine turns slower at isle than recommended (lower RPMs).
Please note that improper adjustment is just one of several possible causes when your ATV is idling too high or too low:
Related: How to Know if the Gas in Your ATV Is Bad or Not
If you’re unable to get the idle to where you want it by adjustment only, these are the most common culprits. Troubleshooting and fixing these issues will be covered in a separate post.
The correct engine speed an ATV should idle at varies, but most ATVs should idle somewhere between 1100 to 1700 RPM.
Engine size, year of manufacturing, brand, carb style, and whether it’s a two-stroke or four-stroke are all factors that play a role when determining the correct idle speed.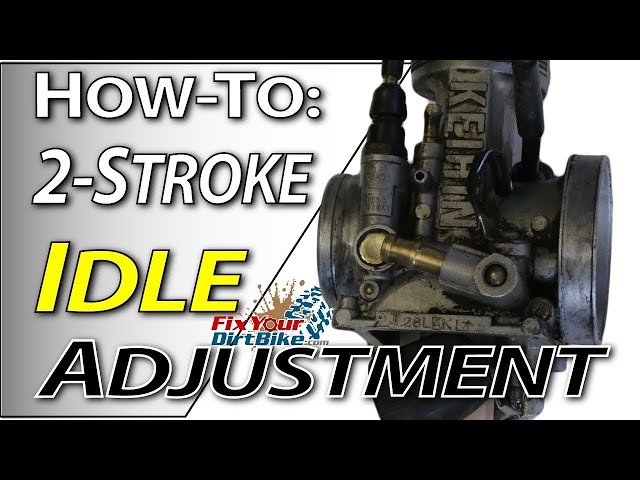
Please refer to the owner’s manual for your specific ATV’s exact engine idle speed.
The idle adjustment is not the same in all ATVs. Some bikes, typically budget models or older ATVs, can be easily adjusted at home. Newer and more advanced models may require help from a trained mechanic with access to special tools.
Follow the steps below to adjust the idle on a carbureted ATV by adjusting the idle screw.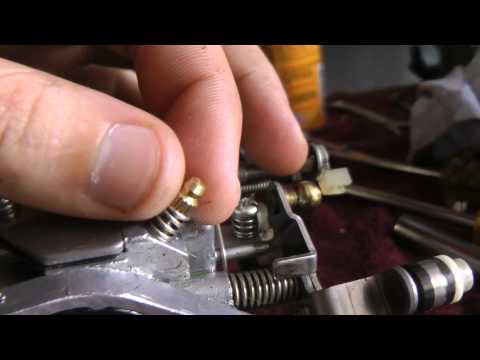
The engine needs to be at operating temperature to adjust the idle properly. Adjusting the idle when the idle is cold can lead to poor idling when the engine warms up.
Some ATVs are designed to run at a slightly higher idle when the engine is cold before it settles down automatically after a few minutes when the engine has had time to warm up. Adjusting the idle in the cold-start phase will cause the idle to drop too low when the engine heats up.
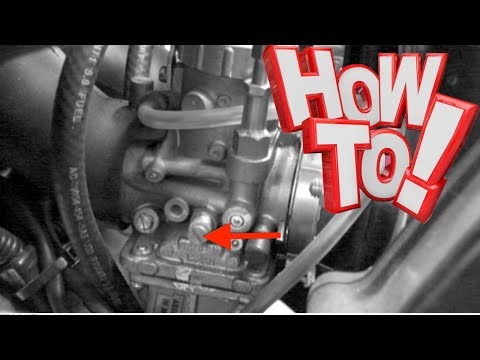
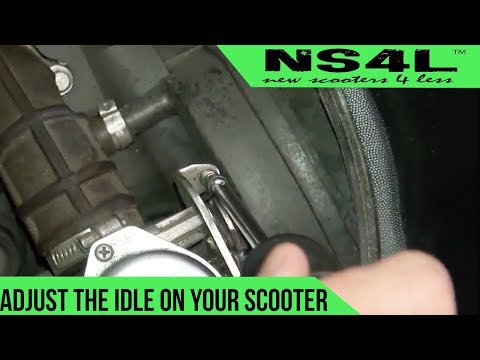
The idle adjustment screw is located on the carburetor. On most ATVs, the carb is readily accessible, but you may need to remove a plastic cover on some models.
The adjustment screw is usually on either side, but it can also be at the front of the carb. Look for a brass-colored screw designed to be adjusted with a Phillips or flat-head screwdriver.
Reaching the screw with the screwdriver may be a bit fiddly.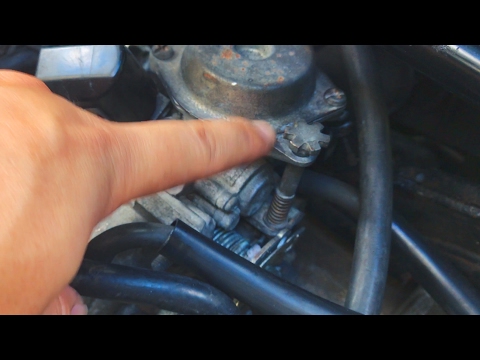 It helps to identify the best access angle and have the correct length screwdriver before you begin the actual adjustment.
To know if the idle needs adjusting, whether it needs to be changed up or down, or when you’ve achieved the correct idle, you need a way of determining the engine RPMs (Revolutions Per Minute).
 Note that this is a job that requires mechanical skills slightly above average.
 Adjust the idle by turning the idle screw in or out depending on whether you’re looking to raise or lower the idle:
If your ATV has a tachometer, turn the screw slowly until the gauge displays the correct RPM specified by the manufacturer.
If you’re adjusting by ear, turn the screw slowly clockwise until you begin hearing signs of engine stalling, such as popping or stuttering. As soon as these symptoms occur, turn the idle adjustment screw half a turn clockwise to increase the RPM slightly.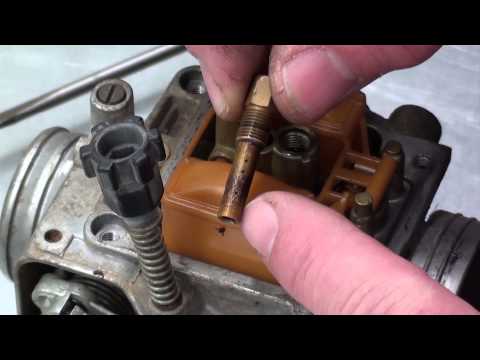 The engine should now be idling smoothly with no signs of stopping.
This is how you adjust the idle on an ATV with an adjustable throttle cable. The same steps apply whether the ATV is carbureted or fuel injected.
Any time you’re making adjustments that affect idling, you need to ensure the engine is at operating temperature for the best results. Please refer to step 1 above.
Older ATVs, budget-friendly models, and most youth ATVs use a mechanical steel cable to transfer movement from the thumb throttle and down to the carburetor. The cable should move freely inside a protective sleeve that s held in place at both ends.
You’ll find an adjustment mechanism at either end of the throttle cable assembly. When adjusted, it will affect the bike’s idle.
On most ATVs with a throttle cable, the adjuster is located up by the thumb throttle, usually covered by a rubber grommet.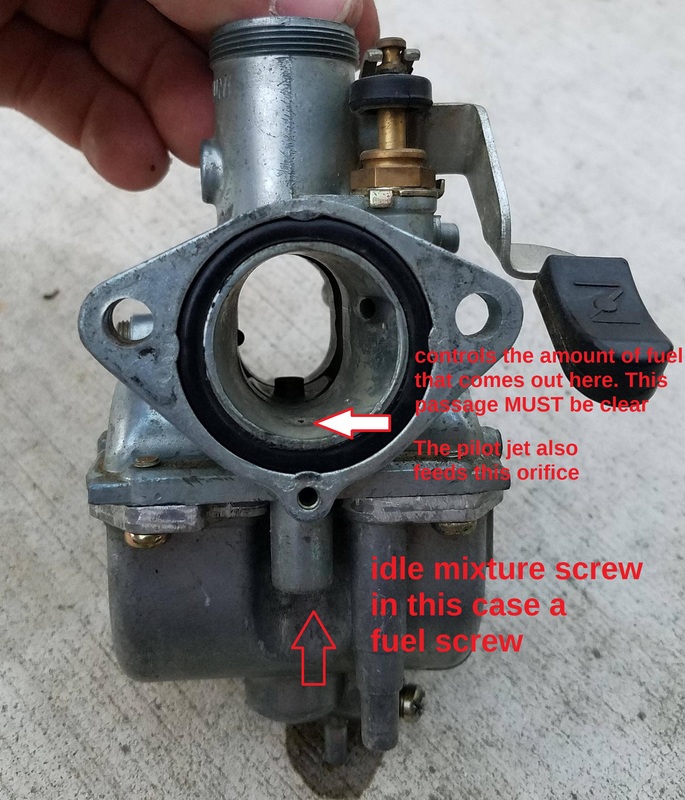
Pull back the rubber grommet by hand to reveal the adjustment mechanism. You may need to use a screwdriver to pry the rubber back in some cases.
A locking nut, also called a jam-nut, secures the adjustment screw. When tightened, this nut prevents the adjustment screw from unwanted movement.
Usually, the locking nut can be loosened by hand. Alternatively, you need to use the correct size wrench to get it loose.
Bring the locking nut a few rounds of thread back to allow free movement in the locking nut.
Just as when adjusting the idle by making adjustments directly to the idle screw located on the carburetor, you need to know whether the idle is too low or too high and when it’s adjusted properly.
Please refer to step 3 above to learn how to read the bike’s RPM.
Adjusting the idle up or down is done by turning the adjustment screw or sleeve clockwise or anti-clockwise.
Keep turning the screw until you reach the desired engine idle speed.
Now that your idle is appropriately adjusted, you need to ensure the adjustment screw stays in place by tightening the locking nut back up.
Grab the adjustment screw with one hand and keep it from moving as you tighten the locking nut firmly with your other hand.
The idle on a fuel-injected ATV is set by the ECU module, automatically adjusting the fuel-air mixture. Unless you get an- aftermarket tuner box, there is no way of making adjustments to the idle.
Please note that manipulating the ECU with a tuner requires special mechanical knowledge and experience and is something you shouldn’t attempt unless you know what you are doing.
When the idle is not right on a fuel-injected ATV, most of the time, the problem is caused by a mechanical issue, as listed initially in this post.
When adjusting the idle on an ATV, the idle screw should be turned clockwise (in) to increase engine idle speed or anti-clockwise (out) to decrease engine idle speed.
Related: ATV Won’t Stay Running or Won’t Idle
| How-To
"Hey, how tough can it be? Just turn the screw and you're done, right?"
There's a lot more to learn about setting idle mixture than just turning a couple of screws and slamming the hood closed. You might be surprised at how much better your street-driven engine will run with a properly adjusted idle mixture. The idle circuit is a crucial component to overall street engine operation and properly adjusting the idle mixture goes a long way toward improving throttle response, fuel mileage, and emissions.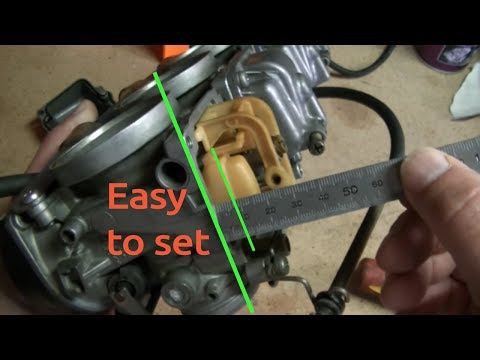
Now that we've impressed upon you the importance of setting idle mixture, take a moment to read the sidebar ("Circuit City") so you have a better understanding of how the idle circuit works. Before we get started, it's best to do the actual tuning outside, because the engine will be idling for an extended period of time. Never work on a running engine inside a closed garage unless the exhaust is properly routed outside with exhaust hoses. You will also need a couple of small, straight screwdrivers; a low-rpm tachometer; and a vacuum gauge. Make sure the transmission is in Park if it's an automatic or Neutral if it's a manual. Block one tire, or set the parking brake so the car won't roll.
To begin, make sure the engine is up to operating temperature and the choke is completely off. A cold engine requires more fuel than a fully warmed engine even if the choke is off. Remove the air cleaner and connect the tach to the engine. Typically, one lead connects to the negative side of the coil, and the other hooks to a suitable ground. Connect the vacuum gauge so it reads manifold vacuum.
Remember that working around the engine is plenty dangerous and can chew up fingers, catch cords from the tach or timing light, and generally cause havoc if you're not careful. Always work slowly and thoughtfully when tuning a running engine. Rushing to the hospital for stitches takes all the fun out of working on cars.
Before you fire up the engine, slowly turn each idle-mixture screw in until it gently bottoms out and count the number of turns it takes. Do this for each idle-mixture screw and then return them to their original positions. If all the idle-mixture screws are not adjusted the same, do that now. Remember to always adjust both screws the same amount. This will help balance the idle mixture and allow the engine to run as smoothly as possible. If the carburetor is new to the engine, start at 1 -turns out (counterclockwise) from full in.
Now start the engine and set the idle speed to around 850 rpm with the idle-speed screw. If your engine has a big cam and must idle at a higher speed, that's OK. Note the reading on the vacuum gauge. Next, turn one idle-mixture screw in -turn and note the change on the vacuum gauge. If the vacuum reading increases—say, from 14 inches to 14- inches—move around to the other side of the carburetor and turn that mixture screw in -turn as well. Again, note the vacuum gauge reading; if the gauge continues to climb, then adjust each idle-mixture screw in another -turn. On most carburetors, turning the mixture screw in (clockwise) leans the mixture, while counterclockwise (out) enriches the mixture.
Initially, if the engine stumbles or the vacuum drops when turning the mixture screw in, turn both screws out about a -turn and evaluate the results. The goal of adjusting the idle-mixture screws is to achieve the highest possible idle vacuum at a set idle speed. If the idle speed increases after you adjust the idle-mixture screws (which is likely), be sure to adjust the idle speed back to the base speed. This is important because a higher idle speed will increase the vacuum reading. Maintaining a standard idle speed will make it easier to evaluate changes to the idle-mixture screws.
The best way to accurately set idle mixture is to use an emission-test machine to read hydrocarbon (HC) and carbon monoxide (CO) levels. As you move the idle-mixture screws, you'll see some very dramatic changes in HC and CO readings. The ideal idle-mixture setting will minimize both the HC and CO. HC readings are expressed in parts per million (ppm) while CO is given as a percentage. One fact that is generally overlooked is that CO can be equated to air/fuel ratio. For example, 0.01 percent CO is equivalent to 14.7:1 air/fuel and 0.38 percent is equivalent to a 13:1 air/fuel ratio.
Most four-barrel carburetors use two screws to set the idle mixture. Some recent Holley and all Demon carburetors use four idle-mixture adjustment points. The idle-mixture procedure is exactly the same for these carburetors except that now you are balancing four adjustment points instead of two.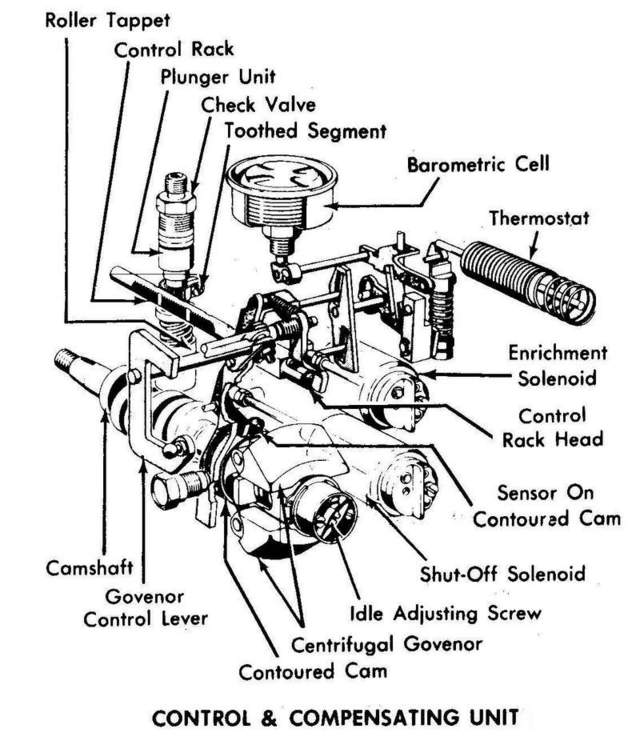 Again, a big key to establishing the ideal idle mixture is an accurate balance of all four of these mixture adjustments.
This procedure also works for engines with lumpy camshafts. One potential pitfall is that big cams often idle at vacuum levels below 8 inches. These engines also require large throttle openings to allow air in for the engine to idle. This uncovers the idle transfer slot, which can cause off-idle stumble problems. The only way to spot this problem is to remove the carburetor and see if the throttle blades uncover more than 0.040 inch of the idle transfer slot (you can use a spark-plug-gap wire gauge to measure this). If too much of the slot is uncovered, the best fix is to drill a 1/16-inch hole in the leading-edge side of the throttle blade and, if necessary, increase the size by 1/32-inch increments. This will allow more air past the throttle blades, which will allow closing the throttle blade slightly so the transfer slot is only barely exposed by the throttle blade. Be careful not to drill these holes too large or the throttle blades will need to be fully closed to generate the proper idle speed. Unfortunately, this can also create an off-idle flat spot.
Fine-tuning the carb in this manner will improve part-throttle operation and should eliminate that annoying off-idle stumble. As you can see, there's much more to setting idle mixture properly than just turning a couple of screws. Spending a little more time to set your idle mixture properly will result in superior part-throttle performance. A simple step like this can make a big difference in how much fun you have behind the wheel.
 6-Liter Four-Cylinder LS-Headed Crate Engine
It often seems like an insurmountable task for beginners to tune and adjust the carburetor of an ATV, but in fact, it is far from being the case. Using our instructions, you can easily set up a carburetor with your own hands.
Due to incorrect carburetor settings, problems such as: acceleration dips, jerks while driving, uncertain start of the engine, poor acceleration dynamics, overheating, loss of power, increased fuel consumption, formation of deposits in the combustion chamber. nine0003
So what exactly are we going to tune?
Attention! The adjustment is carried out under the condition of a warm engine and a clean carburetor.
First, make sure there is no condensation in the carburetor. First, you need to drain the gasoline from the float chamber, for this you need to close the fuel cock and partially unscrew the screw No. 1, after the gasoline has drained from the float chamber, tighten the screw No. 1. nine0003
Let's look at photos of candles with various deposits and defects.
A 100% indicator of a correctly adjusted combustible mixture is carbon deposits on a candle.
Consider the location of the screws for adjusting the quality of the mixture and idle speed of carburetors of different models.
#1 Float chamber plug; No. 2 Mixture quality screw;
#3 Idle adjustment screw.
1 - quality adjustment screw at idle; 2 - fuel inlet fitting; 3 - fitting through which you can sleep fuel from the float chamber; 4 - screw-plug of the float chamber.
1 - ventilation tube; 2 - idle speed adjustment screw; 3 - screw for adjusting the composition of the air-fuel mixture.
ATV carburetor speed and mixture adjustment.
1. Start and warm up the engine until it reaches operating temperature. nine0003
2. Adjust the idle screw to set the idle speed to normal. Completely, until it stops, tighten the fuel mixture screw, the engine should stall. If this does not happen, check the tightness of the air supply system from the air filter.
3. Loosen the fuel mixture screw 1 turn. (Turning the screw clockwise, we enrich the mixture, unscrewing it counterclockwise, we lean).
4. Start the engine and, by adjusting the idle speed screw, set the speed slightly higher than normal
5. Slowly unscrew the fuel mixture screw until the engine reaches maximum speed (we unscrew the screw no more than 2 turns, but depending on engine wear and other malfunctions, the range may vary).
6. Re-adjust the idle screw to set the idle speed to normal.
7. Press the throttle trigger several times, check if the idle speed is stable.
Adjustment of the mixture quality with a needle. nine0008
Probably you have heard more than once about adjusting the quality of the mixture on the carburetor by manipulating the needle. I note that these are extreme measures, for the initial adjustment, use the mixture quality screw, and only if you do not get the desired result, unscrew the mount and remove the needle. What does she represent? This is the main element that regulates the amount of gasoline supplied to the combustion chamber. Connected directly to the throttle handle through a cable. When you turn the knob, the needle rises higher, opening up a channel for fuel, thereby delivering more mixture, which increases power, which translates into speed.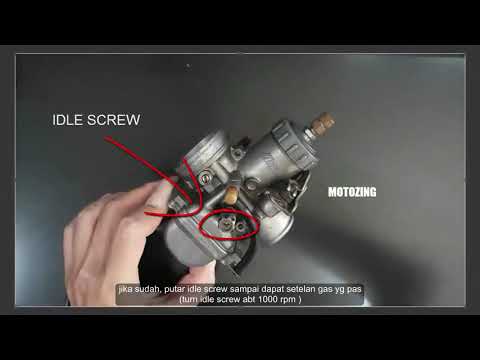 nine0003
You will see 5 grooves on the needle at the attachment point. Initially, the retaining ring fixes it in the central position, this is the best option. But sometimes it is not possible to achieve the required quality of the mixture. Then we will need the remaining grooves, 2 on top and 2 on the bottom, this suggests that we can adjust the dose gradually.
Lifting the retaining ring up and locking it in this position lowers the needle, which, in turn, blocks the channel more than usual. Gasoline enters less than air, and the mixture becomes leaner. Lowering the ring down, we raise the needle, and everything happens exactly the opposite. nine0003
Be aware that an excessively lean or rich mixture can lead to serious malfunctions from overheating to loss of power, carbon deposits in the combustion chamber and all the consequences that follow from this. Keep an eye on the condition of the spark plug electrodes, this is the main indicator that will help you determine the quality of the mixture.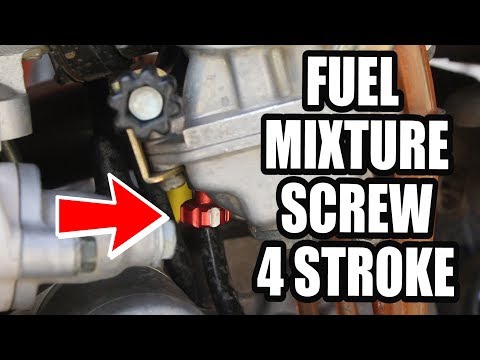
If you have any questions about the adjustment and tuning of the carburetor, you can ask them below in the "Comments" column.
The operation and life of the engine directly depends on the quality of the fuel mixture. The carburetor is responsible for the preparation of the composition, but after prolonged use of the equipment, the settings “go astray”. This results in:
 Due to incorrect system settings, the engine speed decreases, respectively, its power drops. nine0012
 Many riders who decide to buy an inexpensive ATV simply do not spare the technique and ignore this procedure. But even if you plan to change your device in 1.5-2 years, adjustment is needed. The reason for this is increased fuel consumption. A quad with an untuned carburetor "eats" 30-40% more gasoline, and these are tangible costs.
So how do you adjust the carburetor on a Chinese ATV? For this you need:
However, it is important to remember that all adjustments are made only with a "clean" carburettor. This means that the rider needs to remove all the dirt from the node and flush the system to remove condensation and sediment from it.
Note: The engine must be warmed up to operating temperature immediately before adjustment.
To set the carburetor idle, the float chamber must first be cleared of fuel. To do this, start the ATV, close the fuel cock and wait until the machine stalls (5-10 minutes).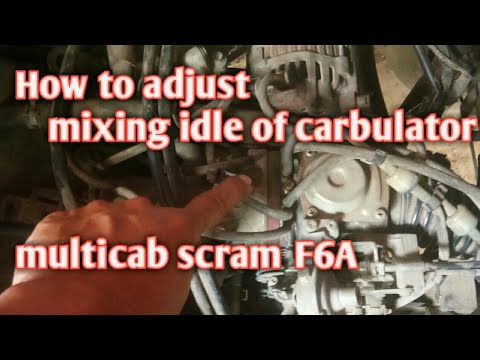 To speed up the process, you can take a little ride on the quadric. Of course, gasoline can be drained, but in any case you will have to warm up the device, so the first method of "removing" gasoline is more effective. nine0003
Then:

Read the manual before adjusting the carburetor on a 125cc ATV to be sure. Remember that the location of the bolts is different in different devices, so read the documentation in advance. nine0003
To evaluate the quality of the fuel composition, make a test run. After that, unscrew the candle, and evaluate its condition. If it is:

Also look out for these “symptoms”: damaged tip (electrode failure), oil deposits (damage to rings and caps), chips and inclusions (sign of motor failure).
To adjust the mixture you need to twist the needle cover and pull it out. To get the needle, pull out the cable. After that, move the ring in the required direction (lower - more air, but less fuel and vice versa). Then start the engine and make sure it doesn't stall. nine0003
The last step in adjusting the 125cc ATV carburetor is adjusting the petrol level. To do this, you need: