I'd like to learn to do hot repairs to tires. For old bias ply type tires and farm equipment. Any chance one of you would happen to know some about this?
"Hot patches" are a thing of the past. Both the Tire Industry Association and the Rubber Manufacturers Association specifically say "hot patching" tires should not be done. All you're doing is burning away the vulcanizing cement which does the job of chemically bonding your patch to the tire.
That being said, back in the day before I knew any better, we would hot patch as follows:
Demount tire
Remove road debris or whatever punctured the tire
Ream out the hole with a carbide drill bit and a drill operating @ low rpm
Treat inner liner of the tire with rubber prep or buffing lube around the area to be patched/ plugged
Rake the area to remove the inner case liner ( kinda a waxy coating that helps keep air from permiating out)
Insert plug and trim flush with tire ( this is if using a 2 piece patch/plug)
Using buffing wheel buff inner case liner and plug until the rubber has a velvet like feel
Vacuum out all rubber dust from the drilling and buffing
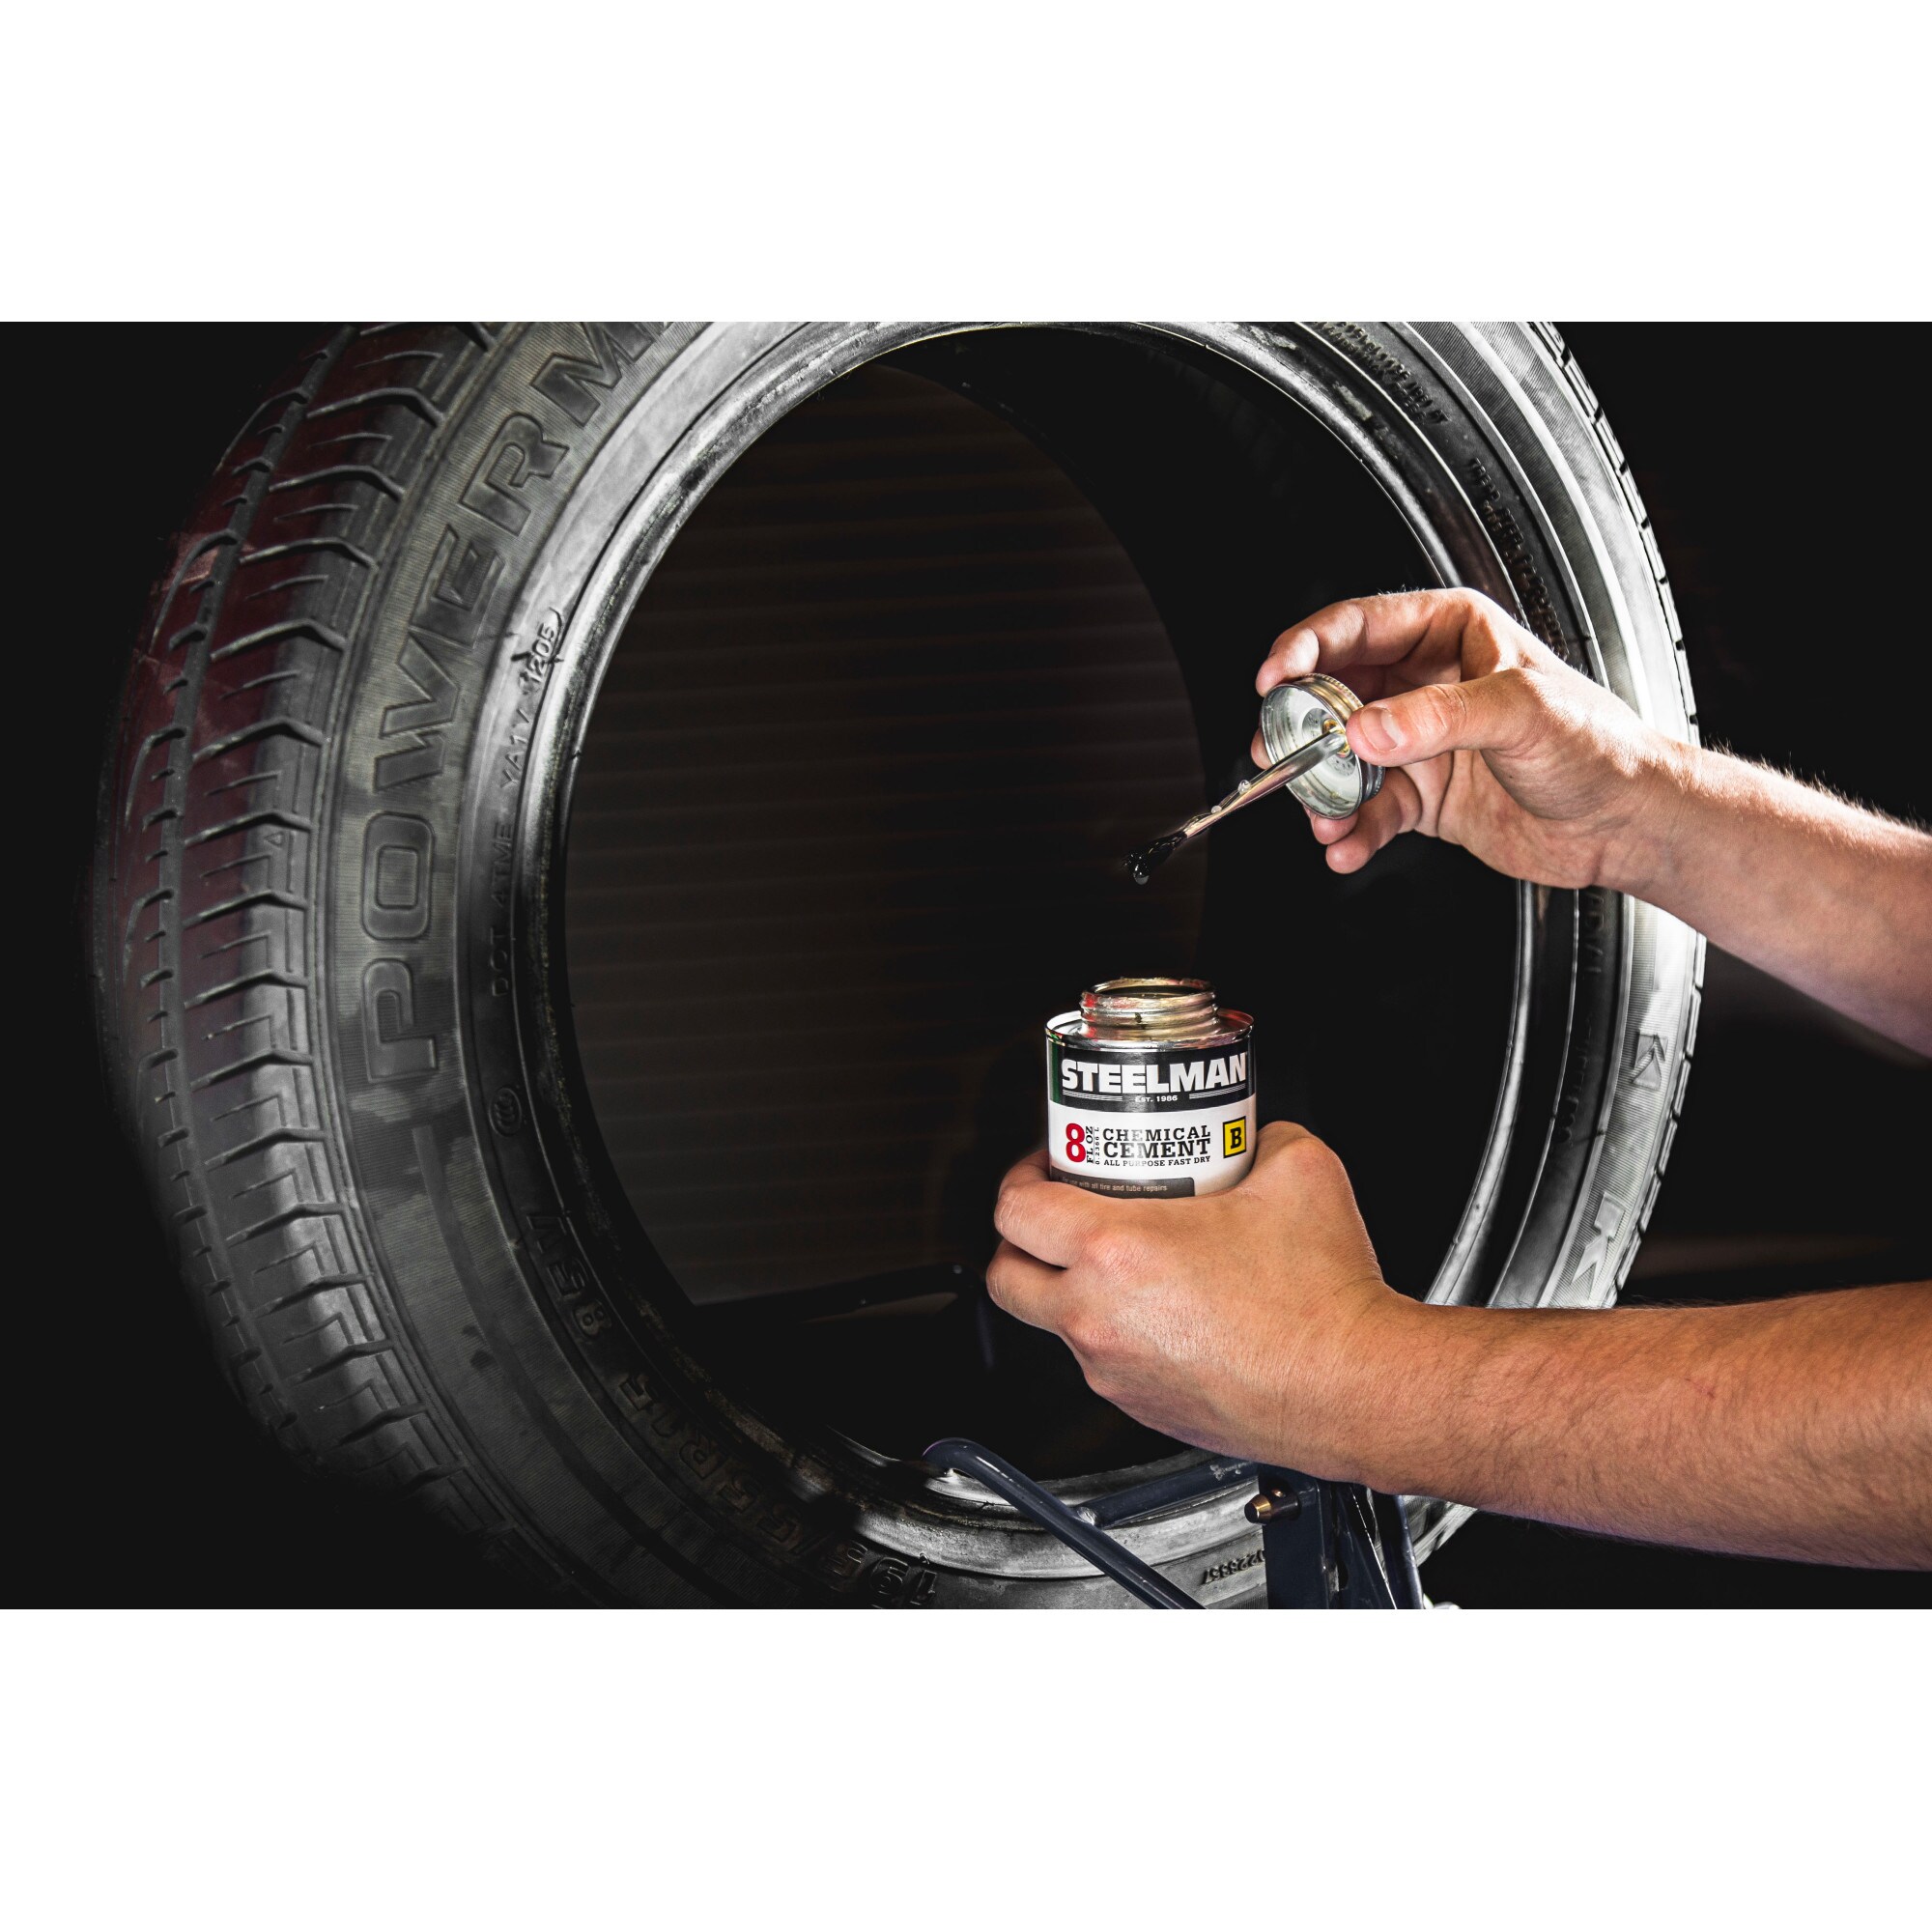
Apply vulcanizing cement
. ........this is when we would light the cement on fire....
After a few seconds blow out the flame
Apply patch
Use a roller to press the patch on
Coat the whole thing with repair sealant
Last edited:
These days we skip the part when you light the cement and instead let the cement sit for a few minutes and dry until it has a dull hazy appearance. Then apply the patch.
Key thing is to scrape away all the case liner and buff the tire down til its like velvet. Be careful not to go down too far and expose the belts. If you buff it down just right the vulcanizing cement does just that.....vulcanizes your patch to the tire. Its not glue. It chemically bonds the surfaces
Last edited:
No No, I mean like putting rubber back in where rubber once was. Think holes, not punctures. Besides my tires don't take patch cement. I've tried buffing, sanding, scraping. Cleaning with brake cleaner, alcohol etc. The patch just peels off.
I've taken to patching the tube, and using pull through tire plug / patch combo with black rtv to seal the tire.
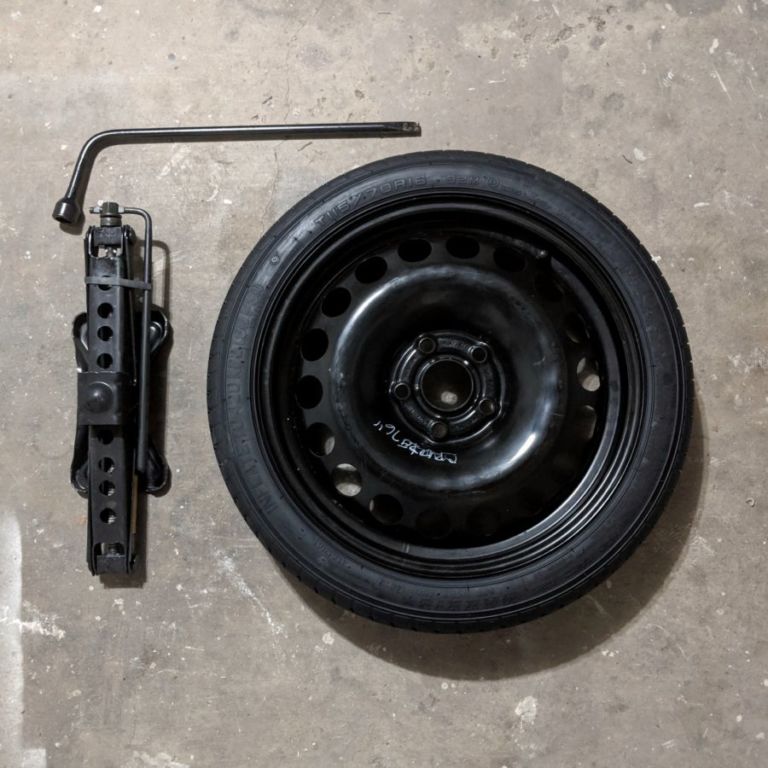
I want to be able to repair tractor tire side walls.
Any and all sidewall repairs I've done or seen done where total jerry rigs. Just enough to send someone limping down the road with no guarantee it was gonna hold. If there is a chunk out of a tire and the belts have become visible I wouldn't do anything but replace it. Have you seen a tire have a zipper rupture in the sidewall?
I have. The debris will literally tear off a limb....
I too have had trouble getting patches to stick. Usually only on riding mower or other small tires where you can't do much buffing. In those cases I just put a tube in them. As long as there is some meat left in the tread.
What's this for? If its not driven on the road or at speed and its just something you tool around on your property with then put a fresh tube in it. Even if its a "tubeless" tire.
Actually, the hot patch process is where you buy these special patches with some kind of flammable stuff on one side of it and you use a specially made press that will fit the patch (all patches I've ever seen were diamond shaped). You put the patch on the tube, clamp it in the press, and set it on fire. When it cools off you're done and no vulcanizing cement is used. It's a old process that was used before they came out with vulcanizing cement.
I haven't seen any of these hot patches in years and don't even know if they are still available but the process worked really well. I also don't think you can use it for anything but tubes because I don't know how you'd get the press to work with a tire. I've still got a old patch press and would use it if I could find some hot patches.
I'm not sure that vulcanizing large sections of tires is something you can do at a home shop. I know that there is a place in Nashville that will do vulcanizing repairs on tires if the repair section isn't too big. I took them a tractor tire that had about a 6" cut in the sidewall and they said it was too big to fix.
m16ty said:
Actually, the hot patch process is where you buy these special patches with some kind of flammable stuff on one side of it and you use a specially made press that will fit the patch (all patches I've ever seen were diamond shaped).
You put the patch on the tube, clamp it in the press, and set it on fire. ....
Click to expand...
Yup, used those many times on my bicycle and mower tubes back in the 70's. Good lord I'm old!
It was a cardboard like stuff in metal that burnt slowly. It worked well.
Setting fire to cement is certainly bad, it isn't hot patching. In hot patching, the patch is vulcanized or changed from a gummy rubber to a cured, harder rubber. Think bubble gum for unvulcanized rubber.
Tire shops had electric patch heaters but self contained slow match type heaters were produced, these used potassium nitrate infused carbon or cotton in a metal iron to clamp the patch down to the tire/tube. The heater would have correct temperature time constant to properly vulcanize the patch.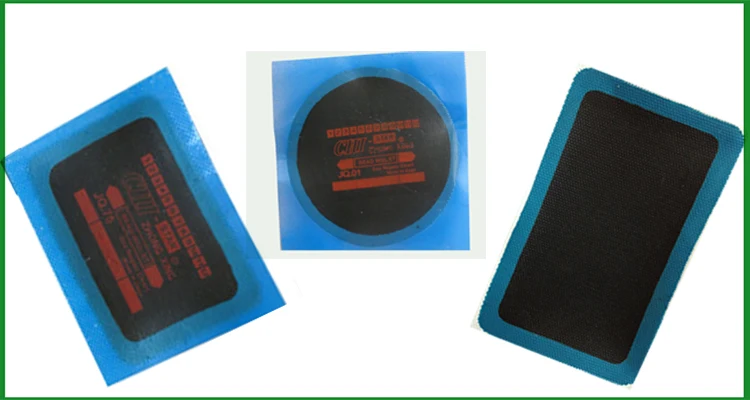
modern chemistry has made these unnecessary, synthetic cements work just as well.
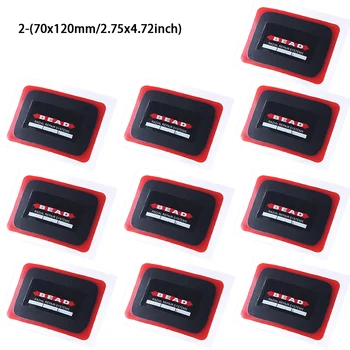
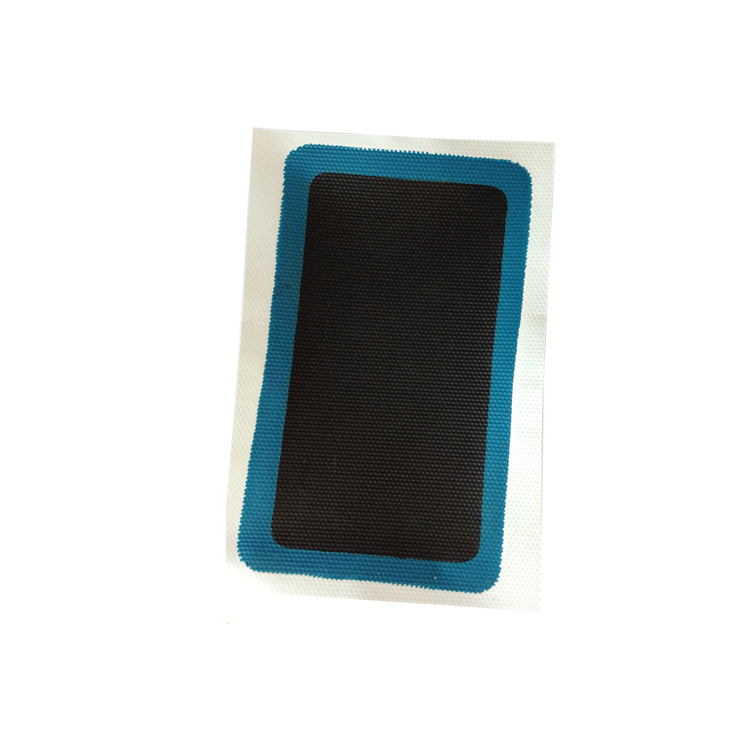
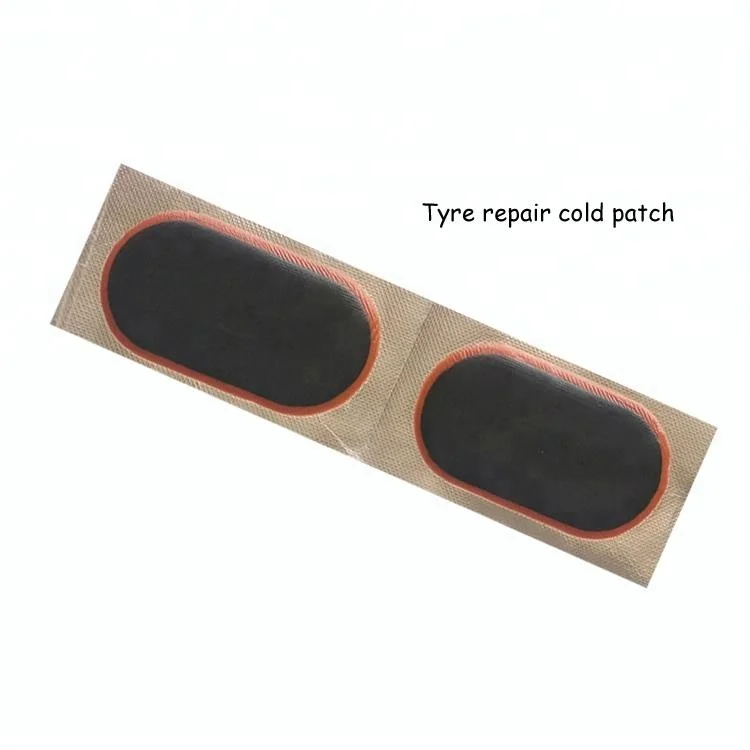
REMA TIP TOP’s feather edge patches are designed for repair of bicycle, garden, car, truck, and tractor tubes. When installed with REMA TIP TOP Cold Vulcanizing Fluid, REMA TIP TOP tube patches will stretch evenly in all directions, resulting in a perfect bond and seamless repair.
Our distinctive red feather edge is often copied, but never duplicated.
| Part No. | Description | Size (inch) | Box/Qty | Case/Qty | |
|---|---|---|---|---|---|
| 0 | Tube patches, round | Ø 1-1/4 | 100 | 216 | |
| 1 | Tube patches, round | Ø 1-1/2 | 30 | 528 | |
| 2 | Tube patches, round | Ø 1-3/4 | 30 | 324 | |
| 3 | Tube patches, round | Ø 2 | 30 | 222 | |
| 4 | Tube patches, round | Ø 3 | 30 | 120 | |
| 5 | Tube patches, round | Ø 3-3/4 | 10 | 180 | |
| 6 | Tube patches, round | Ø 4 | 10 | 114 | |
| 7 | Tube patches, oval | 3 x 1-1/2 | 30 | 264 | |
| 7B | Tube patches, oval | 6 x 2 | 10 | 160 |
REMA TIP TOP's black feather edge design results in a virtually invisible tube repair.
| Part No. | Description | Size (inch) | Box/Qty | Case/Qty | |
|---|---|---|---|---|---|
| B-0 | Tube patches, round | Ø 1-1/4 | 100 | 216 | |
| B-1 | Tube patches, round | Ø 1-1/2 | 30 | 528 | |
| B-2 | Tube patches, round | Ø 1-3/4 | 30 | 324 | |
| B-3 | Tube patches, round | Ø 2 | 30 | 222 | |
| B-7 | Tube patches, oval | 3 x 1-1/2 | 30 | 264 | |
| B-7B | Tube patches, oval | 6 x 2 | 10 | 160 |
 ru
ru Mixes for hand-assembled products are usually based on NDT, since good adhesion is required during assembly (assembly), and excessive shrinkage can cause deformation of the molded components. The adhesives used here are also based on NDT. The choice of certain grades depends on the end use of the product. For high-quality, thin upper components that require flexibility, a compound with a minimum amount of impurities is needed, but lower grade rubber can be used for soles and heels. Synthetic rubbers such as SBR are widely used in molded plastic products. When heat and oil resistance are required, compounds based on nitrile rubbers, nitrile rubbers with PVC or polychloroprene are used, the latter of which is used mainly because of its excellent adhesiveness. Tire reclaim is widely used in black outsole materials and some molded black uppers. Finely ground vulcanized rubber chips can also be used as they are very cheap and help to reduce the porosity of the product. nine0003
Black work shoes use carbon black as a filler, but silica fillers are used in color mixes.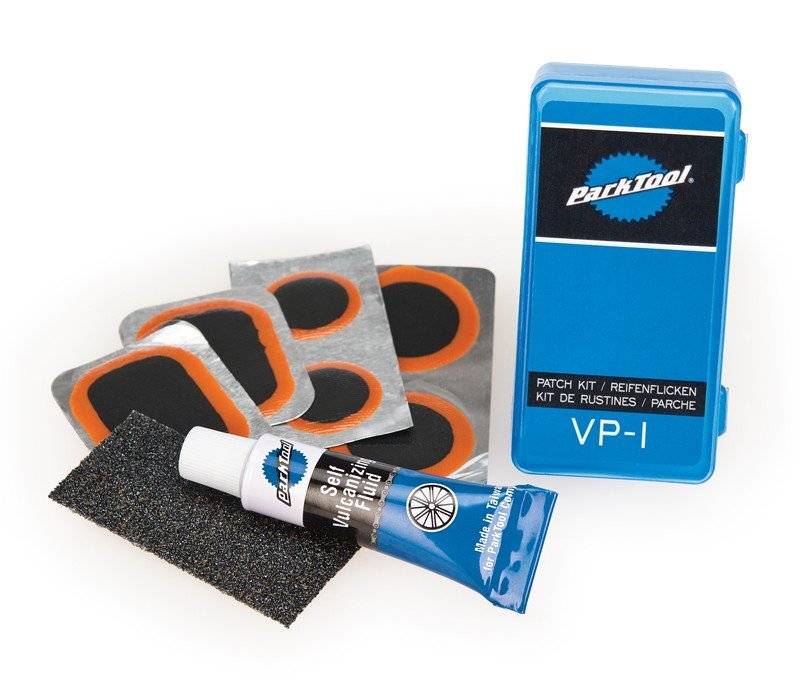 The high quality color sole material contains fine particles of silicon dioxide as a reinforcing filler, while the medium grade sole material contains aluminum or calcium silicate. Activated calcium carbonate gives a satisfactory reinforcement of NC, but to obtain the same reinforcement of SBR, it is necessary to add some silicon-containing fillers. The main fillers are chalk and cheap clays, and titanium dioxide is used to obtain white color. nine0003
A thiazole with guanidine, thiuram or dithiocarbamate as an additive is usually used as an accelerator system, depending on the desired cure rate. For white and light-colored products, a non-staining antioxidant should be chosen.
Cotton is still the most widely used fabric in rubber footwear. Blends of cotton and man-made fibers are sometimes used where additional resistance to abrasion is needed. The lining in the shaft and toe area of work shoes is usually made of a square weave fabric with a density of 0.30-0.40 kg / m2, rubberized, with sufficient stretch to could be pulled over a shoe last. In molded shoes, a knitted weave (smooth or elastic) is also used, giving the shoe a softer feel. nine0003
Canvas uppers are made from square weave flannel combined with twill frame fabric using a thick rubber solution or filled latex. For high-quality sports shoes, the total density of fabrics is approximately 0.50-0.60 kg/n2. For slippers, a wide variety of fabrics are used, such as cotton, wool, nylon, suede (suede-like fabric) and lurex fabric.
Although the manual assembly method is laborious, it has certain advantages. So, it allows large changes in the design of products without acquiring new equipment. Some all-rubber work boots, rubber boots, canvas-top sports shoes, and lightweight canvas shoes with rubber soles are still made this way. A pair of solid rubber work boots can be made up of 40 rubber or rubberized woven pieces, each prepped and cut before assembly. These include: an outer rubber boot, an outer rubber vamp, a fabric lining of the boot, a fabric lining of the vamp, a beret, an insole, a detachable toe, etc.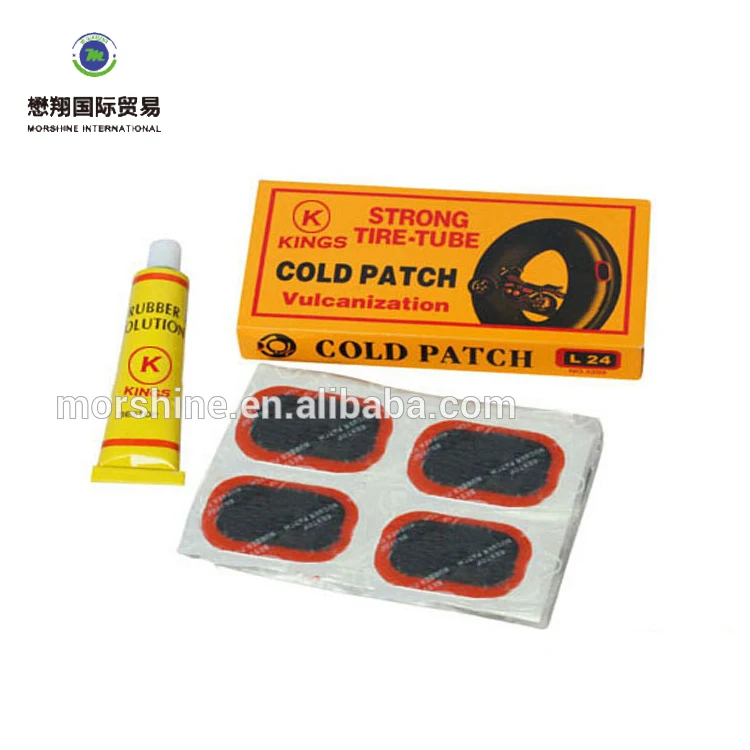 (Fig. 11.1). nine0003
Calendered sheet for soles is made on a four-roll calender, where the fourth roll is embossed with the desired sole pattern and profiled to obtain a product of a certain thickness. By changing the fourth roller, you can get any design and thickness of the sole.
The heel of hand-assembled work shoes or rubber boots is usually preformed to the desired pattern, size and shape. The insole and heel counter are made from waste unvulcanized rubberized fabric, which is ground on rollers and rolled to the required thickness or applied to the fabric. nine0003
Solvent-coated parts are assembled in sequence tightly on a metal block and then carefully rolled to ensure good bonding.
Another method for obtaining the outer surface is the application of a filled latex coating by dipping or coagulation. After thorough washing and drying, the piping, sole and heel are attached. Latex forms a seamless, impervious rubber layer on the frame. nine0003
For shoes with canvas uppers, fabric parts are cut out with a die. Then they trim, sew on accessories or overhead deltas of the tibia and install backs. The product is pulled onto the block and the necessary rubber parts are added.
Vulcanization is carried out in a large cylindrical autoclave, internally heated by steam coils. Shoes are placed on a rack and rotated in an autoclave. Sometimes the pins of the rack on which each boot is placed are connected to a vacuum pump, so that when the boot is vulcanized, its parts are pressed tightly against the last, providing good adhesion. nine0003
Immediately after closing the lid of the autoclave, air is supplied at a pressure of about 3 kgf/cm2, which removes any bubbles or swelling on the external parts of the product. The temperature is gradually raised to 135°C and maintained at this level for the remainder of the curing time (usually 60-65 minutes). Since rubber parts have different thicknesses and vulcanization is carried out with hot air, it is necessary to use accelerator systems based on thiazoles with tetramethylthiuram disulfide (TMTB) as a booster as a booster.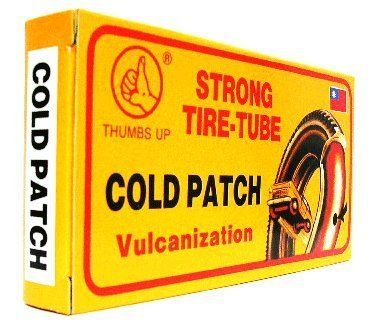 Typically, an antioxidant with good heat resistance is also added. nine0003
Discuss on the forum
Nothing lasts forever under the moon and rubber shoes, no matter how strong they are, also wear out and deteriorate like any other. But what if it could be delayed and reanimate their favorite rubber boots ? If they can be sealed and return the former water tightness? Or dye it and be fashionable again in rainy weather? I assembled in many different ways to help prolong the life of rubber boots or other rubber products (such as an inflatable boat), as well as help eliminate minor problems such as slippery soles. Choose the ones that suit you and be glad that going to the store and spending money is postponed.
The author of the article: Hostess.
My name is Natalia and I have been a professional housekeeper for over 15 years. I save my favorite things of my big family; guarding our house from fleas, midges, bloodsuckers and other rodents; I find faithful electronic assistants in household chores. And I am happy to share all this experience with you)
Do you also want to become a Hostess on our blog? Enough space for everyone! Just write to us via the "contact" form)
In this article
For example, if you didn't read my last article about the right choice of rubber boots and bought shoes in a smaller size. nine0057 Maybe the shoes were given to you or they passed to you “by inheritance” and not the size that you wear.
Maybe due to the deteriorating health of the legs (edema, protruding bones).
You can stretch rubber boots , but not all, but only those made of PVC (poly-vinyl chloride). It is impossible to do such a procedure with rubber ones (they were all like that in Soviet times) - they are not elastic enough and will simply burst during the stretching process. PVC, on the other hand, is able to change shape when heated and then retain it, hardening again when cooled. So if you have rubber ones, just buy a new pair. nine0003
Before stretching boots, make sure they are actually PVC:
Keep in mind that you can stretch for 1-2 sizes, no more than . And it strongly depends on the composition of this PVC, how much plasticizer it contains, and how much the thin mesh of knitwear on its inside can stretch. If the boots are small by more than 2 sizes - there is only one way - to the store for a new pair.
Lifehack! To avoid walking with wet feet before getting into boots - put the serhu on the toe with the plastic bag . This will keep your feet dry. By the way, the same method can be used if you are caught in the rain in wet shoes.
⚠️ Sometimes it is recommended that immediately after putting on the boots, stand in them in a basin (bath) with cold water so that the fastening happens faster, but remember that high contrasts are not always good and can lead to damage!
Pros: Stretching occurs immediately according to the shape of your leg + healing sauna effect for the legs.
Cons: Not everyone likes steaming legs. It is not always possible / time / desire to once again walk in rubber boots, especially wet ones.

Buy Shoe Stretches , they are sold in shoe stores (can also be found online). The boot is heated over steam for a long time until it becomes soft. You can pour boiling water into the boot and wait for the material to soften. After that, you insert the extensions, adjust to your size and leave the boot to cool completely. nine0003
Pros: No need to walk in boots, endure heat and discomfort for a while.
Cons: extensions need to be bought if they are not available. If you adjust them incorrectly, you may have to repeat the procedure more than once.
If your sole tends to slide into a ditch, then it is too smooth - there is no grip on the ice surface. nine0057 Or your sole is too stiff , at low temperatures it hardens even more, which, firstly, limits the maneuverability and flexibility of the foot to maintain balance, and secondly, forms a film of water between the sole and ice, due to which and sliding occurs.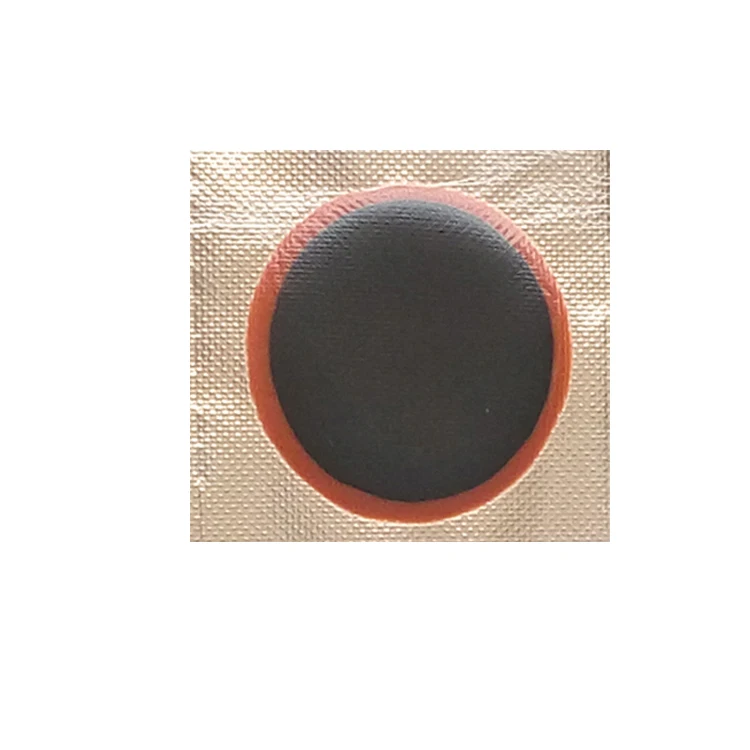 The following tricks will help correct the situation:
Cons: do not always look aesthetically pleasing, you can lose it inadvertently.
 After sanding you need to wait a day until the glue sets. If the sand wears off, it is enough to repeat this simple procedure.
 Sometimes the sole is melted a little on purpose, and then placed on the sandy surface . The sand is imprinted into the sole, providing a long-lasting effect. ⚠️ But there is a risk of ruining the boot, here you need to skillfully.
⚠️ Ice won't scare you anymore, but on other surfaces you will clatter like a horse , and some of them (for example, parquet or tile) can damage by scratching or even leaving dents. Do not forget that improperly selected screws or poor-quality soles can nullify everything. The sole may crack and then you, instead of solving the problem, will have another additional one.
In the process of searching, there were suggestions to screw screws from the inside of the boot so that sharp metal tips stick out of the sole. But how then to walk, feeling all this metal under the foot? The Princess and the Pea never dreamed of this)
 They can only be worn in ice, the rest of the time they will lie on a shelf in your home. There is still an option to put similar linings in a shoe workshop, but forever. nine0241
The most common causes of leaky boots are:
If you step into a puddle and your feet are wet, it's time to take action. The first thing to do is find the location of the damage. To do this, fill the basin with water, put the boot into the water so that everything is under the water up to the ankle and even a little higher is better. Then start quickly rolling the boot shaft into a roll - the air under pressure will go down and if it comes out through a hole or a crack: you will see air bubbles in the water and the place where they come from. Now completely dry the boot and start sealing it.
 However, if you are gluing the sole, then the surfaces of the material to be glued (the parts of the sole at the point of fracture) must be smooth!
👉 Before you decide on the glue - you need to know for sure what material are your "rain-cloths" , because each material has its own glue, for rubber - one, for PVC or EVA - another. If in doubt, take your boot with you so that a specialist can help you determine and choose the right adhesive.
The usual universal glue of the Moment company , which is sold in any hardware store , is better not to take for gluing rubber shoes. Reviews about him are not very good: someone takes, someone does not - there is little hope for him. It will suit you only if you glue this thing and then handle it very carefully, for example, some part from a toy. nine0003
But for gluing PVC boots, they use Moment's Kristall glue, and at the same time, the reviews are the most positive: PVC practically fuses and there are no holes) It is written on the tube:.
Look for specialized compounds , they are sold in auto shops and fishing . Such glue will hold the patch well and make the rubber product airtight again.
K
article, you can buy repair kit for bicycle rubber chamber in a sports shop. There are already patches and decent glue. It’s good that this is a reliable method, but it’s bad - the patches are the most common, they won’t fit in color everywhere and it won’t look very aesthetically pleasing. For things, the beauty of which is not primary or if the patch will not be visible - this set is a very good option.
The network praises "nairite shoe" glue , they say that BF-2 (for static bonding) and BF-4 (for elastic bonding) work firmly. Frequently mentioned glue from Done Deal, called Crazy Hands. This is a transparent and strong adhesive sealant that has excellent grip and is suitable even for transparent rubber products. Sold in auto shops. Buy one of the above and follow the instructions.
The excellent “Seamgrip” glue, which is used to repair rubber boats (look for fishing boats), deserves praise. It is made in the USA and if you want to glue something inexpensive, like ordinary rubber boots, it is cheaper to buy new ones, because. glue costs about the same. But if this is something large or expensive, then this glue will help you out a lot and even glue the soles of your boots so that it will still serve. nine0003
And here is a video on gluing an EVA boot. Everything is detailed and clear)
Glue is not needed here. special rubber is used, which heats up, melts and sticks at the puncture or cut. This method is more complicated than the previous one, but if everything is done correctly, a significant extension of the service life of the rubber product is ensured.
Curing kits can also be purchased at sports, auto and fishing stores. In addition to patches of non-vulcanized rubber, there will be small containers made of tin and a few pieces of combustible composition. A patch is placed on the damaged place, on top - a tin cup with fuel. This whole “sandwich” must be firmly and tightly fixed , so that later, when the fuel is set on fire and the tin gets very hot, the rubber tightly clamped underneath it also heats up and begins to melt, sticking to the second rubber surface. nine0003
Sometimes a regular iron is used instead of a combustible piece and metal cup . It is heated to a temperature that cannot burn through the paper, and placed through it on a patch, which heats up and softens, connecting with the place where the patch is applied.
As for rubber sole , when sealing cracks by vulcanization, the treated surfaces should be rough .

 The patch and tape are easy to remove when the rubber is sealed.
For rubber products there are not many options for how to paint it - the material is quite capricious, because it is smooth and not absorbent. But I still dug up some practical advice on the forums . Time does not stand still and a little later, I'm sure, they will invent paint, especially for rubber boots, so that women of fashion can change their color 3 times a season for each of the jackets or skirts, but for now we use what we have. So here's what we have:
💚 Special paints for rubber or plastics. Typically acrylic, decorative. Experiments with them have shown that this is not the best way, because. when wearing , such paints can peel and crack, especially in the folds, since, apparently, they are not intended for such intensive use. They will only work if you wear rubber boots carefully and infrequently. nine0003
💚 There are paints, especially for car tires for those who tune their cars and want to somehow stand out. You can try them, they are still stronger than decorative ones. They are sold in auto stores, and sometimes they are also found in stationery departments. There are markers, aerosol cans, and regular paint cans.
💚 One girl dyed her elastic bands with a spray designed for leather and was very pleased. The main thing here is to apply the paint evenly so that there are no smudges. nine0003
Instead of repainting the entire boot, sometimes a small decoration is enough to hide, for example, black stripes or dots on light-colored rubber. A very good option is permanent CD markers . These markers cannot be washed off with plain water, so they are not afraid of puddles or rain. Find a suitable pattern and decorate rubber boots with it.
By the way, on the net I came across recommendations a couple of times to make a pattern on rubber boots with nail polish . How do you like this turn? I think it should hold up well. At least for a while. Maybe even for a season.
💚 Those who are faced with the marking of rubber products rubber paint on metal KCh-136 are heard, but how it will behave on flexible products is a question. You need to experiment. In such cases, it is recommended to mix with rubber adhesive (5:1) and apply in 2 layers with intermediate drying.
💚 Well, the last way, which is only suitable for light rubber - Zelenka . If your white rubber boots are never white again, go for it! What is generally only green is not painted! In one of the articles, for example, I described how to dye Eco-fur with green paint or iodine. Now we got to the rubber). True, the method of painting rubber with green paint is not described anywhere, but, based on previous experience, I would pour hot water into the basin and, for starters, quite a bit of green paint. The concentration is determined by how much green boots you need, as well as how much greenery your rubber can “take”.