The low tire pressure light came on in my 2017 Toyota Highlander, so I checked the tires and inflated them to the correct pressure. However, it’s been a few hours, and the light still hasn’t turned off. Is there a way to reset the tire pressure sensor on my Toyota Highlander?
Jack Walsh · Answered on Dec 30, 2021
Reviewed by Shannon Martin, Licensed Insurance Agent.
Occasionally after reinflating your tires or having new ones installed, the TPMS, or tire pressure monitoring system, in your 2017 Toyota Highlander needs to be reset before getting an accurate reading. Fortunately, resetting the tire pressure sensor is easy and will only take a few minutes.
To reset the tire pressure sensor on your Toyota Highlander and get rid of the TPMS light, you should:
Just like how you should regularly check your tire pressure, you should also regularly check to see if you’re overpaying for car insurance by comparing quotes from multiple lenders.
If you’d rather leave the hard work of gathering quotes to someone else, use Jerry. The Jerry app can collect quotes from more than 50 top insurance companies, including Travelers, Nationwide, and Progressive, in seconds for free. If you ever have any questions, agents are just a text away, and they even help cancel your old policy once you’ve made your pick.
MORE: 11 car insurance hacks to save you money
Toyota Car Maintenance
View full answer
WHY YOU CAN TRUST JERRY
Jerry partners with more than 50 insurance companies, but our content is independently researched, written, and fact-checked by our team of editors and agents. We aren’t paid for reviews or other content.
Browse More Content
Car Heater is Not Working: Inspection Cost
What To Do If You're Not Able To Change Gears
Exhaust Fume Odor in Car: Inspection Cost
What To Do If Your Fog or Driving Lights Are Not Working
How to Replace a Speed Sensor
Honda Civic Ex Insurance Cost
Bmw X1 Xdrive28I Insurance Cost
Chevrolet Silverado C1500 Rst Insurance Cost
Mitsubishi Eclipse Cross Le Insurance Cost
Jaguar Xe Prestige Insurance Cost
Forest Hill Car Insurance
Billings Car Insurance
London Car Insurance
Port Allen Car Insurance
Shorewood Car Insurance
I accidentally left my car keys in the trunk of my vehicle, and I don’t have a spare to get them out. Is there a way to pick a car trunk lock?
Jack Walsh
Dec 30, 2021
I need to open up my Honda Civic key fob to switch out the battery, but I don’t see any release or button to make the fob come apart. How do I open my Honda key fob?
Chloe Jenkins
Dec 30, 2021
What do I need to do in order to refinance my car loan? I’m having trouble with the payments and I need to find a loan that has a better interest rate so that I can afford it.
Liz Jenson
Jan 04, 2022
Browse All Questions
Summer is the most popular time to visit the Smoky Mountains, but depending on what you are looking for, spring and fall may be better choices.
David Ghanizadeh-Khoob
Mar 02, 2022
The Dodge Charger has 16.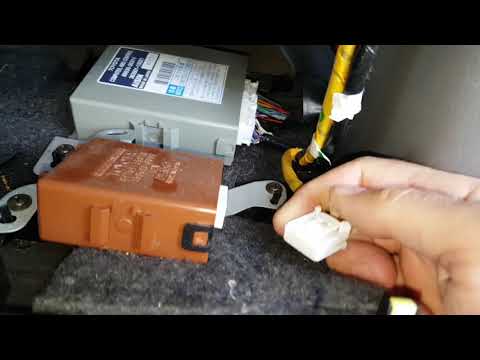 5 cubic feet of trunk space, which is about average for its class.
David Ghanizadeh-Khoob
Feb 03, 2022
In Nevada, failure to move over or slow down for stopped emergency vehicles and stalled cars could result in a $395 fine and 4 points on your driving record.
David Ghanizadeh-Khoob
Jan 20, 2022
Homeowners Insurance
Uninsured Motorist Protection
Car Repairs
State Auto Insurance
Third Party Fire and Theft Insurance
Valuable Articles Insurance
Insurance Shopping
Classic Cars
Car Buying
Wind Damage
Car Financing
Drivers with Disabilities
Electric Cars
Car Sharing
The Hartford
Save Money
Uninsured/Underinsured
buying
Umbrella Insurance
Dodge Viper
Cancellation Policy
Car Damage
Ridesharing
Driver's Permits
Chrysler
Car Loan
Personal Liability
Auto and Home Insurance
No long forms
No spam or unwanted phone calls
Quotes from top insurance companies
Find insurance savings — it's 100% free
Toyota
Hyundai
Mercedes-Benz
Subaru
Chevrolet
Mitsubishi
SUBJECT VEHICLES: 2008–2017 Toyota Highlander and Highlander HV.
RELEARN PROCEDURE? Yes.
SPECIAL TOOLS NEEDED? Yes, a Toyota Techstream.
The tire pressure monitoring system (TPMS) of the 2008–2017 Toyota Highlander and Highlander HV is designed to provide warning when the tire inflation pressure of one or more road tires is low.
A tire pressure warning valve sub-assembly equipped with tire pressure sensor/transmitter is installed in each tire and wheel assembly. The sensor measures the air pressure and internal temperature of the tire. These measured values and the transmitter ID are transmitted to the tire pressure monitor antenna and receiver assembly on the body via radio waves.
This data is then sent to the tire pressure monitor ECU from the tire pressure monitor receiver.
If the transmitter ID has been previously registered, the ECU compares the measured air pressure value and the standard value.
When the value is less than the standard value registered in the tire pressure monitor ECU, the tire pressure warning light on the instrument cluster will turn on.
In order to reset the warning threshold in response to changes in tire pressure values due to tire type and installation position changes, a tire pressure warning reset switch is used. This switch is used to initialize the system after certain repair procedures.
Under the following conditions, the system may not function properly:
Tire pressure monitoring system warning light
NOTE: The tire pressure warning light may turn on due to natural causes such as natural air leaks or tire pressure changes caused by temperature. In this case, adjusting the tire pressure will turn off the warning light.
NOTE: If the warning light turned on due to very low outside temperatures that cause decreases in tire pressure (such as in winter), adjust pressure to a higher pressure suitable to cold conditions. Tire pressure decreases by about 1.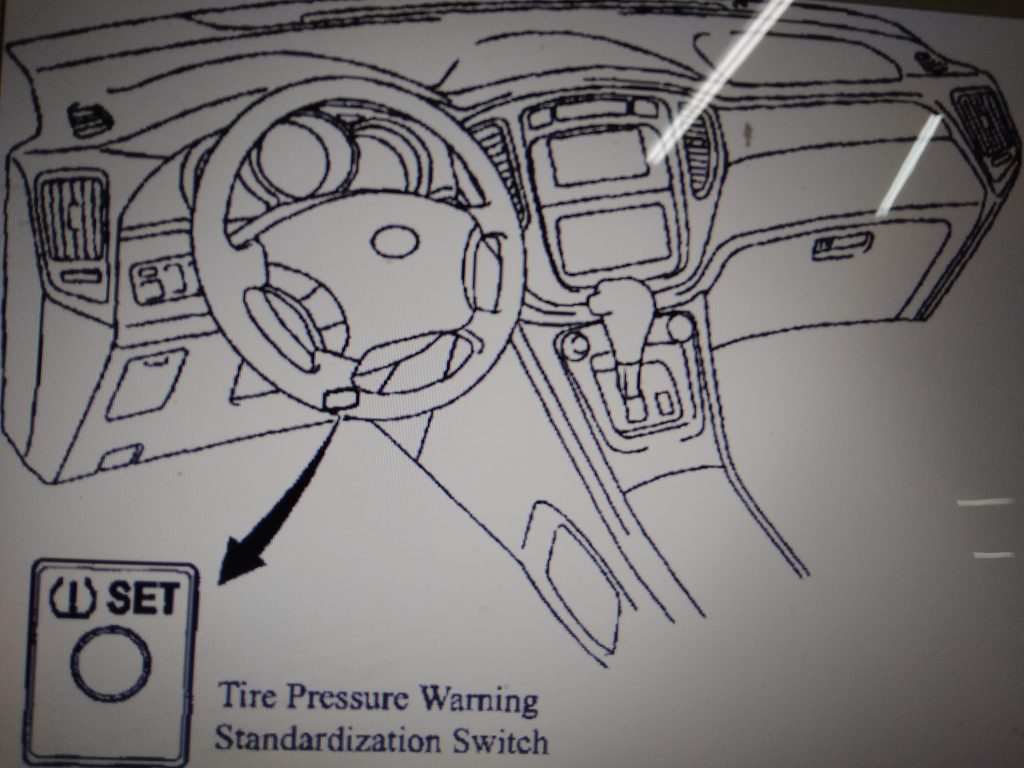 45 psi (10 kPa) for every 18 degrees Fahrenheit (10 degrees Celsius) drop in ambient temperature.
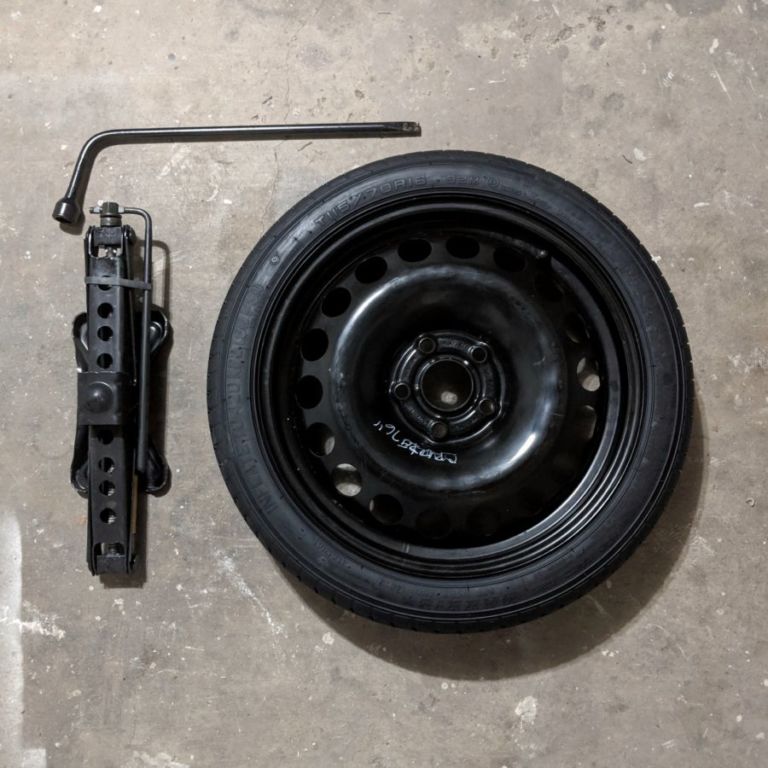
NOTE: The compact spare tire is not equipped with the tire pressure warning valve and transmitter. If a tire goes flat, the warning light will not turn off when the flat tire is replaced with the spare. When the standard tire is repaired, inflated to the specified level and returned to the vehicle, the warning light will go out.
When the tire pressure warning light does not go off, or when it comes on during driving, check tire pressure. If the tire pressure warning light comes on after adjusting the tire pressure, the tire may have a slow air leak.
If the warning light is still on even though the tire pressure is correctly adjusted, the tire could be punctured. Repair as necessary.
If the warning light turns on within several hours after adjusting the tire pressure, the tire may have a slow air leak. Repair as necessary. If the warning light is on or blinks after all above situations have been investigated, there is a malfunction in the TPMS. See appropriate manufacturer service information.
Reset procedures
The system will need to be initialized when tires are replaced with tires of different pressures, or the tire pressure sensor and/or tire pressure monitor ECU are replaced. See “Initializing tire pressure monitoring system.” When a tire pressure sensor and/or tire pressure monitor ECU is replaced, the sensor ID must be memorized by the tire pressure monitor ECU prior to system initialization. See “Tire pressure sensor registration.”
When the tire pressure warning light does not go off, or when it comes on during driving, check tire pressure. Adjust tire pressures to specification. Check that the warning light goes out after a few minutes.
NOTE: If the negative battery terminal is disconnected, initialize the following power systems after the terminal is reconnected: window control system, back door system, sliding door system and the moon roof. Refer to the owner’s manual or appropriate manufacturer service information.
Initializing the tire pressure monitoring system
CAUTION: Set tire pressure within the specified range before initializing. DO NOT push the reset switch without adjusting tire inflation pressure of all tires (including the spare tire). Otherwise, the low tire pressure warning light may not come on even if the tire pressure is low, or it may come on when the tire inflation pressure is actually normal. If you push the reset switch while the vehicle is moving, initialization is not performed.
NOTE: The system will need to be initialized when the tires are replaced with tires of different pressures; or the tire pressure sensor and/or tire pressure monitor ECU are replaced. Set tire pressure within the specified range before initializing. When a tire pressure sensor and/or tire pressure monitor ECU is replaced, the sensor ID must be memorized (registered) by the tire pressure monitor ECU prior to system initialization. See “Tire pressure sensor registration.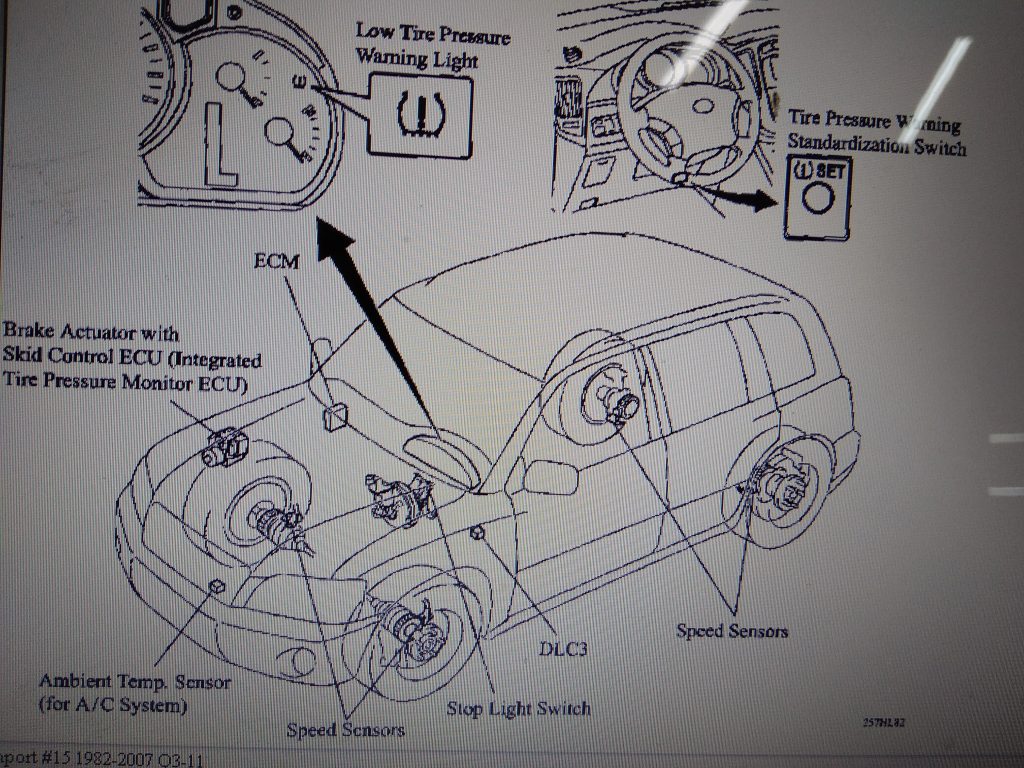 ”
”
NOTE: Perform the tire pressure adjustment after the tires have sufficiently cooled down.
NOTE: The initialization is normally completed within two to three minutes. If the initialization has not been completed successfully, DTC C2177/77 will be set after approximately 20 minutes. Initialization can be terminated by connecting terminals 13 (TC) and 4 (CG) of the DLC3.
During initialization, the tire pressure sensor measures the inflation pressure of the tires, and registers the signals that are transmitted into the tire pressure monitor ECU at a frequency of one per minute. The initialization process is completed when the signals from the tires (including the spare tire) have been received.The initialization process is canceled if the ignition switch is turned to the OFF position prior to the completion of initialization. To restart initialization, the tire pressure warning reset switch must be pressed again.
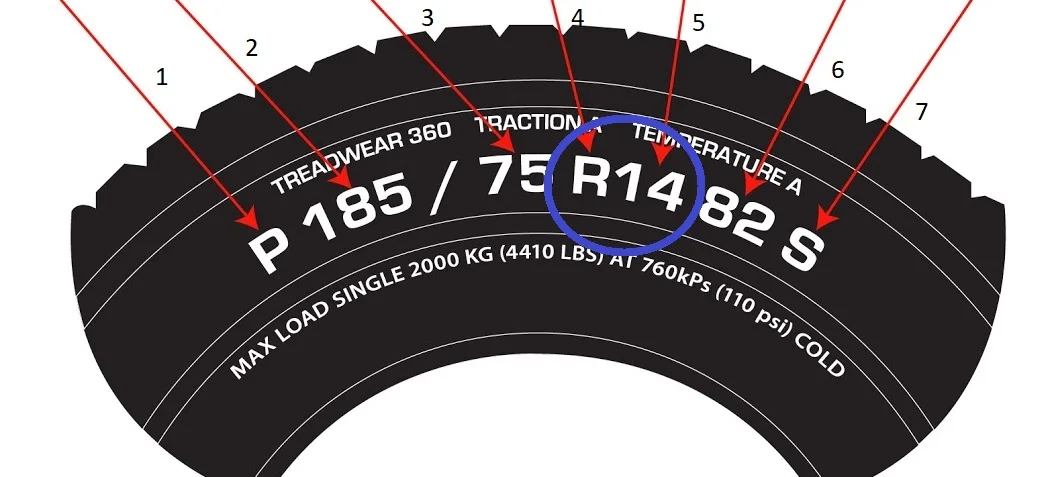
1) Set the tires to the specified (cold) pressures as indicated on the tire and loading information label.
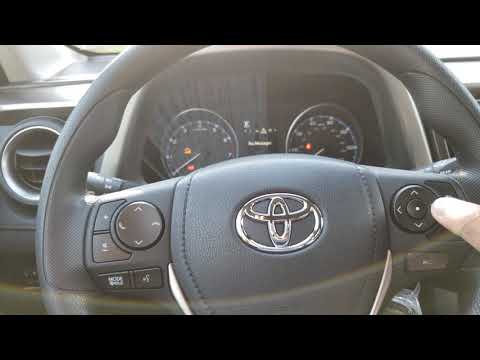
2) Turn the ignition switch ON.
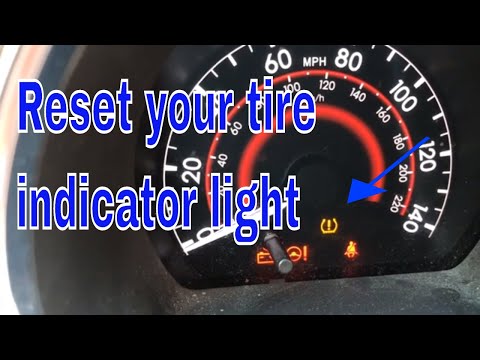
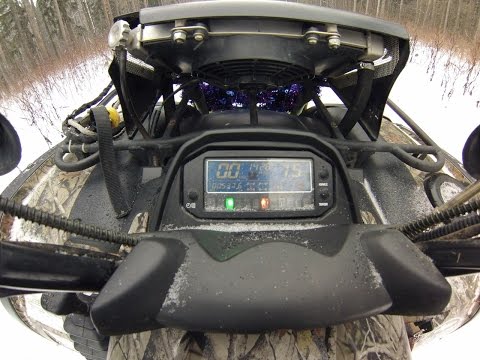
3) Press and hold the tire pressure warning reset switch for three seconds or more until the tire pressure warning light blinks three times (one second on, one second off). See Figures 1 or 2.
4) Turn the ignition switch OFF.
5) Connect the Techstream to the DLC3.
6) Turn the ignition switch ON.
7) Turn the Techstream ON.
8) Check the data list. Enter the following menus: Chassis / Tire Pressure Monitor / Data List.
NOTE: It may take about two or three minutes until the pressure values are displayed. If the values are not displayed after a few minutes, perform troubleshooting according to the inspection procedure for DTCs C2121/21 to C2125/25. If the initialization has not been completed successfully, DTC C2177/77 will be set after the vehicle is driven for 20 minutes or more.9) Initialization has been completed when the expected tire pressure data for all wheels is on the Techstream display.
Tire pressure sensor registration
NOTE: When a tire pressure sensor and/or tire pressure monitor ECU are replaced, the sensor ID must be memorized (registered) by the tire pressure monitor ECU prior to system initialization. To perform this procedure, the Techstream must be used. It is not necessary to register the sensor ID(s) when only a tire rotation is performed.
NOTE: Before beginning the registration process on vehicles where tire pressure sensors have not been replaced, retrieve sensor transmitter ID(s) using Techstream or by reading the ID on the tire pressure sensor. If the sensor is being replaced with a new one, make a note of the seven-digit number (transmitter ID) before installation, as it cannot be seen after the sensor is installed (see Figure 4).1) Set the tire pressure of all the wheels to the pressure specified on the tire and loading information label.
2) With the ignition switch OFF, connect the Techstream to DLC3.
3) Turn the ignition switch ON. Turn the Techstream ON.
4) To perform the transmitter ID registration, enter the following menus: Chassis / Tire Pressure Monitor / Utility / ID Registration.
5) Input the transmitter IDs (ID1 to ID5) using the Techstream and transmit them to the tire pressure warning ECU.
NOTE: The tire pressure warning light will continue to blink until the tire pressure warning ECU receives the input ID signals.
The previously registered IDs will be deleted from the memory when the registration is completed. Registration can begin while in initialization mode. However, the initialization mode will be cancelled when the registration mode is started.
6) The “ID Registration is Complete” is displayed on the Techstream display.
7) Confirm ID registration through data from all wheels being displayed on the Techstream.
8) Enter the menu items in this order: Chassis / Tire Pressure Monitor / Data List. NOTE: It may take about two or three minutes until the values are displayed.
If the values are not displayed after a few minutes, perform troubleshooting according to the inspection procedure for DTCs C2121/21 to C2125/25.
If the IDs have not been registered, DTC C2171/71 will be stored in the tire pressure warning ECU after three minutes or more. If normal pressure values are displayed, the IDs have been registered correctly. If the tire pressure values are not displayed after a few minutes, the IDs may be incorrect or the system may have a malfunction.
After all IDs are registered, DTC C2126/26 (Transmitter ID not Received in Main Mode) is stored in the tire pressure warning ECU and the tire pressure warning light blinks for one minute and then comes on.
When the tire pressure warning ECU successfully receives radio waves from all the transmitters whose IDs are stored in the ECU, DTC C2126/26 is deleted and the tire pressure warning light goes off.
9) Confirm that the expected tire pressure data of all tires are displayed on the screen.
Demounting/mounting procedures
CAUTION: The tire should be demounted from the wheel using the tire changer manufacturer’s instructions. Use the following information to avoid damage during the demounting/mounting procedures.
NOTE: The system will need to be initialized when tires are replaced with tires of different pressures, and the tire pressure sensor and/or tire pressure monitor ECU are replaced. When a tire pressure sensor and/or tire pressure monitor ECU are replaced, the sensor ID must be memorized (registered) by the tire pressure monitor ECU prior to system initialization. See “Reset procedures.”
NOTE: If the negative battery terminal is disconnected, initialize the following power systems after the terminal is reconnected: window control system, back door system, sliding door system and the moon roof. Refer to owner’s manual or appropriate manufacturer service information.
Tire pressure sensor
CAUTION: The use of tire sealants is strictly prohibited for vehicles equipped with a TPMS. Tire sealants can clog tire pressure sensors.
CAUTION: Be sure to reinstall tire valve caps, or dirt or moisture could get into the valve core and cause air leakage. Use only the original valve cap. If any other valve cap is used, it may corrode or melt, and become extremely difficult to remove.
NOTE: The average life of the grommet of the tire pressure sensor is approximately five years, at which time it must be replaced. If the valve is leaking air, but it is less than five years old and the grommets are in good condition, retighten the valve nut to 35 in.-lbs. (4 N.m). Whenever the tires must be replaced, replace grommets for tire pressure sensors as well.
NOTE: If the tire pressure valve sub-assembly is going to be replaced, make a note of the seven-digit number (transmitter ID) before installation, as it cannot be seen after sensor is installed (see Figure Fig. 4).
Whenever a new sensor is installed, it will need to be registered in the tire pressure monitor ECU.
1) When replacing a wheel or tire, tire pressure sensors must be set up in one of the following ways:
2) Remove the wheel. Remove the cap and valve core, and release air from the tire (see Figure 4).
NOTE: Keep the removed cap, valve core, nut and washer.
3) After ensuring that air is sufficiently released, remove the nut and washer that is used to hold the tire pressure sensor and drop the sensor inside the tire.NOTE: Be careful not to damage the tire pressure sensor due to interference between the sensor and tire bead.
4) After dropping the tire pressure sensor into the tire, disengage the bead using the shoe of the tire remover (see Figure 5).
5) Remove the bead on the upper side following the usual procedure
6) Take out the sensor from the tire, and remove the bead on the lower side following the usual procedure.
NOTE: Check that no cracks or damage are visible on the grommet. If so, replace the grommet together with the washer and nut. Always replace the grommet and washer when replacing the warning valve and transmitter.
7) Remove the inner grommet from the tire pressure sensor, or retrieve it from the wheel, if necessary.
NOTE: The tire pressure sensor is powered by a lithium battery. When a sensor is defective, remove the battery from the sensor and dispose of properly.
Installation
1) Insert the tire pressure monitor valve into the valve installation hole. Insert from the inside of the rim so that the print surface can be seen (see Figure 3). Check for the following:
2) Install the washer on the tire pressure monitor valve from the rim side, and tighten the nut to 35 in.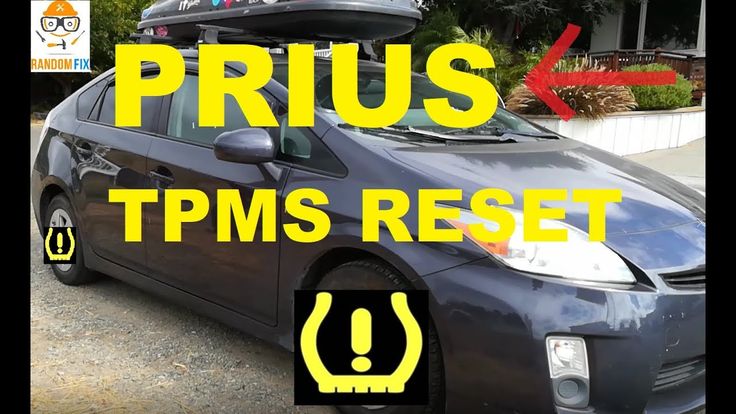 -lbs. (4 N.m). See Figure 6.No further tightening is required once the nut is tightened to the specified torque.
Check that there is no foreign matter on the washer and nut. If the tire and tire pressure warning valve and transmitter have been removed, check that there is no damage or cuts visible, and no foreign matter, such as mud, dirt or sand, is attached to the grommet. Replace the grommet with a new one if any of the defects mentioned above are found.
Check that there is no oil, water or lubricant around the rim hole, tire pressure warning valve and transmitter, washer and nut. Failing to do so may result in improper installation.
CAUTION: If the tire pressure warning valve and transmitter is positioned outside this area, it will interfere with the tire bead, and may cause the tire pressure warning valve and transmitter to be damaged. If the use of lubricant is required when installing the bead, do not apply the lubricant directly to the tire pressure warning valve and transmitter.
3) Put the wheel on the mounting machine, and install the lower tire bead. Position the main body of the sensor in the shaded area as shown in Figure 7.4) Making sure that the tire bead and tool do not interfere with the main body of the sensor and that the sensor is not clamped by the bead, install the upper bead and inflate the tire.
5) After the tire is inflated, the valve nut may be loose. Retighten the nut to the specified torque, and then check for air leaks with soapy water.
6) Install the tire and wheel assembly on the vehicle.
7) When a new sensor is installed, the ID code will need to be registered. See “Tire pressure sensor registration” under “Reset procedures.”
8) After completing the operation, remove the valve core to rapidly release the air in the tire. Ensure that the tire pressure warning light comes on. If the warning light does not come on, refer to the appropriate manufacturer service information. Re-inflate the tires.
9) If there is an air leakage, tighten the tire pressure monitor valve nut to 35 in. -lbs. (4 N.m), and push the valve core two to three times to remove any dirt attached to the valve core. If air continues to leak, replace the grommet, washer and nut. ■
Torque specifications
Component Ft.-lbs.(N.m)
Wheel nut 76 (103)
In.-lbs. (N.m)
Tire pressure sensor nut 35 (4)
Information for this column comes from Mitchell 1’s “Tire Pressure Monitoring Systems Guide” for domestic and import vehicles. Headquartered in Poway, Calif., Mitchell 1 has provided quality repair information solutions to the automotive industry for more than 80 years.
To read more TPMS columns, click:
2008-2017 Nissan Rogue and Rogue Select
Kia Sorento 2011-2017
Honda Pilot and Ridgeline, 2005-2016
Acura ILX, MDX, RDX, TL, TLX, TSX and ZDX -- 2007 - 2016
You are the proud owner of a recent car, the benefits of tactile devices, integrated technologies, however, should provide you with a significant usability of your Toyota Highlander, which says that the technology speaks of electricity, and, as we all unfortunately often know there are problems with resolve. Today we will focus on the tire pressure sensor and specifically on how to reset the tire pressure sensor on a Toyota Highlander so that you no longer have this indicator on the dashboard. nine0004 To do this, we will divide our article into two parts: first, we will explain the typical case where the tire pressure indicator appears and the process to follow, and then the case where the tire pressure indicator remains on even though the tires are inflated, since reset this tire sensor on toyota highlander.
First we will focus on the classic approach to reset the tire sensor on Toyota Highlander which if it lights up, here are the basic simple steps:
 nine0016
 For more Toyota Highlander tips, take a look at the Toyota Highlander category.
This system is designed to alert the driver of low tire pressure. If, while driving, a pressure drop in one of the wheels is detected, the corresponding indicator lights up on the instrument cluster, indicating the need for immediate pressure adjustment.
1. How it works. nine0058
The tire pressure monitoring system (TPMS - Tire Pressure Monitoring System), used on Toyotas, refers to "indirect" action schemes and functions as part of ABS, which is able to perceive a constant difference in wheel speed (a flat tire has less rolling radius and therefore rotates slightly faster).
But such a TPMS cannot simply compare the speed of one individual wheel with the rest, because the car does not move in an absolute straight line very often, in any corners, the outer wheels will always travel more than the inner ones, and the front wheels more than the rear ones. Therefore, a conventional control system adds the speeds of each two diagonal wheels, calculates the difference between these sums, and divides it by the average speed of all four wheels. If the obtained ratio differs from the set one, then the system diagnoses the change in pressure, but it cannot identify a specific tire. nine0005
The disadvantages of this scheme are:
- impossibility to determine a sharp drop in pressure;
- the inability to determine simultaneously the pressure drop even in two wheels located on the same side or the same axle, not to mention all four wheels;
- the dependence of the system performance on the degree of wheel slip, the condition of the rubber and the vehicle load;
- actuation in case of pressure drop not less than 25-30%; nine0065 - the need for long-term calibration (pre-setting).
In this regard, Toyota used in parallel a second method of pressure control using ABS. The fact is that the tire and the rim actually represent an oscillatory circuit, the characteristics of which directly depend on the elasticity of the tire, and hence the pressure in it (meaning the circular vibrations of the tire in the direction of rotation). It turned out to be possible to isolate the frequency of these oscillations from the signal of the wheel speed sensor, and to judge the pressure drop by its change. nine0005
However, TPMS has a noticeable inertia - in order to detect a flat tire, you need to drive a considerable distance (sometimes up to 20-30 km), you will have to go a long way even after normalizing the pressure so that the indicator goes out.
2. Development.
This system was introduced by Toyota in the second half of the 1990s. As you can see, it was used mainly on models of the Corolla family and large rear-wheel drive cars, ranging from class E and above. nine0065 But it seems that the Japanese cooled off quite quickly to this scheme, so today they have abandoned its use on most models, including the Corolla 120 of the later years of production.
| Model | Series | Release |
| Corolla | #E10# nine0079 | 04.1997-04.1998 |
| Corolla/Sprinter | #E11# | 04.1997-04.1998 |
| Corolla | AE100, AE104, CE101 | 04.1998-08.2000 |
| Corolla/Sprinter nine0079 | AE110, AE114, CE11#, EE111 | 04.1998-08.2000 |
| Sprinter Carib | AE11# | 04.1998-07.2002 |
| Corolla Levin/Sprinter Trueno | AE11# | 04.1998-08.2000 nine0079 |
| Corolla Spacio | AE11# | 04.1998-05.2001 |
| Corolla / Corolla Fielder | CE121, NZE12#, ZZE122, ZZZE124 | 08. |
| Corolla Runx/Corolla Allex | NZE12#, ZZE122, ZZE124 nine0079 | 01.2001- |
| Corolla Spacio | NZE121, ZZE12# | 05.2001- |
| Mark II | JZX101 | 09.1996-08.1998 |
| Mark II | JZX100, JZX101 nine0079 | 08.1998-10.2000 |
| Mark II / Mark II Blit | JZX110 | 10.2000- |
| Chaser / Cresta | JZX101 | 09.1996-08.1998 |
| Chaser / Cresta | nine0078 JZX100, JZX10108.1998-06.2001 | |
| Crown / Crown Majesta | JKS175, JZS171, JZS175, JZS177, UZS171, UZS175 | 09.1999-2005 |
| Century | GZG50 | 04.1997- | nine0080
| Celsior | UCF3# | 08. |
3. Indicator.
There are at least two options for indicators on the instrument cluster - ISO K11 and K10. The most famous of them, of course, is the first one - the "horseshoe with arrows". By the way, in the Western world with these indicators there is a similar problem - "what kind of light bulb is this?" - according to surveys, most of the drivers there do not understand their meaning. nine0005
A good indicator should come on when the ignition is turned on and go out after 3 seconds. If the system has detected a drop in tire pressure, then in order for the indicator to go out, after normalizing the pressure, it is necessary to drive a certain distance at a speed of at least 30 km / h. The indicator is powered directly from the output of the ABS control unit.
The principles of the system allow for the possibility of its incorrect operation (the indicator does not light up at low tire pressure or, conversely, it lights up at normal) under the following conditions:
- tires of non-recommended size are used,
- tires of different sizes or models are installed on different wheels,
- wheels have different grip,
- used spare wheel - "dokatka",
- used wheels with snow chains,
- tire pressure significantly exceeds the nominal,
- the pressure in the tire has dropped sharply due to a puncture,
- the system has not been pre-configured,
- the car is moving on a rough or icy road,
- the vehicle is moving at a speed below 30 km/h,
- for short trips (up to 5 minutes).
If the indicator stays on at normal pressure and in the absence of these conditions, this may indicate a malfunction of the TPMS itself.
4. Presetting. nine0058
Adjustment must be done after any wheel and tire (disc) replacement work has been performed, otherwise the system will not function properly. The adjustment procedure is shown below (preliminary pressure in all four wheels must be correctly adjusted).
Type 1 - models without setting button and with DLC1 connector (early version)
1) Turn on the ignition. nine0065 2) Connect the terminals "TS" and "E1" of the diagnostic connector DLC1 under the hood.
3) After 30 seconds, depress and hold the brake pedal until the system indicator flashes 3 times at 2 second intervals.
Type 2 - Pushbutton Models with DLC1 Connector (Transition)
Note. The installation buttons have several design options - with a pictogram, with an inscription or nothing at all, but differ in their characteristic shape and location - at the bottom of the instrument panel on the driver's side. nine0005
1) Turn on the ignition (the car must be stationary).
2) Connect the terminals "TS" and "E1" of the diagnostic connector DLC1 under the hood.
3) Press and hold the setting button until the system indicator blinks 3 times.
4) After that, in order for the system to save the correct settings, it is necessary to drive a certain distance.
Type 3 - models with setting button and without DLC1 connector (late version)
1) Turn on the ignition (the car must be stationary).
2) Press and hold the setting button until the system indicator blinks 3 times.
3) After that, in order for the system to save the correct settings, it is necessary to drive a certain distance.
5. Self-diagnosis.
The pressure control system, although it operates as part of the ABS, also provides its own small self-diagnosis. Codes on those models where the DLC1 connector was still used are read in the standard Toyota way by the number of indicator flashes when the ignition is on and the "TC" and "E1" terminals are closed.