Disclosure: We may get commissions for purchases made through links in this post.
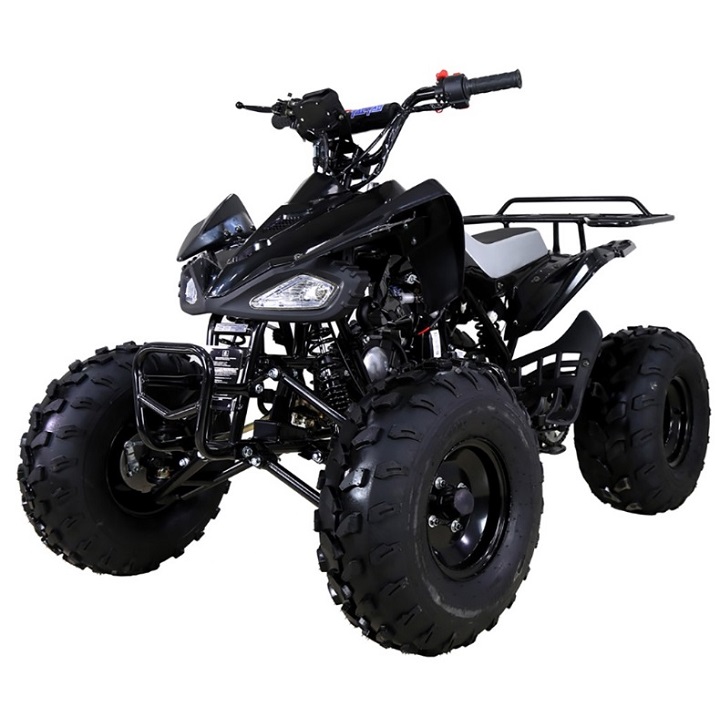
The Suzuki Quadrunner helped reinvent the ATV industry. This four-wheeler sparked a movement away from unsafe all-terrain cycles and successfully established Suzuki as an innovation leader. Since then, manufacturers worldwide have followed suit, resulting in one brilliant design after another. This trend greatly benefited consumers and influenced the archetypal structure of sport ATVs and utility vehicles.
The Suzuki Quadrunner began the industry’s shift to four-wheeled ATVs in the 1980s. Its sturdy design, electronic ignition, and all-terrain capabilities made it an enormous success in the market. It was the quintessential game-changer, with features balanced between function and sport riding.
Read on and learn more about the Suzuki Quadrunner’s specs and features, drawbacks, fixes, and answers to frequently asked questions. Furthermore, discover how this four-wheeler has influenced the entire ATV industry to become what it is today.
Suzuki introduced the first four-wheeled ATV in 1983 with the Suzuki LT125D Quadrunner (also known as the Suzuki Quadrunner 125).
This prototype was marketed alongside the ALT125 ATC between 1983 and 1987 and featured a well-planted four-wheel chassis, an electric start system, and reverse, which were rare luxuries in the early ’80s.
Balloon tires and a thick, soft seat worked in place of a suspension. It was one of Suzuki’s milestone vehicles and the First of Four Wheels.
The manufacturer produced 20 models and six-speed classes during its five-year production run, including the Suzuki Quadrunner LT50 youth ATV and the LT300EH Quadrunner. These versions were able to drive on various surfaces, including mud, slopes, and deserts.
Bigger engine models were utilized for farm work, forestry, and trail riding. High-performance and racing quads also came from this four-wheeler. In 1985, Suzuki introduced the LT250R Quadracer, a sport ATV with a longer travel suspension, a liquid-cooled two-stroke engine, and manual transmission. Honda followed similarly a year later with the legendary TRX250R Fourtrax.
In its final year of production, Suzuki announced the 1987 Suzuki Quadrunner 250 4×4 (LT-4WD), which provided consumers with terrain-conquering capability that wasn’t present in previous models. Its drive system allowed the rider to select between 2WD and 4WD modes.
It featured a front differential lock that allowed the vehicle to crawl out of any situation. The QuadRunner 4WD was also designed with an engine configuration and fuel tank placement that led to comfortable, low seat height, and equipped with high and low ratios that made it great on tight trails.
Here are specs and features of the Suzuki Quadrunner 160e for scale (the specs of the 1983 LT125D model are quite elusive, and this 1989 model is the closest to the first model’s proportions):
 It has a bore-stroke ratio of 58 mm x 60 mm. The engine’s displacement is 158-cc (the LT125 had 124-cc), and its compression ratio is 9.2:1. Fuel tank capacity, including reserve fuel, is 2.2 gallons/8.5 liters (2 gallons/7.6 liters for the LT125) and is delivered by a Mikuni carburetor. It has a Polyurethane foam air cleaner and a wet sump lubrication system.
 The vehicle’s wheelbase is 42.1 inches, and it weighs 341 lbs – this will fit perfectly at the back of your truck.
 It came with foot pegs, a 45-watt headlight, a 5-watt tail light, and 3.4-watt neutral and reverse indicator lights. Tons of online sellers offer Suzuki Quadrunner 160 parts (and Suzuki Quadrunner 250 parts), but the best ones can be sourced through BikeBandit.com or from Suzuki Parts House.
Auction listings give a price range between $300 and a little over $3,000. However, it would depend on the year, condition, speed class, and whether the quad has been kept stock or modded. A 1983 Suzuki Quadrunner LT125 would cost anywhere from $465 to $2,575.
Given that it was the first of its kind, it now sells at twice its original MSRP of $1,188. Another example would be a Suzuki Quadrunner 500 priced at $3,000 – complete with winch, hauling racks, and aftermarket wheels and tires.
1983-1987 Suzuki Quadrunner (LT125) models are very hard to come by, even in online auctions. Most of what previous owners are reselling is Suzuki 250 ATVs, which come from the Midwest and mid-Atlantic U.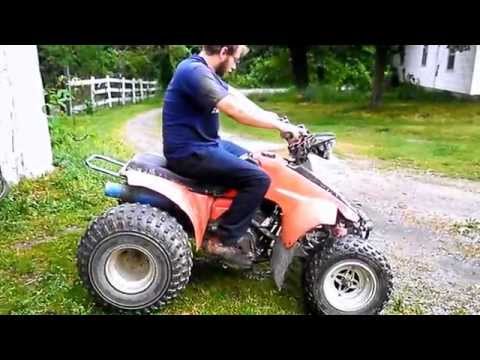 S. regions. Most of these are in good working condition and with front and rear racks – with the cheaper options priced at $300-$500 due to the stock plastic getting brittle or the quad needing a cosmetic makeover.
The Suzuki 250 quad price ranges from $300 to $1,950, while Suzuki Ozark Quadrunner 250s in good working condition would typically be models produced from 2002 to 2006 and would cost around $1,675 tops.
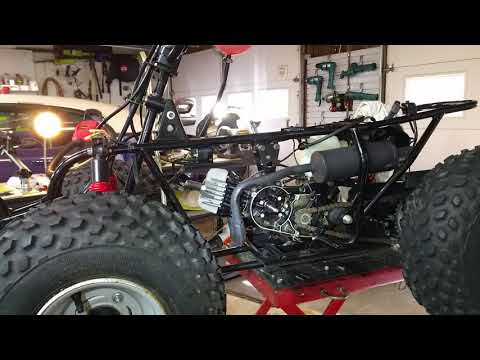
While the Suzuki Quadrunner was a mighty trendsetter in the ’80s, this four-wheeler is not problem-free. Here are some known issues that owners experience with the quad and steps on how to fix them:
A chief complaint from Quadrunner owners is that the quad starts up great with lots of power, but after running at operating temperature, it starts to lose power and dies before the 15-minute mark.
When this happens, check if your air filter needs replacing or if you need to clean the carb with seafoam. Then try to rule out the cause of the problem.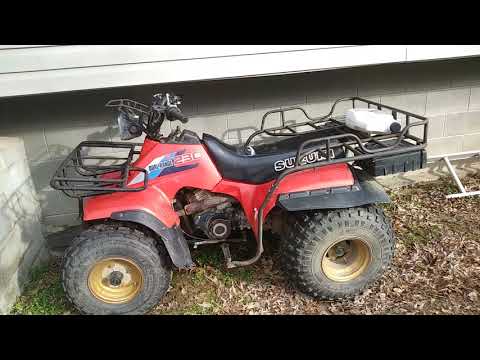 Run the vehicle until it dies, then remove the wire from the plug in the engine.
Connect it to a working spark plug and ground it to the head. If it sparks, this will indicate that you may have a fuel, valve, or compression problem. If the engine dies out after it’s warmed up and would not restart until completely cooled off, your problem may be due to overheating and could result from the valves needing adjustment.
Likewise, it is confirmed by a constant clicking or tapping sound (apart from the usual engine noise that you hear). To avoid, have your valve lash inspected. Check your service manual for recommended intervals.
Both the 250-cc and 300-cc engine displacements of the Suzuki Quadrunner are famous for flooding problems. The usual cause is leaking inside the carburetor. The other possibility is leaking in the fuel pump diaphragm. You would know that this is the case if the vacuum hose from the carb to the fuel pump is wet inside.
Inevitably, the drive chain stretches and causes the quad to lose power over time. When this happens, follow these simple steps. First, park your quad on level ground and allow the drive chain to cool completely. Then use a chain link tool to remove the chain link from your drive chain.
Turn the handle on the tool counterclockwise. Force the pin on both sides of the chain-link out of the hole until removed. Once you have trimmed the chain to the right length, use the chain-link tool to secure the chain’s ends together.
Like any other vintage 4×4, the Suzuki Quadrunner’s plastic body is bound to deteriorate. You can fix this by buying aftermarket or OEM plastics that would fit your Quarunner, getting a little creative with your quad with stickers and decals, or cleaning up your vehicle’s look with some spray paint. Online retailers and parts dealers offer great deals for these options.
The VIN location on a Suzuki ATV varies by year and model. It is usually on the rear frame or rear vertical bars next to the taillight.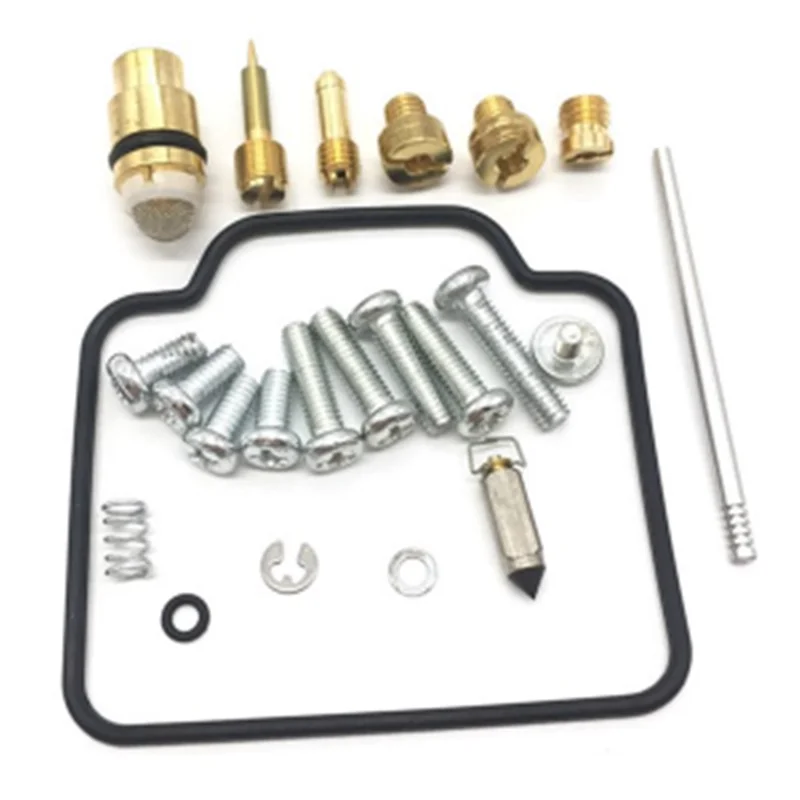 If you still cannot find the VIN, it may be due to these reasons:
If you do not encounter any of these problems and were able to locate the VIN, make sure to check it using a free ATV VIN check tool like this one. Visit your nearest authorized Suzuki ATV dealer if the VIN tool you are using does not provide the information you need.
Additionally, the 10th character of your VIN represents the production year of your Suzuki Quadrunner. As the VIN is alphanumeric, this 10th character could either be a number or letter. You will need a VIN year chart to determine the corresponding manufacture year of your ATV. Note the letters I, O, Q, U, Z, and the number zero are never used on a VIN to avoid confusion with other digits.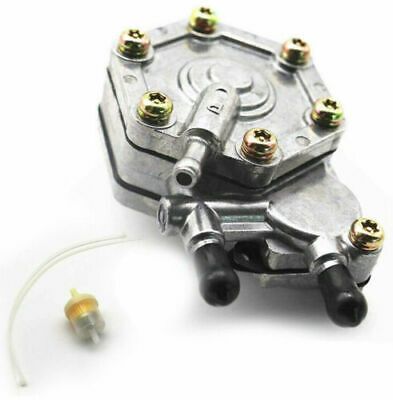 Also, the 10th digit of the VIN is recycled every 30 years.
Suzuki Motor Corporation is a Japanese corporation based in Hamamatsu and is the maker of the Suzuki Quadrunner. What started as a weaving loom business in 1909 has since ventured into the automotive industry.
Today, the company is among the most successful automakers by production worldwide and has over 133 distributors in 192 countries. Aside from producing ATVs, Suzuki is also a well-known manufacturer of automobiles, motorcycles, 4WD vehicles, outboard marine engines, wheelchairs, and internal combustion engines.
With selectable high and low range, front lock differentials, and 2WD and 4WD options, we can understand what made the Suzuki Quad a trendsetter. It sported features that were unheard of in other all-terrain vehicles and prototyped the design for high-performance four-wheelers.
The Suzuki Quadrunner provided a safer, more stable ride, and a few add-ons and rail guards made it multifunctional. It will fall short if compared to today’s off-roading standards, but without it, we will not get to enjoy the powerful behemoths riding the trails today. All in all, the Suzuki Quadrunner was and continues to be a great quad.
(F) = Front (R) = Rear IS = Independent Suspension SA = Straight Axle
| LT 80 Quadsport, 87-05 (F) | 19x7x8 | 3/120 | IS | 10x1.25mm | |
| LT 80 Quadsport, 87-05 (R) | 19x7x8 | 3/120 | SA | 10x1.25mm | |
| LT 160 Quadrunner, 89-02 (F) | 20x7x8 | 4/112 | IS | 10x1.25mm | |
| LT 160 Quadrunner, 89-02 (R) | 22x10x8 | 4/112 | SA | 10x1.25mm | |
| LT 250F Quadrunner, 89-02 (F) | 22x8x10 | 4/140 | IS | 10x1. 25mm 25mm |
|
| LT 250F Quadrunner, 89-02 (R) | 24x11x10 | 4/140 | SA | 10x1.25mm | |
| LT 250R QuadRacer, 85-92 (F) | 21x7x10 | 4/166 | IS | 10x1.25mm | |
| LT 250R QuadRacer, 87-92 (R) | 22x10x10 | 5/130 | SA | 10x1.25mm | |
| LT 250 4WD, 88-02(F) | 22x8x10 | 4/140 | IS | 10x1.25mm | |
| LT 250 4WD, 88-02 (R) | 24x11x10 | 4/140 | SA | 10x1.25mm | |
| Z250 2WD, 02-08 (F) | 22x7x10 | 4/144 | IS | 10x1.25mm | |
| Z250 2WD, 02-08 (R) | 20x10x9 | 4/110 | SA | 10x1. 25mm 25mm |
|
| OZARK 250 2WD, 02-08 (F) | 22x7x11 | 4/110 | IS | 10x1.25mm | |
| OZARK 250 2WD, 02-08 (R) | 22x10x9 | 4/110 | SA | 10x1.25mm | |
| LT 300 4WD XM King Quad, 91-03 (F) | 24x8x11 | 4/140 | IS | 10x1.25mm | |
| LT 300 4WD XM King Quad, 91-03 (R) | 25x10x12 | 5/160 | SA | 10x1.25mm | |
| Eiger 400, 02-07 (F) | 25x8x12 | 4/110 | IS | 10x1.25mm | |
| Eiger 400, 02-07 (R) | 25x10x12 | 4/110 | SA | 10x1.25mm | |
| Z250/400 2WD, 02-07 (F) | 22x7x10 | 4/144 | IS | 10x1. 25mm 25mm |
|
| Z250/400 2WD, 02-07 (R) | 20x10x9 | 4/110 | SA | 10x1.25mm | |
| King Quad 400 4x4, 08-16(F) | 25x8x12 | 4/110 | IS | 10x1.25mm | |
| King Quad 400 4x4, 08-16 (R) | 25x12x12 | 4/110 | SA | 10x1.25mm | |
| LTR-450 2WD, 06-08 (F) | 20x6x10 | 4/144 | IS | 10x1.25mm | |
| LTR-450 2WD, 06-08 (R) | 18x10x8 | 4/110 | SA | 10x1.25mm | |
| King Quad 450 4x4, 07-10(F)IRS | 25x8x12 | 4/110 | IS | 10x1.25mm | |
| King Quad 450 4x4, 07-10 (R)IRS | 25x10x12 | 4/110 | IS | 10x1. 25mm 25mm |
|
| King Quad 500, 09, 11-16(F)IRS | 25x8x12 | 4/110 | IS | 10x1.25mm | |
| King Quad 500, 09, 11-16 (R)IRS | 25x10x12 | 4/110 | IS | 10x1.25mm | |
| LT 500R QuadRacer, 87-90 (F) | 21x7x10 | 4/166 | IS | 10x1.25mm | |
| LT 500R QuadRacer, 87-90 (R) | 22x11x10 | 5/130 | SA | 10x1.25mm | |
| LT-F/LT-A 500 Quadrunner, 98-02 (F) | 25x8x12 | 4/90 | IS | 10x1.25mm | |
| LT-F/LT-A 500 Quadrunner, 98-02 (R) | 25x10x12 | 4/90 | SA | 10x1.25mm | |
| Vinson 500 4x4, 03-07(F) | 25x8x12 | 4/110 | IS | 10x1.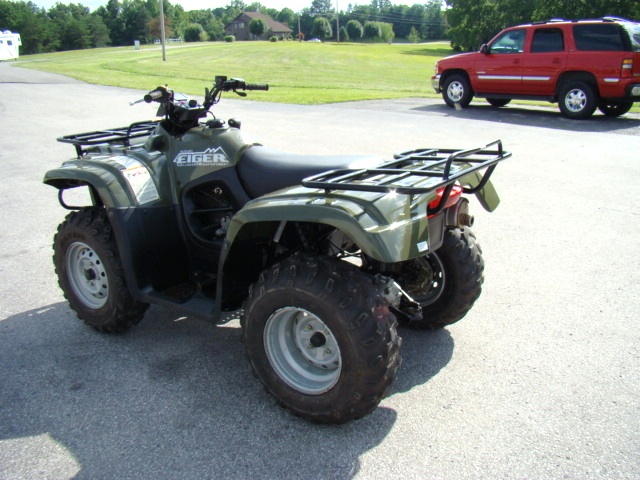 25mm 25mm |
|
| Vinson 500 4x4, 03-07(R) | 25x10x12 | 4/110 | SA | 10x1.25mm | |
| Twin Peaks 700 4x4, 04-05(F) | 25x8x12 | 4/137 | IS | 10x1.25mm | |
| Twin Peaks 700 4x4, 04-05(R) | 25x10x12 | 4/137 | SA | 10x1.25mm | |
| King Quad 7004x4, 05-07(F) IRS | 25x8x12 | 4/110 | IS | 10x1.25mm | |
| King Quad 7004x4, 05-07(R) IRS | 25x10x12 | 4/110 | IS | 10x1.25mm | |
| King Quad 750 4x4, 08, 09-16(F) IRS | 25x8x12 | 4/110 | IS | 10x1.25mm | |
| King Quad 750 4x4, 08,09-16 (R) IRS | 25x10x12 | 4/110 | IS | 10x1. 25mm 25mm |
(F) = Front (R) = Rear IS = Independent Suspension SA = Straight Axle
If you don't see your application listed above, please contact us. Make sure to include the make, model and year of your machine.
Adjusting the valves on an ATV is one of the most important maintenance steps. Ignoring this operation will adversely affect the operation of the engine, make it difficult to start the ATV, and even lead to a number of serious breakdowns. Therefore, it is important for the rider to figure out when it is necessary to carry out the adjustment and whether it is worth performing the procedure on their own or it is better to seek help from an ATV store in Kyiv.
Experienced motorists advise adjusting the valves on the ATV immediately after purchasing the equipment. The fact is that when assembling devices (especially Chinese ones), manufacturers do not pay due attention to this procedure. And the operation of ATVs with incorrectly adjusted gaps leads to:
The second clearance setting should preferably be done when the vehicle is running in. That is, after 300-350 km of the way, the rider should check the cylinder head.
Please note: An operation such as adjusting the valves on an ATV is considered a mandatory maintenance item and should be carried out every 1000-1500 km.
Before adjusting the valves, you need to prepare the quadric for the procedure. To do this, it is recommended to raise the front of the ATV. This will clean the cylinder head oil bath and remove excess fluid.
Then dismantle the body parts that make it difficult to get to the valves. However, it all depends on the model of the quadric, in some devices you can get to the cylinder head without removing the plastic parts and assemblies.
The rider also needs to prepare tools: an 8 wrench (better with a head so as not to damage the nuts), measuring probes (you can find them in any auto shop) and a hammer.
Let the machine cool down before adjusting the ATV's valves. The procedure is performed "cold", so it is better not to start the ATV before adjusting.
In fact, adjustment is a basic operation, so even a novice ATV rider can perform it. The driver only needs:

 01 mm). If the readings are very different, then adjust the gap with a lock nut and screw.
 After making adjustments, start the ATV and observe engine operation. It is possible that at first the device will make a slight tapping sound. However, if the knock is strong, then the valves were not set correctly.
Important: Do not load the ATV heavily after adjustment. Carry out a mini run-in (5-10 km). Also, during the trip, listen to the sounds that the ATV engine makes.
02/19/2021 3887
The time has come to do maintenance (90 thousand km. ). I opened the manual for Ignis (it's true in German) and found that in addition to typical operations (changing oil, filters, spark plugs, etc.), it is necessary to adjust the valves. Engine M13A 1.3l car 2001 Does anyone know if this is true, or if I translated it incorrectly? Because at the Suzuki service center in N.N. there is no such operation in the list of works.
Answers:
For M13A, M15A adjustment every 30.000 km
You can check it yourself (the need for adjustment is at your discretion) It is regulated by washers. There is a "special tool" - an L-shaped bracket, which presses the glass with a protrusion for a possible replacement of the washer, is installed instead of the camshaft cover. All you need to check is a set of probes. The heel of the cam is set at 90 degrees with respect to the plane of the washer and the gap is measured. Gap size:
inlet 0.18-0.22
release 0.28-0.32
Adjusting washers from 2.175 to 3.00 mm in increments of 0.025, numbered 218,220,223,225,228,230, etc.
these clearances are for a cold (20 degrees) engine
Clearances for twin shaft M13A with VVTi
I don’t know about the valves - in any case, this is a serious occupation and a crooked serviceman can make the engine wai-wai.
If the engine is running normally and there are no handy-headed servicemen (then the official service does not say anything) - maybe you should not do this?
 Temporarily.
Smart24 wrote:
The time has come to do maintenance (90 thousand km.). I opened the manual for Ignis (it's true in German) and found that in addition to typical operations (changing oil, filters, spark plugs, etc.), it is necessary to adjust the valves. Engine M13A 1.3l car 2001 Does anyone know if this is true, or if I translated it incorrectly? Because at the Suzuki service center in N.N. there is no such operation in the list of works.
Click to expand...
Actually, there is such work: "checking, if necessary, adjusting valve clearances. "
"
It's strange that they don't do this in NN...
The M13A motor is quite old and, in general, narrow servicemen should not have any questions about it.
IMHO, to drive such specialists with pissing rags.
awerest wrote:
I don’t know about the valves - in any case, this is a serious occupation and a crooked serviceman can make a wai-wai engine.
If the engine is running normally and there are no handy-headed servicemen (then the official service does not say anything) - maybe you should not do this?And here is the service manual for your machine - this is what many here have been looking for and CRAVING like mana from heaven!!! Not exactly d
Would be very grateful if there was an opportunity to get hold of it!!!
Scanner, camera, photocopier - whatever!
I am ready to pay the cost of traffic for the Internet, or postage (if a copy) or something else.
Give it to me!!!!! (manically shaking hands)Click to expand...
The fact of the matter is that some kind of clattering sound appeared in the engine, I think that the valves are knocking. And at the expense of a car service - so far I have not asked them about adjusting the valves. I found this in a book after visiting them. Maybe they will be able to adjust them, but for some reason I thought that Ignis had hydraulic lifters and there was no need to adjust the valves.
As for the book - I can post it, but it's in German, so I'm not sure it will help much, I translated Promtom - the general meaning is clear, but it still translates crookedly.
Maybe someone has information - what clearances should be set?
Are there no hydraulic compensators on M13A?
Does anyone know how the valves are adjusted on my engine? A friend told me that if with washers, then they can do even worse, since the car is quite rare, most likely there are no adjusting washers of all sizes, therefore, only what sizes can be set (from the available washers). True, there is a chance that the screws.
For M13A adjustment every 30.000 km. Knocking is not a necessary condition for adjustment, because. if there is no gap, there will be no knocking, while the valve will crack and burn out very quickly. The absence of a gap can be checked by compression, it will be slightly lowered in the problem cylinder.
Due to the lack of information, most likely you need to remove the head cover and stick your eye in there, look around and carefully assemble everything, then pester the technical director and the Dane - cry that they say I live in the Far North, I can’t drive up, describe the process.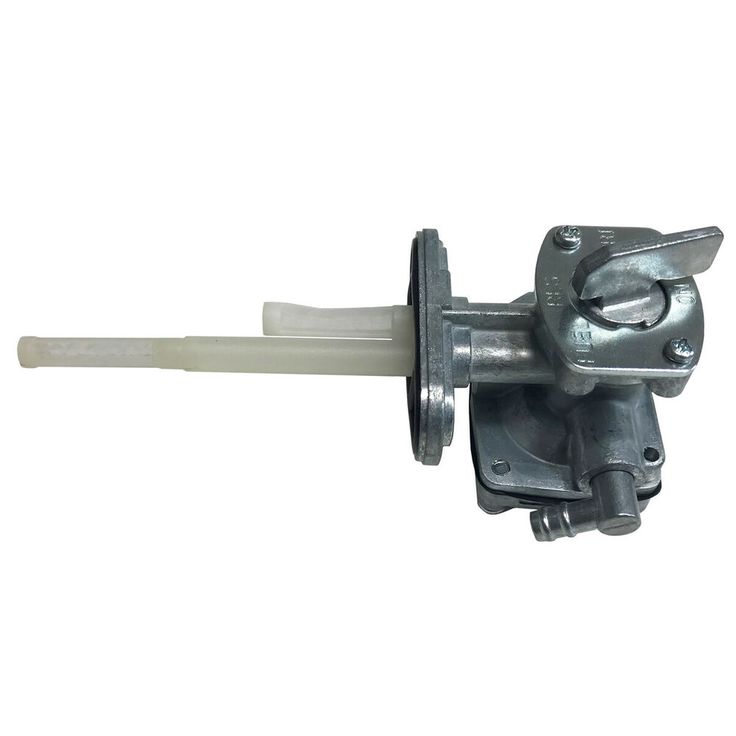
Do not worry about the gasket - it is changed only if it breaks or becomes completely oak due to oil without additives, and even then, you can smear it with sealant.
From practice - on the VAZ-2109 it is also supposed to be adjusted every 30,000, but it also happened that the first adjustment was only 150 thousand !, while all the gaps were normal. The main problems arise precisely because of the intervention of krivoruk masters. Many, many times, he re-adjusted the gaps, bringing them back to normal and chuckling, as the masters set the gap in accordance with THEM opinion, what should be the gap.
Reactions: 1 person
wagon wrote:
The main problems arise precisely because of the intervention of krivoruk masters.
Click to expand...
the purest truth!!! just turn your back for a second, everything will break!
NIC wrote:
in the service did not regulate anything, apparently they managed with a simple diagnosis!
Click to expand...
Everything is clear - they just don't know how!!!:hilarious:
This is not atstoi - the Japanese are very smart - they are well aware that many do not like to change oil on time, and this is death to hydraulic lifters.
wagon wrote:
For M13A adjustment every 30.000 km. Knocking is not a necessary condition for adjustment, because. if there is no gap, there will be no knocking, while the valve will crack and burn out very quickly. The absence of a gap can be checked by compression, it will be slightly lowered in the problem cylinder.
Click to expand...
Based on the above, it follows that on a car made in 2006. no hydraulic lifters? :thumbsdown:
I also have a line in the service book about adjusting the valves every 30 thousand km, on Monday I was at the MOT (30 thousand) in the service they didn’t regulate anything, apparently they managed with a simple diagnosis! but when calling dealers, some had such an item (valve adjustment) and the price for maintenance was an order of magnitude higher .....
Nikolai, green Ignis, 1.3 2WD
wagon wrote:
This is not an atstoy - the Japanese are very smart - they are well aware that many do not like to change oil on time, and this is death to hydraulic lifters.

Click to expand...
Let's hope that this is really SO and you won't have to regulate anything thousands of adok up to 300 !!! And I do not agree to less
Reactions: 1 person
In general, I came to the conclusion that I will not regulate, so as not to make myself even more problems. Thanks for the help.
Yes please! But if you get something, don't forget to post it here, for all the Ignisovods.
At least you can check it yourself (the need for adjustment is up to you) Adjustable
washers.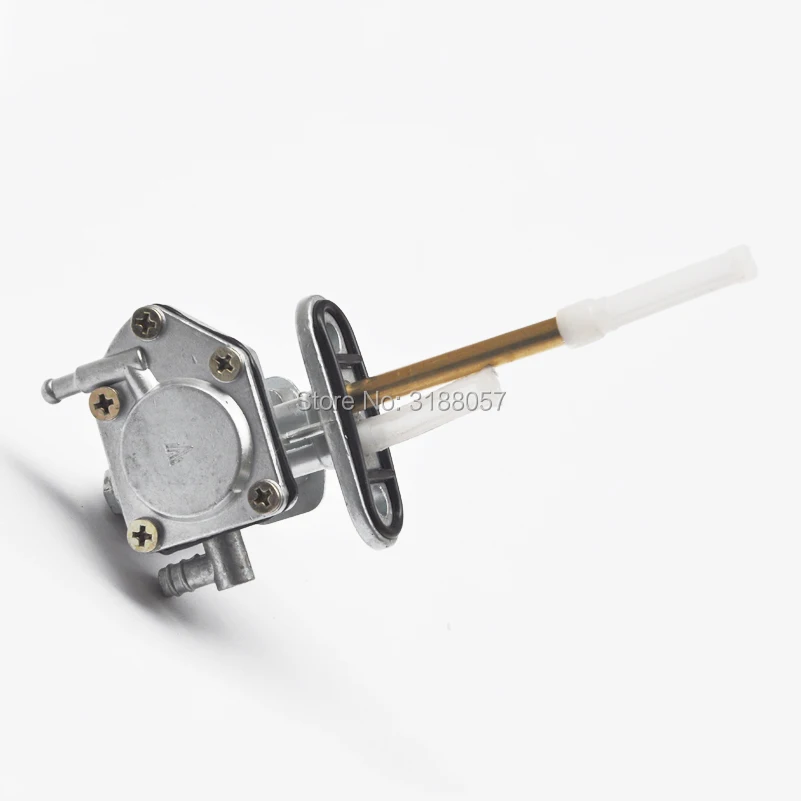 There is a "special tool" - a bracket that squeezes out the glass, is installed instead of the RV cover. To check, only a set of probes is needed. The cam heel is set to 90 degrees relative to the plane of the washer and the gap is measured. There is a gap in the manual.
Reactions: 3 people
In my manual there is no clearance value, if you know this value, please tell me about intake and exhaust.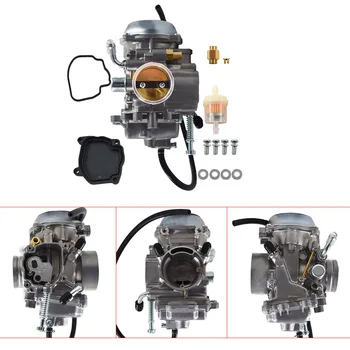 Thank you. Bracket squeezing Zhiguli from nine is not suitable? Are the washers special or special size (diameter, thickness)? What permission? Nine has 0.05. What is RV? Camshaft? And what are you talking about, for which engine?
wagon wrote:
In my manual there is no clearance value, if you know this value, please tell me about intake and exhaust. Thank you. Bracket squeezing Zhiguli from nine is not suitable? Are the washers special or special size (diameter, thickness)? What permission? Nine has 0.
05. What is RV? Camshaft? And what are you talking about, for which engine?
Click to expand...
I didn’t hold the Zhiguli bracket in my hands, Suzukov L-shaped, is placed instead of the camshaft cover, squeezes out the glass with a protrusion for a possible replacement of the washer. I don’t know the washer diameter,
thickness in increments of 0.05. I’ll check it in millimeters and write back. This is for the M13A engine, for the M15 it’s most likely the same.
Reactions: 1 person
WagonZ handsome!!!
Where does this information come from? What car do you have?
Today I carried out MOT . .. 6 years on the car 45 thousand passed ... I also asked about the valves ... They said they work fine, don't knock - don't bother!
This is wrong! They knock only when the gaps are large, and when they are small, they don’t knock, and it is precisely a small gap that is fraught with burnout of the valve plate. It will not be pressed tightly for a shorter time and will not give off heat and will overheat and crack and soot will form. Therefore, it is necessary to regulate, not to regulate, but to control the gaps. The gap should be at least within tolerance, but not go beyond. The gap increases when the camshaft wears out and decreases when the valve seat and grooves on it wear out.
We have a different approach! The less you let the playful hands of mastermen near the car, the longer and more trouble-free it runs!
people - are you sure that there are no hydraulic lifters in the ignis and the gap needs to be adjusted?
they were invented a hundred years ago, somehow it’s hard to believe that they may not be in a Japanese-designed motor .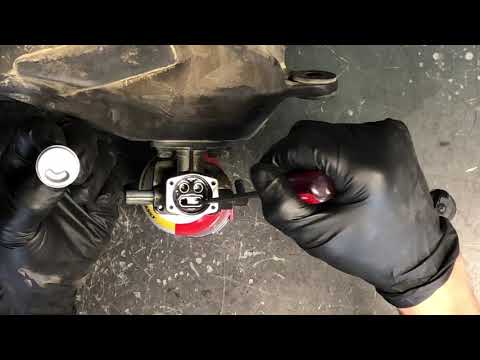 ..
..
awerest I have a Japanese Swift, data from the English manual for Ignis
vitek wrote:
people - are you sure that there are no hydraulic lifters in the ignis and the gap needs to be adjusted?
they were invented a hundred years ago, it's hard to believe that they can't be in a Japanese engine...
Click to expand...
Hydraulic compensators were invented really a long time ago, but they are not used on all engines, even modern and Japanese ones. The thing is, like any technology, there are pros and cons. A familiar specialist told me that quite a lot of jambs are connected with hydraulic lifters. I don't remember the details though :-(0003
So, gaps
inlet 0.18-0.22 outlet 0. 28-0.32
shims from 2.175 to 3.00 mm in increments of 0.025, numbered 218,220,223,225,228,230 etc.
these clearances are for a cold (20 degrees) engine
hydraulics were widely used in the late 80s and early 90s, they have advantages - there is no need for valve adjustments, but also concomitant disadvantages - quality and timeliness requirements
MOT. They make sense on multi-cylinder \ multi-valve engines, where it is difficult to get to the second head, or realignment of 24-32 valves at a cost covers the disadvantages of hydraulics
Reactions: 1 person
Re: So, gaps
WagonZ wrote:
inlet 0.
18-0.22
outlet 0.28-0.32
shims from 2.175 to 3.00 mm in increments of 0.025, numbered 218,220,223,225,228,230 etc.
these clearances are for a cold (20 degrees) engine
hydraulics were widely used in the late 80s and early 90s, they have advantages - there is no need for valve adjustments, but also associated disadvantages - quality and timeliness requirements
MOT. They make sense on multi-cylinder \ multi-valve engines, where it is difficult to get to the second head, or realignment of 24-32 valves at a cost covers the disadvantages of hydraulics
guys! wagonZ is an alien in my opinion! such infa can only be in space!
Re: So the gaps are
now and I'm an alien.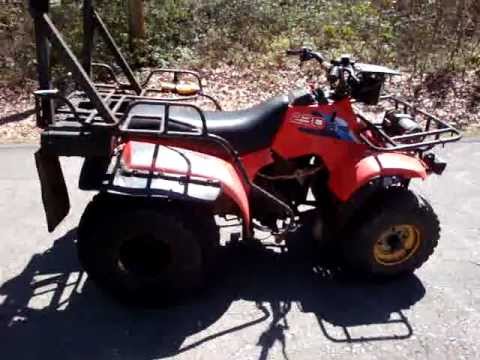 (Information was received today via teleportation from another alien - KotyaraS. Teleported to him for 2 hours - on holidays - Moscow just stupidly dies on the roads).
ordinary miracle
that's why manuals are given to find such things in them
It's not that simple.