When your ATV loses some of the fire in its belly, and you can’t quite put your finger on it. It may be time to check the valve lash. Your ATV engine is designed with a ton of power, and it’s still there, waiting to be tapped.
The top seven symptoms of poor ATV valve adjustment include:
1 ATV won’t start
2 Engine noisy
3 Engine misfires
4 Bike lacks power
5 Engine runs rough
6 Erratic idle
7 Hard on gas
By the end of this post, you’ll understand and recognize common valve lash symptoms, know which condition your engine suffers from and how to fix it.
This guide covers the more common rocker-style valve train. If your ATV is fitted with an OHC (Over Head Cam), the procedure is a little different.
Page Contents
Valve lash or clearance is a factory-specified gap that must be maintained between rockers (or cams) and valve tips. As an engine wears, the valve clearance usually gets larger and so needs to be adjusted. Unfortunately, on some bikes gaining access to the valves is a bit of a chore and is regularly ignored until it can’t be.
All single cylinder engines will have at least two valves, one inlet, and one exhaust. However, most bikes will have four, two of each.
The valves, as you know, are activated by the rockers (cams in OHC engines), which are driven by the camshaft. The camshaft is driven by the crankshaft, and the whole process is sequenced. The timing of this sequence is mission-critical to the optimum performance of your power plant.
Only four-stroke engines have valves, and valves allow for more accurate, predictable, smoother, and cleaner engine performance. A four-stroke engine is just easier to live with, but because it has more internal moving parts than a two-stroke engine, it needs more maintenance.
1 Intake stroke – Intake valve(s) opens as the piston moves down the cylinder and closes again as the piston bottoms out.
2 Compression stroke – Intake valve(s) now closed as the piston moves up the cylinder, compressing the air/fuel mix into the combustion chamber at the top of the cylinder.
3 Power stroke – The spark plug fires and ignites the compressed mix causing the piston to move down the cylinder under power.
4 Exhaust stroke – Exhaust valve(s) open as the piston moves up the cylinder, pushing the spent gases out. The valve is fully closed as the piston reaches the top of the cylinder, and the cycle starts over.
I’ve covered valve lash adjusting previously and you can check it out here “ATV valve adjusting in 6 steps”
An ATV may not start for many reasons. Incorrect valve lash will certainly be on the list. Hot start problems are often caused by valve lash issues. As the engine reaches operating temperature, lash tolerances change. If the valves are too tight, they may remain open, which will reduce cylinder compression.
An engine without compression won’t start. If the valve lash is excessive, your valves won’t open, and the engine won’t receive fuel and so won’t start.
A noisy engine is a useful clue. The tell-tale ticking noise of an idling engine could very well be miss-adjusted valve lash. Loose rockers, as you can guess, will make a racket if the gap between the rocker and valve tip is excessive. And you already know that excessive lash will cause poor running or no start.
Excessive lash, if neglected, can damage the valves and rockers as they hammer together. Checking the lash is the best test, but I’ll often use a stethoscope to confirm. Especially useful if access to the valve cover is labor-intensive.
A misfiring engine could be caused by miss adjusted valve lash. Excessive lash will cause the engine to run lean (not enough gas) and that will cause the plug to misfire. Running the engine with tight valves can also cause the plug to misfire.
If the valves are not closing fully, the engine mix is lean, and that will, as you know, cause a misfire.
If your engine lacks power, maladjusted valves could be the cause. Incorrect valve lash causes the valves to open for more or less time than needed. Excessive valve lash means the valves open late and for less time than needed. This causes a lack of gas which in turn causes a lack of engine performance.
Tight valves can cause the valves to open early and for too long. This causes (depending on how tight they are) lean running, hot running, misfiring, and a general lack of performance.
A rough-running engine is irritating but worse than that. If it’s caused by maladjusted valves, you could cause lasting damage to the motor. If valves are tight, it may cause the engine to run lean. A common symptom is popping noise from the engine.
Overheating engines, burnt valves, hammered valve tips, blown head-gaskets are all real risks that will cost a packet to fix.
Valve clearance will affect idling big-time. If valves are tight, you might find the engine starts but then dies as it warms up. Or the idling is even rougher when warm. Whatever the symptoms, your engine valve lash should be checked once a year. If I owned a used bike, I’d assume it hasn’t been done recently as it’s commonly overlooked.
Adjusting the valve lash is a bit of a chore on some bikes, but it’s worth it. You will notice the difference right away. The engine will start more easily, quieter, and throttle response will be sharp and more powerful.
Whenever performance suffers, so does gas mileage. It simply takes more gas to do the same work. So anytime you notice gas mileage drop, it’s a big clue that your ATV has a problem.
The problem could be something simple like a dirty spark plug, or more serious altogether. Either way, early diagnosis is always best.
You may find the following posts helpful:
ATV idles up and down
How to tell if ATV jumped time
John Cunningham
John Cunningham is a technical writer here at ATVfixed.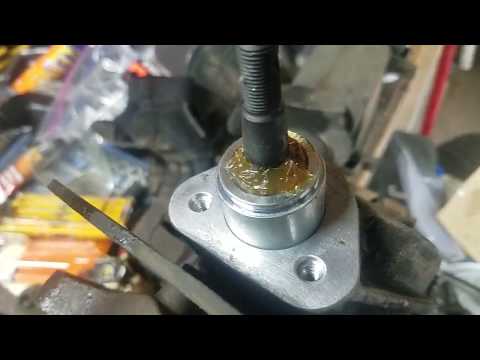 com. He’s a Red Seal Qualified Service Technician with over twenty-five years experience. He’s worked on all types of mechanical equipment, from cars and trucks to ATVs and Dirt bikes.
Regular maintenance ensures that your ATV runs smoothly. What about valve adjustments? Valves allow fresh gas to flow into the combustion chamber and spent gas to exit. On average, valves require no more than periodic clearance, inspection, and occasional adjustments, but how often should you perform ATV valve adjustments?
ATV valve adjustments ought to take place every few months for most machines. However, if you own a high-performance ATV, you will want to check and adjust your valves after every 3-4 riding trips or during oil changes.
In this article, you’ll get a quick guide on how often to adjust your ATV valves. In addition, you will also learn the following:

When a valve is closed, you need to have a gas-tight seal in the space between the valve seat and the valve face. To ensure the valve is well-seated, you need to have some valve clearance (lash) between the rocker arm and the valve stem. You can adjust the lash with a screw, shim, or with a hydraulic device.
As the engine heats up, the metals inside expand. This happens to the valve train components too. If the lash between the valve stem and its operating mechanisms is insufficient when the engine is at rest, it will be even more so when it gets hotter.
If the valve clearance is reduced too much, the following occurs:
 This leads to detonation, pre-ignition, engine overheating, warped or burnt valves.
Again, if you remove the clearance, the valves get to sit a little further from the valve seat. This reduces the seat-to-valve-face contact area, giving combustion gases room to leak past.
By now, the engine might not start, and your valves are badly in need of attention. At this point, trying to start the engine could cause the exhaust valve to overheat or even burn.
Is there a way to tell whether your ATV valves need checking or adjusting without necessarily pulling the top to check the clearance? In other words, are there any particular signs that you need to look out for?
For starters, indeed, the most foolproof way to tell whether your valve clearances are in good shape (spec) is to pull the cover and measure them. Fortunately, there are other ways to tell. Out-of-adjustment valves usually make it easy for you to notice them because:

In a nutshell, they might be noisy – if too loose- or the bike could lose compression or overheat – if too tight.
ATV Valves can lose clearance (slip out of adjustment) due to several reasons, including:

What happens if you don’t adjust your valves? The reason for setting valve clearance is simple; metal expands when hot. Therefore, if the clearance gets too tight, the valve can’t fully sit in the head.
As mentioned previously, this situation can lead to compression loss or overheating. The latter can even lead to the valve’s destruction since the head helps to dissipate the heat from the valve. If the valve is unable to close fully, it loses the chance to transfer enough heat to the head.
And how does this affect your ATV?
If the valve is too tight, the ATV loses compression and performance while your gas mileage suffers. If it gets too loose, it becomes noisy and gets damaged by excessive clearance and metal bits slapping against each other.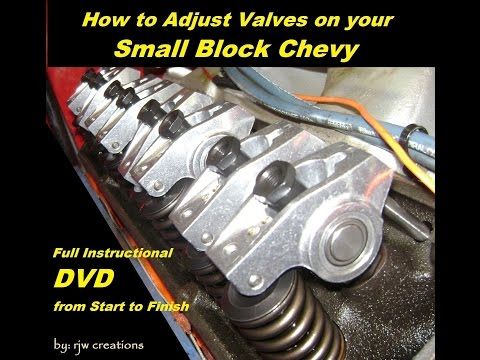
Sometimes, if it gets too loose, the valve fails to open fully in a timely manner, and the engine fails to breathe optimally.
Finally, poorly adjusted valves can cause the entire valve train to wear out. Furthermore, if your valves have too much clearance, they can cause valve damage and failure, which can extend to the camshaft lobes and rocker arms. If you notice your valve train components failing, be sure to check the valve clearance.
So, how often should you adjust your ATV Valves, or should you base this on standard maintenance intervals? Well, this depends on your machine type and the manufacturer’s instructions.
High-performance engines require servicing more often than other utility quads. As such, you will find that you need to adjust your ATV valves every 20 hours or so or with each oil change.
There’s a good reason for this too. You see, if you allow the valves to go too far, the intakes become too tight and they start leaking.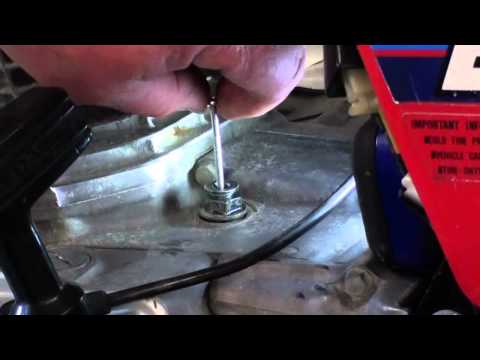 Then, you’ll be setting yourself up for some big-time repairs.
Additionally, depending on the type of bike you have, you might notice that the valves tap slightly when correctly set. Any noticeable sound changes would therefore indicate a need for adjustment.
Even so, the adjustment interval is not cast on stone. Rather, it’s what most manufacturers consider to be a safe bet between the adjustment cost and the heightened risk of valve problems or, worse, decreased engine lifespan.
Consequently, you can decide to either half or double the interval, depending on what works for you. Besides, experience and familiarity with your ATV should also enable you to diagnose valve clearance challenges.
It’s important to note that valves tend to tighten with age. With this in mind, some ATV owners suggest that you are better off adjusting on the looser end than the tighter end of the specs when making adjustments.
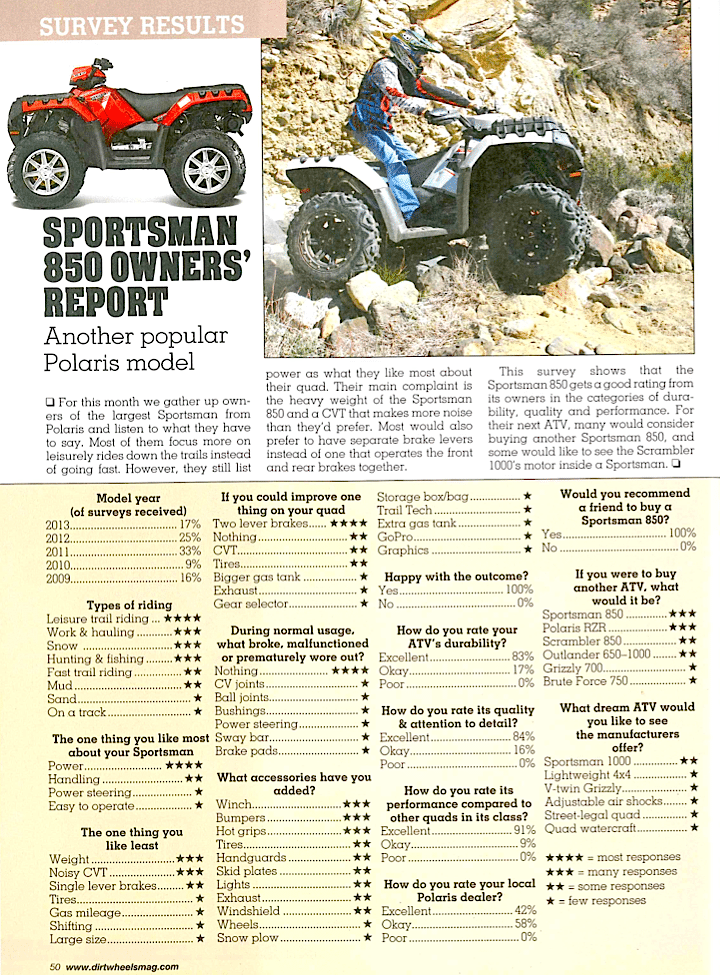
For detailed instructions on how to adjust your ATV valves, check out Dirt Wheel Mag’s guide. Alternatively, you can also check out this video:
ATV valve adjustments are an essential part of your ATV’s preventative maintenance. If you fail to perform the adjustment, nothing will happen immediately, but with time, additional wear and tear happen.
Again, by the time your ATV lets you know that you need to do your maintenance – noisy valves, reduced performance, etc. – more often than not, you will have done some damage already.
Sharing is caring!
Adjusting the valves on an ATV is one of the most important maintenance steps. Ignoring this operation will adversely affect the operation of the engine, make it difficult to start the ATV, and even lead to a number of serious breakdowns. Therefore, it is important for the rider to figure out when it is necessary to carry out the adjustment and whether it is worth performing the procedure on their own or it is better to seek help from an ATV store in Kyiv.
Experienced motorists advise adjusting the valves on the ATV immediately after purchasing the equipment. The fact is that when assembling devices (especially Chinese ones), manufacturers do not pay due attention to this procedure. And the operation of ATVs with incorrectly adjusted clearances leads to:
The second clearance setting should preferably be done when the vehicle is running in. That is, after 300-350 km of the way, the rider should check the cylinder head.
Please note: An operation such as adjusting the valves on an ATV is considered a mandatory maintenance item and should be carried out every 1000-1500 km.
Before adjusting the valves, you need to prepare the quadric for the procedure. To do this, it is recommended to raise the front of the ATV. This will clean the cylinder head oil bath and remove excess fluid.
Then dismantle the body parts that make it difficult to get to the valves. However, it all depends on the model of the quadric, in some devices you can get to the cylinder head without removing the plastic parts and assemblies.
The rider also needs to prepare tools: an 8 wrench (better with a head so as not to damage the nuts), measuring probes (you can find them in any auto shop) and a hammer.
Let the machine cool down before adjusting the ATV's valves. The procedure is performed "cold", so it is better not to start the ATV before adjusting.
In fact, adjustment is a basic operation, so even a novice ATV rider can perform it. The driver only needs:

After making adjustments, start the ATV and observe engine operation. It is possible that at first the device will make a slight tapping sound. However, if the knock is strong, then the valves were not set correctly.
Important: Do not load the ATV heavily after adjustment. Carry out a mini run-in (5-10 km). Also, during the trip, listen to the sounds that the ATV engine makes.
02/19/2021 4861
Adjusting the valves on an ATV is a maintenance procedure. As a rule, the first adjustment of the valves of modern ATVs is made after a run of 1000 kilometers. We recommend checking the valve clearances of the ATV and, if necessary, adjusting them after 300-350 km.
Very often, especially on Chinese-made ATVs, the gaps are set incorrectly right from the factory, also due to heating and cooling cycles, the valves can stretch and the gap will be broken, which can subsequently lead to damage to the valve plates, deterioration of the timing mechanism and even to valve burnout.
So if you're serious about engineering and want to maximize the performance of your ATV engine, don't be lazy and check the valve clearances during your first service.
How to adjust the valves on an ATV.
Before unscrewing the valve cover, we recommend lifting the front of the ATV with a winch to empty the cylinder head oil sump, this will allow you to stay a little cleaner when removing the cover and not smear oil on the parts of the ATV. By the way, some ATVs have special adjustment windows to avoid removing the valve cover completely.
You may need to remove the gas tank plastic trim and the gas tank to remove the valve cover.
Attention! When adjusting, the ATV engine must be absolutely cold (30-35 degrees).
Next, you need to unscrew the cylinder head cover or windows (it is better to use a head, and not a ring wrench, so as not to damage the edges of the bolts). After all the bolts are unscrewed, the cover may not immediately give in, in order to move it, it is better to lightly hit the bottom edge of the cover with a hammer through a wooden block. Do not attempt to use sharp objects to avoid damaging the lugs on the lid.
After removing the cover, carefully remove the rest of the gasket from the cover and from the head so that they do not enter the engine.
Next, you need to set the cylinder to TDC (top dead center) of the compression stroke.
So, in order to catch the TDC, you need to unscrew the viewing window cover, unscrew the spark plug (required) and crank the crankshaft with a manual starter (kick starter) until a special mark appears in the viewing window.
Only check and adjust valve clearances at top dead center (TDC) at the end of the compression stroke. The marks on the timing chain sprocket and the reciprocal marks on the cylinder head help to establish this position.
Sometimes the mark is applied incorrectly and therefore it is better to check the TDC control, being reinsured, by the position of the valves. All dead center valves must be closed.
We need special feeler gauges to check the clearance. They are sold at any auto store.
Next, we need to check the valve clearance, for which the probe is inserted into the valve stem clearance.
The valve clearance is different for each ATV model, and you can find its value in the manual for your ATV.
The feeler gauge must enter the gap freely (should not cause scratching sensation when moving in the gap), but at the same time, a feeler gauge larger than 0.01 mm should not enter the gap.
If you notice that the valve clearance on your ATV does not match the manufacturer's instructions, you need to make an adjustment.
To do this, loosen the lock nut and adjusting screw, insert a feeler gauge of the correct size into the gap, turn the adjusting screw until it contacts the feeler gauge, and fix the lock nut. Then check the gap again.
It is not necessary to tighten the nuts too hard, a medium hand force on the wrench is sufficient.
After all valves have been adjusted, the cylinder head cover must be reinstalled.