If you haven’t hopped on your bike in a while or the weather has changed, your tires will most likely need a bit of inflating. Fortunately, pumping up a bike tire is as easy as falling off a log. To keep those wheels running smoothly, it’s a good idea to check the tires before every ride. This usually takes a little hand-squeeze to check the pressure.
Maintaining proper tire pressure will definitely improve the quality of your ride. When your tires are sufficiently inflated, you’ll feel safer and have better grip and handling no matter what bumpy road or twisting trail you find yourself cruising down. But if your tires are squishy, you will feel a heavier rolling resistance and you risk damaging the wheels which takes time and money to repair.
Knowing how to pump up a road bike tire is an essential element of cycling. While the task itself is fairly simple, the different types of valves and pumps, as well as knowing the exact amount of pressure, make it intimidating for those who are new to cycling.
First things first, you need to know the bike tire valve types and work out what type of valve you’ll be dealing with before setting up your tire for pumping. The valve plays a significant role in ensuring your tires are in for the long haul, ride best, and resist pinch flats.
Depending on your bike, most tires have either a Presta or a Schrader valve. Telling the difference between the two is quite simple. Schrader valves are wider and shorter in diameter and have an inverted round opening needle with a spring used to open and close the passage of air. Presta valves, on the other hand, are slimmer, longer, and their needle sticks out. Rather than using a spring to release the air, Prestas have an integrated nut that keeps it shut. To release the air, you would need to unscrew the locknut.
What makes Presta valves more favorable is that even when the plastic cap is open, it won’t leak air. This means even if you forget to put the valve cap back, you don’t have to worry about having a flat tire again after 300 meters down the road.
As each valve is different, it’s important to make sure they are compatible with the type of pump you have. Because pumps have unique head connections, they are not easily interchangeable with tires that have either a Presta or Schrader valve. Some pumps have dual attachments and fit with both valve types—the smaller one for Presta and the larger one for Schrader.
There are many bicycle tyre pumps for you to choose from, but generally, they fall into two categories.
Floor PumpsFloor pumps are a great tool to keep stored in your garage and maintain your bike at home. They are larger and take fewer strokes to pump up your tires. With a high capacity of 160 up to 200 PSI, they inflate a bike’s tire in a pinch.
Hand PumpsA floor pump has higher capacity and is much easier to use, but you can’t take it with you when riding. A hand pump, on the other hand, is much smaller, and it fits comfortably in jersey pockets. Although they are limited in PSI and normally take longer and a lot of heavy pumping to fully inflate a tire, they are still perfect for quick trips out.
Another way to inflate your bike’s tires is by using a CO2 inflator. They contain compressed carbon dioxide and are lifesavers when you need some extra air on the go. They are short-term solutions and not something you’d want to use regularly because they dissipate rather quickly in the span of a single day.
Use the Correct Pounds-per-Square-Inch (PSI)Bike tires should have enough air to function properly, and inflating them to the exact psi requires some finesse. Usually, tires have a minimum and maximum pressure threshold printed on the sides, typically ranging from 25 to 120 PSI, depending on the bike and different terrains. It’s advisable to stick to the manufacturer’s specifications and not go over those limits because they are there for a reason.
By default, your tire should be inflated enough to avert it flattening all the way to the rim or prevent it from completely blowing out. However, there is room to modify the pressure and set it on the amount of pressure that works for you best.
How to Pump Up a Road Bike TireUsually, there’s not much to it—pumping a bike tire is pretty much self-explanatory. But if you’re still confused on how exactly the process goes, follow the steps below:
 If you’re using a floor pump, it’s better to put one foot on each side of the stand. With a hand pump, place one hand firmly on the valve and pump with the other.
Voila! Your bike is ready for use. Keep checking the tire pressure, though, as they naturally deflate over time. Keep the PSI on a sweet spot for a smooth and comfortable ride.
by Mike Anderson
themikeanderson
6th July 2015While the majority of you will almost certainly know how to inflate the tyres on your bike, it’s another of those simple tasks, like changing an inner tube or using clipless pedals, that can seem pretty confusing to a beginner.
There are plenty of different types of pumps, inflators, valves, tubes and tyres – and all that can be a real nightmare if you’re coming to it for the first time.
So here’s a handy guide to all things tyre inflation that’ll help to clear up any ambiguity surrounding the subject and have you fully inflated and ready to ride in no time…
The best place to start is what type of valves your inner tube (or tyres, if you’re running tubulars) have. There are two basic types of valves that you’ll find on bikes: Presta and Schrader. For the most part, inner tubes and tubulars on road bikes will use Presta valves, and mountain bikes will use Schrader valves.
The visual differences between the two are obvious, with the Presta (pictured above) being slimmer, lighter and having a lock nut to close that you can see on the top. Schrader valves are wider, more robust and have a spring mechanism on the inside to keep the valve closed, rather than a screwable top section.
Because the widths (or diameters if you prefer, seeing as they’re both cylindrical) are different, they’re not easily interchangeable in wheels that are designed to accept one type.
Schrader valves are too thick to fit through the tube hole in a road rim, and Presta valves will need adapters or shims (or an awful lot of electrical tape) to fit on an MTB rim. Plus, in really narrow road tyres, there might not even be space for the large Schrader valve to fit between the beads.
As they have no spring in the valve, Presta valves are easier to pump up than Schrader, especially so with small capacity hand pumps, and it also means small pumps don’t need an in-built device to depress the spring in a Schrader valve.
One of the smart parts of Presta valve design is that even when the top section is open, it won’t leak air unless it’s pressed down. That means even if you forget to rescrew after you’ve pumped the tyre up, you shouldn’t find yourself with a flat again 500 metres down the road.
Because the two valve types are different, they require two different types of head on a pump – or, as is often the case, an interchangeable head.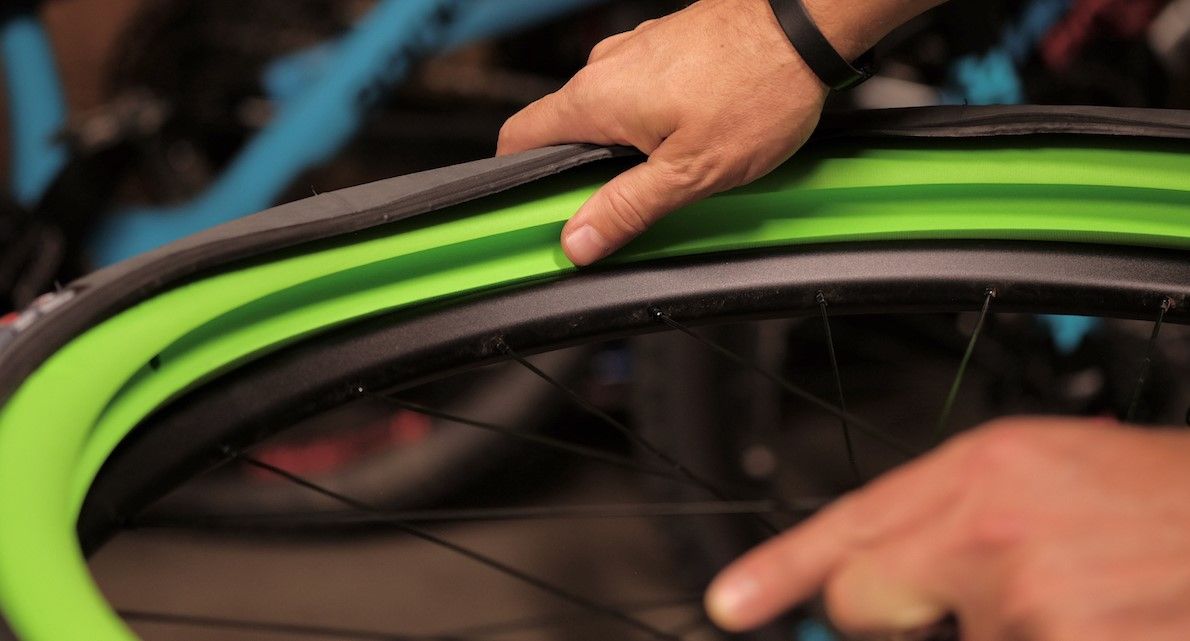
In other words, you can’t use a Schrader-headed pump to inflate a Presta valve tube without an adapter, and the opposite operation won’t work at all.
Fortunately, most modern floor pumps have a very simple answer for this: a pump head with dual attachments. And that’s even better if you ride both road and mountain bikes, because it means you only need the one pump for both jobs.
The Birzman pump (left) is set up for Presta valves in the picture, but to inflate a Schrader valve you have to unscrew and remove the gold section. But on the PRO pump (right) it’s much easier as there’s a dual head with an ‘s’ at on one side and ‘p’ on the otherSome are very obvious (like the PRO pump on the right of the picture) as there are literally two different attachments on the end of the hose but others (like the Birzman pump pictured left) require you to unscrew the end to reveal the Schrader adapter, or in some cases even flip the valve end over.
It’s still a simple operation but one that can seem completely confusing if you’re just standing there with the valve hose in your hands trying to figure it out.
When it comes to actually pumping up your tyres, there are a few different types of pump/ways to do it. The first and most common of these is the track pump. Track pumps are one of those essentials that every cyclist should own.
They’re usually around two feet high, have a fairly large capacity and are capable of inflating tyres to high pressures – usually much higher than required. For example, my track pump can inflate to 160psi which is far higher than I’d ever want my tyres.
Track pumps are quite large and generally kept in the garage (or wherever you keep your bike in the house) to pump up tyres before you ride.
The main bonus is that because of their high capacity, they make inflating tyres to high pressure comparatively easy – you can inflate a tyre all the way up to 100psi in 10-15 strokes easily (depending on pump capacity).
Track pumps are quite large, comparatively, but they’re the best and easiest option to pump your tyres up before a rideThen there’s the mini pump.![]() Mini pumps are ideal to stick in your jersey pocket in case of a mid-ride puncture. Most are capable of inflating tyres to a reasonably high pressure (though not as high as a track pump), but it’s a longer and occasionally more frustrating experience.
Mini pumps are ideal to stick in your jersey pocket in case of a mid-ride puncture. Most are capable of inflating tyres to a reasonably high pressure (though not as high as a track pump), but it’s a longer and occasionally more frustrating experience.
However, no matter how frustrating it’s vastly preferable to being stuck 40 miles from home with a flat and no way of pumping it up.
Mini pumps come in various varieties – some more ‘mini’ than others – and most will have a tube that extends and packs back into the end of the pump in order to add a bit of flexibility without which it would be very easy to snap off the end of a Presta valve. You may laugh, but it can happen.
Mini pumps are ideal for mid-ride puctures. Most have a rubber tube that you can pull out of the pump to add some flexibility and make it easier to inflate tyres on the goThe third common option isn’t strictly a pump, it’s a mini inflator. These use a small valve ending and inflate using disposable CO2 canisters.
The bonus of these is that they inflate incredibly quickly and, depending on the capacity of the canister, can pump a tyre all the way up to around 200psi – not that you’d need to go that high.
The down side is that each canister is single use only, so it’s only as good for as many as you’re prepared to take with you. The SKS Airboy CO2 combines a mini pump and CO2 inflator in one handy unit, which solves that problem.
Mini inflators are a great option for mid-ride punctures. They’re made of two parts – the gas cylinder (on the left) and the head unit (right). But each cylinder is single use only, so you’ll need to carry multiple if you want to be able to inflate more than one tube or tyreThere is one final option, and that’s an air compressor. However, they’re pretty expensive and almost exclusively used by pro team mechanics.
They do make the process an awful lot simpler, and they can also make it easier to hit a desired psi if you have a strong preference. It also saves the pro mechanics from having to pump up 18 individual tyres on the bikes and all the spares every morning at a big race like the Tour de France.
The first step is unscrewing the Presta valve head. It unscrews anti-clockwise and you’ll be able to see it moving upwards along the small central spindle. Make sure it’s open all the way.
Next, attach the pump end to the valve head. As I mentioned earlier, make sure you’re using the Presta attachment on the pump, not the Schrader as otherwise you’ll get precisely nowhere.
Also, you need to ensure the pump head is securely fastened onto the valve otherwise the air won’t go into the tube properly. It needs to be a sealed system to be most effective. How you create that seal depends on the pump. A lot will have a lever you flick up to secure the pump head, some will have a chuck to screw on.
Keep an eye on your track pump’s pressure gauge while you inflate your tyres. If you go over the recommended maximum pressure the results can be drastic, explosive and expensiveAfter that simply pump up the tyre, keeping an eye on the pump’s pressure gauge, and make sure you don’t over-inflate the tyre (most tyres will have written on the side the suggested pressure range).
While you might fancy going a little under the bottom number to cushion the ride or add a little more grip, going over the top one could cause the tyre to explode off the rim, potentially writing off the tyre, tube and rim.
Generally you can find a happy medium between the two through experimentation, and depending on your weight, where you ride, and how much cushioning you want the tyre to provide.
And that’s that. Now you’re ready to roll. Simple, right?
Please enter your email so we can keep you updated with news, features and the latest offers. If you are not interested you can unsubscribe at any time. We will never sell your data and you'll only get messages from us and our partners whose products and services we think you'll enjoy.
Read our full Privacy Policy as well as Terms & Conditions.
Cookies help us deliver our services. By using this website, you agree to our use of cookies. Learn More
Accept
production
Hello everyone! In this article, we will tell you how to pump up a wheel on a bicycle.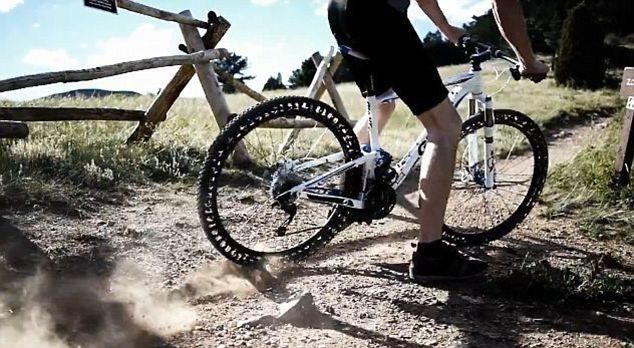 We'll give beginners tips on getting the right tire pressure, talk about different pumps, and cover all the challenges you might run into. Go!
To begin with, let's deal with tire pressure, since a lot depends on it, for example:
Bicycle manufacturers usually list the optimum bead pressure range, which can vary greatly depending on wheel width. For example, for fat bikes, the optimal pressure is from 0.5 to 2 atmospheres, for mountain bikes from 2 to 4 atmospheres. Well, for road models, suitable pressure ranges from 5 to 8 atmospheres.
Based on this, it can be concluded that the minimum pressure is used where it is necessary to ensure good grip on uneven surfaces. Well, the maximum pressure increases the roll on a flat surface. Therefore, we recommend that you inflate the wheels according to how you plan to ride. If you don't have a particular preference, inflate at a medium setting for good rolling and traction.
The weight of the cyclist should also be taken into account - if you weigh little, then it is better to choose a pressure closer to the minimum, and vice versa.
There are three standards of nipples used on modern bicycles. This is:
Schroeder is the best known type of nipple, which is also used in cars. Therefore, you will meet him on most bikes.
Presta is a thin nipple often referred to as a French nipple. These nipples are most commonly found on high-end bikes. As for the Dunlop standard nipples, they are very rare.
Some may think that each nipple requires a special pump. But this is not so - it is enough to purchase a regular car pump and an adapter for your type of nipple.
If you don't have a car pump, you can purchase a bicycle pump. Most of the models on sale are universal, and support all nipple standards at once. Bicycle pumps are:
Compact pumps pump the wheels for a long time, but they take up little space. They can be mounted directly on the frame, and always carry with you, which is very convenient.
Floor pumps are more comfortable to use as they blow in more air with one push. In addition, they are equipped with a pressure gauge that allows you to control tire pressure. These pumps are an indispensable tool for road bike owners.
That's all for today. Thank you for your attention, if this article was useful to you, please like us or share it with your friends. See you again.
It may be elementary, but being able to inflate bike tires is an essential skill for any cyclist.
Many of you already know how to do this, but for those who don't, the different types of valves, pumps, and more importantly, how much pressure to inflate your tire can be a little overwhelming.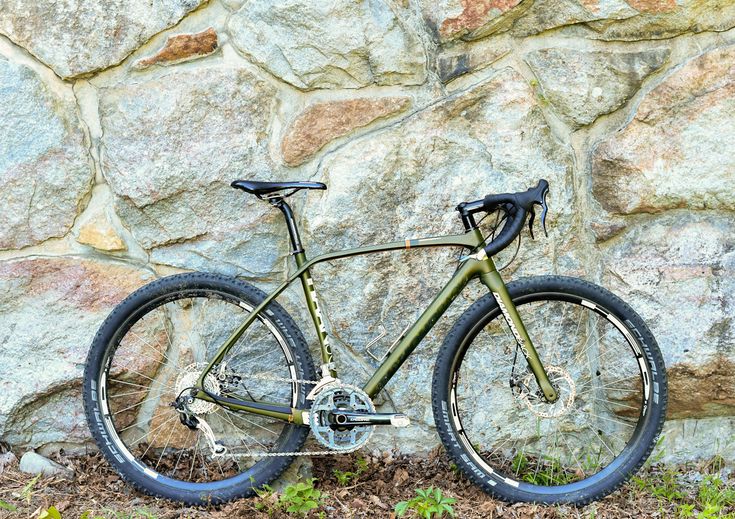 Let us help you through this process.
Contents
Pneumatic tires were invented to overcome the harsh "ride quality" of massive wheels.
The air inside acts like a spring, giving you suspension and allowing the tire to adapt to the terrain for better traction.
Tire inflation is a quick job that can easily improve your driving pleasure. Incorrect tire pressure will adversely affect cycling and make it more prone to punctures.
If you've never repaired a puncture before, you may not have thought about how your tires hold air in.
The vast majority of bikes will use a tube. It's a donut-shaped airtight tube that sits inside the tire with the inflation valve you see on the outside.
Inflated tire rests on the ground and provides puncture protection.
You may have heard of tubeless tires which do not have a tube but use a special rim and tire to seal air without using a tube. This usually requires a tubeless sealant, which is a liquid that plugs any air outlets.
Tubeless tires are more commonly used on mountain bikes, but the technology is moving to road bikes.
Tubeless sealant also seals punctures, and no tube means much less risk of pinching flat surfaces - that's when your inner tube gets pinched by the rim, causing a puncture. Thus, tubeless tires can run at lower pressures than inner tube tires to improve comfort, speed, and traction.
At the highest level, you also get tubular tires. They are essentially a tire with a tube built into it, but they are rarely seen or used outside of professional racing.
Inflating tires to the correct pressure is an important part of bike maintenance.
Running tires at too high or too low pressure can be potentially dangerous and can also affect your bike's handling.
Later we will discuss the correct pressure, but for now let's look at possible problems.
An under-inflated tire will reduce your efficiency and leave you vulnerable to annoying punctures.
If you drive with tires at too low pressure, the tire may wear out prematurely. Excessive sidewall deflection can lead to carcass cracking and tire brittleness. This can eventually lead to tire blowout.
Excessively low pressure also increases your susceptibility to punctures and can even cause your tires to literally jump off the rim if you turn at speed (the pressure inside is what keeps your tire on the rim).
Damage can also be caused by tire deflection up to the rim. This can lead to dents or cracks, which can compromise your wheel and require a costly replacement.
Conversely, too high pressure can cause the tire to come off the rim with explosive consequences. This pressure can also compress the wheel because if it is too high, the compressive force on the wheel can be too great.
From a drivability point of view, low pressure can lead to poor drivability due to the tire squirming under load.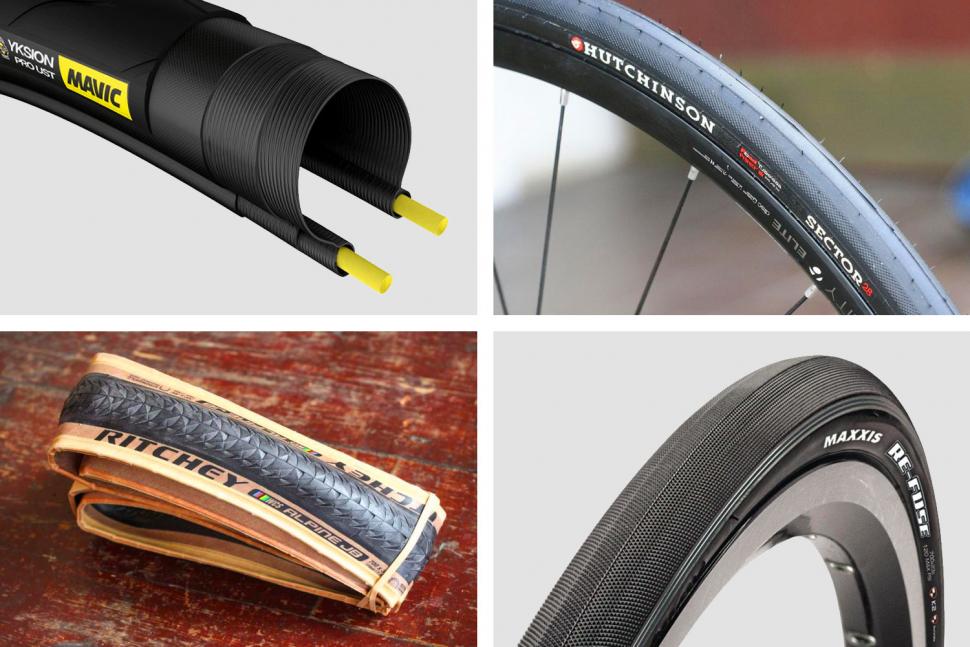 Your bike will be difficult to control and will be slow and sluggish.
On the other hand, too much pressure can lead to poor traction and a rough ride, leading to fatigue and in turn poor handling.
There are two possible reasons for your flat tire. Either you have a puncture or your tire has deflated over time.
The adhesiveless patches are great for a quick fix, while the more traditional kit is a versatile option when you have a bit more time.
All tire systems will bleed slowly because the tubes are not completely sealed. For example, standard butyl tubing retains air fairly well compared to lightweight latex tubing, which bleeds relatively faster. Even tubeless setups will slowly leak air.
Old tubes will pass more air than new ones, so if they haven't been replaced in a while, it's worth taking a look at them. It is less likely, but also possible (especially on older tubes), that the valve is no longer sealing properly.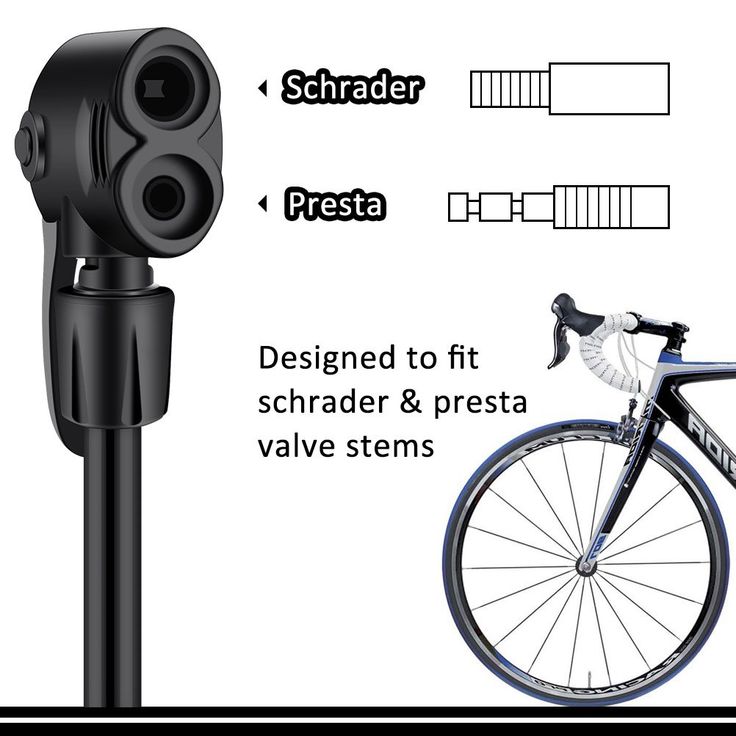
The best way to check what's going on is to try pumping up the tire. If it's holding air, you probably have nothing else to do. If this does not happen, most likely you have a puncture.
If air leaks slowly overnight, you have a slow puncture or just an old tube that needs to be replaced.
The first thing you need to know before inflating a tire is the valve type.
The valve is the key part that keeps the air in the tire but also allows the tire to be inflated (or deflated).
The Schrader valve is also used for car tires.
Schrader valves are more common on lower end bikes and in the past mountain bikes. The same valves are used on car tires.
The valve assembly is a hollow tube with a spring loaded valve that automatically closes and screws into the outer housing. The pin comes out of the valve and is usually flush with the end of the outer tube.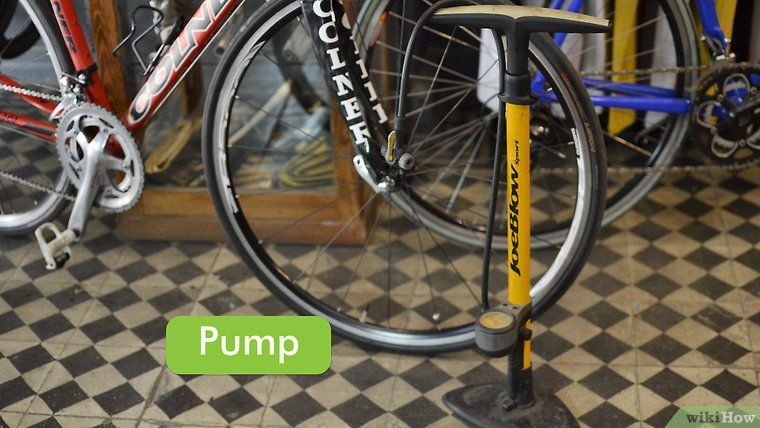 This pin can be pressed to release air.
The dust cap on Schrader valves is an important part of the design that can help close the valve completely if it is not fully sealed. Essentially, it provides a secondary "backup" seal.
The spring-loaded design of the valve is slightly susceptible to contamination from dirt or sand, so it is important to protect it as well.
These Presta valves are longer and narrower than the Schrader type valve.
Presta valves are only found on bicycles.
They originated on road bikes, where a narrower valve (6mm versus 8mm for the Schrader) meant a smaller valve hole (usually the weakest part of the rim).
These days you can find them on both mountain bikes and road bikes. Instead of using a spring, the valve is held in place by a nut that holds it closed, although the valve itself seals "automatically" when the pressure inside the tire forces it to close.
With a schrader valve you can simply press the pin to release the air, but with a Presta valve you first need to unscrew the small lock nut. Don't worry about the nut coming off the end of the valve body because the threads are rounded to prevent this from happening.
There seems to be a myth that Presta valves handle high pressures better - this is probably not true given that there are Schrader valves that can handle many hundreds of psi (much more than you'll ever need). in your tire).
However, Presta valves are definitely a bit more fragile than Schrader valves. It is very easy to strike the threaded inner body of the valve, bend it or break it, so care must be taken. However, valve cores are easily replaced with standard tools.
Compared to Schrader valves, this requires a special tool.
Presta valves can be supplied with a retaining ring that secures the valve body to the rim. This can make them easier to inflate. The dust cap is not essential to sealing it, but helps keep the valve clean.
The only other type of valve you may encounter is the Dunlop (also known as Woods) valve. The base diameter is the same as the Schrader valve but can be inflated with the same pump as the Presta valve.
They are very popular on city streets in Europe and elsewhere in the world, but you are unlikely to find one in the UK or the US.
The tubeless valve is difficult to distinguish from a regular Presta valve.
Valves for tubeless tires are attached directly to the rim, not part of the inner tube.
Most often they are of the Presta type, but there is also a Schrader.
If you have a Schrader type valve like the one shown above, the first thing you need to do is remove the dust cap (if present).
Simply unscrew the cap counterclockwise to open the valve.
Now attach the pump head.
Inflate the tire to between the minimum and maximum indicated on the tire sidewall and remove the pump. Ready!
If your bike has a Presta type valve like this one, you will first need to remove the plastic valve cover (if any).
The plastic cover will open another threaded valve cover.
Loosen the threads, but be careful not to damage them in the process.
Now attach the pump head of your choice to the open valve and inflate the tire to between the minimum and maximum pressure indicated on the sidewall of the tire.
Inflate the tire to the desired pressure and remove the pump.
Finally, close the valve by turning it clockwise and install the plastic valve cover.
If you have a tubeless tire or a tube with sealant inside, there are a few extra steps you should take to avoid pump contamination.
Turn the wheels so that the valves are at the bottom and leave for a few minutes to allow the sealant to drain.
Turn the wheels so that the valves are up and inflate the tires. The same thing happens when the tires are deflated to prevent the sealant from splattering all over the place.
We would say that if you can only own one type of pump, get a foot pump for home use because it is efficient, fast and easy to use.
However, there is no doubt that having an extra mini-pump for the duration of the trip is very useful - otherwise you risk getting stuck on the side of the road in case of a puncture.
There is no limit to pump selection. Basically, they all do the same job, some of them look better than others.
From budget to outrageously expensive, you'll find something to suit your needs.
Mini pumps work but are much more difficult to use. Again, there are many options that will fit in your pocket. We prefer hose mini pumps because it reduces stress (and potential damage) on the valve.
Another option for your inflation needs is the CO2 pump. They use compressed carbon dioxide in a small cartridge to inflate or fill a tire very quickly. Not something you would like to use on a regular basis, but perfect for emergency repairs.
The first thing to do is attach the pump to the valve.
Remove the valve cap, and regardless of valve type, we find it useful to let some air out to make sure the valve doesn't stick and opens and closes cleanly. Screw on the chuck, or push it in and lock it.
If your tire is completely flat, it may be difficult to install the cartridge at first because the valve tends to move back into the rim. Simply hold the valve at the back while pressing down on the outside of the tire so you can lock the cartridge in correctly.
The locking ring on Presta valves (if equipped) can also help by preventing the valve from dropping, holding it in place for you.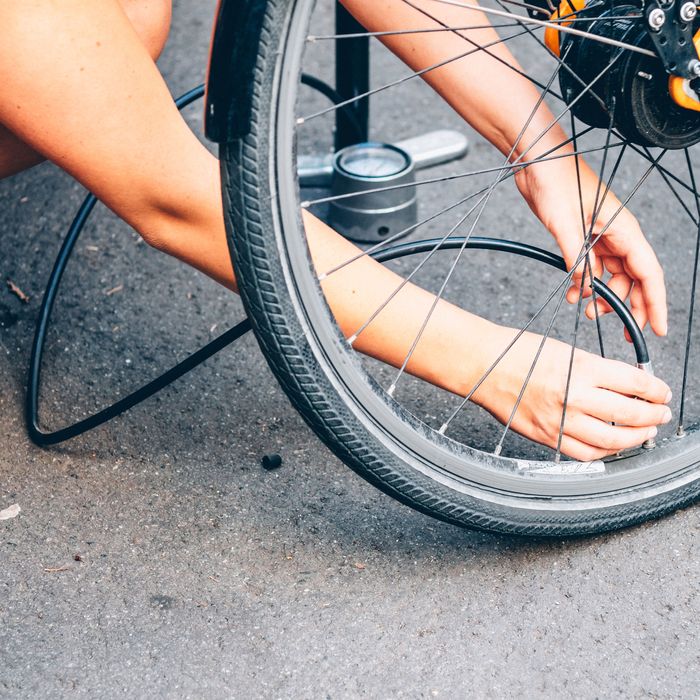
The connection to the valve must be tight. It is normal for a small amount of air to escape when installing the pump, but this should not last long. If so, remove and reinstall cartridge. If the problem persists, it might be worth checking the rubber seal in the chuck to make sure it's not worn out and needs to be replaced.
Remember to be careful with the valves - they are fragile. This is especially true if you are using a mini pump without a hose.
Be sure to secure the pump by hand to avoid applying too much force to the valve, which could cause damage.
When you start pumping, make sure you use the full stroke of the pump. You will find that most of the stroke is compressing the air to the point where it will be forced into the tire.
If you don't use the pump all the way, the air won't be forced out of the bottom - you need to pressurize to move the air from the pump to the tire. Instead, you'll just end up wasting your energy to no avail.
With a floor pump, don't just use your hands, use your body weight to push down and pumping becomes much easier.
Sometimes you may find that the pump does not hold pressure, especially when inflating a tire from a fully deflated position. This may especially apply to older pumps where the seals may be slightly worn.
We find that vigorous inflation first helps to create enough back pressure (i.e. tire side rebound) in the system to ensure that the valves actuate properly and seal the tire. Keep going until you get the right pressure.
When the cartridge is removed from the valve, a hiss of air loss can usually be heard. This usually happens on the pump side, not the valve side. The pressurized air from the hose and cartridge just comes out.
The pump pumps air into your tire. The principle of operation is simple; you increase the pressure inside the pump until it exceeds the pressure inside the tire. This "overpressure" forces air into the tire, which also increases tire pressure.
The pump is simply a manually operated piston. As the pump moves down, a check valve (allowing air flow in one direction) seals the piston chamber, causing the air pressure to rise as the pump is compressed. This pressure increases until it exceeds the pressure inside the tire.
At this point, the second one-way valve will allow air to flow from the pressure pump chamber into the tire. You extend the pump again, the check valve opens to fill the chamber with air, and you repeat the process.
To prevent leakage of tire pressure, the second check valve at the base of the pump closes. If it wasn't there, the pump would just open up again.
Presta valves close automatically, but spring-loaded Schrader valves are usually held open by a pin in the valve mount (meaning you don't need any additional inflation force to overcome the pressure exerted by the spring).
The pump head is also known as the cartridge.
The cartridge is the part that attaches the pump to the valve and forms an airtight seal over the valve. There is one of two designs: threaded or push-on with a locking lever. Most pumps nowadays can also be adapted to Schrader or Presta valves.
They will either have two different mounting points or a cartridge that can be changed for both types.
For large pumps (and many mini pumps too) the cartridge is often on the hose, preventing your force from damaging the valve.
Pumps are often equipped with a tire pressure gauge.
Proper tire pressure is perhaps one of the most controversial topics, but there are a few guidelines you can follow.
As a rule of thumb, your tire should be strong enough to prevent it from flexing all the way to the rim, yet malleable enough to provide some suspension - after all, the beauty of a pneumatic tire is that you don't have an incredibly hard ride.
Most tires have a minimum and maximum pressure marked on the side. It is advisable not to go below or exceed these limits, because manufacturers have indicated them for a reason. Of course, this means there is still plenty of room to play around with the pressure and what works for you.
For mountain bikes, the problem is relatively easier to solve, as the goal is usually to improve traction, cornering, and damping.
As a rule of thumb, riders try to run as low pressure as possible without making it so soft that the tire squirms under load in a corner or flexes enough to damage the rim.
Things get a little more complicated for road bikes because along with grip and comfort, rolling resistance (how efficiently the tire rolls) is an important factor.
On all but the smoothest surfaces, a stiff tire will have no advantage, and instead of the tire being able to lean and conform to the bumps, causing the bike to move forward, you will bounce.
On all but the flattest surfaces, lower tire pressure can provide greater comfort and efficiency.
Testing showed that 20 percent tire compression (the amount of tire compression when a load is applied, measured by the height from the ground to the rim) was the optimal balance.
Incidentally, some manufacturers recommend the same level of tire compression, although this figure is somewhat controversial.
This value is indeed a good starting point for experimenting with tire pressures.
You don't always have to remove the pump/gauge to check tire pressure.
We recommend that you check your tires before every ride. Usually, you just need to squeeze them with your hand to check the pressure.
No, this is not very accurate, but you will quickly feel the pressure in your tires and be able to determine whether they need to be inflated or not.
If you get serious about this, you can end up with a pressure gauge that can read your tire pressure very accurately.![]()