There are ongoing arguments about the relative benefits of winter tires; suffice to say that I’m in the pro-winter camp. I believe that winter tires offer superior cold temperature grip compared to all-season or even all-weather tires, even on dry pavement. Since it seems that you can’t so much as touch two cars together without causing more than $1,500 damage, I look at winter tires as a good investment. If they stop 10 feet shorter just once, they’ll have paid for themselves. Plus, you’re splitting your wear between two sets of tires since your warm-weather rubbers get a four month vacation.
Winter tires should be mounted on a dedicated set of wheels, whether its relatively inexpensive steel or fancy alloy rims. Besides the cost of mounting/dismounting your tires twice per year, each on/off cycle risks damaging the tires or even the wheels. There’s at least a $60 difference in cost at my shop between swapping unmounted tires and exchanging mounted tires, so it only takes a couple of seasonal changes to effectively pay for the wheels.
If you’re among the growing group of people to have winter tires on a dedicated set of wheels, there’s a good chance that you’re still paying someone to do those seasonal changeovers for you. Really though, if you’re comfortable changing a flat tire, you’ve got the skills to do the winter changeover yourself.
While you can get away with using the tire changing tools that came with your car, it’s both easier and far safer to pick up the proper gear - which can be useful for other DIY jobs.
Ideally, you’ll want a service jack, safety stands, lug wrench and/or sockets, a breaker bar, and a compressor to inflate the tires.
Now is a good time to check the tire pressures. Tires that have lost more than 10-15 psi during storage should be inspected for leaks.
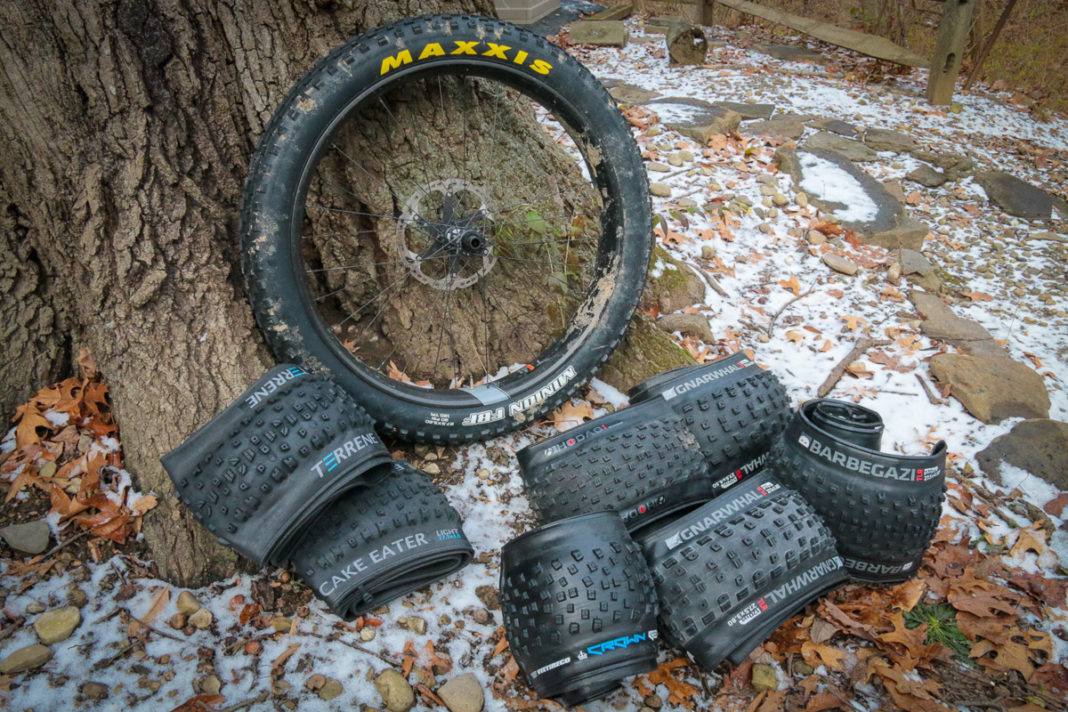
One option for winter wheels, as seen with two of these three sets, is to use the factory alloy wheels for the winter rubbers. Winter tires for the original 15-inch wheels on my wife’s Nissan Maxima were relatively inexpensive.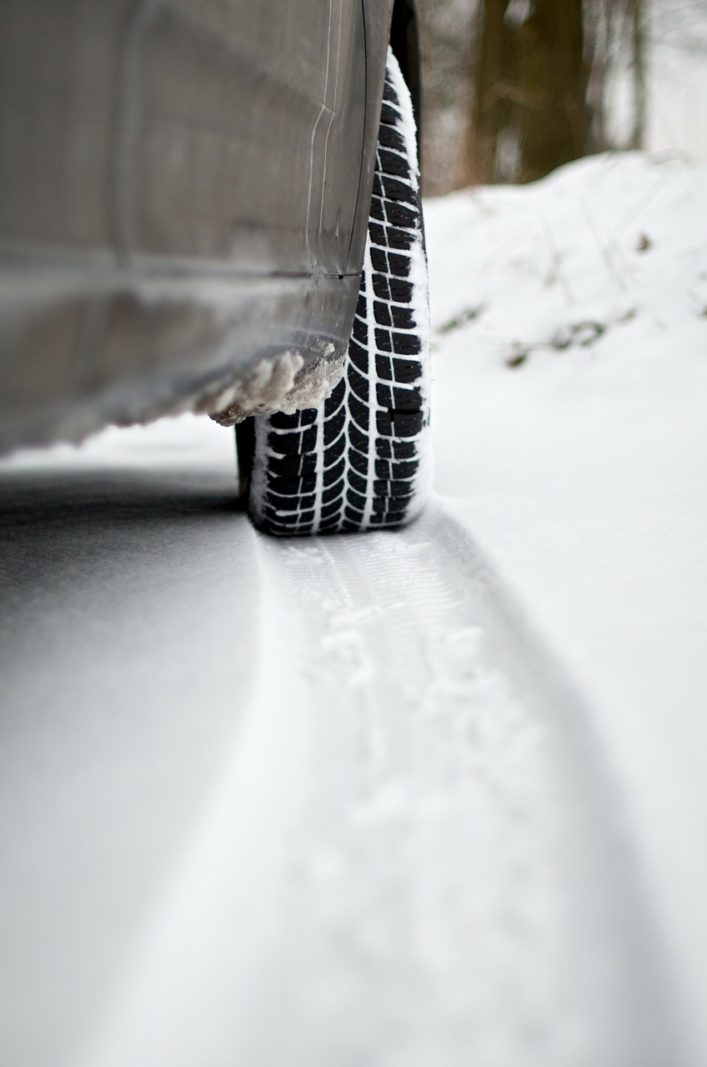 I bought more stylish 17-inch wheels and tires to use the rest of the year.
RELATED: Top 10 winter tires for 2016
Secure the area
Once in position and turned off, the car should be placed in gear (manual) or Park (automatic), and the parking brake firmly set. Ideally, wheel chocks or blocks should be placed on either side of the tire at the diagonal opposite side of the wheel that’s being changed.
With this car, I bought 16-inch steel wheels to spare the car’s original 17-inch alloy wheels from salt exposure and corrosion, while reducing the cost of the winter tires themselves.
Loosen the nuts
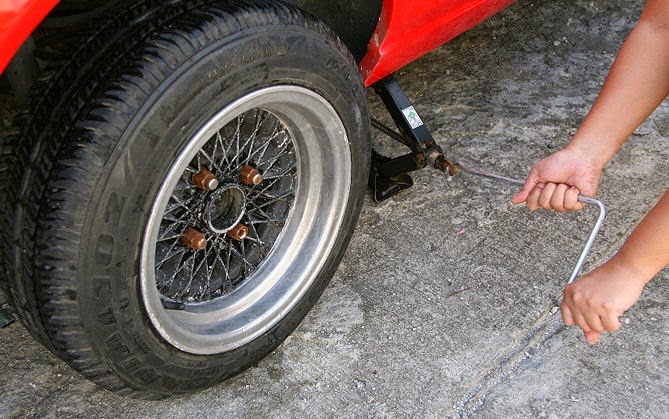
Even if you have air tools, it may be necessary to crack the wheel nuts free while the tire is still on the ground and has resistance to turning. If you’re using hand tools, this step is required. A quarter- to half-turn is plenty; we only want to loosen them enough to ease their removal once we’ve lifted the tire off the ground.
Take extra care with the locking wheel nut, if present. It is distressingly easy to strip or break the keyed portion of these sockets if they’re not perfectly aligned or sitting the entire way on.
Remove the wheel
Now that we’ve lifted the wheel off the ground, we can readily remove the wheel nuts. After you’ve removed the wheel, write down where it was mounted. I like to mark the tire’s position on the inside sidewall with a tire crayon (available from Canadian Tire or most auto parts stores). Chalk will work in a pinch, but may rub off. To eliminate any potential confusion, I use “D” and “P” for driver and passenger sides, and “F” or “B” for front or back.
Inspect the brakes
With the wheels off, take a moment to check out your brakes.
It’s a bit messy, but spraying a lubricant or rust inhibitor like Honey Goo or Krown T40 on the axle nut and centre flange keeps them from corroding – a greater concern with steel wheels, as they’re exposed to the elements.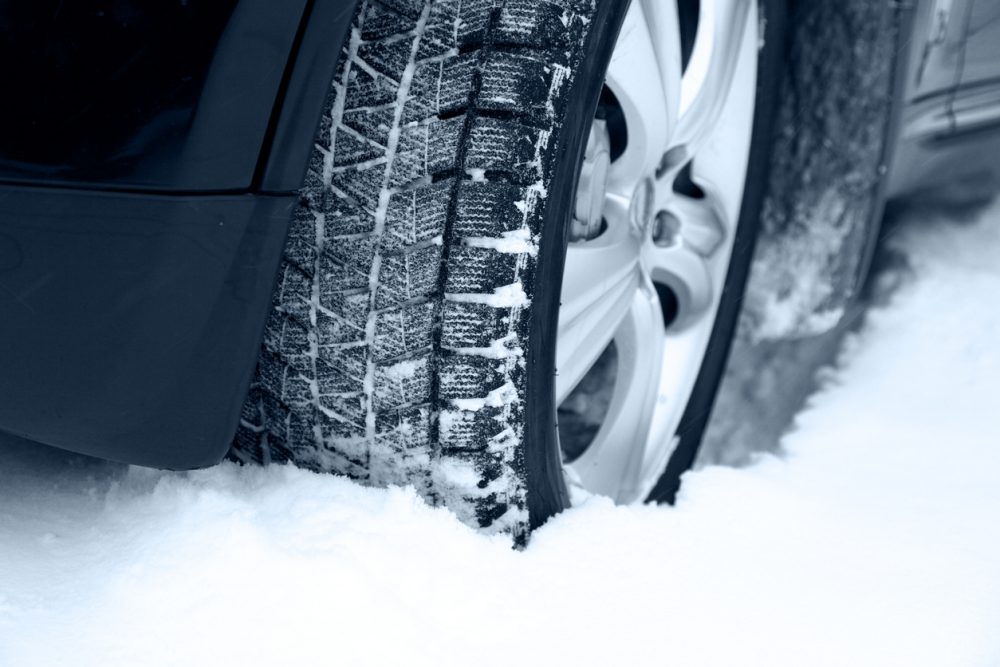 Any dirt or corrosion on the flange itself should be removed. Do not lubricate or put anti-seize on the threads of the wheel studs.
Replace the wheel
When putting the wheels back on, always start tightening the nuts by hand. If aftermarket wheels with oversized centre holes are used, all wheel nuts should be run in sufficiently to centre the wheel before their final tightening.
Whether air or hand tools are used to install the wheel nuts, it’s recommended that a torque wrench be used to ensure that they are tightened to the correct value (it’s normally listed in the owner’s manual). Nuts should always be tightened in the appropriate cross-sequence.
By: Brian Early Special to the Star
SHARE:
REPORT AN ERROR
JOURNALISTIC STANDARDS
ABOUT WHEELS.CA
If you travel to the mountains or snowy areas regularly, sooner or later you’re going to have to use tire chains. Start by getting the right set for your vehicle at your local Les Schwab.
Quick-fit chains are not your grandpa’s tire chains. They are MUCH simpler to put on and take off. Here are a video, step-by-step instructions, and driving safety tips for installing quick-fit tire chains on your vehicle.
When you need chains, driving conditions are nasty. Snow is coming down, passing traffic is spraying slush, dirty water is dripping off your wheel wells, the road is slick, and it may be dark. Don’t make this the first time you put on your chains.
Practice installing your new chains once BEFORE you travel. Take advantage of a dry garage or driveway to make sure your winter tire chains are the right size and you’re comfortable putting them on. If needed, the professionals at Les Schwab Tire Centers can help.
Put together a simple winter road trip safety kit with warm gloves, waterproof layers, and other items to make your winter driving more safe and comfortable. In the winter, always carry this emergency kit and tire chains in your vehicle.
Once you’re comfortable installing your chains, you’re ready to hit the snow.
Be Safe. If you’re on the road, pull off as far as possible onto a safe shoulder. Flip on your hazard lights. Put on your waterproof layers, hat, headlamp, and gloves from your winter road trip kit.
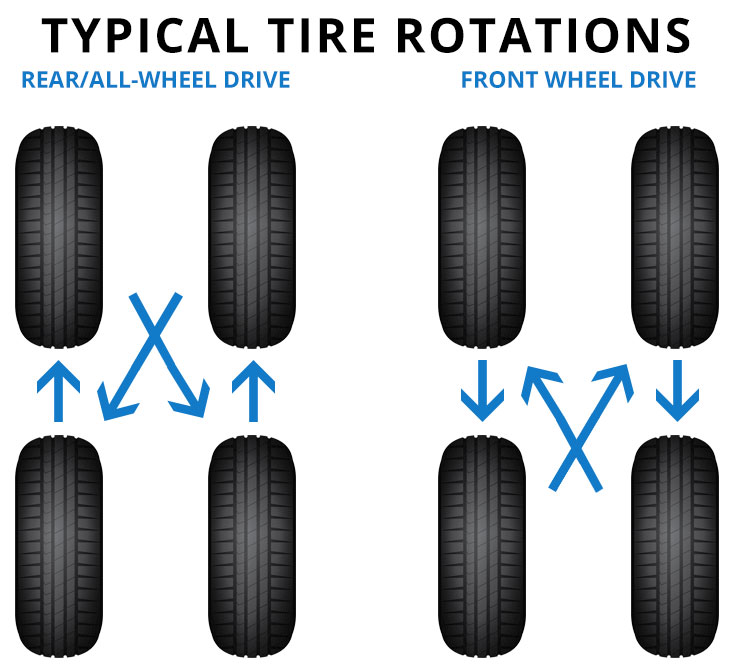
Identify the Correct Tires. If your vehicle is front-wheel drive, the chains go on the front. If it’s rear-wheel drive, chains go on the back. If it’s all-wheel drive, please check your owner’s manual. If you’re not sure, you can ask the experts at Les Schwab for help.
Pull Out Chains & Instructions. With your vehicle parked, open the bag and pull out your instructions and your first chain. Each bag comes with two chains. The plastic instruction mat that comes with your chains can be used as a barrier between you and the snow to keep you dry.
Untangle Your Chains. Holding them from the plastic-covered cable, make sure everything is straight and the chains are not looped over one another. Hold up your chains so the yellow end is in your left hand and the blue end is in your right.
The chains should hang loosely and the metal hooks seen along the yellow and blue sections should be facing away from you so they don’t damage your tires.
Place Chains onto Your Tire and Connect the Cable. Lay your chains on the ground and push them behind the tire, yellow cable end first, from the right side to the left.
Once the chains are centered behind the wheel, grab both ends and pull them up over the top of the tire.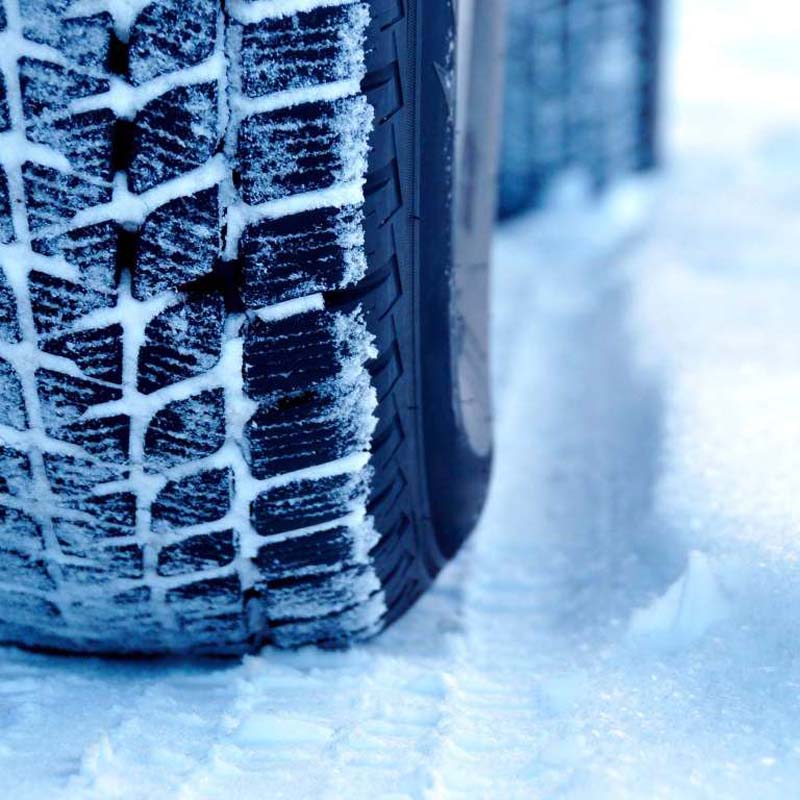 You should feel the chains against your axle.
This will allow you to easily connect the yellow and blue ends of the cable by slipping one end into the other and pulling them into place.
Connect the Red Hook. Now that the cable is connected on top, look for the red hook directly opposite the cable connection. Connect the red hook on the right to the first available gold link on the left.
Check the Diamond Shape. Push the connected chain over the top of the tire. You should see the diamond shape in the chains against your tire. Between each of those diamonds is the center rail, which should be placed down the middle of the tire tread.
Connect the Red Chain Along the Bottom. Now that the cable is connected on top, look for the red hook directly opposite the cable connection.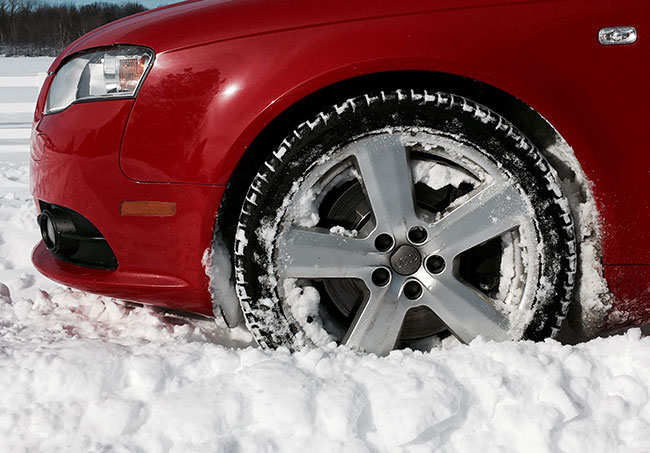 Connect the red hook on the right to the first available gold link on the left. Push the connected chain over the top of the tire.
The bottom of the chains includes a red draw chain with bungee on your right, and a chain guide on the left. Pull these out towards yourself.
Take the long red chain and run it through the chain guide and pull as tight as you can with both hands. Don’t pull using the bungee. As you pull, one of the chain links will find its way into the notch on the red chain guide, locking it into place.
Using the bungee end of the red chain, pull it through one or both of the red loops and secure it to a gold-side chain opposite the red loops. If you can’t get it through both loops, that’s ok, pull tight through one and attach it to a side chain to the left of the loop.
Repeat on Second Tire. Repeat these steps to install chains on the other side of your vehicle.
Drive Forward Slightly. The next step is to drive forward about 15 feet, or a full car length. This gives the chains a chance to relax and settle on your tires.
Re-tighten Chains. To take up any slack, unhook the rubber end of the red draw chain and pull it tight again. Once it’s tight, guide the red chain through the loops and, again, securely latch the bungee end to the gold-side chain.
The chains should be tight on the tire. And, be sure to stop if you hear them making any contact with your vehicle. If your chains are still loose, unhook the bungee and adjust the red hook straight across from the chain guide. Unhook and reattach to the tightest position on one of the three gold chain links. It’s okay if the extra links are hanging loosely. Now, you’re ready to reattach your bungee.
While driving with tire chains, listen for a loud sound of slapping, or metal on metal. If you hear any indication that a chain may be broken or hitting your car, STOP as soon as safely possible. Loose or broken chains that flap can wrap around a strut or shock component, causing big damage to your vehicle. To help prevent damage, here are a few tips for driving when you have winter chains installed on your vehicle.
Pull over in a safe location and remove the chains. Start by unhooking the bungee and chain from the guide, removing them from the tensioner. Unlatch the red hook, and then undo the blue and yellow cable connection. Once all of your chains are off and lying flat on the ground, pull backward or forward slowly a few feet so you can safely pick them up.
At the end of your trip, lay your chains out in the garage and let them dry.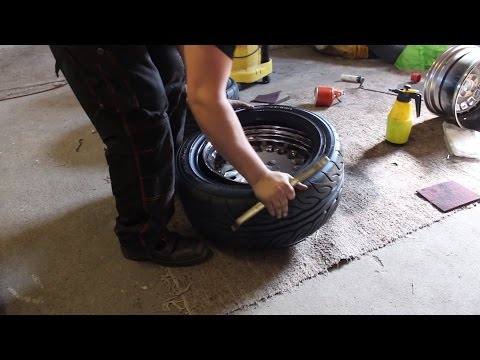 If you pack them wet, they can rust.
Also check them for wear, especially if you’ve driven them on asphalt for any distance. Look for flat spots, and replace the chains if you find some.
Link at left shows flattening from wear. Link in center shows sharp edge from wear that can damage a tire.
Remember, if you don’t use your chains all winter long, you can return them with proof of purchase to any Les Schwab for a full refund in the spring.
Get your next set of Quick-Fit chains, along with a few tips on how to install them, at your local Les Schwab, where doing the right thing matters.
Want more tips on winter road safety? See 19 Winter Driving Resources You Can’t Do Without.
Get More Winter Tips
When transferring the car to the cold season, the main requirement is to correctly install winter tires.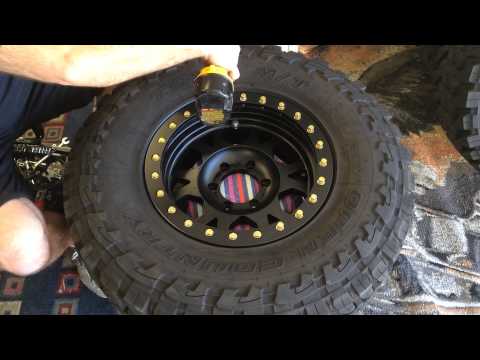 Different tires differ from analogues in the specific structure of the tread, which imposes restrictions on installation.
In order for the buyer to correctly change the shoes of the car, the factories put special markings on the sidewalls. The inscriptions will help determine where the rubber has front and back, left and right sides.
Content
 3 The strobes of the studded Michelen
 Modern tires are divided into three types depending on the design of the tread. The difference in pattern allows manufacturers to tailor product characteristics to specific road conditions.
Also, the shape of the pattern affects the noise and wear resistance of the ramp.
Typically used for agricultural and off-road vehicles.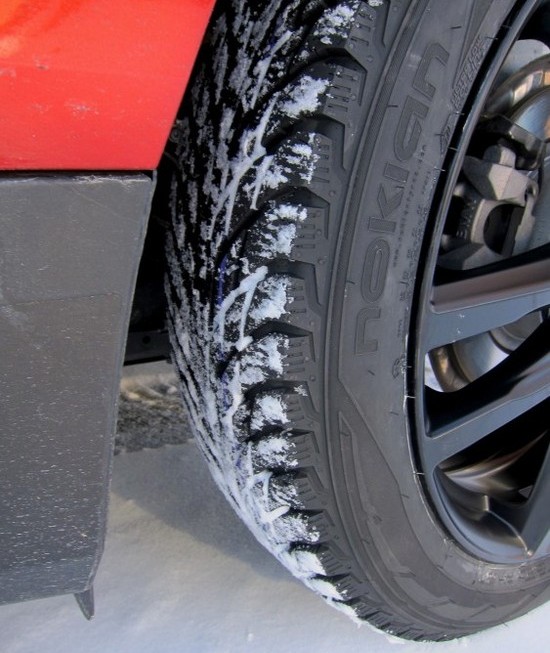 H unidirectional pattern is the simplest and most budgetary variety that can work the same, regardless of the rolling side.
Of the minuses, one can single out a lot of noise during acceleration and mediocre stability at higher speeds.
A popular tread pattern used primarily for winter tyres. Thanks to the abundance of moisture removal, the slopes hold a wet road well and are resistant to aquaplaning.
The "V" pattern has minimal noise and good road holding. The nuance is the exactingness of the correct installation (strictly in the direction of the arrow). If you break the rule, loss of performance and accelerated wear are possible.
Asymmetric directional tread is the most difficult to manufacture. Thanks to this design, the tire combines cornering stability and optimal grip on straight sections.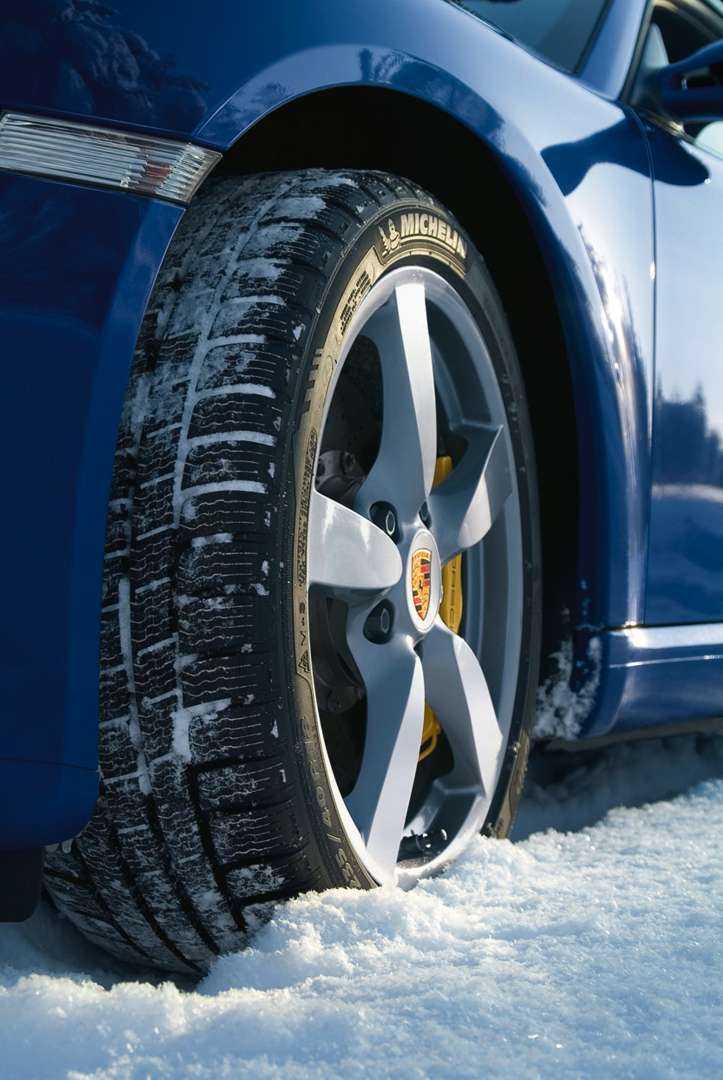
Improved performance of hybrid technology guarantees an advantage on the race track. For the average user, the advantages are not noticeable - at low speeds in urban mode, ramps cannot reveal their full potential.
Experienced motorists know that each tire has a direction of rotation. If you put the wheel on the machine incorrectly, its efficiency is greatly reduced. The wear of the tread also increases, which leads to rapid abrasion of the studs, increased noise of movement.
Special inscriptions like Rotation, Outside will help you find out which side to put the tires on the car. Designations are applied to the sidewalls, while the indices are relevant for all manufacturers. Regardless of the brand, be it Hankuk or Rossava, the labeling is the same.
Symmetrical directional tires are the easiest to install. Arrows may not be applied here - the desired strip is indicated by the drawing itself. Typically, on such rubber, the location of the spikes is a herringbone. The front of the arrow, when considering the tire from above, should be in the direction of the car.
The photo shows the correct installation of a symmetrical directional tire.
Asymmetric tires can be supplied in the same way. If there is a characteristic elongation on the working surface, the installation is performed in this way.
On models where a clear direction of the pattern is not visible, it is necessary to navigate along the side indicators. The pictures show the most common tire designations.
Asymmetric tread - meaning of the inscription: located on the inside of the wheel:
Designation of the side of rotation - the arrow points forward:
[ad-pc-mob-pa154]
For tires where there are no arrows or similar indicators, there is no difference how to put them on the car. Due to the fact that there is nothing to show the necessary side - tires with non-directional tread work equally in both directions.
Such skates are characterized by a specific design of spikes. The elements have symmetrical bevels on both sides.
There are also installation rules for winter tires. Arrows and markings are also used here to indicate the correct installation. The Rotation inscriptions combined with the arrow, Outside and Inside markings, indicating the location of the sides, are relevant.
Incorrect installation on winter tires affects more. The soft composition of the stingray wipes off faster, and the metal spikes fall out easily. Thus, the error reduces the life of the product by 40-50%.
Models with directional tread are also popular for winter. Here, the direction of rotation of the wheels is similarly indicated by an arrow. In its absence, the correctness is determined by the location of the tree of thorns. When viewed from above, the tip should be in the direction of the car.
If the tires are installed incorrectly, their grip on slippery surfaces will decrease, the wear of the tread and metal inserts will increase.
Firestone symmetrical non-directional tire designed for family cars. Rubber compound characteristics suitable for moderate winter use. The slope can be placed on either side.
Tires of the specified brand are directional and non-directional. Products are mounted according to the general rules. To determine the correct location in the MP-52 model, there are Rotation arrows.
For MPS 530 asymmetric tyres, the indications for the mounting side "outside and inside" must be followed.
Michelin winter studs are predominantly produced with a directional tread design. Such models need to be beaded on the rims based on the pointers or the location of the “tree” of the tread.
Similar models of the Michelin Energy type do not show a clear direction of the blocks. Here you should navigate by marking the inside and outside of the rubber.
Dunlop also manufactures a wide range of automotive wheels. Due to trade in Europe and the USA, brand products are subject to general labeling rules.
Depending on the model, the tread pattern can be symmetrical or asymmetrical. The direction is determined by the arrows or the corresponding inscriptions on the sidewalls of the tire.
The version designed for crossovers differs from competitors' offerings in high cross-country ability and low price. Due to the complex design of the working part, motorists often make mistakes when mounting a tire.
To facilitate the procedure, the manufacturer puts a Rotation indicator with a characteristic arrow on the side of the ramp, which minimizes the likelihood of incorrect installation.
Budget tire Kama Irbis 505 has a pronounced tread direction. If you are careful during tire fitting, it is difficult to confuse the direction. The model has a standard pointer and pattern orientation.
Manufacturer Cordiant produces several types of tires. Asymmetric and symmetrical modifications are popular among motorists. Depending on the design, the tires are marked with direction or inside/outside indicators.
In the fifth version of Nordman, it is impossible to confuse the correct direction. There is a pronounced directional pattern and pointers on the side parts.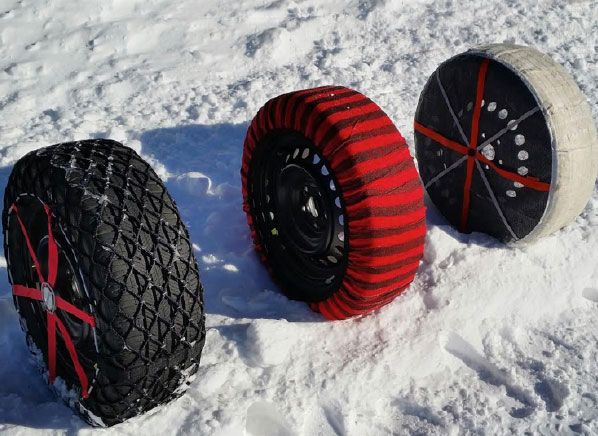
The central part of the working platform is a solid Christmas tree, the point of the triangle must be directed in the direction of the vehicle.
Pure summer tires use the same markings and standards as other types of tires. There is a directional and non-directional tread, symmetrical and asymmetrical. Mounting is carried out according to the tree or indexes printed on the sidewalls
Tires of the Hakapelita model, regardless of modification, have an exclusively directional structure of the working part. The popular version can only be mounted on discs in one direction.
Proper mounting is indicated by the arrows on the side of the tire.
The products of the German corporation are in great demand among Russian buyers.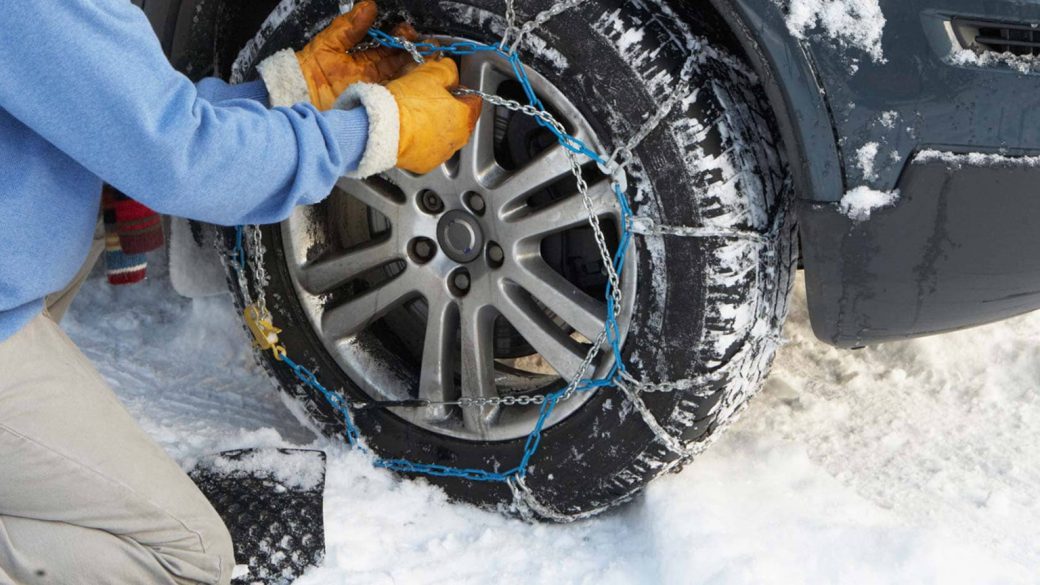 The manufacturer's assortment includes asymmetric and directional designs. According to European standards, in 100% of cases, there are indicator elements on the tire, which contribute to the correct installation.
All the inscriptions and arrows present will help to fence the ramp with the utmost precision.
Mark Sava comes from Slovakia. It produces directional and equilateral tire models that are in demand in Europe. The brand's products are popular due to a good combination of price and quality.
Regarding the direction of the pattern, it all depends on the type of model and the intended application. The range includes varieties of all designs.
Directional ramps are mounted according to the arrows, asymmetrical ones are installed according to the Outside and Inside inscriptions.
Old versions of Yokohama Ice Guard tires had a symmetrical, directional tread type, where it was almost impossible to mix up the place or side of mounting.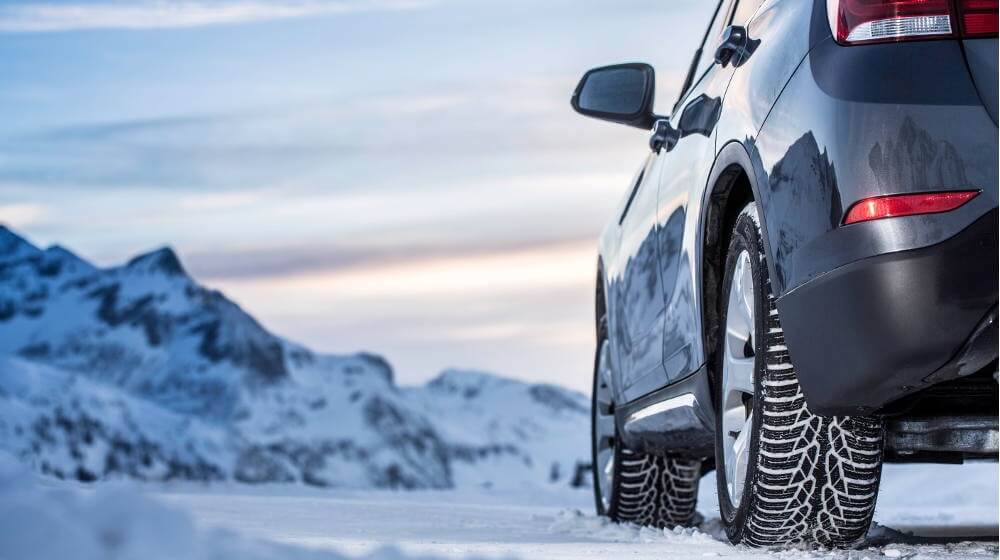 In 2018, the manufacturer introduced a new generation of the model to the Russian market. Here you can clearly see the asymmetry of the shape of the working area.
Due to the design change, the tire has a new marking. Inner and outer honor markers are located on the sidewalls, where "Outside" is the outer side.
Most of the company's new models of ramps are asymmetrical. The main feature of the working area is that the inner side is made soft. At the same time, the outer part is rigid. This gives the car more stability in corners and improves straight-line stability.
Regarding the correct installation, it is enough to study the inscriptions on the walls and act according to the factory instructions.
Note! Some products are divided into right and left (there are additional indexes). The fact must be taken into account during the boarding.

The combination of advanced technology and high-quality rubber alloy guarantees excellent performance and durability of the asymmetric tire.
The model is distinguished by reinforced blocks on the outside, as evidenced by the word Outside. This also shows the direction of the studs - upon closer examination, the central part of the working surface is elongated in the direction of the machine.
Feedback0003
Proper tire installation on the vehicle ensures safe handling on the road, increases tire life and reduces fuel consumption.
Regardless of the seasonality of use, all modern tires are divided into three main types according to the tread pattern:
Each of these types has features of installation and use. The easiest way to determine a specific type of tire is by marking on the side surface or by the characteristic tread pattern.
The tread pattern of these tires is very diverse. They do not have any special markings and are installed on the car in random order.
They have a special V-shaped pattern and special markings on the outer sidewall of the tire in the form of the inscription "ROTATION", as well as an arrow indicating the desired direction of rotation of the wheel.
Have different patterns on different sides of the tread and are marked with the word "Outside" on the outside of the tire. Additionally, there may be an inscription "Inside" on the inner side.
When installing new tires on a car or when changing tires seasonally, it is imperative to pay attention to the marking and direction of the wheel tread.
When installing a tire with a symmetrically directional pattern, the arrow printed on the sidewall of the tire is positioned in accordance with the direction of rotation of the wheel when the car moves forward.
Tires with an asymmetric pattern must be installed so that the "Outside" designation on the sidewall is on the outside of the wheel.
Important! Special attention is required when mounting asymmetric tires marked "Right" and "Left". To do this, you will need two pairs of tires with the appropriate inscriptions, which are installed on different sides of the car.
The directional tread pattern is designed to effectively wick moisture (wet snow, mud, etc. ) away from the tire-to-road contact. This reduces the risk of aquaplaning and improves vehicle handling.
If the setting is incorrect, the reverse situation occurs. When driving on a wet surface, the effect of aquaplaning appears, the contact of the working spot of the tire with asphalt worsens. As a result, the stability and control of the machine is reduced, which can lead to a serious accident.
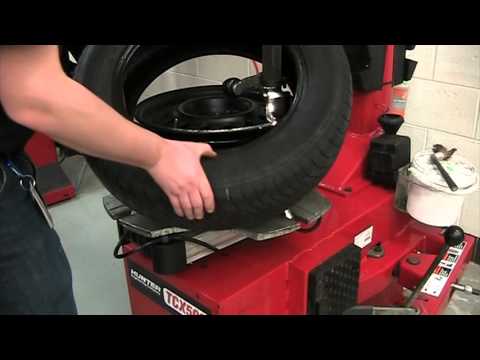
Self-changing tires for experienced motorists does not cause much difficulty. If you turn to a tire shop for such a service, you must personally check the correct installation of the rubber after the work is completed.
It should be remembered that if the tires were beaded, the wheels must be balanced on a special machine. This is necessary to eliminate their beating during movement, especially at high speeds.
After mounting the wheels, it is important to check the tire pressure and bring it to the desired value.