Getting a new ATV can be exciting. You’ve already planned out thrilling off-road adventures and you can hear the sound of the tires hitting the gravel in your head.
Unfortunately, you can’t simply start riding your ATV off the bat. Before your new ride is ready for regular riding, you’ll need to go through an early testing process known as “breaking in.” This easy process is crucial to your ATV’s life and performance, but many riders are impatient and skip it or rush through it. To avoid expensive, hazardous problems down the line, break in your vehicle with these simple steps.
When you first purchase a vehicle, its parts need a chance to warm up and get used to being used on the road together. “Breaking in” a vehicle refers to the process in which you run the vehicle on a light load or low power. The term is often used in reference to the engine, but any part of a vehicle can be broken in.
Check your vehicle’s user manual for more information about how your vehicle should be tested upon purchase.
READ MORE: Tips For First Time ATV Owners
Breaking in helps the vehicle’s engine smoothly get used to expanding and contracting, which will ensure that it is aligned properly. Otherwise, overworking an engine immediately after purchasing it can damage its cylinders, which creates many problems.
READ MORE: Common ATV Problems and How To Resolve Them
Warm It Up and Rev It Up
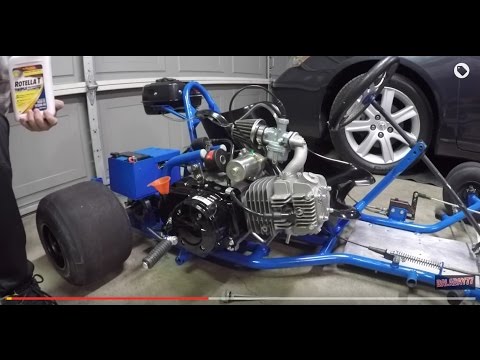
When you first begin breaking in your four-wheeler, you’ll want to give it a few minutes to warm up. This should take less than ten minutes, though it will ultimately depend on the engine’s size and the liquid’s ability to cool. In the future, it’s a good idea to do this whenever you ride your ATV.
Do a 20-Minute Active Engine Run
Once your quad is warmed up, let its engine run for 20 minutes.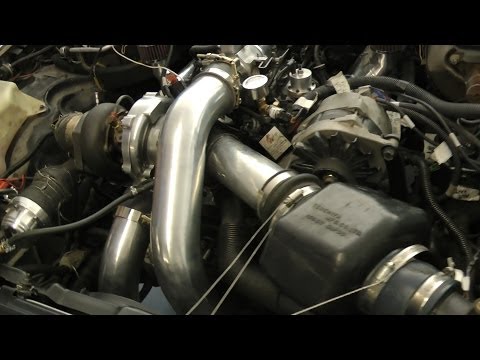 This is a crucial step, as you’ll be able to test out your vehicle’s basic ability to function. During the engine run, test out different throttle settings, going between idle and 70% throttle. Unless you notice any alarming mechanical issues, slowly increase the throttle, now testing out the 50% to 80% range. If everything is fine, continue on to running the vehicle as if it were being taken for a real ride.
Change the Oil and Filter
The work you’ve done up to this point has taken burrs and metal bits off of the piston rings, cylinder bores, and bearings they were attached too. As a result, these bits have contaminated the oil. The only way to deal with this is to change the oil.
It’s recommended that you install a new filter before filling up with new oil. Use conventional oil rather than synthetic oil. This will help continue the rest of the breaking-in process smoothly.
Don’t Go Too Hard, Too Fast
Taking it slow and steady is always a good approach to breaking in any type of vehicle. Overwhelming the engine can disrupt the process. Rather than trying to rush through the break-in period, consider running the vehicle and changing the oil over multiple trials, increasing the throttle and length each time.
Run Your Engine Normally
As you continue breaking in your four-wheeler, run the engine as you normally would on the road. This important step gives you the opportunity to test the vehicle’s proper functions in the manner that you can actually expect to ride with. Do this for at least five hours – you want to give your vehicle the chance to demonstrate any last-chance issues before you’re finished testing.
READ MORE: Features to Look For in a New ATV Purchase
Do a Second Oil and Filter Change
It’s important to change the oil multiple times to ensure that no debris is left in the fuel. Now that you’ve finished testing out your engine’s performance, it’s time to give it one last oil change.
This time, replace your oil with whatever kind of oil you plan on using permanently.
Enjoy As Normal
Now that you’ve completed breaking in your vehicle, you can ride confidently, knowing you’ve settled the engine in at an appropriate pace and cleaned out the oil filter of any debris. Now, there’s only one thing left to do: take your ATV on its first real ride.
These steps have ensured your safety and your vehicle’s functioning, and you should be ready to take on any terrain. Of course, ride safely, and regularly monitor your vehicle for any maintenance issues. Take care of your ATV, and it will take care of you.
Delivery options and delivery speeds may vary for different locations
Sign In
or enter a zip code
Email * Password *
REPAIR & HOW TO
MAINTENANCE
TROUBLESHOOTING
GUIDES
TIPS & TRICKS
ALL ARTICLES WATCH VIDEOS ABOUT US SHOP PARTS CONTACT US
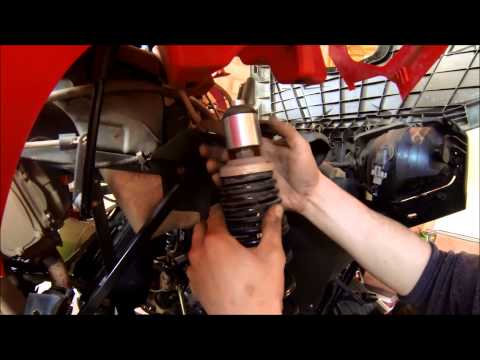
If you spent hours rebuilding the engine in your motorcycle, ATV or side-by-side, the last thing you want to do is ruin all that hard work by failing to properly break in the motor.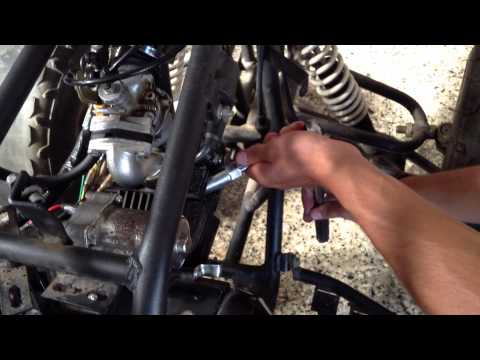
The steps to follow for breaking in a rebuilt engine once it's running again will vary slightly depending on the type of engine. For example, the steps for a high-performance street bike requiring high RPM for peak performance differ from a more sedate side-by-side that relies on lower RPM torque to get the job done. However, these steps more or less apply to all rebuilt engines.
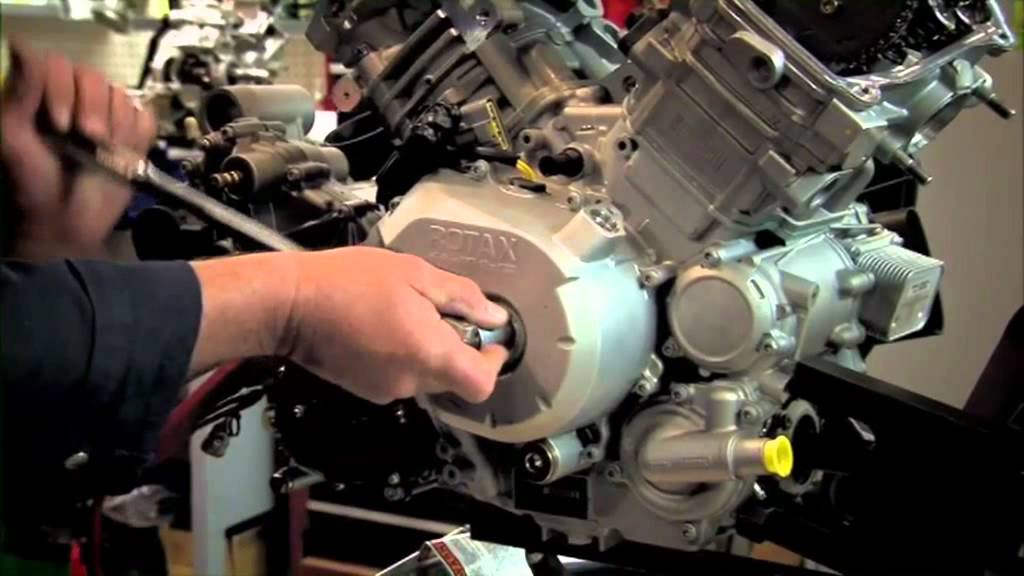
Supplies Needed: Breaking In a New EngineFill the motor with a conventional engine oil, not a synthetic. Synthetic and semi-synthetic oils are too slippery and slick, which prevents the new piston rings and cylinder bores from seating properly. During the first few minutes of running, the piston rings and the walls of the cylinders need a small amount of friction so they can wear fractionally, and so their surfaces can conform to one another to form an effective seal.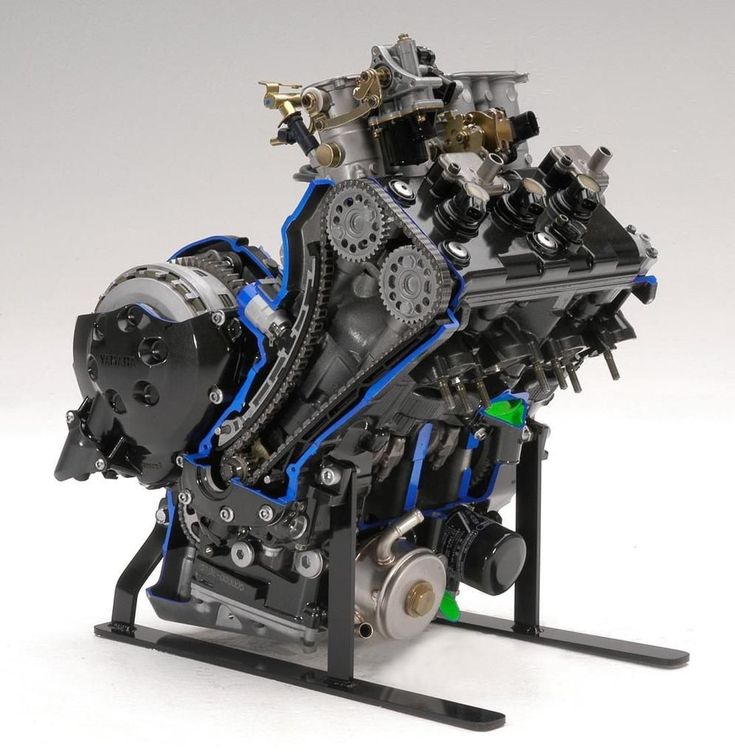 It's this seal that gives an engine good compression, and it's that compression that really adds to the performance of your rebuilt engine.
PRO TIP: You don't have to be brand-specific with motor oil, just make sure you're using a quality oil. However, many riders prefer to use an oil that's produced by the same manufacturer as their engine.
Static Engine Run to Operating TemperatureThe first time you restart the motor after a rebuild should be a static run. Wheel the machine outside or make sure you're in a well-ventilated space. Then, start the engine and bring it up to operating temperature while gently varying the throttle between idle and 50% open. Don't go over 50% throttle at this point. Once the engine has warmed up, give it a thorough inspection for any leaks; listen for any odd noises; and look for any other mechanical issues such as excessive vibrations. Shut off the engine and let it fully cool down.
An engine break-in happens mostly during the first 20 minutes of running after the rebuild. If you have access to a dyno, strap the vehicle down and vary the load on the engine between idle and 70% throttle. Otherwise, take the vehicle for a short ride to put a load on the engine. Vary the throttle between idle and 70% to push it a little harder than you did in the static test. Find somewhere without any traffic where you can safely run the vehicle while varying your speed to break in the engine.
Assuming everything goes well and there are no mechanical issues, start varying the throttle between 50% to 80% to further increase the load on the engine. Next, run the vehicle as you would in normal operating conditions. If it's a competition motorcycle, run it like you would at the track. If it's a UTV, run it like you would when hauling stuff.
NOTE: There's no point in babying the engine during the end of the break-in period only to then shock it and encounter a massive failure the first time you run it in real-world conditions.
After the initial 20-minute active run, give the motor another thorough inspection, and then change the oil and the oil filter. All the tiny pieces of metal that were sloughed off the piston rings, cylinder bores, bearings, etc. as they bedded-in are all now suspended in the oil and flowing around the engine. Drain out the oil and remove the oil filter to get rid of all that debris.
Install a new oil filter and refill the engine with oil. Once again, use conventional oil because the parts within the engine are still bedding themselves in and synthetic oil will hinder that process.
Normal Engine RunningThis step will vary depending on the type of engine and how it will be used. If the engine is in a performance street bike, motocross bike, ATV or UTV, run it for 3-4 hours as hard and fast as you normally would. If the engine is in a cruiser bike, run it for 400-500 miles exactly as you normally would, regardless of how long it takes. If the engine is in an ATV or UTV, run it for a weekend (at least 6 hours) just as you normally would. Don't baby the engine; run it as hard as you will every day thereafter.
Once the engine has completed the normal running cycle, go ahead and change the oil and the oil filter again. By now the engine should have finished breaking in, and you want to remove every last trace of debris suspended in the old oil. Fit a new oil filter, and this time use the type of oil you're going to use long-term in the engine, whether that be fully synthetic, semi-synthetic or conventional oil.
Partzilla has all the OEM oils and oil filters and aftermarket brand oils and lubricants you need to break in your rebuilt engine. We look forward to serving you.
body
 Service after purchase.
 ATV running-in is a controversial and discussed issue. There are zealous break-in opponents (they immediately unscrew the limit bolt and pull the trigger to the fullest), on the other hand there are zealous break-in drivers (they try so hard not to overload the ATV that they drive at a speed of 40 km per hour up to 2000 km of run). In everything, measure and flair are needed, and the health of your ATV will come with you. We believe that running-in (without fanaticism) is still necessary, grinding in new parts inevitably causes engine overheating, and in order to make sure and not to fly in for serious repairs immediately after purchase, it is better to run the ATV.
Our article will focus not only on the break-in as such, but also on the actions that need to be carried out after buying an ATV, since these two processes, in our opinion, are inseparable and cause a lot of questions for a beginner.
ATV break-in.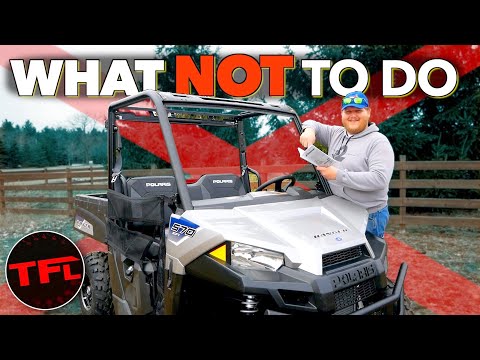
Remember, you shouldn't test its all-terrain qualities, buoyancy and top speed immediately after buying an ATV, the joy of buying can be greatly overshadowed.
The whole process is not as intricate and complex as it might seem at first glance. The first 300-500 km are the most important during the break-in process, if possible, try to change the engine speed (driving speed) as often as possible, the engine parts must be run-in in all travel ranges, in addition, when the speed decreases, the parts cool down faster, which allows them to get used better.
Avoid constant low rpm. Firstly, this is fraught with overheating of the engine, and secondly, as we said above, the grinding of parts must take place in all ranges.
Feel the technique, after the slightest hint of wedging, you must immediately let the ATV cool down.
Accelerate freely in every gear at an acceptable speed, but remember that at least the first thousand, ideally 2000 km (few people get it), you should forget about pulling the trigger to failure. In order not to be tempted and not to squeeze the gas to the fullest, you can tighten the throttle stopper bolt (most often this has already been done at the factory), after running in, the screw must be unscrewed to the state of free play of the trigger.
Don't forget to thoroughly warm up the ATV engine before driving, the oil should have time to evenly distribute throughout the engine. This is especially true at low temperatures, when the viscosity of the oil is increased. The engine already experiences heavy loads during grinding. If possible, an oil heater can be placed under the engine 15-20 minutes before the start, this will greatly facilitate the start and reduce the load. Don't forget about fire safety.
Don't try to break-in in one day (many want to), divide this process into two or three days, drive in the morning and in the evening when the ambient temperature is not too high.
Here are the main things you should pay attention to when running. After you pass the first 300-500 km, you should carry out a technical inspection.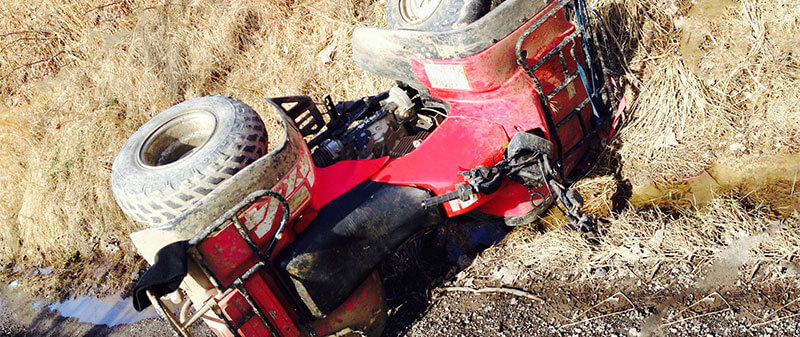
Things to look out for after buying an ATV.
Forget about the primordial Russian habit of reading instructions only after something has already broken. Read the instructions, some questions will disappear by themselves.
Perform a visual inspection of the ATV, make sure there are no cracks in the frame, plastic, rubber and main suspension components are not damaged, it often happens that the mounting bolts are not rotated properly from the factory. Do not be lazy, take the keys and scroll through all the available connections. The most important components (for example, wheel hub bolts) should be immediately put on thread sealant (use blue).
Monitor fluid levels. Do not forget to change the oil at the time specified by the manufacturer, this will significantly increase the engine life. An article about pumping the brakes is here. Follow the link and learn all about choosing ATV engine oil.
Wiring must be treated with silicone grease, it will repel moisture, and it is better to fill the connecting chips with sealant immediately.
Regularly check the tire pressure, focus on the instructions, the optimal pressure is from 0.5 to 0.8 atmospheres, try different pressures (without enthusiasm). If the pressure is too low, handling will deteriorate and the wheel may be disassembled, if the pressure is too high, traction will decrease. Tire pressure is an individual matter, and the optimal ratio will come to you with experience.
Do not exceed the manufacturer's recommended octane rating, as this may cause the engine to overheat.
That's about all you need to know about ATV break-in and initial maintenance. Treat the equipment with attention, and it will surely thank you for a long service life without breakdowns.
Any questions or suggestions? You are welcome in the "Comments" column.
Contents
ATV users ask a lot of questions in terms of running-in: is it necessary to run-in an ATV, how much to run-in, how to run-in.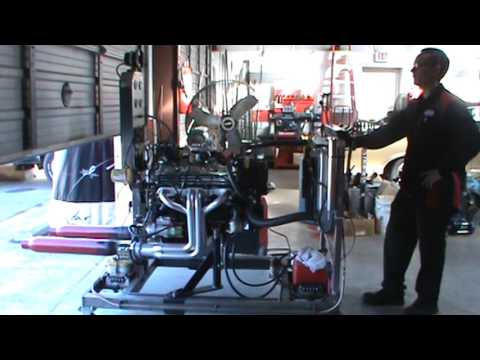
Indeed, the first thousand kilometers of the rolled run play a decisive role in the further operational survivability of the quadra. Note: the initial operation of any equipment is necessary for the future durability of various components and mechanisms. A properly broken-in ATV will ensure maximum machine life and performance. During this period, it is important to avoid operating modes with increased load.
Run-in during the first kilometers of operation must be carried out with due care, with the exception of "highlander", various cross-country tests and the like, which is done by many owners of motorcycles and vehicles. Engine load should be medium. ATV running-in is carried out in different modes. Parking, prolonged idle use is undesirable. After a long drive (20-30 kilometers), it would not hurt to stop to cool the engine.
From 0 - 250 km
It is encouraged to drive at a speed of approximately 25 km/h without load
From 250 - 1000 km
Driving with a load of not more than 50%, speed of 35 km/h
From 1000 - 1500 km
Speed limit up to 40 km/h and 75% load allowed
From 1500 - 2500 km
Permitted to drive with a full load at a speed of 60 km / h
During initial operation (estimated from 300 to 500 km), the most important point is to avoid driving for long distances.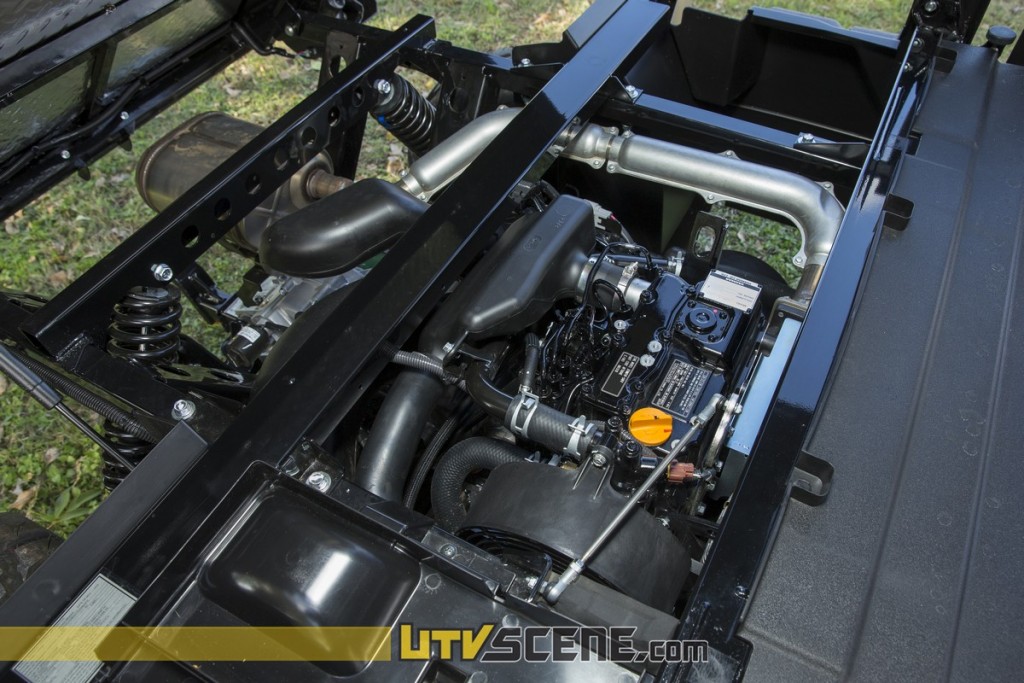 At this stage, the maximum grinding of parts to each other is considered. And it is important to move at different speeds.
Continuous low speed is contraindicated
Move the quad at different speeds to allow lapping at different speeds and RPMs (very useful during break-in).
The above material concerns book recommendations. Now I'll try to tell you how to speak from myself!
First of all, I would like to note the following: imported production of vehicles does not mean the most accurate exposure of the dimensions of parts and the running of an ATV is not needed. Don't rely on this myth. In any case, you need to roll. Lapping parts is required. Further fuel consumption and engine durability will depend on the primary operating conditions.
Put simply in a rustic way, ATV break-in is a normal ride on a simple road with pleasure without pressing the trigger too much. In the event of an accidental hit in difficult road conditions, it is worth switching to a lower gear, despite the ease of overcoming an obstacle in a higher one.