A sprayer boom is an effective tool to evenly and accurately apply pesticides over a surface area. If you have an existing spot sprayer or skid sprayer you can make a boom yourself and take your spraying to the next level.
For a minimal investment, you can build a versatile DIY spray boom that you can use for an ATV, UTV, mower, truck, or lawn tractor. It is a pretty simple setup that does not take much time and you can do it with just a few tools. However, there are some key aspects you want to get right, so let’s jump right in.
There are two main boom types: conventional and boomless. In this article, we will be looking at how I built a simple conventional spray boom. A conventional boom is probably what most people think of when they consider a sprayer boom. It is made of a number of flat fan nozzles evenly spaced across a pipe or bar.
The boomless type of sprayer boom is really not a boom at all, hence the name. Instead of multiple nozzles spread across a piece of pipe, there are just two specially designed nozzles to cover the same area as a boom. There are many advantages to this type, but the coverage will be a bit less consistent. If want to see how a boomless setup compares to a conventional boom be sure to read this article comparing the difference between boom and boomless sprayers.
Conventional spray booms can be divided into two categories as well: wet and dry. The difference is how the fluid is carried to your nozzle bodies. For more information, you can read this article where I explain the difference between a wet and dry boom in detail. I decided to build a dry boom for my sprayer because it is simpler to get all the nozzles to line up and you don’t have to drill holes in a pipe.
The quantities of these items will vary depending on how large a boom you want. You can use these to make a boom with just two nozzles or 15. It can be even larger assuming you can support the boom on your sprayer and find a long enough piece of the steel tube.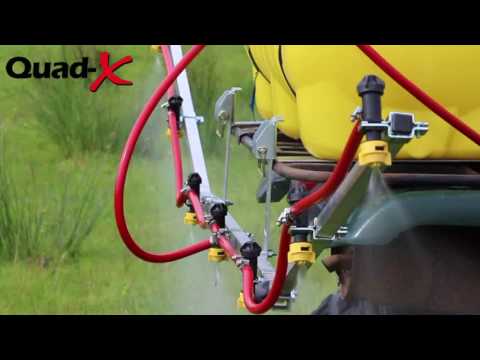
I go with square tubing because it is easy to line up the nozzle bodies. Round pipe means your nozzle clamps and nozzle bodies don’t line up precisely.
Boom clamps are available for ¾, 1, and 1-¼ square pipe. I use ¾ inch pipe because the cost and weight will be less.
For nozzle bodies, you can use the standard simple threaded nozzle bodies but I prefer quick-jet nozzle bodies from Teejet. With these nozzle bodies, it is easy to take your nozzles on and off, and it lines up your nozzles automatically. With the standard simple nozzle body and threaded cap, you must hold your nozzle in place and tighten the cap and it can be a pain to try to get every single nozzle lined up.
These nozzle bodies also have a check valve so that when your pump is not running or you shut off your section valves, your nozzles will not continue to spray. The check valve closes when the pressure drops below a certain pressure. This keeps the liquid left in the hoses from dripping out after you shut off your boom valves. For my sprayer, I use nozzle bodies with 3/8 hose barbs but you can get other sizes.
The nozzle bodies are connected to your boom pipe by clamps also made by Teejet. They fit securely around the nozzle body and the square pipe. Again, the best part is that using a square pipe and clamps automatically lines everything up. Using a clamp on a round pipe would make it harder to line up
As mentioned above, you would choose the size based on the steel pipe size you want to use. The portion that clamps around the nozzle body does not change, only the pipe size it will connect to.
EPDM rubber hose is very resistant to different types of chemicals fertilizers and pesticides etc. it is a great choice for boom hose. You can also use braided nylon tubing it has chemical resistance but it does not hold up to sunlight as well as EPDM. It will discolor, become brittle and crack.
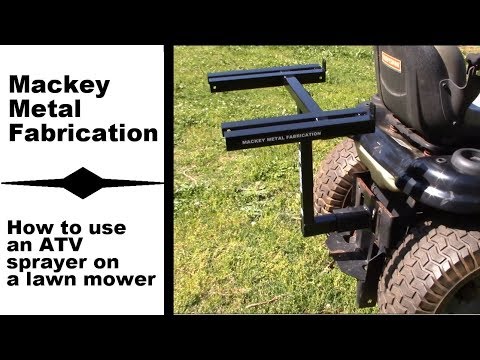
How you mount your spray boom will vary depending on the type of equipment or vehicle you were going to be using to spray. In my scenario I wanted a small boom to put on the back of the zero-turn lawnmower. This mower just happens to have slots on the guard around the muffler that was the perfect spot to attach some angle brackets.
You may not have the same place to attach brackets and you will have to find something else at work. If you wanna spray with an ATV you can generally find a way to attach some brackets to The rack with the view bolts. For a UTV or pickup truck, you could design a bracket to fit into the receiver tube.
How To Install A Hose Bib?
Please enable JavaScript
How To Install A Hose Bib?
Sprayer boom installed on the back of a zero-turn mower. The hoses are not yet hooked up.
Tools Needed
After deciding how wide of coverage I wanted, cut the 3/4 inch steel tube to a length marked out where I wanted my nozzle bodies. I will cover more about how I decided on my spacing below.
After marking the spots where I wanted to know somebody so you can install the square boom clamps around a nozzle body and slide them onto the square pipe. This is a very simple and slick process because these nozzle bodies and clamps are specifically designed to fit together and mount on 3/4 inch square tubing.
There are two different nozzle body styles used on a “dry” boom. “L” style and “T” style. The “L” style nozzle bodies have one hose barb. This type will be at the ends of your boom or boom section if you have multiple sections. The “T” style has two barbs. One on each side, this type of body will be in the center of your boom or boom section. Depending on the size of your spray boom you may have several of the “T” style bodies, but you will just use two of the “L” style nozzle bodies per boom section.
Installing the brackets on the mower ATV truck TV or whatever you were spraying with is the part that requires a little more creativity as all vehicles or equipment will be a little different and you’ll have to find someplace to attach the brackets.
You can see in the image below how I was able to mount the brackets on my mower.
The hardest part of the process of having to drill a hole in the brackets for the U bolts. The brackets already had some holes but they were not close enough together for the 3/4-inch U-bolts I used. The size of the bolts is 1/4 x 20 so I used a quarter-inch drill bit.
I primarily use flood jet boneless nozzles on this boom so the spray pattern does spray out far enough tonight at the rear wheel. If I was gonna use flat fan nozzles that spray straight down I will probably extend the brackets so that they would clear The rear wheel on the mower.
The last step is to plumb your boom with your sprayer. On the end of either side of the boom, you will have an “L” style nozzle body, in between, you will have your “T” style bodies You simply connect each nozzle body with the appropriate amount of hose. Try to cut the hose as short as possible and still reach each nozzle body. This will keep your hose from hanging down in between the nozzle bodies, creating a spot for fluid to reside when the sprayer is not in use. This can lead to residue build-up inside your boom hoses.
In the center of the boom or each boom section, you will need to install a hose barb tee. This is where we will connect the supply hose from the pump. For my low-volume sprayer, I am using ⅜ inch inside diameter hose and a ⅜ inch hose barb tee.
Finally, I included a 3/8 ball valve in my supply line to the boom. This will allow me to shut off my boom when I don’t need it or want to use my spray wand instead.
Your spray nozzle spacing will be determined by the spray nozzles that you will use. There are several different spray nozzle patterns available. If you are just getting started and would like more information on the different types of spray nozzles be sure to check out this article on common spray nozzle questions. On a traditional sprayer boom, flat fan nozzles are most common but flooding nozzles and boomless nozzles are also common.
Regardless of the nozzle brand or type, each nozzle will have a spray angle. Common spray angles are 40, 80, 110, and 120 degrees. The wider the angle the farther the nozzles can be spaced and still overlap to provide even coverage.
15 and 20-inch spacing are common for booms using flat fan spray nozzles. Wider angle flooding nozzles can be spaced further apart. Boomless nozzles are generally placed close together and they spray in opposite directions. You can get the full scoop on boomless nozzles in this article about the best boomless nozzles.
I chose to mount my nozzles 40 inches apart because the nozzles that I wanted to use were wide-angle flood nozzles with a 120-degree spray pattern. The manufacturer recommended 40-inch spacing when mounted above 18 inches of the ground.
Boom height is also a factor in how wide you should space your nozzles. The higher off the ground you mount your boom, your spray nozzle will cover a wider area.
For example, an 80-degree nozzle at 12 inches off the ground will cover a width of 20 inches. At 36 inches from the ground, it will cover a 60-inch width.
So, in theory, the higher you mount your boom the wider you can space your nozzles and still get even coverage. However, the higher your nozzles from the surface, the less dense and consistent your spray pattern. At a certain height, your droplets will disperse and drift away leaving your sprayer ineffective. Typical mounting heights are 18 inches up to about 36 inches off the ground.
A spray boom can be made in many different ways. No matter how you go about building one, it is key to remember that the type of spray nozzle you are going to use will dictate many aspects of your boom. Nozzle spacing, boom height, and the size of your plumbing need to be designed around the nozzle.
If your nozzles are spaced too far apart you will not have even coverage. If your boom is too high your spray droplets will drift. If you don’t supply your boom with a large enough hose to adequately supply enough fluid for the size and quantity of your nozzles, you will have inconsistent spray patterns.
The spray nozzle is the most important part of a sprayer so as long as you build your boom around your nozzle type you can build a simple but effective spray boom.
Interested in building your own sprayer?
Published: · Modified: by Allison · This post may contain affiliate links · This blog generates income via ads
Are you looking for a guide that will show you tips on how to set up a sprayer? I am happy to inform you that you landed on the right page. This DIY sprayer boom kit plans will interest you. All the plans listed here were done by amazing outstanding folks like you who decided to share their secrets.
Most of the projects listed in this article are quite easy to follow. It might take some time and labor but the end product would be worth it.
So, to set up a sprayer on a four-wheeler will take about 14 minutes, depending on the side of the land and distance between the weed areas you're targeting. Firstly, you'll need to get a pesticide license, you can know more about that on their online Agriculture Department or their local office in your area.
Once that is done the next step is getting a few supplies for this project, you'll need a measuring device, a sprayer, water, a four-wheeler, chemicals, 4 rubber tie-down straps, and most importantly, personal protective equipment (PPE). The steps are easy to follow so you will be done in no time.
Click for more details
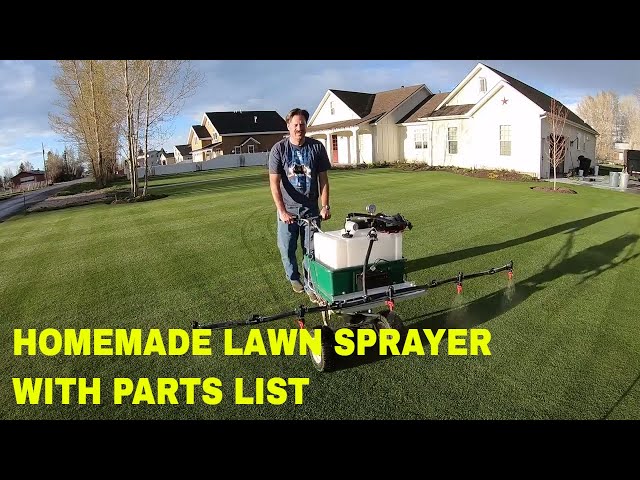
 Homemade DIY Boom Sprayer $25
Here is a great boom sprayer that you can do yourself, and it's also super cheap. You can make this book sprayer at home for just $25 less. The creator used a 1-inch PVC pipe to give the hose support and the piece also has a nozzle attached to it at the ends, a sprinkler system nozzle.
This is a temporary setup but it's quite great because it covers a wide range of land. The steps to make this are easy to follow. It's a video, not everything the creator said is heard but the way he built it was simple and if you pay attention you can build it without any need to hear from the creator himself.
Have you ever wondered how to make an 8-foot long boom sprayer? It's super easy and fun to build.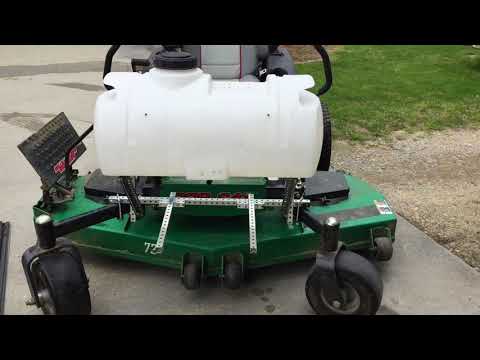 Let's go! First, you'll need a PVC reinforced hose, a $15 pressure pump, and a few other supplies. The parts that were bought cost up to $25 and that's quite cheap for an 8-foot long jet boom sprayer.
To make the height, you'll need an 8-foot tall aluminum, some ⅜ tubing, zip ties, and clips. It's long, therefore, it can cover many areas. It's an ideal boom sprayer for large land areas. It's super easy to build and even easier when you're building with a friend or someone to help share ideas or add to your already existing ideas.
With this guide, you are going to learn how to build an inexpensive sprayer using an electric pump, a truck battery, and an empty IBC tote. This sprayer's pump is a decent agricultural pump that protects microorganisms, it's a diaphragm pump, and when used to make your sprayer will not damage any useful microorganisms on your farm.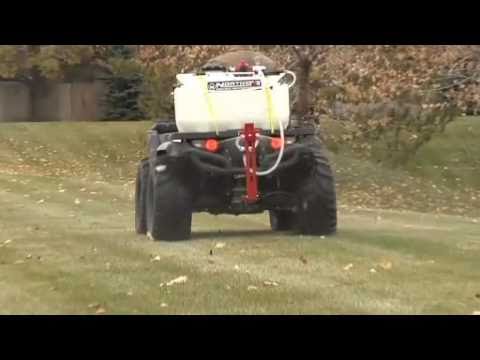 You can make this effortlessly and eliminate all the unwanted weeds and organisms that you don't want. If you have a farm for commercial purposes, you need a sprayer like this.
This is a five nozzle boom setup with a close-off valve in between each nozzle making it easy for you to shut off the flow and stop any potential leakage. The nozzles have a battery that should last for at least an hour, a five-gallon pump, a restrainer, and a pressure release valve. If you want the parts list am that you can prepare properly if you decide to try this guide the creator will email it to you once you indicate interest from the video link. This task is super easy and fun to build, and it's also meant for the lawn.
This is quite a big sprayer.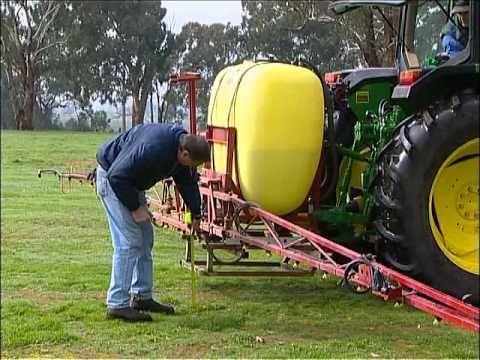 The tank used is a big and durable one. You need a few materials to get going with this task. You need some fittings, a large hose, and other components. The tank for the sprayer is a large round tank, as such, it will most likely leak at the bottom, that's why the creator made a lid at the bottom to hold the water in and keep the tank working. This project isn't as easy as one might think, but it's doable. One of the downsides of this take is that it's time-consuming, and a lot of work involved.
This boom sprayer has an electrical wiring and plumbing system, it even has a custom-built charging port. Here are a few gears the creator used, a small rig cage, pump, and a few other supplies. The creator didn't spell out all that he needed, but once you understand the video tutorial, you'll get the hang of it. This task will need someone with a little experience in electrical wiring to be able to perfect the wiring and plumbing. This is by far the coolest boom sprayer I have ever seen.
The creator used a 15-gallon workhorse vom and spot sprayer for tractor supply. You will also need to use an old lawn trailer. This will make the job easier. You'll be using a cart for the sprayer build. It's spacious and cool to build. This can't be easily gotten from anywhere. Use it to build a stand for your sprayer. After that, attach the components inside the cart, and get ready to test the cart sprayer which will be a great feel.
This video tutorial will teach you how to calibrate a boom sprayer. You might already have a boom sprayer at home ready for use, but you don't have the slightest clue on how to calibrate the sprayer. Well, with this guide you will learn the easiest way and maybe teach someone as well. This guide won't teach you how to build a boom sprayer although, you can always try your luck and see what comes from it.
That’s a wrap! I hope you enjoyed reading this article on DIY sprayer boom kit as much as I loved writing it for you. Some of the projects show you how to build a boom sprayer from scratch, while others give you tips on how they were able to build theirs.
If this article was helpful to you, feel free to share it with your friends and family members that might be interested in making a boom sprayer.
The 400 l mounted sprayer is suitable for applying herbicides and liquid fertilizers, as well as spraying crops with water during dry periods. As a rule, it is used for processing areas up to 4-5 hectares. The main advantages of this unit over analogues from other manufacturers are triple spray nozzles that allow you to adjust spraying modes, as well as resistance to aggressive chemicals due to high-quality materials from which the sprayer is made.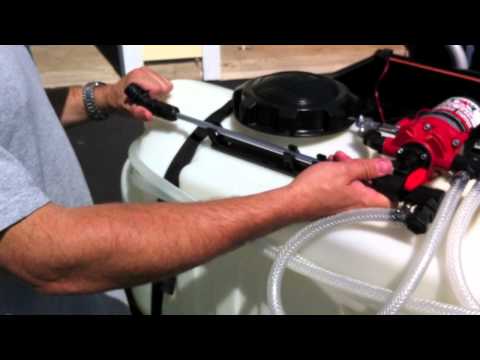 nine0003
Performance
Productivity up to 6 hectares per hour of work is achieved thanks to the Polish pump with a capacity of 120 l / min, which provides the necessary intensity of liquid supply to 12 spray nozzles located on a 6-meter sprayer boom. The maximum operating speed of such a unit is 12 km / h.
Economical use of chemicals
The flow rate on these sprayers can be adjusted from 20 liters to 400 liters per ha. Adjusting the dosage of application saves expensive chemicals. For example, when foliar fertilizing, if the crops are planted at a great distance from each other, it is possible to block the nozzles that fall on the aisles, which also helps to avoid excessive consumption of fertilizers. nine0003
Triple spray nozzles
Triple nozzles allow you to choose the intensity and method of spraying (soft spray, spray or spot watering). The first two methods are chosen for continuous treatment, and spot irrigation is suitable for treating low plants in rows (strawberries, cabbages, etc. ) and makes it possible to carry out root fertilization.
Thanks to high-quality materials of which nozzles are made, they differ in the increased durability. It also increases the service life of the fine filter installed at the outlet of the tank, which prevents various impurities from entering the spray system and clogging the nozzles. nine0003
Automated control system
The sprayer is controlled from a special control panel that allows you to turn off and turn on any of the booms individually, as well as adjust the spraying intensity, regularly mix the contents of the fertilizer tank to ensure uniformity of the composition. In addition, the convenient location allows you to control the sprayer from the remote control while sitting on the driver's seat of the tractor.
Stable construction nine0003
The frame of the unit, as well as the rods, are made of steel sheet by stamping, due to which they have increased strength. The boom height can be adjusted mechanically using a hand winch.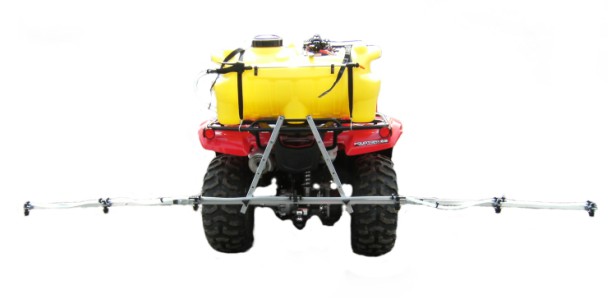
Uniform liquid distribution
The sprayer boom is equipped with damping springs. They effectively dampen the boom vibrations, minimize the possibility of damage during operation, and the liquid is sprayed evenly, regardless of the soil topography. nine0003
Protection against aggressive influences
All elements of the mounted sprayer are covered with special chemically resistant anti-corrosion paints that protect them from the effects of aggressive chemicals. Such a unit will not only last a long time, but also retain its appearance.
Tank with clean water
After contact with chemicals, you can wash your hands with clean water. It is poured into a sealed tank before starting work. This container completely excludes the ingress of any impurities into the water. nine0003
The Mini-Spray ATV Mounted Sprayer range is suitable for a variety of small spray applications including spot treatment, field fields, crop yards, paths, paddocks, sports turf, landscaped areas and large gardens. nine0003
The machine's compact dimensions keep it within the width of most vehicles, allowing easy access to all areas and reducing crash damage. The easy removal of the device allows the vehicles to remain fully universal.
No spraying jobs too small…
Our Mini-Spray ATV sprayers are designed for smaller vehicles with small jobs, a great alternative to backpack spraying. See full specifications for both ranges at the bottom of this page. nine0003 12-volt pump advanced Bononf-Warden polyurethane reservoir inclusion and off-off weight
The main advantages
Suitable for a wide range of spray situations
Electrical switches on Mini-Spray ATV sprayers allow you to operate the pump and marker * from a seated position. All Mini-Spray ATV sprayers come standard with a manual valve block. nine0003
* Factory option
See full specification below
Ease of Maintenance
The simple design makes maintenance of Martin Lishman ATV sprayers quick and easy and minimizes downtime.