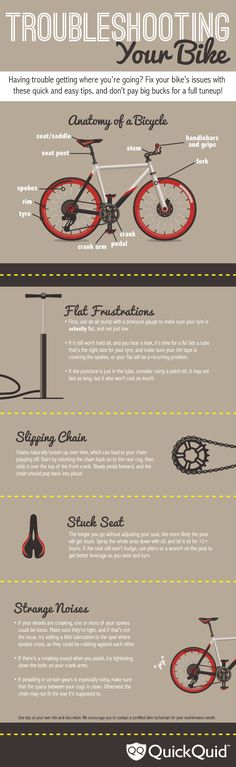
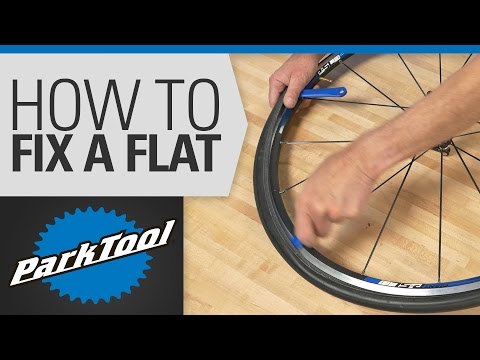
| Afraid to take off your rear wheel to fix a flat tire (or when taking off both wheels to put a bike in a car trunk)? Worried that you'll mess up the chain or shifting; or that you'll get all greasy? Think you'll never get the rear wheel back on right? We have good news: Anyone can remove and install a rear wheel and it won't affect the shifting or the chain. And if you work carefully, you won't have to touch that greasy drivetrain either. Here's how it's done on any bicycle with derailleurs, from road bikes, to mountain bikes and any 2-wheelers in between. Watch the videos and review the step-by-step photos and text. We're also happy to demonstrate in person, too, so please let us know if you'd like a quick lesson. We've covered all the tips and tricks, so you'll be an expert in no time! |
WHEEL REMOVAL 1, 2, 3!
1. Shift onto the small cog and small chainring.
Shifting the chain down onto the smallest cog on the rear wheel and the smallest chainring on the crankset, creates slack in the chain, which makes rear wheel removal much easier. It also makes wheel installation easier because it gives you an accurate way to line up the wheel (on the smallest cog) so that it slips right into the bicycle frame.
If you're riding and feel the rear tire becoming soft slowly from a puncture, you may have time to make the shifts to the smallest cog and ring as you're slowing to a stop.
If you're not riding, or have already stopped, operate the right shift lever, lift the bike by the seat and pedal by hand and the chain will move down the cogs in the back. Depending on the type of shift lever, you may need to move the lever a couple of times to move the chain onto the smallest cog.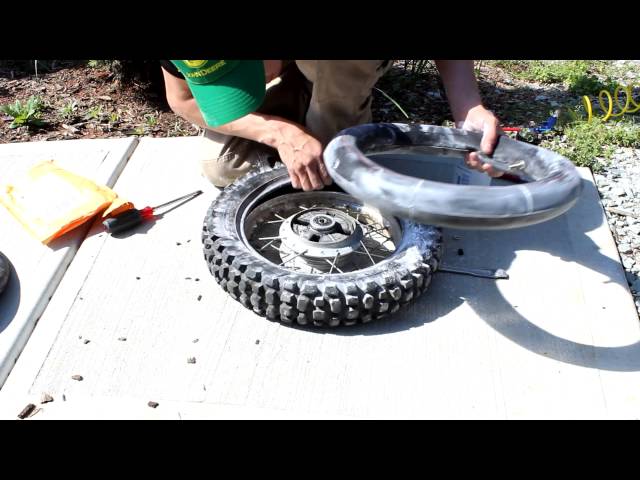
Now, do the same with the left shift lever and pedal by hand and get the chain onto the smallest chainring in front, too.
2. Open the brake
Note: If you're fixing a flat tire, you needn't worry about this step because when the air is all out of the tire it will fit through the brake easily. Also, if your bike has disc brakes, you too can skip this step because you don't need to touch disc brakes to remove wheels.
On most bikes with rim brakes, when you try to remove the wheel, the tire bumps into the brake pads. This is because the brake needs to be adjusted close to the rim, while the fully inflated tire is significantly wider than the rim.
To prevent the tire bumping into the brake pads, you can open sidepull brakes by fully rotating the little lever on the brake upwards (photo a). This little lever is called the brake quick release for the way it lets you quickly release (open) the brake pads. For linear-pulls (also called "direct-pulls," and "V-brakes") lift/pull the end of the "noodle" out of its holder (photo b).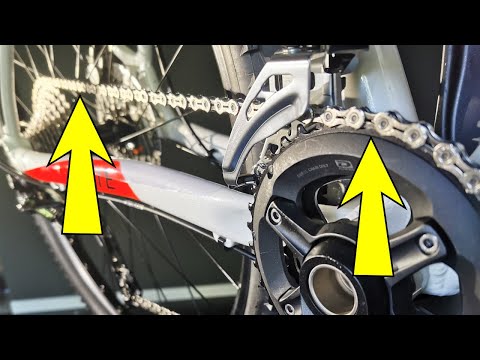
Some sidepulls are opened by pressing a button on the lever. Look for this if there's no lever on the brake.
Open cantilever brakes (these feature a cable that runs over the top of the tire) by lifting the cable end on one side out of its holder.
Workarounds: If you can't find a way to open a brake, you can also let air out of the tire until you can pinch it enough to squeeze it through the brake pads. Another trick - though it requires tools and time - is to remove one brake pad which will often provide sufficient clearance. If not, you can remove both pads. Just be sure to remount them carefully so that they contact the rim squarely and don't touch any part of the tire.
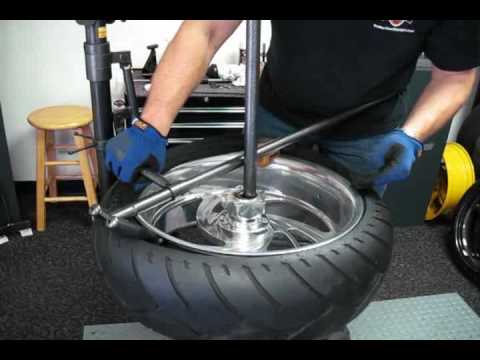
3. Pull the derailleur back and remove the wheel
Now you're ready to remove the wheel. Most bicycle wheels have quick releases holding them in the frame (the red parts in the photo). To open the quick release and loosen the wheel, simply pull and fully open the lever, which is usually on the opposite side of the chain. Don't twist the lever. Just pull it out/away from the frame.
When the quick release is open, the wheel is ready to come out. To remove it, lift the bike by the seat so that gravity will help you. On some bikes the wheel will drop right out at this point (don't let it roll down the road and escape!). Or, if it doesn't fall out on its own, give it a slight blow with your hand and that might knock it right out.
Don't force anything though. If the wheel doesn't come out right away, it's because the derailleur and chain are blocking it. To get them out of the way, keep holding the rear end of your bike off the ground by lifting the bike by the seat. Reach down with your free hand and pull back the derailleur with your hand to get it, and the chain, out of the way.
Now, the wheel should fall out or drop out if you shake the bike. If the chain gets in the way still, just grip the wheel and shake it so that it's free of the chain and fully off the bike (that way you never touch the chain and stay clean). Good job!
Note: To clearly show the desired derailleur position, we locked it in place. You must pull it back by hand when removing wheels because it won't stay in place on its own.
How to put the rear wheel back on
| As you guessed, installing the rear wheel is the same as removal only in the reverse order! You just place the wheel back in the frame being careful to get the chain on the right cog, close the quick release to lock the wheel in, and close the brake so your brakes are working again. The video shows front and rear wheel installation in that order. We go over the step-by-step below and explain some of the things that can go wrong and how to deal with them. It can be frustrating if the wheel won't go in easily. But there's always a mechanical reason. So, look at what you're doing carefully and read our instructions a few times and you should be able to find the problem and address it so that the rear wheels goes right back where it belongs. |
If your wheel won't go in easily, check these things:
Did you get the chain on the cog right? Remember that you shifted the chain onto the smallest rear cog before you removed the wheel. So, you must put the wheel back on by first lining that smallest cog up just right so that the chain is on it. Also, pay attention to how the chain rests on the cog. The chain is a closed loop. The cog should be inside the loop (see the photo in Step 3).
Note: If the wheel has been off the bicycle for some time, it's possible that someone might operate the shift levers. This can move the derailleur so that when you line up the wheel with the smallest cog the wheel won't go into the frame. Instead it bumps into the frame. To remedy this and get the wheel in, simply operate the shift lever as if you're shifting onto the smallest cog.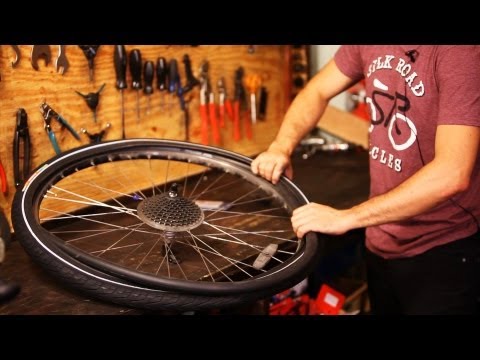 This will move the rear derailleur back where it needs to be so that the wheel will line up right with the frame and go in.
Did the chain come off the derailleur pulley? Another glitch that can prevent the wheel going right into the frame is if the chain happens to come off the top pulley on the derailleur (photo). This is hard to see but it has a similar effect to someone shifting the derailleur into the wrong position and it makes the wheel run into the frame and not want to go in. To fix it, just push the chain back onto the pulley and make sure it stays there as you install the wheel. Tip: Use a stick to push it on or wrap your finger in a rag and you'll stay grease-free.
Is your quick release still open? Sometimes when the wheel is separate from the bike, the quick release lever gets bumped and flipped over and closed. When this happens the wheel won't fit in the frame anymore because the quick release is closed and in the way.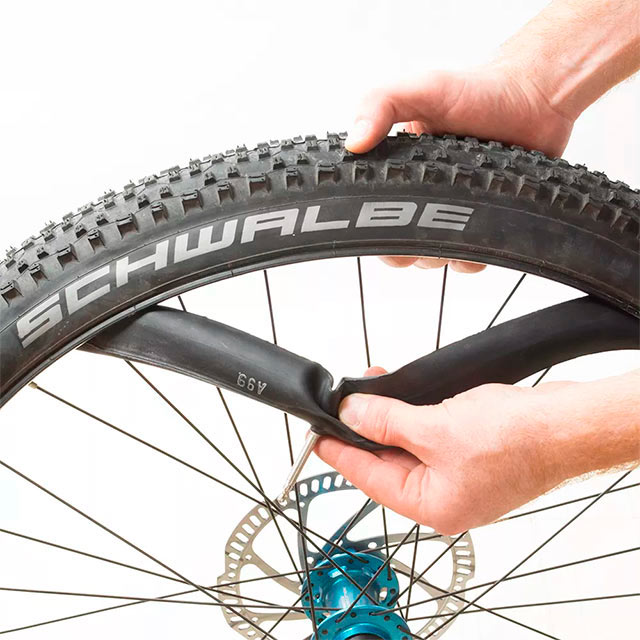 Open it and the wheel will fit.
Now that you know how it's done, you may want to practice removing and installing your rear wheel a few times to become expert at it so that when you have to do it, it's a breeze. And, so you can dazzle your friends by helping them remove/install their wheels! Have fun and let us know if you'd like a demo.
Whether you need to fix a puncture, put your bike on a trainer, or just disassemble your bike, you need to know how to remove your wheels. A lot of riders struggle to remove the rear wheel because it can get caught up in the rear derailleur and chain. Just follow these steps, and you’ll be able to easily remove and reinstall your rear wheel in seconds.
[button]Shop bikes[/button]
 Prepare the bike
Removing the rear wheel while holding the bike up by the saddle.
It's best to remove the rear wheel with your bike in a repair stand. If you don’t have one, it’s still easy to remove the wheel while holding the bike up with one hand. Some people turn the bike upside down, but I find that makes removing rear wheels harder without gravity to assist you.
Shift the rear derailleur into the hardest gear (the smallest cog, outboard on the cassette). This gives you more space and more chain slack to remove the wheel.
If you have a rim brake bike, open the brake caliper’s quick-release lever. This spreads the brake pads so there’s more room for the tire to pass through.
If you have a clutched derailleur (commonly on gravel bikes and mountain bikes with 1x drivetrains), disengage the clutch:

Quick-release axles: Undo the quick release lever and spin the lever counterclockwise, if you need to loosen it further. Typically, just opening the lever will be sufficient.
Thru-axles: Thru-axles are found on newer disc brake bikes. Thru-axles are larger in diameter and thread directly into the frame. Unscrew the thru-axle with an Allen wrench or the integrated handle and remove it completely.
[newsletter}
If your rear wheel doesn't drop out easily, you’ll need to move the rear derailleur out of the way. The rear derailleur is spring-loaded. Once you’ve shifted it into the hardest gear, it’s easy to rotate it backwards so it doesn’t hold the wheel in the dropouts. You can grip the main body of the derailleur and swing the entire derailleur backward.
You want to swing the derailleur back far enough so that the upper pulley wheel is no longer blocking the cassette. Then, the wheel should easily come down and out of the dropouts.
Tip: If you get caught on the chain while removing the wheel, instead of grabbing the chain and getting chain grease on your hands, you can simply push the derailleur cage down and forward to get enough slack to move the chain out of the way.
To reinstall the rear wheel, simply reverse those steps. It should be self-explanatory, but here are a few things to pay attention to:
Once your wheel is in the dropouts, tighten or reinstall the rear axle. If your rear derailleur has a clutch, turn it back on.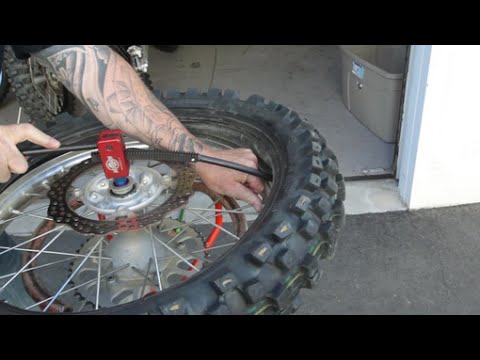 If you have rim brakes, don’t forget to close the caliper quick-release.
Tip: Confirm your derailleur is still shifted into hardest gear and the chain is sitting on the smallest cog for correct alignment with dropouts.
And you’re done. Practice this procedure a few times, and you’ll be taking your rear wheel on and off like a pro mechanic!
[button]Shop bikes[/button]
How to remove the rear wheel of a bicycle, in theory, all cyclists and cyclists know. And here's what to do in conditions close to combat, when there are 35 minutes left before the train's departure, and the rear wheel has flattened 10 kilometers from the station ... I advise you, dear colleagues and readers, to always carry with you, except for a gentleman's set of hexagons, montazhek, "teflon", a pump and a spare chamber, a rag and a package of wet wipes. Believe me, holding the handlebars of a bicycle with clean hands is much more pleasant than dirty ones.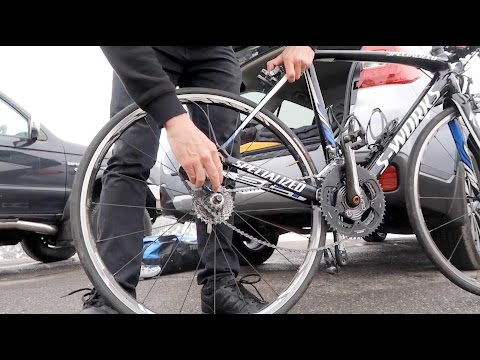 nine0003 So, you feel an urgent need to remove the rear wheel of the bike. To start, throw the chain on the smallest rear wheel sprocket. Remove anything from the handlebars that might break when you put the bike upside down. Remove the backpack from the trunk, if it is, of course, there. Disengage the rear brake if you have rim brakes (V-brake). If you are big and strong, just put the bike upside down. If you are of a more delicate build, do this in two steps: first put the bike "on the left side", then take the frame and front fork and turn it "upside down". Open and loosen the eccentric or unscrew the fixing nuts, make sure that the wheel “goes” (perhaps the disengaged brakes will not be enough, you will have to release the pressure in the chamber). Using a cloth, grab the rear derailleur by the frame, pull back the chain to free the sprockets; With the other hand, pull the wheel out of the dropouts - the “lugs” of the rear stays. nine0003 After you have done all the necessary manipulations with the removed wheel, it must be returned to its native rear triangle.
 We insert the wheel between the feathers, while the sprockets should be inside the chain ring. Gently (again, through a rag) we tilt the switch frame to the steering wheel so that the chain loosens and the wheel “falls” into the dropouts; at the same time, we make sure that the chain wraps around the small sprocket of the gear block, and then goes into the switch frame (you can just press on the wheel, but it’s not always possible to find the right angle the first time). If you have disc brakes, check the disc's entry into the caliper slot (a device that, when you press the brake lever, clamps the disc with brake pads). nine0003 Make sure the wheel axle is fully seated in the dropouts on both sides. Make sure the chain is in the correct position. Spin the pedals; if you notice that the wheel is rubbing against the frame, correct the misalignment. Tighten the nuts, close the eccentric. Turn the bike over, apply the brakes, make sure that the pads are properly aligned with the rim and that the rim is firmly clamped.
 If necessary, pump up the wheel, set the position of the brake pads. You can collect the tool, hang a backpack, fix the removed bells and whistles on the steering wheel and hit the road. nine0003 If you are not interested in how to remove the front wheel of a bicycle, you can read no further. But believe me, removing the front wheel of a bicycle yourself is no less exciting than the rear. The principle is similar - remove, unfasten, turn over, open, loosen, blow off; reverse actions don't involve fiddling with the chain. The front wheel can be removed and put in the position of the bike "lying on its side". Be sure to check the entry of the axle into the dropouts and the operation of the brakes! The main thing is not to forget to wipe your hands afterwards! And then why do you carry with you this unimaginable burden - a package of wet wipes ... nine0007
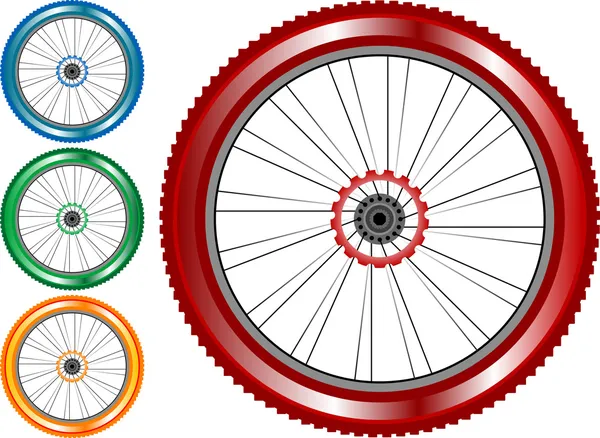
The transmission of a bicycle needs constant care.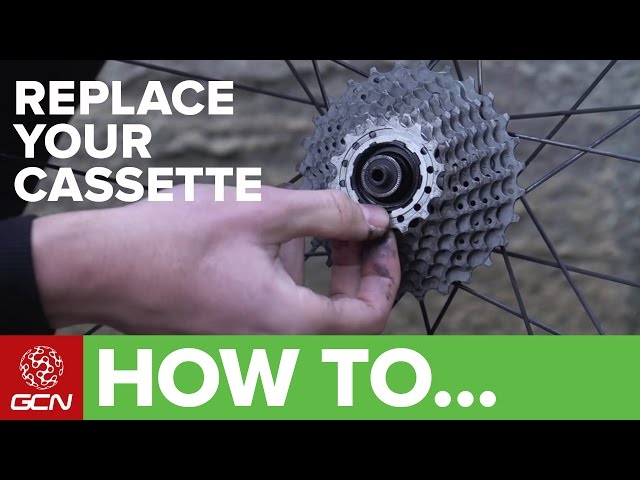 The chain and sprockets on the wheel are most subject to wear. A single-speed bike is not immune from such breakdowns. The only difference from multi-speed models is that the chain and stars are designed for a longer resource. Consider how to remove the star from the wheel for later replacement.
First - why is it needed and can it be dispensed with? No you can not. A partially worn drivetrain impairs the performance of the entire bike. Therefore, the star must be replaced in the event of a breakdown. In particular, this is true for sprockets, which are used especially often. Naturally, before doing repairs, the worn part must first be removed.
Cassettes are consumable items and must be replaced periodically. On average, from 5 to 15 thousand km of driving.
The gear range setting depends largely on the riding style. Consider the most typical cases
Downhillers are unlikely to have to climb steep hills. Because of this, many DH bikes only have one forward gear. The number of gears in the rear cassette is limited.
This style of riding involves driving quite long distances, and the condition of the road, to put it mildly, is different. The number of front sprockets is 2-3. The number of reverse gears ranges from 8 to 9. This allows you to save strength when overcoming climbs and carry out a quick descent.
The All Mountain bike drivetrain has a single front sprocket combined with an 11-ring cassette in the rear. This makes the bike easy to handle, fast and functional at the same time.
Finding the best settings is a matter of trial and error, taking into account your riding style, bike wheel size and a number of other factors. nine0007
Removing the rear of the transmission is easy. The sprocket removal tool kit is as follows.
The first step is to remove the rear wheel of the bike. Using a wrench, unscrew the nuts, then remove the chain from the rear sprockets. For some modifications (for example, for MTB), removing the wheel is literally a matter of minutes, since it is mounted on an eccentric. nine0007
Install the puller on the slotted nut. The "whip" is used to keep the cassette from spinning. Rotate the puller with an adjustable wrench. The direction of rotation of the whip is in the opposite direction.
Removing the nut is not easy. You will also have to work hard to install it in place. After the nut has been unscrewed, the cassette unhooks from the wheel without effort. It remains only to assess the condition of the cassette and determine which particular sprocket has failed.
The outer chainrings can be removed immediately after the bike cassette has been removed. They are cleaned and carefully inspected, assessing the degree of wear. Worn - replace. nine0007
A bicycle cassette with sprockets differs from a ratchet in that individual sprockets can be replaced individually. All that needs to be done is to remove the worn part and replace it with a new one. The space between the individual sprockets on the wheel is filled with spacers and rivets, which make the dismantling-assembly process easier. It is only important not to confuse the sequence. This is especially true for multi-speed mountain models. nine0007
Sometimes cassettes are equipped with "spiders". This is a design where several stars are rigidly fixed. In this case, if any of the parts is badly worn out, you will have to replace the entire "spider".
Replacing single sprockets can cause chain shifting difficulties. This is due to the fact that the chain is sufficiently worn in relation to the new sprockets. For this reason, it is advisable to replace the chain and cassette at the same time.
To remove the sprocket on a single speed bike, simply open the circlip. Many single speed fans claim that the “native” retaining ring is no good and sometimes breaks, even if there is no question of replacing the star. In any situation, if the stopper is out of order, you need to replace it. Otherwise, backlash is inevitable. The chain will simply dangle in different directions.
If the sprockets are bad, the bike will not ride. Timely replacement of transmission parts is relevant for all models of bikes: from the simplest “hard workers” to the most sophisticated high-speed highways and mountain bikes. nine0007
Bicycle rubbing mechanisms should be periodically lubricated and cleaned of dirt. This extends the life of the transmission and makes driving safer. After several trips on bad roads, forests or, moreover, off-road, the bike turns out to be literally overgrown with mud. If the frame and wheels can be washed clean, then the contamination of the bicycle mechanism is simply not visible. Therefore, after such trips, it is useful to inspect the bike and take measures to clean the parts, and, if necessary, replace worn-out components. nine0007
You can clean the bike cassette according to this algorithm.